Adobe editing picture
How to edit images or objects in a PDF using Adobe Acrobat
User Guide Cancel
Search
Last updated on Sep 19, 2022 12:41:51 PM GMT | Also Applies to Adobe Acrobat 2017, Adobe Acrobat 2020
- Acrobat User Guide
- Introduction to Acrobat
- Access Acrobat from desktop, mobile, web
- What's new in Acrobat
- Keyboard shortcuts
- System Requirements
- Workspace
- Workspace basics
- Opening and viewing PDFs
- Opening PDFs
- Navigating PDF pages
- Viewing PDF preferences
- Adjusting PDF views
- Enable thumbnail preview of PDFs
- Display PDF in browser
- Working with online storage accounts
- Access files from Box
- Access files from Dropbox
- Access files from OneDrive
- Access files from SharePoint
- Access files from Google Drive
- Acrobat and macOS
- Acrobat notifications
- Grids, guides, and measurements in PDFs
- Asian, Cyrillic, and right-to-left text in PDFs
- Workspace basics
- Creating PDFs
- Overview of PDF creation
- Create PDFs with Acrobat
- Create PDFs with PDFMaker
- Using the Adobe PDF printer
- Converting web pages to PDF
- Creating PDFs with Acrobat Distiller
- Adobe PDF conversion settings
- PDF fonts
- Editing PDFs
- Edit text in PDFs
- Edit images or objects in a PDF
- Rotate, move, delete, and renumber PDF pages
- Edit scanned PDFs
- Enhance document photos captured using a mobile camera
- Optimizing PDFs
- PDF properties and metadata
- Links and attachments in PDFs
- PDF layers
- Page thumbnails and bookmarks in PDFs
- Action Wizard (Acrobat Pro)
- PDFs converted to web pages
- Setting up PDFs for a presentation
- PDF articles
- Geospatial PDFs
- Applying actions and scripts to PDFs
- Change the default font for adding text
- Delete pages from a PDF
- Scan and OCR
- Scan documents to PDF
- Enhance document photos
- Troubleshoot scanner issues when scanning using Acrobat
- Forms
- PDF forms basics
- Create a form from scratch in Acrobat
- Create and distribute PDF forms
- Fill in PDF forms
- PDF form field properties
- Fill and sign PDF forms
- Setting action buttons in PDF forms
- Publishing interactive PDF web forms
- PDF form field basics
- PDF barcode form fields
- Collect and manage PDF form data
- About forms tracker
- PDF forms help
- Send PDF forms to recipients using email or an internal server
- Combining files
- Combine or merge files into single PDF
- Rotate, move, delete, and renumber PDF pages
- Add headers, footers, and Bates numbering to PDFs
- Crop PDF pages
- Add watermarks to PDFs
- Add backgrounds to PDFs
- Working with component files in a PDF Portfolio
- Publish and share PDF Portfolios
- Overview of PDF Portfolios
- Create and customize PDF Portfolios
- Sharing, reviews, and commenting
- Share and track PDFs online
- Mark up text with edits
- Preparing for a PDF review
- Starting a PDF review
- Hosting shared reviews on SharePoint or Office 365 sites
- Participating in a PDF review
- Add comments to PDFs
- Adding a stamp to a PDF
- Approval workflows
- Managing comments | view, reply, print
- Importing and exporting comments
- Tracking and managing PDF reviews
- Saving and exporting PDFs
- Saving PDFs
- Convert PDF to Word
- Convert PDF to JPG
- Convert or export PDFs to other file formats
- File format options for PDF export
- Reusing PDF content
- Security
- Enhanced security setting for PDFs
- Securing PDFs with passwords
- Manage Digital IDs
- Securing PDFs with certificates
- Opening secured PDFs
- Removing sensitive content from PDFs
- Setting up security policies for PDFs
- Choosing a security method for PDFs
- Security warnings when a PDF opens
- Securing PDFs with Adobe Experience Manager
- Protected View feature for PDFs
- Overview of security in Acrobat and PDFs
- JavaScripts in PDFs as a security risk
- Attachments as security risks
- Allow or block links in PDFs
- Electronic signatures
- Sign PDF documents
- Capture your signature on mobile and use it everywhere
- Send documents for e-signatures
- About certificate signatures
- Certificate-based signatures
- Validating digital signatures
- Adobe Approved Trust List
- Manage trusted identities
- Printing
- Basic PDF printing tasks
- Print Booklets and PDF Portfolios
- Advanced PDF print settings
- Print to PDF
- Printing color PDFs (Acrobat Pro)
- Printing PDFs in custom sizes
- Accessibility, tags, and reflow
- Create and verify PDF accessibility
- Accessibility features in PDFs
- Reading Order tool for PDFs
- Reading PDFs with reflow and accessibility features
- Edit document structure with the Content and Tags panels
- Creating accessible PDFs
- Searching and indexing
- Creating PDF indexes
- Searching PDFs
- Multimedia and 3D models
- Add audio, video, and interactive objects to PDFs
- Adding 3D models to PDFs (Acrobat Pro)
- Displaying 3D models in PDFs
- Interacting with 3D models
- Measuring 3D objects in PDFs
- Setting 3D views in PDFs
- Enable 3D content in PDF
- Adding multimedia to PDFs
- Commenting on 3D designs in PDFs
- Playing video, audio, and multimedia formats in PDFs
- Add comments to videos
- Print production tools (Acrobat Pro)
- Print production tools overview
- Printer marks and hairlines
- Previewing output
- Transparency flattening
- Color conversion and ink management
- Trapping color
- Preflight (Acrobat Pro)
- PDF/X-, PDF/A-, and PDF/E-compliant files
- Preflight profiles
- Advanced preflight inspections
- Preflight reports
- Viewing preflight results, objects, and resources
- Output intents in PDFs
- Correcting problem areas with the Preflight tool
- Automating document analysis with droplets or preflight actions
- Analyzing documents with the Preflight tool
- Additional checks in the Preflight tool
- Preflight libraries
- Preflight variables
- Color management
- Keeping colors consistent
- Color settings
- Color-managing documents
- Working with color profiles
- Understanding color management
This document explains how to add, resize, move, or replace images and objects in a PDF using Acrobat. See the step-by-step instructions below.
-
Open the PDF in Acrobat, and then choose Tools > Edit PDF > Add Image .
-
In the Open dialog box, locate the image file you want to place.
-
Select the image file, and click Open.
-
Click where you want to place the image, or click-drag to size the image as you place it.
A copy of the image file appears on the page, with the same resolution as the original file.
-
Use the bounding box handles to resize the image, or the tools in the right hand panel under Objects to Flip, Rotate, or Crop the image.
-
Open the PDF in Acrobat, and then select the appropriate tool depending on what you want to move:
Image: Choose Tools > Edit PDF > Edit . When you hover over an image you can edit, the image icon appears in the top left corner.

Interactive Objects: To edit form fields, buttons, or other interactive objects, choose Tools > Rich Media > Select Object .
-
Do any of the following:
- To move the image or object, drag it to the desired location. You cannot drag images or objects to a different page (you can cut and paste them to a new page instead). To constrain movement up or down, or right or left, press and hold the Shift key and then drag the object.
- To resize the image or object, select it, then drag a handle. To retain the original aspect ratio, hold the Shift key and then drag the handle.
If you select multiple objects, you can move or resize them together. To select multiple objects, press and hold the Shift key and then click the objects one-by-one.
-
Open the PDF in Acrobat, and then choose Tools > Edit PDF > Edit .

-
Select the image (or images) - click the image to select it.
-
Under Objects in the right hand panel, click one of the following tools:
Flip Vertical Flips the image vertically, on the horizontal axis.
Flip Horizontal Flips the image horizontally, on the vertical axis.
Rotate Counterclockwise Rotates the selected image ninety degrees in the counterclockwise direction.
Rotate Clockwise Rotates the selected image ninety degrees in the clockwise direction.
Crop Image Crops or clips the selected image. Drag a selection handle to crop the image.
Replace Image Replaces the selected image with the image you choose. Locate the replacement image in the Open dialog, and click Open.
To rotate the selected image manually, place the pointer just outside a selection handle. When the cursor changes to the rotation pointer , drag in the direction you want it to rotate.
The Arrange options let you move an image or object in front of or behind other elements. You can push an item forward or back just one level, or send it to the front or back of the stacking order of elements on the page.
-
Open the PDF in Acrobat, and then choose Tools > Edit PDF > Edit .
-
Select the object (or objects) - click the object to select it.
-
Under Objects in the right hand panel, click Arrange and choose the appropriate option.
Alternatively, you can right-click the object (or objects), and point to Arrange and then choose the appropriate option.
For complex pages where it is hard to select an object, you may find it easier to change the order using the Content tab. (Choose View > Show/Hide > Navigation Panes > Content.)
The Align Objects options in the right-hand panel let you precisely align multiple objects on a side - left, vertical center, right, top, horizontal centre , and bottom.
When you align objects relative to each other by their edges, one of the objects remains stationary. For example, the left option aligns the left edges of the selected objects with respect to the left edge of the leftmost object. The leftmost object remains stationary, and the other objects are aligned relative to it.
The horizontal center option aligns the selected objects horizontally through the centre of the objects, and the vertical center option aligns the selected objects vertically through the centers of the objects. The objects are aligned along a horizontal or vertical line that represents the average of their original positions. An object can remain stationary if it is already aligned with the horizontal or vertical line.
Depending on the alignment option you select, objects move straight up, down, left, or right, and might overlap an object already located there. If you see an overlap, you can undo the alignment.
-
Open the PDF in Acrobat, and then choose Tools > Edit PDF > Edit .
-
Select the object (or objects) - press and hold the Shift key and then click the objects one-by-one.
-
Under Objects in the right hand panel, click Align Objects and choose the appropriate alignment option.
Alternatively, you can right-click the object (or objects), and point to the Align Objects option from the context menu and then select the desired alignment option from the submenu.
You can edit an image or graphic using another application, such as Photoshop, Illustrator, or Microsoft Paint. When you save the image or graphic, Acrobat automatically updates the PDF with the changes. The applications that appear in the Edit Using menu depend upon what you have installed and the type of image or graphic you have selected. Optionally, you can specify the application you want to use.
-
Open the PDF in Acrobat, and then choose Tools > Edit PDF > Edit .

-
Select the image or object.
Select multiple items if you want to edit them together in the same file. To edit all the images and objects on the page, right-click the page, and choose Select All.
-
Under Objects in the right hand panel, click Edit Using and then choose an editor.
To choose a different editor than offered on the menu, select Open With, locate the application, and click Open.
If a message asks whether to convert to ICC profiles, choose Don’t Convert. If the image window displays a checkerboard pattern when it opens, the image data could not be read.
-
Make the desired changes in the external editing application. Keep in mind the following restrictions:
- If you change the dimensions of the image, the image may not align correctly in the PDF.
- Transparency information is preserved only for masks that are specified as index values in an indexed color space.
- If you are working in Photoshop, flatten the image.
- Image masks are not supported.
- If you change image modes while editing the image, you may lose valuable information that can be applied only in the original mode.
-
In the editing application, choose File > Save. The object is automatically updated and displayed in the PDF when you bring Acrobat to the foreground.
For Photoshop, if the image is in a format supported by Photoshop 6.0 or later, your edited image is saved back into the PDF. However, if the image is in an unsupported format, Photoshop handles the image as a generic PDF image, and the edited image is saved to disk instead of back into the PDF.
You can save every page (all text, images, and vector objects on a page) to an image format using the File > Export To > Image > [Image Type] command. You can also export each image in a PDF to a separate image file.
For more information, see Convert or export PDFs to other file formats.
We value your feedback. Tell us about your experience with PDF editing.
Give Feedback
Try these online PDF tools: Convert PDF to JPG
More like this
- Edit text in PDFs
- Edit scanned PDFs
- Enhance document photos captured using a mobile camera
- Add headers, footers, and Bates numbering to PDFs
- Edit document structure with the Content and Tags panels (Acrobat Pro)
- Product feature: Edit PDFs using Acrobat
Sign in to your account
Sign in
Manage account
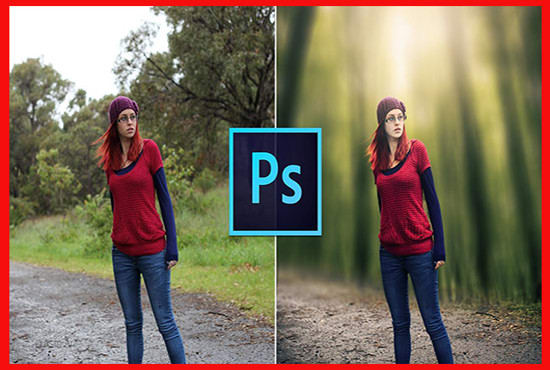
How to edit photos in Adobe Photoshop – Smarthistory
The following covers Smarthistory’s process for editing photographs using Adobe Photoshop. We also use Adobe Bridge for this process—this program comes free along with Photoshop. There are other free or inexpensive apps out there that do much of what Photoshop does, including Pixlr.
From a live webinar with Dr. Steven Zucker.
Jump to
- Selecting photos to edit
- File management
- Correcting for lens distortion and oblique angles
- Correcting color
- Sharpening and spot fixing
- Cropping and saving
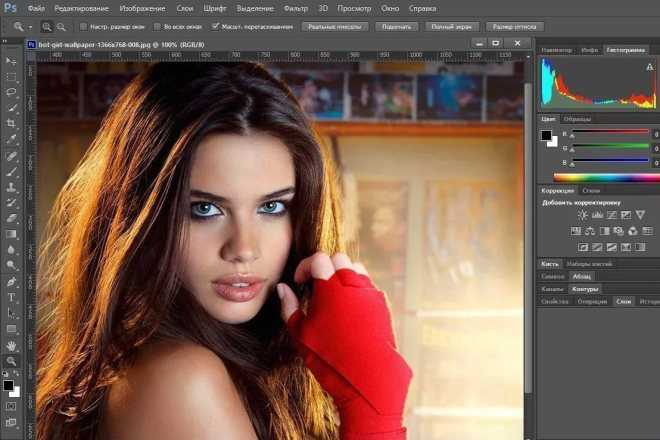
Selecting photos to edit
We start by opening our entire set of photos of a given object in Adobe Bridge. This program allows you to easily view and select large sets of images.
Looking at a set of photos in Adobe Bridge
For each angle that you shot, you’ll want to compare every similar image (ideally, you have shot 4 to 10 frames of each one). At this point, you are looking for clarity (the least-blurry image), and good framing.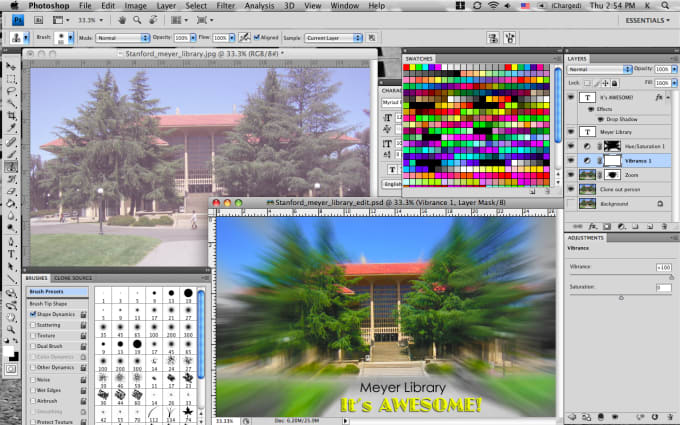
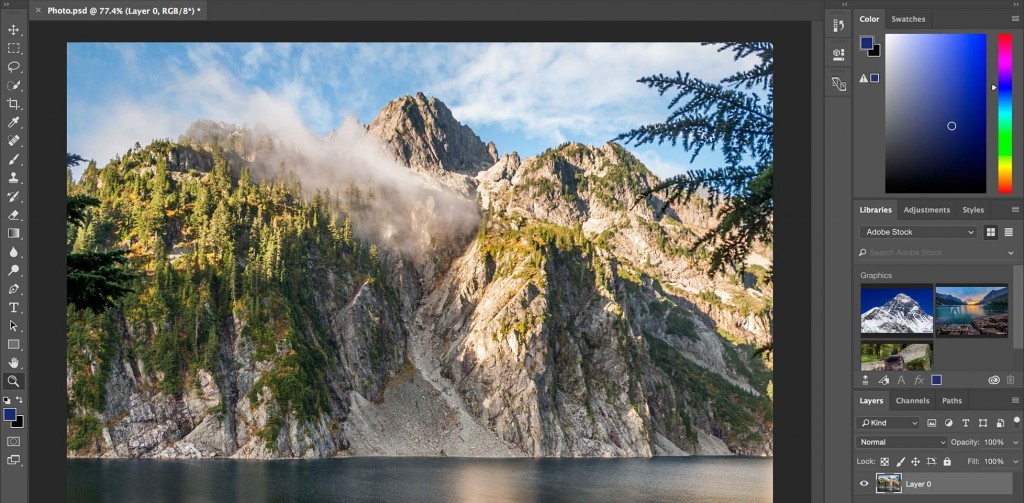
We recommend comparing each of the similar images two at a time at 200% zoom. (You can do this in Bridge, or open them in Photoshop.) Pick a detail near the center of the image to focus on, and determine which shot is clearest. If two versions of the image are equally clear, pick the one with the superior framing, lighting, or least lens distortion—whatever you think will result in the best image.
Looking at a photo at 200% zoom in Photoshop. A similar photo has been opened in the other tab, and you can click back and forth between them to compare. This one is soft (not sharply focused), hopefully the next shot is better!
Double click a thumbnail in Bridge to open it in Photoshop or mark the images you want to use as “selected.” You can then easily copy these into a new folder to edit.
File management
Everyone has their own system for managing files. There is no one right way to do this; what is essential is that you create a system and stick with it. We recommend saving raw and edited files in separate folders so there is no risk of overwriting.
Correcting for lens distortion and oblique angles
Now you’re ready to bring your selected images into Photoshop and start editing.
The first thing we do is run Filter→Lens correction (if there are settings available for the camera and lens we are using).
Then, we correct the angles and alignment in the image by choosing Select all→Edit→Transform. We generally use the “Skew” function under Transform, though in some cases we judiciously use “Warp” to correct minor issues. We also use “Rotate,” “Perspective,” and “Distort” when needed. When using “Skew” be careful to maintain the work’s original aspect ratio. When using the “skew” function, it is helpful to adjust opposite sides of the image in opposite directions. This prevents the image from becoming too tall or too wide. Some people find Photoshop’s “guides” feature to be helpful in this process.
Left: unedited photo; right: photo edited for angles, color, and reflections. (Pablo Picasso, Gertrude Stein, 1905–06, oil on canvas, 100 x 81. 3 cm, The Metropolitan Museum of Art)
Tip: Sometimes minor lens distortion can be an important clue to the position of the photographer in relationship to the work of art or architecture and should be retained.
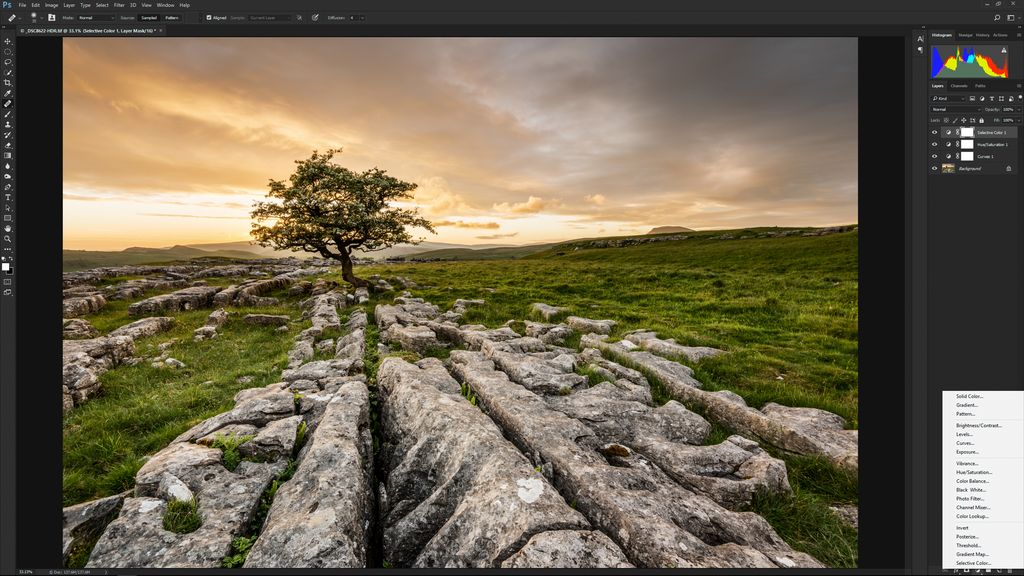
Correcting color
Once your photo is adjusted for angles, you’ll want to look at color. Most cameras today tend to shoot on the warmer side, de-emphasizing cyans and blues. We like to correct for this using the following process: We start by selecting Image→Auto Color, then Auto Contrast and Auto Tone, in that order. We find that this will often give decent results, but sometimes we have to undo (use History if you’ve gone more than one step) and use just two or just one of these functions. Use your judgement here—the goal is fidelity to the object, keeping in mind that there is no “true” color, since so much depends on lighting conditions.
If the image still needs adjustment, we use the Image→Adjustments→Color balance. We may also employ Hue/Saturation at this stage.
You can use Brightness/Contrast and/or Levels to bring out details and adjust the contrast. The idea is to bring out as much detail as possible without oversaturating or washing out the image.
For smaller areas of the image that need adjustment, the Dodge and Burn tools can be helpful.
We think it’s okay to allow for slight changes in color between closeups and wide shots or gallery shots. Our eyes, and the camera lens, function differently in these situations and it’s alright to account for this.
Left: unedited color; right: edited color. (Michelangelo, The Dream of Human Life, c. 1533, chalk on paper, 39.6 x 27.9 cm (The Courtauld Institute of Art)
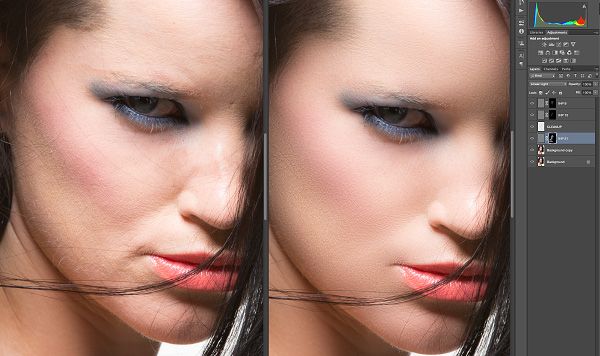
Sharpening and spot fixing
When we have adjusted the angles and color, we often apply the Sharpen Edges filter to heighten details. Be careful not to over sharpen particularly with any print or image that is linear. We use the Healing tool and the Clone Stamp tool to correct for scratches, white spots, reflections, and/or to build a little background if necessary after adjusting angles.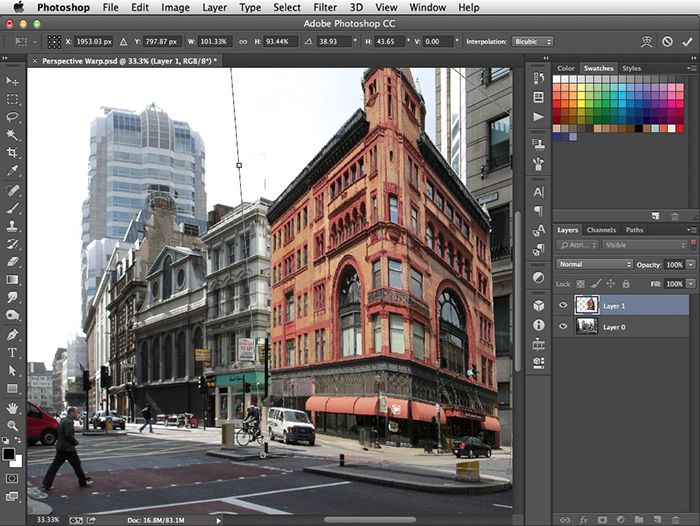
Left: unedited photo; right: edited photo. The angles and color have been corrected, and the reflections on the glass have been removed. (Power Figure: Male [Nkisi], detail, 19th–mid 20th century, Kongo peoples, wood, pigment, nails, cloth, beads, shells, arrows, leather, nuts and twine, 58.8 x 26 x 25.4 cm, The Metropolitan Museum of Art)
Cropping and saving
If you’re making a Smarthistory-style video, cropping your images to 16:9 will mean they’ll fit perfectly into the frame of the video, but this isn’t absolutely necessary; sometimes it’s nice to have an image that is a different aspect ratio to allow for pans, tilts, or zooms.
Save your image at the largest possible size. For video, you will want the highest resolution you can get (within reason). We use .jpg files with the quality set to “maximum” (though be careful of images larger than 10MB or so, since they will slow the performance of your video editing program).
Your own photos are likely not the only ones you will need for making your video. Check out our image search tutorial to guide you in searching for additional images.
Cite this page as: Dr. Naraelle Hohensee, Dr. Steven Zucker and Dr. Beth Harris, "How to edit photos in Adobe Photoshop," in Smarthistory, June 14, 2018, accessed November 7, 2022, https://smarthistory.org/editing-photographs/.
Edit images or objects in a PDF using Adobe Acrobat
User's Guide Cancel
Search
Last update Sep 30, 2022 10:53:16 AM GMT | Also applies to Adobe Acrobat 2017, Adobe Acrobat 2020
- Acrobat User Guide
- Introduction to Acrobat
- Access Acrobat from desktops, mobile devices, and the web
- What's new in Acrobat
- Key combinations
- System requirements
- Workspace
- Workspace basics
- Opening and viewing PDF files
- Opening PDF documents
- Navigating PDF document pages
- View settings PDF
- Customizing PDF viewing modes
- Enable thumbnail preview of PDF 9 files0011
- Display PDF in browser
- Working with online cloud storage accounts
- Accessing files from Box
- Accessing files from Dropbox
- Accessing files from OneDrive
- Accessing files from SharePoint
- Accessing files from Google Drive
- Acrobat and macOS
- Acrobat notifications
- Grids, guides and measurements in PDF
- Use of Asian text, Cyrillic and left-to-right text in PDF documents
- Workspace basics
- Creating PDF documents
- Overview of the procedure for creating PDF documents
- Create PDF files in Acrobat
- Creating PDF documents with PDFMaker
- Using the Adobe PDF Printer
- Converting web pages to PDF
- Create PDF files with Acrobat Distiller
- Adobe PDF conversion settings
- PDF Fonts
- Editing PDF documents
- Editing text in PDF documents
- Editing images and objects in a PDF document
- Rotate, move, delete and renumber pages PDF
- Edit scanned PDF documents
- Enhance document photos taken with a mobile device camera
- Optimizing PDF documents
- PDF document properties and metadata
- Links and attachments in PDF
- Layers of PDF documents
- Thumbnails and bookmarks in PDF documents
- Action Wizard (Acrobat Pro)
- PDF files converted to web pages
- Set up PDF documents for use in a presentation
- Articles PDF
- Geospatial PDF
- Applying actions and scripts to PDF files
- Changing the default font for adding text
- Deleting pages from PDF documents
- Scanning and OCR
- Scanning Documents to PDF
- Document Photo Enhancement
- Troubleshooting scanner problems when using Acrobat to scan
- Forms
- Fundamentals of Working with PDF Forms
- Create forms from scratch in Acrobat
- Create and distribute PDF forms
- Completing PDF Forms
- PDF form field properties
- Filling out and signing PDF forms
- Configuring Buttons to Perform Actions on PDF Forms
- Publish interactive web forms PDF
- Fundamentals of working with PDF form fields
- PDF form fields for barcode
- Collecting and Managing PDF Form Data
- Form Inspector
- Help with PDF forms
- Send PDF forms to recipients using email.
 mail or internal server
- Merge files
- Merge or merge files into one PDF file
- Rotate, move, delete and renumber pages PDF
- Add headers, footers, and Bates numbering to PDF documents
- Crop PDF pages
- Adding watermarks to PDF documents
- Adding a background to PDF documents
- Working with PDF Portfolio Files
- Publish and share PDF Portfolio
- PDF portfolio overview
- Creating and customizing a PDF portfolio
- Sharing, editing, and annotating
- Sharing and tracking PDF documents online
- Mark text when editing
- Preparing to edit a PDF document
- Starting PDF editing process
- Hosting collaborative reviews on SharePoint or Office 365 sites
- Participate in editing PDF document
- Adding comments to PDF documents
- Adding a stamp to a PDF file
- Approval processes
- Comment management | view, add answer, print
- Import and export of comments
- PDF editing tracking and management
- Save and export PDF documents
- Save PDF
- Converting PDF files to Word format
- Convert PDF document to JPG 9 file0011
- Converting and exporting PDF documents to other file formats
- File formatting options for PDF export
- Reusing PDF content
- Security
- Enhanced security for PDF documents
- Protecting PDF documents with passwords
- Digital ID Management
- Protecting PDF Documents with Certificates
- Opening protected PDF documents
- Remove sensitive data from PDF documents
- Setting security policies for PDF files
- Selecting the protection method for PDF documents
- Security warnings when opening PDF documents
- Protect PDF files with Adobe Experience Manager
- PDF Protected View
- Overview of security features in Acrobat and PDF files
- JavaScript in PDF files is a security risk
- Attachments as a security risk
- Allow or block links in PDF files
- Electronic signatures
- Signing PDF documents
- Capture a signature on a mobile device and use it in any application
- Sending documents for electronic signatures
- About certificate signing
- Signatures based on certificate
- Confirmation of digital signatures
- Adobe 9 Approved Trusted List0011
- Proxy Management
- Printing
- Basic tasks for printing PDF files
- PDF Brochure & Portfolio Printing
- PDF advanced print settings
- Print to PDF
- Print color PDF documents (Acrobat Pro)
- Printing PDF files using custom sizes
- Accessibility, tagging, and reflow
- Create and test accessibility tools for PDF documents
- Accessibility features in PDF files
- PDF Reading Order tool
- Reading PDF documents with accessibility and reflow features
- Edit document structure in the Content and Tags panels
- Creating Accessible PDF Documents
- Search and indexing
- PDF indexing
- Search in PDF documents
- 3D models and multimedia
- Add audio, video, and interactive objects to PDF files
- Add 3D models to PDF files (Acrobat Pro)
- Displaying 3D models in PDF files
- Interaction with 3D models
- Measuring 3D objects in PDF files
- Setting up 3D views in PDF files
- Enable 3D content in a PDF document
- Adding multimedia content to PDF documents
- Add comments for 3D layouts in PDF files
- Play video, audio and multimedia formats in PDF files
- Adding comments to videos
- Prepress Tools (Acrobat Pro)
- Prepress Tools Overview
- Printing marks and fine lines
- Color separation preview
- Processing transparency
- Color conversion and ink management
- Color Trapping
- Preflight (Acrobat Pro)
- PDF/X-, PDF/A-, and PDF/E compliant files
- Preflight profiles
- Extended Preflight
- Preflight reports
- Viewing preflight results, objects, and resources
- PDF output methods
- Fixing problem areas with the Preflight tool
- Automate Document Analysis with Droplets or Preflight
- Analyzing documents with the Preflight tool
- Additional check with the Preflight tool
- Preflight Libraries
- Preprint variables
- Color Management
- Color Consistency
- Color settings
- Document Color Management
- Working with color profiles
- Basic Color Management
| | | | | | |
This document describes how to add, resize, move, or replace images and objects in a PDF using Acrobat. (If you need information on how to edit or format text in a PDF document, or edit a scanned PDF document, please click the appropriate link below.)
-
Open the PDF in Acrobat and select Tools > Edit PDF > Add Image .
-
In the Open dialog box, select the image file you want to add.
-
Select the appropriate file and click Open.
-
Click where you want to position the image; if you want to resize it, drag the cursor without releasing the mouse button.
A copy of the image file will appear on the page at the same resolution as the original.
-
Resize the image using the frame handles, or use the tools in the right panel under Objects to mirror, rotate, or crop the image.
-
Open the PDF in Acrobat and select the appropriate tool to move the object:
Image : select Tools > Edit PDF > Edit .
 When you hover over an editable image, an image icon appears in the upper left corner.
 Interactive Objects: To edit form fields, buttons, or other interactive objects, select Tools > Rich Media > Select object .
-
Do one of the following.
- To move an image or object, drag it to the desired location. Objects and images cannot be moved to another page (they can be cut and pasted onto a new page). To move up or down, or to the right or left, press and hold the Shift key and drag the object.
- To resize an image or object, select it, then drag the handle. To keep the aspect ratio of the image unchanged, press and hold the Shift key and then drag the handle.
You can also move and resize multiple selected objects. To select multiple objects, press and hold the Shift key and click the objects one by one.
-
Open the PDF in Acrobat and select Tools > Edit PDF > Edit .
-
To select an image (multiple images), click on it.
-
In area Objects In the right panel, select one of the following tools:
Vertical Mirror Flips the image vertically about the horizontal axis.
Horizontal Mirror Flips the image horizontally about the vertical axis.
Rotate counterclockwise Rotates the selected image ninety degrees counterclockwise.
Turn clockwise Rotates the selected image ninety degrees clockwise.
Crop Image Crop the selected image. Drag a selection handle to crop the image.
Replace Image Replaces the selected image with the selected image. Select a new image in the Open dialog box, then click Open .
To rotate the selected image manually, place the pointer next to the selection handle. When the cursor changes to a rotation pointer, and rotate the image by dragging.
The Arrange options allow you to place an image or object above or below other elements. You can raise or lower an element one level, or place it above or below all elements on the page.
-
Open the PDF in Acrobat and select Tools > Edit PDF > Edit .
-
To select an object (several objects), click on it.
-
In the Objects area of the right panel, click Arrange and select the appropriate option.
Alternatively, you can right-click an object(s), hover over Arrange, and select the appropriate option.
For pages that have a complex structure, where it is difficult to select an object, you can change the order using the Content tab. (Choose View > Show/Hide > Navigation Bars > Content.)
Parameters alignment of objects allow you to accurately align multiple objects on any side — left, vertical center, right, top, horizontal center, and bottom.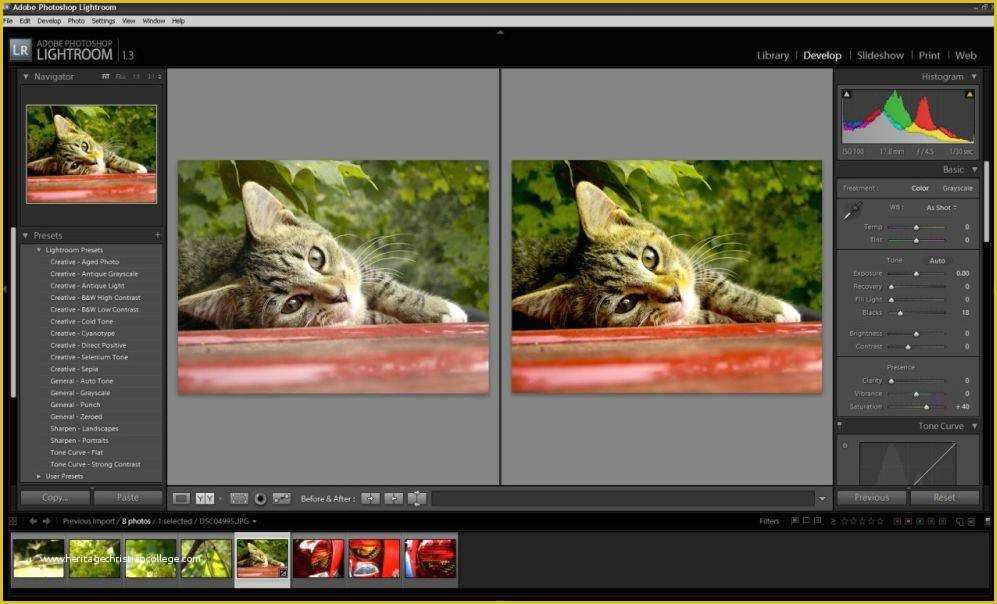
When aligning objects relative to each other, one of the objects remains stationary. For example, using the Align Left option aligns the left edges of the selected objects with the left edge of the leftmost object. The leftmost object remains stationary and other objects align with it.
The Horizontal Center option aligns selected objects about their horizontal axis, while the Vertical Center option aligns selected objects along their vertical axis. Objects are aligned along a horizontal or vertical line that represents the midpoint of their original positions. An object can remain stationary if it is already aligned horizontally or vertically.
Depending on the alignment option selected, objects move straight up, down, left, right, and may overlap an object that is already there. If an overlap is found, the alignment can be undone.
-
Open the PDF in Acrobat and select Tools > Edit PDF > Edit .
-
To select an object (multiple objects), press and hold the Shift key and click the objects one by one.
-
In the Objects area of the right pane, click Align Objects and select the appropriate alignment option.
In addition, you can right-click one or more objects, hover the mouse pointer over the context menu item Align objects and select the desired alignment option from the submenu.
Images and graphics can be edited in other applications such as Photoshop, Illustrator, or Microsoft Paint. When you save an image or graphic, Acrobat automatically updates the PDF document to reflect your changes. The list of applications in the Edit with menu depends on the number of applications installed on your computer and the type of selected image or graphic. You can also specify your own application.
-
Open the PDF in Acrobat and select Tools > Edit PDF > Edit .
-
Select an image or object.
Select multiple items to edit them simultaneously in one file.
 To edit all images and objects on a page, right-click the page and select Select All.
 -
In the Objects area of the right panel, click Edit with and select an editor.
To select another editor not listed in the menu, select Open with , find the application you want, then select Open .
If a message appears asking you to convert to ICC profiles, select Do not convert. If a checkerboard pattern appears in the image window when you open an image, the image data cannot be read.
Make the desired changes in the external editing program. In doing so, the following limitations must be taken into account.
- If the image dimensions are changed, the image may not always align correctly in the PDF document.
- Transparency information is only stored for masks specified as index values in an indexed color space.
- Flatten the layers of an image when working in Photoshop.
- Image masks are not supported.
- If you change image modes while editing an image, you may lose valuable information that can only be applied in the original mode.
-
In the editing program, select File > Save . The object is automatically updated and displayed as a PDF when you switch to Acrobat.
If an image in Photoshop is in a format compatible with Photoshop 6.0 or later, the edited image is saved as a PDF. However, an image that is in an incompatible format is treated in Photoshop as a generic PDF image, and the edited image is saved to disk instead of a PDF file.
You can save each page (all text, vector objects, and images on a page) as an image. To do this, select File > Export to > Image > "[Image Type]". In addition, you can export any image from PDF to a separate image file.
For more information, see Converting and exporting PDF documents to other file formats.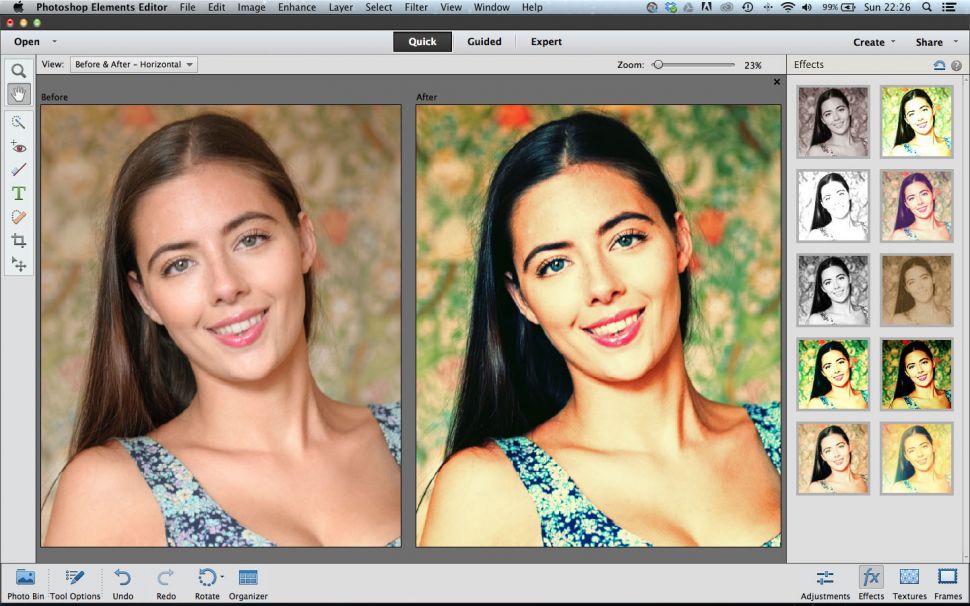
Related items
- Edit text in PDF documents
- Edit scanned PDF documents
- Enhance photos of documents taken with a mobile device camera
- Add headers, footers, and Bates numbering to PDF documents
- Edit document structure in the Content panels and Tags (Acrobat Pro)
- Product Feature: Edit PDF Documents with Acrobat
Login
To come in
Manage your account
Edit and format text in PDF files using Adobe Acrobat
User Manual Cancel
Search
Last update Sep 30, 2022 10:53:06 AM GMT | Also applies to Adobe Acrobat 2017, Adobe Acrobat 2020
- Acrobat User Guide
- Introduction to Acrobat
- Access Acrobat from desktops, mobile devices, and the web
- What's new in Acrobat
- Key combinations
- System requirements
- Workspace
- Workspace basics
- Opening and viewing PDF files
- Opening PDF documents
- Navigating through the pages of a PDF 9 document0011
- View settings PDF
- Customizing PDF viewing modes
- Enable PDF thumbnail preview
- Display PDF in browser
- Working with online cloud storage accounts
- Accessing files from Box
- Accessing files from Dropbox
- Accessing files from OneDrive
- Accessing files from SharePoint
- Accessing files from Google Drive
- Acrobat and macOS
- Acrobat notifications
- Grids, guides and measurements in PDF
- Use of Asian text, Cyrillic and left-to-right text in PDF documents
- Workspace basics
- Creating PDF documents
- Overview of the procedure for creating PDF documents
- Create PDF files in Acrobat
- Creating PDF documents with PDFMaker
- Using the Adobe PDF Printer
- Converting web pages to PDF
- Create PDF files with Acrobat Distiller
- Adobe PDF conversion settings
- PDF fonts
- Editing PDF documents
- Editing text in PDF documents
- Editing images and objects in a PDF document
- Rotate, move, delete and renumber pages PDF
- Edit scanned PDF documents
- Enhance document photos taken with a mobile device camera
- Optimizing PDF documents
- PDF document properties and metadata
- Links and attachments in PDF
- Layers of PDF documents
- Thumbnails and bookmarks in PDF documents
- Action Wizard (Acrobat Pro)
- PDF files converted to web pages
- Set up PDF documents for use in a presentation
- Articles PDF
- Geospatial PDF
- Applying actions and scripts to PDF files
- Changing the default font for adding text
- Deleting pages from PDF documents
- Scanning and OCR
- Scanning Documents to PDF
- Document Photo Enhancement
- Troubleshooting scanner problems when using Acrobat to scan
- Forms
- Fundamentals of working with PDF forms
- Create forms from scratch in Acrobat
- Create and distribute PDF forms
- Filling out PDF forms
- PDF form field properties
- Filling out and signing PDF forms
- Configuring Buttons to Perform Actions on PDF Forms
- Publish interactive web forms PDF
- Fundamentals of working with PDF form fields
- PDF form fields for barcode
- Collecting and Managing PDF Form Data
- Form Inspector
- Help with PDF forms
- Send PDF forms to recipients using email.
 mail or internal server
- Merge files
- Merge or merge files into one PDF file
- Rotate, move, delete and renumber pages PDF
- Add headers, footers, and Bates numbering to PDF documents
- Crop PDF pages
- Adding watermarks to PDF documents
- Adding a background to PDF documents
- Working with PDF Portfolio Files
- Publish and share PDF Portfolio
- PDF portfolio overview
- Creating and customizing a PDF portfolio
- Sharing, editing, and annotating
- Sharing and tracking PDF documents online
- Mark text when editing
- Preparing to edit a PDF document
- Starting PDF editing process
- Hosting collaborative reviews on SharePoint or Office 365 sites
- Participation in the editing of a PDF document
- Adding comments to PDF documents
- Adding a stamp to a PDF file
- Approval processes
- Comment management | view, add answer, print
- Import and export of comments
- PDF editing tracking and management
- Save and export PDF documents
- Save PDF
- Converting PDF files to Word format
- Convert PDF document to JPG file
- Converting and exporting PDF documents to other file formats
- File formatting options for PDF export
- Reusing PDF content
- Security
- Enhanced security for PDF documents
- Protect PDF documents with passwords
- Digital ID Management
- Protecting PDF Documents with Certificates
- Opening protected PDF documents
- Removing sensitive data from PDF documents
- Setting security policies for PDF files
- Selecting the protection method for PDF documents
- Security warnings when opening PDF documents
- Protect PDF files with Adobe Experience Manager
- PDF Protected View
- Overview of security features in Acrobat and PDF files
- JavaScript in PDF files is a security risk
- Attachments as a security risk
- Allow or block links in PDF files
- Electronic signatures
- Signing PDF documents
- Capture a signature on a mobile device and use it in any application
- Sending documents for electronic signatures
- About certificate signatures
- Signatures based on certificate
- Confirmation of digital signatures
- Trusted list approved by Adobe
- Proxy Management
- Printing
- Basic tasks for printing PDF files
- PDF Brochure & Portfolio Printing
- PDF advanced print settings
- Print to PDF
- Print color PDF documents (Acrobat Pro)
- Printing PDF files using custom sizes
- Accessibility, tagging, and reflow
- Create and test accessibility tools for PDF documents
- Accessibility features in PDF files
- PDF Reading Order tool
- Reading PDF documents with accessibility and reflow features
- Edit document structure in the Content and Tags panels
- Creating Accessible PDF Documents
- Search and indexing
- PDF indexing
- Search in PDF documents
- 3D Models and Media
- Add Audio, Video, and Interactive Objects to PDF Files
- Add 3D models to PDF files (Acrobat Pro)
- Displaying 3D models in PDF files
- Interaction with 3D models
- Measuring 3D objects in PDF files
- Setting up 3D views in PDF files
- Enable 3D content in PDF document
- Adding multimedia content to PDF documents
- Add comments for 3D layouts in PDF files
- Play video, audio and multimedia formats in PDF files
- Adding comments to videos
- Prepress Tools (Acrobat Pro)
- Prepress Tools Overview
- Print marks and fine lines
- Color separation preview
- Processing transparency
- Color conversion and ink management
- Color Trapping
- Preflight (Acrobat Pro)
- PDF/X-, PDF/A-, and PDF/E compliant files
- Preflight profiles
- Extended Preflight
- Preflight reports
- Viewing preflight results, objects, and resources
- PDF output methods
- Fixing problem areas with the Preflight tool
- Automating Document Analysis with Droplets or Preflight Operations
- Analyzing documents with the Preflight tool
- Additional check with the Preflight tool
- Preflight Libraries
- Preprint variables
- Color Management
- Color Consistency
- Color settings
- Document Color Management
- Working with color profiles
- Basic Color Management
| | | | | |
Learn how to add or replace text, fix typos, change fonts and typefaces, adjust alignment, and resize text in a PDF document. (For information on how to edit images, objects, or scanned PDFs, see the link page below.)
When you add text to a PDF document, by default, Acrobat uses the nearest font attributes for the new text. Similarly, when editing existing text in a PDF document, if the font is not available on the system, the application defaults to a fallback font for that particular character set. For example, the application uses the fallback font Minion Pro for Roman fonts. This default behavior can result in inconsistent display of fonts in a PDF document. In the Content Editing section, using the font options, you can select a specific font when adding and editing text so that fonts appear consistently across all PDF documents.
-
In Acrobat, on menu Edit , select Preferences . The "Settings" dialog box will be displayed.
(You can also press Ctrl+K on Windows or Command+K on macOS.) -
In the dialog box, click Content Editing under Categories.
 The font options are displayed as shown in the image below.
-
Select the appropriate font from the drop-down lists:
- Fallback font for editing
- Default font for added text and Font size
-
Click OK to save changes and close the Preferences dialog box.
Text editing reflows the paragraph text inside the text field according to the changes made. All text fields are independent of each other, and pasting text in one block does not result in text flowing into an adjacent block or onto the next page.
-
Select Tools > Edit PDF > Edit .
Dashed outlines indicate editable text and images. -
Select the text to be edited. When selected, the text box turns blue and a rotation handle appears at the top of the selected text box.
-
Edit text with the following steps:
- Enter new text to replace the selected text, or press the Delete key to delete the text.
- To rotate a text field, use the rotation handle at the top of the selected text field.
- Manage list items with the list controls (bulleted and numbered) in the Format panel on the right. You can create list items, convert paragraphs to list items, convert list items to paragraphs, and convert lists of one type to another.
- Select a font, font size, and other formatting options from the Format panel on the right. You can also set additional formatting options such as line spacing, letter spacing, horizontal scale, stroke weight, and color.
By law, you must buy a font and install it on your system in order to correct text using this font.
Editing text is only possible if the system has a font installed for this text.
 If the font is not installed on the system, but is embedded in the PDF document, you can only change the color and size of the font. If the font is not installed and embedded, you cannot make changes to the text.
 -
Click outside the selection to deselect and start again.
-
Select Tools > Edit PDF > Edit .
Dashed outlines indicate editable text and images. -
Select the text to be changed.
-
In the Format panel on the right, select a font, font size, or other formatting options. You can also set additional formatting options such as line spacing, letter spacing, horizontal scale, stroke weight, and color.
Formatting options in the right areaBy law, you must buy a font and install it on your system in order to correct text using this font.
Editing text is only possible if the system has a font installed for this text.
 If the font is not installed on the system, but is embedded in the PDF document, you can only change the color and size of the font. If the font is not installed and embedded, you cannot make changes to the text.
 -
Click outside the selection to deselect and start again.
You can add or insert new text into a PDF document using any font installed on your system.
-
Select Tools > Edit PDF > Add text .
Open a PDF document and choose Tools > Edit PDF > Add Text. -
Click and drag the mouse pointer to define the width of the added text block.
-
For vertical text, right-click in the text box and select Adjust vertical text direction .
-
The Add Text tool intelligently recognizes the following text properties near the clicked point:
- Font name, size, and color
- Spacing between characters, paragraphs and lines of text
- Horizontal zoom
These properties are automatically applied to text that is added at the click point.
The text properties can be changed using the options in the Format section in the area on the right.
-
Enter text.
-
To resize the text box, drag the selection handle.
-
To move the text box, hover over the bounding box (do not hover over selection handles). When the cursor changes to a move pointer , drag the field to the new location. If you want to maintain alignment with other list items, drag the box while holding down the Shift key.
The text block on the page can be moved or rotated. The Text and Image Editing tool highlights each text block with an outline, so the user can immediately determine which text will be changed. Editing can only be applied to the current page. You cannot drag a text box to another page, or move or rotate individual characters or words within a text box. However, you can copy the text box and paste it on another page.
Resizing a text box reflows the text within the resized text box.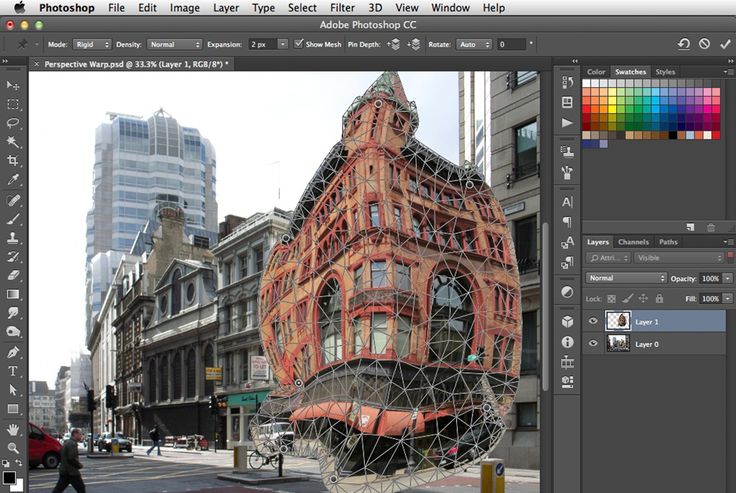 This does not change the size of the text. As with other editing operations, resizing only applies to the current page. The text does not wrap to the next page.
-
Select Tools > Edit PDF > Edit .
-
Click the text box you want to move, rotate or resize.
A bounding box with selection handles appears around the selected text field. -
Do one of the following.
moving
Hover over the bounding box (do not hover over selection handles). When the cursor changes to the Move pointer, drag the field to the desired location. To move the field only in the vertical and horizontal directions, hold down the Shift key while dragging.
Turn
Press and hold the rotation indicator, rotate the image by dragging.
Resize
Move the pointer over any of the selection handles and drag to resize the text box.

To mark selected text with a highlight, strikethrough, or underline, use the tool Comments . The text of the PDF document will not be changed. These marks only indicate where and how the text should be corrected in the original file. For more information, see Highlight, strikethrough, or underline text.
Annotation and drawing marks tools can be used to annotate text. Comments are notes and drawings that allow you to share ideas or provide feedback on PDF documents. Entering text messages is available using the Memo tool. You can draw lines, circles, or other shapes with the drawing tools, and you can also type messages in the corresponding pop-up notes. For more information, see Adding Annotations and Markups to PDF Documents.
You can add items to numbered and bulleted lists, create list items, and convert paragraphs to list items, list items to paragraphs, and lists of one type to another.
-
Select Tools > Edit PDF > Edit .
Acrobat recognizes paragraphs and lists separately. Therefore, paragraphs and lists can appear within the same bounding box during editing. But, if you open the modified file after saving, paragraphs and list items will be displayed in separate bounding boxes.
-
Do the following.
Adding or removing items from a numbered or bulleted list:
- To add or remove list items of any level, the same controls are used as in MS Office. For example, to add a new line, press the Enter key at the end of the list item. To delete a new line and position the cursor at the end of the previous list item, press Backspace .
Create a numbered or bulleted list:
- Position the cursor in the area of the document where you want to add the list.
- Select the appropriate list type (bulleted or numbered) under Format in the right pane.
Convert paragraph to list item:
- Position the cursor in the paragraph, then select the appropriate list type (bulleted or numbered) in section Format on the panel on the right.

Convert list item to paragraph:
- Select all items in the list. The corresponding list type will be highlighted under Format in the right pane.
- Press the highlighted list type.
Converting a list from one type to another:
- Place the cursor on a list item or select all items in the list.
- Select the appropriate list type (bulleted or numbered) in section Format on the panel on the right.
You can also add list items using the keyboard. For example, before a paragraph, type "a" followed by a closing bracket ")" and include a space. A numbered list will be added starting with the letter "a)".
The Fill & Sign tools can be used to add text and other symbols anywhere on a form. For instructions, see Fill out and sign PDF forms.
You can create, distribute, track, fill out, and sign PDF forms using Acrobat. For more information, see Help with PDF Forms.
You can easily organize pages in a PDF document if you have permission to edit it. For more information, see Rotate, move, delete, extract and renumber PDF pages.
Acrobat allows you to add a header and footer to all pages of a PDF document. Headers and footers can include the date, automatic pagination, Bates numbers for legal documents, title, or author's name. For more information, see Add headers, footers, and Bates numbering to PDF documents.
You can selectively apply a background to individual pages or ranges of pages in a document or PDF documents. The PDF format only supports one background per page, but backgrounds can vary from page to page. For more information, see Add a Background to PDF Documents.
A watermark is text or an image that appears either before or behind the content of an existing document, similar to a stamp. For example, you can add a "Confidential" watermark to pages with sensitive information.