Blur in lightroom
How To Blur The Background In Lightroom – ShootDotEdit
At ShootDotEdit, we provide you with specialized photo editing services. However, as a photographer, you might want to add those finishing touches to your images at times. So while we absolutely offer editing (and culling!) services for professional photographers, we also know that sometimes you just want to (or have to) do it yourself! There are many different effects that can be used to make your wedding photos stand out, and one of them is blurring the background. In this blog post, we provide you with some of the reasons why you might want to use this effect. Plus, we share tips on how to blur the background in Lightroom to add variety to your images.REASONS TO BLUR THE BACKGROUND
IN LIGHTROOM
Besides the general aesthetics of an attractively blurred background, there are several reasons to consider for using this Lightroom effect on photographs. You may want to bring more focus to the photograph’s subjects, create a heightened sense of atmosphere in the photo, or even disguise elements in the background. Your goal and the look you want to create with your image will determine the strategies you use to blur backgrounds in Lightroom as well as the extent to which you blur your images.
1. Bringing More Focus To The Subject
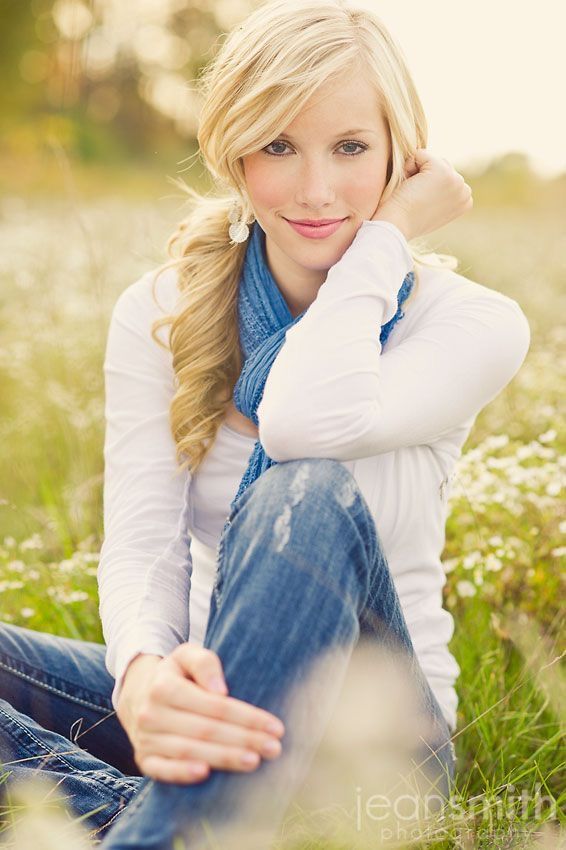
In wedding photography, much of the time, the people in your photo are the primary focus. The setting or background, no matter how beautiful, is secondary and should not distract from the subject or subjects of the photograph. Applying a background blur while keeping the individuals in the photo in focus is one way to ensure that viewers’ attention goes right to the main subjects of your image. And that’s why knowing how to blur the background in Lightroom is a great skill to possess for a wedding photographer even if you are outsourcing your post production work to an expert.
2. Adding A Timeless, Dreamy Style
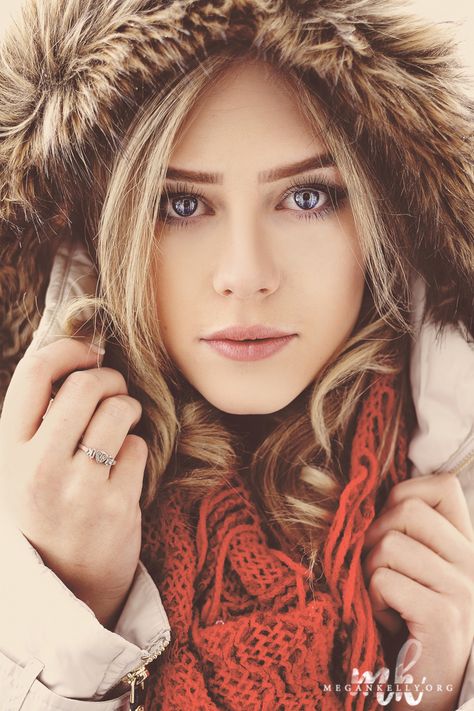
Another situation that might require a heavier level of background blur is when you are looking to create a more dreamy, timeless look for the finished image.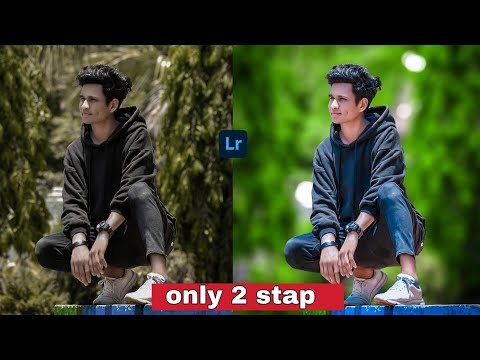 A more dramatic blur, expertly applied, can create that perfectly timeless, fairy-tale style that many clients might want for their wedding photos. The concept is similar to creating the same soft blur in Photoshop, and the key to keeping this style looking professional rather than amateurish is to know the right levels of blur and exactly how to apply it.
3. Disguising Unwanted Elements
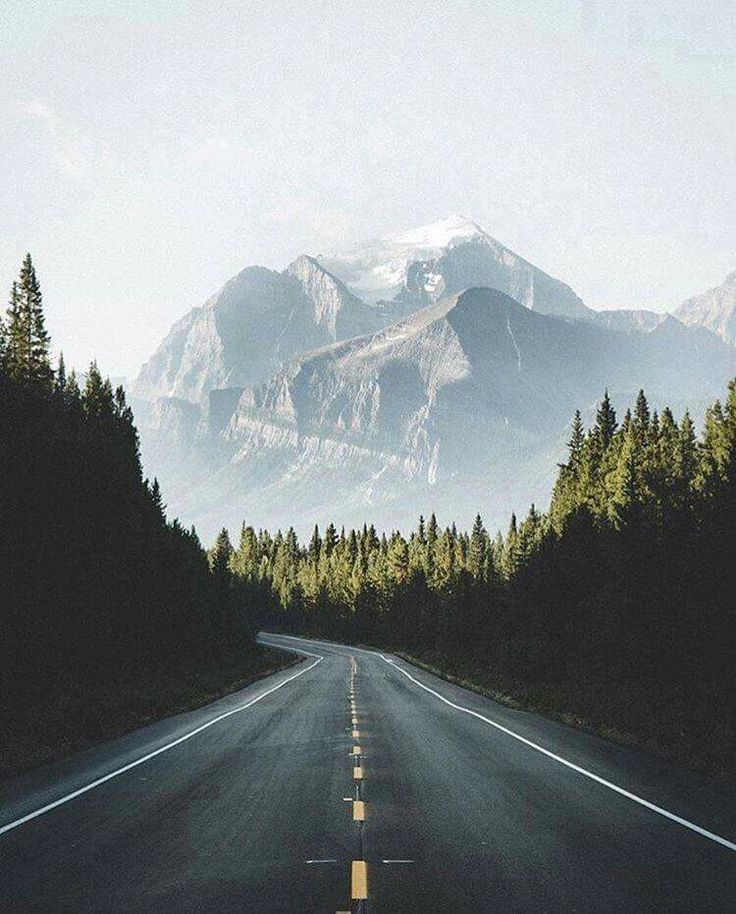
Besides ensuring that your images look breathtaking, learning how to blur the background serves the purpose of masking flaws. For some photos, you may have a background that is breathtakingly gorgeous from a distance, but some of the details, such as old buildings, are far less attractive in focus. A soft blur effect can be the ideal solution for removing the harsh features of such elements. Although blur, in theory, could be used to completely hide out-of-place elements in the background as well, a better approach is to remove these through a more intentional process, such as with the spot healing brush.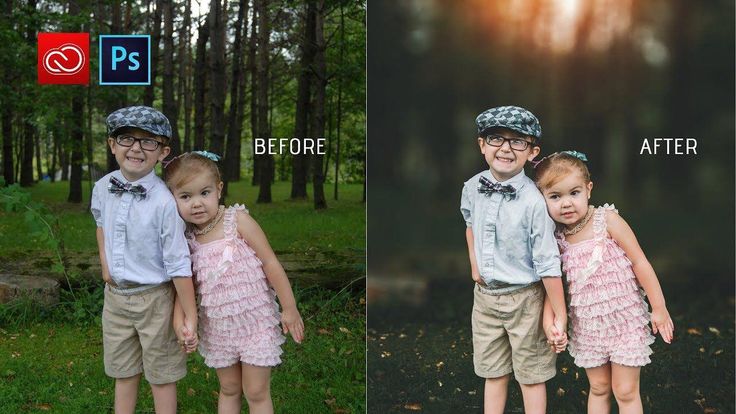
How to use Lightroom to Blur Background
Whether you were not quite able to capture the perfect focal balance with your camera during the shoot, or you just want to add more finesse to your image, adding the right amount of background blur can be the solution. Knowing how to blur backgrounds in Lightroom can be the difference in giving those wedding photos the look you desire.
Suggested Read: Behind The Scenes: Professional Photographer's Edit Stories
STEPS TO LEARNING HOW TO BLUR THE BACKGROUND IN LIGHTROOM
The capabilities of your camera and the precise blur effect you want for your photographs will determine how to blur in Lightroom for the best result. As some of the blur processes in Lightroom are more complex, the result will also depend on your skill level in knowing how to blur in Lightroom. However, each option begins with the same basic steps of creating a mask over the photograph’s background and then applying the blur effect to that mask. Here are a few steps for how to blur a background in Lightroom.
Suggested Read: 7 Tips For Selecting The Perfect Background
1. Import Your Photo Into Lightroom And Prepare The ImageBecause this process requires specific areas of the photo to be worked on that change from one to the next, background blur in Lightroom must be applied to individual photos. Unlike some effects that your wedding photo editor applies, it cannot be applied to groups of photos at the same time (if you hope to achieve professional results). Once you have chosen the photo you want to adjust, make sure you are using the Develop module in Lightroom to begin making the changes.
Related Read: How To Batch Edit In Lightroom To Speed Up Your Workflow
2. Set Up The Brush Tool For Creating A Background Mask
With Lightroom, you will need to create your own mask so that the blur you create will only affect the background of the photo. This is done by painting over the background (or the parts of the background you wish to blur) with an adjustment brush, such as the brush tool. From the brush panel, you can either choose a preset brush effect or create a custom effect yourself by manipulating the settings.
The more comfortable you are with customizing these settings, the better you will be able to create your desired blur result. Although the brush effects can be changed after you begin, these changes will also affect areas of the image you have already painted, making it very helpful to have an idea of what these settings should be before you begin.
3. Paint The Background Of The Image To Create The Mask
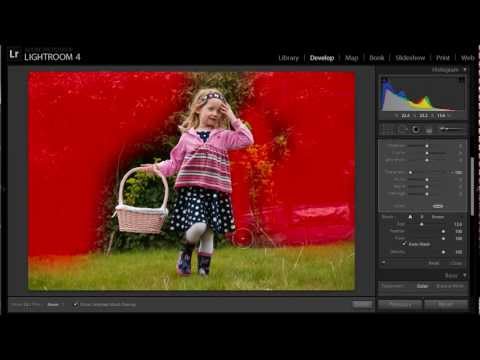
Once you have created a new mask, but before painting on the background, make sure that you have the Show Selected Mask Overlay option selected in Lightroom. This ensures that your original image stays intact and will highlight the selected area in red so that you can see it clearly.
Image by Brian Hatton Photography
Similar to Photoshop, as you paint over the background, brush properties allow you to fine-tune the mask and only affect areas that you paint moving forward. Changing the size of the brush, in particular, will help you to more carefully select the parts of the photo that should be blurred and not elements that need to remain in focus. As needed, you can use the erase brush to remove sections of the image from the mask that should not be blurred, just like you would when undoing an action in Lightroom.
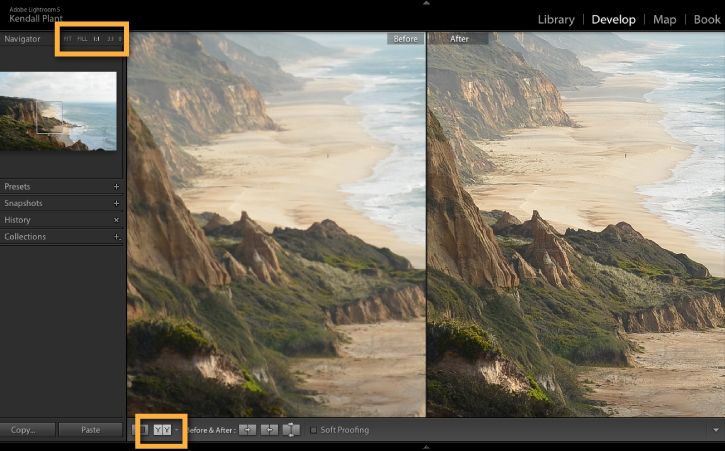
4. Adjust The Blur Effect With Clarity And Sharpness Filters
After you have selected the entire background that should be blurred, you can edit the Clarity and Sharpness settings in Lightroom to change the impact of the blur effect. Many professionals suggest setting the values for both at -100 to create a full blur for the background of your image, but the correct settings will vary for each photo.
Image by Brian Hatton Photography
Once you have these settings just right for the blur effect you want, you are ready to save the images. To make sure that you don’t lose valuable work, you can use an automatic Lightroom catalog backup.
Further Read: How To Edit Wedding Photos - ShootDotEdit's Expert Tips
OUTSOURCE WHEN NEEDED
Knowing how to blur backgrounds in Lightroom is a powerful skill for any photographer, especially those who specialize in weddings. Although the basic steps in the process are simple, applying the right brush settings and creating the perfect background mask could be a challenge, eating up a lot of your time. That is why it is valuable to outsource your photo editing needs to a professional like ShootDotEdit, who can take care of the time-consuming parts of post production, leaving you to only add adjustments, like background blur, when necessary.
Here at ShootDotEdit, we provide post production photography services for professional wedding photographers. We also love to share valuable insights on topics that are relevant to your photography. As we said at the beginning, we know photographers have to edit. But when you’re tired of doing it yourself, check us out, because we do it for you, giving your precious time back! And to learn how we do it, take a look at our pricing plans.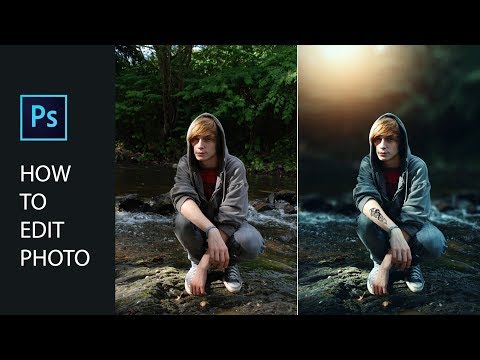
How to Blur Background in Lightroom (3 BEST ways!)
This guide is for every photographer who’s wondered how to blur background in Lightroom.
Perhaps you don’t own a lens with a wide aperture to blur the background with a shallow depth of field.
Or maybe you just wished you’d used a larger aperture in the first place! Whatever the case, we’re here to help.
Editor's Choice
Luminar
Easy to use software to blur the background in just one click.
Check Current Price
Blurring background in Lightroom is useful for many reasons. Bokeh can be used to highlight your subject by ‘blurring out’ distracting background elements.
It can also help give an image a more three-dimensional-look, with varying degrees of focus across the layers of your image.
Let’s look at three great ways to introduce a background blur effect to your photos using Adobe Lightroom, and one neat way to blur background in Lightroom CC Mobile.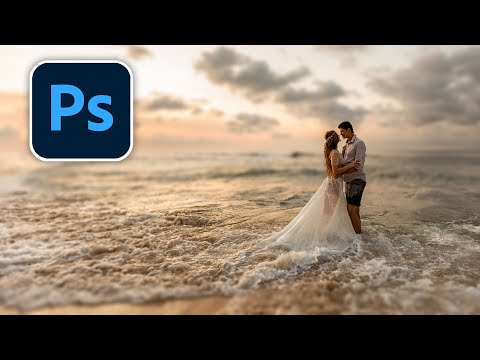
Table of Contents
How to Blur Background in Lightroom – 3 Ways
It’s not uncommon for photographers to ask, Is there a blur tool in Lightroom? After all, we tend to think of it as more of a Photoshop function.
But there are, in fact, multiple tools you can use to blur background in Lightroom.
I’m going to show you three such methods. Some of them, like the radial filter, are easier but give you little control. The Graduated filter and Brushes give you more control but require more work.
Choose the one that’s better for your photos. I’m using Lightroom Classic but all three are available in Lightroom CC.
1. Lightroom Background Blur: Brushes
Credit: Dan Golde
With adjustment brushes, you can make the most precise mask to blur the background out of any photo, regardless of the shape of the subject.
You can do this as realistically or as creatively as you want. That’s what makes it so special. Here are the steps to take for this photography blurring brush effect.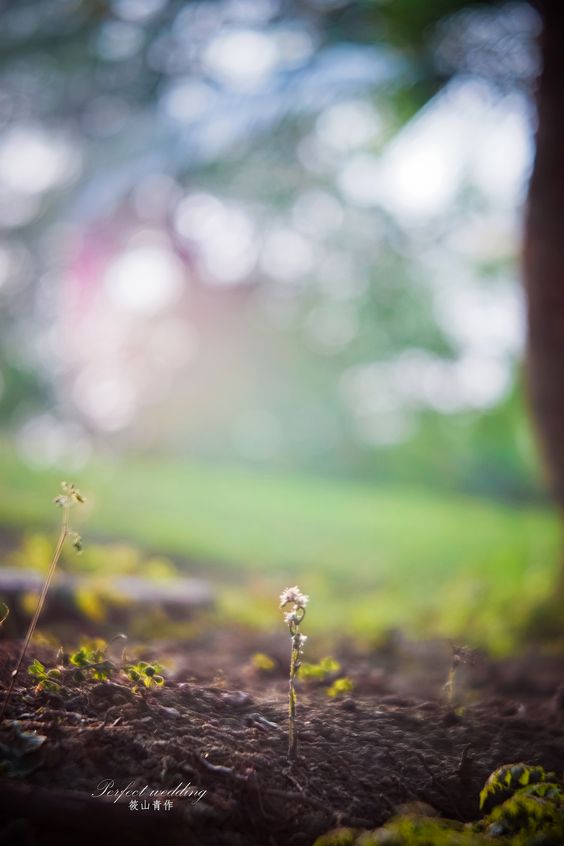
Step 1: Import your photo
In Lightroom, you need to import your images into the library instead of just opening them as you would do with Photoshop or other programs.
You can do this in the menu File, Import Photos and Videos. This will open a browser window where you can choose the files that you want. Then click on the Import button on the bottom right of the window.
Step 2: Grab the Adjustment Brush tool
Once you have your images in the Lightroom Library, you need to move into the Develop module to edit them. In there, you’ll have all your controls on the right.
On the top side of the panel, you’ll see the different adjustment tools available in Lightroom. The first one from the right is the Brush. Click on it to activate it.
At the bottom of the panel, you’ll see that the different options to customize the tool change and the ones for the brush become active, for example, size and feather.
Step 3: Customize the Adjustment Brush
Depending on what you want to select, you can adjust how big or small you want the tip of your brush to be.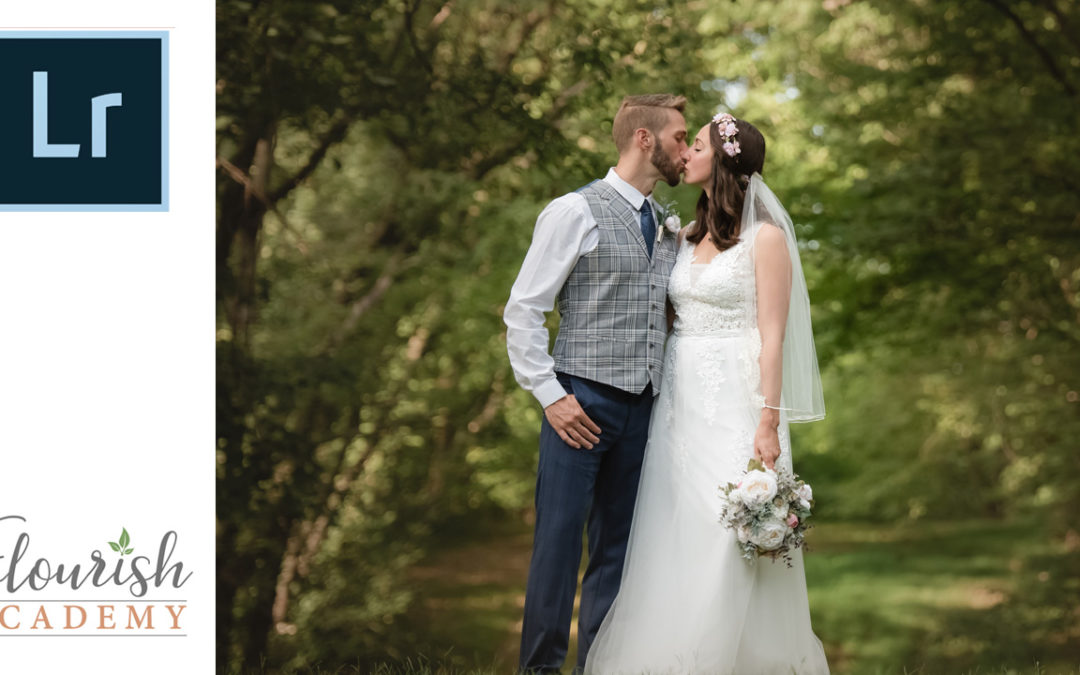 Adjust it with the slider called Size.
Then, with the Feather slider, you can change the hardness of the brush. Adjust this depending on whether you want a smooth transition or hard edges around your selection.
Step 4: Paint the background
Anything you paint will be affected by the changes you make (in this case, it will be blurred), so you need to paint the background, not the subject.
It doesn’t matter if you’re not very precise at first, you can fine-tune the selection in the next step. For more accuracy, you can check the Show Selected Mask Overlay option to see in red everything that you paint.
Step 5: Fine-tune the selection (optional)
If you accidentally painted over the subject when you were making the layer mask, you can easily correct it. On the brush panel, above the Size slider, you’ll find the Erase option. Click on it.
You can then adjust the eraser brush for size and hardness, and remove the mask from any areas where you don’t want it.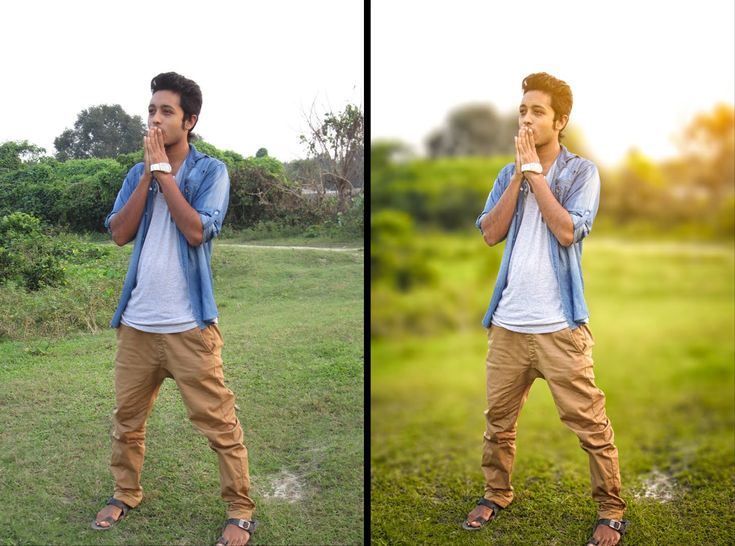
Step 6: Blur the background
Move up on the panel and find the Sharpness slider. Drag it to the left to start blurring. You can now uncheck the Show Selected Mask Overlay box to hide the red and see the blur effect on your photo more clearly.
2. Lightroom Background Blur: Radial Filters
Credit: Laura Briedis
Step 1: Import your photo
Import your photo into Lightroom or open it if you already have it in the catalog. This method is based on an oval or circular shape, so you need to choose the photo wisely. For example, if you want to do a soft blur vignette, or when your subject in the foreground is round.
Step 2: Grab the Radial Filter
Move to the Develop module and choose the Radial Filter from the adjustment tools. It’s the second one from the right.
Step 3: Make the selection
Click on the center of your subject and drag the mouse outwards to create the circle or oval around it. Don’t worry if it’s not super precise, you can adjust it as needed after it’s done.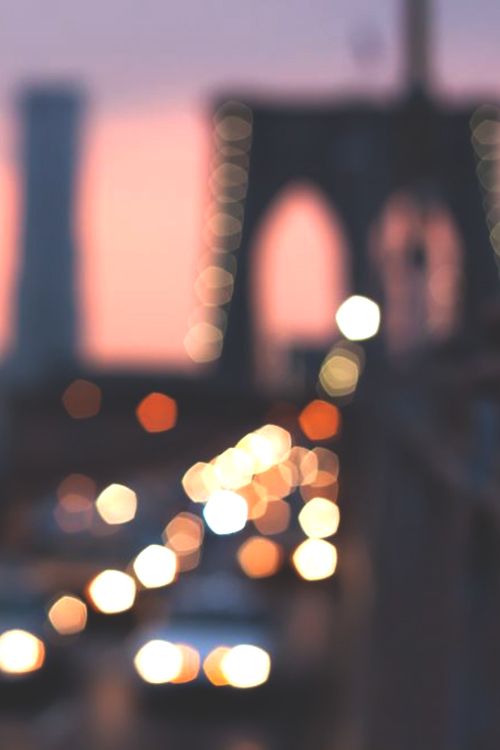
Step 4: Fine-tune the selection
Click and drag the on the edges to adjust the selection. If you can’t manage to fit the circle properly around the subject, it might be because you’re not exactly in the center. You can drag the center pin to fix it.
Then, you can slide the Feather slider left or right to increase or decrease the transition area. To see this more clearly you can have the red mask on.
You can always make extra adjustments to the selection using the brush.
Step 5: Blur the Background
Find the Sharpness slider on the panel and move it towards the left until you reach the desired amount of blur.
3. Lightroom Background Blur: Graduated Filters
Credit: Karsten Winegeart
Step 1: Import your photo
This is the most natural way to blur a background in Lightroom because the depth of field created on-camera works on planes, so all elements on the same plane will be in focus even if they belong to different subjects.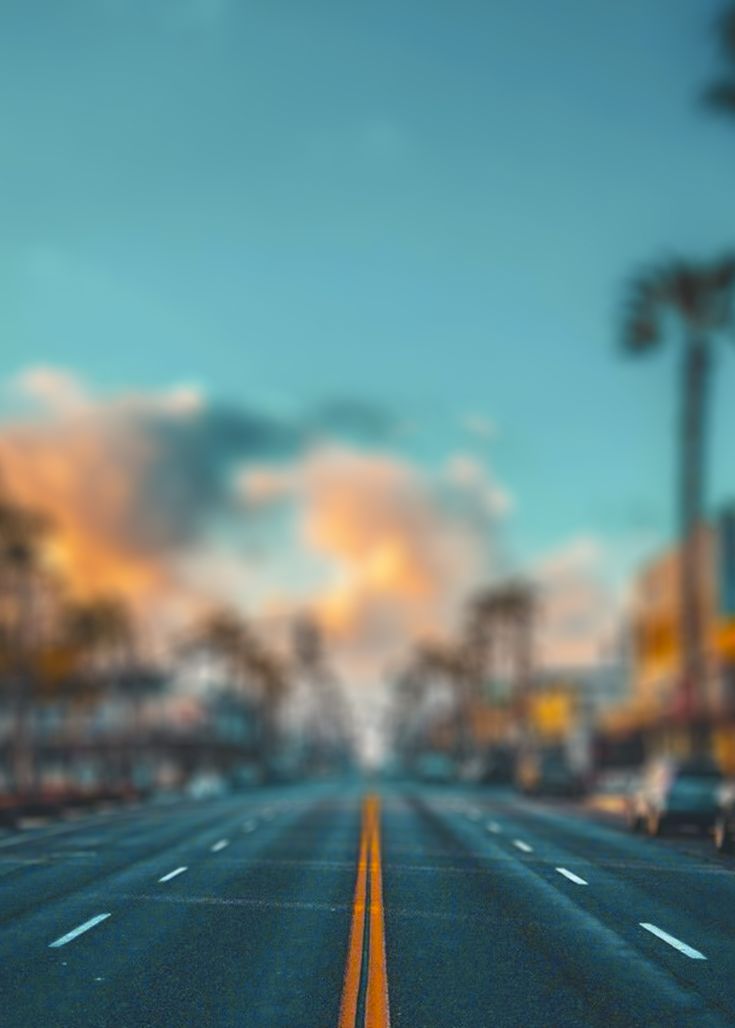
This is the result you’ll get using the graduated filter. As such, you can choose images where you want to blur the front and back of the subject, as in the above example.
So, choose an appropriate photo and import it into Lightroom. Then move into the Develop workspace.
Step 2: Select the Graduated Filter
This is the third adjustment tool from the right, just next to the radial filter. Click on it to activate it.
Notice that you don’t get any new sliders with this one. That’s because you’ll fine-tune it directly, but I’ll get to that.
Step 3: Apply the selection
Click and drag on the area that you want to blur. Notice that three lines appear. You can click and drag the ones on the outside to adjust the feathering.
The more separated you have the lines, the bigger transition you’ll have and vice versa. You can also change the direction of the lines; they don’t have to be horizontal or vertical.
Step 4: Add another Adjustment Filter (optional)
This step is optional depending on what you want to achieve.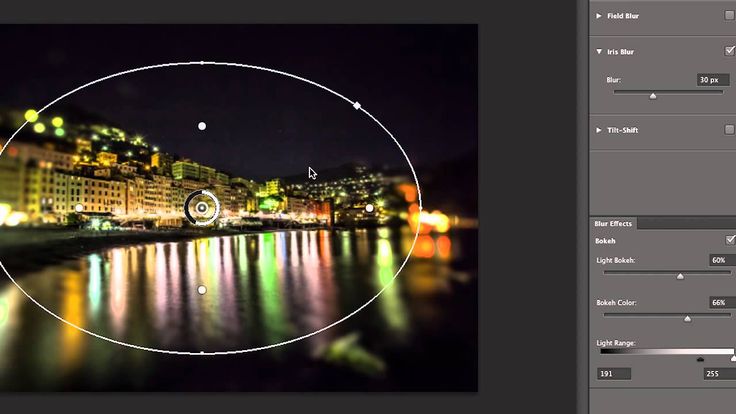 In my example, I needed one for the back of the subject and one in front.
Step 5: Blur the background
As with any of the other methods, you now just have to find the Sharpness slider and drag it to the left. Click on each filter to adjust them separately.
How Do I Blur the Background in Lightroom CC Mobile?
If you need to blur the background using your smartphone, don’t worry, all three methods are also available in Lightroom Mobile.
Credit: Ana Mireles
- Import your image into Lightroom or take one using Lightroom’s camera.
- Scroll through the menu and find Selective mode. Tap on it to activate.
- Click on the Plus icon on the left to open the selective tools menu.
- Pick the method of your choice from Radial Filter, Graduated Filter, or Brush.
- Tap and drag on the image to create the selection mask.
- (Optional) Tap and hold on the pin to open the Mask options if you want to Invert, Duplicate, or Delete the mask.

- Scroll through the menu until you find Detail, tap on it to open the sliders.
- Drag the Sharpening slider to blur the background.
- Save or share your final image.
FAQs About Background Blur In Lightroom
How do you blur the background in Lightroom?
There are many ways to add background blur in Lightroom. The most effective tools include the use of the Radial Filter, Graduated Filter, or Brush tool.
We recommend that you experiment with each of the Lightroom background blur tools to get the results that suit you.
Can you add a background in Lightroom?
While you can add background blur in Lightroom, it’s tricky to add a new background to your image.
The best application to add a background to an image is Adobe Photoshop. It allows you to create new layers to take a foreground subject and add it to a new background.
Does Lightroom Classic have a blur tool?
Lightroom Classic has similar features to the standard version of Lightroom.
The process is simple to apply and utilizes the Adjustment Brush, Radial Filter, and Graduated Filter to achieve a blur effect.
How do you blur the background in photos?
To blur the background in photos, you’ll need editing software or a smartphone app that supports the function.
Every app works differently, with features such as a Radial Filter, Graduated Filter, or Brush. Others, such as those found on smartphone apps, apply a simple radial filter in varying strengths.
How to Blur Background in Lightroom | Final Words
I hope you enjoyed this tutorial on how to blur background in Lightroom. As you can see, Lightroom blur effects are actually very easy to create, and particularly useful when editing portraits to help your subject ‘pop’.
If you have any questions or suggestions, let us know in the comments.
Don't Miss These Articles:
Working with the background and sharpening in Adobe Lightroom
How to Blur a Background in Lightroom
How to make a white background in Lightroom
How to Darken a Background in Lightroom
How to Remove Noise in Lightroom
How to Sharpen in Lightroom
How to brighten part of a photo in Lightroom
How to change color in Lightroom
How to Remove Aberrations in Lightroom
How to Change Color Profile in Lightroom
|
| Despite the fact that Lightroom is positioned more as a convenient cataloger and RAW converter, you can use the image retouching options in the program. Thus, if you need to quickly and easily do some basic processing on a batch of photos, Lr will do just fine. By the way, the price of a license for Lightroom will depend on where you will use the program. So, you can purchase a licensed version for educational or government institutions, as well as for commercial organizations. |
How to blur the background in LightroomIn order to create a blurred background effect, it is not necessary to install Photoshop and master all the nuances of working in a photo editor for several hours. Thanks to Lightroom's simple interface and its fast performance, you can easily make an image with beautiful bokeh. To achieve the blur effect, you need to open the "Develop" tab and select the "Radial Filter" tool. | |
|
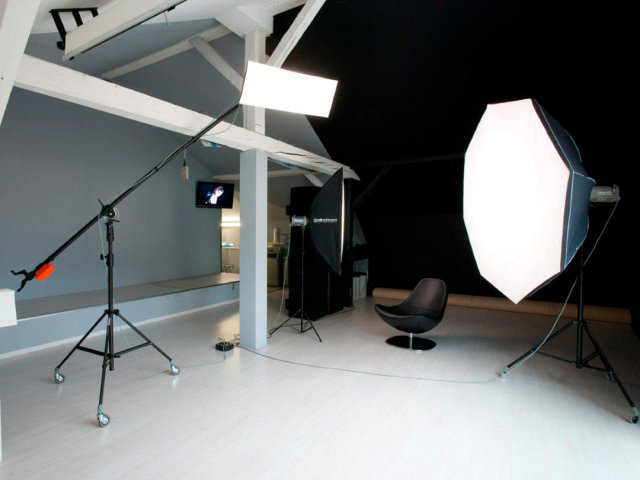
| How to make a white background in LightroomWhen working in a photo studio, a situation may arise when the background in the image is not uniformly white. In this case, you can correct it in the photo editor by importing the image into Lightroom. Go to the "Develop" module and select the "Adjustment Brush" tool. To get a perfect white background, you need to adjust the sliders for exposure, contrast, shadows and highlights, setting them to their maximum values. Set the feather to 0, and with the brush selected, edit any areas that are different from the color you want. To see more clearly non-uniform areas, you need to set the values of the curves and set the color warning. |
How to darken the background in LightroomThe technique for creating a dark background is identical to the technology described in the previous step. Select an adjustment brush from the Develop tab and adjust its size. To get a darker background, you need to set the exposure, shadows and highlights to the “-100” position, leaving the contrast as high as possible. Next, follow the same steps as for lightening the background - feathering large areas and more thorough editing of the area near the object. Don't forget to set the color warning option to see the highlights more clearly. |
|
|
| How to remove noise in Lightroom When shooting at high ISO values or slow shutter speeds, so-called noise may appear in images. Easily visible color spots/grain will greatly affect the image quality. If the shooting conditions did not allow you to remove noise using the settings, you must use the Lightroom photo editor to suppress graininess. Noise reduction tools are located in the "Develop" tab. Select the "Detali" window, which contains the sharpness settings, as well as the sliders for adjusting the color and luminance noise. By adjusting these values, you can easily remove noise from photos. When editing, do not forget to set the photo size to 100% in order to visually evaluate the result. |
How to sharpen in LightroomSharpening is one of the main tasks of the photographer when creating the perfect frame. Even the most expensive lens cannot always cope with this task. In this case, you have to resort to the help of professional photo editors. In Lr, you can change the sharpness settings in the "Develop" module, working with the "Detali" tab. Under the "Sharpening" heading are four sliders with which you can set the desired sharpening value. By changing the position of the "Amount" cursor, you can make the picture sharper. The "Detali" parameter allows you to avoid the occurrence of halos along the contour of the details. |
|
|
| How to lighten part of a photo in LightroomWith the help of a photo editor, you can significantly improve the quality of the picture by working with the settings for brightness, contrast, and other characteristics. When shooting, the camera may not focus correctly and darken the already dark details of the frame. In order to brighten dark areas, you need to change basic settings such as exposure and contrast. By working with these two parameters, you can significantly improve the quality of the photo. If the image lacks volume, change the Curves settings (Tone Curve). With desaturated colors in the frame, it makes sense to change the settings in the HSL tab. |
How to change color in Lightroom To replace the color in the image, you can use not only Photoshop, but also the Adobe Lightroom photo editor. For example, if you want to replace the orange color of an orange in a fruit photo with yellow, you need to move the Orange slider all the way to the right. You can make any of the colors in the photo more saturated and brighten, depending on the tasks. |
|
How to remove aberrations in LightroomWhen processing a photo in the program, when you enlarge the image, you can notice clear colored edges around objects. These artifacts are called chromatic aberrations. Such bands can be removed using the tools in the Lens Correction tab. In modern versions of Lightroom, during processing, you can check the box next to the “Remove Chromatic Aberration” option. The program will automatically correct color distortions. If aberrations are not removed by automatic processing, it is possible to correct them manually. | |
How to change the color profile in LightroomWhen editing photos on wide color monitors or high quality prints, you may need to change the Adobe RGB color profile. By default, Lightroom uses the sRGB profile when displaying and saving photos. To change the color profile, in the export settings you need to select the tab called "File Settings". In the Color Space window, set the range of colors you need. |
|
 The popular Photoshop does a great job with careful color correction and can work with layers. However, Lightroom is quite capable of reducing noise, blurring the background or changing its color.
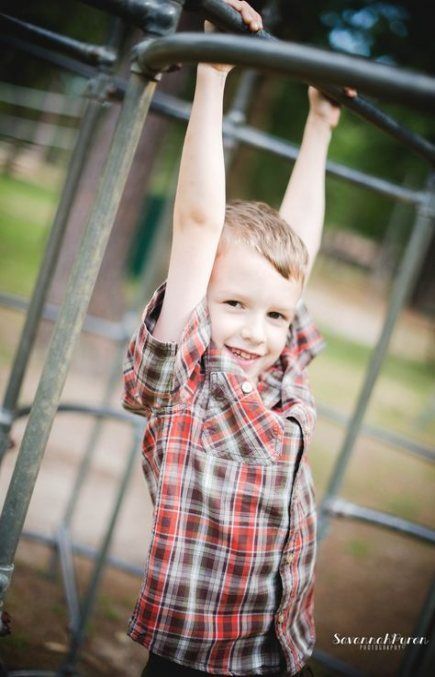
 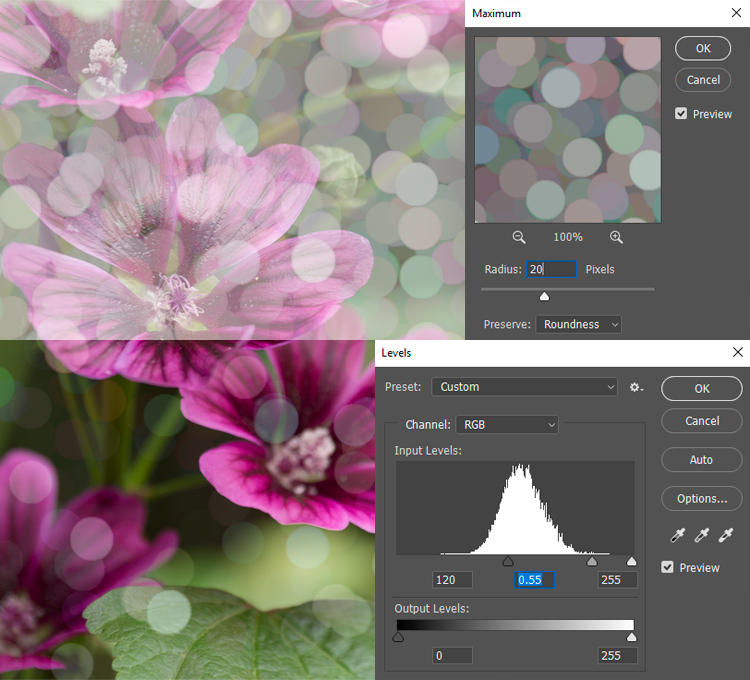 To keep a certain area sharp, drag the oval window to the desired location. Adjust the Clarity and Sharpness sliders to the values you want. To make the transition between areas smoother, use the Feather option.
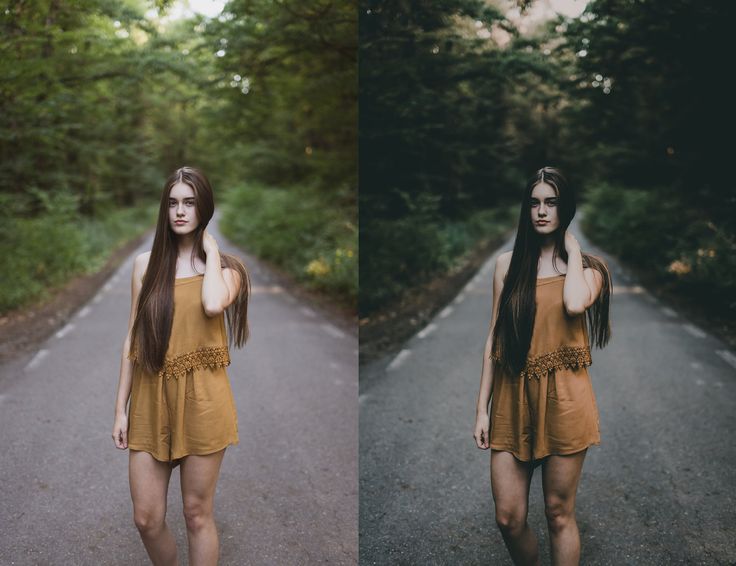
 Its default value is 25.
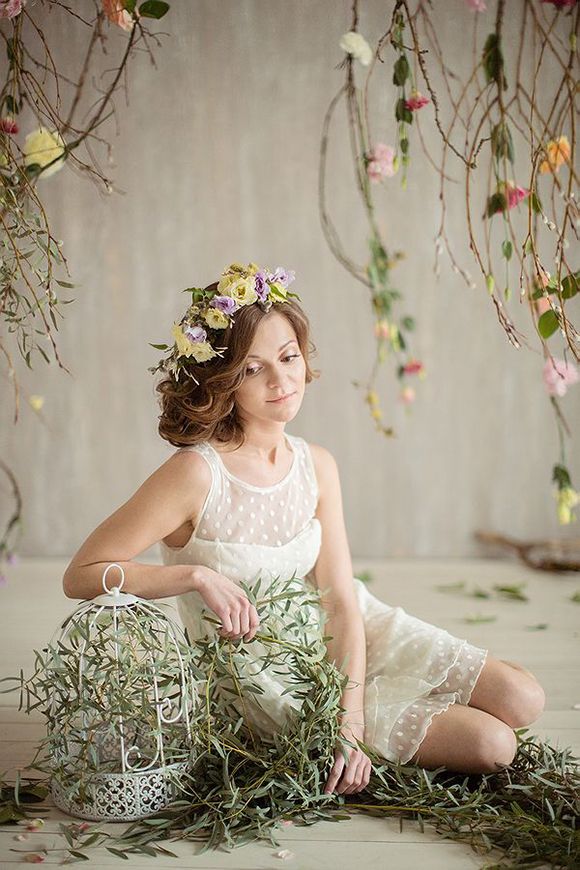
 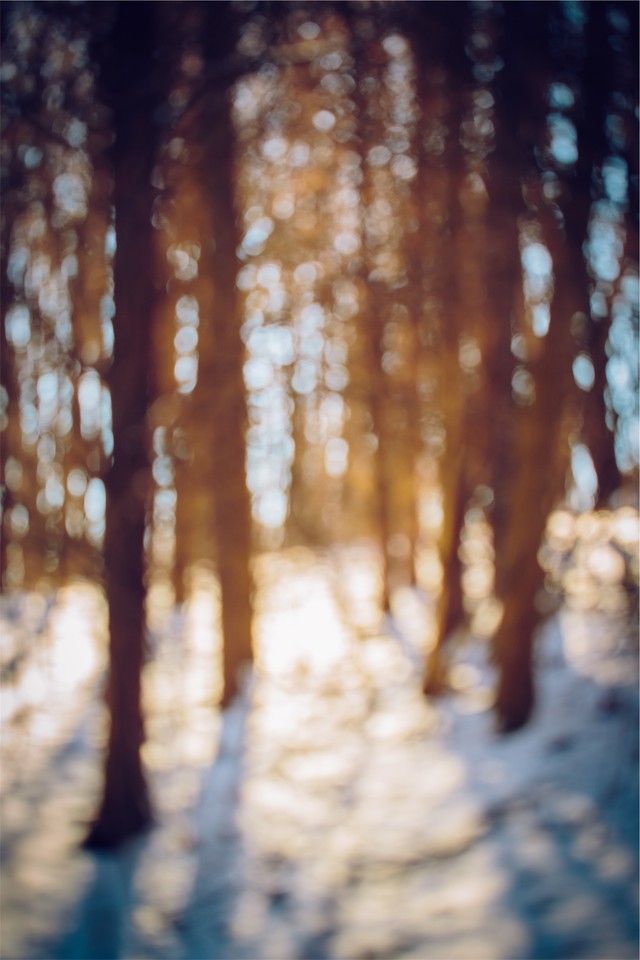 Tools for working with colors and their shades are located in the HSL panel.
 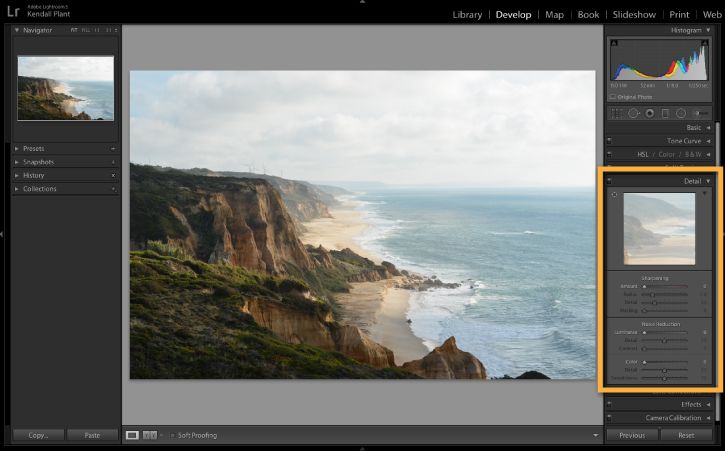 You can set the range of greens and purples, as well as their saturation, with the Purple Hue and Gren Hue sliders.
 How to blur the background in Lightroom
If you want to focus more on the subject in your photo, minimize the background. It is best to do this while taking a photo - focus on the subject, choose a wide aperture and a long focal length to limit the depth of field. The result is a sharp subject but a blurry background.
But in this article, photographer Rick Ohnsman will teach you how to blur the background in Lightroom.
To blur the background in post-processing, use Photoshop or other advanced editing software that supports layers, selections, and features such as gradients and Gaussian blur.
Let's see how to blur a background in Lightroom.
Two basic steps
There are two main things to keep in mind when blurring a background in Lightroom:
- which areas you want to blur;
- what kind and degree of blur is needed.
What and how to mask
In Photoshop, defining the area you want to work with is usually done with a selection. But there is no selection in Lightroom. Instead, Lightroom uses what it calls "masks". They are needed so that you can select the areas in which you want to apply effects.
Lightroom has three local adjustment tools that you can use to select areas and apply masks.
- Correction brush.
- Graduated filter.
- Radial filter.
Blur the background with a graduated filter and a filter brush
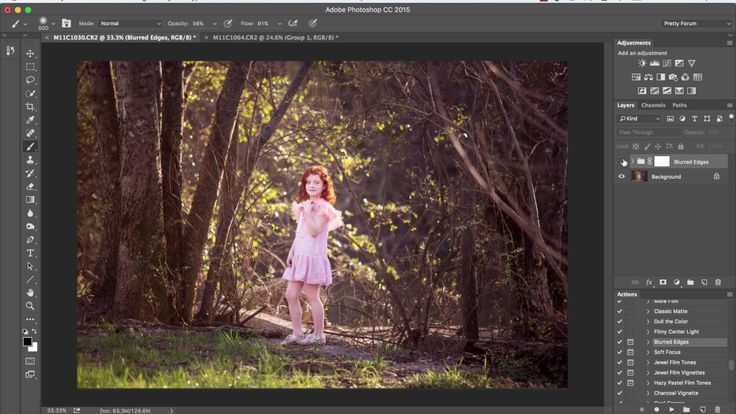
Step 1. Drag the graduated filter from the right edge over the entire image. Mask Overlay On (Green)
Step 2: With the gradient filter still selected, grab the filter brush tool. Erase the parts of the mask that you don't want to blur. The Auto Mask option is useful for finding edges
Step 3: Finish erasing the parts of the object that you want to sharpen. After that drag the slider Sharpness (Sharpness) down to create a blur. It's good to disable the mask overlay here so you can see what you're doing - just press "O"
It's better to think of the filter brush as more like an airbrush than a brush. There are four options that can be used to control the brush.
Size: changes the size of the brush.
Feather ( Feather ) : Changes the hardness of the edge of the brush and how fast the effect fades.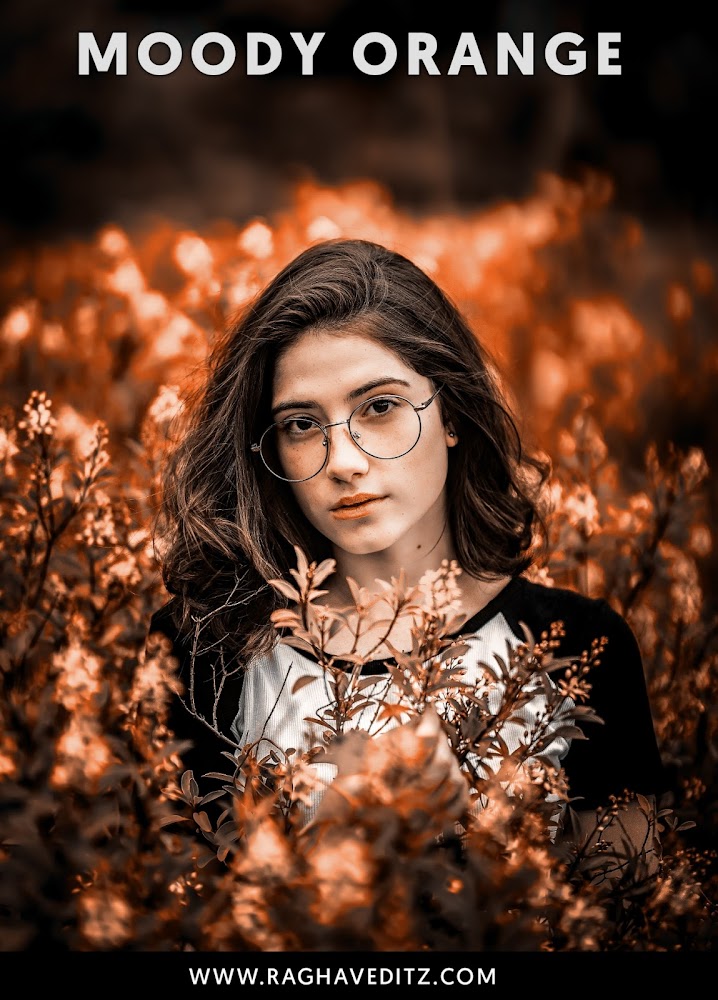
Flow Flow : Determines how quickly the effect is applied with each stroke of the brush. Use the slider to adjust the flow, or select the brush tool and change the flow using the number keys on your keyboard. Using multiple strokes will enhance the effect.
Density Density ) : Controls the maximum opacity of the brush effect. For example, if the Flux value is 100 and the Density is 50, a single brush stroke will apply the effect at 50% Opacity.
You can simply select the Adjustment Brush, drag the sharpness slider all the way (reverse sharpening) and start painting, watching the painted areas become more blurred. (You're still creating a mask, but you won't see it unless you enable mask overlay).
For more precise work, the adjustment brush method is not the best method.
Radial filter
The radial filter has a shape limited by circles and ovals.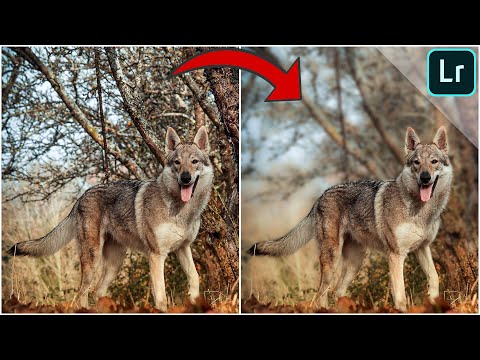 The effect comes from the center of the spot on which it is applied. You can control its size, feathering and orientation.
Using the "Invert" checkbox, you can also specify whether the filter effect will appear outside the oval (default) or inside the oval.
The photo shows the process of blurring the background using a radial filter.
1) Mask the entire image with a radial filter. (Turn on the mask overlay to see where the mask is applied.)
2) Use the filter brush to erase the parts of the mask that you want to keep sharp.
3) Move the sharpness slider to the left to sharpen (soften) the masked areas back.
Left image before masking; the image in the center shows the masked area after removing the mask on the barn; the image on the right shows a blurred background.
Overlay option
Being able to see where the mask is applied makes things easier, so enable the overlay mask option. This can be done by checking the Show Selected Mask Overlay checkbox or by pressing the "O" key.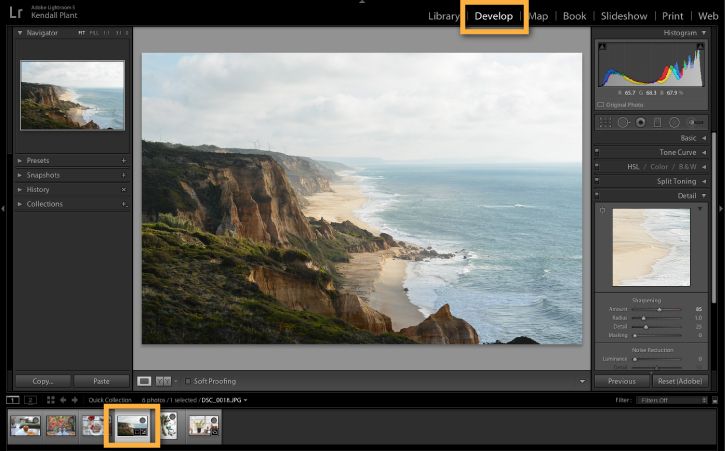
In the photo, the background blur was created by simply loading an adjustment brush with the Sharpness slider down and then painting over the areas that needed to be softened. Added a radial mask with slightly increased exposure to the fern.
Modifying masks
There are tools to modify the Adjustment Brush, Radial Filter and Graduated Filter.
- Auto Mask - Checking this box will help the brush find edges in your image and make masking much easier.
- "Erase" - you can use the adjustment brush to paint the mask. When you do this, you will see a "+" symbol in the center of the brush. Clicking on the "Erase" option will change the symbol in the center of the brush to a "-" symbol so you can erase parts of the mask you've already painted on.
You can add or subtract from Graduated Filter or Radial Filter masks using the Filter Brush tool. When you work with a graduated or radial filter mask, you see the word Brush to the right of the word Mask.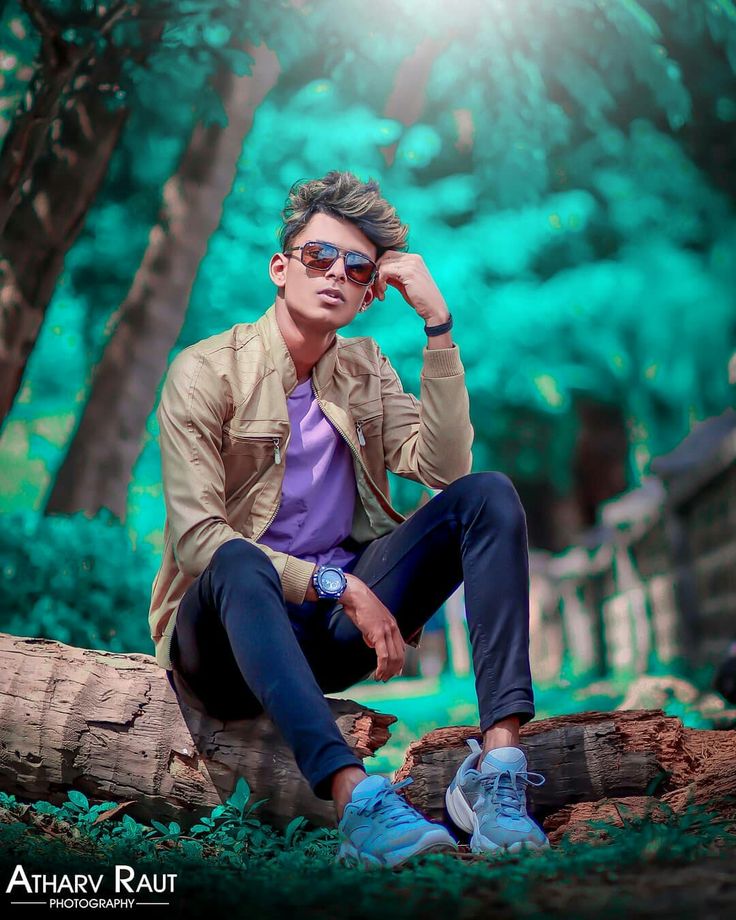 Important: This is a different brush than the Adjustment Brush tool.
Range masking ( Range masking )
When using range masking, you still apply the initial mask using the three tools mentioned above. But by enabling range masking, you can have more precise control over where the mask is applied.
Luminance range masking allows you to selectively apply a mask to a range of luminance in a photo, and a color range mask allows you to apply a mask to a color range.
Clockwise from top left corner: 1) initial image. 2) Background selected with color range mask. 3) The background is blurred with one layer of blur. 4) The background is blurred with three duplicate layers of blur
This is the original image taken on a foggy day
Gradient filter applied. Graduated filters applied on the right and left first, with a sharpness slider to -28
Gradient filter applied. Then lowered another gradient filter on top with the Sharpness slider down to -95
Adjustment brush applied, then added some extra mask with adjustment brush and reduced sharpening to around -33
Final result with some extra Dehaze negative added to
masksCreate blur
Create masks will determine where the blur effect will be applied. This is a more time-consuming and responsible stage. Let's say you have a person in the foreground as your main subject. You want it to be sharp, but you don't want to blur the background.
- Drag the gradient filter over the image to mask the entire scene.
- Use the Filter Brush tool (from Graduated Filter) to fine-tune the mask by erasing areas on the object, adding back as needed, and also using the auto-mask feature to better mask near the edges.
- Now that the gradient filter is selected, drag the sharpness slider down, perhaps all the way to the left.
- See if moving the Clarity slider down a bit helps achieve the desired blur.
Double the blur
Once you've added a sharpening or contrast effect, right-click the pin and select Duplicate. A copy of the adjustments will be applied on top of the existing adjustments and the blur will be doubled. You can make as many duplicates as you want, gradually increasing the effect.