Diy black backdrop photography
How to Add a Black Background to a Picture in 5 Minutes
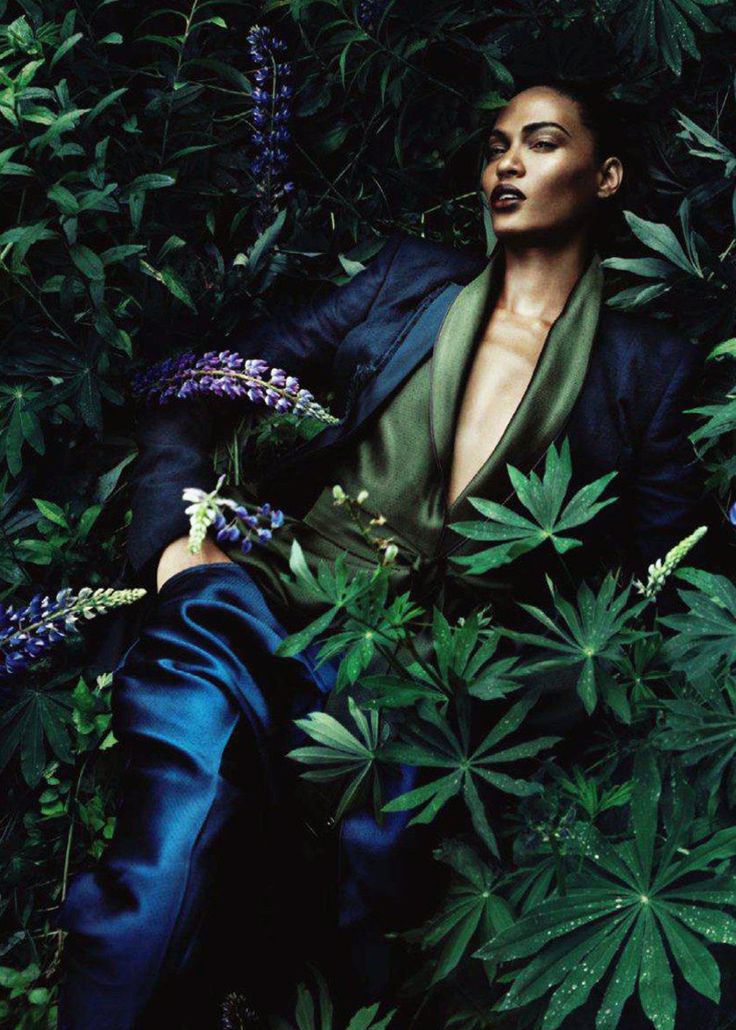
Photos of a single object in front of a black background are so appealing! And their popularity on social media is growing fast. Many people are obsessed with the idea of applying the dark background technique in various ways. Some even go so far as creating Instagram accounts and websites for promoting food against it. But the greatest thing about working with this background photography is that it’s easy to master even without experience. Anyone interested can do it – even you and me!
Just read the tips in this guide and become the king or queen of black background images!
But first, let’s look at the basics of working with a pure black background. Even if there are a limited number of secrets behind outstanding dark background images, it’s essential to emphasize the core factors that guarantee good results.
As Expert Photography notes the most important thing to pay attention to is the lighting. To make it work, bring in a bright light focused on the subject to deepen the play of shadows on the dark background. Voila - and the perfect photo backdrop magically appears!
As you can see, capturing images with a black background isn’t a matter of searching for the proper decorations or place – the best dark backgrounds appear behind a properly illuminated subject.
However, as the last stop before diving into our guide, you should keep in mind the core principle applied even for black photography: a dark background doesn’t actually need to add a sharp contrast with the subject. It’s the wise application of light that creates the appearance of a pure black background.
In this article, we’ve collected all the top information you need to successfully create cool dark backgrounds in your photos the easiest way. The first section attaches the basics of black background photography in the days when only black and white backgrounds were available. Let’s start by looking at the way film photographers contributed to such images.
Black backgrounds and film photography
In the early days of photography, a white and black background was the only option available. And artists learned how to make the background black using this color scheme in a way that still works – even for contemporary images!
Specifically, the greatest achievement of film photography for creating contemporary black backgrounds was finding a way to establish a sharp contrast between subjects by playing with the lighting alone.
And the results were truly marvelous. Just look at these examples of classic photography – they can easily serve as a source of inspiration for contemporary black background images!It’s incredible that we’re looking at exclusively white and black background in shots that had no chance to go through the post-processing stage in a photo editor software. Today, even these masterpieces could look better, and the dark backgrounds could gain more depth.
At least, that’s how professional photographers work with black backgrounds now. Luckily, we live in an age when it’s possible to edit photos and create whatever effects we want in all our images. With Luminar Neo, you can easily insert to a color photo black and white background or beautify the appearance of it. Click the button below to try one of the best photo editing software tools on the market and look at how to darken the background of a photo.
Thanks to the great photographers of the past, we know that the art of creating a pure black background is a matter of lighting. And, of course, crafting a proper backdrop for a plain background image behind the chosen subject. We’ll look at the importance of this in the next section.
The magic behind crafting a plain black background
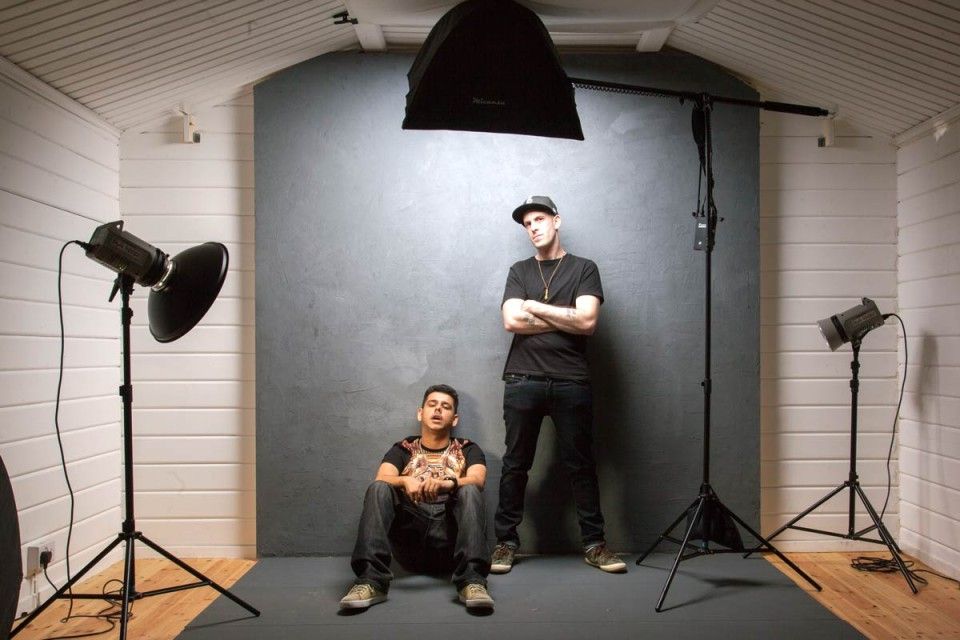
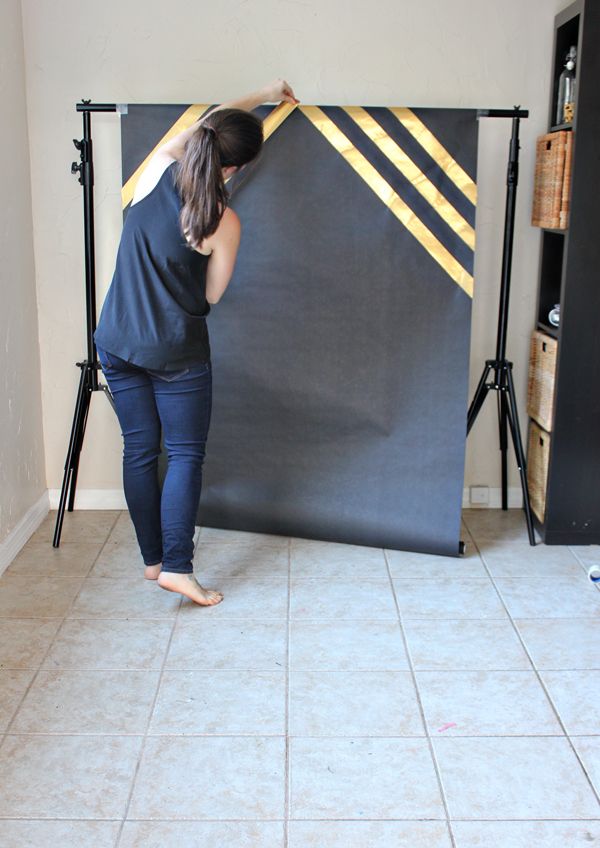
Of course, there are many different methods how to black out background on a photo. The best and most obvious way to shoot is to find a proper black backdrop. So it’s time to search for a piece of fabric big enough to serve as a dark background.
In this context, finding a backdrop has another advantage: working with a solid black background significantly reduces the amount of time spent on the post-processing stage. The best choice is a dark or black stretchy fabric that doesn’t reflect light (so no plastic, shiny sheets, or materials that create light backgrounds). As most photographers agree, the best of the best is to choose black velvet. At the same time, a stretchy piece of fabric, a simple photo background or even a black bed sheet might also work great (especially if you don’t have money for velvet).
However, you can avoid this step altogether. You may be surprised, but the best pictures don’t necessarily include a black backdrop. The proper lighting and precise exposure can do the job instead.
Let’s look closer at how the right lighting and exposure can create great black backdrop photography without using an actual black backdrop.
Lighting tricks for black background photography
Beyond the basic photography rules, there are particularities to lighting for images with dark backgrounds. Among all, don’t hesitate to play with sides and natural light when you take photos with black background. For instance, it can be created in different ways. One of them is by putting your subject close to the window in a room where all the doors and other windows are closely shut. In this situation, adding a black backdrop on the wall can make the appearance of a dark background a bit stronger - but it’s not that necessary.
At the same time, artificial studio lighting is still easier to work with. It gives you an extra level of control by providing the opportunity to use flags – pieces of fabric that allow you to block the light from unneeded areas. Here, the size of the room really matters, and the combination of a small area and a black background will work best for your photography.
The chemistry behind crafting a black backdrop for black photography
Generally, the proper exposure of subjects in front of black backgrounds is as essential as the lighting. Just pay attention to camera settings to achieve the best results. You don't need to look for ways how to put a black background on a picture. By knowing your camera well, you can even turn casual backgrounds black!
A nice trick to create the illusion is to play with the camera settings in manual mode.
Here’s a guide to adjust them appropriately:
1. Put your ISO to the lowest level possible (this decreases the camera’s sensitivity to light).
2. Set your shutter speed to the highest level (so the least light will reach the sensor).
3. Select an aperture of around f/5.6.
4. Check that you see nothing but a dark background on the screen. If a plain background image appears, proceed to step 6.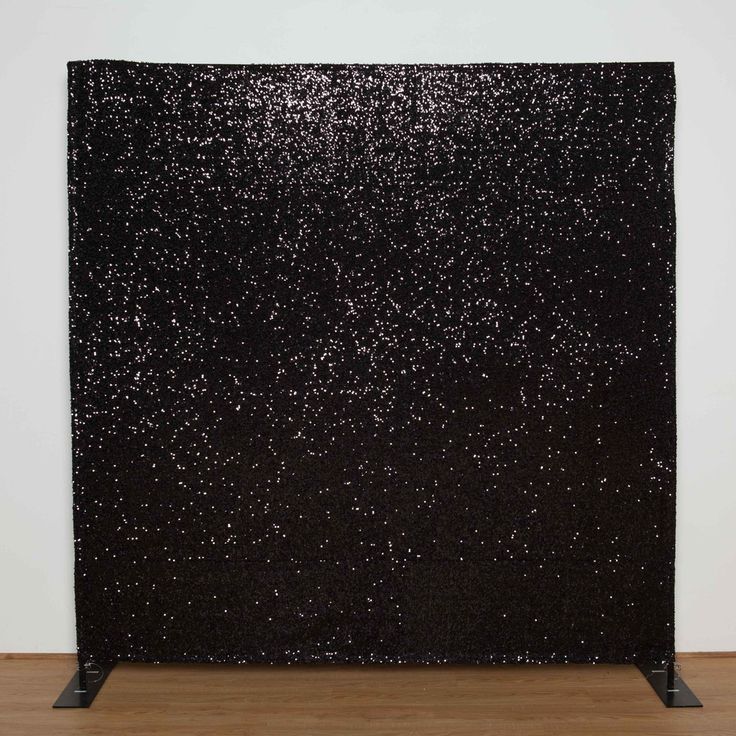
5. Go back and increase the aperture to f/8.0 if the black backdrop isn’t as dark as you expected.
6. Use the flash to bring in your subject from the plain background image.
However, avoid shooting indoors, better choose an open space. The flash can introduce wallpaper, tables, and other unnecessary elements into your black background image. In general, blond and pale models require less work with lighting and exposure than models posing for black photography (or just with darker skin and hair). In the latter case, a backlight may be needed.
Techniques for capturing a black background portrait
In addition to the above-mentioned lighting and exposure principles for photographs, there are some additional factors to consider while working with humans and for black photography. For example, to make your dark background in a portrait as black as possible, consider pushing it as far as possible from the person you’re capturing. Distance does magic with any type of portrait (including those on a white-and-black background) - combined with the proper choice of lighting (which is important for black photography especially).
Thus, the crucial task for a black background portrait is working with the color balance, as the lighting may significantly affect the way tones are represented in the image. Choosing the proper angle and the appropriate power of light is quite important for this type of photography.
Besides, headshots with black backgrounds call on you to consider dynamic range. For such image, limited dynamic range hinders the ability of a camera to include both black and white backgrounds (or, for example, dark shadows and bright sunlight).
Finally, a black background portrait isn’t only about capturing people. For instance, in gardening, there’s a special category of images of flowers with black backgrounds called specimen shots. In addition, you can find lots of lovely portraits of pets, birds, and food on the Internet. However, switching subjects doesn’t change the basic principles of how to take pictures with a black background. Make sure that you consider distance, lighting, brightness and dynamic range.
Useful tips for a proper start in mastering black photography
Now that you know the principles of working with black backdrop photography, adjusting your camera settings, and creating images of people and flowers, it’s time to apply all this theory in practice!
In this section, we’ve collected the best recommendations for those who have never captured images with dark backgrounds before. Check them all out and get marvelous pictures with black backgrounds!
1. Search for cool black backgrounds outdoors. With the proper attention, it’s possible to find the dark nature background of your dreams everywhere. To make the most of the natural environment, go out on a sunny day and search for the long shadows from buildings, cars, plants, and other objects available on the streets. Once you find a shiny black background at the intersection between sun and shadow, pick any subject and start shooting right away!
2. Prepare the object for your dark background photoshoot in advance. Once you’ve found a nice shadow for your image, it’s best to have something you really want to capture there. To work properly with the subjects of your black background photography, put them in the line between the sun and the shadow.
3. Find a black poster or a bed sheet. This is useful for backdrop photography and for practicing capturing indoor images on a dark background. Put on the wall a piece of furniture, a blackboard, a poster or a bed sheet makes it convenient to practice capturing various subjects in front of a black background and become confident in this skill.
4. Experiment with flash. An essential element of the camera settings for black photography, the flash provides an opportunity to improvise with angles and bright areas in your photos. In other words, it enhances your creativity.
5. Look closer at what you see. A great trick for checking the depth of your black background is to try looking at it by squinting your eyes – this limits the amount of light your eyes take in and helps you to see more clearly.
Post-processing of black background photography
Notwithstanding all your efforts spent getting the perfect black background, post-processing is inevitable – especially if your camera has a wide dynamic range. Also, if you need to find a way how to add a black background to a photo, use image editing software.
When working with it in Photoshop, professionals mostly adjust contrast, shadows, and levels, then brush on their dark background images. In addition, we recommend smoothing the color of the shiny black background with a brush tool.
Another useful technique in Photoshop while black background photo editing is using the burn tool on an image with low exposure. Being put in the shadows while editing the black backdrop photography, it brings the best result. In combination, several edited parts of an image create a balanced vision, free of the common extremes found in such images.
Post-processing of black background images with Luminar
In Luminar Neo app, the task of darkening the color of light backgrounds is solved even more easily than in Photoshop. Luminar Neo offers a wide range of instruments that allow photographers to work with a portrait background, make changes to a grey background, add a black background to photos and even apply various Photoshop plugins. It even includes a background remover! These tools are useful for both beginners and professionals. They’ll help you achieve success in black background photography, so make an investment in the future of your images – order the whole package of Luminar Neo instruments online and guarantee yourself marvelous photo results at the post-processing stage!
9 Ways to Create a Black Background for Photos
Highly Recommended
$2,200 of courses & tools for only $98!
96% off the world's best photography courses and tools by industry pros. (Downloadable bundle.)
HURRY! Offer ends Tuesday 18 October.
Learn more here
Images with a black background are extremely popular. If you do a quick browse through your social media, you’ll notice how many people post photos of food, flowers, animals, products, people, headshots and all sorts of subjects on black backgrounds.
In fact, these images aren’t just trending on social media; you can find them in ads and editorials, magazines and websites. It’s an extremely appealing look that can convey mystery or elegance.
Black background images are also highly requested in portrait photography because it gives a professional look to the photos. And the best part is that even though they look professional, you don’t have to do them in a professional studio – you can do them everywhere.
More great news: you don’t need to have expensive gear or experience. What you need is to have the right tools and information, and you’ll be adding this skill to your photography in no time.
In this article, I’ll show you different ways to get perfect black backgrounds according to your own needs. In some of them, you need more equipment, in others more skills – this way you can choose which one works best for you.
You’ll also find some amazing example images for inspiration.
Let’s get to it!
Table of Contents
9 Ways to Create a Black Background
“I’ve been 40 years discovering that the queen of all colors was black.” This quote by the painter Pierre August Renoir is something that many artists have expressed throughout art history – if not in words, in their artworks.
Black was one of the first colors used in art, as charcoal was the first material turned into pigment. Black was also the first color of ink used for printing. Therefore, we can’t consider art if we don’t consider the color black and its multiple uses and implications.
Throughout history, it’s been used to represent evil, darkness, mystery, mourning, elegance or power depending on the culture. But, what about black in photography?
Many famous artists and photographers have used black backgrounds throughout different periods and for different genres. A few famous examples from portrait photographers are Annie Leibowitz in her self-portrait; Sharon Stone, photographed by Peter Lindbergh; and Audrey Hepburn, by Richard Avedon.
Aside from portraits, black backgrounds were used by Edward Weston to photograph some of his famous photos of still life. Robert Mapplethorpe’s flowers are another inspiring example.
In 1930, photographer Ansel Adams created something called the zone system. As you can imagine by the time period, it was formulated for film photography. However, most of its principles still apply in digital photography.
The zone system is a tonal scale formed by 11 different tones – each called a zone – going from pure black to pure white. These are usually represented by Roman numerals; zero (or 0) corresponds to pure black, and ten (X) is pure white.
The middle grey from zone V is the one that you know from grey cards. All camera metering systems are calibrated to measure light as if the object being measured was a middle grey. This is an important concept that will serve you to create black backgrounds.
Shooting images on a black background can be tricky. Some people think it’s very difficult – which is not; some others think it’s as easy as buying a black photography backdrop – which is also not true.
Achieving good black background images is all about lighting (this is especially important for headshot backgrounds). When you have the right light and the correct exposure, you can turn anything into a black backdrop – regardless of its original color.
Of course, there are also different ways to do it in post-processing. So, if you like how a black background looks in photography, there’s no excuse not to have it in your own photos.
Here are 9 ways to create a black background with all the information you need in each case. Which one you use is your choice.
Credit: Prem Pal Singh
The easiest and most straightforward way to create black background photographs is to use a black backdrop. Just like anything else in photography, it has its tricks.
First of all, you need to choose the right material. To paraphrase the authors of the book Light, Science & Magic: we tend to believe that light is the active player in lighting, but different surfaces change light differently, so the subject plays an active role too.
A black backdrop is perceived as black in a photograph if it’s not bouncing back any light towards the camera. A plastic or shinny material will be harder to work with.
Instead, a material that absorbs light will be easier to control. If you’re working with fabric, velvet is the best choice for a black background.
Most professional paper backdrops have non-reflective dye. However, you can buy your own paper to craft a DIY backdrop. Just make sure it has a matte surface.
Credit: Skitterphoto
Cameras work by analyzing the light that comes in through the lens to tell you the correct exposure for your photo. So, they measure the light that’s reflecting from the objects in front of them.
However, the light meter inside your camera is calibrated using the principles of the zone system I was telling you about at the beginning of the article.
This means that the camera will think everything is grey. (Ok, that’s a very simplistic way of putting it, but bear with me, and I’ll explain with a practical example!)
Forget about the subject for a second. If you photograph a black background using the reading from your camera’s light meter, it will come out grey. If instead you photograph a white background, it will come out grey too.
That’s because your camera is trying to compensate for what it thinks is an under or overexposed photograph.
If you measure the light on a grey card, when you photograph a black background, it will actually look black. This is because the camera is exposing to the light that reflects from a grey area; it no longer thinks that the black is underexposed.
3. Use an external light meterCredit: Brandon Day
In the previous two ways, I explained how you can avoid black backgrounds looking grey as a result of incorrect light measurement from your camera.
So, another way to solving this issue is to avoid using the light meter in your camera. You’ve probably seen professional photographers using a handheld external device to determine exposure. That device is an incident light meter.
There’s a difference between the light that’s hitting the subject (called incident light) and the one that bounces back from the subject to hit the sensor in the camera (reflected light).
External light meters measure the incident light, so they don’t care if the subject is black or white, metallic or wooden. This means that the subject won’t be assigned to a particular tonal zone.
Some photographers wonder if light meters are obsolete, but we’d argue that they are still definitely useful in certain situations where accurate light readings need to be made.
If you adjust the camera settings based on the light meter’s reading, you’ll be bypassing the step where the camera interprets it as middle grey.
4. Use spot metering modeCredit: Daniel Putzer
If you don’t have a grey card or an incident light meter, you can still use the camera’s meter to get the correct exposure. To do this, you need to use the spot metering mode.
Keep in mind that spot metering mode is only available if you use your camera in manual or a semi-automatic mode such as aperture priority or shutter speed priority.
Spot metering ‘reads’ the light from a small area of your photograph. In most entry and mid-level cameras, this spot is the center of the frame.
In some high-end cameras, it’s possible to toggle the spot from the center to the focal point.
Check your user manual to understand where the spot is on your camera and whether you can change it.
Once you’ve set your metering mode, frame your scene in a way that the subject or the highlights (depending on what you’re looking for) are being measured.
This way, the camera won’t consider the background or the rest of the image when it gives you the reading. You have to adjust the camera settings using this reading. You can reframe if you want – just ignore the new reading if the highlighted subject is not in the spot anymore.
5. Blacken the backdrop using flagsCredit: Daria Shevtsova
Any background – even a white background – can be black if it doesn’t receive any light. However, it’s not always that easy because light can spill onto your backdrop.
To prevent any light fall-out, you can use accessories called flags.
Flags are tools used to direct light – since they’re solid black, they completely block the light.
For example, let’s say you’re taking a portrait in your studio with a Rembrandt lighting setup. This lighting style is achieved by placing the light high and to the side of the subject.
If you want to prevent that light from illuminating the background, you can put a flag in between the light and the backdrop.
Make sure you angle it in a way that you don’t interfere with the light falling on the subject. Of course, you can also block part of it and create a special effect that illuminates only a portion of the face, as shown in the image above.
Another light modifier that works for this type of effect is the barn door attached to a strobe unit. These accessories have four flaps that move independently. You can open or close them to widen or narrow the lighted area, thus keeping your black background in darkness.
6. Look for shadow areasCredit: Anastasiya Lobanovskaya
When you’re photographing outdoors, and you don’t have any gear other than your camera, you can still create a black background.
You need to position your subject in front of a shadowy area. For example, in a doorway, as shown in the image above. Obviously, the inside needs to be dark.
Another naturally dark area is a tunnel. You might not have noticed before, but there are plenty of opportunities like this – start looking for them, and you’ll see they’re not that difficult to find.
Make sure you’re using the correct exposure to avoid the camera overexposing the shadows and making them look grey. You can use tips #2 or #4 from this article to do it.
7. Create a black background using a SpeedlightCredit: Akshat Vats
This way of creating a black background is also called an “invisible background”. It can be done with any kind of flash, even with a Speedlight.
The idea is that you’ll overpower the existing ambient light to properly illuminate your subject and leave the rest in complete darkness.
To use this lighting technique, you’ll need a light modifier to confine the light to your subject and avoid any fall-out into the background. It can be a softbox or an umbrella if you don’t fully open it.
The first thing you have to do is adjust the camera settings to underexpose the image – so much so that you can’t see any details.
As you probably know, you need to adjust three factors when exposing a photograph: aperture, shutter speed and ISO.
In this case, you need to keep the shutter speed below the maximum sync speed. That’s the highest speed that your camera can use to sync with a flash. For most cameras, this is 1/250 sec.
Then, lower your ISO to 100, or 50 if your camera allows it. Not only will this make your image noise-free, but it also makes the sensor less sensitive to light. Finally, close the aperture.
Once you take a picture and you can’t see anything, then you have the right settings. That ‘nothing’ is your black background.
It’s time to incorporate the subject. Position your subject as far as you can from the background; this way, there are fewer chances of the light spilling.
Then, place the light directed only at the subject. You can make use of flags if you need to, but a directional light modifier should do.
Now, connect the camera to the flash and start shooting. If your subject is underexposed, pump the power of the flash. You shouldn’t change the settings in the camera because that would impact the background.
8. Change the color of the background using PhotoshopCredit: Mahbod Akhzami
If you want to create a black background digitally, you can do it with photo editing software. I’m going to explain how to do it in Photoshop because it’s my go-to program, but there are many others that will work.
Some free options that you can use online are Photoscissors, Pixlr and Photoshop Express. Another free option is GIMP, but it doesn’t have a browser version – you have to download it.
If you want to follow along, use Adobe Photoshop. The first thing you have to do is select your subject. To do this, you can use any of the selection tools that Photoshop offers.
The most accurate is the pen tool, but it has a steep learning curve. There are some other automated methods, such as object/subject selection, that have become very refined over the years. And there’s a range of other tools in between that you can use.
There isn’t one perfect tool to select – most of the time, you’ll need a combination of tools to select subjects properly. It depends on the shape, the contrast between the subject and the background, and your photo-editing experience and skills. For this example, I used the Color Range selection.
If instead of selecting the subject you selected the background, you need to invert the selection.
Now, duplicate the layer and add a layer mask. At this point, you won’t see any changes, but if you look at the Layers panel, you’ll notice the mask thumbnail with the subject in black and the rest in white. Remember that in layers, anything in black is blocked, and things in white are visible.
Click back on the original layer in the layers panel. Then, add a Solid Color Adjustment Layer and choose black. This will create a new layer that’s fully black in between the other two.
Since the top layer has a layer mask, you’ll only be able to see the black in the background area, while the subject will remain the same.
Remember that you’re working non-destructively, so you can fine-tune the selection any time you want.
For example, if you can see a border from the original color around the subject, you can go to the layer mask and paint it black with the Brush tool. If you overdo it and accidentally brush over the subject, you can toggle the color to white and repaint it to make it visible.
That’s it. Now you have your subject on a black background regardless of the color from the original background.
9. Darken the background in post-processingCredit: Kirill Balobanov
Despite your best efforts, sometimes the black background in your photograph doesn’t look fully black. Fortunately, this is something that can be easily fixed in post-processing.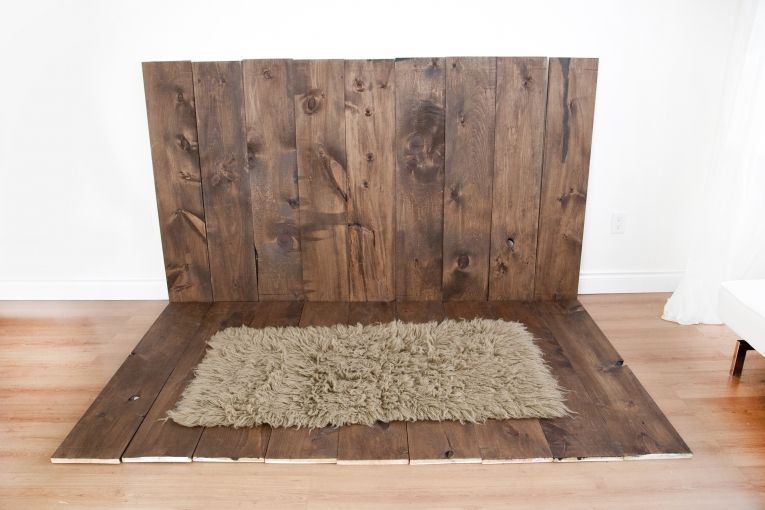
Again, I’m using Photoshop, but you can do this with Lightroom or any other editing software. There are many tools and techniques to do it. For the example above, I used a Curves Adjustment Layer.
To do it this way, you have to go to the Layers panel. Then, add a Curves Adjustment Layer on top of your original layer.
In the Curves properties panel that pops-up, you can adjust the tonal range of your picture. On the left side, you’ll see three eyedroppers. Click on the top one – that’s the one that controls the blacks.
Now click on your background. This way, you’re telling Photoshop that the background is the blackest black in the picture.
This will make your background black, although it will modify the entire tonal range darkening the entire picture. If you like it, there’s no problem. If, instead, you want to keep your subject as it was originally, you need to give visibility to the subject from the layer underneath.
To do this, go back to the layers panel. You’ll notice that the Curves Layer you added has a white thumbnail – that’s a layer mask. So, grab the brush tool and paint it black on top of your subject. You can use a low flow to do this gradually; this way, you won’t have any rough transitions.
That’s it; you darkened your black background in post-processing. The same process can be done using Levels or adjusting the Brightness and Contrast instead of using Curves.
The Burn tool is also useful for this type of editing. This tool is based on a darkroom technique from film photography.
When you were printing a negative film in the darkroom, you first exposed the entire image correctly, then covered everything but the part that needed to be ‘burned’. Next, you would add some extra exposure to that part to make it darker. In Photoshop, using the burn tool darkens specific areas of your image.
If you don’t need to darken the entire background but want to get rid of reflection highlights, you can use any of the Healing tools or the Clone Stamp.
In a few clicks, you can create a fully black background in your photographs.
Final Words
Knowing how to create a black background is useful for any photographer. After all, dark backgrounds really have so many applications in photography.
I hope this article gave you all the information and inspiration you need to go out and try for yourself.
Have you tried creating a black background for your images? If you have any other tips, ideas, questions or comments, let us know below.
Highly Recommended
$2,200 of courses & tools for only $98!
96% off the world's best photography courses and tools by industry pros. (Downloadable bundle.)
HURRY! Offer ends Tuesday 18 October.
Learn more here
How to get a black background when shooting
In the previous tutorials, I talked about how to get a white background when shooting, how to get a white background in Photoshop, and how to make a black background in Lightroom.
Of course, in the graphics editor, if the photographer has the necessary skills, you can transplant the object to any background. The question is how long will it take. If during shooting there is an opportunity to get one or another background or effect on the background, it is better to do this than spend time on post-processing.
If everything is clear and logical with a white background - in order to get a white background when shooting, you need to illuminate it more strongly than the object, then getting a black background when shooting is connected with the inverse problem.
Briefly, the principle of obtaining a black (or close to black) background can be formulated as follows: in order for the background to become black, the subject being photographed must be exposed normally, and the background must be underexposed in such a way as not to be fixed on the sensor (or other light-sensitive material). Simply put, you need to light up the subject, but not light up the background.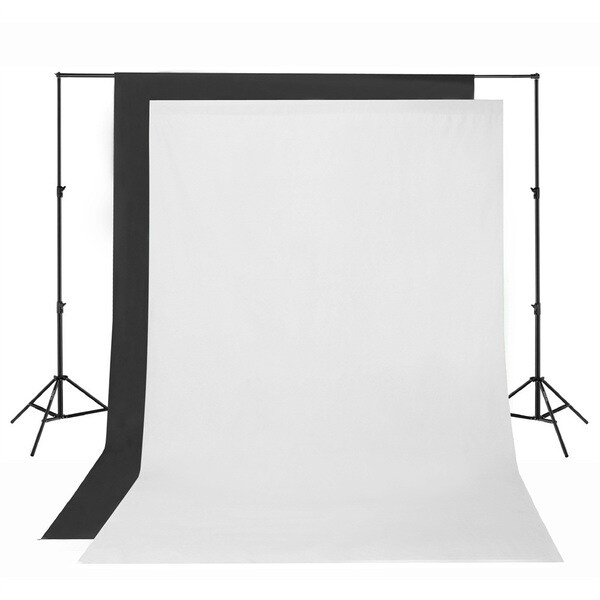
Next, I will show by a clear example that in order to get a black background, it is not at all necessary to have this same black background available. Of course, if you have a black paper, or even better, natural velvet background (velvet absorbs light very well, without giving spurious reflections), this makes the task much easier.
So, I took a picture of this bottle first in natural light, in a normal room in my apartment. There is a bottle on black acrylic, and the background is light wallpaper on the wall, they just didn’t fall into the depth of field. That is, I do not have a black background.
Now, actually, the procedure:
We need to determine the exposure at which the background will turn black. To do this, set the M mode, shutter speed equal to the sync speed (usually 1/200 - 1/250 sec), ISO to minimum, then select the aperture to completely cut off natural light. I got f / 11 aperture, with some margin. So, I got the following camera parameters: ISO 100, f / 11, 1/200 s. With these values, I am guaranteed to get a black background.
Next, adjust the flash output to properly expose the subject. I should note that this method is not suitable for shooting with the built-in flash or an external flash that is installed on the camera.
I used a simple lighting scheme with one source. On the left is a softbox, the light source in which is a Canon 580 EX II flash, controlled using a radio trigger. It is very important to place the softbox as close to the subject as possible so as not to increase the flash power unnecessarily, and most importantly, to reduce the intensity of light reflections from the walls into the background.
Now another very important point: the distance between the background and the object must be much greater than the distance between the object and the light source! The principle is simple - the inverse square law. Who does not know - please use the search on the site. My distance from the softbox to the bottle was about 30 cm, and from the bottle to the background (wall) - 2. 5 meters. Here's a little brain training for you: calculate what will be the difference in illumination between the object and the background?
And finally, in order to completely eliminate the possibility of light directly from the softbox hitting the background, I put a black flag next to the softbox. Shirmochku, in other words. Now I can be sure that when shooting I will get a black or as close to black background as possible.
It is easier, of course, to get a black background using pulsed light sources, but it is also possible with constant light. Only it is desirable to work in a darkened room and carefully control the spread of light.
The main principle is that light should be only where it is needed. If we need a black background, we cut off the light from it. As a result, any background becomes black.
Author: Evgeny Kartashov
12/02/2013 Views : 186146 Source: photo-monster.ru Author: Evgeny Kartashov
More photography tips
Sort: New Commented Viewed
Prisms, which are usually shown in physics classes at school, can be a great accessory for creative photography. They create great iridescent highlights and other effects...
Read more →
01/19/2020. Photography - Tips for photography. Translation: Alexey Shapoval
27 705
0
In the first part, we have already covered how to convert a regular camera and make it suitable for IR shooting. Now let's find out everything you need to know to get excellent...
Read more →
24/12/2019. Photography - Tips for photography. Translation: Alexey Shapoval
9 874
0
Color infrared (IR) photography is amazing and amazingly easy if you have the right tools and techniques at your disposal. In this material, divided ...
Read more →
03/12/2019. Photography - Tips for photography. Translation: Alexey Shapoval
12 416
Using your own light sources when shooting street portraits makes it possible to illuminate the subject at any chosen angle.
Read more →
11/11/2019. Photography - Tips for photography. Translation: Alexey Shapoval
12 555
0
Just a few decades ago, the term "street photography" did not even exist, although the very first photograph in the world, taken by Joseph Nicéphore Niépce in 1826, depicts the city.
Read more →
04/11/2019. Photography - Tips for photography. Translation: Alexey Shapoval
15 757
0
Most modern cameras, be it DSLRs or mirrorless cameras, have the ability to manually set the white balance depending on the shooting conditions. Even...
Read more →
25/10/2019. Photography - Tips for photography. Translation: Alexey Shapoval
27 630
0
4 ways to remove the background in Photoshop | Articles | Photo, video, optics
Perhaps you are shooting goods for a catalog on a crumpled background that nothing can save, or you need to move the model into an atmospheric fantasy universe - in any case, the background needs to be changed. All beginners face this sooner or later.
What are the ways to cut out the background? What is the fastest way to do it? Is it possible to perfectly remove the background the first time and, if not, how to refine the picture? We answered these questions and put together a complete guide for you on how to get rid of the background in Adobe Photoshop.
pixabay.com
How to cut out the background in Photoshop using a mask
A mask is a stencil that you can use to adjust the opacity of individual parts of a layer. You decide what will be visible in the image.
The advantage of the mask is that it does not erase pixels like an eraser, but hides them, as if covering them with an invisibility cloak. It turns out that the picture under the mask remains the same as it was, we just do not see it.
The mask is worked with the Brush tool (hot key B, i.e. Brush). To draw on a mask, only two colors are used - black and white.
One thing is important: the black color hides the image, and the white one shows the visibility of the layer.
The selection tools Magnetic Lasso, Magic Wand and Quick Selection are on the manual editing toolbar on the left. You can quickly activate them with the W (Quick Selection, Magic Wand) and L (Magnetic Lasso) keys. Illustration: Elizaveta Lentchevich, Photosklad.Expert
To remove the background in Photoshop using a mask:
1. Select the layer from which you plan to erase the background.
2. Add a mask to it.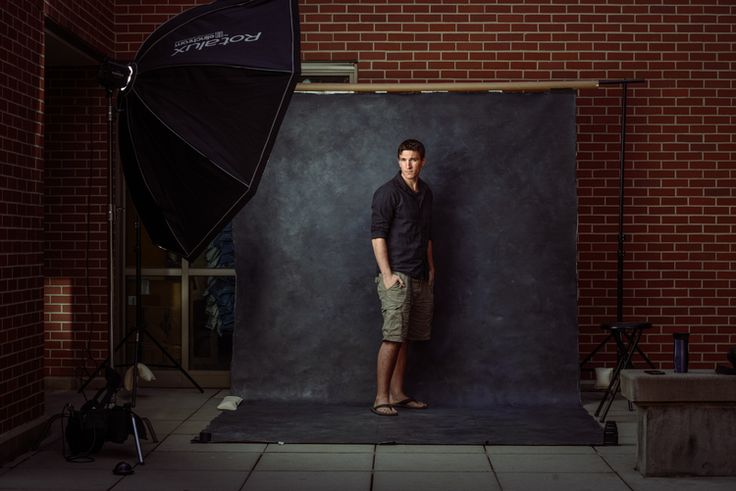 A white mask will automatically be added - that's what we need.
3. Select a black brush and erase the excess, avoiding hitting the model.
To add a mask to a pixel layer, click on the indicated button. A white layer will appear, from which you can erase the excess with a black brush / Illustration: Elizaveta Lentchevicha, Fotosklad.Expert
Away from the model, use larger brushes to work faster. The closer to the object you want to leave without a background, the smaller the brush. Also adjust the brush feathering parameter - too soft edges will give an unnatural result, will make the model translucent, and too sharp will make the picture look like a rough-cut scissors photo with torn edges from a glossy magazine.
4. After you remove the background using the mask, any movement of the layer must be done along with it. Luckily, the mask is automatically attached to the layer, so no extra effort is required. Also, the mask cannot be removed, otherwise all your work will be lost.
The result on the left looks sloppy because the feathering and brush diameter are too large / Illustration: Elizaveta Lentchevicha, Photostore. Expert
5. If you accidentally erased too much, it doesn't matter. Change the black color to white and return the lost area (the fastest way to swap colors in places is with the X hotkey).
To work faster and not tire your hand, use a graphics tablet. For convenient work, the simplest and cheapest option is suitable.
Remove background function in Photoshop
Starting with Photoshop 2020 CC, the program has a Remove background function. The developers have implemented the Adobe Sensei neural network, which itself calculates where the object is and where the background is, and removes only the background.
- Open a file.
- Remove the lock from the layer by clicking on it. It blocks the ability to erase pixels from the layer, which defeats our purpose.
- Open the Properties palette.
 If it's not in your workspace, look for it in the top command line on the Window tab.
 - Click the Remove background button.
The program will execute the command for some time - this process is not lightning fast even on powerful computers, so you will have to wait a bit.
As a result, you will get a layer where the background is hidden under a black mask. The program adds the mask automatically so that in case of an error you can manually refine the result and make it more accurate.
Remove background function in the Properties palette. Result after application / Illustration: Elizaveta Lentchevicha, Photosklad.Expert
The more the object differs from the background in color and brightness, the more accurate the selection will be. If the model and the object merge with the background, then the program will inevitably skip a piece of the background, or hook the object itself, as in this case. This result needs to be improved.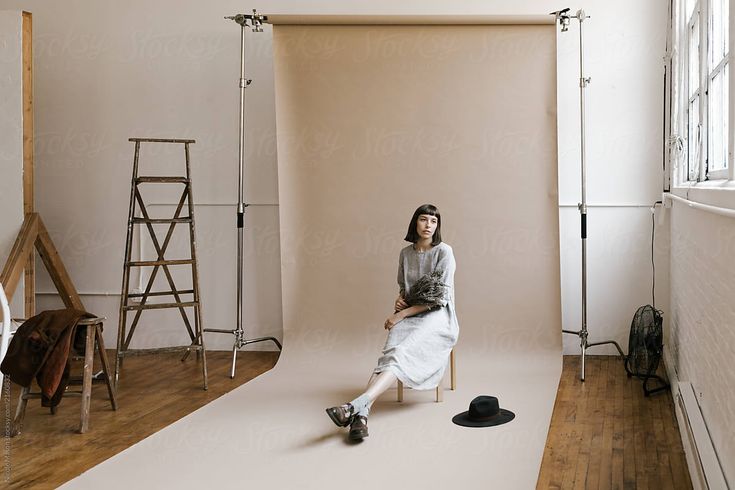
If you have an older program, then you will not be able to implement this function - you will have to switch to new versions of Photoshop.
How to remove the background with a selection
The selection tools help you select an object or background so that you can cut it out later, or adjust the selected part of the image. For example, isolate a piece of the background to change the color or brightness of the sky.
- Select any selection tool. Magnetic Lasso or Quick Selection works best. They stick to the object along the contrast border - the difference between objects in color or brightness.
- Outline the object. The magnetic lasso outlines the outline itself, but if you use Quick Selection, then you need to select a brush with a plus drawn next to it and indicate the areas you want to select yourself.
If the Quick Selection captures a piece of the background, take the brush with the minus drawn next to it and exclude unwanted pixels from the selection.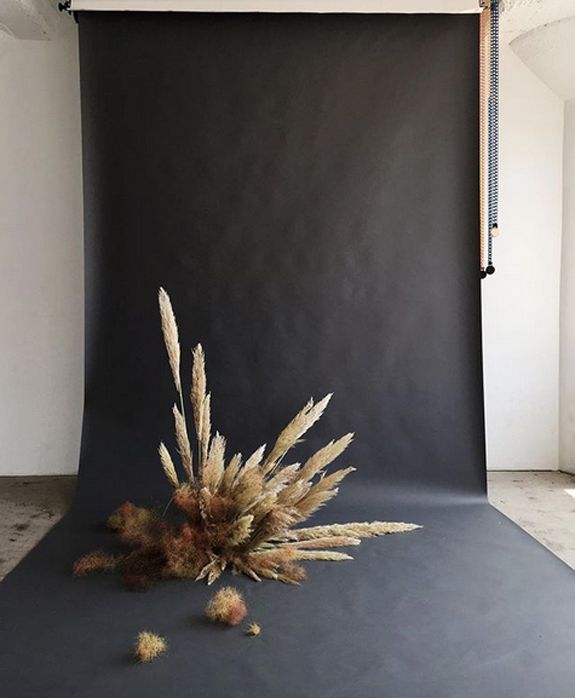 Watch the size of the brush - the larger it is, the larger pieces the tool captures and works less accurately.
 - At the top, on the tool options bar, choose Selection and Mask. There you can turn the selection into a layer with a mask, or simply remove extra pixels by erasing the background.
- To do this, scroll the panel on the right to the very bottom, find Output to and select New Layer or New Layer with Layer Mask. In the first case, you will get an object without a background, in the second - everything is the same, but the background will not be removed, but hidden under a mask. This option is better, because this way you can change the result.
The brushes on the left add and remove pixels from the selection, while the Select button and the mask on the right allow you to hide the background under the mask or completely remove it / Illustration: Elizaveta Lentchevich, Photostore.Expert
Fine-tuning the selection it captures an extra piece, somewhere the edges between the object and the background are too sharp and torn.
 You can automate the process as much as possible, trusting the tools, and then modify it manually - this will save time and ensure maximum quality.
 Quick mask mode
- Click on the rectangle below the color swatches in the right panel (or hotkey Q). The selection will temporarily disappear, and part of the image will turn red. This is a quick mask mode that allows you to make selections more precise with a regular brush, as if you were working on a layer with a mask.
- Adjust the brush settings as you would with a mask. Keep track of shading, size, and also what color you are working with - black or white.
- When you're done, press Q again or on the rectangle below the palette. The quick mask will turn into a selection that you've fine-tuned by hand.
Signs that you are in Quick Mask mode - the selection has disappeared, and instead there are areas painted in red. Also highlighted in red is a layer in the Layers palette / Illustration: Elizaveta Lentil, Photostore.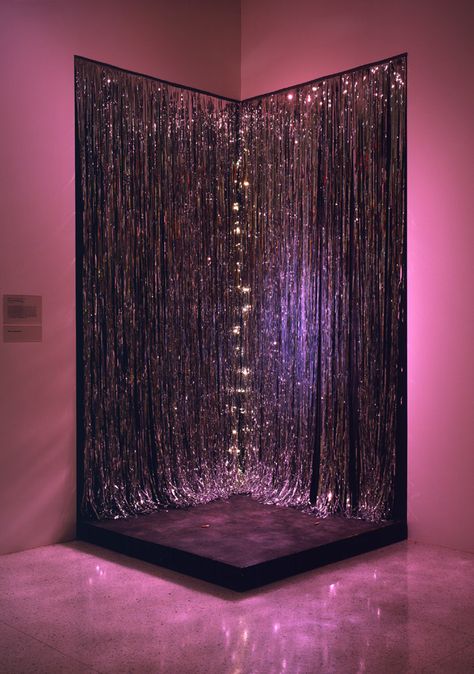 Expert , fleecy surfaces. Note that if the radius is too large, there is a risk that the tool will erase part of the object. In this case, the inaccuracies that have appeared must be finalized manually.
If Edge Detect doesn't help, use the Refine Edge brush. The principle of operation is similar, only here you can manually control the entire process of selecting complex areas.
On the left is the Refine Edge brush second from the top, on the right is Edge Detection, and then four sliders that refine the selection: edge smoothness, selection feathering, contrast and selection edge shift / Illustration: Elizaveta Chechevitsa, Fotosklad.Expert
How to cut out the background using the Color Range and Magic Wand tools
You can cut out a solid background using the Color Range or Magic Wand tools. Their principle of operation is similar - they find and select pixels of a certain color.
Magic Wand Tool in Photoshop
- Select the tool and point to the background on the image.
- The program will create a selection based on the color you specified.
To make the spread of shades larger and the program does not highlight the color of a random pixel on the background, set the Sample size to 3x3 or 5x5, and also increase the Tolerance parameter. The higher it is, the more shades of color the tool captures.
If you click the Select Adjacent Pixels Only button, the tool will only select areas that continue in color with the one you selected. If this button is not pressed, the Magic Wand selects all parts of the picture where this color occurs. For example, if you want to cut out a red background and the model has red lips, the tool will select both the background and the lips. It is inconvenient if you need to remove the background, and not all the red color from the picture.
- Finish the resulting selection with Quick Mask or Select and Mask and convert it to a normal layer or a layer with a mask.
Color Range Tool in Photoshop
- Go to Selection and choose Color Range.
- Click on Select and find the background color.
If the power of automation was not enough, take the tool By samples and click on the desired color in the photo. At the same time, if you take the eyedropper +, the program will capture more and more shades of the background / Illustration: Elizaveta Lentchevicha, Photostore.Expert
3. Click OK, and finalize the resulting selection, convert it to a mask or a layer with pixels using Selection and Mask .
Results
Which method is more convenient and better? The one that is more convenient and understandable for you. In Photoshop, the same operation, as a rule, can be performed using several equivalent algorithms.
- Drawing a mask by hand and using it to cut out the background is a high-quality and most controlled way.
Learn more