Diy softbox lights
How to Make a DIY Softbox for Free
Almost anything can be used as a light modifier. As long as it interacts with light in one way or another, it can be considered a light modifier. In this article, I will show you how to build a do-it-yourself (DIY) softbox with things you likely already have around at home.
As long as you have these basic ingredients, you should not have to pay any additional cost to make the softbox, which can deliver even and diffused light for your photography. If for some reason you lack something like a light bulb or some aluminum foil, you may have to make a quick trip to the store and spend a little bit of money.
Beginning photographers may feel intimidated by the expensive light modifiers on the market that are often used by professionals, but the goal of the article is to demonstrate that expensive modifiers are not necessary to create high-quality images.
If I were just starting out in photography now, I would not be even looking at investing in Profoto or Broncolor equipment right away. A DIY softbox is more than enough for many types of introductory shoots. Sure, there will be some obvious differences between the results of high-end and DIY gear, especially to a trained eye, but you can still use a DIY softbox for shaping light as long as you know what you’re doing.
What You Will Need to Build a DIY Softbox
Here are the ingredients you will need to gather for this homemade lighting project.
- A Light Source. This can be anything from an IKEA flashlight to a Speedlite. I will make a softbox that can accommodate a light bulb, but you can pick a different light source and adjust the modifier to fit your specification.
- Two Cardboard Boxes. One will serve as the foundation and the other as the reflector inside. Ideally, they will be of the same size.
- Aluminum Foil. To create the reflective surface inside the softbox. Ideally, it should not be too crumpled
- Diffusion Material.
 This could be a shower curtain, baking paper, tracing paper, etc.
 - A Hot Glue Gun. To glue the pieces of the softbox together and fix the light source in place
- A Knife and Scissors.
- Tape.
- Permanent Marker.
Once you have all the items on the checklist, it’s time to build!
Step-by-Step Instructions on Building a DIY Softbox
Step #1. Prepare the Cardboard Box
Take your cardboard box and cut off the lid flaps.
Step #2. Mount a Light to Cardboard
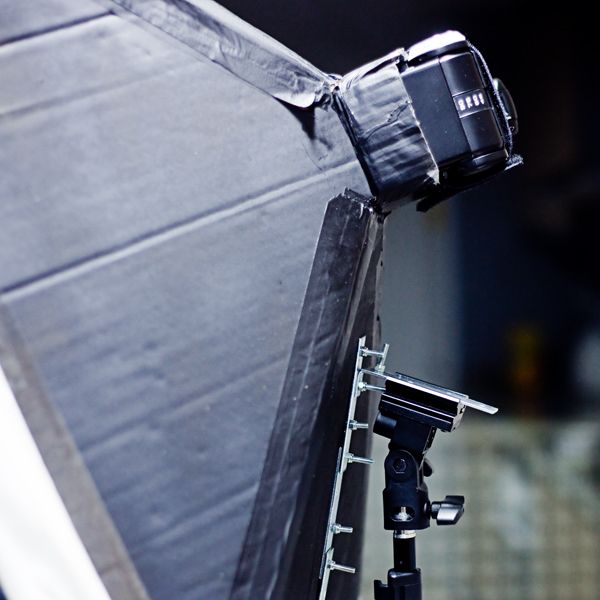
Create a hole in the back of the box so that you can fit your light source through it. In my case, I used a desk lamp and made a hole large enough to fit the base of my light bulb through. There are several ways you can hold your softbox in place. I was able to use the light bulb to hold the softbox in place.
For extra safety, you may want to use a hot glue gun or tape the light to the softbox. Bear in mind you may find it difficult to remove it afterward. If you choose to use my method, make a hole slightly smaller than the light bulb base, that way you will push through the bulb and it will hold in place fairly well.
It is best to use an LED bulb and not a filament one as they tend to get hot and your setup may catch fire.
Step #3. Make Measurements on the Box
Now to make the reflector. As this requires measurements, it will likely be the most difficult step of this tutorial. You need to measure the width and length of your box. In my case, the longer edge was 12.5in/32cm and the shorter edge was 9.5in/24cm.
The next thing you need to measure is the part of the box where the bulb will be. I figured that an opening measuring 3in/8cm long and 2in/5cm wide would be sufficient. It is best to base your measurement on the dimensions of your light. Once you have that, measure the length from the corner of your box to the corner of your light source square.
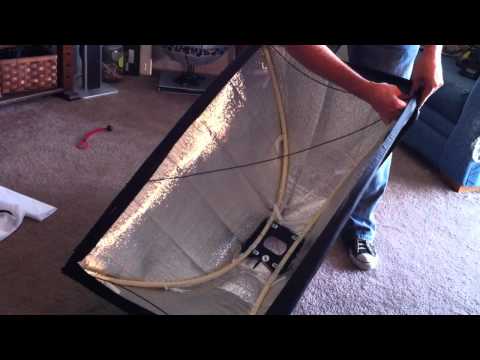
Step #4. Cut out Trapezoids from Cardboard
You will need to cut out two different trapezoids: one for the longer edge and one for the shorter edge. Take a piece of cardboard that will measure exactly the same as your longer edge and put it inside the softbox. Make a dot where the cardboard meets the edge of the softbox as well as a dot where it meets the light source square.
Then you want to connect the dots and cut out the reflector sides. Make sure that the slanted edges measure the same length.
Step #5. Tape the the Pieces Together
Cut out each side and tape together the four reflector sides and then insert them inside the softbox body. Now make sure to tape together the reflector and the softbox.
Step #6. Add the Aluminum Foil
Now you want to put aluminum foil inside. I recommend not cutting it into shapes as it can be difficult. It is also okay to simply cover the inside of the reflector in aluminum foil.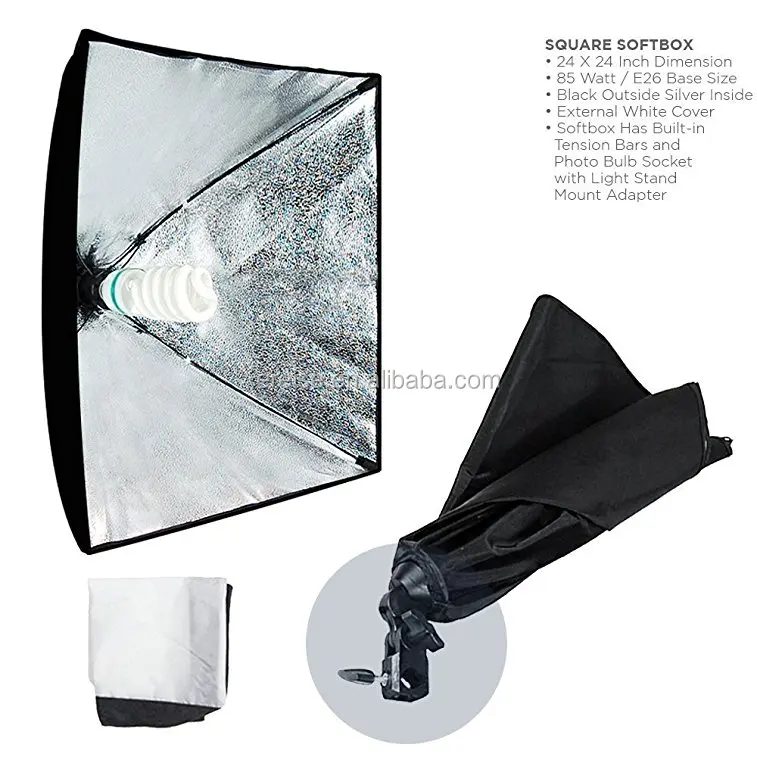 The aluminum foil has to be slightly crumpled so that it catches and reflects light in many directions. Make sure to use plenty of tape to hold the aluminum foil in place.
Step #7. Add Diffusion to the Front
Finally, to diffuse your light source, you can put some baking paper (or any other diffuse material) on top of your softbox. This will even out the light. Remember that diffusion is not the same as soft light.
Voila! The DIY softbox is complete!
Shooting Photos with the DIY Softbox
Once I finished building the DIY softbox, I took my iPhone and shot a few simple images with this setup. Here is a product shot I did with my new softbox:
This is a simple perfume image that could be used for e-commerce. I noticed that the bottle lights up in an interesting way when the light comes through it, so I placed my softbox at the bottom of the frame to bring that out.
An Alternative to a DIY Softbox
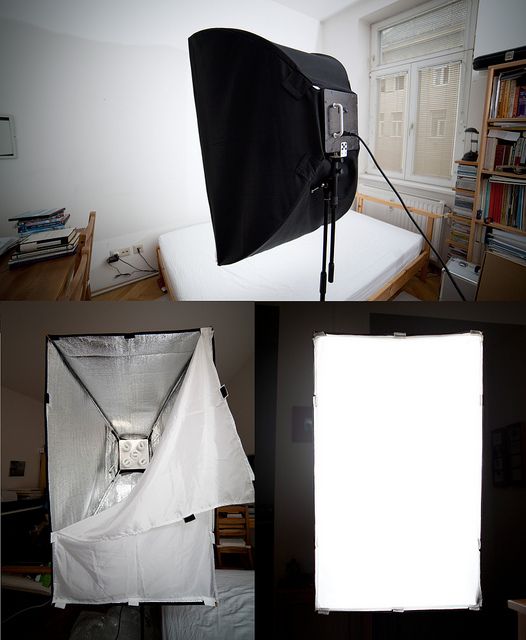
If you don’t want to bother with building a softbox and cutting various shapes out of cardboard, you can also go with an alternative method. Frankly, I use this method all the time, both with flash and constant lights, even on large sets with decent budgets.
What I do is use shower curtains.
Frankly, I don’t know why more people don’t do this. A shower curtain is essentially a large diffusion material/fabric that is a lot more affordable than a dedicated scrim. The great thing about shower curtains is that you can set them up quickly and even cut them to create custom light patterns.
There are multiple reasons to use a softbox. If your reason is to create diffused light, then you can opt for a shower curtain and get results that may be just as good. In fact, if you want to create ultra-soft and diffused light, then a shower curtain is a better DIY option. The reason I would use a DIY softbox is when I need to reduce the spill of light to a maximum. Another reason would be if the light source isn’t all that strong.
Parting Thoughts
Almost anything can be a light-shaping tool if you’re creative about how you use it.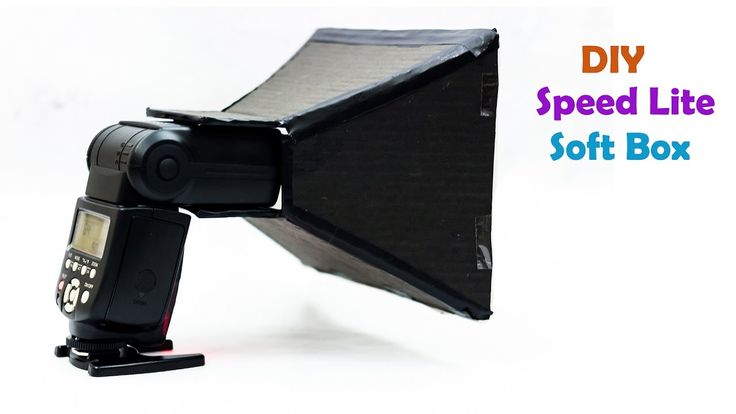 I encourage you to experiment with everyday objects to find interesting light qualities, and the easiest way to do so is to take a flashlight and shine it through or on things you see.
How to Build a DIY Softbox (Easy, Cheap or Free)
A naked flash or strobe light creates harsh shadows and hotspots. But dress it up with a softbox, and that same flash creates a soft, flattering light.
A softbox is essentially a large box that attaches to the light. It has a white diffusion panel on the front to soften the light, hence the name.
While the design is simple, softbox lighting kits can be pricey. Building your own softbox is an easy, inexpensive way to soften the light from a flash or strobe. Constructing a basic softbox only takes about 20 minutes.
If you do a bit of digging in the kitchen cupboards, you may find the materials that you need on hand. This means you can make a DIY softbox for $0.
If you don’t already own some of the materials, like aluminium foil and tape, it will still only cost you a few dollars.
[Note: ExpertPhotography is supported by readers. Product links on ExpertPhotography are referral links. If you use one of these and buy something, we make a little bit of money. Need more info? See how it all works here.]
For this tutorial, we focused on creating the most straightforward, low-cost softbox that still produces great light.
Is it as nice as an actual softbox? No, it’s a bit bulky and doesn’t fold for storage. But, if you have a tight budget, or want to try a softbox before you invest in one, try out this DIY photography lighting project.
What You’ll Need to Build a DIY Softbox
- A box. The larger your box is, the softer the light will be, but the more awkward it will be to use. For this tutorial, I used a shipping box that was roughly the size of a shoebox. This size works well for an on-camera flash. If you plan to use an off-camera flash, you can use a larger box for even softer light.
- A white garbage bag (or alternative diffusion material).
 A white garbage bag acts as the diffusion panel at the front of the box, softening the light. You can use any white material that allows light to pass through, like an old white t-shirt or sheet. The diffusion material should be at least a few inches larger, on each side, than the top of your box.
 - Box cutters and scissors. You’ll be doing a bit of cutting for this project. Box cutters or a scalpel are the easiest way to cut up the cardboard boxes. You’ll also need a pair of scissors to cut the diffusion material.
- Tape. You can use any large tape for this project. Plain invisible tape is too thin, but shipping tape, duct tape or painters tape is all wide enough and sticky enough to get the job done.
- A marker. You’ll need a marker to create the right size opening for your flash.
- A hot-shoe flash. This tutorial is for a DIY softbox for a hot shoe flash. You can adjust the instructions for a larger light.
 To follow this step-by-step exactly, you’ll need a hot shoe flash with a tilting head that can point straight up.
Important: Do not use this softbox on any light that runs hot to the touch. Placing cardboard on a hot object could create a fire hazard. Most hot shoe flashes run cool to the touch.
How to Make a DIY Softbox for a Hot-Shoe Flash
1. Remove the Top Flaps
First, get rid of those pesky top flaps on the box. Using the box cutters, slice off the top flaps so that you have a box with one end open. This end of the box will house the diffusion panel and face towards the subject. Recycle or discard the cut-offs.
2. Trace the Opening for the Flash
The open end is now the front of the DIY softbox. Place the flash at the bottom edge of the softbox, instead of the back. This allows you to bounce the light inside the box for an even softer light. It also makes the process easier.
Choose which side to use based on the orientation that you’d like your softbox to be.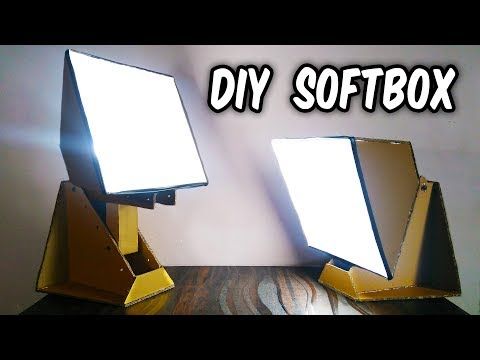 I chose to place the flash opening in one of the two longer sides of the box so that my DIY softbox would have a horizontal rectangle shape. If you want a vertical shape, choose one of the shorter sides of the box instead.
With the side selected, tilt your flash head straight up. Then, place the flash head roughly in the centre of that side. Use a marker to trace the flash head. (The flash head is the part of the flash where the light comes out.)
3. Create Flaps to Hold the Flash in Place
Draw an X inside the rectangle that you traced earlier. Using the box cutters, cut along the lines of the X. DO NOT cut along the lines of the rectangle that you created when you traced the flash head.
You want to create a snug slot for the flash to fit through, with four triangles slots cut into the box, not a large hole. Err on the side of too small as you cut. You can always cut them a bit bigger if the flash doesn’t fit.
Once the flaps are cut, tuck your flash head in the opening to check the fit. You want the flash head to be snug so that you don’t need to tape the softbox onto the actual flash. If you can’t fit the flash in the hole, make the X a little bigger, a bit at a time, until you have a good fit. Once you know that the flash fits, go ahead and remove it before the next step.
4. Line the Inside of the DIY Softbox with Aluminium Foil
Next, line the entire interior of the softbox with tin foil. Cut a hole that matches the flash opening in the foil, so that the foil isn’t blocking the opening. Secure with tape as needed.
The aluminium foil will bounce the light inside the box. Even when your flash head is pointing up, the light will still be directed out the front of the softbox, towards the subject.
5. Create the Diffusion Panel
Finally, cover the front of the softbox with the white diffusion material. I used a garbage bag, but you can also use white fabric from an old t-shirt, sheet, or curtain. Whatever you have lying around. If you use a garbage bag, you can use one side of the bag and tear open the seam so that you are only using one layer. Leave the seams of the bag intact and use two layers of the garbage bag for an even softer light. I chose to use two layers.
Cut the material the size of the front of the softbox, plus an inch or two so that the material wraps around the front sides of the box. Place the material over the box, and secure with tape. Use one long piece of tape on each side to completely attach the material, without any gaps.
6. Insert Your Flash and Start Shooting
Your softbox is constructed, now you just need to add your flash. Point the flash head straight up, then slide the flash through the opening. Leave the flash pointing straight up, towards the ceiling. All the tinfoil inside will help bounce that light to the opening for beautiful soft light.
Leave some room between the flash head and the top of the softbox, don’t push the light so far up that it’s touching the tin foil.
Here’s what my photos looked like with my DIY softbox, and with a naked flash:
Bare flashWith DIY softboxThe photo using the DIY softbox creates a much softer light that’s less harsh on the subject. If you look closely to the right of the subject, the vintage camera, you can see a shadow cast by some window light. The bare flash is so powerful it eliminates that shadow, which gives the image less depth.
You can use a DIY softbox much like using any softbox. Remember, using manual flash will give you further control over the light. With a transmitter and receiver, this DIY hot shoe softbox can also be used off-camera.
Common Softbox Lighting Questions
What Is a Softbox in Photography?
A softbox is, quite literally, a box placed over the light to create a softer, more flattering light. They come in several different sizes. Larger sizes offer softer light but are harder to wield. There are also several different shapes, including square, rectangle, and octagon. A softbox can really help your still life and product photography.
What Material Is a Softbox Made of?
A softbox that you would buy from a photography store is made of different fabrics. They are black on the sides to prevent light from spilling out and have a white diffusion panel to soften the light on the front. Most are made from materials such as nylon and polyester, or blends of these materials.
Which Is Better: Softbox or Umbrella?
Softboxes and umbrellas will both create a pleasant, soft light that’s great for portraits and other types of photographs. The main difference is in the shape and the spill. Umbrellas come in one circular shape, while softboxes come in squares, rectangles, and octagons.
The shape of the modifier determines the shape of the catchlight in the subject’s eyes. Umbrellas have more spill, which means softboxes are easier to control and lose less light.
Conclusion
A softbox creates great, flattering light. You don’t need to invest a lot of cash or a lot of time to add one to your arsenal of photo gear. With 20 minutes and a few items that you have in your kitchen and garage, you can build a DIY softbox.
A DIY softbox won’t look as nice or be as portable, but it will still offer quality photographs without breaking the bank. It’s the end result that really matters.
Content
- 1 Principle of action
- 2 Ready -made flashing LEDs
- 2.1 Schemes of use
- 3 Ordinary LEDs
- 3.1 How to make LEDs Migai Migai Migai Migai Migui schemes for their flashing lights on them basis
- 4 Application
- 5 hands
- 6 How to make a string of LEDs
- 7 Key findings
Blinking light signal
is widely used - from a special mode of operation of lamps to
indication of complex equipment. It is increasingly based on a flashing LED, as
is a reliable and durable alternative to any other types of light sources.
Consider what its
principle of operation is, what ready-made solutions for such a device are available today on the
market, how to make the ice element, which functions in the usual mode,
began to work in a flickering rhythm, what is the general scope of their application, and also how
make garlands and running lights on their basis with your own hands.
Contents
- 1 How it works
- 2 ready flashing LEDs
- 2.1 Patterns of use for
- 3 Ordinary LEDs
- 3.1 How to make the LEDs blink
- 3.2 Schemes of flashing lights based on them
- 4 Scope
- 5 Do-it-yourself LED running lights
- 6 How to make a garland of LEDs
- 7 Key Findings
Principle of operation
Flashing LED
is a standard led crystal, the power circuit
of which includes a capacitance and a resistor that determine the operating mode. Outwardly,
is no different from conventional analogues. At the same time, the mechanism of its operation at the
level of processes occurring in the electric circuit is as follows:
- When current is applied to resistor R, charge and voltage accumulate in capacitor C.
- When its potential reaches 12 volts, a breakdown occurs at the p-n-boundary in the transistor.
 This increases the conductivity, which initiates the production of a light flux by the ice crystal.
 - When the voltage drops, the transistor becomes closed again and the process starts again.
All modules of this circuit operate at the same frequency.
Prefabricated flashing LEDs
Flashing LEDs
from various manufacturers are essentially functional
complete, ready for use in various areas of the circuit. In terms of external parameters, they are not much different than
from standard ice devices. However, their design incorporates a
generator-type circuit and its accompanying elements.
The main advantages of
ready-made flashing LEDs are:
- Compact,
rugged housing, all components in one housing. - Large range
supply voltage. - Multicolor
performance, wide variety of hue switching rhythms. - Economy.
Tip! The simplest flashing LED can be made by connecting a led crystal, a CR battery and a 160-230 Ohm resistor in one chain observing the polarity rules.
Schemes for using
The simplest version of the scheme for flashing lights produced today by
based on
LEDs, the manufacture of
of which is possible for radio amateurs on their own, includes:
- Low power transistor.
- 16 volt, 470 microfarad polar type capacitor.
- Resistor.
- Ice element.
When the charge is accumulated,
its avalanche-like breakdown occurs with the opening of the transistor module and the glow of the diode.
This type of device is often used in a Christmas tree garland. The disadvantage of the
circuit is the need for a special power supply.
Another variation of
of today's popular flashing LED circuits includes a pair of NPN transistors
modification KT315 B. The following components are also used to assemble
:
- Two pairs of
resistors for 6.8-15 kOhm and 470-680 Ohm. - Two
capacitors, 47-100uF.
- Small
LED or piece of ice strip. - Power supply
3 to 12 V.
The principle of operation of the
device is determined by the alternating change in the charge / discharge cycle of
capacitors, which in turn open the transistors and feed the LEDs
and make them blink.
Conventional LEDs
Standard non-flickering
LED provides bright, even illumination and is characterized by low power consumption
. Along with qualities such as durability, compactness,
energy efficiency and a wide range of glow temperatures, this makes
out of competition among other artificial light sources. On the basis of such led elements, a circuit of flickering
lamps is assembled. Consider how they are made.
How to make the LEDs flash
The flasher on the LED
can be assembled based on one of the above diagrams. Accordingly,
will need to purchase the components described above. They are necessary for
functioning of one or another variant. In this case, the assembly will require
soldering iron, solder, flux and other necessary components for soldering.
The assembly of a chain of flashing LEDs is preceded by the obligatory tinning of the output contacts of all connected elements. Also, one should not forget about observing the rules of polarity, especially when turning on capacitors. The finished luminaire will flicker at a frequency of about 1.5 Hz, or equivalently, about 15 pulses every 10 seconds.
Flasher circuits based on them
In order for
elementary flashes of light to occur at a certain frequency, a pair of
transistors of the C945 type or analog elements is required. For the first option, the collector
is located in the center, and for the second, the base is located in the middle. One or
pair of flashing LEDs is made in the usual way.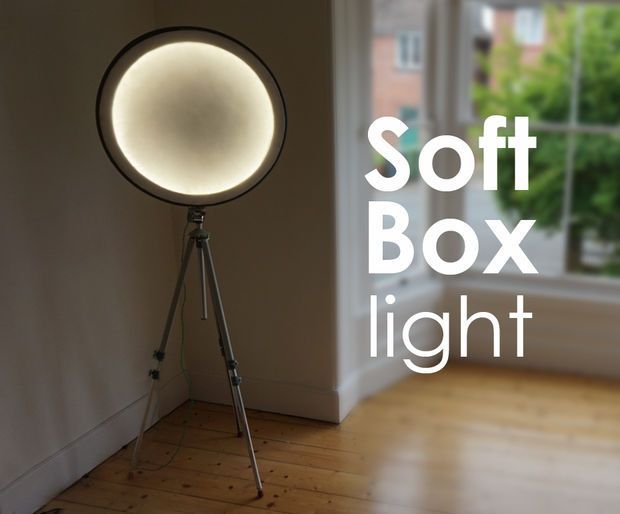 In this case,
the frequency of flashes is set by the presence of capacitors C1 and C2 in the chain.
Into such a system
, it is permissible to introduce several ice crystals simultaneously when installing
a sufficiently powerful pnp-type transistor. At the same time,
LEDs are made flashing when their contacts are connected to multi-colored elements, the sequence of flashes
is set by the generator module, and the frequency is set by the preset software
settings.
Field of application
LEDs with flashing rhythm
are used in various fields:
- In the entertainment field, in toys, for decorating, as garlands.
- As an indication in domestic and industrial appliances.
- Lighting devices.
- In advertising elements, signboards.
- Information boards.
Important! LEDs emitting light in a flashing rhythm are used not only in the visible range of the spectrum, but also in the infrared and ultraviolet segments. Their area of appointment is automation and remote control systems for various equipment - heating, ventilation, household appliances.
Do-it-yourself LED running lights
One of the areas of
LED flashing operation is the “running lights” device. For
circuit assembly, the following components are used:
- Generator
with a rectangular pulse. - Display device
. - Decoder.
- Counter.
The
circuit is made on a solderless breadboard. At the same time, at par
resistors and capacitors, a small spread is allowed, but not more than 20%.
LEDs from HL1 to HL16 may not necessarily be the same color, but different
shades.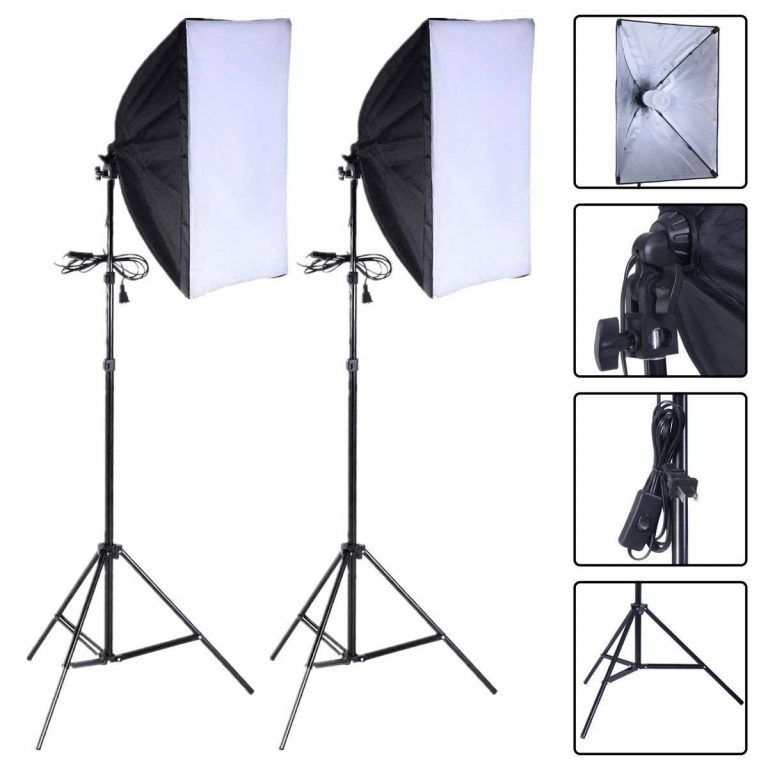 However, the voltage drop of each ice cell must be within 3
volts.
How to make a string of LEDs
You will need the following
components and a tool kit to make a
LED garland that flashes periodically at a given rhythm:
- 20 mAh LEDs.
- Wire 0.5-0.25 mm 2 .
- 6 volt transformer.
- 100 ohm resistor.
- Small tip soldering station, solder, rosin.
- Knife with a sharp blade.
- Silicone based sealant.
- Marker.
Assembly algorithm:
- Define
exactly with gaps between flashing elements. - Prepare the
wire and mark the marks for the LEDs with a felt-tip pen. - On the marks
cut the insulation with a sharp knife. - Next, apply rosin and solder to
exposed areas. - Solder
diode electrodes to these locations. - Apply
Silicone Sealant to exposed areas to provide electrical insulation.
When
is completed, connect the power supply and a conventional resistor. The device is connected to the network and
is checked for operability.
Tip! In the manufacture of garlands, it must be taken into account that the exclusively sequential nature of the connection of the LEDs in the circuit will provide their characteristic flashing effect.
Main terminals
Flashing LED -
is a standard LED element equipped with a resistor and a capacitor for a specific rhythmic glow
, working according to the following principle:
- The incoming current accumulates a charge on the resistor.
- Upon reaching the specified potential, a breakdown occurs in the p-n junction of the transistor - the current passes, the LED flashes.

- As the charge decreases, the transistor closes and the process repeats.
A common homemade blinking LED circuit may include one or a pair of transistors. When assembling them yourself, you need to prepare in advance all the necessary components and tools required during the work. The scope of flickering ice lamps is huge - from toys and garlands to signaling, indication and remote control systems.
If you know how to
in another way to assemble the blinking LED circuit, be sure to share
useful information in the comments.
How to Light Your Videos: A Beginner's Guide
If you're an aspiring vlogger, videographer, or streamer, good lighting is the first thing to consider. Without it, the picture will be dull, with hard shadows and an unnatural hue. To avoid such mistakes, we have prepared a detailed guide for you, in which we have collected all the important information: why you need light, types of lighting, and how to properly place lighting equipment during shooting.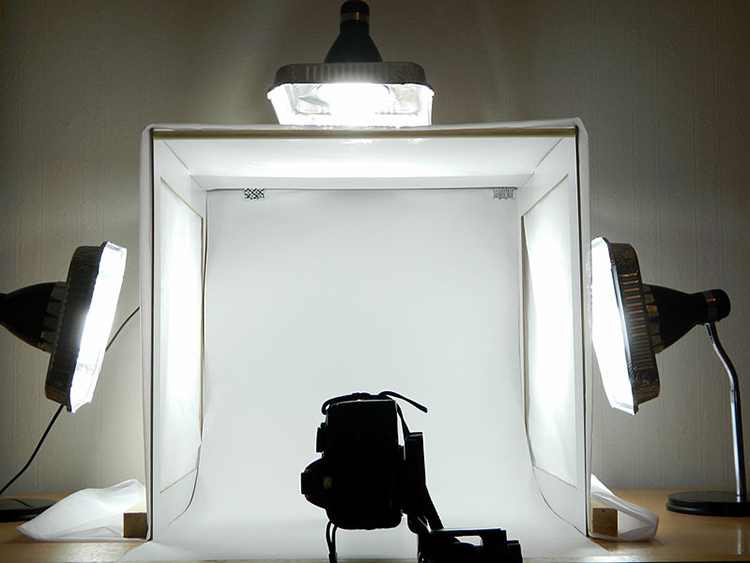
Why light is the first step towards cinematic videos
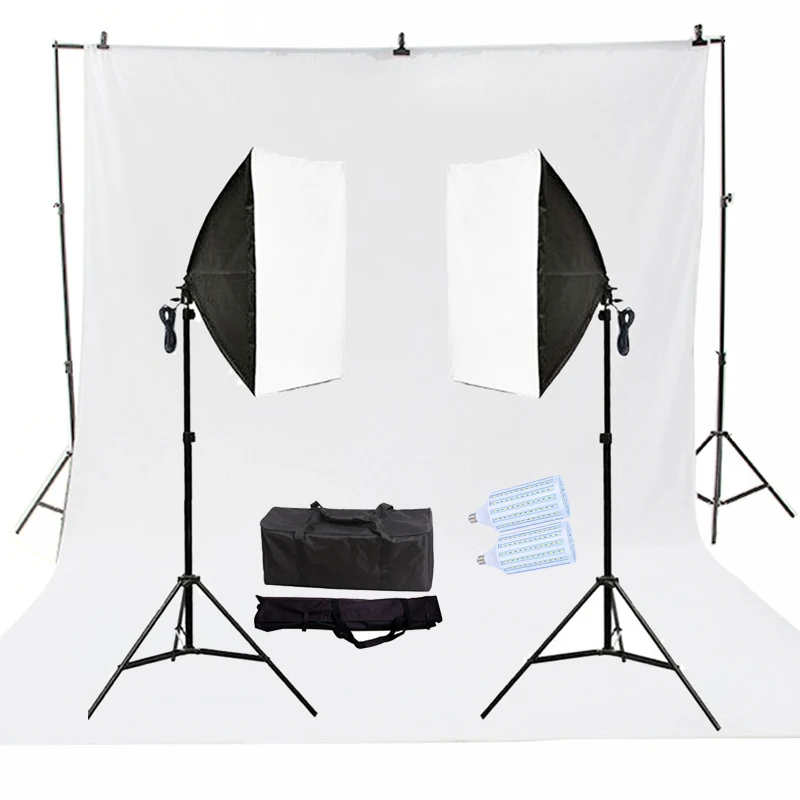
Shooting high-quality video at home is a doable task if you choose and install lighting responsibly. Even in a sunny apartment you can’t do without additional lamps and softboxes, and if the room is dark, even more so.
Artificial lighting highlights your subject just the way you want it to, focusing the viewer's attention on it. It will also hide the background littered with household items. You can set the mood of the video yourself: colored lamps and spotlights will help with this.
Don't forget that the quality of the final video does not depend on the scenery, the make-up of the model or the cost of the camera. Without good light, the chances of getting a cool video are greatly reduced.
Also clips you shoot in good lighting are easier to edit. You don’t have to spend hours in a video editor and build color correction - light will do half the work for you.
Professional softboxes and lamps are expensive, but don't despair: beginners can use the tools at hand and the result will be no worse than experienced YouTubers.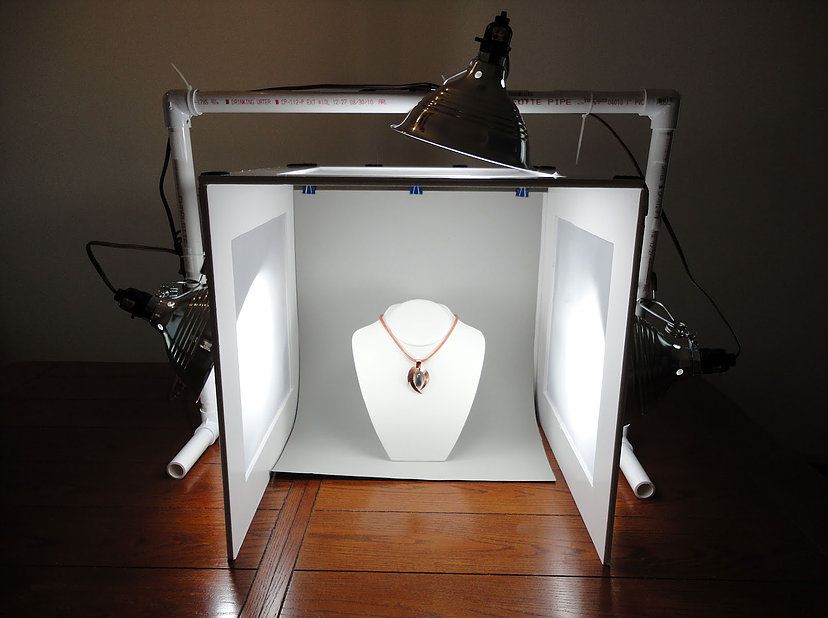
Types of lighting that are most often used in videos
First, it is important to understand what kind of light can be: soft, hard, colored and mixed. Each type of lighting has its own function, which must be taken into account when placing it on the set (read - apartment?).
Soft light
This is one of the main types of lighting that is used not only for filmmaking, but also for video recording in home studios. Soft light does not add hard shadows in the picture, but rather diffuses them.
This light creates a warm and welcoming atmosphere, and the closer you bring the light source to your subject, the softer the effect.
When used. Videographers use soft light when they want to reduce shadows behind their subject. So the frame looks more attractive: remember the videos of bloggers on Youtube - the image on them is always bright and pleasing to the eye.
Soft light alone does not produce hard shadows: not against the background, not on the subject, not anywhere else. That is why sometimes one lamp with soft lighting is enough to record a high-quality video.
Soft lighting is also suitable for portrait videos and interviews: it hides fine lines, evens out the skin and hides small imperfections.
Another soft light is used to eliminate unwanted shadows created by other light sources.
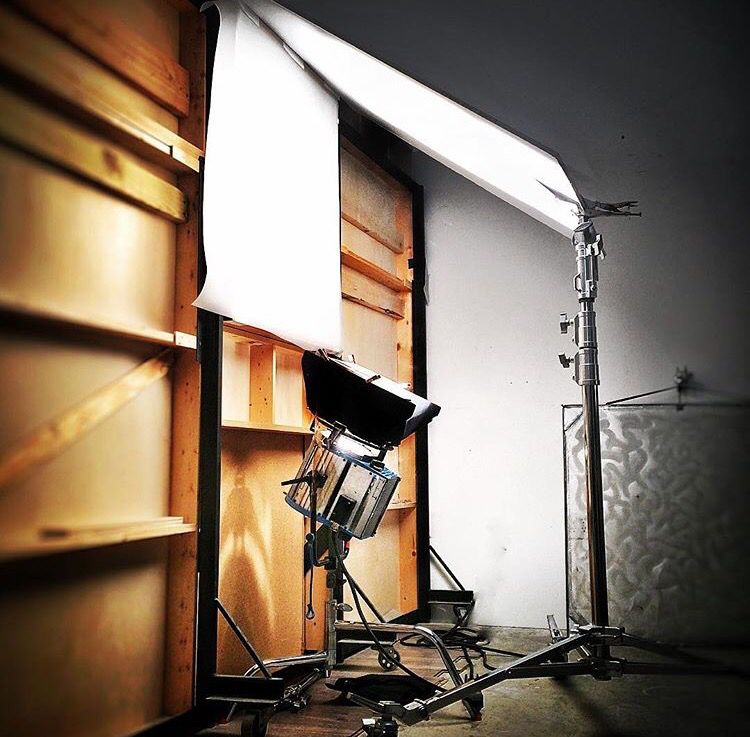
How to create. There are several ways to achieve soft light with a regular lamp: point the light at the ceiling or a special reflector, and not directly at the subject. Or cover the lamp with a translucent material - regular baking paper or a white sheet will do. It’s even better to order an inexpensive softbox on Ozon or Aliexpress - it will last you a long time and you won’t have to bother with complex designs every time.
Hard light
Video hard light is an intense and bright light that casts a sharp and distinct shadow on the subject. The most vital example is the sun in the afternoon. Remember your perfectly even shadow on the pavement - this is the result of hard lighting.
When used. Hard light is ideal for creating dramatic, gloomy and even depressing scenes. Think of any horror movie - the atmosphere of fear is created with the help of direct lighting.
In addition, this light is suitable for product photography, when you need to emphasize the shape of the object.
How to create. Direct light source can be a table lamp, flashlight or spotlight. The main thing is to direct it directly to the shooting location.
Moving the luminaire or spotlight closer to the subject also increases the "hardness" of the light.
Color Lighting
This is an additional light that corrects the tones in the video (when the color goes too cold or warm) or adds a certain mood or atmosphere to the video.
With the help of colored lamps and lenses it is possible to create a New Year's mood even on a hot July day. Or, on the contrary, add dark shades for a video compilation of the scariest films released last year.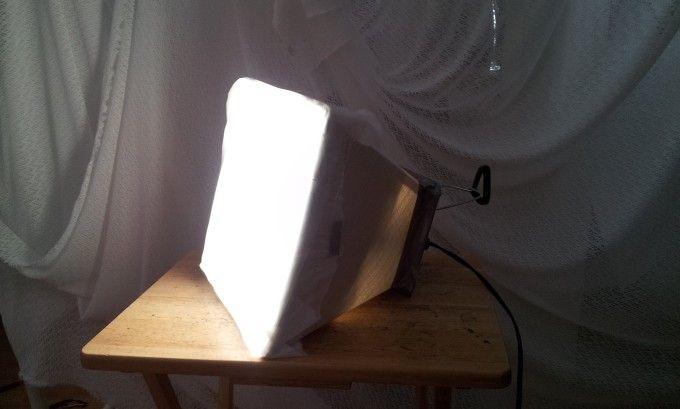
When used. Colored lenses and panels are indispensable when you want to create a certain mood. With the help of colored spotlights, it is easy to convey the atmosphere of an incendiary disco or a cozy evening by the fireplace.
If the main light is yellowish, an additional white light will give the picture a more natural tint - this effect is called "white balance".
How to create. You can order colored gel filters online, which are placed either on the light source or on the camera lens.
Also look for lamps that already have multi-color modes built into them. They are compact and easy to place even when shooting in a small studio.
New Year's garlands and colored LED lamps, which are sold in almost any hypermarket, can act as a source of colored light. Surely you have seen purple light in the windows - these are LED lamps for plants, but they are also used as backlight.
❗️Life hack. Take an ordinary light bulb and paint it the color you want. It remains only to screw it into the lamp, turn on the camera and start recording.
Arrangement of light for video filming and types of lighting
It is not enough to understand the types of lighting, it is important to arrange all the light sources so that the picture is like that of millionaire YouTubers.
What do you need to know? There are four main types of lighting that are used in layouts:
- Key light
- Fill (levelling) light
- Backlight (backlight)
- Background light
Primary light
Key light is the main and most powerful light source in the frame. It is usually placed in front of the subject, about 45 degrees above or 45 degrees to the right or left.
Key light does not apply to a particular type of lighting equipment. It can be anything from a flash on the camera and a table lamp (not a chandelier!) to a fireplace in the room.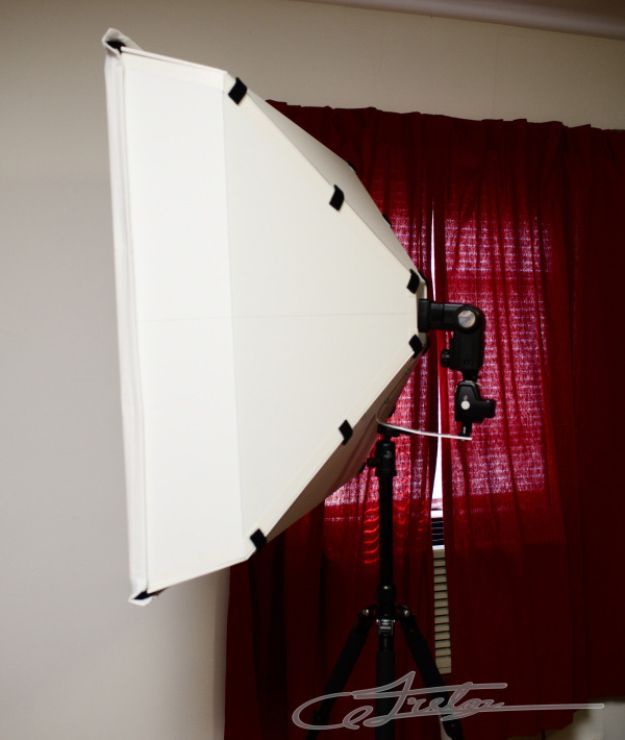
Fill light
Compensation light fills in areas that the main light source does not illuminate - shadows disappear, the subject is highlighted. Most often it is used when recording a video in which a person is present.
Fill light source can be:
- professional lamps and spotlights
- reflectors that redirect the main light back to the subject (this includes special gadgets, walls, ceilings and fabrics)
- flash or strobe - a device that simulates the flash of a camera
It should be placed on the side opposite the key light. The intensity of the fill light is usually about half that of the main light.
Backlight
Backlight greatly improves the quality of your video. It highlights your subject from behind. Backlight can be placed in several ways: put it as close as possible directly behind the object, or hang it above it.
The main task of lighting is to separate the object in the frame from the background, to make it more voluminous and textured.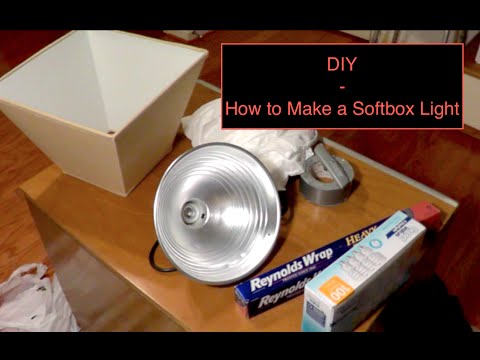 But he also has a more creative task. A backdrop can emphasize haze, fog, raindrops or cobwebs in the background - it will look magical and unusual. It is also suitable for silhouette and landscape photography.
When shooting portraits, backlight highlights the model, highlights her silhouette. If a person has long hair, thanks to the backlight, they will seem to shine in the frame.
The backlight can be an LED panel, a fluorescent lamp, car headlights, a bedside lamp, or even a candle.
Background light
Background lights illuminate the background and visually separate the subject from the background. In addition, with the help of such lighting it is possible to create a certain mood in the video and highlight the background itself, if you want to accentuate it.
You can hang a garland, a glowing decorative sign or a small lamp on the background.
Lighting plans for home video shooting
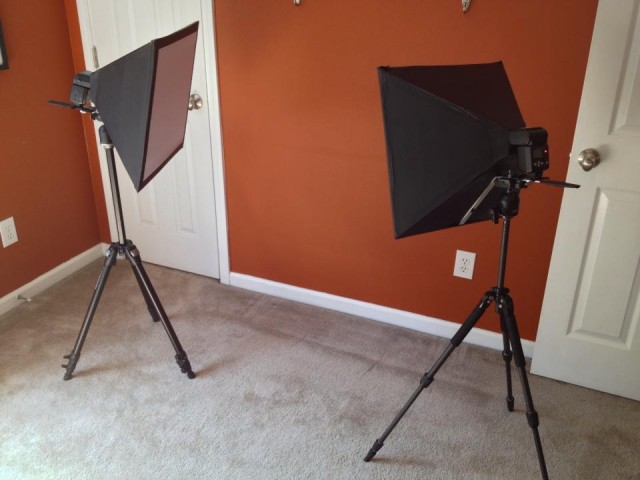
There are several ways to place video lighting - especially with multiple lamps. Three-point lighting is popular, but you can also use two or four lights, as well as ring lighting.
Three-Point Light
This scheme uses three main light sources - key, fill and backlight. The three-point light is most common among vloggers - perfect for a single person speaking into the camera.
Two-point light
This lighting scheme is also common in filming, especially for quick interviews. It consists of key and fill light.
If you don't have two lamps, use a reflector. It will direct the light from the sun or the main light onto the subject and create an equalizing light.
Four-Point Lighting
Add background lighting to a three-point setup and you've got an almost professional studio. The background light is located at about waist level, right behind the subject - brightens the wall and eliminates unnecessary shadows.
Ring Light
A ring light that will help the aspiring YouTuber, streamer or videographer create high quality videos.