Gimp how to make transparent
How to Make a Transparent Background in GIMP
Removing the background is one of the most used graphic design procedures. There could be many reasons why you would want to do that.
For example, you don’t like the background, you want to add the image to another background, or you simply want to make the image transparent.
When you make the image background transparent, you can use the colour according to the background of the new image. If you put a transparent image on top of a blue image, the image will now have a blue background. This is quite handy in graphic designing.
You can use GIMP to remove the background from an image. I am going to show you how to do that step-by-step in this GIMP tutorial.
How to Make a Transparent Background in GIMP
Step 1: Open up the image as a layer
As I have mentioned before, you need to get used to isolate different images and actions as layers. This tutorial is so simple that if you just open your image, it will still be fine. Although I want to maintain a good habit and open my image as following.
File -> Open as Layers
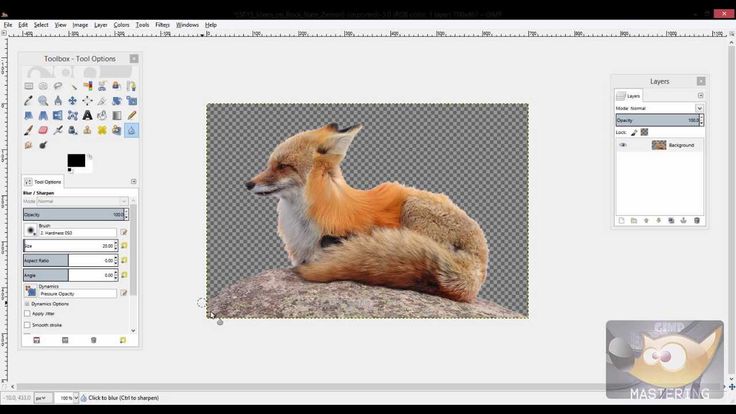
Open As LayersStep 2: Use the Fuzzy select tool
The Fuzzy Select tool is designed to select areas of the current layer or image based on colour similarity. This tool will help us to select the unwanted background with one click.
Step 3: Add Transparency
An alpha channel is automatically added into the Channel Dialog as soon as you add a second layer to your image. It represents the transparency of the image.
If your image has only one layer (like our example), this background layer has no Alpha channel. In this case, to Add an Alpha channel.
Layer -> Transparency -> Add Alpha Channel
Step 4: Delete the background
Press the Delete keyboard button to remove the background.
If you have other different coloured regions that you need to remove, click on them and delete them.
You might have to repeat the steps 2 to step 4 if necessary.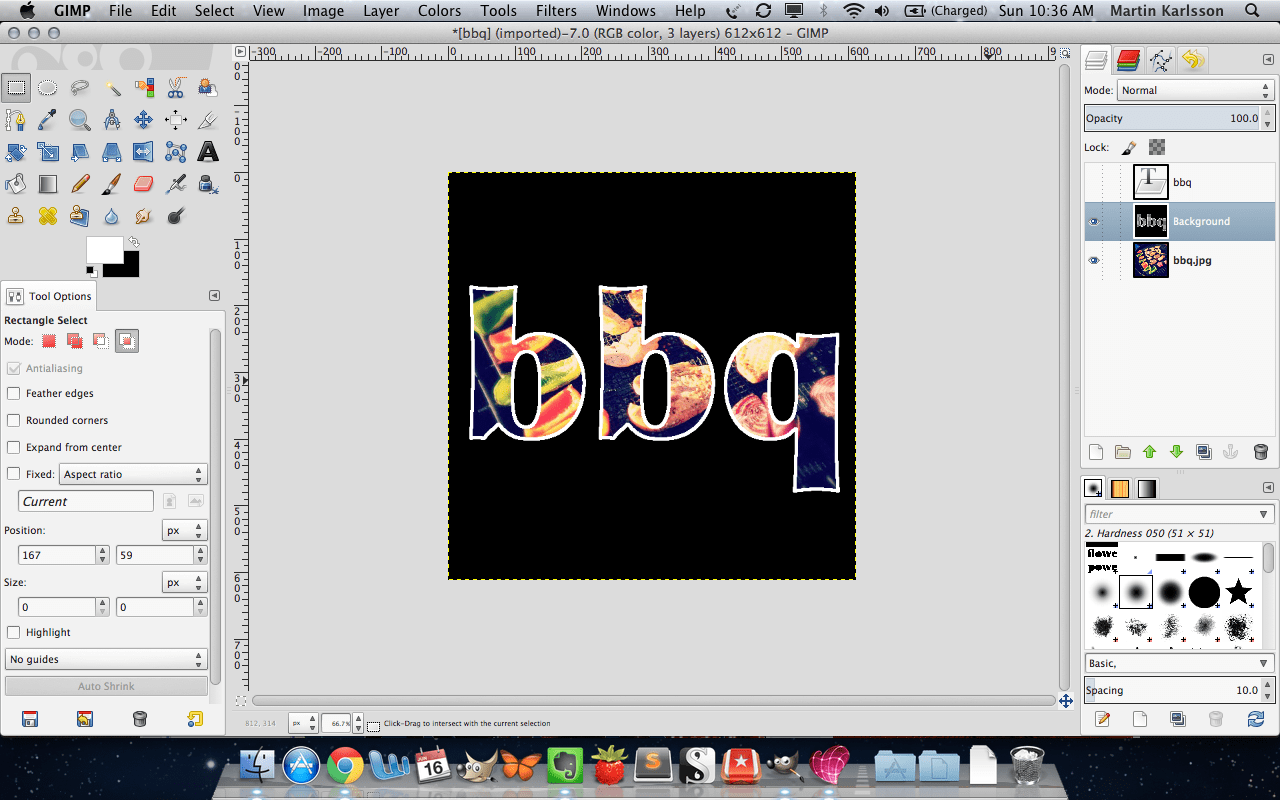 I have to remove the blue background in this example.
Step 5: Export the image
To export the image go to File -> Export As, choose PNG file format and click on Export. All done!
Advanced tutorial: Removing the complex background of an image in GIMP
If you have a complex background to remove, you need to take a different approach to do your job.
For the second part of this tutorial, I will demonstrate how to remove the background by adding a transparent layer and how to add a layer of your preference.
Step 1: Add a transparency layer
Once you open your image, right click on the image layer and click “Add Alpha Channel“. This needs to be done, to ensure that there is transparency at this layer.
Step 2: Select the foreground
Next you need to select the foreground by using the foreground select tool. You may wish to copy my settings as shown at the example below and before you start outlining your object make sure that the draw foreground option is selected at the settings.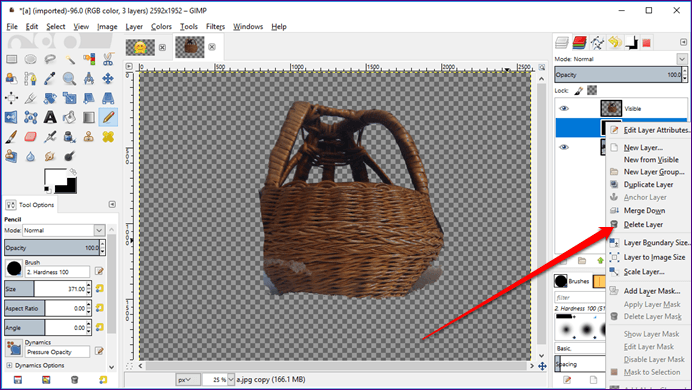
Once you have adjusted your settings, draw a rough outline of your object and hit the enter key when done. Precision is not important at this step.
Adjust the stroke width at the settings panel and draw your object by clicking and dragging your mouse, like you paint it with a brush. You can adjust the stroke width near the outline of your object to get a more accurate result.
You can also change the foreground colour prior to selecting the foreground, to be more obvious whilst go through the process. My personal choice is a red colour.
When you release your mouse it should show up like the example.
Step 3: Fine tune your selection
You can fine tune the process by selecting the draw background option, to adjust the initial rough outline. Again, you don’t need to as far as you can with the precision.
You may need to go a bit back and forth between the draw foreground and draw background adjustment to minimize the work for the next step. A result as per below will be fine.
Hit the enter key when satisfied.
Step 4: Final adjustment
To get a more accurate result, you can refine even further the outline by working with the path nodes. This is what you can also use to outline text in GIMP.
To see the path nodes follow the steps as shown.
- Make sure that you are at the paths dialog
- Click the selection to path option
- Unhide the path > Click Ctrl+Shift+A to deselect the path
- Choose the paths tool
- Click on the path
Focus on the outline precision
Adjust the outline to be nearly tangent to your desired foreground shape.
To add a node: To add a node point to a segment, and click where the node you want to be.
To adjust the outline curvature: Click the Ctrl key and drag the node. The node handles will be revealed to increase the precision to maximum.
To delete a node: Click the ctrl+shift key and click on a node to remove it.
When the path is refined to a final shape, click the “Select from Path” option.
Step 5: Add a layer mask
Finally, you need to add a layer mask to “reveal” the transparency, that you created in the initial step.
To add a layer mask, right click on the current layer > Add Layer Mask > Selection and click Add.
If you have followed all the steps correctly, the background will now be masked and you can import or create the background that you like.
Step 6: Add a new background
To create a new background, you have to create a new layer. If you are a regular reader of It’s FOSS, you already know how to create a new layer as it is shown in several GIMP tutorials.
As the difficult part is done, I will let you explore different ways to add a new background. If you already have an image that you want to add as a background, you need to open it as layers from the file drop menu, so you don’t have to create the layer manually.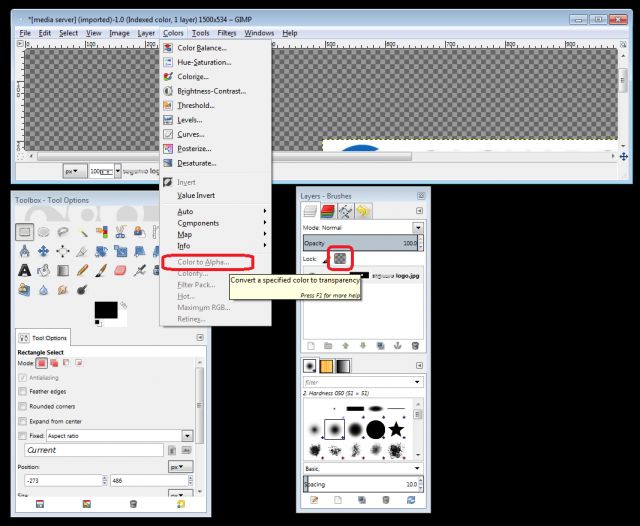
Either way, you may need to re-order your layers to achieve the final result.
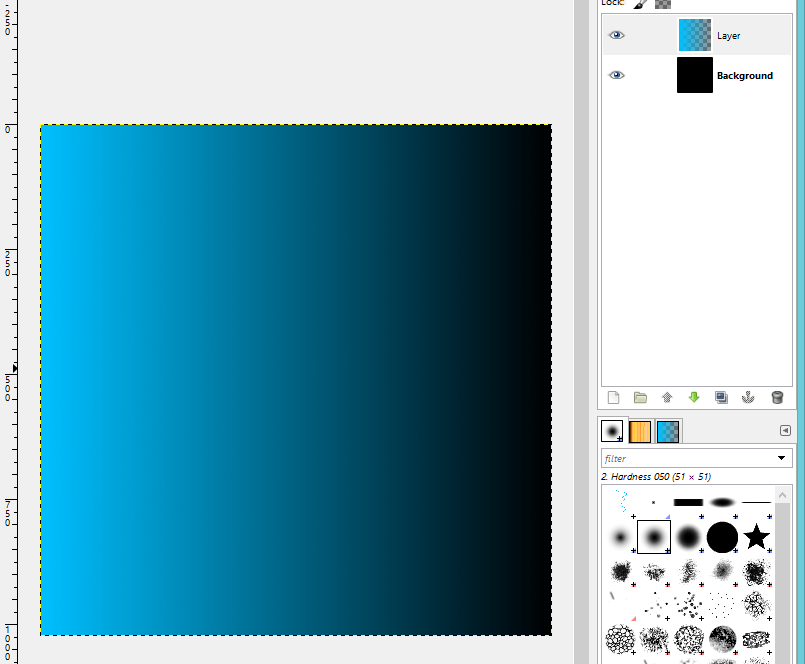
My preference for this example is to use the gradient tool, and yes I picked the colours from Ubuntu!
Final result with complex background removed and replaced by another
Conclusion
There are many different ways to add transparency to an image, depending on the complexity of the background. There is not an absolute path to follow for every occasion and the more hours you spend with GIMP the more efficient user you become.
Don’t forget to subscribe to the newsletter and let me know what you created following this tutorial at the comments below.
gimp: how to make a transparent background
Posted on September 12, 2016 by Thomas Cokelaer
How to make a transparent background/selection on an image using GIMP
- 1. Open your image.
- Select the appropriate selection tool from the Tool window or the Tools – Selection Tools menu on the Layer window.
 I usually use the magic wand/fuzzy select (Select contiguous region) tool or the Select regions by color tool.
 - Click in the region you want selected. Use shift-click to add more regions/colors.Tip: It’s easier if you zoom in (View – Zoom menu) to see finer details of exactly what you’re selecting.
2. Select the area you want to make transparent.
3. In the Layer window (the one showing your image), select Layer – Transparency – Add Alpha Channel.If this is blanked out then it’s already done. This makes sure your image can store transparency data
4. Select Edit – Clear. This makes the selection transparent.
5. Save the file. Note: If you save it as a PNG file, be sure to select the ‘Save colour values from transparent pixels’ option in the Save as PNG dialog box.
Please follow and like us:
This entry was posted in photos and tagged gimp. Bookmark the permalink.
-
Search for:
Follow me
-
Recent Posts
- Nice vscode extensions
- conda list command broken (unknown variable: python_implementation)
- ipython autocompletion does not work
- Setup ssh server on Fedora Linux platform
- How to use subprocess with PIPEs
calendar
September 2016 M T W T F S S 1 2 3 4 5 6 7 8 9 10 11 12 13 14 15 16 17 18 19 20 21 22 23 24 25 26 27 28 29 30 Recent Comments
Archives
Archives Select Month October 2021 (1) July 2021 (1) January 2021 (2) November 2020 (1) June 2020 (1) May 2020 (2) April 2020 (1) March 2020 (1) January 2020 (1) August 2019 (2) May 2019 (1) December 2018 (1) October 2018 (1) August 2018 (1) May 2018 (1) March 2018 (1) February 2018 (3) January 2018 (4) December 2017 (6) October 2017 (3) September 2017 (1) August 2017 (1) June 2017 (1) May 2017 (1) January 2017 (1) November 2016 (1) October 2016 (1) September 2016 (4) March 2016 (1) February 2016 (3) January 2016 (1) June 2015 (1) May 2015 (1) February 2015 (1) December 2014 (2) November 2014 (1) October 2014 (1) September 2014 (2) August 2014 (8) July 2014 (1) June 2014 (4) May 2014 (5) April 2014 (1) March 2014 (2) February 2014 (1) January 2014 (4) November 2013 (1) October 2013 (1) September 2013 (4) August 2013 (2) July 2013 (5) June 2013 (2) March 2013 (3) February 2013 (2) January 2013 (4) December 2012 (3) November 2012 (8) October 2012 (7) July 2012 (7) June 2012 (3) April 2012 (3) March 2012 (4) February 2012 (1) January 2012 (4) November 2011 (4) October 2011 (4) September 2011 (11) August 2011 (10) July 2011 (2) June 2011 (2) May 2011 (14) April 2011 (7) March 2011 (18)Categories
- amusement
- bioinformatics
- biology
- Computer Science
- Data analysis
- Internet related
- Life Science
- Linux
- Notes
- Others
- photos
- Python
- R
- raspberryPi
- Software development
- Uncategorized
- wordpress
Meta
- Log in
- Entries feed
- Comments feed
- WordPress.
 org
org
Media RSS
Chapter 7. Painting in the GIMP
Chapter 7. Painting in the GIMP
1. Selection
Often when performing operations on an image, you need to change only part of it. In GIMP, you do this with the selection of that part. Each image has a selection associated with it . Most (but not all) operations in GIMP only apply to selected parts of an image.
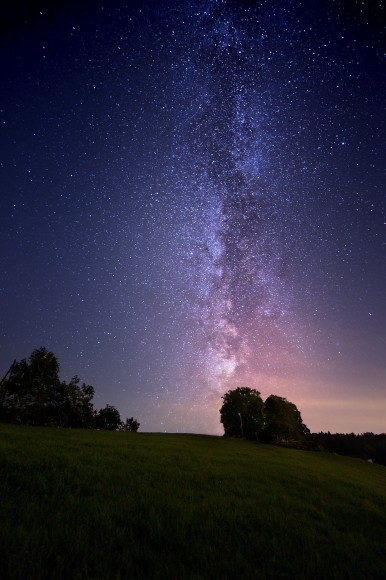
Figure 7.1. How would you separate a tree?
There are many, many situations where just making the right selection is the key to getting the result you want, and often it's not that easy to do. For example, in the image above, I want to cut out the tree from this background and paste it into another image. In order to do this, you need to create a selection that contains the tree and nothing but the tree. This is difficult because the tree has a very complex shape, and in some places it is difficult to distinguish it from the objects behind.
Figure 7.2. The selection is shown by the usual dotted line
A very important feature that is critical to understanding is described here. Usually, when you make a selection, you see it as a dotted line that surrounds part of the image. The idea you should take away is that a selection is a kind of container, with selected parts inside, and unselected parts outside of the image. This concept of selection is appropriate in most cases, but in reality it is not entirely correct.
The selection is actually implemented as channel . In terms of this internal structure, it is identical to the red, green, blue, and alpha channels of an image. Therefore, the selection contains a value specific to each pixel in the image, ranging between 0 (not selected) and 255 (fully selected). The advantage of this approach is the ability to partially select some pixels by setting values between 0 and 255 for them. As you will see, there are many situations where it is desirable to have smooth transitions between selected and unselected areas.
Then what is that dotted line that appears when you make a selection?
This is the contour line separating more than half selected areas from less than half selected areas.
Figure 7.3. The same selection in quick mask mode
When looking at the dotted line representing the selection, you should always keep in mind that this is only telling you part of the story. If you want to see the selection in more detail, the easiest way to do this is by clicking on the "Quick Mask" button located in the lower left corner of the image window. This will cause the selection to appear as a translucent overlay on top of the image. The highlighted areas are unaffected; unselected areas are colored red. The more the area is selected, the less red color appears on it.
Many operations work differently in Quick Mask mode, as described in the Quick Mask chapter. The Quick Mask button toggles the Quick Mask mode on and off.
Figure 7.4. The same selection in quick mask mode after feathering
1.1. Feather
With default settings, basic selection tools such as the Rectangular Selection tool create sharp selections. Points inside the path are fully selected, and points outside are not fully selected. You can check this by turning on the quick mask: what you see is a clean rectangle with sharp edges, surrounded by a solid red color. In the tool options there is an item "Feathering". If you enable it, the tool will instead create selections with smooth transitions. The feather radius, which you can change, determines the distance over which the transition occurs.
If you follow these guidelines, try this trick with the Rectangular Selection Tool and then switch to Quick Mask mode. You will see that the clean rectangle has blurry edges.
Feather is especially useful when cutting and pasting to help the pasted object blend smoothly and unobtrusively into its surroundings.
You can actually feather a selection at any time, not just if it was originally sharp. You can do this from the image menu by selecting Selection → Feather.... The Feather Selection dialog will be called. Set the feather radius and click the OK button. You can choose the opposite - sharpen a smooth selection into a fully sharp one by choosing Selection → Defeather.
| Note | |
|---|---|
| For technical readers, feathering works by applying a Gaussian blur to the selection channel, with specific blur radius settings. |
1.2. Make selection partially transparent
You can set the transparency of a layer, but you can't do it directly for a selection. It is very useful to know how to make glass image transparent.![]() You can do this in the following ways:
You can do this in the following ways:
-
For simple selections, use the Eraser tool with the desired transparency.
-
For complex selections: use Select → Float to create a floating selection. This creates a new layer with the selection called "Floating Selection" (Section 4.5, "Make floating"). Set the opacity slider in the Layer Dialog to the desired opacity. Then anchor the selection: outside the selection, the mouse pointer includes an anchor. When you click while the mouse pointer includes the anchor, the floating selection disappears from the Layer Dialog and the selection is at the right place and partially transparent (anchoring works this way only if a selection tool is activated : you can also use the Anchor Layer command in the context menu by right clicking on the selected layer in the layer dialog).
And if you use this command a lot press Ctrl - C to copy the selection, Ctrl - V to paste it, thus creating a floating selection, set the transparency and make a new layer via Layer → New Layer The in which the floating selection will be inserted. Transparency can be set before and after creating a new layer.
-
Alternatively, use the command Layer → Mask → Add Layer Mask to add a mask to the layer with the selection. Then use a brush with the desired opacity to color the selection with black, i.e. transparency coloring. Then use the command Layer → Mask → Apply Layer Mask. For more information, see Section 2.1.3, Layer Masks.
-
If you want to make the solid background of the image transparent, add an alpha channel and select the background with the Related Area Selection.
 Then select a background color with the Color Picker, which will make the foreground color the background color. Use the Flat Fill Tool on a selection in Color Dropout mode. Thus, all points with this color are erased; other points are not completely erased and their color changes.
 The simplest option is to use the Edit → Erase command, which makes the selection completely transparent.
GIMP Layers: Layer Transparency | Davies Media Design
As discussed briefly in this series, layers can contain varying degrees of transparency or be completely opaque. This is an important concept because transparent layers allow designs to be more intricate and contain more depth, and also allow compositions to be saved without a background.
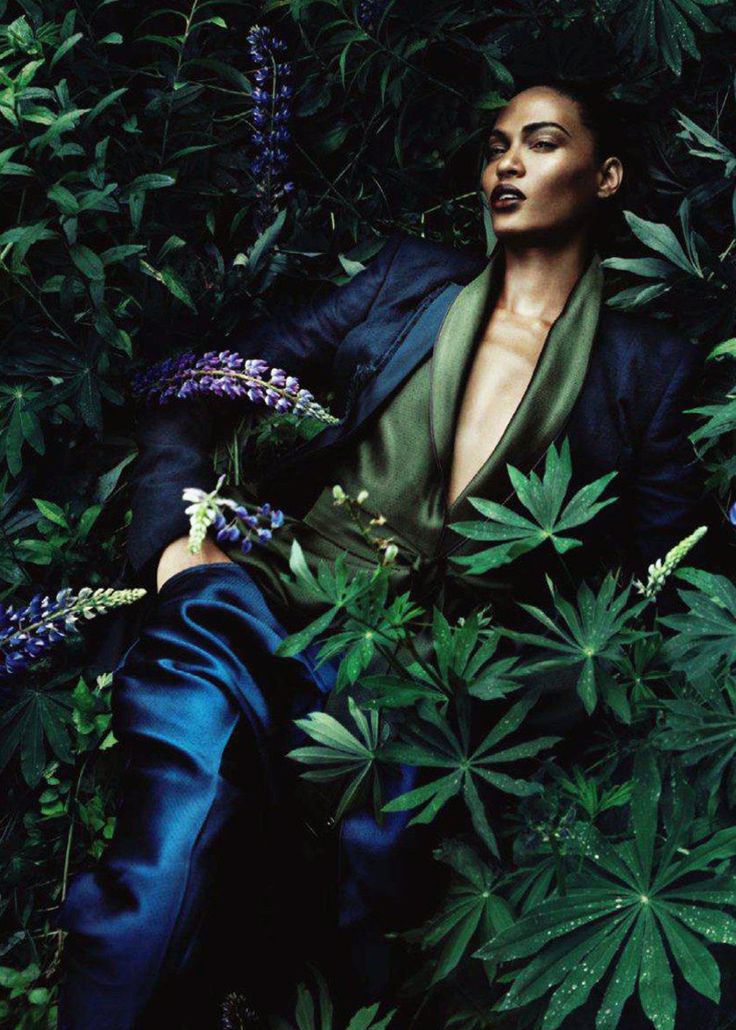
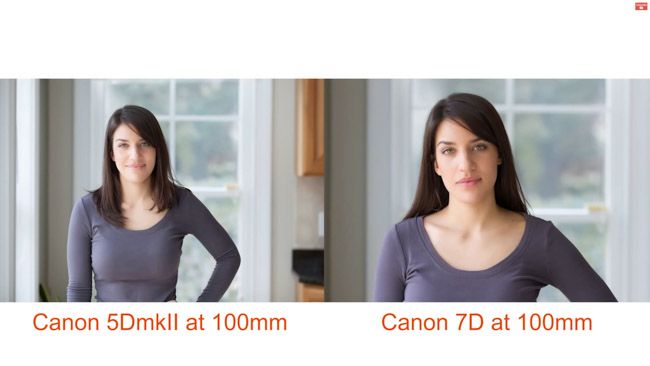
To better understand this concept of transparency, I have three open layers in my composition (highlighted in green in the photo above). The first layer is layer 1 which is at the top of my layer stack and is a completely transparent layer.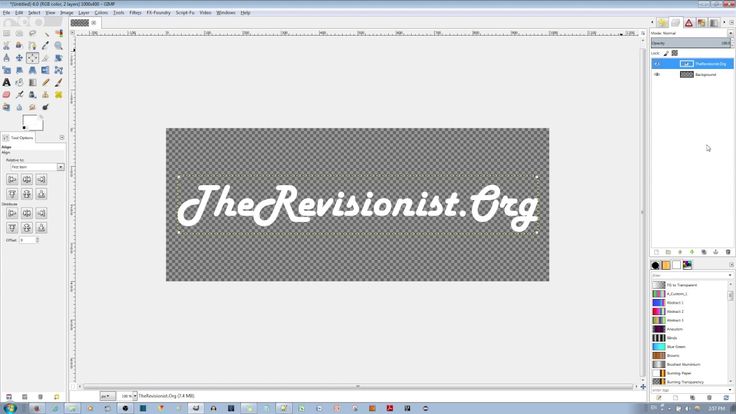 The second layer is an image called "Model in Red Chair" which is completely opaque and contains no transparency (more on that in a second). The third layer is our background layer, which is also completely opaque but filled with white. This layer also contains no transparency.
Adjusting the transparency of a layer with the opacity slider
There are several ways to change the transparency of a layer, and the results depend on how you interact with the layer's transparency. For example, if I click on the "Model in Red Chair" layer (denoted by the green arrow), I can use the opacity slider at the top of the Layers panel (red arrow) to adjust the overall opacity of that layer. By default, the slider is set to 100, which means it has 100% opacity or is completely opaque. If I drag the slider to the left, the number becomes less than 100, which means the image layer now contains a percentage of transparency.
If I drag the slider until it reaches 50 (as shown in the photo), that means the image layer is now 50% opaque and 50% transparent. That's why we can see through this layer a bit, revealing the white background behind it (which therefore makes our image a bit lighter, since adding white to all of your pixels will lighten those pixels upwards).
I can also manually enter a value in my opacity slider if I need the exact number here. To do this, I just need to use the mouse to highlight the current value (right now it's set to 50.0), then type in the new number and press enter. For example, I'll type 23 to set my opacity value to 23% and my opacity value to 77% (as shown in the green highlighted area in the photo above).
On this note, I would like to point out that there is an inverse relationship between opacity and transparency - or in other words, the value of one of these dimensions is always the value of the other dimension subtracted from 100. Thus, if my opacity level is set to 65 %, my layer will be transparent for 35%. If my layer is 40% transparent then the opacity should be set to 60%. Yay math
I can also use the arrows on the right side of the opacity slider (indicated by the red arrow) to increase or decrease the opacity by a percentage point of 1. This way, if I click the down arrow once, my layer's opacity will now be 22 %. If you double-click the up arrow, the layer's opacity will be 24%.
Note: when my layer's opacity is set to 0% it won't be visible anymore because it will be completely transparent. The opacity of my layer can never be less than 0% or greater than 100% - it will always be in that range.
In the next part of this tutorial, I'm going to set my layer's opacity back to 100% (you can either drag the opacity slider all the way to the right, or manually enter a value of "100").
Alpha Channels and Layer Transparency
The next important concept when it comes to transparency is what is called an alpha channel.
Compositions in GIMP always contain channels of some kind that determine how colors will appear in the composition.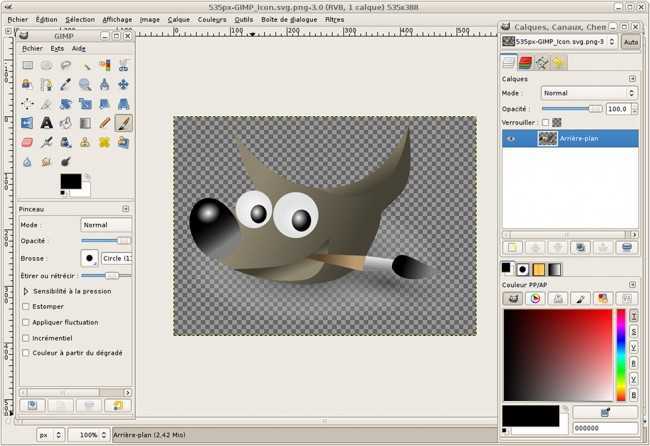 These channels make up the so-called color space. The most commonly used and default color space in GIMP is the RGB color space. This means that your image consists of three color channels - red, green and blue (which is why we use the abbreviation "RGB"). You can see these color channels by going to the Channels tab next to the Layers tab in the Layers, Channels, Paths, Undo History area (denoted by the red arrow in the image above).
Here you can see that we have the red, green and blue channels, each stacked on top of the other in the same way we stack the layers. However, you will notice that there is also a fourth channel here - the Alpha channel. This channel represents true transparency for the layer. If a layer doesn't have an alpha channel, it won't be able to create separate areas of transparency.
In other words, we can reduce the overall opacity of the entire layer at once (as we did with the Opacity slider earlier in this article), but we can't take a tool like the Eraser tool and create a small area of transparency for layer.![]()
That being said, since we can see that there is an alpha channel associated with the active layer we're on (our image layer), we should be able to create an isolated area of transparency, right? Well, it's a little more complicated than that.
If I go back to the layers panel (red arrow in the photo above), you'll notice that I'm still clicking on the "Model in Red Chair" image layer (green arrow).
Now if I take the Eraser tool from the toolbox (red arrow in the photo above) and erase a random area on my layer, you'll notice that it doesn't actually create transparency where I'm erasing. Instead, it colors black (blue arrow in the photo). What for?
Well, in GIMP you have to specify for every layer that doesn't already contain transparency that you would like to add an alpha channel to that layer and thereby make it transparent. Right now only Layer 1 contains transparency because we created a new layer and filled the background with transparency (visit my previous article in this series where I created this layer). This is why the alpha channel was displayed in our channels dialog (even though we clicked on our model in the red chair layer - in other words, it was misleading because our model in the red chair layer seemed to have an alpha channel, even though it not this way).
The other two layers in the composition, the "Model in Red Chair" image layer and the background layer, were created without transparency (JPEG files do not contain transparency, and we filled our background layer with white instead of transparent when we first created it).
So while it shows that an alpha channel exists for our composition, it actually only exists for Layer 1. We have to manually create the alpha channels for the other two layers. Otherwise, when we try to erase the area (either with the Eraser tool or another tool like the selection tool), the area will be filled with the current background color, which is black.
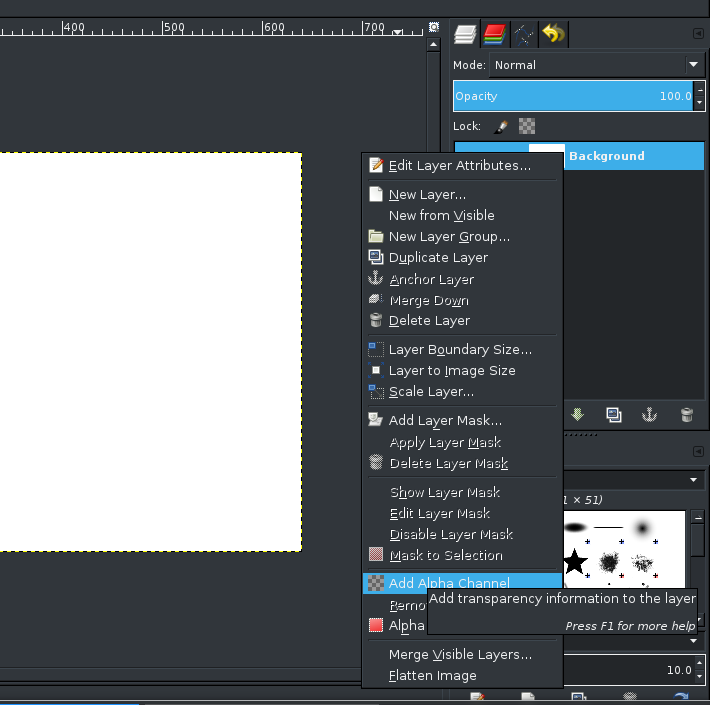
To do this, all I have to do is right click on my active layer (denoted by the red arrow), then click on "Add Alpha Channel" (blue arrow - if you hover over this option, it will display the message for this option will be "Add transparency information to the layer").
After you add an alpha channel to a layer, two notable things happen immediately. First, your layer name will no longer appear in bold when it becomes your active layer (this is a very subtle change, but if you un-add the alpha channel and look at your layer name, you will notice that it is in bold) . font when clicked or active. By re-executing the Add Alpha Channel action, the font will no longer be bold when the layer is active).
Second, you'll notice that when you right-click on the layer, the Add Alpha channel option will now be greyed out or disabled in the menu. You can no longer select this option because your layer now has an alpha channel.
Now that we have our alpha channel, I'll use my eraser (red arrow) on my layer again. This time, instead of painting with black, it will show a white background layer (blue arrow) that is under our model layer in the red chair.
If I hide the background layer by clicking the show/hide icon (red arrow), you'll see a gray checkerboard in the area where we used our eraser (blue arrow).