How do i resize images
How to Resize an Image [from Any Device]
Device Links
- Android
- iPhone
- Chromebook
- Mac
- Windows
- Device Missing?
With today’s modern gadgets, taking photos has become so easy that having hundreds of images in storage is not a particularly strange or uncommon thing. Storage does become a problem, though, as the better camera quality gets, the larger the photo’s file size.
Resizing is not just cropping an image; it can also mean the manipulation of pixels to reduce the file size. If you’re trying to send a lot of pictures to another person, but the file size is too large, you’ll need to condense the photo to send it.
This is where resizing images comes in handy. With the proper tools, you can adjust both the picture and file size of a particular image to suit your needs. In this article, we will show you how to resize an image for a variety of devices.
How to Resize an Image from Windows
Probably one of the most versatile tools for image editing, a Windows, Mac, or Chromebook will usually come with programs that allow you to edit images. Additionally, some of the best photo editing tools are available for free. We’ll list a few programs along with some tips on how to reduce images.
TinyWow
The fastest way to resize images without downloading or installing programs is by using TinyWow. TinyWow is a free online tool that offers many extensive features for image processing, from background remover, resizing dimensions, adding text, and more! Here’s a quick guide on how to resize an Image from Windows, Mac, and Chromebook.
- Open one of your favorite browsers and visit TinyWow.com.
- Hover your mouse to the Image tab and click Resize Image Dimension
- Click Upload from your PC or Mobile or Drag some files.
- Change the Ratio and Height of your preferred sizes.
- Click Resize.
- Once the resizing is done, you can now Download the images.
Paint
All Windows versions below Windows 10 will come with MS Paint by default. Although quite basic as photo editing tools go, it can still resize pictures rather easily. To do so, follow these steps:
- Open the image by either right-clicking on it and selecting Open With, or clicking File, then Open on the Paint top menu.
- On the Home tab, under Image, click on Resize.
- Adjust the image size either by percentage or pixels as you see fit. Click on Maintain aspect ratio to keep the image size constant when adjusting by percentage.
- Click on OK when you’ve made your adjustments.
Paint 3D
Windows 10 comes with an updated version of the Paint app, which has a lot more options than the original. The interface has been changed quite a bit, though, so those familiar with the previous program may find themselves lost when trying to navigate the menus.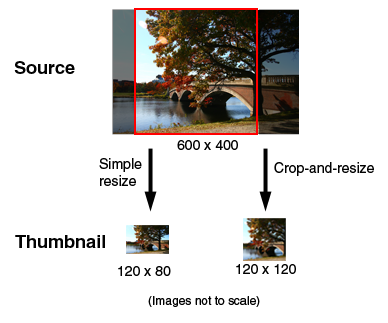
To resize an image in Paint 3D, do the following:
- Open the image in Paint 3D.
- Click on the Canvas tool at the top menu.
- On the menu on the right, you can adjust and resize the image either by pixels or percentage. The lock aspect ratio maintains the proper image size balance, and Resize image with canvas increases or Decreases the Paint 3D canvas size in relation to your adjustments.
- Click on Menu, then Save to keep any changes.
Adobe Photoshop
Considered one of the best image tools around, you cannot think of photo editing without mentioning Adobe Photoshop. Although not free as the others mentioned, this program’s versatility is well worth the price. To resize an image in Photoshop, follow these steps:
- Click on Image in the top menu.
- Choose Image Size.
- Adjust the dimensions as you see fit the click on OK.
Batch resizing can also be done, though it will require recording Actions, then proceeding to choose File, Automate, then Batch.
Irfanview
A free and very popular image viewer, Irfanview also has the ability to resize images, both individually and in batches, without having to record program actions first. It is a very handy tool to have, and as it costs nothing to install, it’s worth giving this program a try. You can resize images in Irfanview like so:
- Open the image by right-clicking and choosing Open with or finding it through the Irfanview menu by clicking File, then Open.
- Click on Image on the top menu, then click on Resize/Resample.
- Adjust the image values as you see fit, then click on OK.
Batch conversion of images located in one folder can be done by opening Irfanview, clicking on File, then choosing Batch Conversion/Rename. All images located in the folder will then be resized automatically.
How to Resize an Image on a Mac
The Mac is a powerful tool for people that want to edit images. Many graphic artists prefer to use a Mac when editing, though whether this is a professional or personal choice is up for debate. The available tools are still quite useful, though. Here are some of the easiest to use:
Preview
The default photo and image viewer for the macOS comes with several editing options, including resizing. To do so, follow these steps:
- Open the file you want to resize in Preview and then click on Tools > Adjust Size.
- Click the box next to Resample image and adjust the image to your liking.
- To do batch image resizes, open multiple images in the same window, then follow the steps given above.
How to Resize an Image on a Mac using Adobe Photoshop
This popular photo editing program is also available for use on Mac.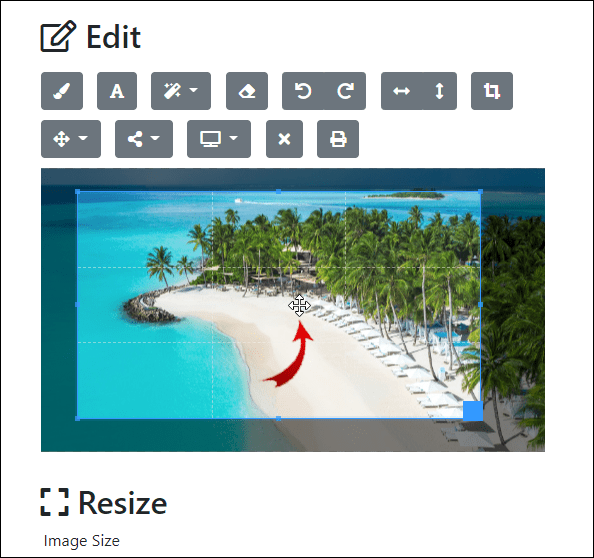 The steps for image resizing are the same as those for the PC.
How to Resize an Image on a Chromebook
As the Chromebook is limited to only Google-approved applications, the choices for photo editing on this platform are not as varied as the others. However, it still comes with a default program that works nicely. Alternatively, you can enable the Google Play Store on your Chromebook, then download image editors as if you were using an Android device.
Image Editor
This is the default image viewer for your Chromebook and is the program used when you open an image file. To edit pictures using this app, do the following:
- Open your image file, then click on Edit in the menu.
- Now, click on Re-size.
- Adjust the values as you see fit.
How to Resize an Image on an Android Device
Out of the box, an Android phone or tablet does not come with applications that can be used to resize an image.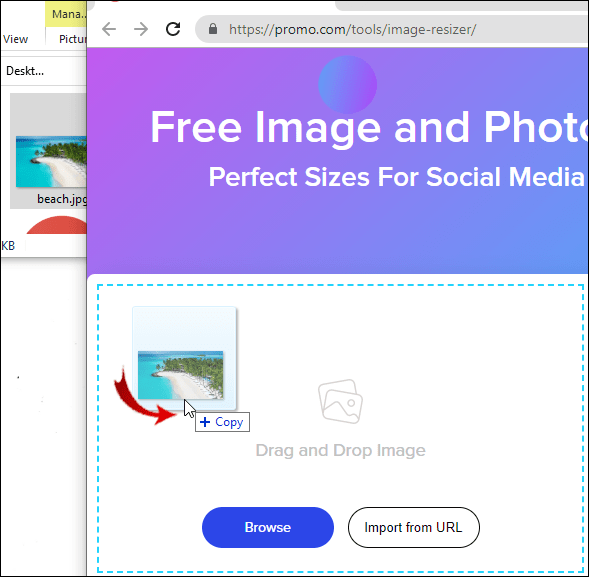 The Photos app that comes as a standard with Android can be used to view files, but there are no available options for you to edit anything. Fortunately, useful applications for Android devices can be found in the Google Play Store.
The type of app may vary depending on both your device type and Android version, but most have very similar tools. The standard process of resizing an image is to either select one or multiple images from your album, then choose the resolution that you want it resized to. Here are a few choice tools that are highly rated on Google Play:
1. Photo Compress & Resize
An easy-to-use and intuitive Image size reducer, Photo Compress & Resize allows the user to either decrease the image size or crop images and remove unwanted portions of the picture. It can perform batch image reductions, allowing for multiple files to be selected and reduced all at once.
2. Photo & Picture Resizer
A convenient photo resizer made for Android devices, the Photo & Picture Resizer app gives the user the option to quickly change the size of single or multiple images with a few simple taps. Made to match the original picture aspect ratio by default, the Photo & Picture Resizer makes it easy to upload images to various social media sites. The app also allows for batch processing multiple images all in one go.
3. Q Reduce: Photo Reducer and Q Reduce Lite
The Q Reduce app is a no-nonsense, straightforward file size reducer that does one thing and does it well. The Lite version performs single image reductions while the full version allows for batch images along with several other image editing options, such as crop selection and photo archiving.
How to Resize an Image on an iPhone
Although the Photos app that comes with your iPhone can be used to crop images down to a certain size, it doesn’t have the feature to decrease its resolution or file size. There are, however, apps available through the Apple App Store that do the job very well:
1. Image Size
Simple to use and rather straightforward, Image Size is one of the most popular image editors in the App Store. This free tool is handy for those that would like a no-nonsense way to reduce picture file sizes.
2. ImageResize
A handy tool for quickly resizing and then posting images from your iPhone, ImageResize is another popular editing tool in the Apple App Store. When resizing images, it displays the estimated resulting file size, so you can easily adjust files for uploading to sites with specific file size requirements.
3. Batch Resize
A useful app that allows users to resize multiple images at once, Batch Resize is a great tool for those that like to take a lot of pictures and have albums with a lot of images.
Additional FAQ
Here are the answers to a few of the most frequently asked questions on how to resize images.
1. What online tools can you recommend for resizing images?
The following tools offer simple drag and drop options when resizing picture files, and all of them are free and available without installing anything. For single images, try using PicResize, or PhotoSize.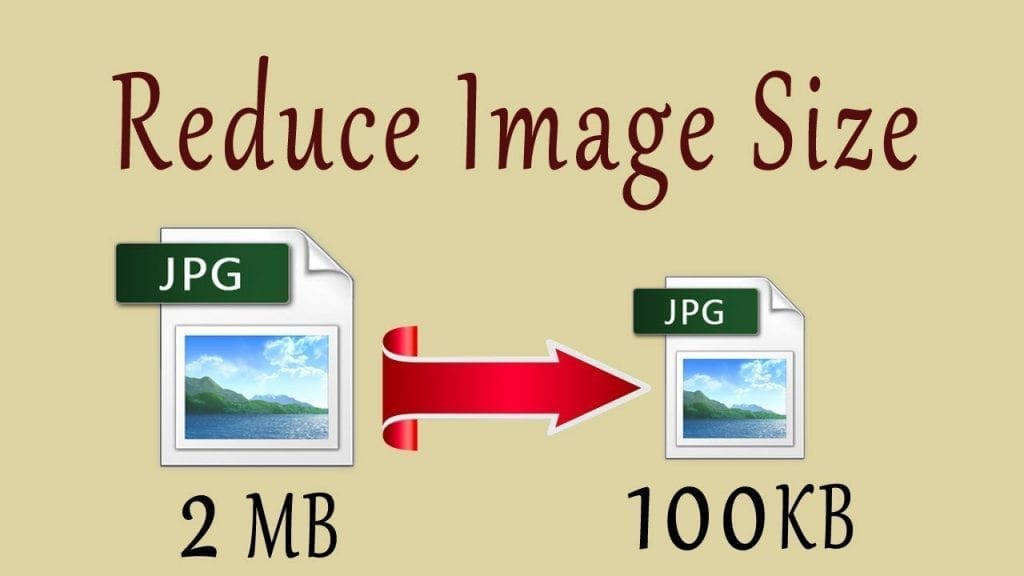 For batch projects, BulkResize, and BIRME are rather useful. As they are online tools, it really does not matter which platform you use them on. As long as you have an online connection, you can use any of them.
2. What programs can you recommend for resizing batches of images?
The applications provided for each platform above have choices that offer batch image processing. They are some of the most popular for each of their specific platforms and offer users a great tool for resizing multiple images.
3. What effect does resizing an image have on the file size?
Resizing an image has a very considerable effect on a picture’s file size. Decreasing or increasing the size of an image will respectively decrease or increase the number of pixels that are rendered when you open the file. This means that a smaller number of pixels creates a smaller file size and vice versa. This is important to remember as many online sites have upload limitations and won’t accept images beyond a certain file size.
An Integral Part of Picture Taking
Now that taking pictures is so simple, the need to manage the size of image files has attained more significance, especially for those that do it often. It would be extremely frustrating to take a picture of an important moment, only to find that you have run out of storage space. Resizing pictures has now arguably become an integral part of taking them.
Do you know of other ways to resize images on different devices? Share your thoughts in the comments section below.
How to Resize an Image on Windows Using Built-in Apps
- To resize an image on Windows, you can easily use the built-in Photos app or Microsoft Paint.
- In the Photos app, there's a "Resize" option hidden in the side menu, which you can use to change the size and quality of an image.
- In Microsoft Paint, you can click "Resize" and then enter the percentage or pixel size you want.
- You'll get the best results by scaling an image down — if you want to increase an image's size, you're better off using a program like Photoshop.
- Visit Business Insider's Tech Reference library for more stories.
It's not unusual to resize an image. In fact, if you often work with images downloaded from the internet, you'll probably find yourself resizing them a lot.
Luckily, the ability to resize images is built into nearly every photo application around. This includes two of the most popular, which are installed on every Windows 10 PC from the start: Photos, and Microsoft Paint.
Note, however, that there's a difference between resizing an image to be smaller, and resizing it to be larger. Nearly every program, Photos and Paint included, can scale an image down without issue. However, if you use these programs to make an image larger, you might find that the image loses a lot of quality.
If you need to scale an image up (greater than 100% of the original size) without getting it pixelated and blurry, then you'll need to use a program like Adobe Photoshop that includes a smart resizing feature.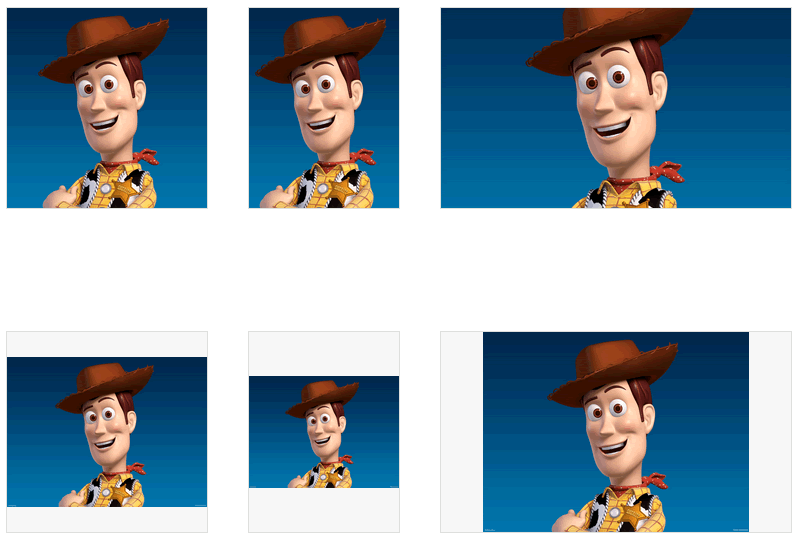
But if you need to scale an image down, or you're fine with losing image quality, here's how to use Windows' built-in image resizing tools.
Check out the products mentioned in this article:Adobe Photoshop (From $99.00 at Best Buy)
Windows 10 (From $139.99 at Best Buy)
Acer Chromebook 15 (From $179.99 at Walmart)How to resize an image on Windows using the Photos appThe Photos app should be the default photo viewer for nearly every image type in Windows.
1. Double-click the image file you want to resize to open it in Photos.
2. Once it's opened, click the three dots in the top-right corner, then click "Resize."
Select the "Resize" option from the side menu. William Antonelli/Business Insider3. A small pop-up will appear, offering you three preset sizes for the picture. Pick one of them, or click "Define custom dimensions" at the bottom.
4. If you picked custom dimensions, a menu will appear that lets you set exactly how big you want the image to be. You can also choose how high quality the resized image will be — higher quality pictures look better, but have a bigger file size.
If "Maintain aspect ratio" is checked, then you only need to change either the height or width, and the other dimension will change automatically to match it.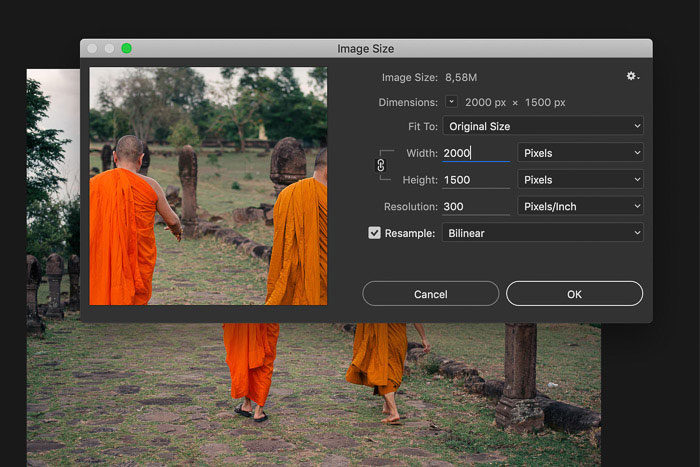
Set your new dimensions, and then click "Save resized copy."
You'll be shown the picture's current size at the top of this menu. William Antonelli/Business Insider How to resize an image on Windows using Microsoft Paint1. Start Paint, which you can usually find in the Start menu. If it's not there, you can type "Paint" in the Start button search box and click it when it appears in the search results.
2. Open the photo you want to resize by clicking "File," then "Open," and selecting the image from your computer's files.
3. In the top menu bar's "Home" tab, click "Resize." The "Resize and Skew" window should appear.
4. Enter the size you want to resize the image to. You can set the size by percentage (i.e. "30 percent larger"), or click "Pixels" and enter the exact dimensions you want. As long as you keep "Maintain aspect ratio" checked, you only need to specify the horizontal or vertical dimension, and the other dimension will be set automatically.
Enter the percentage or pixel size to make the new version of your image. Dave Johnson/Business Inisder5. Click "OK" to make the change.
6. Save the new version of your image by clicking "File" and then "Save As."
7 easy ways to speed up your Windows 10 computer, from disabling unneeded effects to upgrading your hardware
How to take a screenshot on Windows 10 computers in several different ways
How to change the size of your desktop icons on a Windows 10 computer
How to create a guest account on your Windows 10 computer in 6 steps
5 ways to save battery on any Windows laptop and keep your computer running longer
Dave Johnson
Freelance Writer
Dave Johnson is a technology journalist who writes about consumer tech and how the industry is transforming the speculative world of science fiction into modern-day real life. Dave grew up in New Jersey before entering the Air Force to operate satellites, teach space operations, and do space launch planning. He then spent eight years as a content lead on the Windows team at Microsoft. As a photographer, Dave has photographed wolves in their natural environment; he's also a scuba instructor and co-host of several podcasts. Dave is the author of more than two dozen books and has contributed to many sites and publications including CNET, Forbes, PC World, How To Geek, and Insider.
Read moreRead less
Resize image online | Visual Watermark
Our online Resize Tool allows you to quickly and easily resize your images. You can process up to 10 photos completely free of charge within one day. The application supports JPEG, PNG, WEBP, HEIC, GIF, BMP formats. Works on any operating system, you just need to have an internet connection.
Resize photo
How to resize photo with our application:
To upload your photos to the application, you can use the button "Add photo" in the upper left part of the screen, click "Select images" in the center of the screen, or simply drag and drop all files with the mouse. After clicking on these buttons, you will see a dialog box with the ability to select the location from where you want to transfer images: “From my computer”, “From Google Drive”, “From Google Photos”, “From Dropbox”.
You can upload photos of any size, as long as it does not run out of free space on your computer or mobile device.
If you clicked on “From my computer” , select the desired folder in the window that appears and select the images you want to resize. Pressing Ctrl+A on Windows or Cmd+A on Mac will select all the photos in the folder at once.
Immediately after clicking on one of the following options - “From Google Drive” , “From Google Photos” or “From DropBox” a window will appear in which the application will ask for access to your online storage. Click on “Allow access” .
The “Add photo” button also allows you to add additional photos to those already uploaded.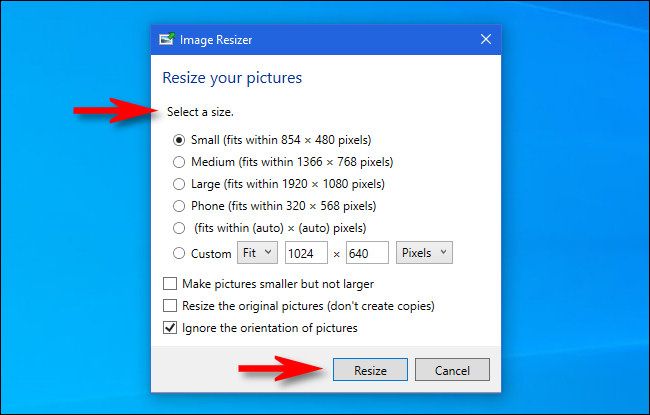 Button "Clear" allows you to delete all photos from the application.
After you have uploaded all the images to the application, click “Resize Images” on the top right. You will see a window with output settings.
From the drop-down list, you can set the desired reduced copy format by selecting one of the options “Source format”, “Convert to JPEG” or “Convert to JPEG and compress”. It is worth remembering that reducing the quality may remove some details and add noise to the image, but the file size becomes more compact.
Next, you need to choose how the image will be resized.
If you select option “Fit Width” , you must specify the width in pixels below. In this case, the height will automatically adjust to the desired value. Similarly, you can select “Fit to height” and specify the size. Then the application will calculate the required width.
Option “Fit to Rectangle” will be useful if you are interested in specific photo width and height dimensions in pixels. Accordingly, you should enter them below.
Option “Percentage” allows you to specify the degree of image reduction. For example, if you specify 70%, this means that the width and height of the original image will be reduced by 30%.
All your output settings will be saved in the application's memory. This is very handy if you are constantly resizing images in the same way. In this case, you will not have to enter the data again.
All that's left to do is click "Resize Image".
You can upload edited photos to your computer, Google Drive or Dropbox.
Our online application allows you to process up to 10 images per day. If you are interested in resizing a large number of photos at once, then you should purchase the paid version of the program. It will allow you to download up to 2000 images at the same time .
Resize a photo
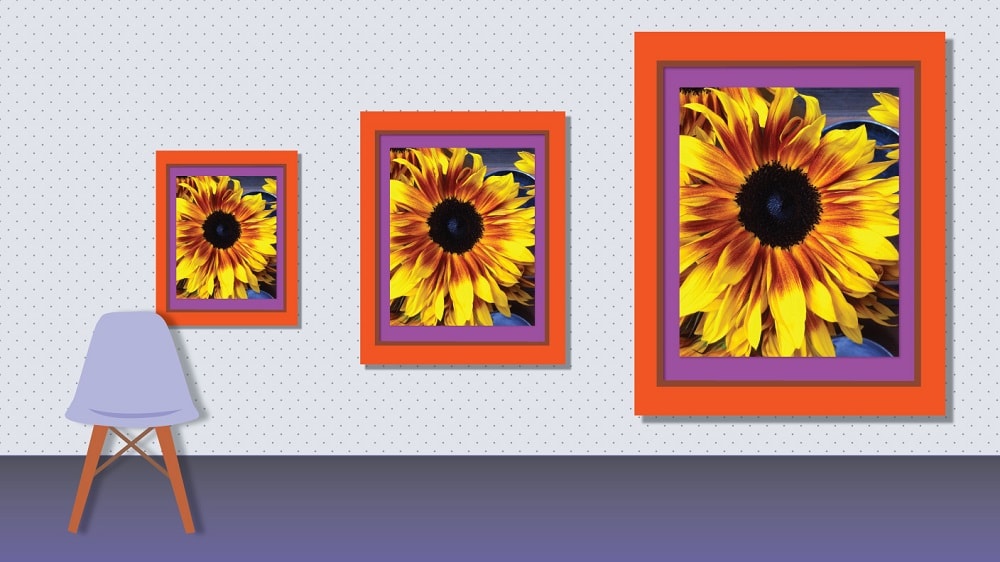
Why resize an image
With the advent of high-resolution cameras, we have to deal with a lot of data. For example, a standard good quality JPEG photo can weigh up to 5 MB and measure 4200 x 2800 pixels wide and high. This highly detailed image is ideal for print applications or when fine detail needs to be shown on screen.
But for normal use on the pages of various Internet resources, as a rule, photos of the highest quality are not required. What's more, 's smaller files have the significant benefits of 's: faster network transfer, easier opening, viewing, and storage. To do this, you should have a handy image processing tool at hand that will help you prepare files for publication in a matter of minutes.
The three most common situations where we need to resize a photo.
When posted on a website
Standard monitor resolution, like image size, is defined in pixels. At the same time, the most popular sizes, such as 1024 x 768, 1152 x 864, 1280 x 960, can be 2 or more times smaller than the width of a high-quality photo. If the original photo is uploaded to the site without resizing, the browser itself will compress it to the desired width and height, which can significantly slow down its work .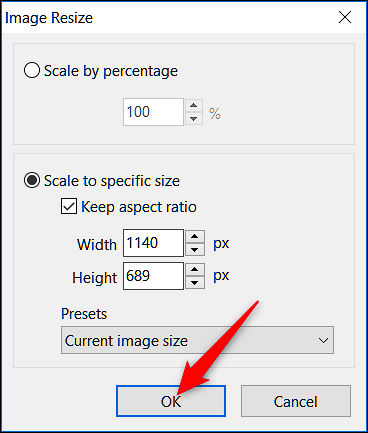
Heavy files, not pretreated, takes extremely long to open . They are more difficult to download from the site to the user's computer. All this can scare away a significant part of web page visitors. In addition, the image quality after compression by the browser will be significantly inferior to the quality of the photo after processing in a special editor.
It is also worth considering that pages that are large in weight are indexed worse in search engines due to their workload. And incorrectly chosen proportions lead to the fact that when visiting the site from a mobile phone, all the pictures go astray.
Thus, in order to achieve the optimal ratio of photo quality without reducing the download speed, it is necessary to properly prepare the images before adding them to the site.
When posting on social networks
When creating visual content for social networks, it is very important to consider the recommended sizes for different types of images - posts, ads, profile headers or avatars. If the original image is smaller than the specified parameters, it will be stretched and become fuzzy. If more, it will be compressed programmatically, due to which it will lose quality either will be truncated at the wrong place .
The most important parameters of the main social networks.
Image for external links: 500 × 261 px. Picture for the post: 1200 × 630 px. Page cover: 820 × 312 px. Profile photo: 170 × 170 px.
Post image: 1080 × 1080 px. Picture for Instagram Stories: 1080 × 1920 px. Profile photo: at least 110 × 110 px.
Tweet image: 1024 × 512 px. Cover: 1500 × 500 px. Profile photo: 400 × 400 px.
YouTube
Image over video: 1280 × 720 px. Channel cover: 2560 × 1440 px. Profile photo: 800 × 800 px.
If you don't want to deal with all possible parameters, you can use one universal size 1024 x 512 px. In most cases, such an image will be displayed correctly.
When sent as an email attachment
As you know, mail services have their limitations on the size of transferred files. For example, the maximum Gmail attachment size for incoming emails is 50MB. When it comes to downloading a file and sending an email, the upper limit is 25 MB. The larger the image size, the more difficult it is to send it by mail, especially if there are several such files.
Therefore reducing the size of the picture may be one of the solutions to problem . If you need to batch send, you can first adapt the width and height of the images while maintaining image quality, and then additionally send all files to a compressed folder (.zip).
Resize photo
Main advantages of our online application
If you think that working in an online application requires special skills and knowledge, then you are wrong. We have developed the program in such a way that the entire interface is as simple and clear as possible.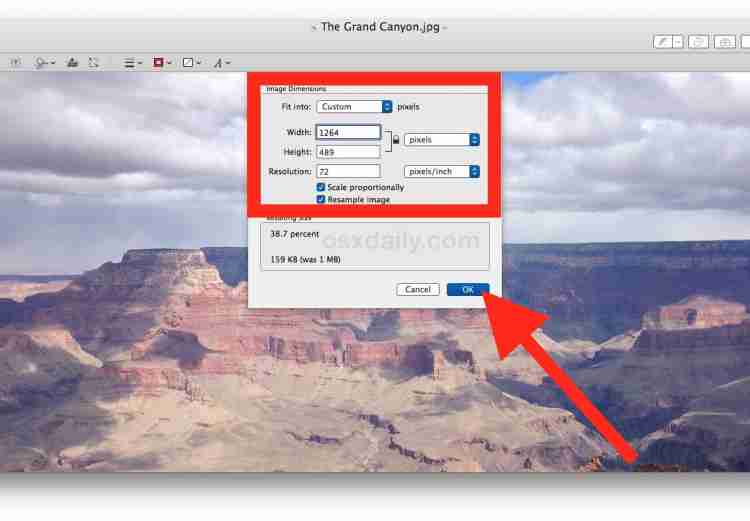
Our free application allows you to reduce the size of pictures in just three clicks.
Here's why you should use the app from Visual Watermark:
-
Simplicity and convenience . You don't need to be a professional image editor to master the program. The interface is not overloaded with functionality. Only the essentials for you. Complete lack of advertising. Nothing will distract you from photo processing. If you have any questions, please read the detailed instructions for use above.
-
Can be used on any device. Our application works directly in the browser. You don't need to download or install anything. Visual Watermark Resizer works on any operating system and any device - Windows, Mac, Linux, iOS and Android. Just go to the application page and start working.
-
100% secure . All your pictures are processed only in the browser. They do not come to our server.
 We do not have access to your files. Your images are securely protected.
 -
Free access . On our site you can resize images online and for free. But there is a small limitation. You can process up to 10 photos per day. If you do not need to batch process a large number of images, then our free service is ideal for you.
Resize Photo
Frequently Asked Questions
Below are answers to the most frequently asked questions.
1. How to resize a photo without losing quality?
Resizing a photo without any loss of quality is almost impossible. Of greater importance is whether this loss is noticeable after image processing. Modern applications allow you to reduce the size without degradation. Thus, the resulting image will look just as great as the original.
Another thing is when you want to increase the size of a small low resolution file. In this case, the image will definitely turn out blurry and unsharp.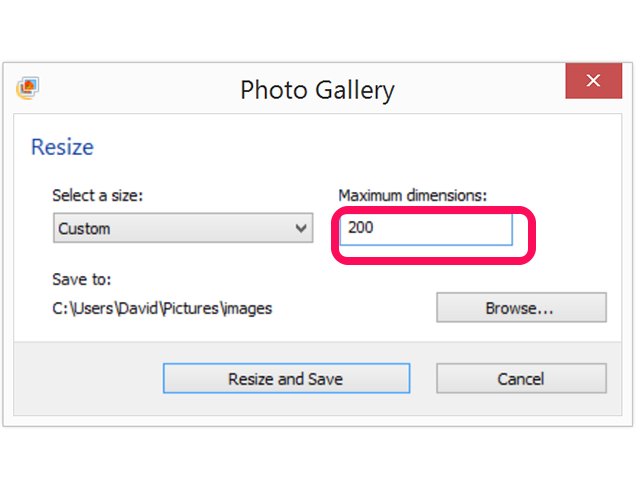 You can experiment with different photo sizes in our free online application and choose the one that suits you best. Visual Watermark never changes the original files. You only receive modified copies.
2. How can I reduce the photo size?
First, upload your images to our Visual Watermark Resizer application. Next, set how exactly you want to resize. You can specify exact dimensions in pixels for width or height, or both.
In addition, it is possible to reduce the photo as a percentage if you do not have the specific size of the desired image in front of you.
3. How to resize photos online and for free?
This is easy to do in our online application. Go to the top of the page, upload the images, enter the required parameters and click "Resize Images". Processed copies of original photos will be ready in seconds.
The Visual Watermark Resizer online tool is free and available to everyone. It does not require registration and entering personal data. You also don't need to install anything. Just go to the application page and get started.
4. How to resize an image correctly?
The most important thing to keep in mind is the aspect ratio of your image. For example, if you have a landscape photo with a 3:2 aspect ratio and 6000x4000 pixel dimensions, then your resized copy cannot be 5000x3500px because that's a different ratio of width to height.
If you enter incorrect parameters, in which, for example, the height is greater than the width for a landscape photo, our application will place a new photo in front of its enlarged blurred version. To avoid this, make sure you didn't change the aspect ratio when you entered the settings.
If you need to correct the proportions of the original photo first, use our online photo cropping tool.
5. How can I resize an image to reduce the file size?
You need to understand that with any change in the size of the photo to a smaller side, the weight (ie file size) automatically decreases. For example, if the original image was 6000 x 4000px, and after processing in our application - 4000 x 2000px, then the file size has also decreased.
If you still don't like the size of the file, you can simply compress it. To do this, use our Compress Photo tool, which will solve the problem while maintaining high image quality.
Resize photo
Resize images, photos, pictures online for free with high quality
Resize images, photos, pictures online for free with high qualityResize images using a modern browser such as Chrome, Opera and Firefox.
Powered by aspose.com and aspose.cloud
Drop or select your files*
Enter URL
Dropbox
* By uploading files or using our service, you agree to our Terms of Service and Privacy PolicyPercentage
Dimensions
Size, %
Width
Height
Maintain aspect ratio
Background color
Scaling type
High quality scaling algorithm
Save as
Share on Facebook
to share on Twitter
Share in LinkedIn
Cloud API
9000 GITHUBSupply
GITSED COMPORT + D to favorite this page or Esc to cancel
Aspose.
 Imaging Resize
 Aspose.Imaging Resizing allows you to easily resize images on the web.
Resizing is a free application based on Aspose.Imaging , a professional .NET/Java API offering advanced in-place imaging features and ready for client and server side use.
Need a cloud solution? Aspose.Imaging Cloud provides an SDK for popular programming languages such as C#, Python, PHP, Java, Android, Node.js, Ruby, which are based on the Cloud REST API and are constantly evolving.
Aspose.Imaging Resizing
- Resize one or more images using high-quality interpolation
- Allows you to use various resampling algorithms
- Supported source image formats: JPG, JP2, J2K, BMP, DIB, TIFF, GIF, PNG, APNG, TGA, EMF, EMZ, WMF, WMZ, WEBP, SVG, SVGZ, DICOM, DJVU, DNG, ODG, OTG, EPS, CDR, CMX.
- Save as: PDF, PSD, JPG, JP2, J2K, GIF, PNG, APNG, BMP, TIFF, TGA, WEBP, DICOM, HTML5 Canvas, SVG, SVGZ, EMF, EMZ, WMF, WMZ.

- Allows you to use various resampling algorithms
How to resize an image with Aspose.Imaging Resizing
- Click inside the file drop area to upload a file, or drag a file there.
- You can upload a maximum of 10 files per operation
- Enter the desired size for your image
- If necessary, change the type of scaling and format of the resulting image.
- The link for downloading the processed images will be available immediately after the operation is completed.
- You can also send a link to the finished file to your email address
- Please note that the file will be deleted from our servers after 24 hours and the download links will stop working after this period of time.
FAQ
-
❓ How do I change the size of an image?
First, you need to add a file to resize: drag the file or click inside the panel to select the file. Then click the "Resize" button. After the processing process is completed, you can download the finished file.
-
❓ How can I change the size of a multi-page image?
It's simple - follow the same steps as for resizing a single page image.
-
🛡️ Is it safe to resize images with Aspose.Imaging Free Resize App?
Yes, the link to download the results files will be available immediately after the operation is completed.
 We delete downloaded files after 24 hours and download links will stop working after this period of time. Nobody has access to your files. Resizing an image is absolutely safe.
 When a user uploads their files from third party services, they are treated in the same way.
The only exception to the above policies is when a user chooses to share their files via the forum by requesting free support, in which case only our developers have access to them to analyze and resolve the issue.
-
💻 Can I resize images on Linux, Mac OS or Android?
Yes, you can use the free Aspose.Imaging "Resize" application on any operating system with a web browser. Our service works online and does not require software installation.
-
🌐 What browser should I use to resize?
To resize, you can use any modern browser, such as Google Chrome, Firefox, Opera, Safari.
-
❓ Can I use the resulting image for commercial purposes?
Although our applications are free, you are not limited in the commercial use of the received images, while avoiding infringement of the rights of third parties in the original images.
Learn more