How to change color in photos
How to Replace Colors in an Image | Color Changer Tool
Your browser does not support the video tag.
If you've got the right photo with the wrong colors, our color replacing super powers are here to save the day. You don't have to get complicated photo editing software like Photoshop to do it. You just need PicMonkey. We're gonna show you quick steps for how to replace colors in an image, then talk about the finer details and tips. Sign up free to try it out for yourself right now!
What's the difference between color adjusting and color replacing?
Traditional color adjustment tools allow you to modify the overall color of the image: they move all the colors together. These are great for correcting white balance or introducing tints and changes to saturation across the entire image for aesthetic effect. A color replacing tool (also called a color changer) allows you to change individual colors without impacting other colors in the image. So you can change the color of your lettuce and avocados without changing your tomatoes or peppers or cabbage.
Why you shouldn't use Photoshop for color replacing
Adobe's color replacing tutorial tells you there are three ways of changing colors in Photoshop. And they work. But if you don't have time to dive in and figure out which tool is the right one; or you don't like sorting through multiple pull-down menus that have 17 to 20 choices each; and more importantly, if you're confused by phrases like "changing out-of-gamut colors for printing" and "Bitmap, Indexed, or Multichannel color mode," you'll be stopped right out of the starting gate. PicMonkey's made for people who do other things in addition to making stunning images all day long (entrepreneurs, social marketers, side-giggers, creative passion-istas, we're looking at you). So everything's quicker and easier, and you still get jaw. dropping. results.
How to replace colors using PicMonkey
Your browser does not support the video tag.
Quickly change the color of an image in PicMonkey with these steps:
Click Create new and open a photo of your own or pick one from our stock photo library.
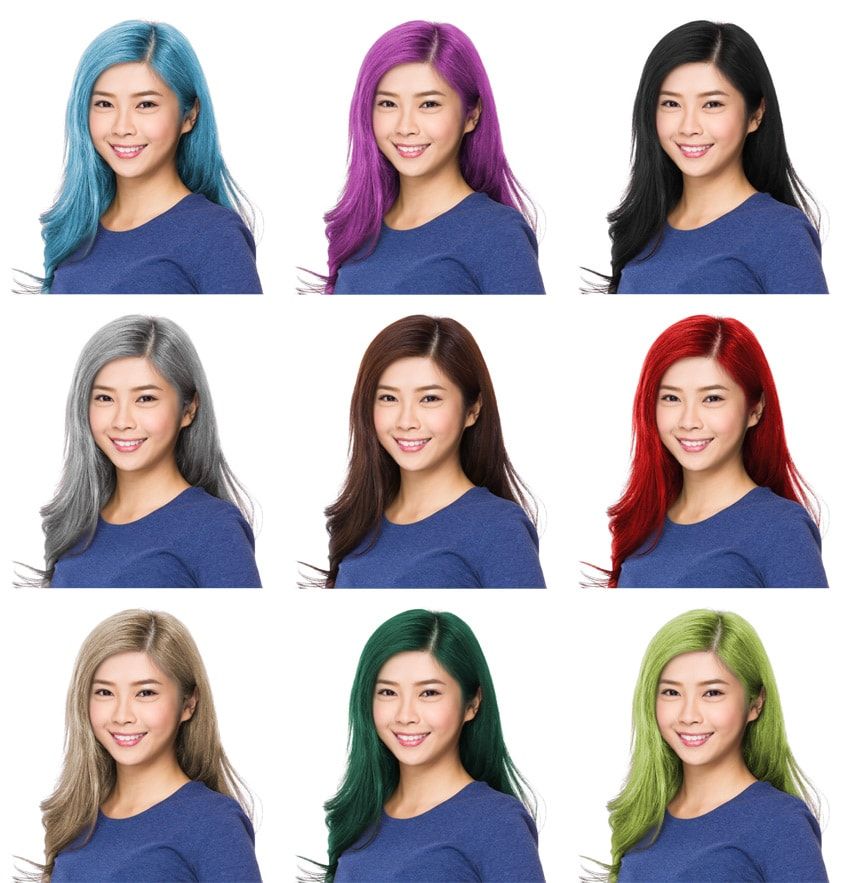
In the Effects tab, click Color Changer. Select the color dot for the hue you want to change.
Move the Hue slider and watch the color change. Fiddle with Saturation and Luminance sliders to customize even more.
Click Apply when you're done.
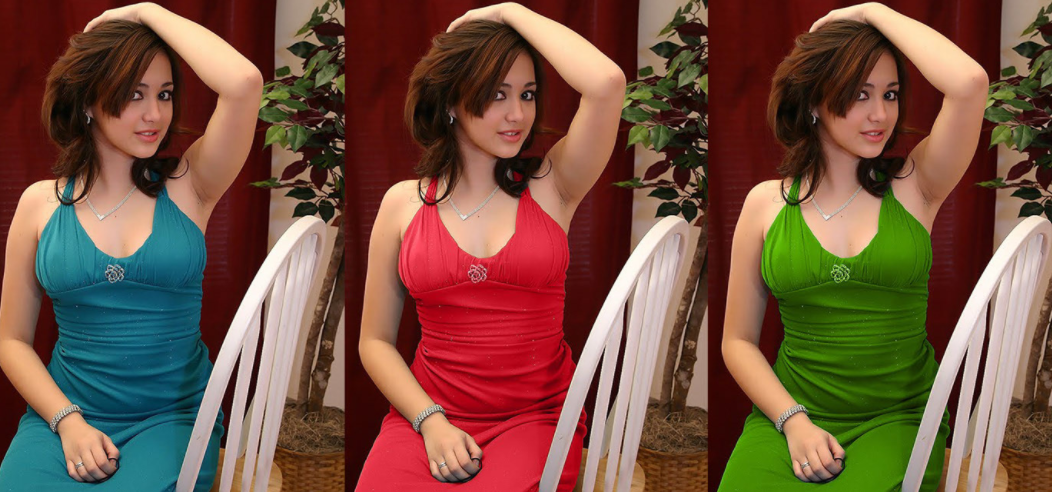
Now let's get a little more into the nitty gritties. We're going to start with a photo of a woman in a stylin orange shirt and change it to...well, you'll see.
Select the layer you want to make changes to
Click Create new, then choose wherever your photo is stored, or grab one from our massive stock photo library or pick a design template. Most often your photo is going to be one layer, unless you're working with multi-layered design, either from a template or your own fine handiwork. In those cases, you have to tell PicMonkey which layer you want to change, by selecting it in the Layers panel (click the stacked squares icon on the far right side of the bottom toolbar).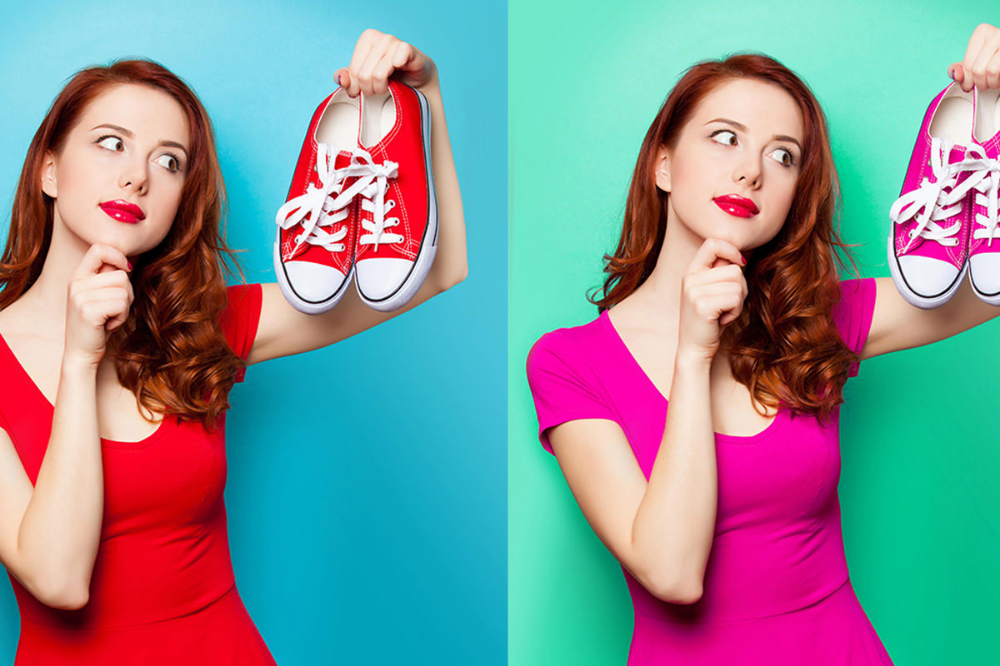
Psst...need to remove an image background? See: Automatic Background Remover, Plus Design Inspo!
Open Color Changer
Find Color Changer in Effects, and also in Edits, among the tabs in the blue column on the far left. Click it. The controls will open in the left panel. Click the color dot that's closest to the color you want to change.
Adjust Hue, then Saturation and Luminance
Now comes the fun part. Adjust the Hue slider and watch the colors change. Note that, while your mouse is hovered over the circle handle on the slider, the exact number of your adjustment appears. This is handy if you want to remember your adjustments — in combination with the numbers of adjustments on the other sliders, it creates a recipe for a look you can replicate on other photos.
Move the Saturation and Luminance sliders to adjust the amount of color and brightness, respectively, for the color you've selected.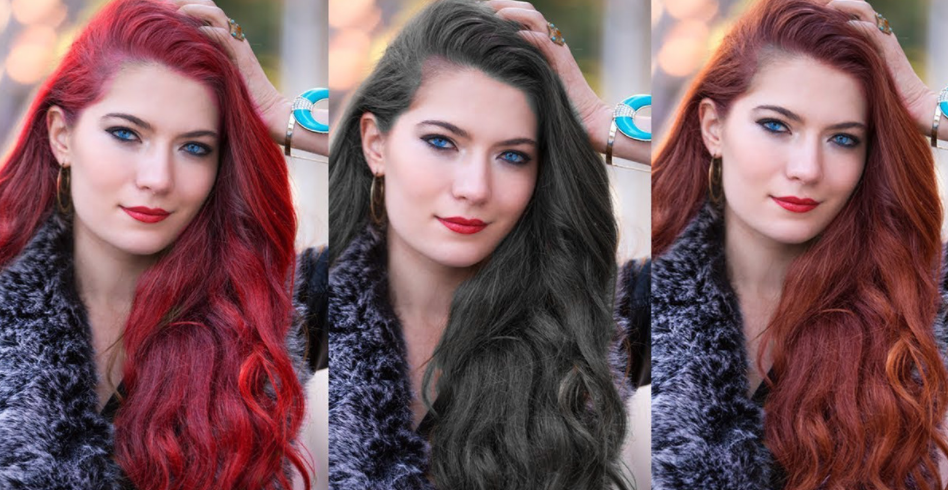
To change other colors in your photo, just pick another color dot and move the Hue, Saturation, and Luminance sliders.
Click Apply when you're done.
Note: We are NOT trying to turn our subject into a smurf; however, because her shirt consists of multiple colors, we need to get creative. Which means...
Use the eraser to remove changes from a specific area
If you want to keep an area of the selected color from receiving hue changes, use the Brush/Erase tool. Click the paintbrush icon in the upper right corner of the controls in the panel. Click the eraser icon in the Erase & Brush palette that opens to the side. Now drag the eraser over parts you want to keep the original color. In our example, we've erased the color change from everything but our subject's shirt!
This is especially useful if trying to change colors in the subject of your photo, but it shares colors with your background.
More tips for getting the best look
Don't be shy about hitting Apply; the colors in the images aren't really updated until you apply the change.
 Apply when you've made an adjustment before going back in to do touch ups.
Color Changer indexes all the colors in your photo to the color dots in the panel, but sometimes they're not what you see with your naked eye. For example, if you want to change teal colors, don't click the green color dot — Color Changer files 'em under the blue color dot. Just methodically click through all the color dots if your first choice is wrong.
In some photos, folds and shadows are actually two different colors, so you may need to apply color changes separately to each.
If an area of color isn't shifting with the rest, it may be because the tool considers it a different color. To fix this, try adjusting those adjacent colors as a separate step.
The cool thing about Color Changer? You can use it to achieve realistic or totally "out there" looks. Your choice!
More help: How to Use the Color Changer Effect
Change Color of Image Online
Want to change image colors instantly? Use Pixelied's handy picture color changer tool to change the color of images within seconds and share them online!
Or drag & drop your image here
How to change the color of an image in 4 steps
Use the image color editor tool to alter the colors of your image.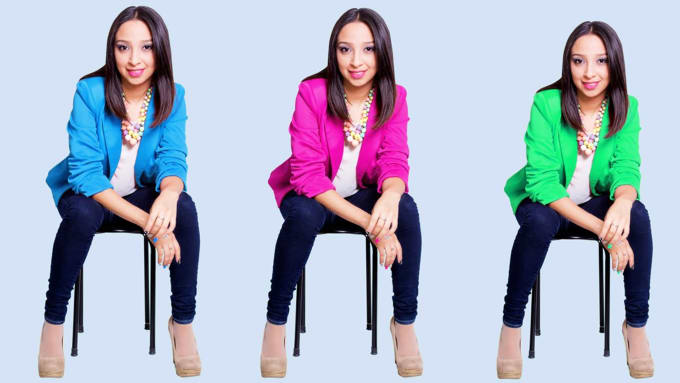 Then use the numerous other editing tools at your disposal to create eye-catching designs out of your recolored image. With Pixelied, you can change the color of images quickly to match your satisfaction and needs.
Step 1
Upload a photo or drag and drop it to the editor in JPG or PNG format.
Step 2
Click on Image Effects & Filters from the menu above your image.
Step 3
Choose a specific color using the Tint tool and adjust the slider to control the color intensity.
Step 4
Click on Download to save your image in multiple file formats when you’re done.
The free toolkit for easy, beautiful images
Pixelied is the perfect solution if you’re looking to change the color of images online for free. Whether you want to make your picture stand out or emphasize some of its details, Pixelied's best-in-class photo editing toolkit helps you replace the color in the image and improve its appearance within moments.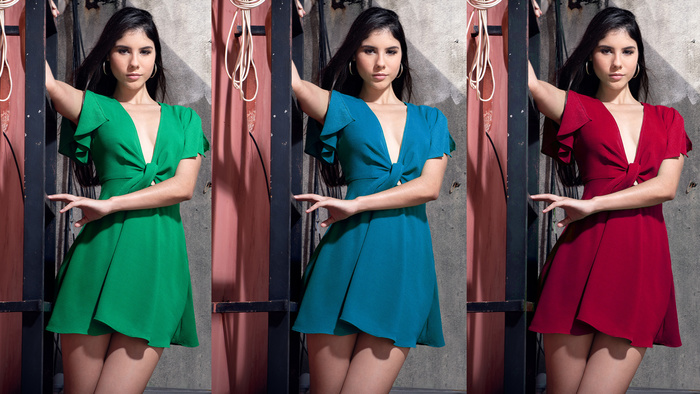
Replace Color in Image Online Instantly
Enhance your photo’s details by replacing similar shades with contrasting hues. Adjust the image’s colors to make it more attractive.
Pixelied’s picture color changer tool enables you to replace the color in images and make them more eye-catching. Tweak the colors and improve your image’s appeal in less than a minute.
Add Color to Black and White Pictures
Emphasize the details in your black and white photos by filling them up with vibrant colors. Create designs that stop your digital audience from scrolling over.
Use colors for breathing life into B&W snaps by recoloring the entire image or selective elements to make them pop. Unleash the true potential of bland grayscale photos with Pixelied's image recolor tool!
More Image Effects at your Fingertips
Create unique visual content with Pixelied’s online photo editor.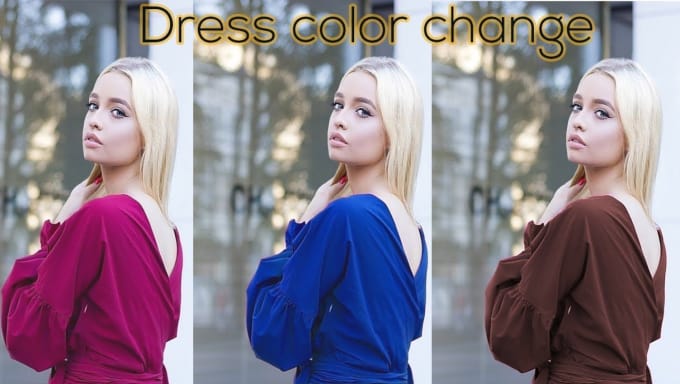 Change the color of images and add special effects and filters to improve your designs.
Add captions to photos, frame them in customizable borders, increase their visual depth with intelligently placed shadows, and more. With Pixelied, your creative options are endless!
Export Image in Multiple High-Res Formats
Produce unique designs that are ready to print or publish online. Modify the image’s size and quality to perfectly match your social media dimensions.
Pixelied enables you to download your creatives as high-resolution images for free. Just click the Download button when you're finished and save your creation in multiple file formats like JPG, PNG, PDF, and SVG.
Change Color of Image with More Customizations
Crop
Omit unnecessary bits from your designs to improve image composition using the crop tool.
Border
Highlight your pictures with sharp, colorful borders of adjustable width to increase their gravity.
Drop Shadow
Use the property of visual depth created by shadows to make your design look three-dimensional.
Flip
Flip elements and mirror text on your designs to leave the viewers wondering in awe with the flip tool.
Rotate
Spin the subject or fix the orientation of elements with the rotate tool to give your design a new perspective.
Opacity
Adjust the opacity to make important objects appear more precise and fade away others.
More Than Just an Image Color Changer Tool
Pixelied is more than an image color changer tool. The all-in-one online image editor enables non-designers and digital professionals to produce unique creations from scratch or use intuitive templates for free.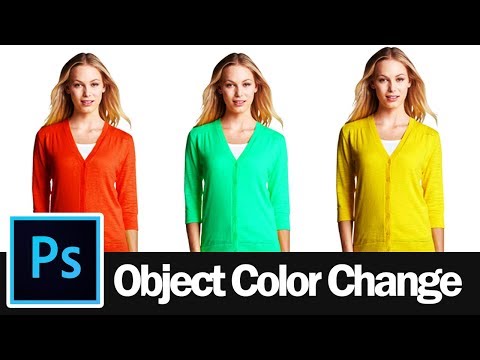 Sift through thousands of stock photos available in our library and use the other editing tools at your disposal to make jaw-dropping visuals and share them across the web!
Other tools:
What Our Users Are Saying
Pixelied is worth its weight in gold. When you find a rare resource like this one, you’ll quickly be asking yourself, ‘How did I live without it?’ Avoiding Pixelied means avoiding time-saving and efficiency. And all without sacrificing design quality? Count me in!
Kyle Courtright
Founder, Logo Wave
I never thought creating my very own logos and designs would be so easy. The fact that I can create such stunning pieces of designs on my own is something I am absolutely loving with Pixelied.
Ella Lucero
Founder, Quaries
I’ve had a chance to use Pixelied templates for my company’s Linkedin and Facebook posts.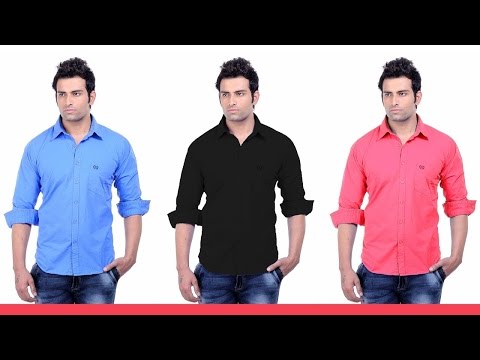 I have to honestly say that I have been impressed – and I am not one to easily impress! The advanced editing features and customizations are time-savers, and best of all, it’s really easy-to use.
Dave Sutton
CEO, TopRight Transformational Marketing
Pixelied is worth its weight in gold. When you find a rare resource like this one, you’ll quickly be asking yourself, ‘How did I live without it?’ Avoiding Pixelied means avoiding time-saving and efficiency. And all without sacrificing design quality? Count me in!
Kyle Courtright
Founder, Logo Wave
Frequently Asked Questions
How to change the color of an image?
To change image color, upload your photo or drag n drop it to the editor. Next, click on the ‘Image Effects & Filters’ button located at the top toolbar of the editor. Scroll down and select the tint tool. Adjust the color of the image and its intensity using the slider. Once done, download your picture in multiple file formats.
What app can change the color of your picture?
Pixelied is an online app that replaces the color in your image with the color of your choice. Upload an image, pick a color to replace, and download your new photo.
What is the best picture color changer tool online?
Pixelied is the best online app to replace the color in an image without Photoshop or specialized software. This application can improve your photo composition and change the color of your image.
Is the image color editor easy to use?
Pixelied is an online photo editing tool that’s easy to use and requires no technical skills of complicated software like Photoshop or Gimp.
Can I add text, photos, icons, and elements to my image?
Yes, you can fully customize an image by adding text, icons, photos, elements, illustrations, mockups, and much more.
Can the images downloaded be used for commercial purposes?
Yes, the downloaded images can be used for personal and commercial purposes without attribution.
Change the color of an object
ADVANCED · 6 MIN
Change the color of the product photo.
You will need
Get files
Training files (ZIP, 10.6 MB)
The practice files contain Adobe Stock resources that you can use to practice what you learned in this lesson. If you would like to use the practice files for other purposes, you can purchase licenses from the Adobe Stock website. The folder contains the ReadMe file. Check it out for the terms of use of the training files.
You will learn special techniques to apply different colors to objects, create realistic color combinations and bring images to life
To change the color of an object and create a professional-quality photograph, you need to adjust three basic color parameters: hue (color), saturation (intensity) color) and brightness (the amount of light and dark).
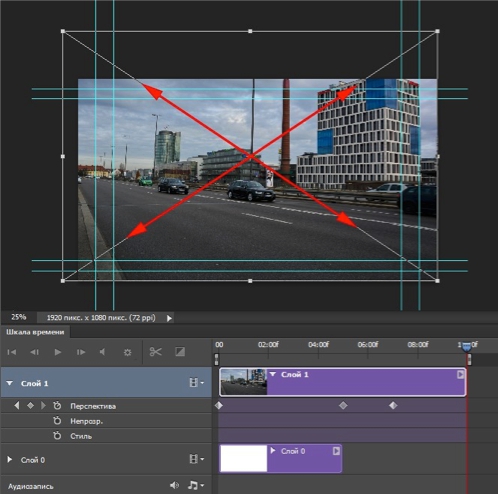
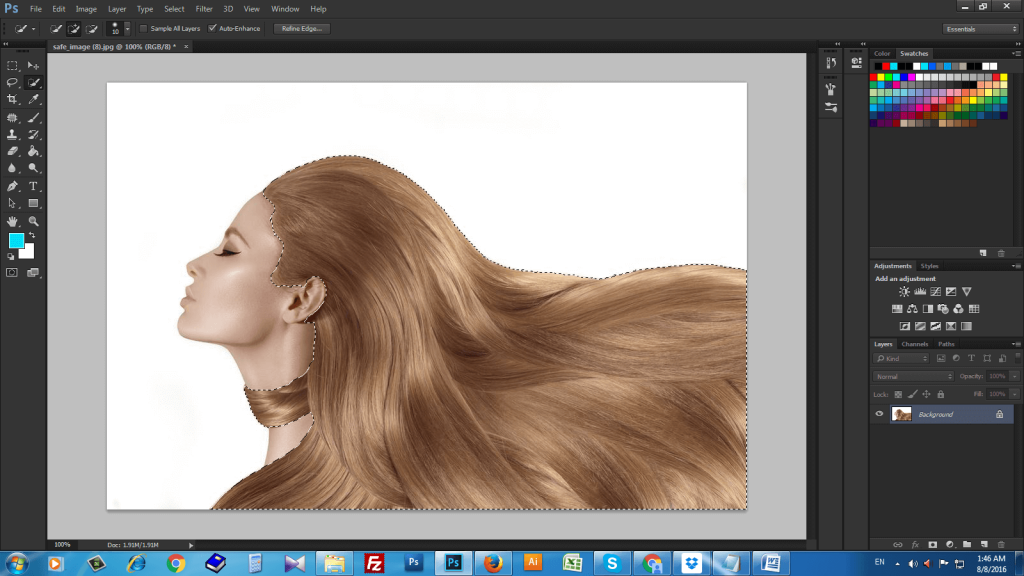
Object selection
- Select Object Selection from the toolbar and drag a rectangle over the entire object. A selection area will be created, the edges of which will automatically adjust to the size of the object.
Create a layer group and apply a mask to it
- In the Layers panel, click the Create New Group button to create a layer group.

- While the selection is still active, click the Add Layer Mask button in the Layers panel to create a mask that matches the shape of the object's selection. Adding a mask to the group will allow you to use the same mask for multiple layers in later steps.
Applying a new color and adjusting hue and saturation
- Click the Create New Adjustment or Fill Layer button in the Layers panel and choose Solid Color. This action will add a color fill layer to the layer group. The mask on the layer group will limit the application of the pure color. It will only be applied to the object.
- Select the new color you want to apply to the object and click OK. The object will now be filled with this solid color.
- While the selection is still active, open the Blend Modes menu in the Layers panel and choose a color blend mode. The color blend mode uses the hue and saturation of the new color while maintaining the brightness of the object's original color.
Adjust the brightness of the new color
- Click the Create New Adjustment Layer button in the Layers panel and choose Levels. This will add a new "Levels Adjustment" layer.
- Drag the Levels Adjustment layer above the color fill layer in the layer group.
- Use the Input Values sliders in the Properties panel to lighten the object. For example, you can drag the white slider to the left to lighten the subject, or drag the gray slider to the left to increase contrast. These settings will affect the third color component, brightness, which will give the color-changed object texture and shading.
free methods on PC and phone
Want to know how your favorite dress would look in a different shade? Or run a fashion blog in a single color style and want to recolor the object in the frame so that the photo fits the style? We reveal several free ways, how to change the color of clothes in a photo without having professional retouching skills.
Changing the color of clothes in PC programs
The first and most convenient way is through computer programs. In this case, how quickly you achieve the desired result, depends on the complexity of the selected photo editor. Let's look at this using the example of two popular programs: PhotoMASTER and Photoshop.
PhotoMASTER
This editor in Russian is characterized by extremely simple operation, you can use it even without the relevant skills. PhotoMASTER includes AI features that recognize and eliminate imperfections in photographs, making processing much faster than in others editors. The program has a large collection of photo filters and effects, retouching and plastic tools, removing digital noise, sharpening, color correction and much more.
Download PhotoMASTER from the link below and test the program right now:
Download for free
For Windows 11, 10, 8, 7, XP
Step 1.
 Prepare everything you need
 Prepare a photo for processing, then install it on your computer PhotoMASTER. To do this, download the free distribution and run the double unpacking of the installer. After installation, launch the software and click "Open Photo".
Photo editor start windowStep 2: Change the color
In the Enhancements section, click the Color tab. Find the hue you want to change and use the slider to adjust its value. All changes can be tracked in the preview window.
Adjust the desired hue This method will only work if there are no other objects of the same color in the photo. In this case, the hue will change throughout the image. To change a single subject, after opening the picture, go to the "Retouch" section. Select the "Corrector" function and brush over the area of the image that you want to change. After that, in the "Color tone" item, select the desired value by moving the slider and tracking the changes.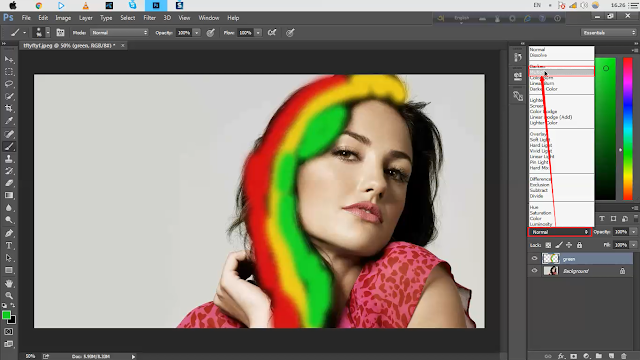 You can also adjust the "Temperature" and "Hue" settings to achieve the desired effect.
Step 3. Save the result
Export the finished image using the "Save" button on the top panel of the program. Specify the folder for export, file name and format. You can also compress the file size without quality loss, to do this, open the "File" menu item - "Resize and Save".
As you can see, changing the color of clothes in PhotoMASTER is easy. Download the distribution kit using the button below and start experimenting with color in the photo right now.
Smart photo editor for beginners and pros
Download
For Windows 11, 10, 8, 7, XP
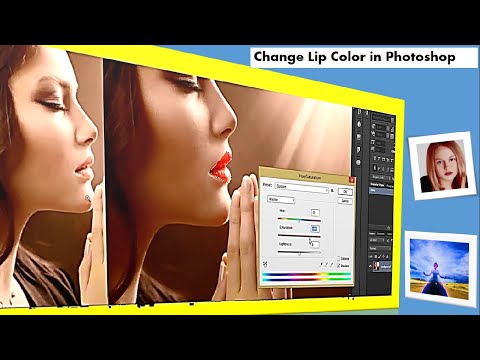
Adobe Photoshop
Adobe Photoshop is aimed primarily at professional photographers and retouchers, so you can quickly change the color of a dress on photo, as in the previous version, will not work.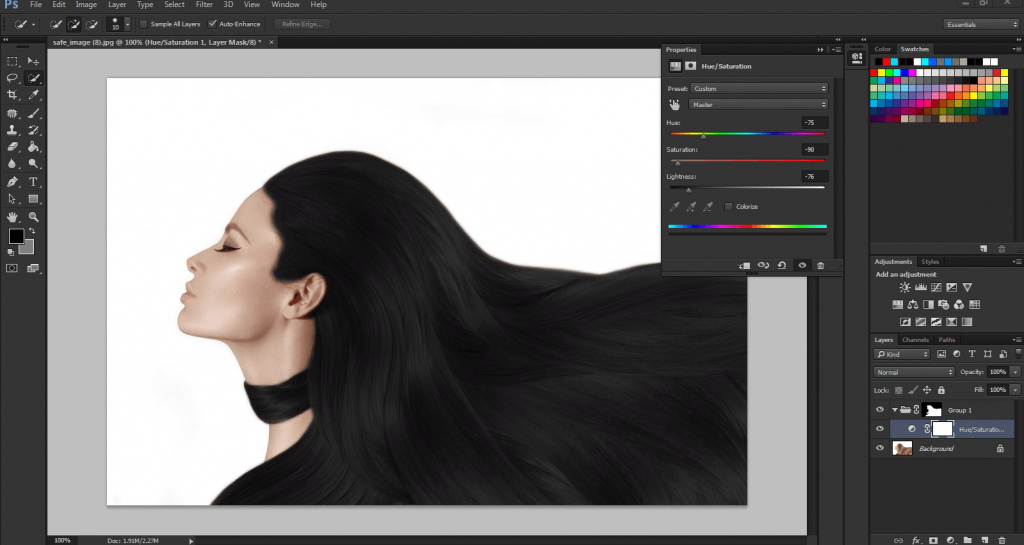 You will have to spend some time mastering the functionality of Photoshop. Here's the easiest way:
- Launch Photoshop and add a file to process.
- Expand the "Image" item in the top menu and select "Correction", then "Replace Color".
- Use the eyedropper to click on the shade you want to change.
- In the "Scatter" item, adjust the parameter so that the area that you want to recolor is displayed on the negative.
- Change the hue by adjusting the Hue setting.
- Photoshop captures all color channels, so the color can change even where there seems to be no desired hue. Remove this with a minus pipette.
- If some area is not painted over, click on it with the eyedropper with a plus sign.
See also:
- The best graphic editors
- Free photo editors for Android
Changing the color of an object in a photo in applications
Mobile photo editors will help you change the color of a photo on your phone.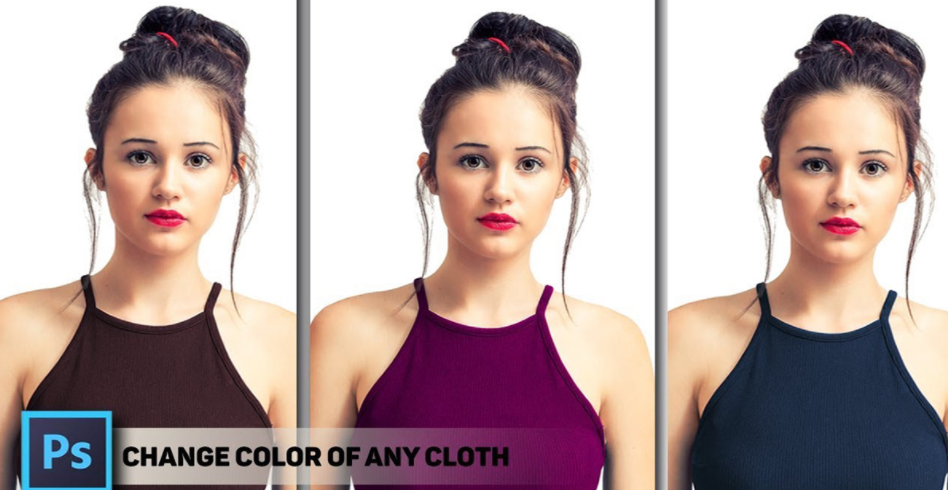 They are not as easy to manage as computer software, but are useful for quick processing.
PicsArt
PicsArt is a popular editor for Android and iPhone phones with dozens of filters and special effects. The program can be downloaded for free through the App Store or Google Play, but it should be noted that most of the features in it are paid.
- Launch the app and open the photo to edit.
- Click "Effects" in the bottom menu.
- Find "Color" and select "Replace".
- Move the selection circle to mark the replacement color.
- Adjust the settings and find the right shade.
Snapseed
This application is also suitable for all smartphone models. Snapseed includes many useful editing features. However, there is no direct color replacement function, so it will take some time to understand how to change the color of an object in a photo.