How to fix pixelated pictures
How To Fix Pixelated Photos & Pictures
Have you tried zooming in your digital photos to try and get a clearer image, only to have a grainy and blurry photograph as a result? This is called pixelation, and this is what happens when you stretch out your photos so much or try to resize it. It is caused by displaying bitmap graphics at a larger resolution than supported, thus causing individual pixels of an image to be visible. At lower resolutions, this might cause some blurring effects, but if you try to blow a small-enough photo up to a larger size, you’re going to end up with a digitized photo. This can be a bit frustrating, especially when you need a larger version of the photograph.
Luckily, that’s not the end of it. In this article, we’ll take a look at how you can fix pixelated photos so that you don’t end up with a distorted or otherwise low-quality picture. We all love to have perfect photos to share with our friends and followers in social media; and for those who are not into that, keeping lovely and great quality photographs in personal photo albums is a delight.
Why Do My Pictures Look Pixelated?
Before we move onto our guide, let’s take a look at an example to get a better idea of what we’re going to be dealing with.
This lowercase letter A is presented at a size of 256×256. Notice how crisp the lines are – your eyes won’t see any pixels, just curves and straight lines. It doesn’t appear to be blurry or jagged in any way.
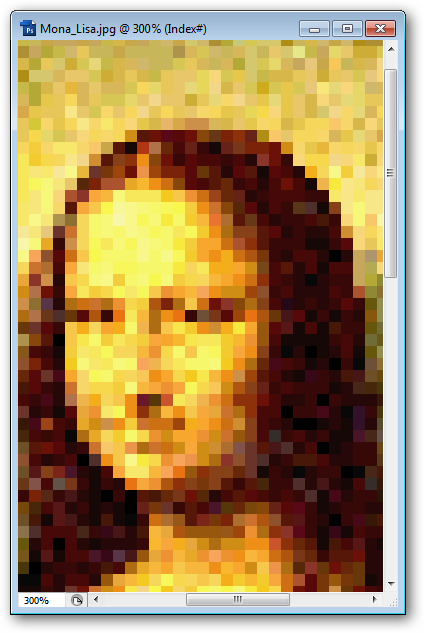
Now here’s the same image file, resized to be 1024×1024. Take a look at the difference.
Notice how on every curve you can see rectangular blocks? That’s pixelation. It happens when there is too much display area, and not enough data to create smooth curves. When this happens, images become blurry, distorted, and just overall worse in quality.
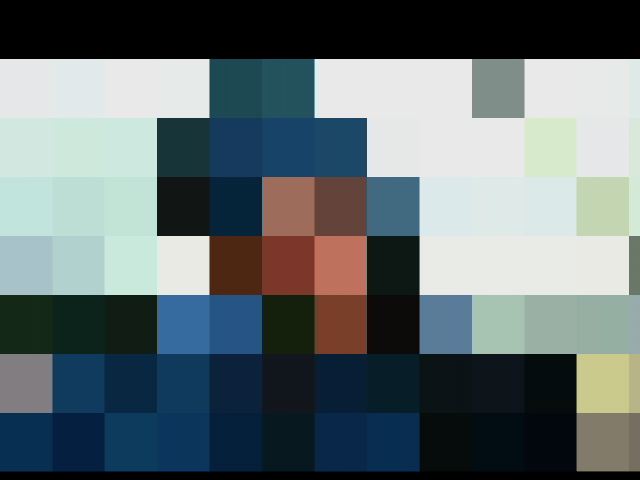
Pixelation usually occurs when you try to resize a low-quality image or when viewing a very low-quality image. When you upsize an image too much, it becomes blocky in appearance, with stair-like nature of each curve. This destroys the overall effect of the image you are viewing.![]()
Short of creating a new image of the same object in a higher resolution, there is no way to increase the resolution of an image. However, it is possible to use software tools to improve the image quality so that the pixelated image doesn’t look so bad.
There are a couple of different ways to accomplish this task. You can use an online service to process the image, or you can use Photoshop, Paint.net, or other graphics program to do the same job manually.
In this article, I’ll present a short tutorial on how to improve the appearance of a pixelated image regardless of what tools you have available.
Before we get started, an important note: whenever you edit an image, make sure to make a backup copy of the file and work only on the copy. Leave the original image file intact, so that if things go terribly wrong (remember that things often go terribly wrong), you still have the original image as a fallback.
Fix Pixelated Pictures With an Online Tool
Online tools have the advantage of allowing you to do significant work without having to download any software to your computer. This is great if you are on a work or school machine where you may not be allowed to install new programs, or you may be working on a phone or tablet. There are many online tools that can do image editing and manipulation. I know of two good ones for fixing pixelated pictures and will describe them here: Pixenate and Fotor. Both sites offer a range of free tools that you can use to manipulate images without having to download a specific program. They are ideal for occasional image editing, especially if you need to do it on a mobile device, and both do a pretty good job of fixing pixelated pictures. Both apps work in much the same way.
For example, in Fotor:
- Upload your image to the site.
- Select ‘Effect’ from the left menu and scroll to Pixellate.
- Use the scroll bar to scroll left to minimize pixelation.
That should smooth out pixelation nicely. Fotor also offers a Smoothing tool that can do more, but this is a premium tool. You will either end up with a watermarked image or have to pay.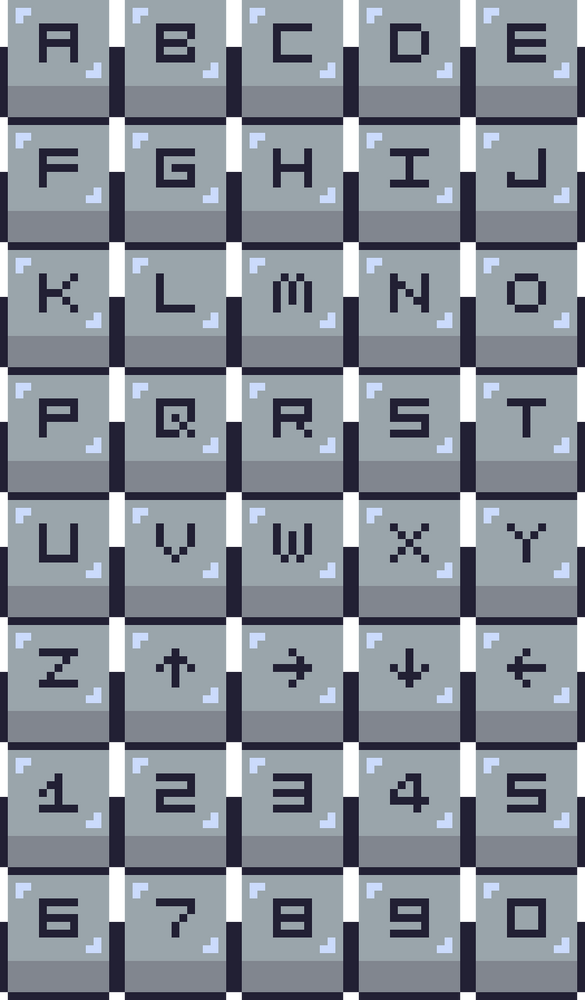 If you want to try out the tool, select Beauty from the left menu and Smoothing then use the sliders to minimize the pixels.
In Pixellate:
- Upload your image to the site.
- Select the ‘Smooth Photo’ icon from the left menu.
The impact this has on the image depends on the initial image quality but should improve it somewhat.
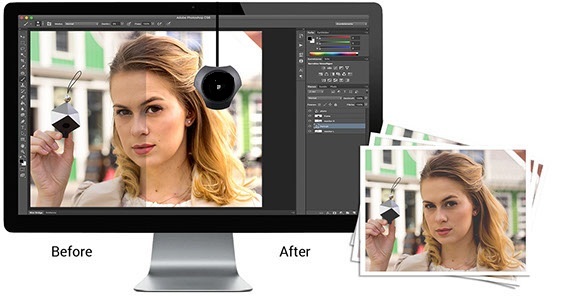
Fix Pixelated Pictures with Photoshop
If you have a little more time and a lot more money, you can do quite a bit to fix a pixelated image in Photoshop. Photoshop is the undisputed king of image editing programs but requires quite a lot of money to buy. However, this software can do so much to your photos that the cost will definitely be worth it. Despite a fairly steep learning curve with many Photoshop functions, it only takes a second to fix pixelated pictures.
- Open your image in Photoshop.
- Select ‘Filter’ and ‘Blur’.
- Select ‘Gaussian Blur’ and use the slider to find an acceptable level.
 Select ‘OK.’
 - Select ‘Filter’ and ‘Sharpen.’
- Select ‘Unsharp Mask’ and use the slider to find an acceptable level. Select ‘OK’ once done.
- Save the image.
Another approach is to add a layer with soft light to minimize the appearance of the pixels.
- Right-click the image and select ‘Layer’ and ‘Create New Layer.’
- Select ‘Blending Options’ in the top menu and select ‘Soft Light.’
- Select ‘Filters’ and ‘Noise.’
- Select ‘Despeckle’ and find a level you’re happy with.
- Select ‘Image,’ ‘Adjustments,’ and ‘Brightness/Contrast.’
- Adjust both to find an acceptable level.
The first process will do a bit to minimize pixelation and that may be enough. If it isn’t, try the second process as this can help a bit too.
Fix Pixelated Pictures with Paint.NET
If you don’t have Photoshop and can’t justify the expense, Paint.NET or GIMP are viable alternatives. I tend to use Paint.NET as I have used it for years. It isn’t anywhere near as powerful as Photoshop but is free, regularly updated and can perform many basic image editing tasks. Teaching you how to use GIMP is beyond the scope of this article, but Paint.NET is pretty straightforward.
- Open your image in Paint.NET.
- Select ‘Effects,’ ‘Blur,’ and ‘Gaussian Blur.’
- Use the slider to reduce the pixel effect.
- Select ‘Effects,’ ‘Photo,’ and ‘Sharpen.’
- Use the slider to find an acceptable level.
- Save the image.
There is no substitute for taking high-quality pictures but if you don’t have that luxury, there are a few ways to reduce pixels in images. The exact levels to which you make adjustments depends on the image itself. Where you see ‘find a level’ just use the sliders to find a position where pixelation is minimal but the overall impression of the image is maintained.
Fixing Pixelated Photos Through Mobile Apps
Most of us take photos through our smart phones, since it is more convenient and easy to do so.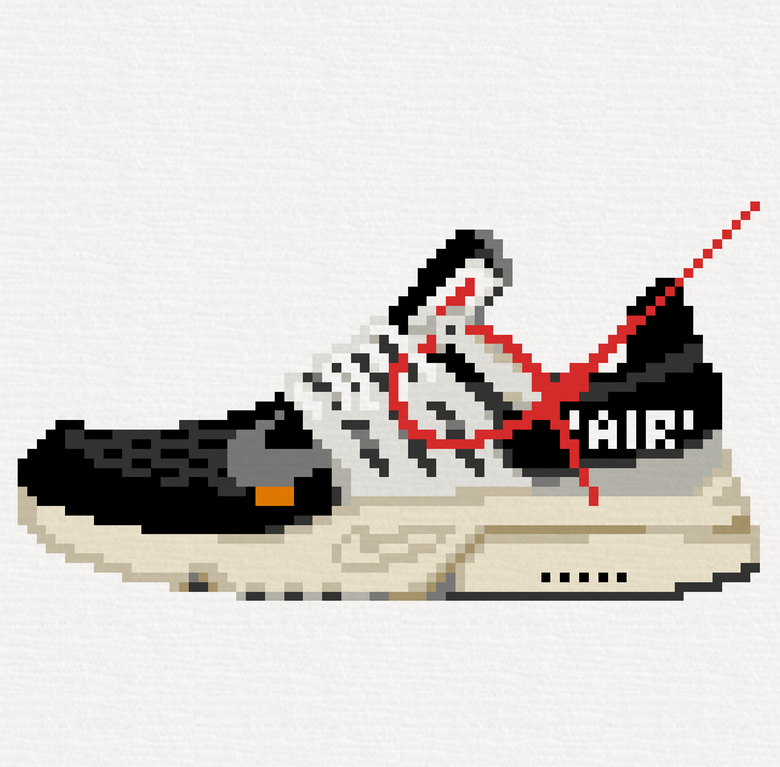 The newest models and versions of smart phones are equipped with excellent cameras that are able to take crisp and clear photos. There are odd moments, though, that we encounter the need to fix blurry and pixelated photographs in our phones. Thankfully, there are a number of photo editing apps that you can download from App Store or Google Play to solve this issue. Here, we have compiled a list of some of the most helpful apps to fix pixelated photos:
- Adobe Photoshop Express: Photo Editor Collage Maker – This app is free to download, and has amazing features, including the ability to make dark and grainy pictures look great.
- PIXLR – This mobile photo editing app is very user friendly, whether you are a newbie or a professional photographer. It has all the tools required for you to do amazing and creative edits; and it’s free to download!
- Sharpen Image – This app was specifically developed to sharpen images. It’s pretty basic, with two forms of sliders – one for adjusting pixel size and the other for sharpening effects.
- Afterlight – Afterlight lets you edit images in a quick and straightforward way. It allows you to fix blurry photos in a breeze with a variety of tools to help you enhance image quality.
Pixelation can be very annoying to deal with. It doesn’t take much for a great picture to be ruined by poor quality. Fortunately, there are tools and techniques you can use to improve the quality of a pixelated photo.
How to Fix Pixelated Image Online: 4 Easy Steps
To depixelate an image online for free, upload it to our website, letsenhance.io, and click ‘Start processing’. It’s that easy! But we also provide in-depth instructions on how to fix pixelated photos with our AI web app and Photoshop below.
What is pixelation and what causes it?
Images consist of tiny squares called pixels. When pixel density is high enough they fuse into a smooth and clear image. In this case, we don’t see individual squares.
But when the picture is stretched out above its optimal resolution, it becomes blocky with stair-like lines. That’s pixelation.
It usually occurs when websites blow out pictures uploaded by users to the required width and height.
Note: Some apps smooth out upscaled images, making them blurry instead of jagged. It depends on the upscaling type.
Blurred vs. pixelated imageThe best way to prevent pixelation is to get an original clear image with more megapixels. But if you don’t have one, you can sharpen your pixelated photo with our online app.
How to fix a pixelated image without Photoshop
The only way to effectively deal with pixelation is to use AI-based solutions.
Traditional image editors, like Photoshop, only smooth out the edges a little bit, making a picture look blurry. In turn, AI, trained on millions of images, can genuinely restore the details, putting the missing pixels in place.
We trained our network, Smart Enhance, specifically to fix compression noise and pixelation.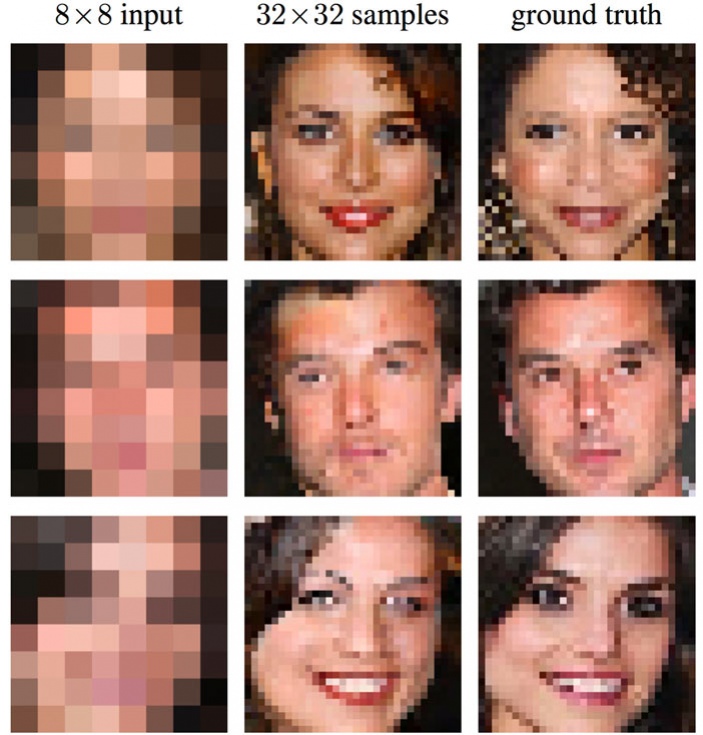 In this sense, Smart Enhance stands out even among AI image editing software.
How to depixelate an image online for free
Step 1: Sign in to Let’s Enhance
Sign in to your Let’s Enhance account or go to letsenhance.io/signup and create a new one. You can sign up with your Google, Facebook, or email.
Now, with a free account, you can process up to 10 images.
Step 2: Upload your pixelated pictures
Drag & drop photos you want to depixelate anywhere on the page or select them from your computer / phone. Alternatively, import files from Google Drive or URL.
You can see the output resolution and print size at 300 DPI to the right of the image thumbnail.
Tip: You can upload multiple photos and depixelate them all at once.
Step 3: Click ‘Start processing’
Our default mode, Smart Enhance, will fix your pixelated image without any settings. All you have to do is to click the Start processing button.
Additionally, you can fix the lighting and colors of your image by turning on the Light AI toggle.
Tone enhance mode increases contrast and brightness. Color enhance boosts saturation.
Tip: Adjust the intensity of applied filters by dragging the slider.
Step 4: Download your depixelated photos
Wait till the processing ends. Then click on the image thumbnail to save it to your device.
Now, you have a new beautiful depixaleted image that you can share with friends or use for anything you like.
Image depixelated with Let's EnhanceNote: Output quality depends on the degree of pixelation. It’s always better to have an original high-quality image. But if you don’t have one, our tool is your best bet when you want to unpixelate photos.
How to scale up a low res image and avoid pixelation
Sometimes you got a small picture that looks sharp at 100% scale. If you want to enlarge it you can use Let’s Enhance in the default mode. It will double its size without making it look pixelated.
For a 100 x 100 image, the output would be 200 x 200 pixels.
But you can make your image even bigger.
Select Photo upscale type and choose Custom size. Now, you can make your image up to 16 times larger.
Note: Free users can upscale an image up to 64 MP. This is enough to produce a pretty big 8000 x 8000 picture.
How to fix a pixelated image on iPhone
To depixelate a picture on your phone, upload it to our website, letsenhance.io, and tap the Start processing button in the pop-up.
You don’t have to change any settings. The default mode is perfectly capable of removing pixelation.
You can follow more detailed general instructions from this post. They’re true for both desktop and mobile versions of our website.
Make your pixelated product photos clear
Step up your eCommerce game by improving the quality of your product photos. Depixelate and enlarge your images to provide a more detailed view of the things you sell to your buyers.
Use batch processing to sharpen dozens of pics at once on our website.
Or take advantage of our API to set up an advanced image processing workflow tailored to your website. Set the custom AI upscaling, noise reduction, lighting, and color enhancement to automatically adjust user-generated content to your requirements.
Learn more about how you can use Let’s Enhance for your online marketplace.
High-quality photos make a big difference in the online real estate business. According to a study, rental listings with clear images generate extra $2,348 in annual revenue, on average.
Let’s Enhance automatically removes pixelization and blur from your images, making your listings more appealing to customers.
For the best results use our real estate preset that includes Light AI, depixelation, upscaling, and noise reduction.
To enable this preset, click Presets > Real Estate.
Depixelate zoomed-in and cropped images
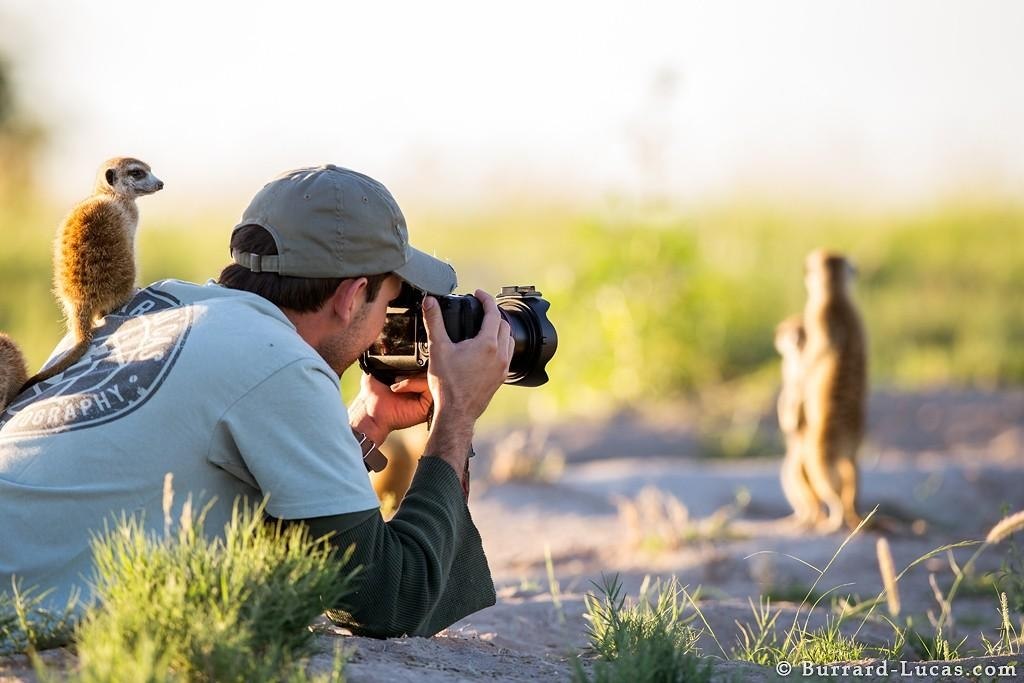
Pixelation often occurs when you make a crop of a small region in your photo. In genres like wildlife photography, it’s often the only way to get a close view of an object.
With Let’s Enhance, you can easily fix cropped pixelated images.
Think about it as a lossless optical zoom that you can apply anytime after taking a photo.
How to depixelate pictures in Photoshop
There’s 4 common ways to fix a minor pixelation in Photoshop:
A. Go to Filter > Noise > Despeckle.
Apply it a few times by pressing CTRL + F (Windows) or CMD + F (Mac)
B. Go to Filter > Blur > Smart Blur. Play around with Radius and Threshold sliders till you get the best result.
If you aren't happy with Smart blur results, you can experiment with a Gaussian blur filter.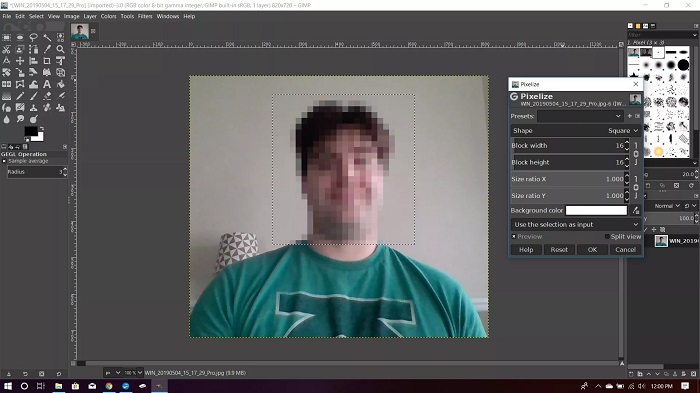 Sometimes it works better.
C. 1. Go to Image > Image Size.
2. Set the resolution to twice the original size.
3. Check the Resample box and apply a Bicubic Smoother enlargement.
Tip: You can combine all 3 methods to make the image smoother.
Keep in mind, Photoshop only slightly smooths your pixelated image. Check how it deals with heavy pixelation compared to Let’s Enhance.
In this case, we used Smart blur and Bicubic Smoother enlargement in Photoshop. Let’s Enhance was in the default mode (Smart Enhance).
FAQ
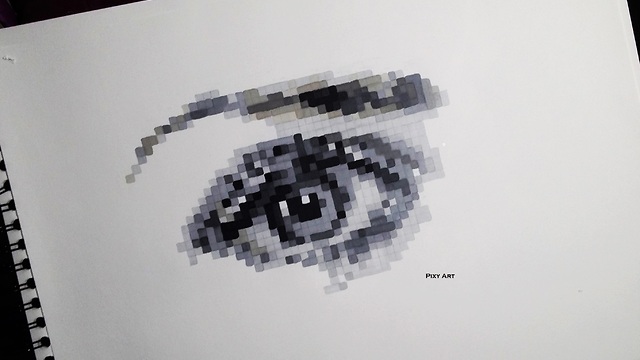
How do I know if an image is pixelated?Photos are composed of pixel grids. When the image is upscaled above its original resolution pixels become visible. Picture becomes blocky, curves get triangle edges. You could see shapes like that in the old 8-bit games or modern pixel art.
How to avoid pixelation?- When taking photos set your camera to maximum megapixels.

- When editing photos or uploading them to social media use source files with the highest resolution.
- If you need to enlarge an image don’t use old upsampling methods like ‘nearest neighbor’. Opt for AI-based upscaling instead.
- Use vector graphics for simple visuals like logos. You can scale vectors up and down without quality loss. But keep in mind, vectors don’t support precise color detailization. That’s why photos are only in raster format. I.e., they become pixelated when stretched out.
Not quite. You get blurry photos when your camera is out of focus or when the image is enlarged with certain upscaling algorithms.
Pixelation occurs when low res photos are enlarged with the basic upscaling method, i.e. ‘nearest neighbor’.
How can I make a blurry picture clear?The process is the same as for depixelation. Upload your pic to Let's Enhance website and click Start processing.![]() Our default AI upscaling network, Smart Enhance, automatically spots what’s wrong with your images — whether it’s blur, pixelation, or grain — and fixes them.
Our default AI upscaling network, Smart Enhance, automatically spots what’s wrong with your images — whether it’s blur, pixelation, or grain — and fixes them.
AI code is trained to reconstruct missing details on thousands of image pairs. In the beginning, it makes a lot of mistakes, just like humans. But just like humans, it improves with each new iteration. So when AI/ML-based app is delivered to users, it already restores missing pixels with high accuracy.
Depixelate 5 images with Let’s Enhance for free
We hope this guide was helpful and now you know how to fix your pixelated photos. So don’t hesitate to sign up and get your 10 free images to depixelate, upscale, or otherwise improve with our powerful AI technology.
Subscribe to LetsEnhance - Image enhancement powered by AI
Get the latest posts delivered right to your inbox
Great! Check your inbox and click the link to confirm your subscription.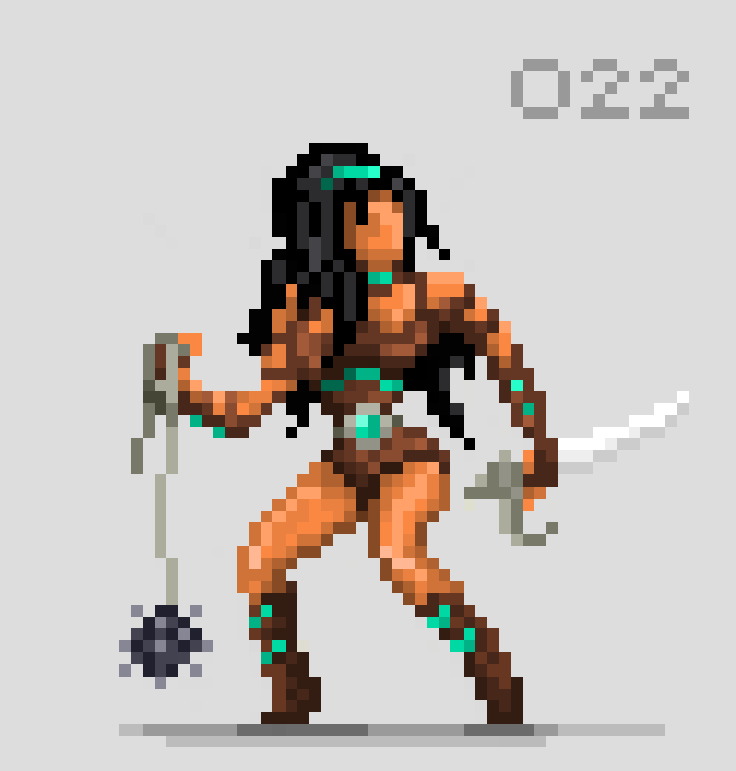
Please enter a valid email address!
Need to enhance images?
Automatically upscale and color correct your images for your needs with our AI
Try for free
[Tutorial] How to fix a pixelated image on Windows/Mac/iOS
Last updated October 12, 2022 by Peter Wood
Taking a great picture is never easy. When you get a pixelated image with the correct time and angle, is there a way to fix the pixelated image and save the file? Because digital images are made up of pixels, a pixelated image is the result of poor quality, improper compression, or over-enlargement. With a lack of available pixel information in an image, it is impossible to get a neat image from a pixelated one.
When you know the detailed causes of image pixelation, you can solve the related problem accordingly. This post will show you effective ways to fix pixel image on different gears. Just read the detailed description of the process to get rid of the problem right now.
- Part 1: 2 easy ways to fix pixelated images with AI
- Part 2: 2 ways to fix a pixelated image on the web
- Part 3: How to fix a pixelated image in Photoshop
- Part 4: How to fix a pixelated image using a smartphone
- Part 5: A little advice about pixelated images
Part 1: 2 easy ways to fix pixelated images with AI
Method 1: how to fix a pixelated image with AI retouching
If you just need to fix some image noise, sharpen, or remove JPEG artifacts, WidsMob AI Retoucher is an all-in-one AI photo editor for fixing pixelated images. It provides 3 different AI retouching modes to reduce image noise, restore low light files, and remove hazel. It also allows you to adjust the sharpness, color and brightness for an optimal image. In addition, you can also take advantage of the enhancement features and artificial intelligence algorithms for automatic image processing.![]()
1. Restore pixelated images from image noise, low light, and haze pixelation.
2. Manually adjust exposure, saturation, color enhancement, and noise reduction.
3. Improve portraits with skin smoothing, gloss removal, blemish removal, etc.
4. Balance clarity and noise reduction functions to correct pixelated images.
Win Download Mac Download
Step 1 : Download and install WidsMob AI Retoucher, you can run the program on your computer and press button Import Button for adding images to the program. When you need to fix multiple pixelated photos, you can simply drag and drop the photos you need directly into the program.
Step 2 : Select the desired image and click the Edit button on the top right corner to enter the editing window. Go to the Adjust menu and scroll down to find the Sharpness option.![]() Just move the slider to make the image less pixelated. Balance it with Luminance and Chroma .
Just move the slider to make the image less pixelated. Balance it with Luminance and Chroma .
Step 3 : If you need to automatically enhance photos, please select AI Retouch from the left menu to fix the pixelated image. There are 3 different modes for correcting pixelated images, Low Light Recovery , Noise Reduction and Haze Removal . It will enhance photos with just one click.
Step 4 : Just turn on the Before/After mode to preview the effect and get the best effect. As for portrait images, you can choose Cleanliness of the face the ability to improve the file. When you're done, you can simply click the Save as button to save a neat image to your computer.
Win Download Mac Download
Method 2: How to fix a pixelated image with AI Image Upscale
To make images less pixelated, you can simply upscale them with AI image upscaling, which is an image upscaling method with details .![]() WidsMob ImageConvert is the desired choice for upscaling the original image up to 4X while maintaining quality. It's more than an AI image enlarger, but it also lets you customize presets, resize photos, and even add watermarks.
WidsMob ImageConvert is the desired choice for upscaling the original image up to 4X while maintaining quality. It's more than an AI image enlarger, but it also lets you customize presets, resize photos, and even add watermarks.
Win Download Mac Download
Method 2: How to fix a pixelated image with AI Image Upscale
To make images less pixelated, you can simply upscale them with AI image upscaling, which is an image upscaling method with details. WidsMob ImageConvert is the desired choice for upscaling the original image up to 4X while maintaining quality. It's more than an AI image enlarger, but it also lets you customize presets, resize photos, and even add watermarks.
1. Increase image size and quality to make images less pixelated using AI.
2. Provide 3 different AI image scaling modes with file size up to 3000 pixels.
3. Resize photos, rotate/flip images, add images/text watermarks and more.
4. Customize the desired presets with a combination of actions and apply them with one click.
Win Download Mac Download
Step 1 : Open WidsMob ImageConvert on your computer after installation. Click on the Import button to add the desired photo you want to enhance. Unlike other online image upscalers, you can enhance photos up to 3000 pixels by 3000 pixels with original details.
Step 2 : Double-click the image and select AI image enhancement The button on the top right corner to make the image less pixelated. Select the desired scaling mode, such as 4X, to increase the original size by 4 times. Here you can check the details to see if it works.
Step 3 : After you have enhanced the image, you can click the Save as button to save the enlarged image.![]() Follow the same process to improve the image if it is still within 3000 pixels. In addition, you can also use other features or create a preset to touch up your photos.
Follow the same process to improve the image if it is still within 3000 pixels. In addition, you can also use other features or create a preset to touch up your photos.
Win Download Mac Download
Part 2: How to fix a pixelated image online
Is it possible to fix a pixelated image online? There are advanced online tools that can edit and process pixelated images. VectorMagic and Fotor provide advanced technology for image management with one click.
1. How to fix pixelated images with Fotor
Fotor provides a basic way to polish and fix a pixelated image. It just applies a simple effect to enhance photos. You can also use the Smoothing tool to do more, but this is a premium tool. Of course, you can just select the same function from the beauty menu.
Step 1: Go to Fotor in any browser and sign in to your account.![]() Then you can click the Open button to upload the pixel image you want to polish into the online photo editor.
Then you can click the Open button to upload the pixel image you want to polish into the online photo editor.
Step 2: Select Effects in the left menu and scroll to select Pixelation parameter setting option. It provides both a pixel add option and a pixel erase option.
Step 3: Select Erase pixelated option and use the scroll bar to scroll left to minimize pixelation with both options for Size and Pixel Size . After that you can click on Apply Button to confirm.
2. How to fix pixelated images with VectorMagic
VectorMagic is one of the few online photo editors that fix pixelated images. Just like the name of the program, it is a free online photo converter that is designed to convert pixel images to vector graphics and at the same time smooth out pixelated areas.
Step 1: Connect your computer to the Internet and access vectormagic.![]() com in a browser. Click on Select image to upload button to upload pixel image to this online photo editor.
com in a browser. Click on Select image to upload button to upload pixel image to this online photo editor.
Step 2: It will fix the pixel image with a vectorized image into a vector image such as SVG, EPS or others. It keeps track of every bit of information available in your image and cuts every edge pixel in exactly the right place.
Step 3: You can then further tune Detail level , color and even use Advanced settings to fix a pixelated image by turning the pixelated image into a vectorized one.
Part 3: How to fix a pixelated image in Photoshop
Photoshop is a professional photo editor for fixing pixelated images that can be too complicated for new users. This is true when processing high-quality images. But when it comes to fixing a pixelated image, Photoshop isn't as complicated as you might think. Photoshop has the advantage of supporting extensive image formats.![]()
Step 1: Launch Photoshop on your computer, go to File > Open to load the pixel image into your photo editor. Of course, you can simply duplicate the photo layer to avoid replacement.
Step 2: Expand View menu on the top ribbon and select Actual Pixels option to display the actual pixelation level of the image you want to polish.
Step 3: Full Filter > Noise and click on the Spot Removal option. This filter can smooth pixel edges and you can use it multiple times on your image with the keyboard shortcut Ctrl + F.
Step 4: Next, click the Smart Blur option in the Filter > Spot menu. When the settings dialog box appears, adjust the radius setting to about a pixel and a half and enter a threshold of 14 pixels.
Step 5: Look at the result in preview panel, if it works well, click on OK to confirm the changes. Finally, you can fix the pixelated image neat and save it in high quality.
Part 4: How to fix a pixelated image on a smartphone
Pixelated images are particularly common on smartphones, in part because camera technology is still ineffective on many mobile devices. But there is no pixelation removal feature built into the photo editing app. But when you need to improve the quality of your photos and reduce this problem, Adobe Photoshop Express is a good option for both iPhone and Android devices.
Step 1: Install Photoshop Express on your mobile phone. Allow it to access your photo library the first time you open the app. Then import the pixel image from your smartphone's memory.
Step 2: Click on Correct image The icon marks the three horizontal lines with sliders at the bottom to open the image capture screen. You can then apply various filters to fix the pixelated images.
Step 3: clarity is able to soften or brighten the picture. Sharpen is used to enhance the details of your image. Reduce noise can remove and reduce noise. Band Aid can remove blemishes from your image.
Step 4: Apply these filters and adjust various settings to fix the pixelated image until you get a satisfying result. Click on Share icon in the upper right corner of the screen for posting to Facebook.
Part 5: A few tips about pixelated images
1. Prevent image pixelation in the first place
An image that is pixelated is caused by being stretched in a strange direction or enlarged too much beyond its original size. As the saying goes, an ounce of prevention is worth a pound of cure, and that's true of pixel art. When you resize an image in Photoshop, you can convert it to a Smart Object if you want it to stay pixel-free, otherwise you can also just limit the size you upscale it to. Any image only has a certain number of pixels, and if you enlarge it too much, it will become pixelated.
2. Get professional help
You need to know when to call a professional, and if you've tried the steps above and can't remove pixels from your photo, then it might be time to send it to a professional photo processor to fix it. Even professionals can't do miracles, but they can often do a pretty good job. There are even cheap ways to do this, like finding a good photo editing site on a site like Fiverr and paying someone to clean up your pixelated photo.
Note:
Make sure you save a backup copy of the original image. Otherwise, you won't be able to undo your changes. If you do decide to hire someone to clean up your pixel art, make sure your instructions are clear so they know what to do with it.
If you want to print your pixelated old photos after editing, you'd better contact a professional old damaged photo recovery service, where experts will give a second life to your damaged photos and make them look realistically edited in high resolution.
Conclusion
In this tutorial, we talked about how to fix a pixelated image on Windows, Mac, online, Android or iOS. When you download an image from a website and find that the image is pixelated, here are the best methods you should follow. And many photo editing apps don't support exporting edited images in full resolution. This means that your images will become poor quality or even pixelated after editing. When limited pixel information is available, it is difficult to make the image sharp. When you need AI to fix a pixelated image automatically, WidsMob Retoucher and WidsMob ImageConvert should be the best photo editors to help you.
Win Download Mac Download
You may be interested
- How to sharpen an image with or without Adobe Photoshop
- Best Practices for Improving Image Quality
- Fix grainy photos - what you need to know
How to fix pixelated images and photos
If you've ever tried to enlarge a digital photo to get a clearer image, you've probably ended up with a grainy and blurry photo. This phenomenon is called pixelization. This happens when you stretch the photo too much or try to resize it. This happens when you display bitmap graphics at a higher resolution than is supported, causing individual pixels in the image to become visible. At low resolution this can cause some blur effects, but if you try to stretch a rather small photo to a larger size, you will end up with a digitized photo. This can be a little frustrating, especially if you want a larger version of the photo.
We all love having perfect photos to share with friends and social media followers. Therefore, in this article, we will tell you how to fix pixelated images and photos.
Reason for pixelated images and photographs
First of all, you need to understand why pixels can appear in an image or photograph. For clarity, you can achieve the appearance of pixels yourself. To do this, it is enough to take any image on a computer or smartphone and simply enlarge it 4-5 times. In this case, pixelation will appear.
This occurs when the display area is too large and there is not enough data to create smooth curves. In this case, the images become blurred, distorted and generally degraded in quality.
The only way to increase the resolution of an image is to create a new image of the same object with a higher resolution. However, you can use image enhancement software to make the pixelation look less bad.
There are several different ways to solve this problem. You can use an online imaging service or use Photoshop, Paint.net, or another graphics program to do the same job manually.
First of all, you need to understand why pixels can appear in a picture or photograph. For clarity, you can achieve the appearance of pixels yourself. To do this, it is enough to take any image on a computer or smartphone and simply enlarge it 4-5 times. In this case, pixelation will appear.
This occurs when the display area is too large and there is not enough data to create smooth curves. In this case, the images become blurred, distorted and generally degraded in quality.
The only way to increase the resolution of an image is to create a new image of the same object with a higher resolution. However, you can use image enhancement software to make the pixelation look less bad.
There are several different ways to solve this problem. You can use an online imaging service or use Photoshop, Paint.net, or another graphics program to do the same job manually.
Be sure to make a backup copy of the file before working on the image and only work with it. Leave the original image file intact so that if something goes wrong, you have the original image as a backup.
How to fix pixelated images and photos with an online tool
The advantage of online tools is that they allow you to do a lot of work without having to download any software to your computer. This is very handy if you are using a work or school computer that is not allowed to install new software, or if you are using a phone or tablet.![]()
There are many online tools for editing and processing images. We recommend two good tools for fixing pixelated images: Let's Enhance.io and Fotor. Both web services offer a range of free tools that you can use to work with images without having to download special software. They're perfect for casual image editing, especially if you need to do it on a mobile device, and both do a pretty good job of fixing pixelated images. Both apps work pretty much the same.
If you want to fix a pixelated photo with "Let's Enhance.io", you need to follow the steps below:
- First of all, go to "Let's Enhance.io" website and register;
- After that, upload your photo to the site;
- A new page will then open. In section "Operations" in the upper right corner of the page, select "Photo ";
- Select "Custom" and press "2x" or "4x" . You can only use other options if you have subscribed to this service;
- Finally click "Start Processing" and upload your new photo to check it out.
If you want to use the Fotor tool, you need to follow these steps:
- First of all, go to the Fotor website;
- Then select "Effect" in the left menu and scroll to item "Pixelization ";
- Minimize pixelation by scrolling left "Pixel size ";
- Finally click "Apply" .
How to fix pixelated images and photos with Photoshop
If you have a little more time and a lot of money, you can do quite a bit to fix a pixelated image in Photoshop. Photoshop is the best image editing program, but it costs a lot of money to buy it. However, this program can do so much with your photos that the cost is definitely worth it. Despite the rather long and difficult process of mastering many of Photoshop's features, fixing pixelated photos takes only a second.
So, if you want to fix pixelated images and photos with Photoshop, you need to follow these steps:
- First of all, open Photoshop on your computer;
- Open an image and click "Filter" in the menu section at the top;
- Then select "Blur ";
- Then select Gaussian Blur and use the scroll bar to find an acceptable level;
- Press "OK ";
- Press again "Filter" and select "Sharpness ";
- Select "Unsharp Mask" and use the scrollbar to find an acceptable level;
- Press "OK" and save the image.
Learn more