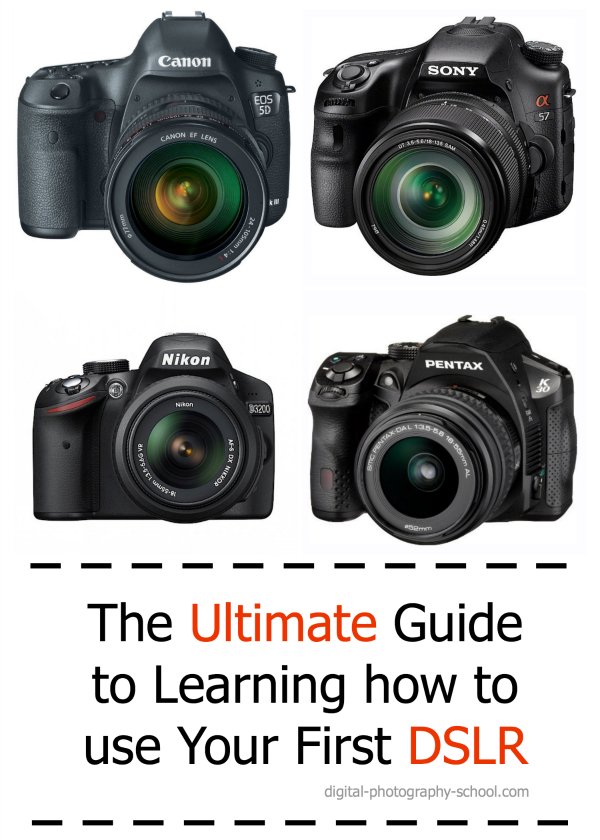
Learn digital slr photography
The Ultimate Guide to Learning how to use Your first DSLR
New to Photography? Check out our free Ultimate Guide to Photography for Beginners.
If you’ve bought yourself a DSLR (or mirrorless camera) and, after unpacking it from the box, you are intimidated by the number of buttons and dials, and by the thickness of the manual, it can be very tempting to put the manual down, flick it onto ‘Auto’ and start shooting.
Whilst that is fine for some, it may not be long until you crave the creative control that inspired you to purchase a DSLR in the first place, but where do you begin?
If you consider yourself a beginner who is unsure of how to make the most of your camera, this post is designed for you. It’s intended to be a brief, a one-stop shop to help you take your camera off auto, and take control of your DSLR. It isn’t intended to be a replacement for your camera manual, so will not explain every last setting in great depth, but will cover enough of the basics to get you in control of your camera, and give you the key topics to go back to your manual to read.
Here’s some steps for learning how to use that new DSLR that we’ll cover in this article.
- Master Shooting modes (including priority modes and full manual)
- Understand ISO
- Learn the ‘exposure triangle’
- Master Metering including exposure compensation
- Learn About Focussing
- Understand file size/types
- Learn about White balance
There’s lots to learn if you want to get the most from your DSLR but lets start by digging into each of these topics.
Note to Mirrorless Camera Owners: almost everything in this article is relevant not only to DSLR owners but also mirrorless camera owners too!
1. Master Shooting modes
The best place to start is with shooting modes. The shooting modes will most likely be found on a dial labelled with ‘auto, Av, Tv, P, M’ and maybe more. Selecting a shooting mode will determine how your camera behaves when you press the shutter, for example, when ‘auto’ is selected, the camera will determine everything to do with the exposure, including the aperture and shutter speed. The other modes, ‘Av, Tv, P, M’, are there to give you control:
Don’t worry if your mode dial looks a little different; different manufacturers use different abbreviations for the shooting modes. Your mode dial may have the letters ‘A, S, P, M’ (instead of Av, Tv, P, M), yet they all function in the same way. Below, I have given each abbreviation for the given mode.
Aperture Priority (Av or A)
Aperture priority can be thought of as a ‘semi-automatic’ shooting mode. When this is selected, you as the photographer set the aperture and the camera will automatically select the shutter speed. So what is aperture and when would you want to control it?
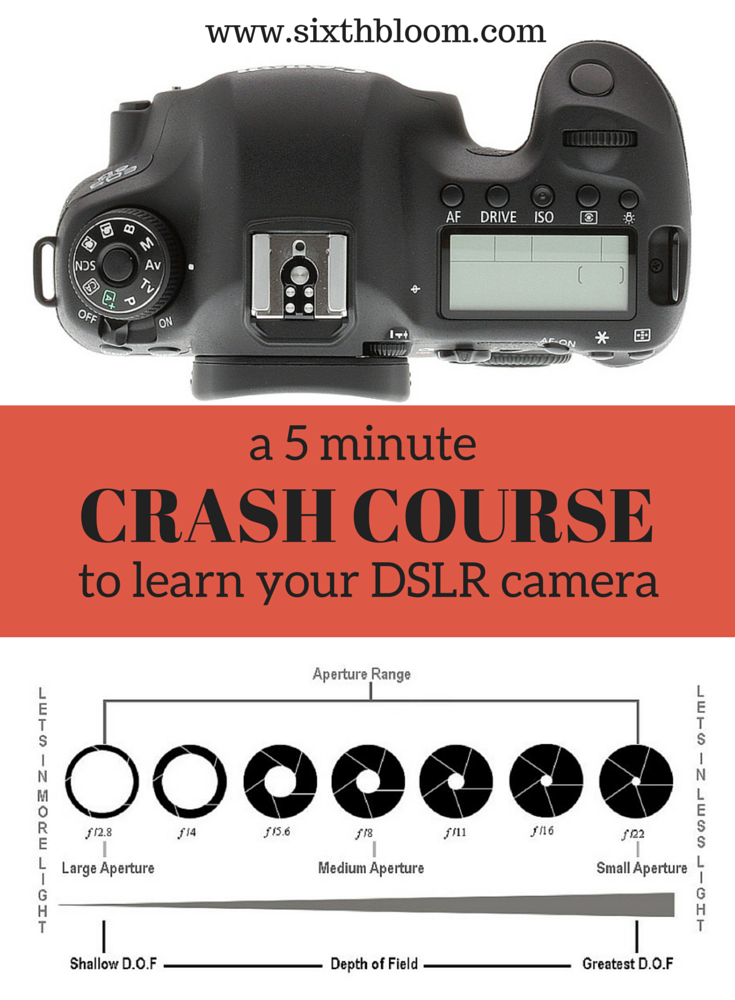
The aperture is the size of the opening in the lens through which light is allowed to pass whenever the shutter is opened – the larger the aperture, the more light passes through.
The aperture is measured in ‘f-stops’ and is usually displayed using an ‘f-number’, e.g. f/2.0, f/2. 8, f/4.0, f/5.6, f/8.0 etc, which is a ratio of focal length over diameter of the opening. Therefore, a larger aperture (a wider opening) has a smaller f-number (e.g. f/2.0) and smaller aperture (a narrower opening) has a larger f-number (e.g. f/22). Reducing the aperture by one whole f-stop, e.g. f/2.0 to f2/8 or f/5.6 to f/8.0, halves the amount of light entering the camera.
Aperture is one of the most important aspects of photography as it directly influences the depth of field – that is, the amount of an image that is in focus. A large depth of field (achieved by using a small aperture (large f-number)) would mean that a large distance within the scene is in focus, such as the foreground to the background of the landscape below.
An aperture of f/13 was used here to give a large depth of field, ensuring that the whole image, from the foreground grasses to the background mountains. was sharp
Whereas a shallow depth of field (achieved by using a large aperture (small f-number)) would produce an image where only the subject is in sharp focus, but the background is soft and out of focus.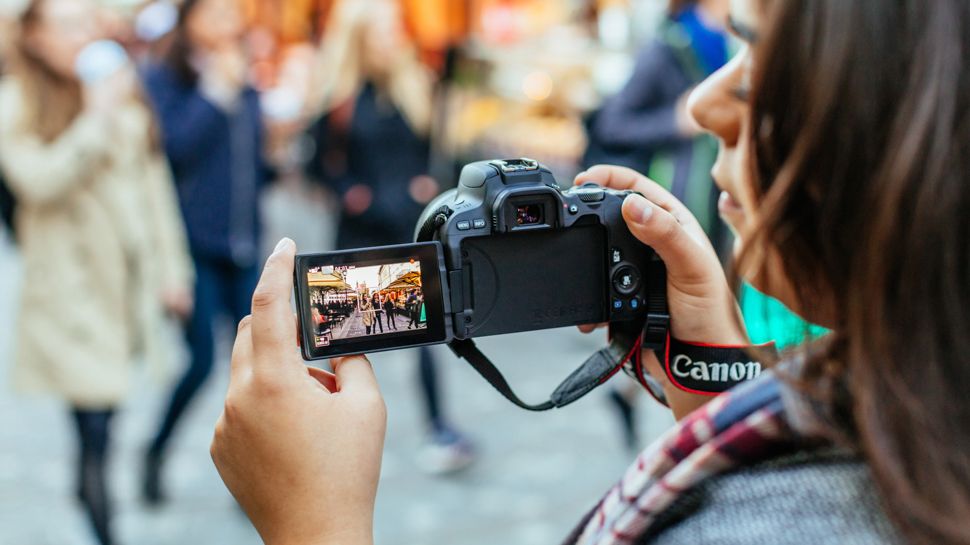 This is often used when shooting portraiture or wildlife, such as the image below, to isolate the subject from the background:
A large aperture of f/4.5 was used to capture this water vole, against a soft, out of focus background
So when using aperture priority, you can get complete control over your depth of field, whilst the camera takes care of the rest.
Further Reading: Read more about Aperture Priority Mode.
Shutter Priority (Tv or S)
Similarly to aperture priority, this is another ‘semi-automatic’ shooting mode, though in this instance, you as the photographer set the shutter speed and the camera will take care of the aperture. The shutter speed, measured in seconds (or more often fractions of a second), is the amount of time the shutter stays open when taking a photograph. The longer the shutter stays open, the more light passes through to the sensor to be captured.
You would select a short shutter speed if you wanted to freeze a fast moving subject, such as shooting sports, action or wildlife, for example:
A very fast shutter speed of 1/4000th sec was used to freeze the motion of this grouse in flight
You would use a long shutter speed if you wanted to blur a moving subject, for example water rushing over a waterfall (slower shutter speeds will require you to put the camera on a tripod to ensure the camera is held steady whilst the shutter is open):
To capture the motion of the waves, and render the water with a soft, milky texture, a shutter speed of 6 seconds was used here
So whilst you worry about what shutter speed you need for a given photograph, the camera will determine the appropriate aperture required to give the correct exposure.
Aperture and shutter priority shooting modes may be semi-automatic, meaning that some may deride their use because they’re not fully manual, however they are incredibly useful modes to shoot in that can give you enough creative control to capture scenes as you envisage them.
Further Reading: learn more about Shutter Priority Mode.
Program (P)
Program mode is almost a halfway house between the semi automatic modes of aperture/shutter priority and full manual control. In program mode, you are able to set either the aperture or shutter speed, and the camera will maintain the correct exposure by adjusting the other one accordingly, i.e. as you change the aperture, the shutter speed will automatically change, and vice versa. This gives you additional freedom that using either aperture priority or shutter priority cannot give without switching between shooting modes.
Manual (M)
Manual mode is exactly what it sounds like, you are given full control over the exposure determination, setting both the aperture and shutter speed yourself. There will be an exposure indicator either within the viewfinder or on the screen that will tell you how under/over exposed the image will be, however, you are left to change the shutter speed and aperture yourself to ensure you achieve the correct exposure.
Practically Speaking: as a first step to taking your camera off ‘auto’, aperture priority and shutter priority modes offer two very simple ways to start to understand how the different setting impact your images and are a perfect starting place for learning how to use your camera more creatively.
2. Understand ISO
ISO is a measure of how sensitive the sensor of your camera is to light. The term originated in film photography, where film of different sensitivities could be used depending on the shooting conditions, and it is no different in digital photography. The ISO sensitivity is represented numerically from ISO 100 (low sensitivity) up to ISO 6400 (high sensitivity) and beyond, and controls the amount of light required by the sensor to achieve a given exposure
At ‘low’ sensitivities, more light is required to achieve a given exposure compared to high sensitivities where less light is required to achieve the same exposure. To understand this, let’s look at two different situations:
Low ISO numbers
If shooting outside, on a bright sunny day there is a lot of available light that will hit the sensor during an exposure, meaning that the sensor does not need to be very sensitive in order to achieve a correct exposure. Therefore, you could use a low ISO number, such as ISO 100 or 200. This will give you images of the highest quality, with very little grain (or noise).
Taken at ISO 100, the image does not show signs of noise (even when looking at the 100% crop (right)
High ISO numbers
If shooting in low light conditions, such as inside a dark cathedral or museum for example, there is not much light available for your camera sensor. A high ISO number, such as ISO 3200, will increase the sensitivity of the sensor, effectively multiplying the small amount of available light to give you a correctly exposed image. This multiplication effect comes with a side effect of increased noise on the image, which looks like a fine grain, reducing the overall image quality. The noise will be most pronounced in the darker/shadow regions.
This image was taken as the sun was going down, meaning there was not much ambient light. Therefore, this was shot with ISO4000, however you can see very obvious noise in the 100% crop (right)
Practically Speaking: you want to keep the ISO as low as possible, as the lower the ISO, the less noise and the higher the quality of the resulting image. Outside on a sunny day, select ISO200 and see how it goes. If it clouds over, maybe select an ISO between 400-800. If you move indoors, consider an ISO of around 1600 or above (these are approximate starting points).
Most digital SLRs now have an ‘auto-ISO’ function, where the camera sets the ISO depending upon the amount of light in which you are shooting, keeping it as low as possible. Auto-ISO is a very useful tool when starting out with your camera, as it is allows you to define an upper limit i.e. where the images become too noisy such as ISO1600 or 3200, and then forget about it until situations where you specifically want to override the automatic setting, for example if taking landscape images using a tripod, you can afford to use the lowest ISO possible.
Further Reading: Discover more about how to use ISO.
3. Learn the ‘Exposure Triangle’
It’s important to note that aperture, shutter speed and ISO are all part of the ‘exposure triangle’. They all control either the amount of light entering the camera (aperture, shutter speed) or the amount of light required by the camera (ISO) for a given exposure.
Therefore, they are all linked, and understanding the relationship between them is crucial to being able to take control of your camera. A change in one of the settings will impact the other two. For example, considering a theoretical exposure of ISO400, f/8.0, 1/10th second.
If you wanted to reduce the depth of field, and decided to use an aperture of f/4.0, you would be increasing the size of the aperture by two whole f/stops, therefore increasing the amount of light entering the camera by a factor of 4 (i.e. increasing by a factor of 2, twice). Therefore, to balance the exposure, you could do the following:
- Situation 1: Reduce the shutter speed by a factor of 4, i.
 e. to 1/40th second.
 - Situation 2: Reduce the ISO by a factor of 4, i.e. to ISO100
- Situation 3: A combination of the above, shutter speed by a factor of 2 (to 1/20th second) AND reduce the ISO bv a factor of 2 (to ISO200).
Aperture, shutter speed and ISO are all facotrs that influence your exposure, and are all linked. It’s just a case of balancing the books!
They all have the net effect of reducing the amount of light by a factor of 4, countering the change in aperture. It’s just a case of understanding that they are all linked, and so changing one setting, will cause a change in another.
Using a combination of the semi-automatic shooting modes and auto-ISO would mean you won’t necessarily need to think about adjusting your exposure in such a way initially, however understanding the relationship that ISO or aperture has with shutter speed, and knowing the practical implications is a big step in mastering your DSLR .
Further Reading: Read more about the Exposure Triangle.
4. Master Metering
Through out all of the above discussion, I have said that the camera calculates the exposure depending on the amount of available light, but what is it actually doing?
When taking a photograph, using any form of automatic exposure calculation (e.g. aperture priority mode, shutter priority mode, auto-ISO etc) the camera always tries to calculate an ‘average’ exposure. It will asses the entire scene, both light and dark areas, and determine the exposure so that all of the tones within the entire image average to 18% grey – called the ‘middle’ grey.
This is known as metering, and it is the reason that if you point your camera at a bright white scene, such as after it has snowed, and take a photograph the resulting image will always appear darker than you or I see it. Similarly, if you point your camera at a really dark scene, such as a low-lit room, and take a photograph the resulting image will always be brighter than you or I see it.
The scene is always being averaged by the camera and most of the time that results in the image appearing to be correctly exposed. However, you can control what areas of the scene are being assessed by the camera in order to influence the way in which the exposure is metered.
Generally, there are three metering modes that you can choose from:
Average – The camera will assess the tones across the entire image form corner to corner, and expose the scene to 18% grey from that assessment.
Centre-weighted – The camera weights the exposure reading for the area in the centre of the viewfinder that can total up to approximately 80% of the scene, ignoring the extreme corners of the image.
Spot metering – The camera will use a very small area of the scene, typically a small circle in the centre of the viewfinder that totals approximately 5% of the viewfinder area. It will make the assessment of dark/light tones in this area and expose the entire scene to 18% grey, from that assessment.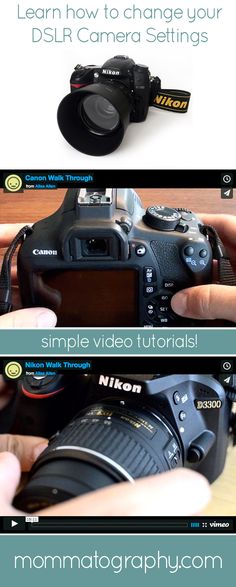
Practically speaking: when starting out with your camera, either average or centre weighted metering are a good starting point. They will both provide a fairly consistent measure of the exposure required and, if you select one mode and stick with it, you will soon begin to understand when a scene will be under exposed (i.e. too dark) or over exposed (i.e. to light) compared to how you see it with your own eyes.
But what can you do if a scene is under/over exposed? That is where exposure compensation comes in.
Further Reading: A Beginners Guide to Metering Modes
Exposure Compensation
Generally found on a small +/- button near the shutter, this is one of the most useful functions to learn how to use. It allows you to either increase or decrease the cameras default meter reading to account for the actual brightness of a scene.
If a scene contains primarily bright tones and is being rendered too dark, for example, a bright white snow scene (that will typically be reduced to 18% grey by the default metering system), you can apply positive exposure compensation to let the camera know that the scene should be lighter than middle grey.
A spring lamb leaping in front of a snowy hillside. Left: Straight out of camera, with the snow caught as grey. Right: With +2 stops exposure compensation (added in post processing). The bright snowy background caused my camera to underexpose this scene by nearly two stops, which could have been corrected by exposure compensation in camera.
Conversely, if a scene contains primarily dark tones and is being rendered too light, for example, a dark night scene (that will typically be increased to 18% grey by the default metering system), you can apply negative exposure compensation to let the camera know that the scene should be darker than middle grey.
Further Reading: How to Use Exposure Compensation to Get Better Exposed Photos.
5. Learn About Focussing
Regardless of what shooting mode you are using, or what ISO you define, the chances are there will be a subject of your image that you want to have in focus. If that focus is not achieved, the image will not be what you wanted.
Autofocus modes
DSLRs come with a range of autofocus modes, however, for simplicity, the two that are most important to understand are AF-S and AF-C
AF-S – autofocus-single. This is best used when taking photos of stationary subjects such as portraits of people, landscapes, buildings etc. When you half-press the shutter, the focus will be acquired and locked on that point for as long as you hold the button down. If you want to change to focus, you need to release the button, recompose and then re-half-press.
AF-C – autofocus-continuous. This is best used when taking photos of action or moving subjects such as sports and wildlife. When you half-press the shutter, focus will be acquired and locked on to a given subject. When that subject moves, the focus will adjust with it, refocusing all of the time until the photograph is taken.
(These modes are not to be confused with the AF/MF switches on the lens, where AF stands for autofocus and MF stands for manual focus.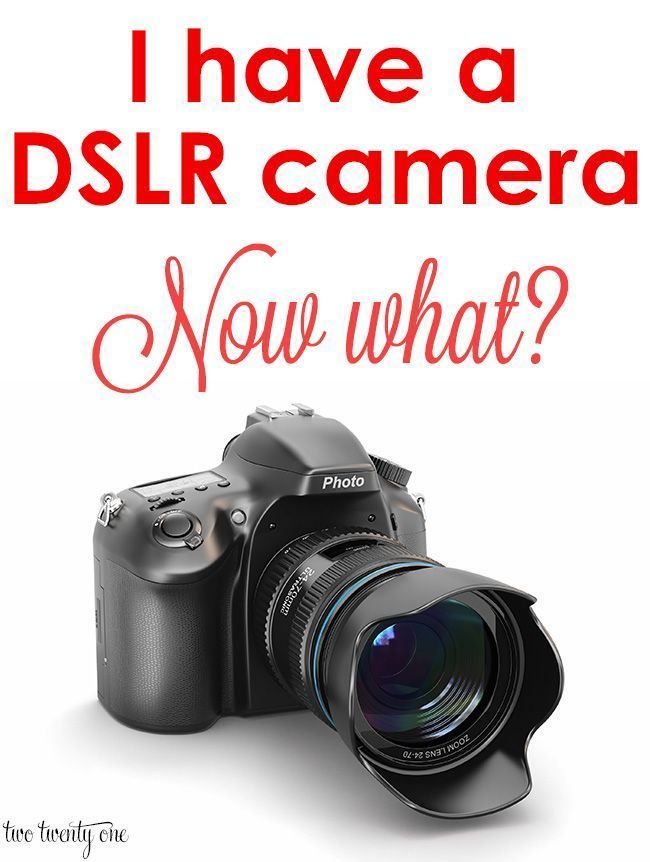 That switch is an override for if you want to manually focus your lens. If you want to make use of the autofocus modes discussed above, ensure the lens is set to AF).
Further Reading: Understanding Focus Modes
Focus Points
Both of those focus modes rely on what are known as focus points. When you look through the viewfinder, you should see a number of squares/dots overlaid across the screen. When you half-press the shutter, you should see one of these squares be highlighted in red. That is the active focus point, and it is that position within the frame that the camera is focussing on. A viewfinder with 9 focus points is shown below:
New DSLRs can come with over 50 focus points and the temptation is to leave it on fully automatic focus point selection, with the thinking that the camera will be able to select the correct focus point. However, only you know what you want to focus on, and there is no better way than ensuring the correct subject is in focus than by using one focus point, and placing that focus point over the subject.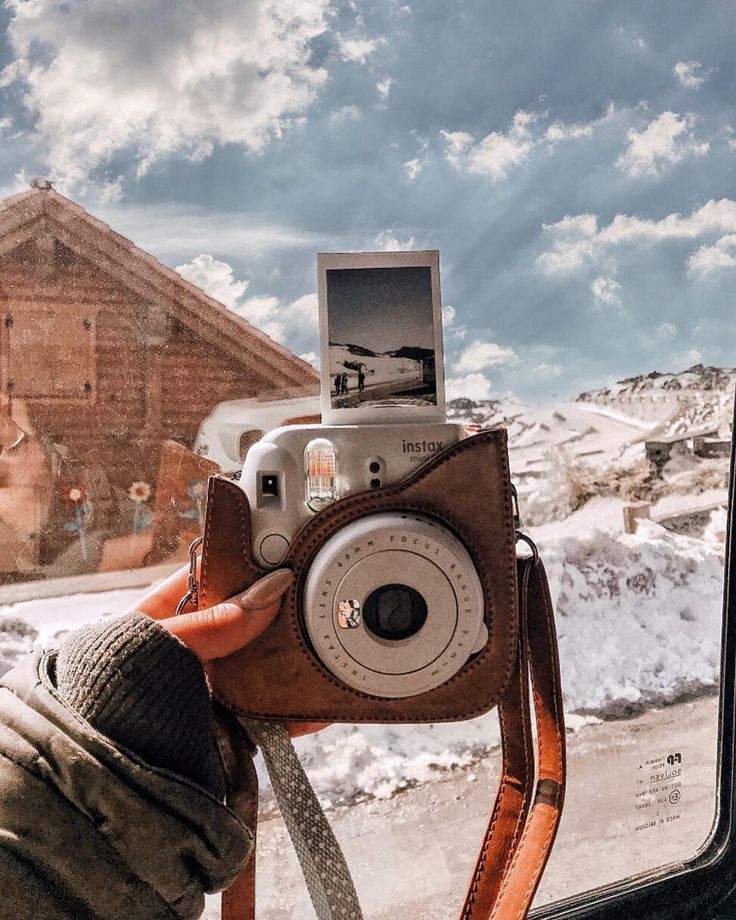
If you select a single focus point, you should be able to change which point is active fairly easily either by using directional buttons one of the dials. If you select a focus point that is on your desired subject, you will ensure that the camera focuses where you want it to. After a small amount of practice, you will soon get into the habit of being able to change the focus point without taking the camera away form your eye.
Practically speaking: Initially, set your camera to use a single focus point (your camera manual should tell you how to do this). This way, you will be able to choose what you are focussing on, ensuring that the subject you want to capture is in focus. Once you are familiar with the basic focussing modes and focus point selection, you can then explore the more advanced modes that your camera may offer.
6. Understand File Size and Types
You will have the option to be able to change the size of the images that your camera records, and in which file type. You want to set the file size to the largest possible (whether it is ‘large’ or ‘fine’ or ‘super fine’) to ensure that you are making the most of the mega pixels that you have just invested in.
You will also have the option of choosing whether to record the images as ‘raw’ or ‘jpeg’ file type. A raw file is uncompressed, and so contains a lot of image data that allows for a lot of flexibility during post-processing (i.e. on your computer) but also comes with additional complications such as the need to ‘process’ every file using dedicated editing software and a larger file size. A jpeg is a compressed file type, that is automatically processed by the camera. They will be ‘print ready’ straight out of the camera, and are much smaller files, meaning you can fit more images per memory card.
Practically speaking: When starting out with your camera, using jpeg is the most straight forward. It will enable you to get the best results whilst you learn the basics or your camera before complicating matters with post-processing of raw files.
7. Learn about White balance
If shooting in jpeg, as recommended above, you will need to make sure you set your white balance before taking a picture. The white balance can significantly impact colour tone of your photographs. You may have noticed that sometimes your images have a blueish tone to them or, in others, everything looks very orange. This is to do with the white balance and, whilst you can make some adjustments to the image on your computer, it is much simpler if you get it right up-front.
Different light sources (such as the sun, light bulbs, fluorescent strips etc) emit light of different wavelengths, and therefore colours, which can be described by what is known as colour temperature. Light from a candle, or from the sun during sunrise/sunset, is very warm, and contains a lot of red/orange wavelengths; whereas light from a fluorescent strip is much cooler, containing a lot of blue wavelengths. This coloured light is reflected off of surfaces, but our brain in clever enough to recognise this and automatically counter the effect, meaning that we still see a white surface as a white surface. However, your camera is not that intelligent, and unless told otherwise, will record the orange or blue tones giving the colour cast to your images.
Left: The image captured using auto white balance has a heavy yellow tone from the artificial street lighting. Right: the same image, corrected for a ‘Tungsten’ white balance, giving the cooler tones on the stone work, and the bluer sky
As the colour temperature of different light sources is well known, there are a number of presets built into your camera that help to overcome the different colours of light in different situations – cooling the warm light, and warming the cool light – all in the cause of trying to capture the colours of the scene accurately. The ‘auto’ feature (auto WB or AWB) will attempt to predict the colour of the light by detecting the predominant colour of the scene and then countering it, however it may not necessarily make a correct decision, leaving you with inaccurate colours. Therefore it is best to set the colour balance before you take your image and just to make sure (note: the above image was a raw file giving me a lot of latitude for white balance correction. Jpeg files are not as susceptible to white balance adjustments, meaning the white balance correction needs to be made before the image is taken):
Daylight – To be used on clear sunny days. Bright sunlight, on a clear day is as near to neutral light that we generally get
Cloudy – To be used when shooting on a cloudy day. Adds warm tones to daylight images.
Shade – To be used if shooting in the shade, as shaded areas generally produce cooler, bluer images, so need warming up.
Tungsten – Used for shooting indoors, under incandescent light bulbs, or under street lights, to cool down the yellow tones.
Fluorescent – Compensates for the green/blue tones of fluorescent light strips when shooting indoors.
Flash – the flash will add a cool blue cast to the image, so used to add some warmth.
Practically speaking: avoid auto white balance and set the white balance manually. Generally, you will be able to look up at the sky and see what kind of day it is, and determine the colour balance required pretty easily. If you move indoors, just check the lighting that you are shooting under, and again select the appropriate white balance. It will soon become second nature to set it as you take your camera out of the bag.
Further Reading: Learn more about White Balance
Conclusion
So that is an overview of the settings you will encounter when you want to take the leap and take your camera off ‘Auto’. You don’t necessarily need to consider them all straight away, but exploring and understanding the effect of each setting will soon have you in complete control of your camera. The biggest step, that will give you the most noticeable difference in the feeling of control and direct influence on creative results, will be to start using the ‘aperture priority’ or ‘shutter priority’ shooting modes and once you are familiar with those, you can start thinking about exploring further. Soon enough, you will no longer think of your camera as a mysterious black box, but understand how to achieve the photographic results that you bought it for in the first place.
More Ultimate Photography Guides
If you enjoyed reading this tutorial we’ve put together a series of other similar articles that you may find useful:
- Ultimate Guide to Photography for Beginners
- Ultimate Guide to Landscape Photography
- Ultimate Guide to Taking Portraits and Photographing People
- Ultimate Guide to Nature and Outdoor Photography
- Ultimate Guide to Street Photography
- Ultimate Guide to Getting Started in Lightroom for Beginners
- Ultimate Guide to Fine Art Photography
- Ultimate Guide to Photography Terms and Common Words
How To Use A DSLR Camera: A Beginner's Photography Guide
So you’ve got yourself a new DSLR camera! Congratulations, there’s a whole world of photography possibilities about to open up to you. But you might be wondering, as you open up the box and check out the lengthy manual, exactly how best to go about getting the most from your new camera.
Well, I’m here to help. I’ve been shooting with an SLR camera since 1993, starting with a film Canon camera, and then with a number of Canon digital SLR (DSLR) cameras when digital started to replace film.
I’ve been shooting professionally since 2010, and I also teach an online photography course. I consider myself lucky to have been able to help people all over the world get more out of their cameras.
In today’s post, I’m going to break down in simple terms the key features of your DSLR camera, and give you all the most useful tips that you need to get the most out of it.
This guide is written specifically to help a new DSLR camera owner, but will also be largely applicable to those of you with a mirrorless camera. However, if you do have a mirrorless camera, you might prefer to read my guide to using a mirrorless camera, which will be more applicable. I also have a guide to using a point and shoot camera.
This post assumes no prior knowledge of cameras or photography, and hopefully will help you understand the features you have available to you, as well as get you out and shooting better photos quickly.
However, please don’t be frustrated if it takes a bit of time to master some of the concepts of photography. Photography is a skill that takes time to master, and many of the principles of photography are not necessarily obvious or intuitive. With time and patience though, it will become second nature!
I appreciate that the world of photography jargon can be a little overwhelming, so I’m going to start with the basics.
Table of ContentsWhat is a DSLR Camera?
A digital single lens reflex, or DSLR camera, is a digital camera with an internal mirror and prism system.This system is used to direct the light from the lens up to the viewfinder that you look through to compose the image.
I appreciate this may sound a little opaque, so let me break it down a bit.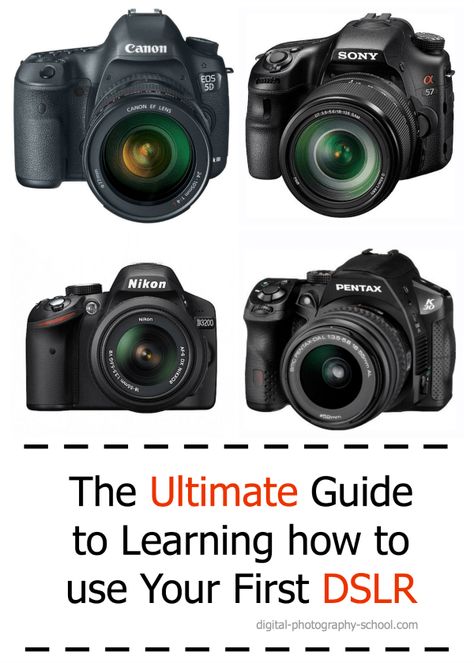
All digital cameras essentially work in the same way. First, light is collected and focused by a lens, and then captured on a digital sensor. The sensor saves that light information into an image file that you can view and edit.
The difference between a DSLR camera and the other cameras on the market today is that a DSLR has this mirror and prism system which is used to send light to the viewfinder.
If you take the lens off a DSLR and look inside the lens mount, you’ll see the mirror sitting at around a 45-degree angle. It’s just reflecting the light up towards the optical viewfinder.
When you press the shutter button, the mirror will flip up inside the camera, out of the way of the sensor. Then the light will pass onto the sensor to record the image. This is why, when you take a photo with a DSLR camera, the viewfinder goes dark when you press the shutter button. The mirror is no longer reflecting the light, and so the viewfinder goes dark.
There are some other differences between a DSLR camera and the other types of camera available, which are covered in more detail in my post on DSLR cameras.
I’ll also add here that DSLR cameras largely replaced SLR cameras with the advent of digital sensors. The key difference is that they have a digital sensor inside rather than a roll of film. However, the prism and mirror system is still a key part of the design.
DSLR Camera Controls: A Guide
When you first take your new DSLR camera out of its box, you are going to notice that it has a lot of buttons and dials. And these can certainly be overwhelming. Which is likely why so many people I teach photography to confess that they just leave their camera in Auto and hope for the best.
For the most part, on a modern DSLR camera, Auto mode will actually do a pretty decent job in 80% of situations.
However, this also means that there are going to be times (let’s say 20%) that you aren’t going to get the shot you want if you leave everything up to the camera.
Because of this, learning how to use your camera to its fullest potential, and taking full control, should definitely be your end goal.
Don’t worry if this takes you some time, or if you don’t understand everything at once. As I’ve already said in this post, photography is complicated and learning how a camera works is a process that takes time and practice.
A good start is reading a post like this, but do also consult your manual for your camera model. If your camera didn’t come with a manual, you can usually find relevant information by searching online for “your camera model manual”.
Here’s an overview of the key controls on your DSLR Camera. Note that different camera models will have slightly different controls, but the majority will have the following options.
Mode Dial
The mode dial is the first dial you’ll want to locate. This is the dial that tells the camera how much control you want over its various settings. To change the mode, you just rotate the dial.
Most mode dials have a wide variety of options, which will include an “Auto” mode, for full automatic, and an “M” mode, for full manual.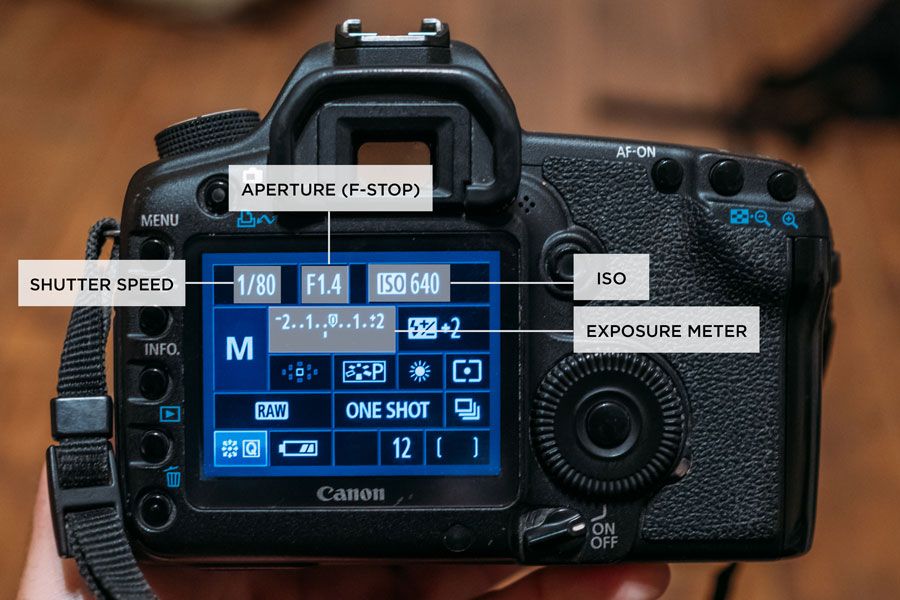
They will also often include a variety of scenery modes, which are automatic modes where you give the camera a clue as to what sort of scene you are shooting, say a landscape or a portrait.
In between the Automatic and Manual modes there will also usually be a number of other modes which bridge the gap between fully automatic and fully manual, and it is these modes, particularly the last two, that I suggest you become familiar with and start to use. These are as follows.
- “P” mode. This is the Program Automatic mode. It is basically just another automatic mode, albeit one where you have control over some settings, including exposure compensation, ISO and white balance. I would generally advise skipping over “P” and moving straight to one of the two modes below instead, “A” or “S”.
- “A” or “Av” mode. This is the Aperture Priority mode. This mode and the mode below are the half way house between full automatic and full manual.
 Aperture priority mode means that you set the aperture (useful for controlling depth of field) and the camera will judge the light in the scene and set the shutter speed to get the correct exposure. You can also control ISO, exposure compensation and white balance. As a landscape photographer, this is my go-to mode for 90% of my photos.
 - “S”, “T” or “Tv” mode. This is known as Shutter Priority Mode. Shutter priority is similar to aperture priority mode, except you set the shutter speed, and then the camera sets the aperture based on the light in the scene. Shutter priority is good for when you want to control movement in a shot, such as for isolating the flight of a fast moving bird, or to show movement in a long exposure shot.
Some photographers will tell you that you have to shoot in manual mode to have full control over your photos. Personally I disagree with this. The main thing is to understand what the different modes are, and what effect the different settings in your camera have on your shot.
As long as you are comfortable with this, and you understand how changing aperture, shutter speed and ISO can affect your shot, that is the key.
If you are unclear on how these three elements, known together as the exposure triangle, work together in photography, we have a detailed guide to the exposure triangle to help you out.
I also suggest reading my guide to depth of field in photography, which explains this in more detail. You may also consider signing up to my online photography course, which covers the exposure triangle and much more in great detail.
Once you understand the relationship between aperture, shutter speed, and ISO, the choice of whether to shoot in manual, shutter priority, or aperture priority is up to you. It will likely come down to personal preference, and the scene you are shooting. There is no “right” option.
As a rule of thumb, I find aperture priority works well for most of my photography because it lets me control depth of field, which is a key compositional technique.
For portraits and landscape work, this is usually more important to me than controlling motion – except when I am doing landscapes where I want to capture movement.
For any scene involving movement, such as action photography, shutter priority often is the most useful mode. This lets me control whether I freeze the subject with a fast shutter speed, or show a bit of movement with a slower shutter speed.
When a scene has particularly challenging lighting, or depth of field and movement are both key considerations for the composition, then I will shoot in manual. This is often the case for scenarios like fireworks photography, photos of the Northern Lights or any long exposure photography.
Exposure Compensation (+/-)
Nearly every camera out there, including smartphones, will have some form of exposure compensation feature. This lets you quickly make the image brighter or darker by either increasing or decreasing the exposure compensation.
The exposure compensation will either be a dedicated button or dial on the camera, or will be easily accessible through the camera’s menu system.
As an explanation for the name, when you take a photo, the process that camera goes through is actually known as an exposure. The sensor inside the camera is “exposed” to the light. This is a throwback to the days of film photography, when exposing the chemicals in the film to the light caused it to react.
Today, the sensor just records the information electronically, but the term exposure has stuck.
Whatever mode your camera is in, it will always judge the light in the scene. It uses this to calculate correct settings so as to get an image that is neither too bright nor too dark, known as a correctly exposed image.
If your camera is in automatic mode, all of this is done for you.
On a DSLR camera, in Program Auto, Aperture Priority and Shutter Priority modes, you can override these settings with exposure compensation.
As an example, if you have your camera in aperture priority and set an aperture of f/8, the camera will calculate the exposure in the scene and set the shutter speed to give what it thinks is a good exposure.
Sometimes however the camera will get it wrong, and the image will be too dark or too light. You can use exposure compensation to basically tell the camera to increase or decrease the amount of light. As you have fixed the aperture, the camera will adjust the shutter speed accordingly.
Exposure compensation is a quick and handy way to adjust the overall brightness of an image without having to go into full manual mode.
Control Wheel for Shutter and Aperture
If you are shooting in aperture priority or shutter priority, you will need a way to change the aperture or shutter speed.
Nearly every camera has a control wheel, which you rotate to increase or decrease these settings. If you are in aperture priority mode, the control wheel will increase and decrease the aperture setting.
If you are in shutter priority mode, the same wheel will increase and decrease the shutter speed.
If you are in manual, then you will need to be able to adjust both the shutter speed and the aperture.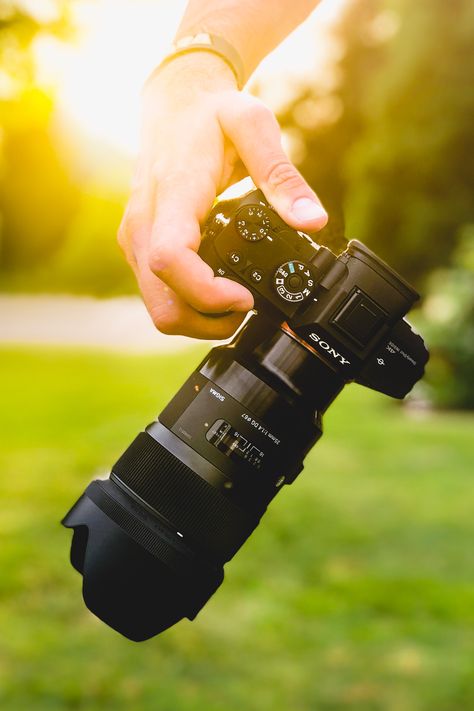 Different cameras handle this differently – some have two wheels, some offer a button that you depress to switch what you are changing.
Consult your camera manual to see how to change aperture and shutter speed in manual mode.
ISO Button
ISO is the third control you have over the exposure of an image. Increasing the ISO makes the camera’s sensor more sensitive to the light, and reducing it reduces the sensitivity to the light.
If you are in manual mode and set the aperture and the shutter speed and then change the ISO, you will notice the image getting brighter and darker.
However, increasing the ISO also makes the image more grainy, as the increased sensitivity of the sensor means that digital “noise” is added to the image.
As a result, ISO is usually the last thing we want to increase. Ideally, ISO will stay at a range between ISO 100 and ISO 400, a range in which most cameras produce nice clean images.
However, sometimes it is just too dark to produce acceptable images without increasing the ISO.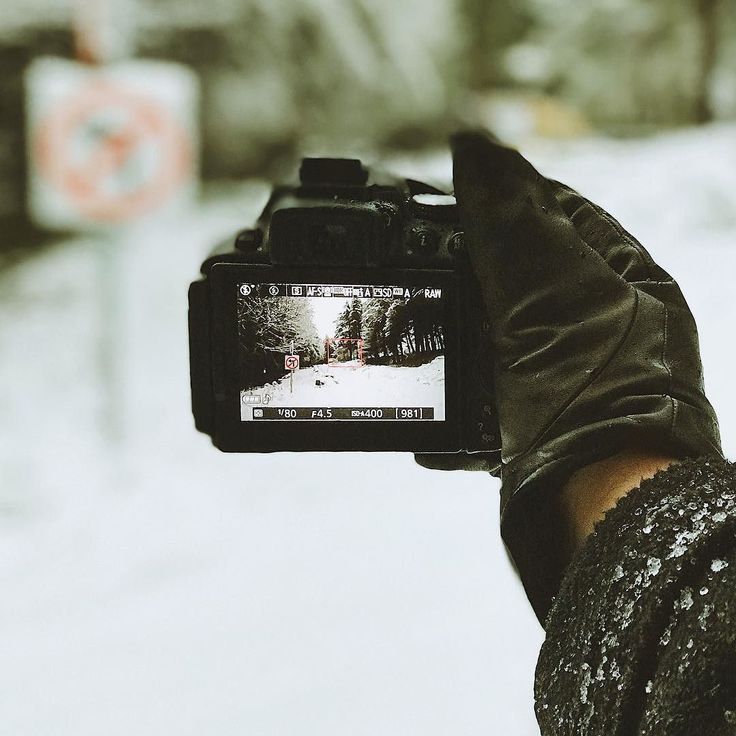 For this reason, most cameras will have a dedicated ISO button, which provides a shortcut for quickly increasing and decreasing the ISO.
It is really important to remember to check the ISO before you take any image. If you set it to a high value manually, the camera will remember that value until you change it.
I have spoken with travelers who have ruined a whole trips worth of photos because they set their ISO to a high value for an evening, and then forgot to put it back down to a lower value for the daytime.
It’s really hard to see the resulting noise on the back of the camera screen – it’s only when you get home and look at your images that you will notice the graininess in all your images.
Key buttons on my Canon DSLR
Focus Mode
Focus is the process of ensuring the subject we are taking a picture of is sharp. An out of focus image will produce a blurry result that is not ideal.
To help with focus, DSLR cameras have a range of focus modes. Which you use will depend on what you are taking a photo of.
The first option that the camera is likely to be set is the standard autofocus mode. In this mode, the camera will default to focusing on what it thinks the subject is. You can take control of this by specify the region of the image you want the camera to focus by changing the image focal point.
This will either be with a dedicated button on the camera, or perhaps by using a touchscreen interface to touch the focus point.
If your subject is moving, then the camera has a different focus mode, which might be called continuous autofocus. It is called continuous because the camera will continue to adjust the focus as the subject moves, rather than just getting focus once.
Finally, the camera will also let you control the focus yourself manually. In this mode, you will have to adjust the focus ring, which is normally found on the cameras lens. It will be a ring all the way around the lens which you can rotate to change the focus.
Metering Mode
I have mentioned throughout the post that your camera evaluates the light in the scene you are taking a picture of in order to calculate the correct exposure. This process, where the camera meters the light to come up with the correct exposure, is known as metering.
You can change the metering mode of your camera, depending on the scene you are taking a photo of, to help ensure your subject is correctly exposed.
The main control you have is over how much of the scene is used for the metering. The default mode, which will work for most photos, is known as evaluative metering on Canon cameras and matrix metering on Nikon cameras.
This mode looks at the light across nearly the whole frame of your image, to produce a balanced exposure. This will cover nearly all your photography requirements.
Sometimes however, we are shooting a scene with challenging lighting – like a dark building against a bright sky. In this case, the default metering mode might give you an image which is technically well balanced, but the building will likely be too dark to be usable.
To resolve this, you could use exposure compensation, or you could change the metering mode.
Different cameras have different metering modes you can choose. The most common is a spot metering mode or a partial metering mode, which means that camera will just use the centre part of the scene to do its exposure calculation.
This means that bright sections of the image around the edges away from the middle will not impact the final shot, and in our example, the building would end up correctly exposed.
Focus Ring
The last two controls on your DSLR camera that we’re going to talk about are on the camera’s lens. The first one is the focus ring, which we briefly touched upon.
If your camera is in manual focus mode, the focus ring is what you will use to achieve focus. On some cameras, even if the camera is set to autofocus, you can override that with the manual focus ring as well.
Focal Length Ring
The focal length ring is also on the camera’s lens, and is found on any lens that has a variable focal length.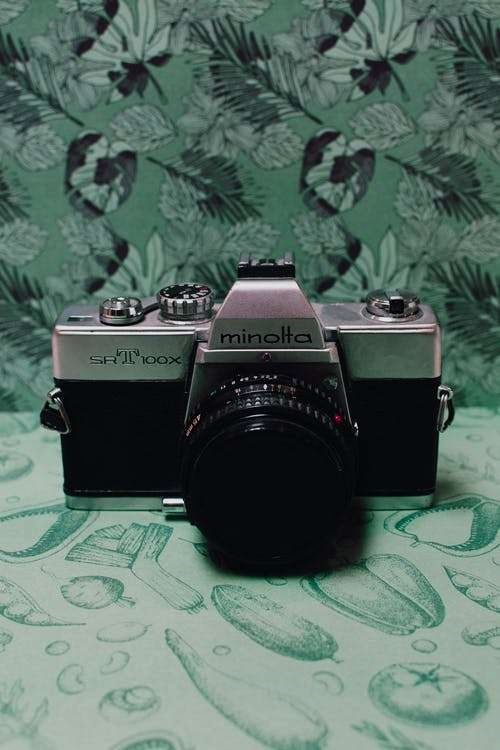 In basic terms, this is the camera’s zoom. Changing the focal length changes the zoom, and rotating the focal length ring is what you do to change the zoom.
How to Use Your DSLR Camera
I’m now going to cover some tips and tricks for using your DSLR, and some areas you should focus on to improve your photography.
1. Learn How to Hold a DSLR Camera Properly
The first thing you are going to need to do is learn how to hold your new DSLR camera properly. It’s really important to try and minimise camera movement when taking photos, as this will translate directly into blurry images.
Most DSLR cameras are relatively heavy, and should always be held with two hands. This will stabilize the camera a great deal more than if you just try to operate it one handed.
If you are right handed, the correct way to hold the camera is with your right hand around the hand grip and one of your fingers over the shutter button. I prefer to use my index finger for the shutter button. Try to ensure the rest of your fingers are tightly gripping the camera’s grip, if they all fit.
Your other hand should be holding the cameras lens from underneath to support it.
Ideally, you will have your elbows tucked in tight to your body which will provide additional stability.
If you struggle with maintaining stability when holding a camera, consider investing in a travel tripod to provide the necessary stability that your camera needs for sharp photos.
2. Get the Horizon level
This is a personal bugbear – I find photos where the horizon isn’t level to be quite off putting!
Sure, this is something that you can fix in editing software, but rotating an image can degrade the quality. So ideally you want to try and get the horizon level whilst you shoot.
Most cameras will have the option to overlay a grid on the screen, or markers inside the optical viewfinder that can help with this, but ultimately it just takes practice to get this right.
3. Understand the Exposure Triangle
I’ve talked about the exposure triangle a number of times already in this post, and that’s because it’s one of the most important photography concepts to understand if you want to take control over your camera.
It can also a fairly challenging concept that takes time to understand, because it includes three different variables, all of which also change how the final image looks.
The Exposure Triangle is called the exposure triangle because it refers to the three things you can change, all three of which affect the exposure of the image.
The three things you can adjust to change the exposure of the image are the aperture, the shutter speed and the ISO.
The aperture is a hole inside the lens which lets light through. You can make this hole bigger or smaller, to let more or less light through.
The shutter is like a curtain inside the camera that whisks aside to let light onto the sensor. Changing the shutter speed changes the length of time the shutter is open – longer time lets more light through, less time lets less light through.
As you will see from the above two controls, they are both related to how much light is hitting the sensor.
The third control you have over exposure, and the third “side” of the exposure triangle, is the ISO setting. ISO controls how sensitive the sensor in your DSLR is to that incoming light.
If you increase the ISO, you increase the sensitivity, and vice versa.
You might wonder why you need three different settings to essentially control the same thing – the exposure.
Well, the answer is that these three settings also control how the final image will look. Aperture and shutter speed in particular are important compositional tools, whilst ISO contributes to how noisy the image is.
More specifically, aperture controls depth of field, and shutter speed controls how movement is portrayed in a shot. These will be covered in the below tips in a bit more detail so you can see when and why you might want to change any of them.
You can also read more about the exposure triangle in my detailed guide to the exposure triangle here.
4. Master the Rules of Composition
I am of the belief that there are three main areas of photography that you need to master to get great photos.
The first of these is understanding your camera, which will let you be sure you can set your camera up properly to get great images. This post is primarily focusing on this area of photography.
The second thing you need to understand is composition, which is the art of placing your subjects within the image and using elements of the world to create a visually pleasing image.
Composition includes things like the rule of thirds, use of colour, leading lines and framing. As you would imagine though, such a major topic requires more than a few sentences to properly cover, and as such I’ve written a full guide to photography composition which you should check out.
Finally, the third thing I think everyone should master is photo editing, which is how you get the most from the photos you’ve captured with your DSLR. As a starter with that, I recommend checking out my guide to the best photo editing software which will give you some pointers as to what options are on the market for photo editing.
5. Learn about Depth of Field
As I discussed in my section on the exposure triangle, aperture controls depth of field. So you might be wondering what this is.
Well, if you’ve ever seen a portrait shot, where the subject is clearly in focus, and everything else in the shot is nicely blurred away, then you have seen an example of a shallow depth of field.
Depth of field basically refers to how much of the image is in focus in front of and behind the subject, relative to the camera.
For landscapes, you usually want the majority of the image is focus, so you would want a deep depth of field. For portraits, you want the opposite, so you would want a shallow depth of field.
Changing the aperture changes the depth of field. For more on this, see my guide to depth of field in photography, which covers this subject in much more depth.
6. Consider Movement
Movement can be a powerful compositional technique, and this is controlled by shutter speed, another part of the exposure triangle.
When you want to freeze motion in an image – say that of a hummingbird flapping it’s wings, or a fast moving vehicle, you will want to use a fast shutter speed. Fast in this context might be anything from 1/500th of a second and higher.
On the other hand, if you want to show motion in your images – perhaps the movement of water, or give the impression of movement by blurring a person who is moving, you would use a slower shutter speed. In this case, slow would generally be anything from 1/15th of a second and slower.
For more on using shutter speeds to control how your image looks, take a look at my guide to long exposure photography, which covers this subject in more detail.
Hopefully now you can see how aperture and shutter speed affect your final image differently, and see why it’s so important from a composition point of view to understand how to change these yourself rather than leaving it up to the camera!
7.
 Use the Light
Photography is all about light. The photos you capture are basically that – the light in the world, reflecting off surfaces, and being recorded by the sensor in your camera.
So as you would imagine, understanding how best to use light will help you with your photography no end.
First, you need to appreciate that the position and angle of the light relative to your shot will make a big difference. An overhead light will create flatter images, whilst a low light will create more visually pleasing images with depth.
This is why shooting at the start and end of the day is generally preferred. The light at these times of day is also a nice yellow tone, which we refer to as being warm. This also makes for more pleasing images.
As a general rule, it’s also best to shoot away from your light source rather than towards it. Shooting away from the light means your subjects will be correctly illuminated rather than in shadow.
8. Practice, practice, practice
I think I have already mentioned this in the post a few times, but just to reiterate, photography is a skill that takes time to master.
Until you start putting concepts like those I outline in this post into actual practice, they won’t really stick or make as much sense. I urge you to grab your camera and start playing with the different settings I’ve talked about in this post.
Get an idea of how changing different things changes the image. Learn how to read the shutter speed, aperture and ISO readouts that your camera overlays in the viewfinder. Play with exposure compensation.
It can be a good idea to set yourself challenges, and to get into the habit of taking your camera with you when you leave the house so you can get some practice in.
I definitely can’t emphasise this enough – practice makes perfect with every skill, and photography is no different.
How to Care for and Protect your New DSLR
Now you have your DSLR Camera, you will want it to last for a good long while. And with these tips, it will.
How to Protect your DSLR
A DSLR is a fairly robust piece of equipment, but it is still a piece of electronics with a number of glass components, and as such, it does need to be looked after.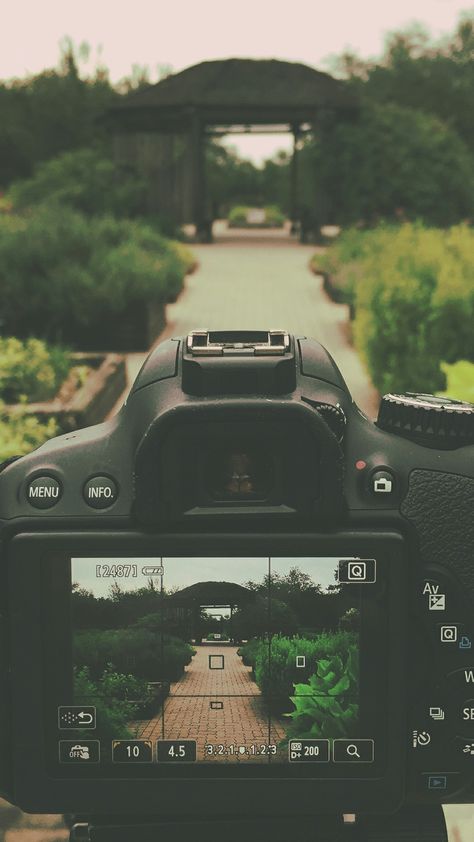
The two accessories I suggest you buy for your DSLR are a lens hood, also known as a sun hood, and a clear UV filter.
These will both protect the lens on your DSLR. This is the bit that protrudes the most, and is the part of your camera that is most susceptible to damage from every day knocks and bumps.
UV filters are relatively inexpensive (around $15 – $40 a piece), as are sun hoods. You just have to get them at the right size for your lens – this should be clearly marked in the item description.
For filters, every filter has a mm rating, which will match the lenses filter thread diameter. For example, most of my lenses have a 77mm filter thread, so I use 77mm filters like this.
You can see a collection of UV filters here and lens hoods here.
How to Clean your DSLR
Over time, a DSLR will naturally pick up dirt and dust from the environment. I find the two things that come in useful for cleaning it are an air blower like this, and micro fibre cloths like this.
These are also available as an inexpensive cleaning kit which contains a number of items for cleaning your camera that you might find useful.
I don’t do any internal cleaning of my camera other than occasionally blowing air to remove dust specks from the sensor. See my section below on DSLR camera servicing for more thorough cleaning options.
Tips for Traveling with a DSLR
If you are going to be traveling with your DSLR then I highly recommend buying a well designed camera bag. Camera bags come with a lot of additional padding that you don’t get in ordinary bags, and they also usually have compartments for your different pieces of equipment, including lenses, spare memory cards, batteries and so on.
You can also get camera bags that are designed to to also carry other items, with part of the bag designed for camera equipment, and the other part for travel items like clothing.
I use and travel with Vanguard bags, who make a wide range of camera related products, including tripods, bags and other accessories. I’ve been a Vanguard ambassador for a number of years and their gear has always been reliable and well made.
They have a wide range of bag options, including this trolley bag, this backpack and this sling bag. I suggest picking a bag that fits your gear plus a bit more, so you have plenty of room.
Discounted Price for Vanguard Products for our Readers!As Vanguard Ambassadors we are able to offer you a unique discount code which will get you 20% off everything in the Vanguard USA, Vanguard UK, Vanguard Spain, and Vanguard Germany online store websites. Just use code FindingTheUniverse (case sensitive) on checkout.
You should always try and keep your camera equipment with you when travelling rather than checking it into hold luggage so you can keep an eye on it and ensure it is handled properly.
Should you Service Your DSLR?
The short answer is yes. From time to time, I would suggest getting your DSLR camera and lenses properly serviced by a qualified technician.
I aim to get my cameras serviced around once a year, and usually I find a Canon certified dealer to do it for me. I’ve also been lucky to attend some Canon sponsored events like the Albuquerque Balloon Fiesta, where free servicing was offered.
A service will usually involve a thorough clean of the sensor and a careful inspection of any other elements of the hardware. I can definitely recommend trying to get this done on a fairly regular basis to keep your camera in good working order.
Best DSLR Camera for Beginners
If you came to this post and you don’t already have a camera, you might be wondering what the best DSLR camera is for you to start with.
We actually have a detailed guide to the best DSLR cameras for travel photography, which covers a range of brands and budgets.
However, for starting out, we suggest you consider the following two entry-level DSLR models. These have all the features you need to learn photography, but won’t break the bank.
1. Canon EOS Rebel T7 (EOS 2000D)
In the world of DSLRs, there are two main manufacturers – Canon and Nikon. For an entry level camera, we would recommend getting one from either of these manufacturers.
Canon’s entry level camera line carries the “Rebel” name in North America (EOS xxxD in Europe), and my first DSLR was a Canon Rebel XTi.
The EOS Rebel T7 shows just how much has changed since those days, with what would have then been flagship technologies now available even in the low end model. You get a 24MP sensor, WiFI and a 500 shot battery capacity.
2. Nikon D3500
The entry level Nikon DSLR camera is the D3500. It offers great performance in a slightly smaller package than the Canon, and also has excellent battery life, rated for 1550 shots per charge.
You also get 24.2 APS-C sized sensor, good performance and an excellent selection of lenses. This is a great first camera that will last you for a good number of years.
When it comes to picking between these two cameras, some of it will come down to how they feel in your hand. The interfaces are slightly different too, but when you are starting out this doesn’t make a big difference.
In terms of what you get for your money, if you are manufacturer agnostic, the Nikon offers slightly better specifications for the same money.
If you want to spend a bit more, or are looking for additional features like moving touchscreens, then take a look at our DSLR camera post for many more options.
Further Reading
If you have recently picked up a DSLR camera, or are thinking of buying a new DSLR camera, then you are likely near the beginning of your photography journey. Well, I’m here to help on that journey – I’ve written a number of photography guides which I think you will find useful to help improve your photography.
These cover a wide range of topics, from beginner content through to intermediate and more advanced concepts. Here’s a selection to get you started.
- We have similar guides for how to use a mirrorless camera and how to use a compact camera.
- If you’re interested in learning more about how a DSLR works, see our DSLR camera guide.
- Knowing how to compose a great photo is a key photography skill. See our guide to composition in photography for lots of tips on this subject
- Once you’ve mastered aperture, you can control depth of field. Read more about what depth of field is and when you would want to use it.
- If you have a lens with a zoom feature, you can take advantage of something called lens compression to make objects seem closer together than they are.
- We are big fans of getting the most out of your digital photo files, and do to that you will need to shoot in RAW. See our guide to RAW in photography to understand what RAW is, and why you should switch to RAW as soon as you can.
- You’re going to need some way of editing your photos. See our guide to the best photo editing software, as well our our guide to the best laptops for photo editing.
 We also have a guide to getting the best performance out of Adobe Lightroom, our preferred editing software.
 - If you’re looking for advice on specific tips for different scenarios, we also have you covered. See our guide to Northern Lights photography, long exposure photography, fireworks photography,
- tips for taking photos of stars, and cold weather photography.
- You may hear photographers talking about a concept called back button focus. If you’ve ever wondered what that is, and want to know how to start using it, see our guide to back button focus.
- For landscape photography, you might find you need filters to achieve the look you want. See our guide to ND filters for more on that.
- If you’re looking for a great gift for a photography loving friend or family member (or yourself!), take a look at our photography gift guide,
- If you’re in the market for a new camera, we have a detailed guide to the best travel cameras, as well as specific guides for the best cameras for hiking and backpacking, the best compact camera, best mirrorless camera and best DSLR camera.
 We also have a guide to the best camera lenses.
 - We have a guide to why you need a tripod, and a guide to choosing a travel tripod
- Ever wondered how to easily replace the sky in an image? Check out our guide to sky replacement in photography for an easy process anyone can do.
Looking to Improve Your Photography?
If you found this post helpful, and you want to improve your photography overall, you might want to check out my online travel photography course.
Since launching the course in 2016, I’ve already helped over 2,000+ students learn how to take better photos. The course covers pretty much everything you need to know, from the basics of how a camera works, through to composition, light, and photo editing.
It also covers more advanced topics, including astrophotography, long exposure photography, flash photography and HDR photography.
You get feedback from me as you progress, access to webinars, interviews and videos, as well as exclusive membership of a Facebook group where you can get feedback on your work and take part in regular challenges.
It’s available for an amazing one-off price for lifetime access, and I think you should check it out. Which you can do by clicking here.
And that’s it for our detailed guide to getting the most out of your new DSLR. As always, we’re happy to take feedback and answer your questions – just pop them in the comments below and we’ll get back to you as soon as we can.
Digital SLR for a beginner 2.0
Gleb Andrev just bought a video course "Digital SLR for a beginner. 2.0" from Syktyvkar
Olga Isaeva just bought a video course "Digital SLR for a beginner. 2.0" from St. Petersburg
IRINA LOGINOVA has just bought a video course "Digital SLR for beginners. 2.0" from Toronto
Denis Pleshakov. just bought a video course "Digital SLR for a beginner. 2.0" from Moscow
Vyacheslav S. just bought a video course "Digital SLR for a beginner. 2.0" from Ufa
Vyacheslav S. just bought a video course "Digital SLR for beginners. 2.0" from Sterlitamak
Evgnia Petrova.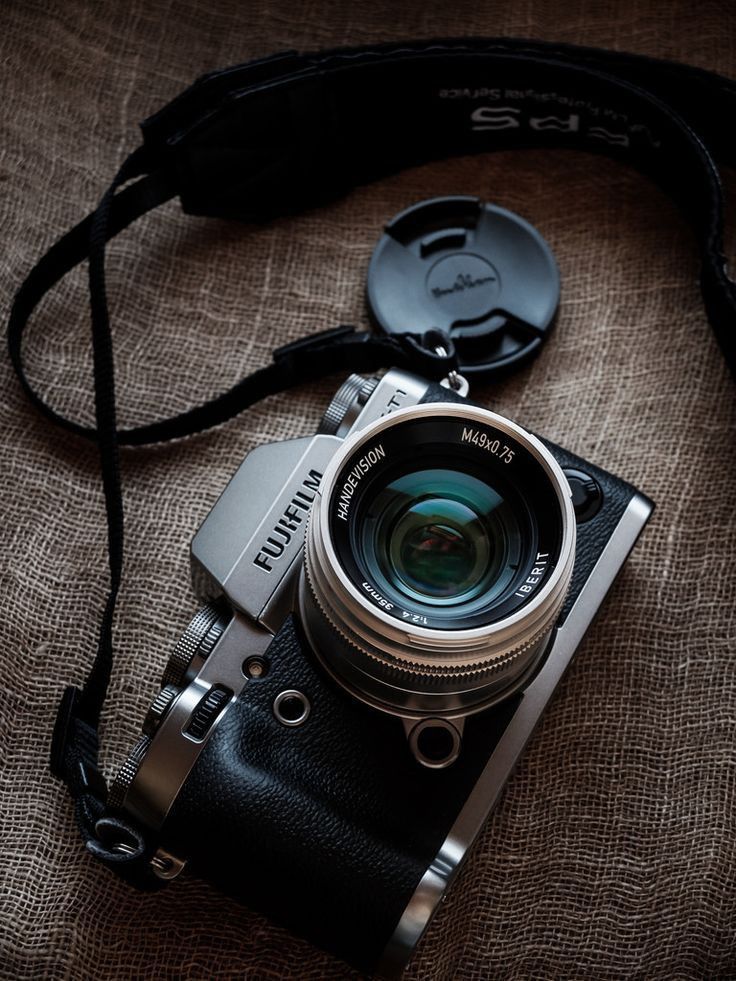 just bought a video course "Digital SLR for a beginner. 2.0" from Samara
Evgen. just bought a video course "Digital SLR for a beginner. 2.0" from Novosibirsk
Julia Rost. just bought "Digital SLR for beginners 2.0" video course from Regensburg
HOW TO LEARN TO TAKE GREAT PHOTOS
WITH DSLR OR MIRRORLESS CAMERA,
EVEN IF YOU ARE A LOT OF A TEAPOT
BUY NOW
Are you trying to take pictures but the pictures come out “flat”, not bright, not colorful?
Do you always choose the wrong angle and the pictures are not catchy, even if the scene you see with your eyes is beautiful and incomparable?
You can't figure out the settings of your camera, and you shoot everything automatically?
A good shot is lucky for you and you get it only 1 out of 100 or less often?
You don't understand photo frame formats and shoot everything in one JPG, losing the quality of your photos?
You want to learn the tricks, tricks and hidden photography techniques that the pros use but don't know how to do
You want to use your camera's resources to 100% but still use it like most people 10-15% maximum?
If you see yourself, then just read this page to the end.
Hello! My name is Alexander Ippolitov, I am in the TOP50 of the best landscape photographers according to 35AWARD. Since 2009, I have been successfully teaching beginner photographers via the Internet. Since then, more than 50,000 people have become my students, and their number is constantly growing.
I also founded the portal for teaching photography www.profotovideo.ru and created 12 high-quality, educational video courses on photography and photo processing, which are very popular both in Russia and abroad.
But it took me more than 15 years to learn how to take pictures on my own, why you ask so much, but because at that time there was no clear methodology capable of conveying only the most important information that would really help me learn how to take good pictures. At that time, in any training there was a huge pile of theory, by the way, almost all "on the fingers" and a little slurred practice. Neither shooting techniques, nor tricks, nor tricks were understood.
I could not understand why I bought a good camera, and the photos are like from cheap soap dishes, until I figured out what was the matter with a lot of perseverance, thanks to English-language video lectures more than 25 years ago.
But I want to make you happy, you don't have to study like I did for 10 years. Since 2009, I developed my own methodology and training system, the results of which were satisfied with more than 10,000 people.
Many have already heard my first video course on photography on a SLR camera "Digital SLR for a beginner or how to take great photos"
DSLR for a beginner version 2.0 | From a teapot to a professional". It will come in handy at this time.
In it, in practice, a lot of techniques and tricks are analyzed, thanks to which you will learn how to take excellent photos both technically and artistically with any "DSLR", "pseudo-DSLR" or advanced "digital compact".
Video training: "Digital SLR for beginners 2. 0"
0"
will make you a real photographer
Video course "Digital SLR for beginners 2.0" will become your "magic wand" on the way to great photos.
In this course, I collected my more than 15 years of experience, optimized the method of presenting the material (fortunately, pedagogical education at one of the best universities in Russia allows), removed all unnecessary water and lyrical digressions, "chewed" the material so that everything A 5th grader will understand.
BUY NOW
Who is this video course for? Having bought a good camera, many people are surprised why the pictures are obtained as from an ordinary cheap digital camera. If this has happened to you, then you urgently need to take this course.
The lessons of the course are suitable for ages from 12 years old to... all unnecessary water and lyrical digressions, and "chewed" the material so that even a fifth grader would understand everything.
In this training you will learn how to take pictures of landscapes, portraits, panoramas, how to use the flash correctly, what shooting modes to use and how to set the camera for best results.
Learn all the tricks of using built-in and external flashes, as well as how to get interesting pictures of seemingly uninteresting places.
And here's what this video course will give you:
Using simple visual examples, you will learn all the most important basics of photography, without which many novice photographers, trying to learn how to take pictures, instantly come to a standstill and then stagnate in one place wasting precious time.
You will freely understand all the components of digital SLR cameras and use its capabilities 100%. I'll tell you a secret, not everyone knows how to own their camera even by 20%.
Master the use of manual shooting modes. And let those who do not care about the quality of their photographs shoot on the machine.
Learn various photography techniques and tricks. That will allow you to get high-quality photographs taken.
Learn important compositional skills and tricks and apply them with ease.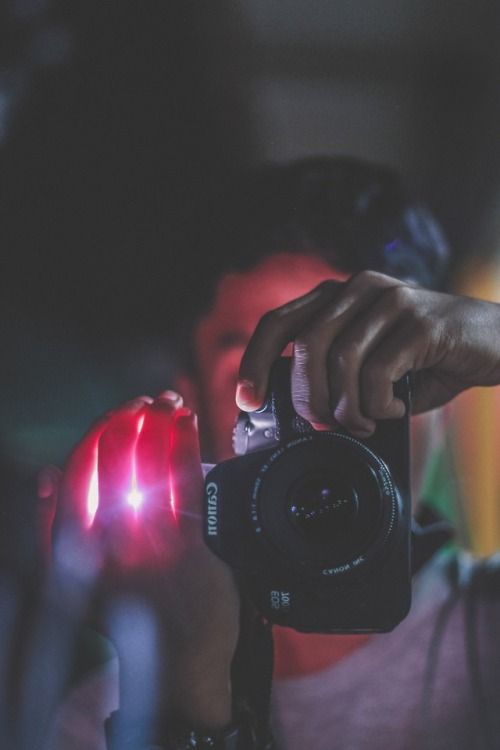 Because it is not enough to be able to use the camera competently, if your pictures do not have the slightest artistic component, then all the work can go to waste.
Learn how to analyze your surroundings to take a good photo. Because shots taken "from the shoulder" are most often unsuccessful without hesitation.
Become savvy in photography, and you will not have questions like .... "What lens to buy for shooting a wedding" ... or "What focal lengths will be in demand on my vacation trip" and the like.
Gain essential lens testing skills before you buy. It is very important to be able to check the optics before you say the word "I take" that is treasured for the seller. Undoubtedly, by law, you can then exchange a low-quality copy, but what happens if you notice this while being at a paid photo session somewhere in the mountains? In addition, there are also some unpleasant things that are not considered a defect, but you will be notified about them and be able to cut off such a lens before buying.
You can’t put a SLR camera and optics in your pocket, so you need to be able to choose a reliable case for it, preferably with rain protection and other simple accessories that help fight condensation, etc. You will no longer have such questions. Also, be savvy in choosing tripods and other necessary accessories.
You can’t put a SLR camera and optics in your pocket, so you need to be able to choose a reliable case for it, preferably with rain protection and other simple accessories that help fight condensation, etc. You will no longer have such questions. You will also be savvy in choosing tripods and other necessary accessories.
Use the built-in and external flashes wisely to get well-exposed and beautiful pictures.
Learn how to work with the RAW format from the additional bonus video course, and immediately understand what the maximum quality of photos is and don't shoot in JPG anymore.
...And that's not all that this video course will give you!!! ALL THEORETICAL LESSONS ARE SUPPORTED WITH PRACTICAL!!!
Video training characteristics:
"DIGITAL MIRROR FOR BEGINNER 2. 0"
0"
FORMAT: The course is recorded in live video format and screencast. Designed to be viewed on a computer. Comes in a digital version for download.
VIDEO FORMAT: Resolution: HD 1280x720, mp4 files playable via internet browser flash player (fully compatible with PC and MAC).
COMPATIBILITY WITH TABLETS (IPAD, etc.): Full compatibility after installing an html-enabled file manager (for example, IFunBox) and then downloading the course to a tablet
NUMBER OF BASIC LESSONS: 75 pcs.
COURSE ARCHIVE SIZE: 4 GB.
MENU: Intuitive menu in HTML format.
Screenshot of the menu of the video course "Digital SLR for beginners 2.0"
Screenshots from some of the lessons of the video course.
Lesson 58. Practical use and control of the depth of field. landscapes
Lesson 55. How to take care of your camera and lenses.
Place an order for the video course "Digital SLR for Beginners 2. 0" right now and in addition to the course you will receive valuable GIFTS. file from the bonus course
(processing time: 2 minutes)
drag the slider in the center of the picture left and right to compare "before" and "after"
RAW file development example from the bonus course
(processing time: 1 minute)
drag the slider in the center of the picture left and right to compare "before" and "after"
RAW file development example from the bonus course
(processing time: 4 minutes)
drag the slider in the center of the image to the left and right to compare the "before" and "after"
1570 RUB
Standard cost of this video course:
(FREE for you when ordering the video course "Digital SLR for Beginner 2.0")
>>PURCHASE THIS COURSE SEPARATELY<< Attention
!!! Limited Bonus Offer
GIFT 2
Desk Cheat Book PDF:
Night Photography Step by Step Tutorial
590 RUB
Standard price for this video course:
0003
(for you for free, when ordering a video course "Digital SLRICK for a beginner 2. 0")
0")
>> Buy this book separately <<
attention !!! The offer with bonuses is limited
Here's what some of my students say about the course they are intended I could not.
I tried to read the instructions several times, but I couldn't finish it. It is written, like all instructions, incomprehensibly, and there are about one and a half hundred pages. So I shot it mostly in automatic mode, good photos were rare.
Somehow while walking through photo sites and looking for photography lessons, I came across this photo course. After signing up for free video lessons and watching them, I decided to buy the whole course. I liked that all the basics were explained in great detail and intelligibly, but for me it was a dark forest. I quickly understood what exposure is and how it depends on various parameters.
Finally, with the help of the lessons, I figured out all the functions of the camera and understood what they are for. Well told about the basics of composition, and how to get great photos. The photo practice section is very well done (of course, I would like more examples of photos with different settings, but you yourself understand that you can’t cram everything into one course).
After a couple of months of active use of my camera, I began to get good photos. The only thing missing for great photos is a good SLR camera, which I thought about purchasing. In the coming days I will go to the store for the first DSLR. In general, the impression of the lessons is wonderful, I do not feel sorry for the investment. In general, these are the best DSLR photography lessons. I will buy and master courses in Photoshop and Lightroom.
Anastasia Lord
(Montreal)
I must say right away that this is not the first course of Alexander that I studied. And for SLR cameras, this is the second course that I purchased.
I have long wanted to know how to learn how to take pictures with a SLR camera. After passing the first version of "Digital SLR for Beginners" I began to shoot really better, the lessons on composition and camera settings helped me especially, but if I had more of the practice that was in the old course, and I think I would shoot even better. And now, in the new version of Digital SLR for a beginner 2.0, practical exercises have been completely updated.
I especially like the way this author presents the material, he tells everything very simply and clearly. And chews in 5 minutes as much useful material as others would chew for 15-20 minutes, but for me, as a young mother, time is worth its weight in gold. And also, what is most important for me is showing examples of how to shoot not just anywhere, but exactly in those places where you want to take good photos, this is about me traveling.
I have already tried many of the lessons from the new course in practice and I was just proud of myself. This is just a great chest of knowledge for those who want to learn how to photograph.
Maria Nosova
(Irkutsk)
From my own experience, I was convinced that with the help of a digital SLR camera you can take excellent pictures without going into technical intricacies: you just need to turn on the camera and select auto mode in the worst case, program mode in the best shooting mode P. And at first, this is more than enough.
But over time, you realize that you are holding in your hands not an ordinary object, but a kind of tool, the competent handling of which needs to be learned and learned. Where? The instruction manual is written boringly, the manual on photography gathers dust on the shelf, lessons from professionals are expensive, and there is no time to surf the Internet in search of useful information.
Agree, it is much more convenient when all knowledge is collected in one place, available at any time and presented briefly and clearly. In my opinion, the Digital SLR video course for a beginner has these and other advantages.
The author of the disc, Alexander, in his characteristic laconic manner, tells how to properly handle the camera. Consistently, step by step in a clear direction and without unnecessary digressions, Alexander teaches how to rise to the heights of mastery, developing both creative and technical skills. For example, he says - try to place the subject you are shooting to the right or left of the center so that the photo is dynamic. And he shows examples. This lesson only takes a few minutes, but you already know how to properly compose. In general, the disk contains all the necessary initial information about working with the camera in order to take pictures no worse than those of professional photographers.
And this is very inspiring! This is not the first video course that I purchased from Alexander and went through from cover to cover and never regretted it. the knowledge that I received practically instantly brought me the first fruits. In general, if you want to know how to use a DSLR, you need this course.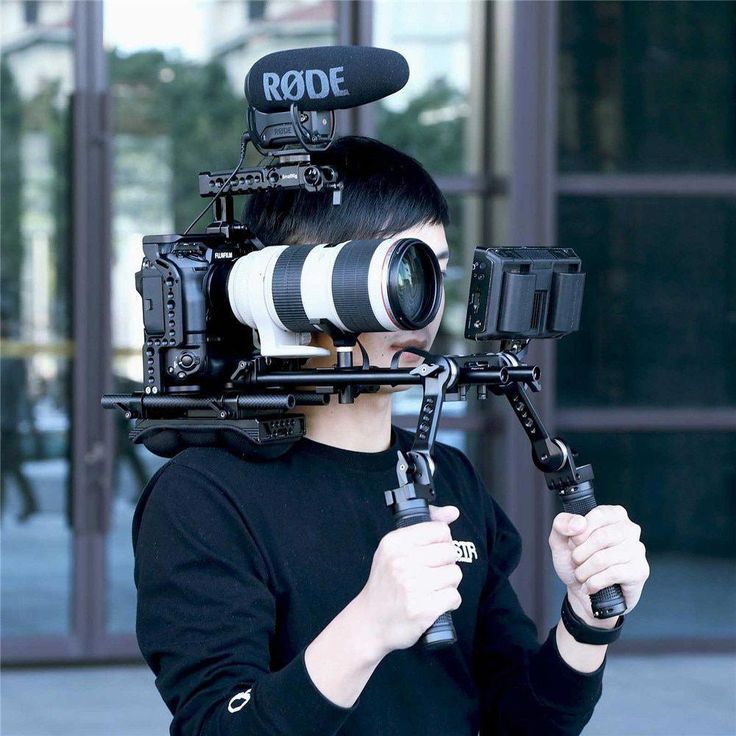
How much does this video training
cost and how is it paid/delivered?
Training video:
"DIGITAL MIRROR FOR BEGINNERS 2.0"
costs:
2990 RUB
BUY NOW
Is it expensive? You decide.
But first, let's compare the prices for training in various photography schools, both full-time and distance learning.
And this is the cost of training only for the very basics of photography, in the course DIGITAL MIRROR FOR BEGINNERS 2.0, you will get much more complete skills and photographic skills
I think further comments are superfluous!
I take all risks. And I give you a personal guarantee of quality. I am so confident in my course that I give a 30-day money-back guarantee.
I've been creating training courses since 2009 and already know a lot about it. I am well aware that you have some doubts about whether this course is suitable for you and whether you can master it.
Therefore, for all my video courses, including this training, I give a full money-back guarantee in case you cannot learn what I teach in this course.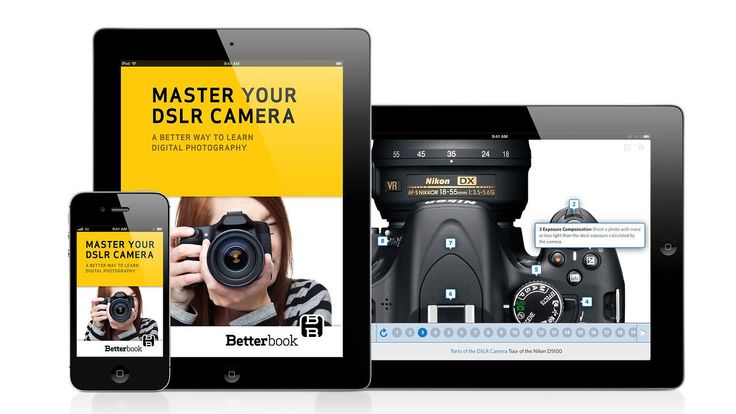
To use the warranty, you will need to write to me at [email protected] within 30 days from the date of receipt of the order
Frequently Asked Questions
I've only held a camera a couple of times, but I really want to learn photography. Can I take the course?
Yes, the course was created to teach photography from scratch, for beginners.
I bought a SONY DSLR will your course suit me? Or is it only for a certain brand and model of cameras?
This course is suitable for learning photography with ABSOLUTELY any SLR, mirrorless camera and even an advanced digital compact with manual shooting modes.
Will the course run on Mac OS?
Yes.
Will the course launch on iPad?
Yes, but after installing a file manager through which you can upload course files and run HTML files. For example, the free IFunBox does a great job with this.
Can I order a course on DVD by mail?
Unfortunately not. Now you can order only the digital version of the course by downloading it from our server, it's faster and cheaper.
I really want a course, but I don't live in Russia.
You can order an electronic version with download of all materials via the Internet, and pay by VISA/Mastercard or Paypal.
Is it safe to pay for the course with a VISA/Mastercard bank card?
Yes, safe. We have contracts with proven and reliable payment systems such as RBK Money, ROBOKASSA, Yandex and PAYPAL.
How to learn to take beautiful pictures with a DSLR.
That wonderful moment has come when the cherished reflex camera is in the hands. Overwhelmed with a sense of delight, novelty and desire to take professional photos. Most cameras have an intuitive interface, and you can insert the battery and screw the lens without instructions. And what's next?...
And then set the green mode, felt the shutter button - it's time to fight... How to learn to take pictures professionally? There is only one answer: by the method of scientific poke!
The weekend is spent hugging a DSLR, the cat hasn’t crawled out from under the sofa for the second day, the children have begun to forget what a parent’s face looks like behind a big black thing… And now the photo shoot is over - it’s time to choose the best photos and share colorful ones with friends pictures. Imagine the surprise when, instead of fabulous sharpness, the pictures turn out to be cloudy silhouettes, stretched faces of friends in place of elegant portraits. If the results are not so sad, then a person gradually gets used to a SLR camera and again and again postpones its more serious study until tomorrow. But if you are disappointed, indignant, and the universal resentment torments your soul, then a future photographer is lurking in you, whose creative desire cannot be limited to a couple of smeared photos from a booze. At this point, you are most interested in the question "why?" and “how to learn to take pictures with a DSLR professionally?”
Where to start?
This will give you a general idea of the location and purpose of the SLR camera controls.
The second step is to start reading thematic literature. Despite the abundance of books on photography, there are not so many useful and worthwhile publications that an amateur photographer should read. I have listed these publications in the article What books about photography should be read by amateur photographers and photographers.
When choosing a book, it is worth dividing:
1. The technical side of photography allows you to create technically competent pictures (without overexposure, sharp, contrasting, with the right focus)
2. The art of composition (the arrangement of objects in the picture), thanks to which the pictures acquire an interesting plot, attract the viewer's attention not by sharpness and color reproduction, but by movement and thought in a static frame.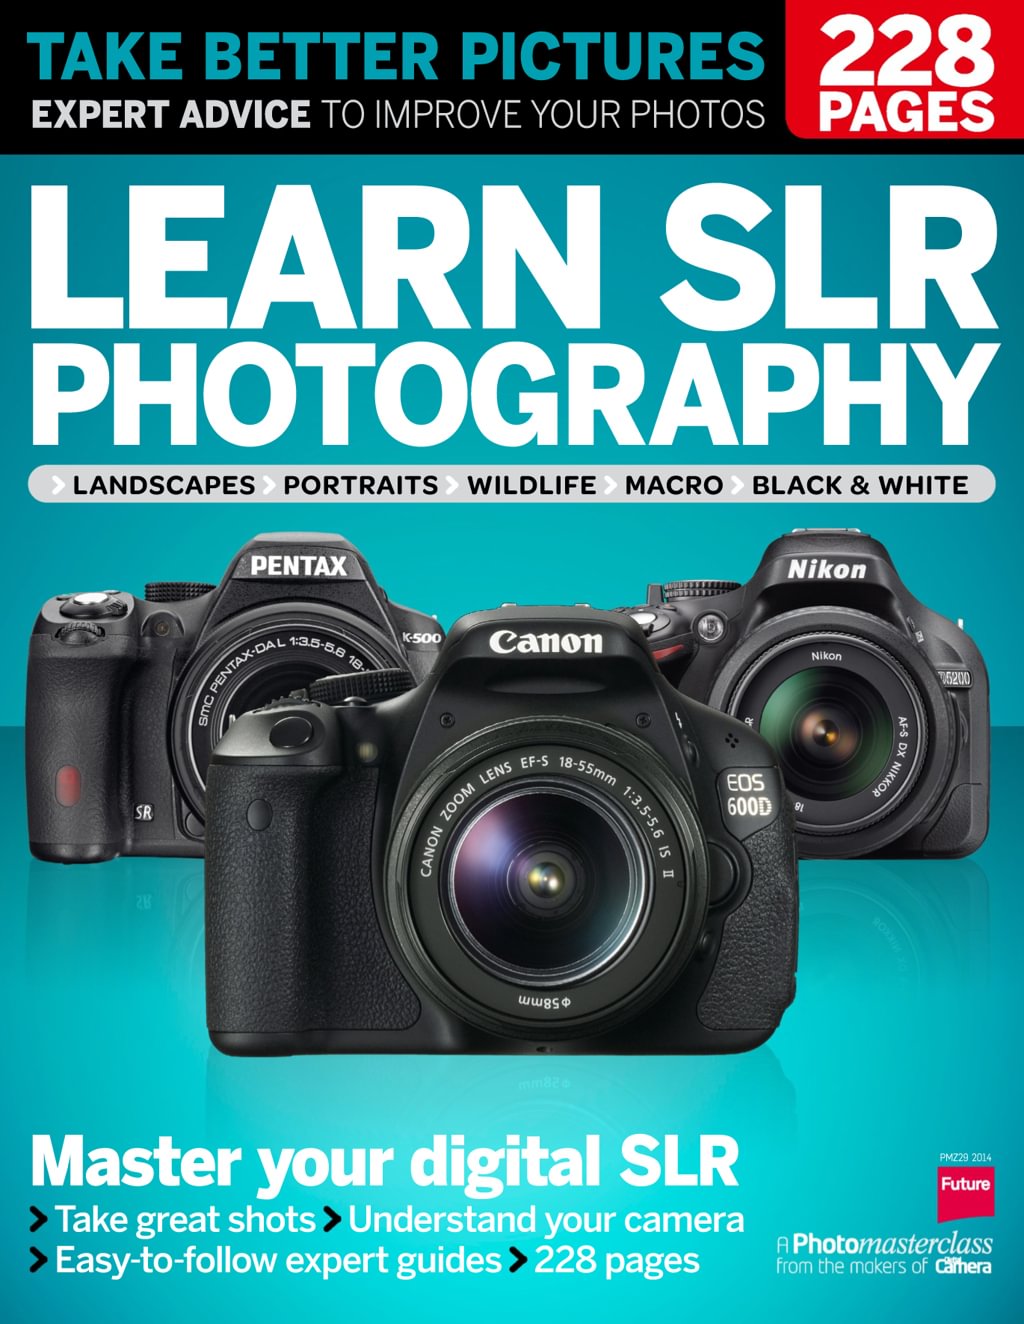 It's what makes you enjoy looking at photography. This is the philosophical side of photography. You need to know or feel the rules of composition in order to learn how to photograph correctly and beautifully.
3. Photo processing in Photoshop or other graphic editor on a computer and prepress preparation.
As you get acquainted with the books and apply the acquired knowledge in practice, the photographs become more perfect, technical errors disappear. More and more attention is paid to the beauty of photography itself, its dynamics, balance… At this stage, it is useful to study the experience of artists and professional photographers and get acquainted with their work. Look at other people's photos, objectively evaluate your own. Communicate with colleagues in photography. Photograph, analyze and photograph again! And, undoubtedly, soon your labors will be rewarded.
But there is a small BUT...
. -family-work-sleep "and again in a circle. In this cycle, the majority daily postpones reading the instructions until tomorrow, what can we say about the whole book ...
So what to do?
Understanding the aspirations of young photographers and the existing time constraints, I tried to briefly and concisely (no more than one page for one photography lesson) the main steps on the path to learning photography in a series of articles "how to learn to take pictures with a DSLR". Learning how to take beautiful and correct photographs is not at all difficult. Take 10 minutes of time to read the article (lesson) - this is enough to learn how to take good pictures. And if you have any questions - I'm always ready to help and give clarifications!
Your attention is the lessons of the Digital Photography School. Start with the basics:
Lesson 1. What is exposure in photography. Proper exposure in digital photography.