Long exposure waves
Long Exposure Ocean Photography (Capturing The Waves)
Long exposure ocean photography is one of the most popular types of long exposure photography.
Capturing those silky smooth ocean waves and smoothed out skies makes for stunning images. Every time I shoot at the beach, I’ll end up shooting at least one series of long exposure images.
But if you’ve never tried shooting long exposure of the waves, then it can be intimidating. So here are 4 steps you can follow to start creating epic long exposures at the ocean.
1. Planning The Shoot
Creating great landscape photos starts before you ever get to the location. Planning out the shot is even more important when it comes to shooting long exposures at the ocean.
Check The Tides
Any time you plan to photograph at or near the ocean, you need to be aware of the tides.
Not only do the tides change the appearance of the landscape, they can also put you in unexpectedly dangerous conditions. This is especially true if you are shooting on or near ocean-side rock formations or caves. The changing tide can easily trap you in a position and cause your gear to be submerged or, in the worst case scenario, pull you out to sea.
So be aware when the tide will be coming in and out, so you know if the spot you are shooting from will become covered in water eventually.
It’s usually a good idea to shoot when the tide is going out. That means get there at or just after high tide and shoot as the tide goes out. There are a couple reasons for this.
First, it lets you see where the ocean level is at its highest so you can plan accordingly and be safe.
Second, long exposures tend to just look better when the tide is receding. You’ll get better surf trails and less crashing waves that make the long exposure look messy. But more about that later.
Overall, just remember that the ocean is unpredictable, so know when the tides change, be aware of your surroundings and plan accordingly.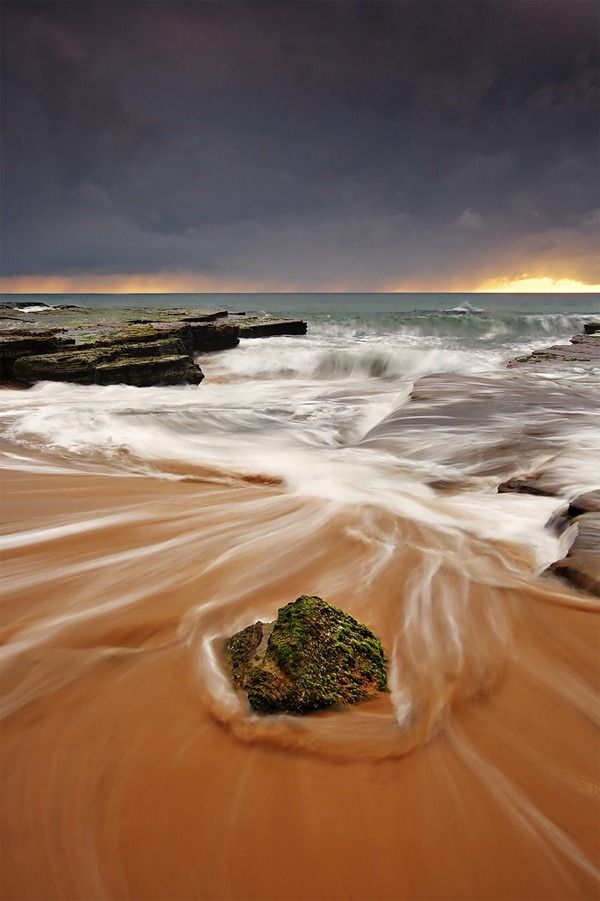
Know Where The Light Will Be
Now as far as the aesthetic of the image goes, knowing where the light will be is absolutely critical.
Just like most other types of landscape photography, the best times to shoot long exposure ocean photos are around sunrise and sunset.
For the more blue calm serene look, try to shoot in the hour or so before sunrise or after sunset. This will make it easier to get really long exposures and turn the moving ocean into a smooth looking sheet.
If you want a long exposure that shows the waves and their path you will want to shoot when the sun is above the horizon. That more direct light will be picked up by the white surf and really accentuate the lines it creates.
For planning the times and direction of light, I use an app called Photo Pills. It basically has everything you could possibly need to plan a photoshoot.
2. Setting Up
Get a solid base
Other than a camera, the most essential piece of gear to shoot long exposures is a tripod.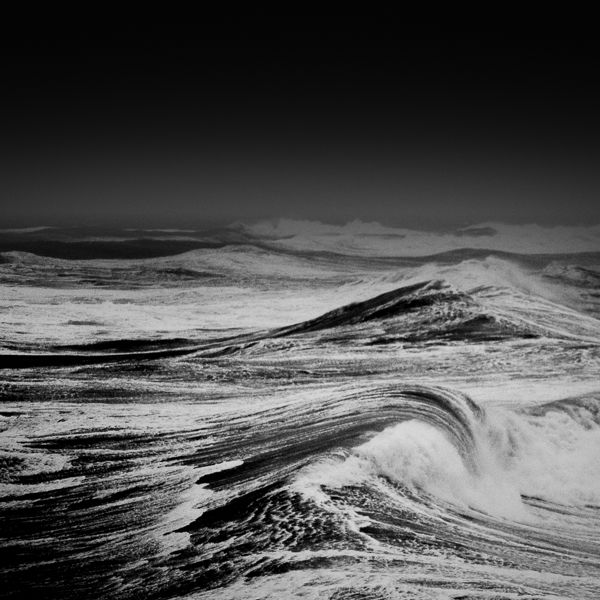
Since you’ll be shooting exposures of 1 second or longer at least, your camera needs to be locked in place. You really can’t get a good long exposure image handheld.
If you’re shooting from the sand, you’ll need a good set of legs that will be stable as waves hit it. Of course, even if you are shooting from solid ground like rocks, having a solid, well-made tripod is critical.
If you are relatively new to photography or using a tripod, beware because there are a lot of absolute garbage tripods out there…especially in the consumer electronics stores. Also, you want to avoid any tripod that connects the legs to a center column. Those aren’t too useful for landscape shooting because you’ll rarely find yourself on flat solid ground.
You can spend over $1000 if you want the best of the best when it comes to tripods, but if you are looking for a great value try checking out this Benro Tripod on Amazon, or for the really budget-conscious buyer, this K&F Concepts Tripod does a good job for a really affordable price (though it won’t last as long as some of the better options).
An ND Filter Makes Things Easier
You can shoot long exposures without an ND filter but you would be limited to the times before sunrise or after sunset, and even then, you couldn’t get real long exposures. So while it’s not a necessity, having a good ND filter does let you shoot long exposures a lot more often.
An ND filter is like sunglasses for your lens. It cuts down the amount of light going into the lens without changing the appearance of the image. Good ND filters will have very little to no effect on the colors in an image while cheaper ND filters can create a color cast that would have to be fixed with photo editing software.
For most long exposure photos, you’ll need at least a 6-stop ND filter (that means it lowers the exposure by 6-stops). I keep a 6-stop and a 10-stop in my bag for these kind of photos.
The filters I use are from a company called Breakthrough Photography. They have just about zero color cast on the images and are very sturdy and well built. I like to get 82mm filters and use step-up rings on any lenses that are smaller than that so I don’t need to spend money on filters in every size.
You can CLICK HERE to check them out on Amazon.
3. Finding A Composition For Long Exposure
Find The Movement
Long exposure photos are all about capturing movement. After all, a 3 minute long exposure of something stationary is the same as a 1/250 second exposure.
That is why long exposure ocean photos are so much fun. There’s movement all over the place. The waves are moving as well as the clouds in the sky.
So pay attention to the direction and the speed of that movement. Faster moving parts of the image (like waves) will blur more than slower moving parts (like clouds).
Contrast With Stationary Objects
So now that you have identified the areas of movement, you want to find elements of the scene that don’t move.
Things like rocks, driftwood, or even your own feet (if you keep very still) are some examples of things that will remain sharp in a long exposure.
These stationary objects create a contrast with the moving blurry parts of the image. This contrast usually makes the image more compelling and also helps add to the feel of motion in the blurry parts. I think on a subconscious level having points of stationary sharp elements in an image tells the viewer that the blurry parts are movement rather than an out of focus lens.
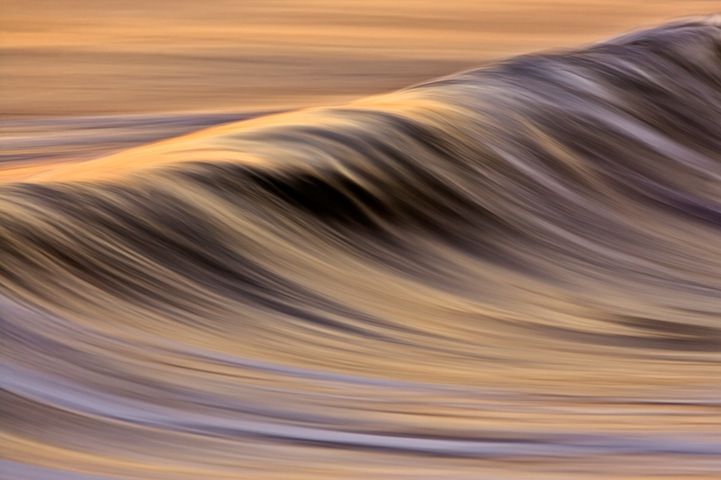
Using stationary objects like this rock allow you to create a more interesting flow of the water and more compelling images (18mm, 0.6 sec, f/10).Follow The Path Of The Water
Another very useful benefit of including stationary objects in the image is that they can control the flow of water.
For example, look at the image above. The waves receding create straight diagonal lines in the flat area behind the rock. This is good and alone would be somewhat dynamic.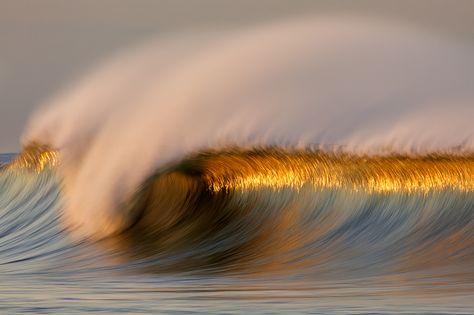 But the rock in the foreground causes the waves to curve around it forming somewhat of an ellipsis shape framing the rock.
This helps keep the viewer’s eye from drifting off the frame. As an added bonus the rock itself points up to the seaside town in the background drawing the viewer in even more.
This is just one example of using the flow of the water to create the composition you want.
[elementor-template id=”11761″]
4. Long Exposure Ocean Settings
For the most part, your long exposure ocean settings will change based on the scene, available light, amount of movement you want, and whether you’re using an ND filter. But here are some basics to get you started.
Aperture
There’s nothing special about the aperture settings for long exposure compared to your typical landscape image. Something in the 8-16 range will get you a decent depth of field to capture most or all of the scene in focus.
You may want to tend towards the higher end (smaller apertures) if you want to extend the exposure as long as possible.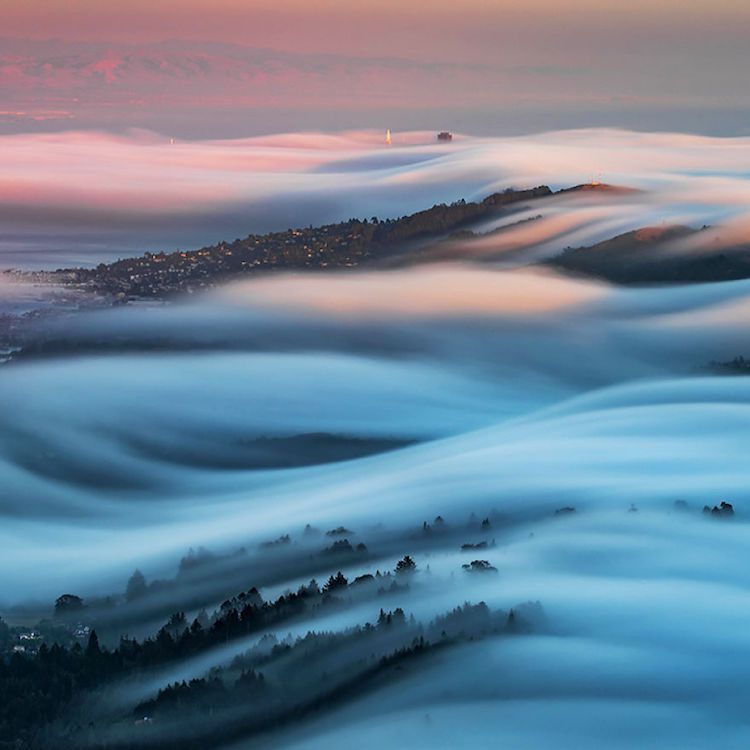
Try to avoid the highest apertures of your lens as this will cause some image softness because of something called diffraction.
I generally start around f/12 on most scenes and adjust from there.
Choose the right shutter speed
Shutter speed for long exposures of the ocean are where the creativity really kicks into high gear.
You can change the look and feel of an image considerably by simply changing the shutter speed.
A shorter shutter speed (1/2 to 2 seconds) is great for retaining the structure and highlights in a wave as it moves down the shore or flows around the rocks of a jetty. This is a useful technique when there isn’t any compelling objects in the foreground. A wave will create its own leading lines to add to the composition.
Here I chose a shutter speed of 1 second so that the texture and shape of the waves were still visible but blurred enough to show motion (18mm, 1 sec., f/13).Another approach is the very long exposure. By using a shutter speed of 30 seconds or more, you can flatten out all the waves of the ocean and create a smooth surface..jpg) As compared to the energetic action you’ll capture in a 1-2 second exposure, the ultra long exposure gives you a peaceful and tranquil feel to the image.
As compared to the energetic action you’ll capture in a 1-2 second exposure, the ultra long exposure gives you a peaceful and tranquil feel to the image.
One of my favorite ways to use the approach is by capturing waves hitting an uneven rocky shoreline. The combination of the water splashing up on the rocks and a 30+ second exposure will create a mist effect.
In reality there were waves crashing up on these rocks but the long exposure gave it this ethereal mist look (50mm, 60 sec, f/14).Like anything else in photography, there is no one right or wrong way to do it. So get out there and try different approaches and shutter speeds. Keep practicing and learning new techniques.
The beach is one of my favorite places to be (whether I’m shooting or not) and it is long exposure ocean photography is a fun creative way to enjoy the beach.
8 Long Exposure Beach Photography Tips for Better Photos
By Anton GorlinA- A+
Download as PDF
Subscribe Below to Download the Article Immediately
You can also select your interests for free access to our premium training:
Business Basics
Cheat Sheets
Child Photography
Colorful Cityscapes
Composition
Creative Photography
Creative Portrait Concepts
Digital Photo Collages
Fairytale Portrait Photography
Food Photography
Interior Photography
Landscape Editing
Landscape Photography
Lightroom Processing
Lightroom Presets
Long Exposure
Macro Photography
Milky Way Photography
My Camera and Photography
Organic Marketing
Pets
Product Photography
Sky Photography
Social Media
Still Life
Time-Lapse Photography
Travel Photography
Urban Photography
Wildlife Photography
Your privacy is safe. I will never share your information.
 Long exposure ocean photography is the holy grail of all seascapes sub-genre.
This article will take you through 8 tips for better long exposure ocean photography.
You’ll be able to create great long exposures every time you are out shooting the sea.
How Long Is a Long Exposure
The values could differ for each photographer, and there is no hard line you need to cross to make it count as a long exposure shot.
Some photographers say it’s 1 second and above, but I don’t agree with that. It could be right for a general landscape where 1 second doesn’t make a huge difference but for seascapes, every moment counts.
I typically consider 0.5 of a second and slower a long exposure and let’s agree to using this value within the article.
Everything above 30 seconds is referred to as an ultra-long exposure for the convenience of understanding the basic settings.
1. Why You Should Get a Sturdy Tripod
A tripod is the first thing you need for any sort of long exposure shots and even more so for seascape photography.
People tend to get lightweight tripods for the sake of carrying less during the hike, but it’s a trap. A lightweight tripod isn’t suitable for what we are after, and I recommend you get something solid and sturdy.
Most of the time the coast is windy, which causes camera shake on a flimsy tripod or can even trip it over. Also, if you are shooting on the beach, each wave hitting it could add to the shake.
I always use aluminium tripods over 1 kg of weight. There is no need to go expensive with carbon as they are lighter and sea salt could ruin your expensive tripod very quickly.
I get a new Weifeng tripod every 6-12 months for $50, and they serve me just great.
There is a trick to extend your tripod life – use WD40 on the joints now and then. Don’t overdo the WD40 as you may start to have issues fixing the clamps.
2. How to Use Use Filters
Neutral density filters (ND) are designed for long exposures. Photographers use these filters to cut the amount of light coming in.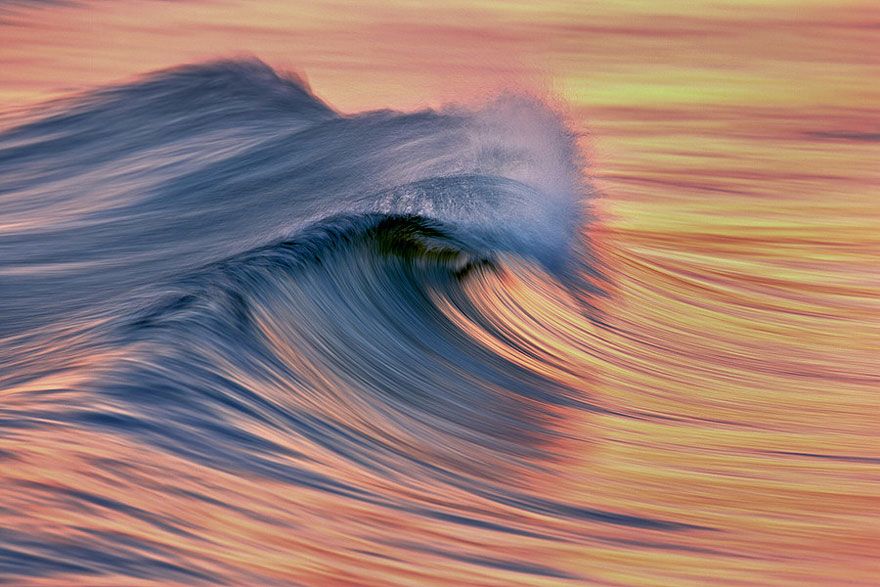 Some of these filters are so dark you could create long exposures with them during the day.
You can safely skip ND2 and ND4 as their effect is quite weak and you could easily achieve the same thing using aperture and ISO (or by using a polarizer). Instead, get an ND8, ND400 or even ND1000.
The first one is three stops; the second one is 8 2/3 stops, and the last one is ten stops. ND400 and ND1000 are very dark, and you’ll need to pre-focus to use them.
A really dark filter is a must-have for the ocean photographer. You can also combine filters to achieve a more significant effect.
Therefore, you don’t really need a single ND1000, for instance. Instead, you could get ND8 and ND400 and use them separately or together.
Also, you could combine an ND filter with the polarizer, which should also be present in your bag. The typical polarizer is similar to ND8, i.e. cuts three stops of light and you can use it as a darkening filter too.
3. Shooting at the Top of a Cliff Will Lead to Better Images
As we climb higher, the swell becomes visually smaller and plays a more minor role in the photo.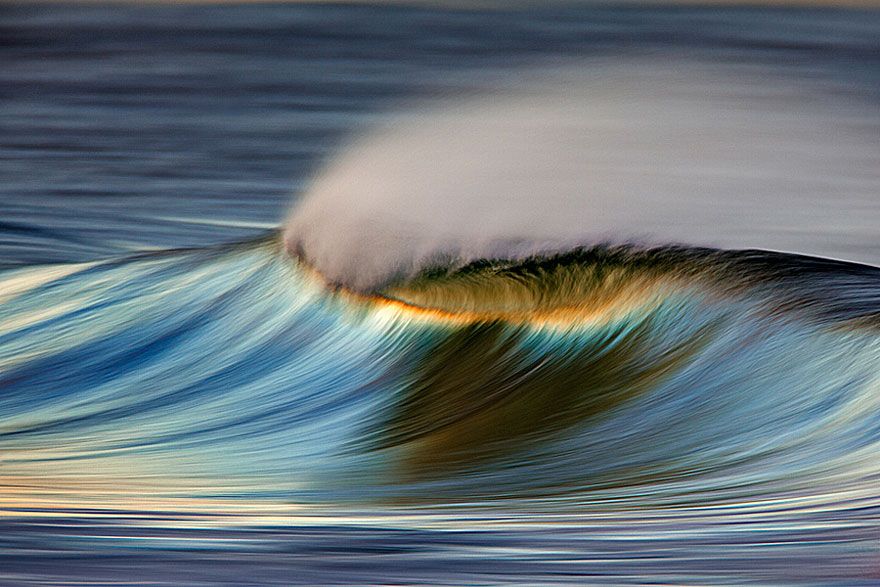 Such a view allows us to smooth out all the waves and to produce a level sea surface with soft colour transitions.
This type of effect works best when we have something massive and rugged such as cliffs and fast-moving clouds. It allows us to remove all of the busy action from the photo.
The other example would be to smooth out water around something protruding from the sea, rock or similar. Also, the cliff edge is the easiest way to produce a diagonal composition – you just need to shift your camera a bit to the side.
These large-scale shots with something rugged only work when the water is level and smooth. Otherwise, the photo becomes overly busy and distracting.
Pro tip: The wind is always stronger on the cliff top, so fix your tripod thoroughly or hide behind something. You could also protect it using a spread raincoat or an umbrella if you have one.
4. How to Create Foggy Water Effect
When we are creating a long exposure shot, the camera averages what it sees over time.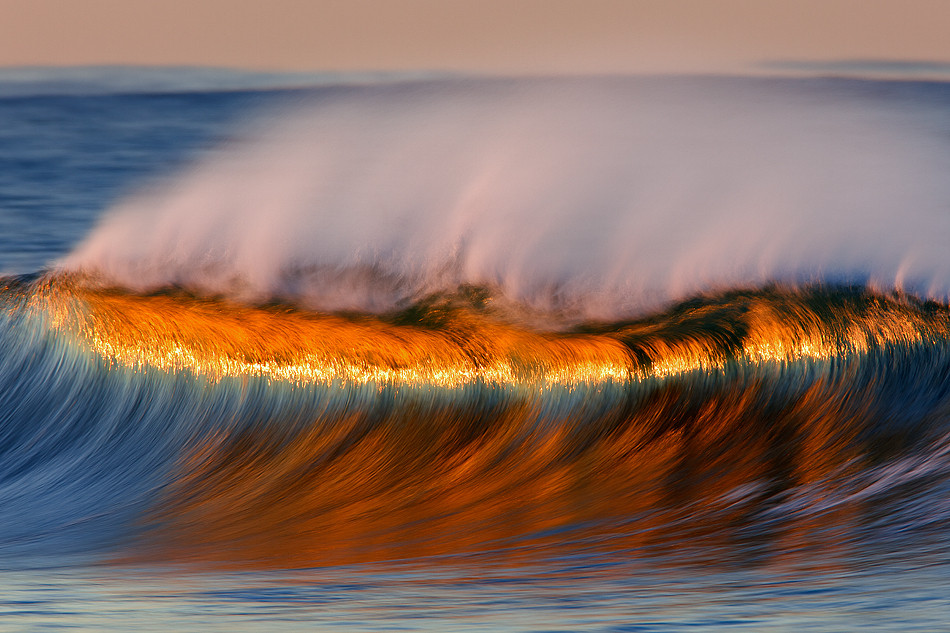 And if we are standing at the sea level with unrest water, the camera sees the waves.
Each wave has a different shape and form and moves a bit differently. Therefore, the final image has all these waves photographed together and smoothed by other wave’s movement.
In the end, it creates a foggy effect – the water doesn’t look like water anymore, it looks like fog. To emphasise this effect, we could include some solid objects, like rocks so that “the fog” goes around these objects.
This type of photo only works when there are waves. If the sea is calm with a small swell, a long exposure will turn it into a level surface.
The shutter speed required for this one is quite long – at least 20 seconds. This effect also looks much better on a zoomed in lens.
5. How to Create Water Trails
Another type of beach photography is to create white water trails on the sand. First, you need to shoot receding water, not an incoming wave. Second, the water moves at a different speed every time, so there’s no hard and set shutter speed for this type of shots.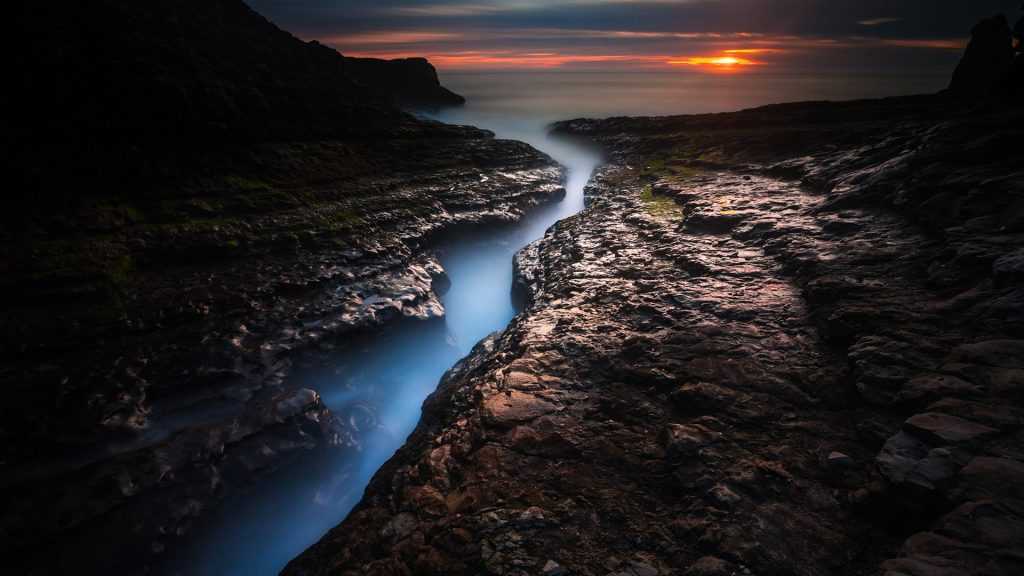
A good exposure time to start experimenting at is 1/2 sec. Sometimes it could go up to 2 seconds for some super slow flow and wouldn’t go faster than 1/4, which is already a rare case.
There is one important thing to mention here.
To create this type of shots, you need to be standing in the water. So, get your shorts and flip-flops (or the waders) out and go in.
Don’t go too deep as it could be dangerous. Rogue waves could knock you down. Knee deep is already too much.
Dip your tripod into the sand about ~10 centimetres for better stability but don’t let go of it. It won’t stand up on its own.
Then wait for the wave and shoot when it recedes.
6. How to Use an Ultra Long Exposure
Ultra long exposures are anything longer than 30 seconds. It could be 60, 120 or whatever. Such shutter speed is used to smooth out the water completely getting rid of all textures and leaving the colours intact.
Also, such exposure smoothes out the clouds as well, which creates a somewhat surreal effect.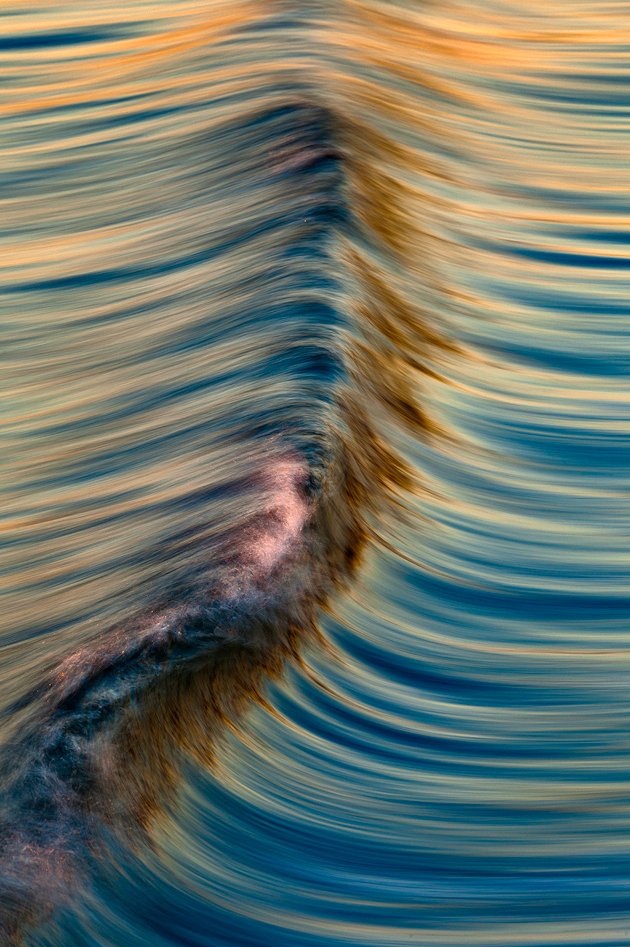 I recommend including something solid as a visual anchor – a cliff, a rock, a lighthouse, anything standing tall against the flow of time.
You need to shoot either well before sunrise (after sunset) or use some dark ND filters as I have mentioned in this article.
Another way for doing this type of shot is a fake long exposure, which I mention later.
7. How to Shoot Abstract Long Exposure Ocean Photography
Abstract ocean photography is becoming more and more popular. Many galleries showcase such pictures. But if you examine these works, most of them look more like snapshots.
Let’s avoid this trap and think about creating something meaningful.
The general idea is to have an average length exposure time combined with some zoom. Pick a day with ordinary sized waves, focus on them.
We need to capture the movement in such a way to blur the waves while not making it a total mess. We’ll be focusing on the various shapes and colours.
Look for the movement, for the lines and for the colours.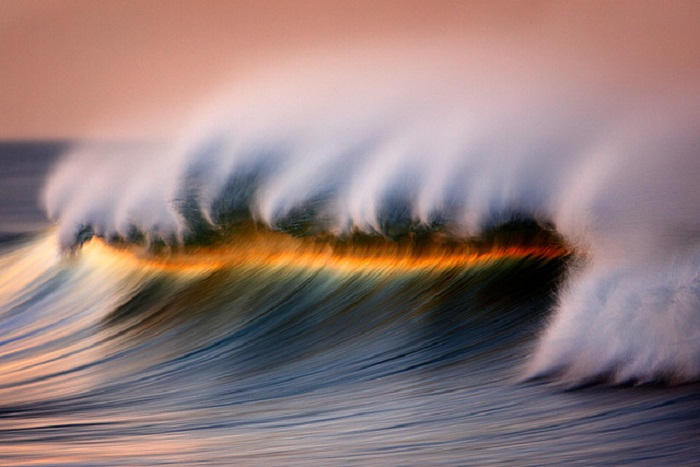 Try to avoid anything solid like the coast.
It’s up to you whether or not to include the sky. Also, you may need to experiment with the shutter speed. It depends on the focal range and water speed and movement direction, etc.
So this is purely a trial and error experiment. Start with 1/2 second as a rule and adjust as necessary.
8. How to Fake Long Exposures in Post-Processing
Sometimes we just can’t do a proper long exposure. Too much light, no or inappropriate filter, a desire to create something even longer, etc. What to do?
There is a way to simulate a long exposure while editing. You need to have your camera on a stable tripod and set it to either interval shooting or shoot manually many photos one after another.
Try to minimise the gap between the pictures. We are not shooting a time-lapse in this instance.
So, here is how to do it:
- Make as many photos as you wish to combine later;
- Edit them in the same manner as a batch;
- Upload all photos as layers in Photoshop;
- Select all photos, go to the Layer –> Smart Objects –> Convert to Smart Object;
- Now the actual magic.
 Layer –> Smart Objects –> Stack Mode –> Mean.
Now you’ve got a good looking long exposure, and no one can tell you merged it in Photoshop.
The added benefit is that you can create a time-lapse if you have created enough shots for it. Or vice versa, you can create a bunch of long exposure from a time-lapse series.
Conclusion
Long exposure photography is a great tool that lifts our art to the next level. But I also have to warn you – there is a whole world of different shutter speeds producing various effects in the final photo.
Do not run mad after just this one long exposure ocean photography technique. You must have it in the list of your methods and know how and when to use it properly without limiting your creative juices.
Next time you’re out there shooting, try a long exposure along with more traditional ocean photography.
Long Exposure Tips | Articles | Photo, video, optics
Long exposure is used in photography for various purposes.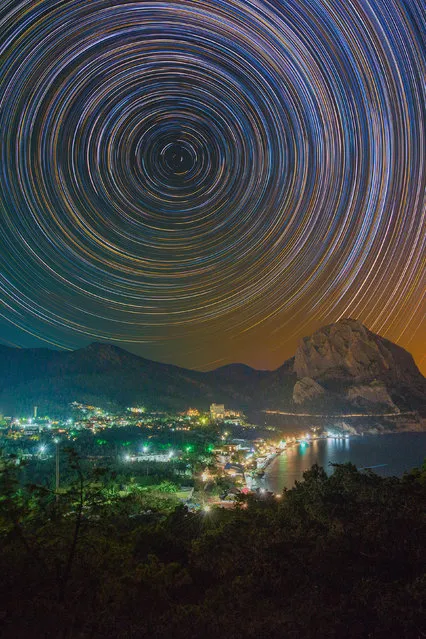 It can help build exposure when shooting at night, or it can be used to create special effects in photography, for example, to show the contrast between the rapid movement of objects around one static one. We've put together some helpful tips to help you get the effect you want when shooting at slow shutter speeds.
Tripod anytime, anywhere
Long exposures are impossible without a tripod. In the few seconds that pass between the click and the end of the shooting, the camera must be in a completely static position. This means that even the occasional vibration caused by inhaling or trembling in the hands can affect the entire frame. Therefore, when shooting at a slow shutter speed, we mount the camera on a tripod, and use the remote control to press the button. Yes, yes, because even vibration when pressed gives a negative effect. This means that you definitely need to stock up on a high-quality and most importantly, stable tripod.
Some pros recommend adding extra weight to the tripod. Even such items as sandbags are used, all this so that the camera does not flinch when shooting.
The Sirui ET-2204+E-20 tripod is ideal for long exposure photography. Large and stable, it is made of carbon fiber and protected from rust and weather conditions. Convenient legs allow you to install this tripod on any surface and securely place the camera on it. The maximum load is 12 kg and the maximum working height when using the central shaft is 145 cm. The E-20 multifunctional ball head is also included in the kit.
Weather conditions
Of course, in order to successfully capture a picture outdoors, you need to take into account the weather conditions. Whether you want to shoot long exposure waves, snow, or even moving car lights, you always need to know what kind of weather (at least roughly) awaits you on location. It will be difficult to shoot such shots in rainy weather, in a cloudless sky, or in bright light. As with any shoot, it's worth researching the area you plan to shoot in advance.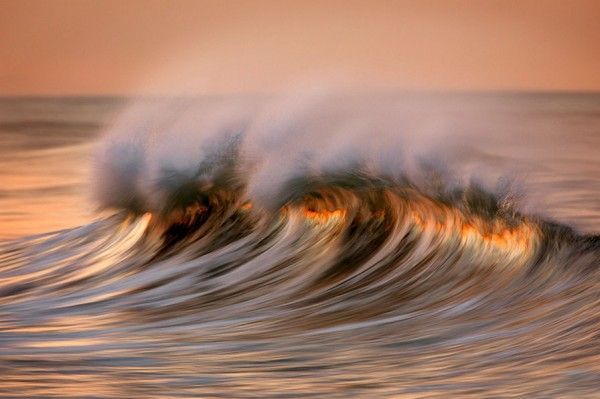 This will give you an idea of what kind of weather you should expect and how the camera will behave in the available light. This is especially true for shooting water: beaches, waterfalls, rivers.
Composition ahead of time
Another reason to research a location before shooting is to be able to compose ahead of time. Choose the exact shooting point and view, and then imagine exactly how you see the frame. You will have to take into account all the details, and look not only at those elements that interest you in the frame, but also at the surrounding objects. This will help you to most successfully integrate a long exposure into a regular landscape photo.
Focus
When shooting, it is very important not to lose focus on a static subject. You can fix it manually or, if you shoot in autofocus mode, you need to press the shutter button all the way. And at this point it is especially important to catch the possible presence of light leaks. Leaks must be isolated to prevent artifacts.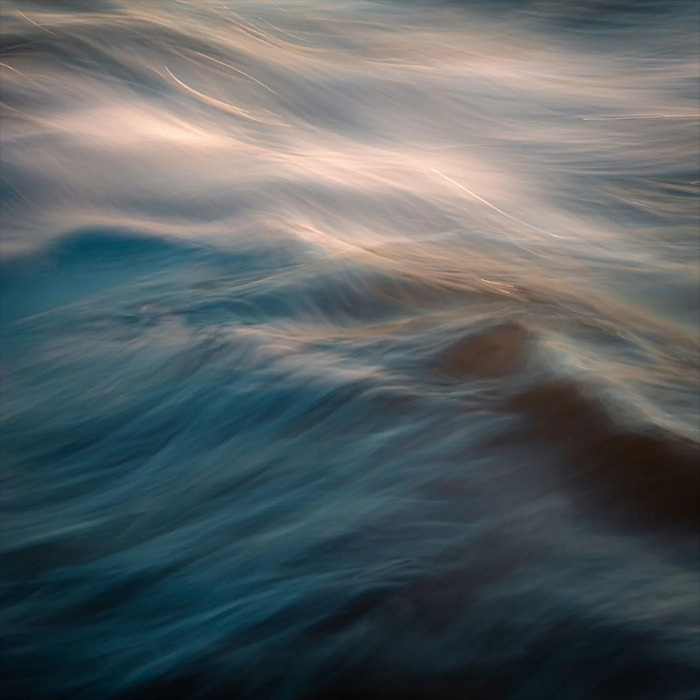 For this, by the way, Canon camera straps have a special rubber element. And if you use a different camera, then you can create an analogue of this element from improvised materials, for example, you can use black electrical tape.
Even small highlights can spoil the frame, so you need to be very careful with their isolation. To do this, a hood will also come to the rescue, which can be selected depending on the diameter of the lens and its characteristics. Fujimi offers many different models, including the Fujimi FBET-74 for the Canon EF 70-200mm f/4.0L, the FBEW-73C for the Canon EF-S 10-18mm f/4.5-5.6 IS STM, and more.
Light
Whether you're shooting at night or during the day, it's crucial to keep track of all the lights and see if you can use them. How much light will be available to you when shooting, what light sources will enter the frame and affect its construction, etc. These are the questions you should ask yourself before taking the coveted shot.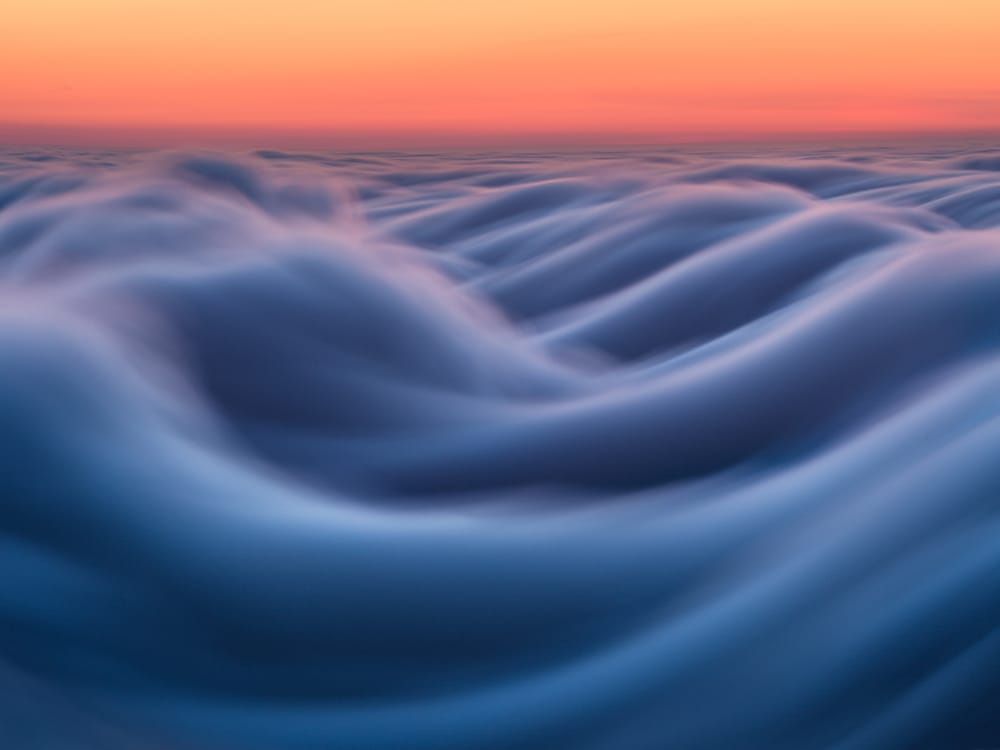 At night, this is especially important, because you have to work in difficult conditions and you never know exactly how the camera can behave in combination with one or another light source.
Test frames
A test frame is always important, especially when all the hardware is already installed. The camera must be in manual mode (M) with Aperture Priority. Accordingly, depending on your idea, the aperture is also set. In order to select the ideal settings, you will have to shoot several text frames and carefully evaluate their results. If they are close to what you intended, then the settings are right for you.
Filters
Neutral gray (ND) filter is often used when shooting at slow shutter speeds. You need to choose the appropriate filter solely based on the result you would like to achieve. Be sure to remember that a strong filter (for 8-10 steps) will not allow you to use the Live View mode, that is, the task will become more complicated, although the camera itself will see everything perfectly. The benefits of such a filter will be clearly visible in the finished photo, it reduces the amount of light that hits the camera matrix.
Filters should be chosen according to the diameter of the lens, so the Polaroid Fader ND (2-400) is suitable for 72mm diameter, and can reduce light by 1-9 stops. Thus, this filter can be used just for shooting at slow shutter speeds.
In addition to this, other filters can be used: polarizing, ultraviolet, etc. In the Polaroid model line, you can find any filter for any purpose.
Mode
Be sure to set the camera to B (Bulb) mode before taking the picture. This mode will allow you to keep the shutter open for more than 60 seconds, and you can set any shutter speed. The rest of the settings cannot be changed. Start practicing with slow shutter speeds and gradually, you will learn how to shoot stylish shots at slow shutter speeds with all the available effects.
The last thing we can recommend is to shoot as much as possible, because only in this way, sooner or later, you can finally reach the goal and learn how to transfer what you see to the camera's matrix.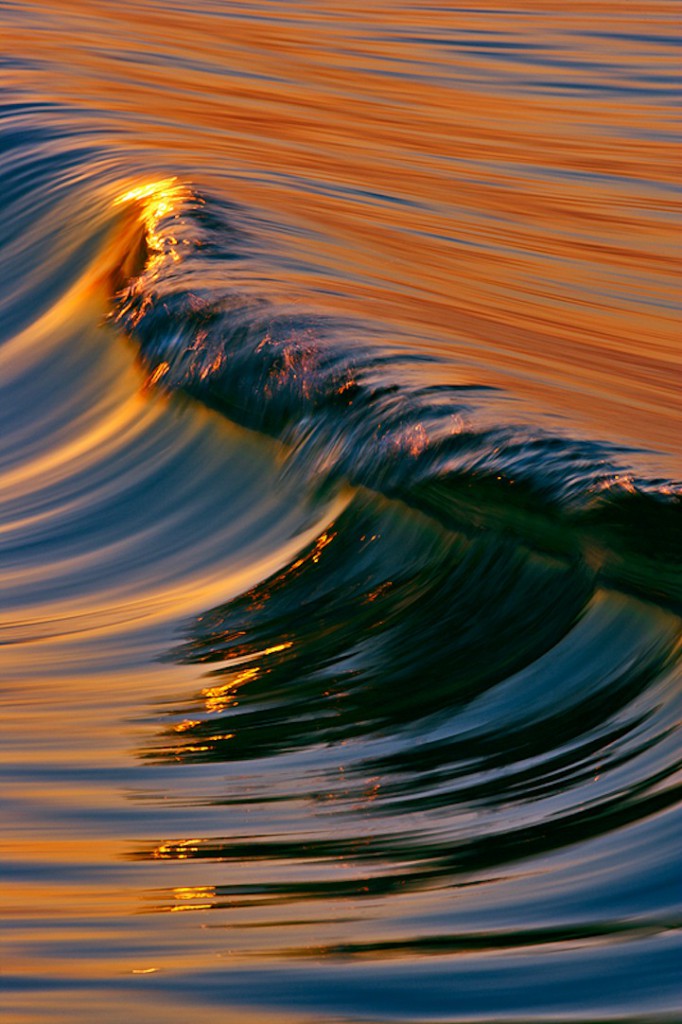
shooting secrets - Russian photo
Long exposure seascapes:
shooting secrets
November 8, 2016
Photo: Rolandas Sutkus
Text: Rolandas Sutkus
By shooting the sea at a slow shutter speed, you can turn it from stormy and stormy. Especially for the readers of our magazine, Lithuanian photographer Rolandas Sutkus tells what conditions are necessary for such a shooting.
Of course, long exposure photography requires patience and skill. But when it starts to turn out, you will see beautiful, slightly fantastic landscapes. You will never notice with the naked eye how nature changes within 3-5-10 minutes, especially the sea element. In your imagination, you can imagine how the frame will turn out, but the photo suddenly turns out to be completely different - surprises await you. How to take a good shot?
Camera still
To get the best shot, I recommend having a good tripod, which should remain stable even in strong wind. It doesn't have to be expensive. Its main advantage should be its strength, good platform, stability. When shooting in the company of other photographers, I have repeatedly observed how an unstable tripod spoiled the frames - they came out unfocused, blurry. The slightest movement of the tripod nullified all the work. You also need a remote control, wireless or wired. I use the wired model: I find it more reliable.
Sometimes you have to go into the sea for a good seascape, but you have to be very careful not to damage your photographic equipment. The legs of the tripod must be sunk in the sea sand so that the waves cannot move it. And only after that I attach the camera, and then I hold the whole structure with my hands, trying not to move.
All auto stabilization functions must be turned off for the lens, otherwise camera shake cannot be avoided. I advise you to shoot in manual mode using BULB shutter speed.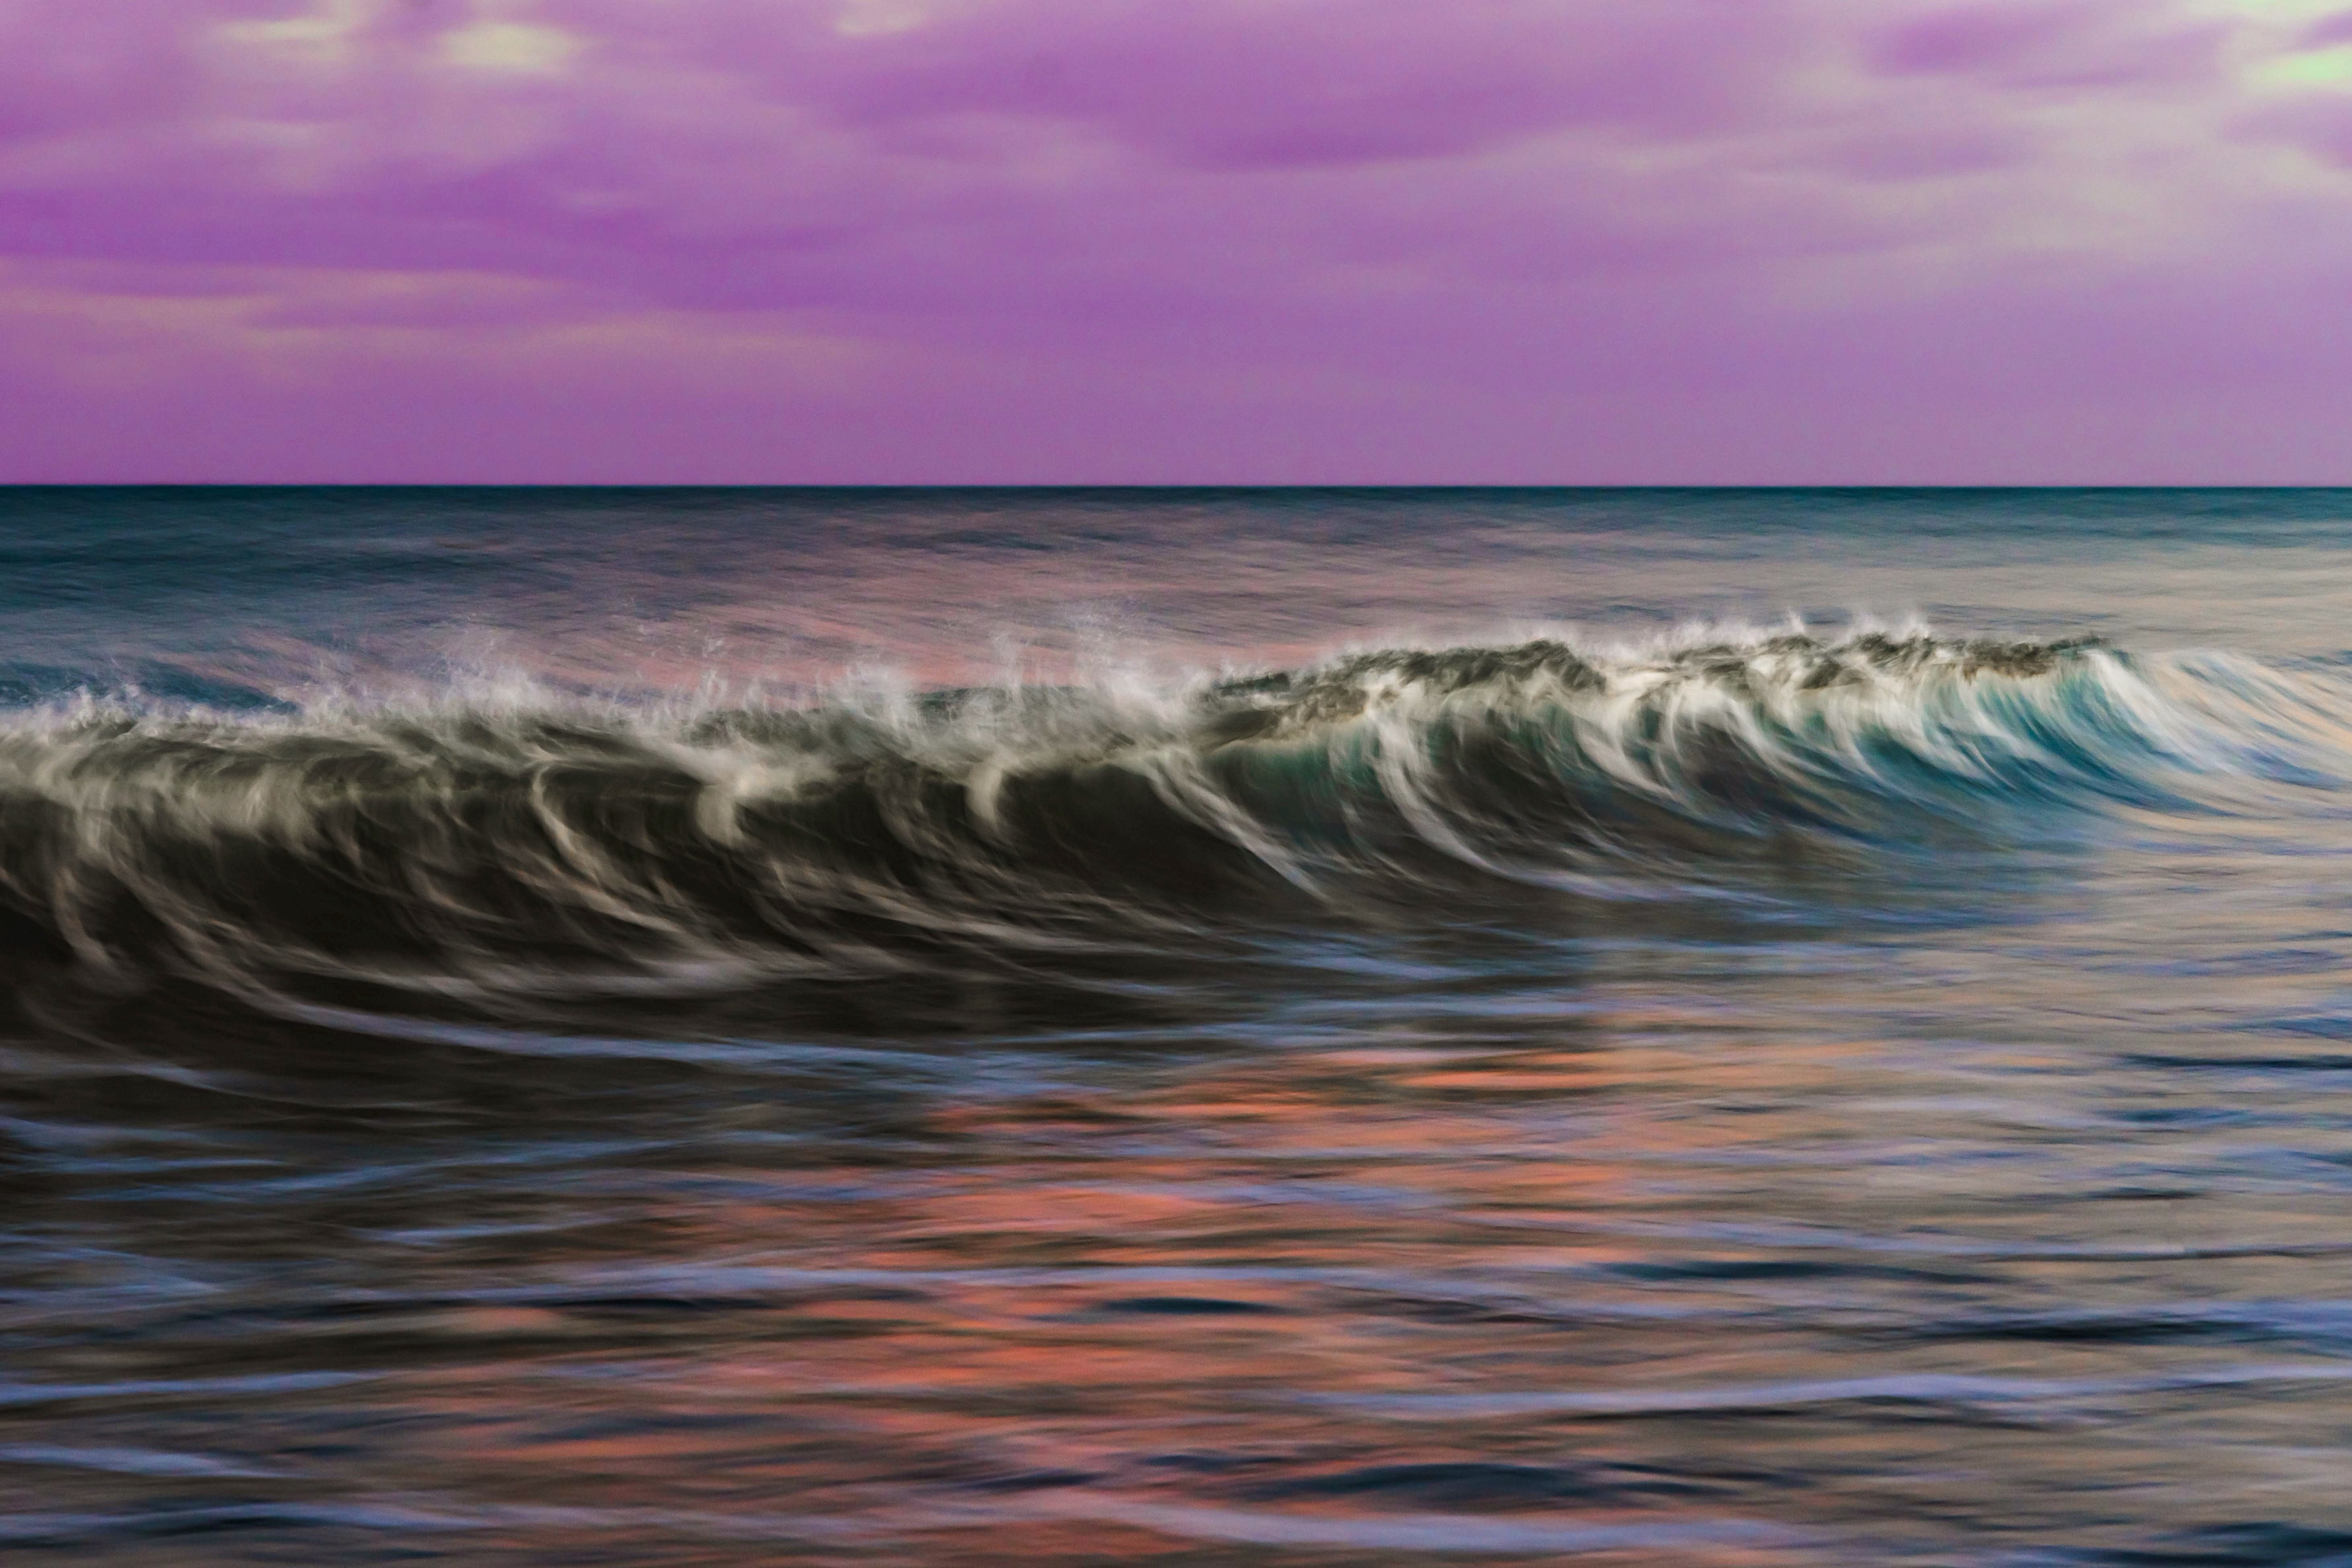 Set the device to the function of raising the mirror and shoot on the second press of the remote control.
Appropriate optics
The first thing I do is clean the lens and filters. I use the LEE Filters filter system. They meet all my expectations, especially I like the natural colors. I would not recommend using different brands of filter systems. I often use ND Grads filters of varying degrees of gradation, depending on the lighting. CPL gives structure to the clouds. I also use LEE Stopper. I must say that CPL is of two types. One gives coldness, and the other makes the color scheme warmer.
The lens angle should be wide. I advise 14 mm, 24 mm, but this also cancels the possibility of using 200 mm. However, one must understand that 200 mm compresses the image.
Correct time of day and weather
When is the best time to shoot the sea at a slow shutter speed - in the evening, in the morning, at night? Is it safe for a photographer and photographic equipment to enter the waves?
Most often I shoot the sea in the early morning and at sunset.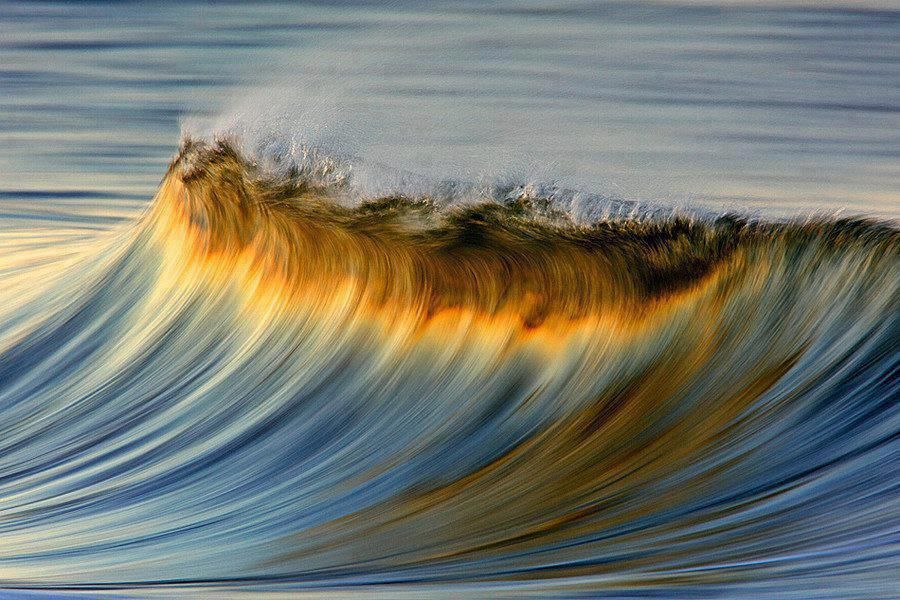 This is the "golden" hour for the photographer, it is at this time that the sky is painted in the most beautiful colors. I try to shoot when there are clouds and even clouds in the sky.
Very interesting shots are taken before or after the rain. I try to catch the time when there are clouds and a strong wind in the sky. In such conditions, the most interesting pictures are obtained, therefore, with a slow shutter speed, these clouds take on fantastic shapes, especially if they are rounded or layered.
Of course, it happens that I shoot during the day, but then you need to carefully monitor the lens so that side sunlight does not get into it. And, of course, magical shots are obtained at night. Many photographers pack up their gear and leave as soon as the sun goes down. But not me. At this point, the fun begins. The night sea is a very interesting topic.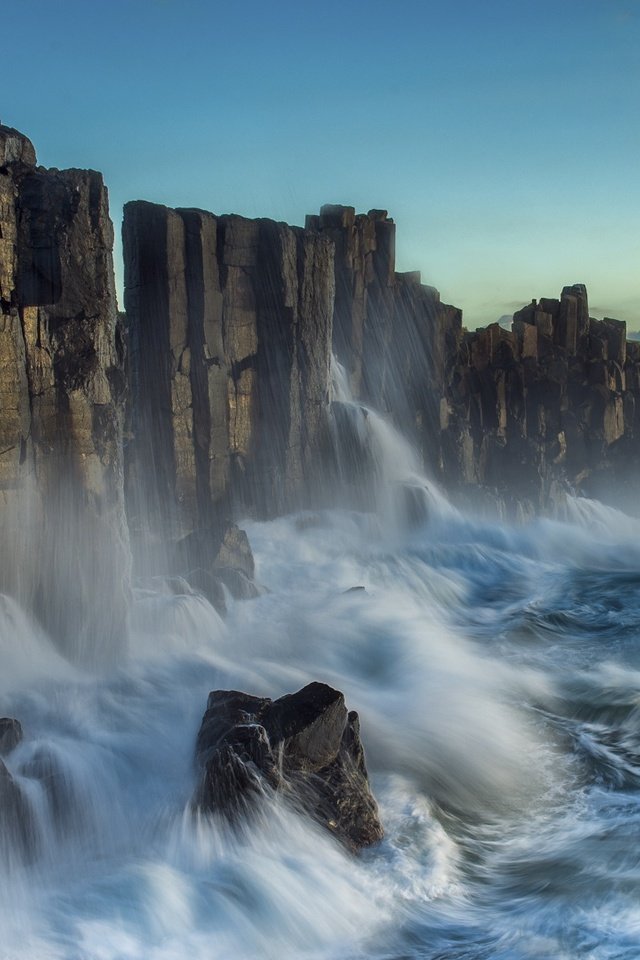 Everything is different: the color of the sea, the clouds, and the nature around. Of course, night shooting has its own characteristics. You need to set the settings correctly and not be afraid to increase the ISO. Then even the slightest reflection will be fixed in the frame, and the result will exceed your expectations. Even on a dark night, your camera will catch the city lights reflected in the clouds. It is good if there is a slight mist that blends the colors.
Let me emphasize once again that when shooting at night, do not be afraid to increase the ISO. If you choose the right lighting settings, then digital noise will hardly be visible. Don't get hung up on meter readings in manual mode. It may show that the frame is heavily exposed, although the output photo will be normally exposed. Of course, you need to take more than one shot, but experiment.
Exposure between 25 and 30 seconds if you want the stars to look like little dots. Above 30 seconds and they will become light lines.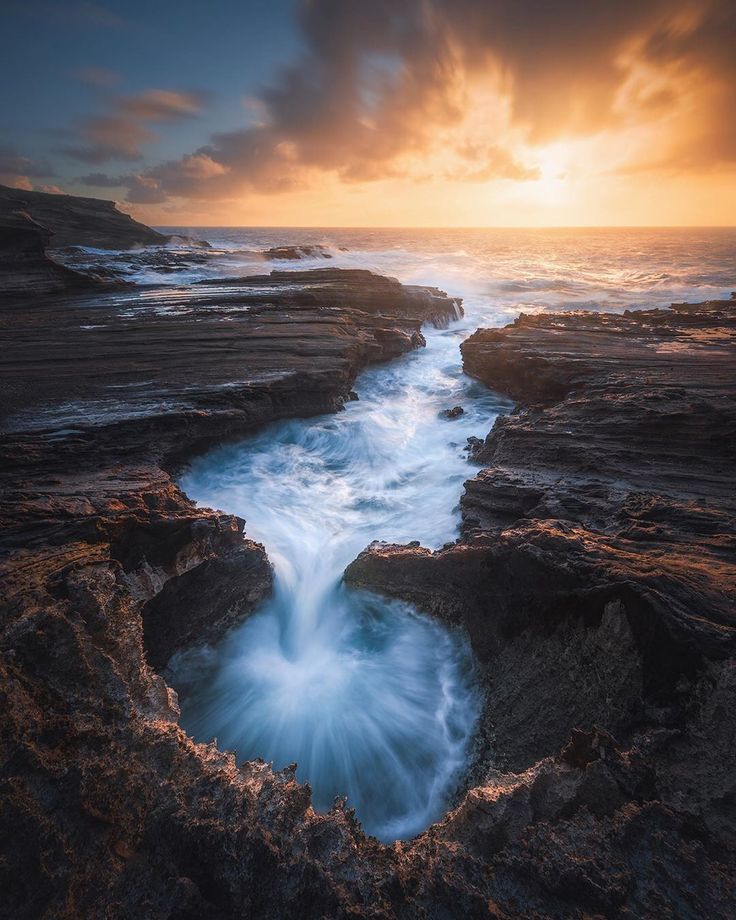 The longer the shutter speed, the longer the lines will be. The longest exposure I worked with was 1 hour 30 minutes. The most difficult thing was to keep an eye on the lens - so that it does not become covered with dew and so that an alternative light source does not appear from anywhere.
The picture came out very unusual, and many photographers were surprised that it turned out at all. Photographers take such pictures by shooting 1000 times at short intervals, and then, using special programs, they combine everything into one frame. The results are very similar.
Nowadays, when technology is developing very quickly and everyone has a phone with a built-in camera, it is very difficult to surprise with photos. Therefore, I began to look for new ways and experiment with my photographic equipment, to do something that you cannot achieve with a mobile phone. For example, night landscapes with inserted figures of people or portraits. Yes, it's hard, but what satisfaction do you get from the result.
Accurate calculation
To get a beautiful white color on water, you need a very accurate exposure calculation. I insert a weak ND Grad filter into the adapter so that the water in this place does not fade at all, and a more powerful filter is placed at the top of the adapter. On top of them - Big Stopper, 10 Stop. First, I took test shots, adjusted the parameters, and finally it worked. After each frame, I look at the histogram of the picture, and if something does not suit me, I lengthen or shorten the shutter speed. Quite rarely, I take pictures with the sun shining, because at a slow shutter speed it turns out to be burnt out.
I don't really like these shots, so I have to resort to all sorts of tricks. I'm waiting for the sun to begin to sink towards the horizon. I close the adapter with the most powerful ND filter.