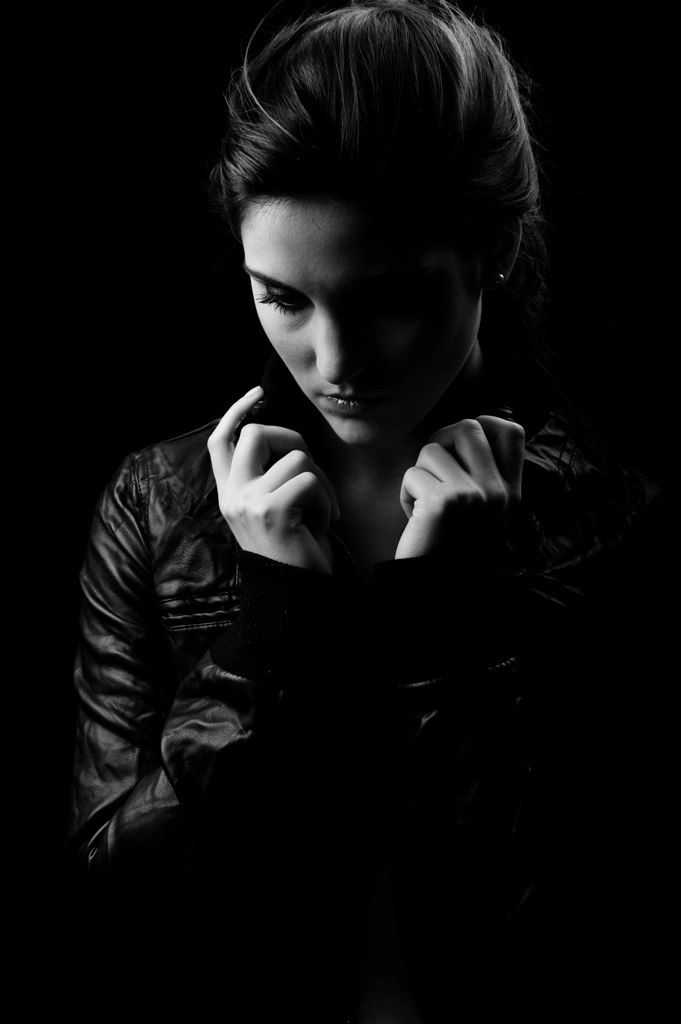
Low light portrait
Great Low Light Portrait Photography
Low light portrait of a shopkeeper in his colorful store, Kolkata, India.
Low light portrait photography is one of the most beautiful forms of people based photography. I love creating beautiful, life affirming portraits under low light conditions. And that’s especially true indoors or under the soft, diffuse light near the edges of the day.
Low light portrait photography is defined by low levels of illumination that, with a physically wide lens aperture (e.g., f/4 or wider) and a camera sensitivity of around ISO 100, results in a shutter speed that’s slower than 1/60 second.
Whether working outside with natural light or indoors with natural and/or artificial light low light photography can produce evocative and meaning rich images.
During the dawn and pre-glow and around dusk and twilight time seems to move at a very different pace. At such times the practice of photography can become a very meditative and transcendental experience, which is one of the reasons I love it so much.
The soft, ethereal quality of light at these times of day is key and an abundance of opportunities await the photographer tuned into the light and the environment in which they find themselves.
It's no co-incidence that many of the great photographs exploring The Human Condition and the beauty of our natural world are made under low light conditions.
The above image was made while on a self-motivated photo walk around the back streets of a famous and popular Hindu temple in Kolkata, India.
The light was low, both in angle and in intensity, and it was a challenge to produce a sharp image given that I was working, hand-held, at 1/13 second.
As I feel the addition of flash to be inappropriate when producing this kind of intimate, documentary style low light portrait it was important to be able to hold the camera still while working at such a slow shutter speed.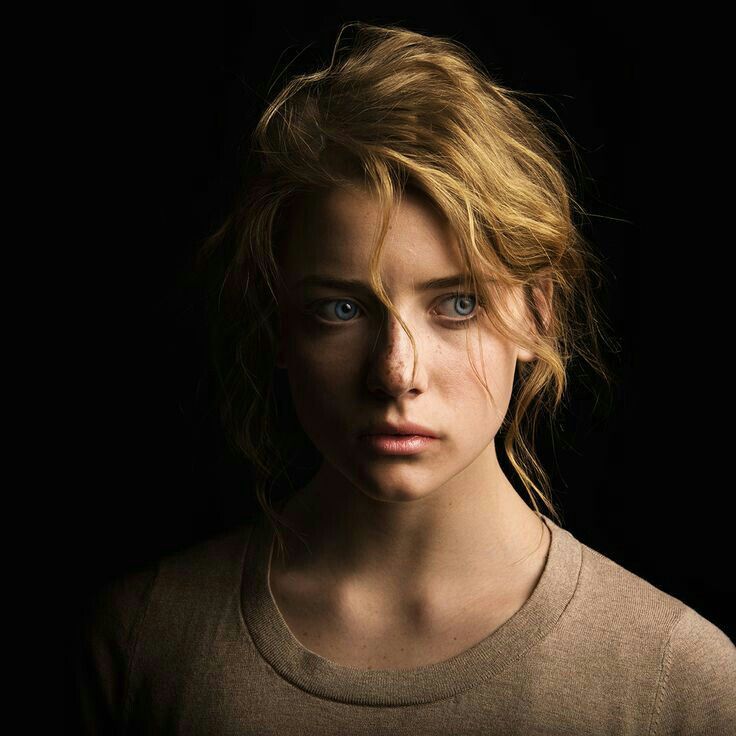
From experience I can say that, with practice, it’s certainly possible.
Man sits by a fire in the back streets of Kolkata, India.
There's no doubt that today’s advanced DSLR and Mirrorless cameras make it easier to make great low light portrait photos compared to what we experienced in days gone by.
The most important technological advancements I’m referring to including the following:
But good technique remains important when undertaking this kind of photography, particularly if you want to avoid photographing at a very high ISO.
Take a look at this black and white environmental portrait of a local man enjoying the warmth of a fire during a local night market in the back streets of Kolkata.
I was able to make use of the fire as an interesting visual element in the foreground and also as a light source to illuminate the subject.
Ultimately it was the fire that enabled me to achieve an acceptable result at 1/13 second with an aperture of f/4 at a relatively modest ISO 800.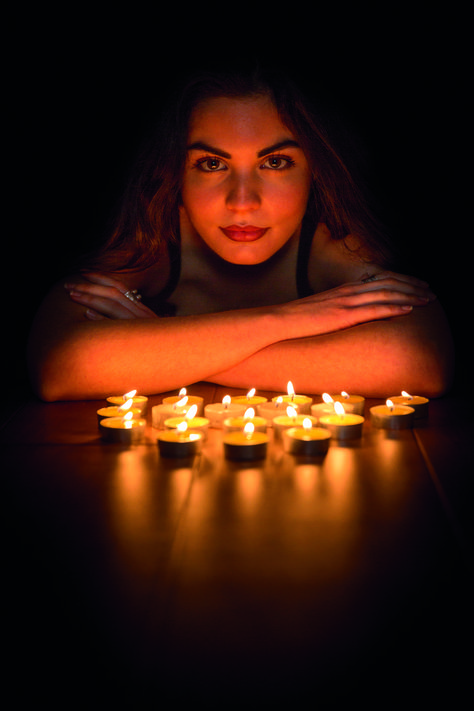
The whole process: gaining permission to make the photo; directing the subject; and making the image was completed in about two minutes.
I then thanked the gentleman and, happy with the resulting photo, continued on my exploration spurred on by a feeling of elated calm.
I really prefer not to push the ISO too high, even when I’m photographing under low light conditions. Sometimes, in addition to being able to keep both camera and subject still, you’ll need to be creative with the existing light sources at your disposal.
Just like in the days of film based photography, confidence comes with practice.
The lens I used for all of the low light portraits in this post was a general purpose zoom lens which, given its relatively light weight and modest size, made it a great option for travel photography.
However, with a relatively modest maximum aperture of f/4, it’s certainly not what you’d call a fast lens.
Nonetheless, with good technique and the ability to direct your subject, it’s possible to produce sharp portraits with a relatively shallow depth of field under low light conditions.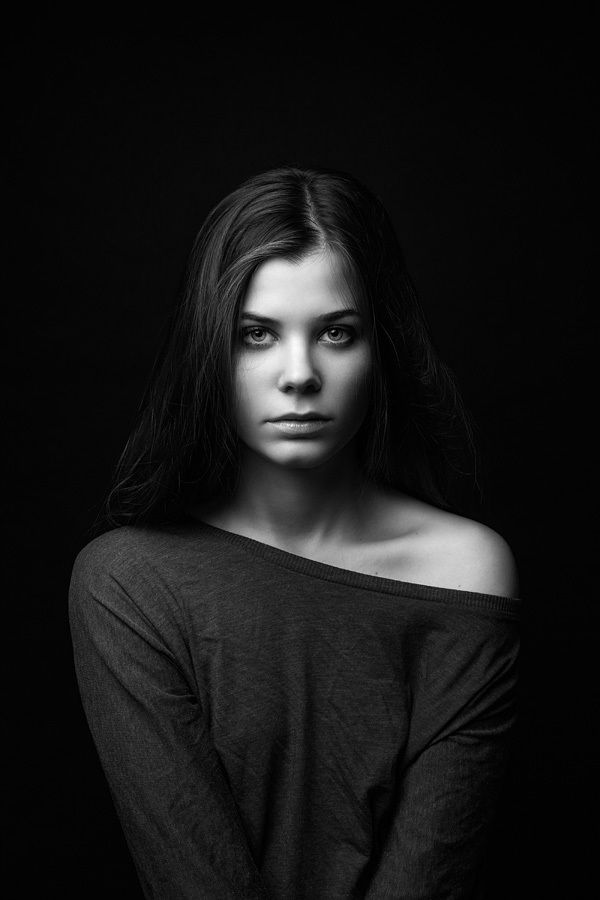
Reducing the camera to subject distance further reduces the depth of field and allows for a more intimate interaction with the subject.
Striking portrait of a beautiful girl at the Kali Bari temple, Chennai.
The Relationship Between Photographer And Subject
Some photographers talk about the need to establish a dialogue or form a relationship with the subject they’re photographing.
I use those same words, but attach a very different meaning to them.
You don’t need to know someone’s life story to be able to make a great photograph of them.— Glenn Guy, Travel Photography Guru
It’s wonderful to know something of your subject’s story, the life they’ve lived and their dreams and aspirations for the future.
A deeper understanding of your subject can certainly help you make a more informed and meaningful image.
But photography is a three edged sword that explores the following:
The photographer’s relationship to the subject or scene depicted
The viewer’s relationship with the subject or scene
The relationship between photographer and viewer
Nonetheless, outside certain documentary projects, it’s rarely necessary to take up a lot of a person’s time as a way of gaining their confidence prior to asking permission to make their photo.
If you’re there to make photos you need to get on with it.
If your intentions are pure and you’re drawn to photograph someone then you need to approach them openly, introduce yourself and ask for permission to make their photograph.
We’re talking seconds here, which is neither a major commitment for you or the person you’d like to photograph.
It helps to explain why you want to make the photo.
And the reason might be as simple as I love your motor bike or I noticed how colorful your scarf is and how beautiful it looks against the background.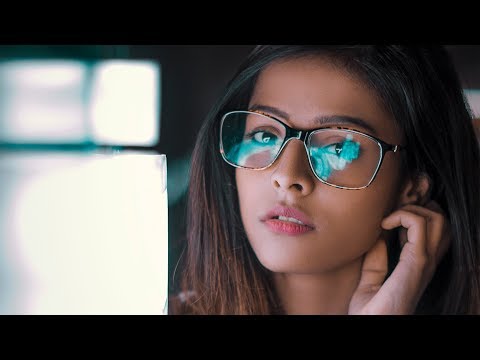
Those kind of statements are clearly complimentary, yet are unlikely to be considered sleazy.
Low light baby portrait displaying the face of innocence, Chennai, India.
Making A Great Low light Portrait Photo
It’s then simply a matter of ensuring your subject is placed in good light, which is one of the reasons you may have noticed them in the first place, setting your camera and lens appropriately and making a few images.
Half a dozen frames, perhaps with a few variations in composition, is usually enough for me.
If you need to make more photos fine, just get on with it. The longer the process takes, the more uncomfortable your subject will become and the harder it will be for you to make a compelling image.
Obviously, if you’re working with professional models, brides or commercial clients more photos will be required. But, when photographing strangers, you just don’t have that luxury.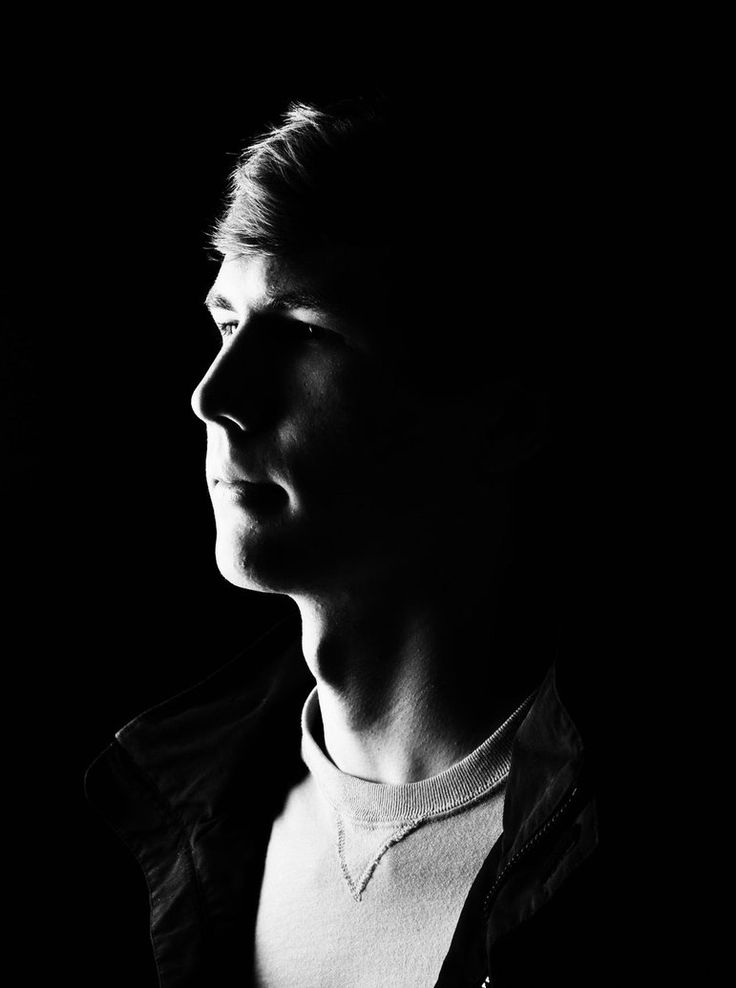
With that in mind I recommend you just get on with making the photos and then get on your way. Sometimes the shortest and most intense interactions are the most memorable.
Many, so-called, candid portraits are either directed by the photographer or made with the subject’s knowledge.
They look candid because the subject has not become overly self conscious by being over directed or made to "hold it" for lengthy periods of time.
Best Photography Course Melbourne
$330.00
Relationships Between Photographer, Subject And Viewer
I believe that the dialogue, interaction or connection folks talk about in a photograph is not based upon an actual discussion between photographer and subject.
Rather it’s a visual connection that occurs at three distinct levels, which I’II describe as follows:
Low light portrait of an interested soul in a Kolkata market, India.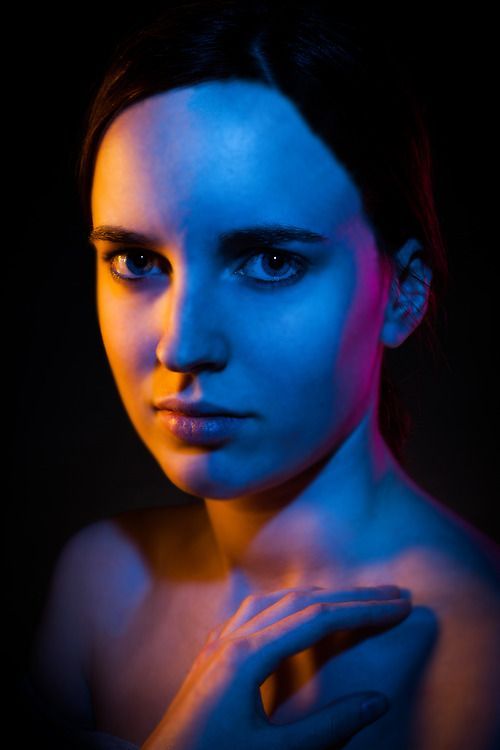
The Connection Between Photographer and Subject
When a photographer directs their subject to look directly into the camera’s lens an interaction is being established, not unlike the one where each person looks directly into each others eyes.
It’s our own life’s experiences and connection to the shared Human Condition that, ultimately, binds us together. The photograph is simply a powerful conduit that allows for this connection to take place.— Glenn Guy, Travel Photography Guru
The Connection Between Subject and Viewer
Viewing a photograph at a close distance can provide a very intimate, personal experience where the viewer engages, on a one-to-one basis, with the subject depicted.
This level of connection can encourage the viewer to believe that they understand the situation or personal plight of the subject depicted.
Low light portrait of a young boy in his father's print workshop.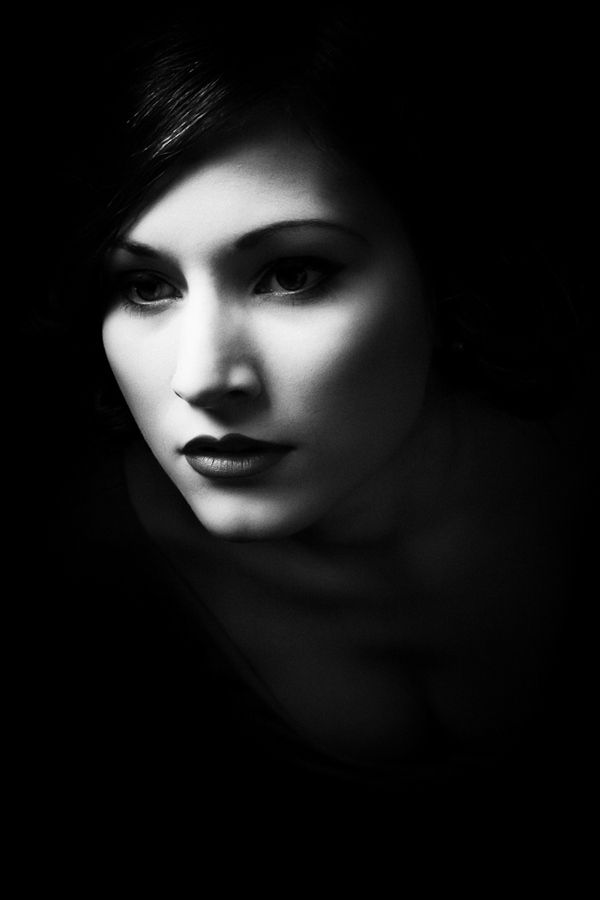
The Connection Between Viewer and Photographer
The kind of person you are (e.g., compassionate, caring, sympathetic, empathetic) is communicated through the photographs you make.
I believe there’s a lot about the photographer that’s revealed through the photos they make. In particular I refer to the following:
The photographer’s world view and motivations
What they choose to photograph
The way they go about making their photos
How they treat and depict their subjects
I’ve chosen to approach my photography as a photo maker, not a photo taker.— Glenn Guy, Travel Photography Guru
The portraits I make are a collaboration between myself and the people I photograph.
I can tell you I'm only interested in making beautiful, life-affirming images that speak to the beauty and wonder of our world and its people.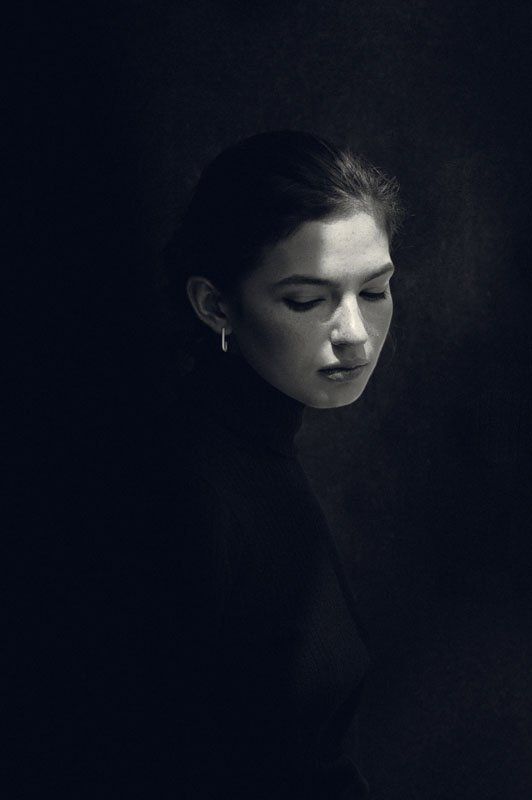
Worry and wisdom in the eyes of a dignified man, Chennai, India.
A Photograph Really Is Worth A Thousand Words
A truly great photograph goes beyond the need for words to describe it.
However, a caption may be useful and, on occasions, informative.
Likewise, an analysis of the image, conducted by deconstructing it and discussing aspects of composition, posing, gesture, context, message, metaphor and meaning can be enlightening.
But, outside of academic lingo and the minute world of photographic criticism, there's something far more powerful that will likely determine the success of your photos.
It’s the viewer’s initial emotional reaction, coming before words and thoughts, that lies at the heart of a photograph’s success. When you hear the word WOW! escape their lips you know you’ve created something quite special.— Glenn Guy, Travel Photography Guru
Technique is important and, from my experience, it’s great to be able to talk and write about your own photography and the work of others that you help or are inspired by.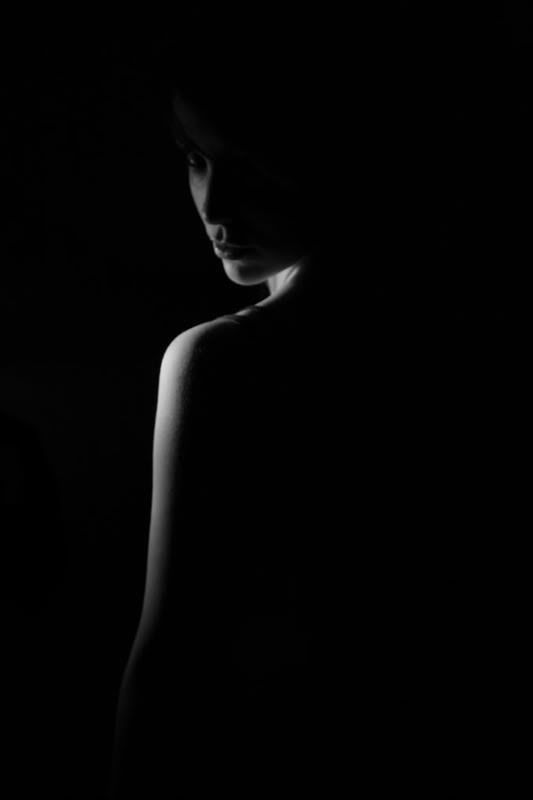
But, to my mind, the ultimate success of a photograph is dependent not upon the words that we use to describe it, but upon its ability to connect, on a deeply personal and emotional level, with our audience.
And that audience is made up of individual, meaning seeking people.
Glenn Guy, Travel Photography Guru
People PhotographyGlenn GuyTravel Photography GuruThe Human Condition, Kolkata Tourism, Kolkata, Chennai, Travel Photography, India
0 Likes10 tips on shooting portraits in low light ◾️ iPhotography
Shooting low light portraits is a great challenge to beginner and seasoned photographers. Knowing how to shoot portraits in low light requires a keen understanding of light quality and how to master exposure in-camera to retain as much detail as possible.
We’ve got a list of 10 tips for shooting portraits in low light to help you create atmospheric and dramatic photos. It may be a low light self-portrait, a photo of your loved one, friend or even your pet – either way, you’ll be able to use these low light portrait tips on a range of subjects.
1. How to Shoot Group Portraits in Low Light
If you find yourself shooting group portraits in low light then positioning is key. Spreading out your subjects will mean you require more light – which you may not have available.
Instead group your subjects closely together to fall in the main pool of light. Do your best to make this look natural at the same time. Think about the spread of the light and what posing shapes would fit best.
Use a wider aperture to gather enough light. Pay close attention to your histogram to make sure nothing is clipping. Follow the rule of thumb, to ensure you get an acceptable level of sharpness, that your F/stop should match the number of people in your group.
For example, if you have 8 people in your low light portrait, shoot at F/8.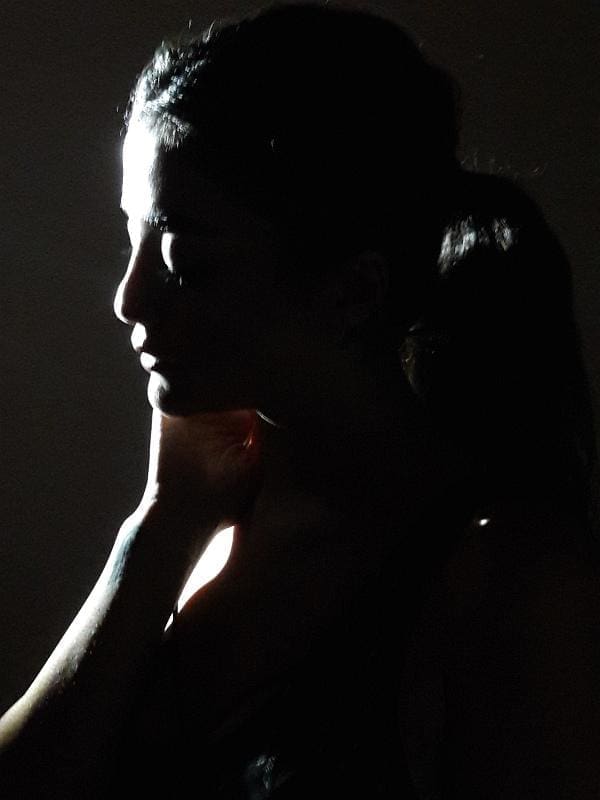 4 people, F/4 etc. This should help keep as many people as possible sharp given your posing arrangement.
2. Camera Setting for Low Light Portraits
It’s best to have full manual controls on your camera (ideally a DSLR or Mirrorless) when shooting in the dark.
The reason for this is that you may need to make small adjustments to aperture, shutter speed or ISO to get your desired exposure. Auto or semi-auto modes may overcompensate too much.
The order in which you adjust your camera settings is key to knowing how to take portraits in low light. Start off with your aperture, get that set to give you the right depth of field you need.
Secondly, adjust your shutter speed. Anything slower than 1/60th get the camera on a tripod. Lastly, raise the ISO. If you’ve done an ISO test before you’ll already know what you max level before you’ll see digital noise.
Read more about doing an ISO test here
3. Flatter Your Subject in Low Light
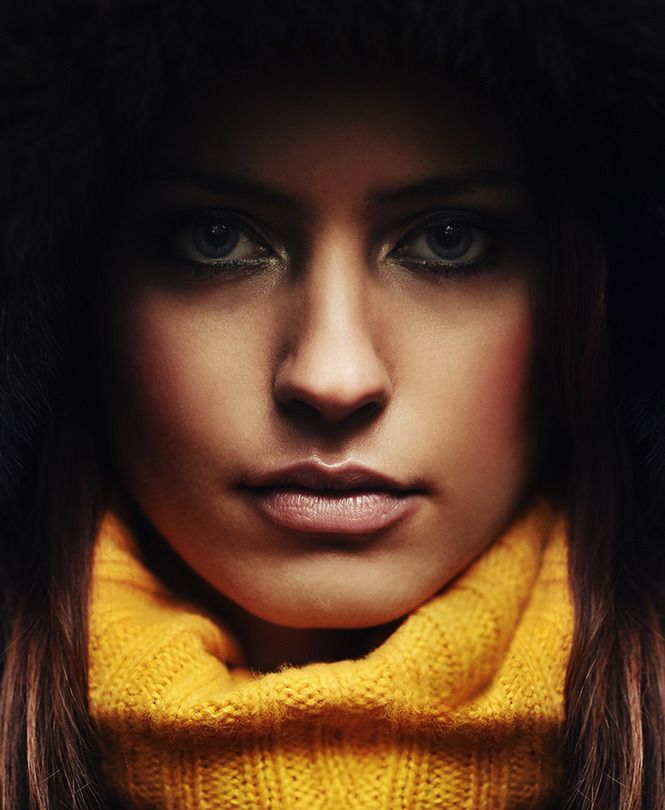
If you are shooting for women’s low light portraits always look to flatter your subject.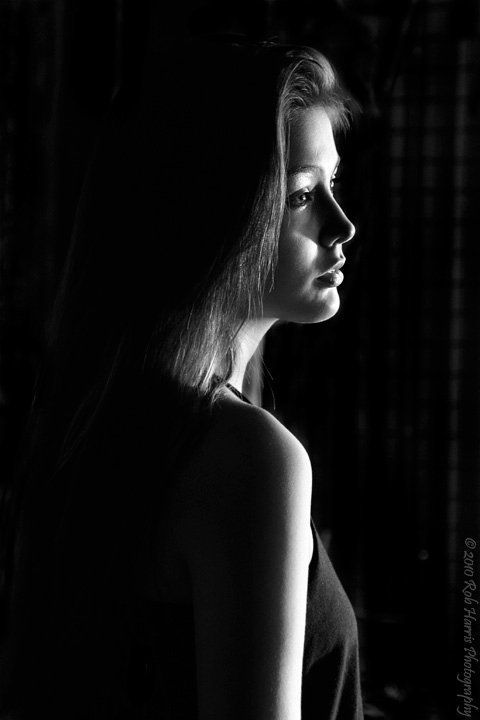 Just because you’re in the dark doesn’t mean you can’t consider beautification. Soft light transitions more gradually across skin which is more flattering than hard light.
You can use a white or silver reflector to bounce light around a subject to create a more 3D outline to your subject.
Ask your subject to turn a shoulder towards the camera. This narrows the appearance of the body and pushes attention towards the face. It’s a quick, but effective way to flatter anyone in low light portraits.
Read more in our complete guide to photographing people here
4. Suspenseful Dark Photos
Alternatively, if you want your photos to look mysterious and foreboding then use hard light.
Fashion photographers shooting men’s low light portraits favour a hard light source (the sun, an off-camera flash etc) to create a division in the subject’s appearance. Having a fast transition from dark to light keeps audiences interested in the heavy contrast.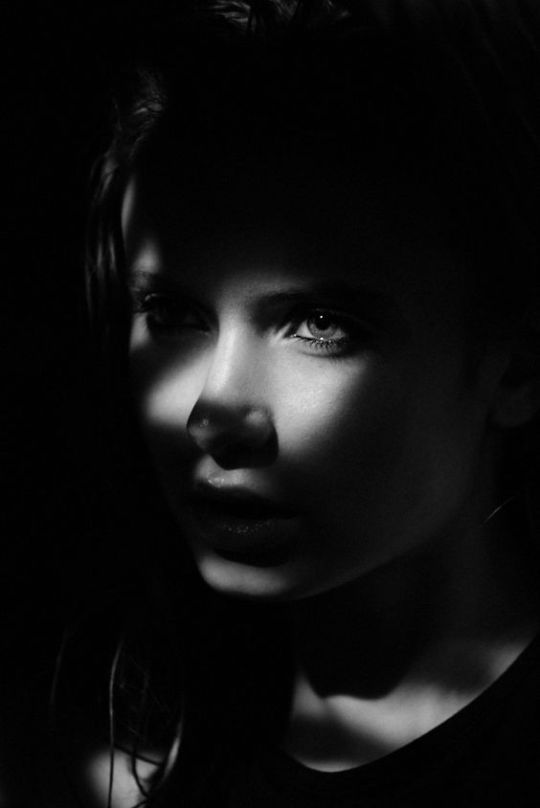
Make sure this type of lighting fits the narrative you are trying to tell. Portrait lighting setups such as split lighting is a very effective way of creating suspense in dark places.
Position your subject close to a light source side on. Ask them to lower their chin but keep their eyes on the camera. Use a smaller aperture (F/8 for example) to increase the contrast in the light quality.
Read more about portrait lighting here
5. Creating Drama in Low Light
Hard light looks great for creating drama in dark environments. You can be shooting portraits outdoors in stormy weather or just after the sun has set. Either way, play around with the position of your subject.
Stand them in between the camera position the light source to create a silhouette for example. Otherwise, place them directly underneath a street light to cast their face in darkness but their body in light. It’ll make them look mysterious but dramatic.
Dramatic low light portraits don’t take a lot of technical know-how, just a good observation of where light is falling and how that would translate to a portrait.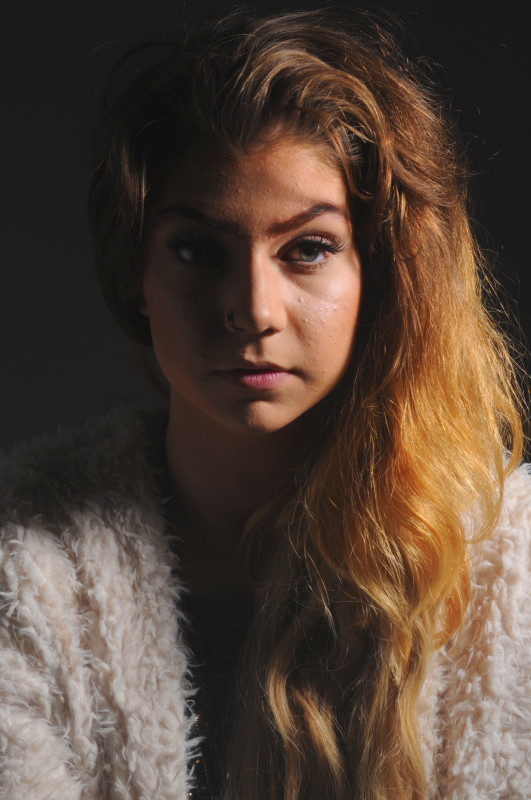 If you’re ever in doubt – just try it out.
6. How to Avoid Underexposure
If you want to keep your shot looking as close to perfect in-camera then pay attention to your histogram.
The histogram will show you how many black pixels are in frame (even better if it gives you this information in a live simulation – but not all cameras have this). Avoid a large peak of pixels to the left of your histogram when dialling in your low light photo settings.
Look to get the majority of your exposure sitting towards the left of the graph but not the extreme edge. Leave yourself something to play with when it comes to editing.
7. How to Edit Low Light Portraits
When you are editing low light portraits don’t be tempted to lift the blacks too much. Raise the shadows instead, as they will have more detail than black pixels.
Keep your eye on any noisy areas in the darkness and use noise reduction tools, such as in Lightroom to draw it back.
If you’re editing your low light portraits in Photoshop (or any other software for that matter) we’ve got a little tip.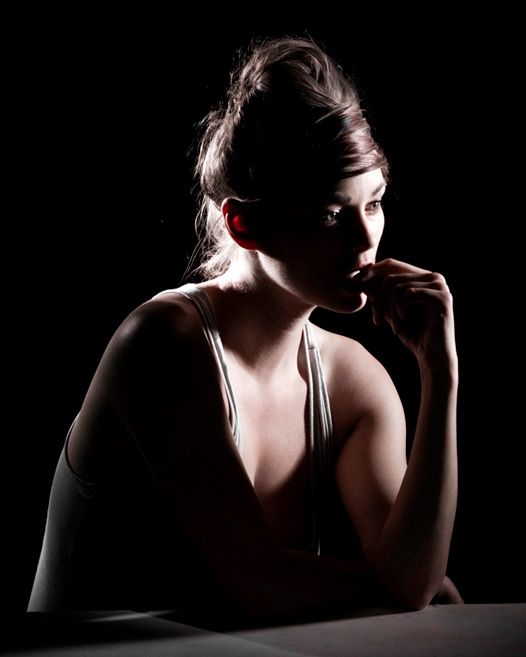 By reducing contrast slightly it helps to brighten and exposure slightly too. This should help you avoid extreme low light portraits.
Experiment with different settings and editing techniques in low light portrait photography to find the ideal variant for you, and enjoy watching your skills grow!
8. Add in a Backlight
It’s a good idea, if you want to more clearly separate your subject from the background, then use a hair light with low key portraits. A hair (or backlight) is positioned at 45 degrees to the rear of the subject generally shining down on to them.
This could be natural light shining through a window or an LED panel. The effect will give a thin glowing outline to their body creating a clear separation between them and the background.
This is useful if your subject and background are both dark – it stops them blending together in the low light.
9. Golden Hour and Twilight Portraits
When should you go out and take your low light shots? Well it’s up to you as to how much of a challenge you want!
Low light portraits with ambient lighting look amazing when shot just after the sun has set during the golden hour.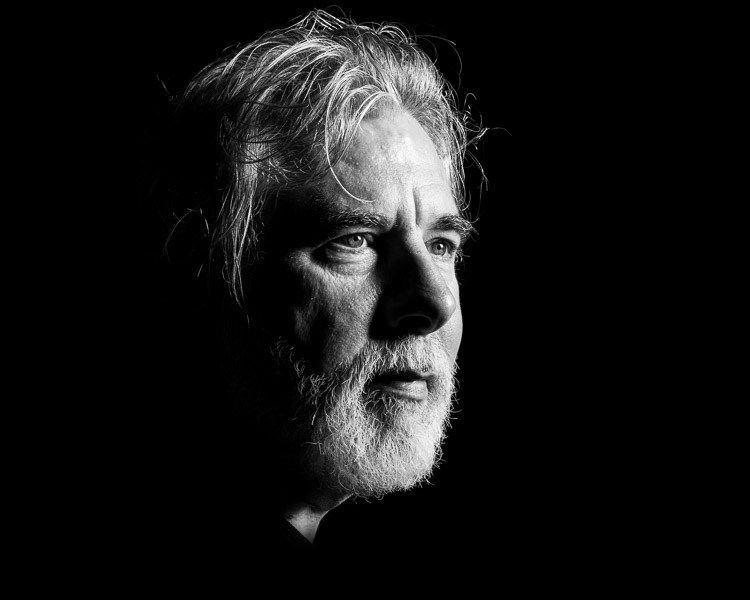 A little while after the sky will start to turn a cerulean blue. This blue hour tone makes low light portraits look cold and steely. It can be very atmospheric on its own.
Shooting down on the beach and using the moonlight to illuminate your subject can look very ethereal and romantic for couples.
Adjust the white balance on your camera if you want to warm the shot up, but shooting at twilight and blue hour can be very flattering.
Read more about night sky photography here
10. Avoid Action Shots in the Dark
Firstly shooting portraits in low light should only be considered when the subject is going to be stationary. Asking your subject to move during exposure in the dark is only going to cause you a headache.
Freezing motion requires a fast shutter speed. This may mean you need to open your aperture to the widest point and raise the ISO beyond clean levels of noise. This is only going to degrade the quality of your overall image so capturing that frozen motion isn’t worth it.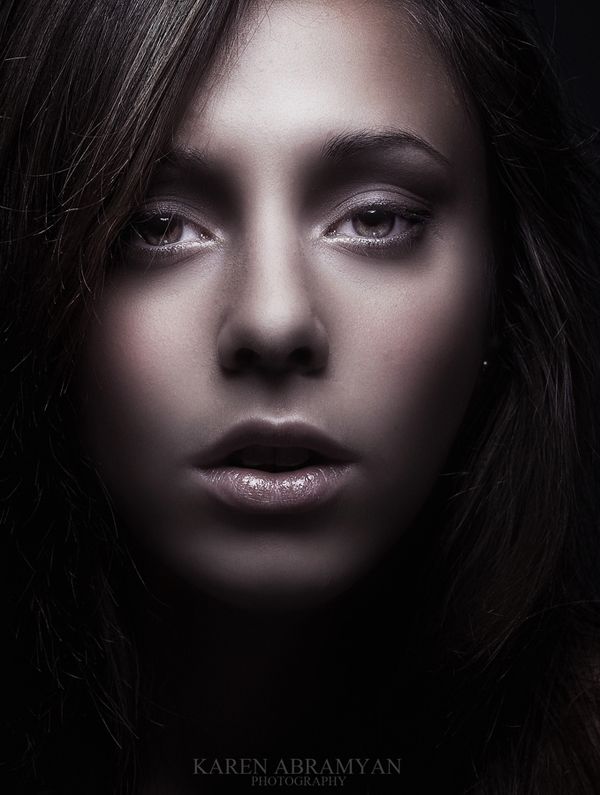
Instead reserve action shots for brighter conditions. If you step away from portraits, experiment with a slower shutter speed to capture light trails of moving traffic for example. This way you can still shoot in low light without having to raise the ISO much.
You’ll need to experiment a bit to find the best aperture for low light portraits that gives you expected results in different lighting situations.
Read more about light painting photography here
Using Flash for Low Light Portraits
If you are shooting low light indoor flash portraits you won’t need to worry about colour temperature and just leave the white balance in auto.
Remember that with low light flash photography you’ll be using a hard light on your subject which can leave heavy shadows. If you don’t want that, bounce your light instead.
If it’s a pop-up flash get yourself a diffuser cap or bounce card to reflect the light off a ceiling. This will spread the light and soften it in turn. The same goes with an off-camera flash unit too.
But for low light portraits with no flash then remember to consider the colour temperature of the light source.
Old street lights tend to emit at lower Kelvin temperatures so you’ll need to adjust to using an incandescent white balance.
Read more about flash photography here
Low Light Portraits FAQ'S
Nikon Lens Advice for Low Light Portraits?
We’ve compiled a list of current Nikon lenses that offer fast apertures (wide apertures) suitable for shooting at night and in low light
● Nikon 35mm f/1.8
● Nikon Nikkor 50mm f/1.4
● Nikon 50mm F1.8
● Nikon 85mm f/1.8
● Sigma 70-200mm f/2.8
● Sigma 24-70mm f/2.8
Best Canon Lens for Portraits and Low light?
Canon lenses with the larger apertures are the best for taking photos of dimly lit subjects. These include lenses that open up to maximum F/stops of F/2.0, F/1.8, F/1.4, and F/1.2
Here are some of the best Canon lenses available right now for low light photography.
● Canon EF 16-35mm f/2.8.
● Canon EF-S 17-55mm f/2.8
● Canon 24-70mm f/2.8
● Canon EF 50mm f/1.4
● Canon EF 85mm f/1.8
● Canon 70-200mm f/2.8
Best Aperture for Low Light Portraits?
It all depends on 3 factors;
● How dim the light actually is where you are?
● How many people are in your shot?
● What you want the image to look like?
With these elements in mind you can pick whether you need a small or wider aperture. You will need to adjust your shutter speed and ISO to use desired F/stops instead of leaving it up to auto.
You don’t always need to use the widest aperture available if you’re willing to push your ISO up or slow your shutter speed.
There are other ways of brightening the exposure rather than just opening the aperture further – pay attention to the exposure triangle.
Low Light Photography Tips
Low Light Photography Tips - Canon IrelandLIGHTING TECHNIQUES
Learn how to get the most out of your Canon camera and how to take stunning photos from dusk to dawn.
Twilight and dawn are magical times. At these moments, the holiday comes, the city changes the mood, offering endless opportunities for photography. But capturing all the details in low light is not easy, especially if you use a smartphone camera.
In low light, use the creative shooting modes of a DSLR, mirrorless camera, or advanced compact camera to capture sharpness and detail that would otherwise take much more effort.
1. Use a wide aperture (small f-number) to capture all available light
Faster lenses allow more light to enter the image sensor, allowing you to shoot at faster shutter speeds while maintaining detail and without having to increase ISO, which is may cause digital noise to appear in the photograph. Taken on camera Canon EOS R6 with lens Canon RF 50mm F1.8 STM at 1/1250 sec, f/1.8 and ISO 1250. © Ejiro Dafe
If you have a manual camera, you can control its aperture in Aperture Priority (Av) mode.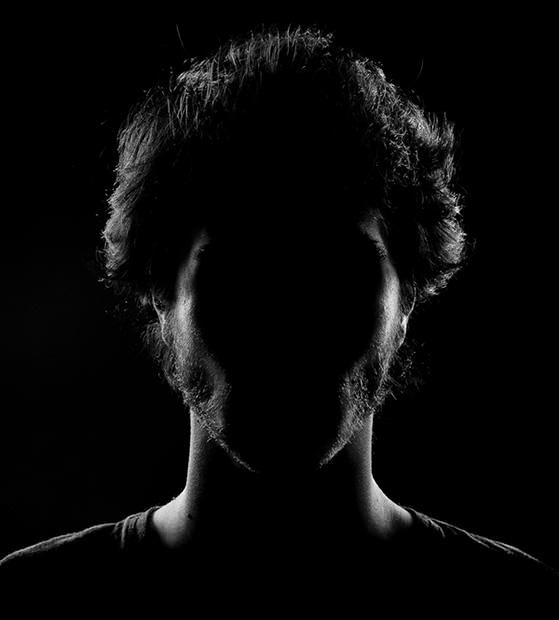 Aperture allows you to adjust the amount of light that will enter the camera. In low-light conditions, you need to illuminate the subject as much as possible to get a good exposure and capture the details in the frame. To do this, use a wide aperture (small f-number). If the picture is still too dark (underexposure), using a slower shutter speed will also let in more light, but risk blurring the frame—see the section below for tips to help you capture sharp images.
However, the aperture setting affects more than just exposure. A wide aperture also results in a shallow depth of field, meaning that at small f-numbers, only a narrow portion of the scene will be in focus. This might be ideal for you if you shoot portraits in the wee hours and want to create an interesting blurred background, but if you want to capture the nuances of a cityscape at dusk, using a smaller aperture (larger f-number) will provide more depth of field, resulting in bringing most of the scene into focus. To get a good exposure, you need to use a slower shutter speed.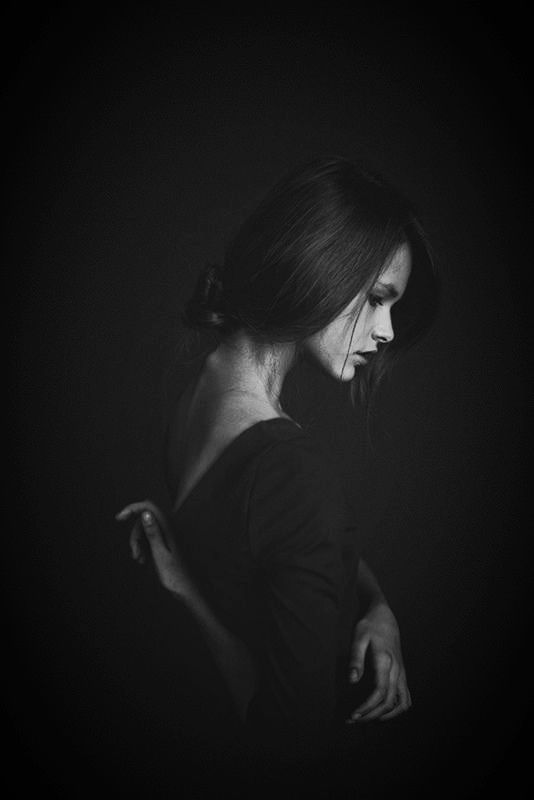
Naturally, some lenses have a wider aperture than others and are called fast lenses. Among the excellent compact solutions for full-frame EOS R system mirrorless cameras such as the Canon EOS R6 and EOS RP, the Canon RF 35mm F1.8 MACRO IS STM lens is a great option for wide-angle shooting of city night views and other low-light scenes. The Canon RF 50mm F1.8 STM offers a more standard perspective (similar to what the human eye sees) and is ideal for spontaneous street photography at night, while the longer focal length Canon RF 85mm F2 MACRO IS STM is a great choice for portraiture in low light.
If you're working with a DSLR, the Canon EF 35mm f/2 IS USM lens helps you achieve natural perspective and effective handheld shooting with Image Stabilizer. The even faster aperture of the Canon EF 35mm f/1.4L II USM is exceptionally good in low light conditions. If you're using a DSLR with an APS-C sensor, such as the Canon EOS 850D, an EF-S lens such as the Canon EF-S 35mm f/2.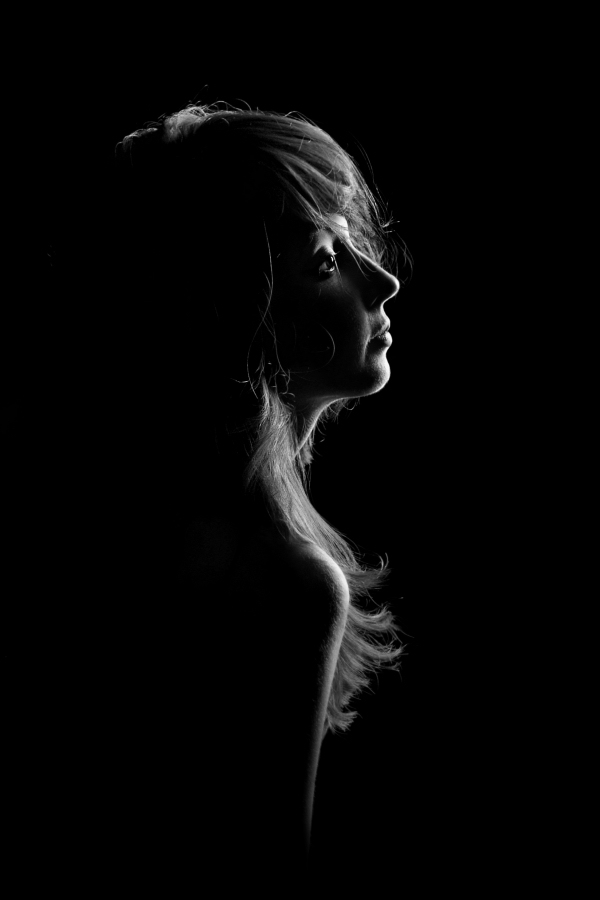 8 Macro IS STM is a great choice for shooting with a natural perspective. If you're looking for a natural but wider-angle perspective with an EOS M mirrorless camera like the EOS M50 Mark II, which also features an APS-C image sensor, check out the Canon EF-M 22mm f/2 STM pancake lens and fast lens Canon EF-M 32mm f/1.4 STM.
2. Increase the ISO value to increase the sensitivity to light
If you have set a wide aperture but your pictures still lack brightness, try increasing the ISO value. This increases the sensor's sensitivity to light, which is useful when shooting at night without a flash. The higher the ISO value, the higher the sensitivity. Canon's DSLR, mirrorless, and advanced compact cameras have larger image sensors, so they can shoot better images at higher ISOs than smaller-sensor cameras such as smartphones.
Full-frame CMOS image sensors in Canon mirrorless cameras such as the Canon EOS RP and EOS R6 produce exceptionally high quality images with little noise or graininess. The APS-C image sensors in Canon's latest cameras are slightly smaller, but still deliver detailed, low-noise images even at very high ISOs, making them ideal for handheld shooting at night.
3. Take clear pictures
When shooting handheld in low light conditions, the image may be blurred. This usually happens when shooting with a camera with a slow shutter speed to capture light (shutter speed). Another benefit of using a wider aperture is that the more light that enters the lens, the faster the shutter speed can be used. This is important because the faster the shutter speed, the more dramatic movement you can capture without blurring. In good light, relatively still subjects can usually be shot at about 1/50th of a second, walking people require a slightly faster shutter speed of about 1/250th of a second, and even faster subjects should be photographed at 1/1000th of a second. or shorter. In low light conditions, a faster shutter speed is required.
In addition to subject movement, camera shake must be taken into account, and the longer the focal length, the more difficult it is to avoid camera shake when shooting handheld. The rule of thumb is to start with the reciprocal of the focal length, so when using a 50mm lens, use a shutter speed of at least 1/50th of a second. or shorter; when using a 600mm lens, use 1/600 sec. etc. Using a lens with optical image stabilization allows you to use slower shutter speeds and still achieve the same level of clarity.
The Canon EOS R6 is equipped with Image Stabilization System (IBIS), which works in conjunction with Lens Stabilizer to produce ultra-clear handheld long exposure shots. You can also use the environment to reduce camera shake by leaning against a wall or placing the camera on a static surface. If you have a tripod, use it as it will give you the most freedom of action.
4. Get the most out of white balance
Adjusting white balance is a creative way to dramatically change the final look of images. Taken on a Canon EOS 7D (now succeeded by the Canon EOS 7D Mark II) with a Canon EF 17-40mm f/4L USM lens at 2.5 sec, f/11 and ISO100. © Marcus Hawkins
In this version of the same photo, the white balance has been adjusted to give the rocks a more natural tint and the sky a deeper shade of blue. Taken on a Canon EOS 7D with a Canon EF 17-40mm f/4L USM lens at 21mm, 2.5 sec, f/11 and ISO100. © Marcus Hawkins
Auto white balance on Canon cameras delivers consistently accurate results when shooting in daylight, as well as decent results when shooting in low light. However, in low light, you can apply atmospheric visual effects to images using alternative white balance presets.
For example, when shooting cityscapes at dusk, the Incandescent white balance setting generally gives areas of the frame with artificial lighting a more neutral color temperature and deepens blue skies. If you want to bring out the warm undertone of artificial lighting, try switching to the Daylight white balance setting.
Many Canon cameras, including compact cameras such as the Canon PowerShot G5 X Mark II, support RAW shooting.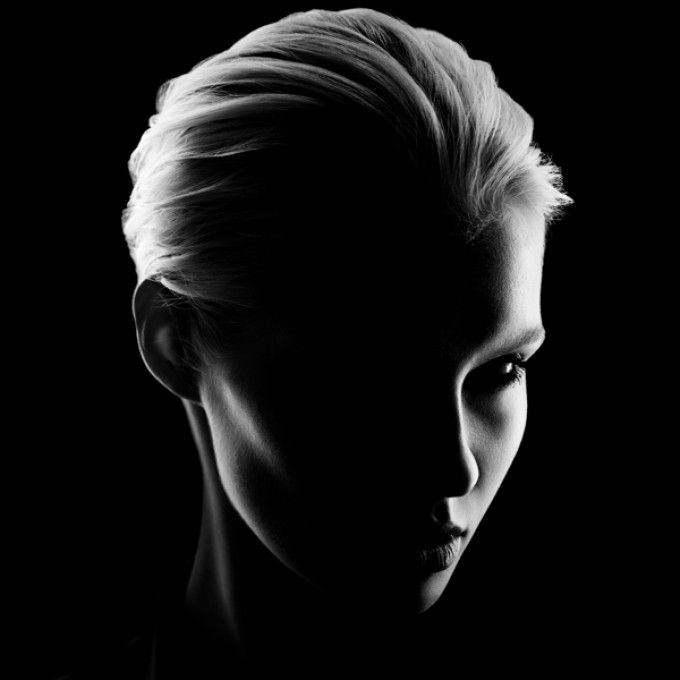 Select this option to change or adjust the white balance when processing images in your preferred RAW image processing program, such as Canon's powerful freeware Digital Photo Professional.
5. Light Effects
Mounting the camera on a tripod allows you to use slower shutter speeds and get enough light while maintaining excellent image quality. Of course, you will need help from the person being filmed, who will have to pose in a more static position, with minimal movement. Taken on a Canon EOS 850D with a Canon EF 50mm f/1.2L USM lens at 1/160 sec, f/2.8 and ISO100.
Slow shutter speeds are ideal for creating light streaks when shooting cars passing through the frame at night, turning ordinary compositions into incredible images. Taken on a Canon EOS R6 with a Canon RF 15-35mm F2.8L IS USM lens at 61 sec, f/16 and ISO400. © Lorenz Holder
You can always make night photos more dynamic by creating light streaks , the basis of which will be the rear lights of cars or the lights of fair carousels. If you want to capture the movement of light in a photo, you will need a slow shutter speed of at least a few seconds, as well as mounting the camera on a tripod or stable surface. Experiment with different shutter speeds. Use the camera's self-timer or remote shooting to avoid camera shake when you press the shutter button. Many Canon cameras are equipped with Wi-Fi, allowing you to change settings and control the shutter from your smartphone using the Canon Camera Connect app.
6. Try burst mode
Burst (or continuous) shooting is ideal for capturing action scenes in low light, ensuring you always capture the perfect moment. Taken on a Canon EOS 7D Mark II with a Canon EF 24-70mm f/2.8L II USM lens at 35mm, 1/1600 sec, f/8 and ISO3200. snapshots in a row at intervals of a fraction of a second. This is a useful feature for moving objects or very fast actions. If your camera has this feature, turn it on so you have a better chance of capturing action scenes in low light effectively.
7. Best Cameras for Low Light Shooting
We have a wide range of cameras to suit every need and budget, ideal for shooting in low light, including the Canon EOS R6.
Canon EOS R6 is the ideal full-frame mirrorless camera for low light shooting
- High performance in-camera image stabilization
- Best-in-class autofocus system works in near-total darkness
- Impressive image quality at high ISO
Canon EOS RP is the best affordable mirrorless camera for night photography
- Full-frame image sensor for stunning low-light performance
- Improved AF in low light
- Competitive price for full frame mirrorless camera
The Canon EOS M50 Mark II is the perfect step forward for smartphone shooters
- Advantages of mirrorless cameras in a stylish and lightweight body with an APS-C format sensor
- Very low light AF down to -4EV and ISO 25600
- Special line of interchangeable compact lenses EF-M
Canon EOS 850D - new level of creative freedom, lightweight DSLR
- Lightweight 515g body ideal for outdoor night shooting
- 24.
 1MP APS-C image sensor delivers superior image quality
 - Classic DSLR ergonomics and optical viewfinder for easy composition tracking
Canon PowerShot G5 X Mark II - compact, elegant and highly technical camera
- Powerful built-in 5x zoom (24-120mm equivalent)
- Compact yet powerful image sensor type 1.0
- Numerous night shooting modes, including Starry Sky Portrait, Starry Sky, Star Trail, Star Time-Lapse Movie and Handheld Night Scene
Check out more low light tips* from Redline Challenge mentor Lorenz Holder.
Author: Matthew Richards
*Only available in some languages.
-
Mirrorless cameras
EOS R6
Whatever you shoot, the EOS R6 lets you unleash your creativity in new ways.
-
Mirrorless cameras
EOS RP
Compact, lightweight and easy to use full-frame mirrorless camera designed for travel and everyday shooting.
-
Standard lens
RF 50mm F1.8 STM
Compact, quiet and lightweight 50mm RF prime lens with a wide f/1.8 aperture, perfect for bringing your creative ideas to life.
-
Lenses RF
RF 35mm F1.8 MACRO IS STM
Fast 35mm macro lens with f/1.8 aperture, wide-angle perspective, close focusing distance and Hybrid IS.
-
DSLR lenses
EF-S 35mm f/2.8 Macro IS STM
Innovative macro lens with a minimum working distance of 3cm and built-in Macro Lite for illuminating subjects.
-
Lenses for EOS M
EF-M 32mm f/1.4 STM
Take your EOS mirrorless camera to the next level with this premium standard lens.
NIGHT PHOTOGRAPHY TECHNIQUES
8 Supermoon Photography Tips
Learn how to capture one of the most stunning sights in the night sky.
NIGHT PHOTOGRAPHY
Night photography tips
In low light, a whole new range of possibilities opens up.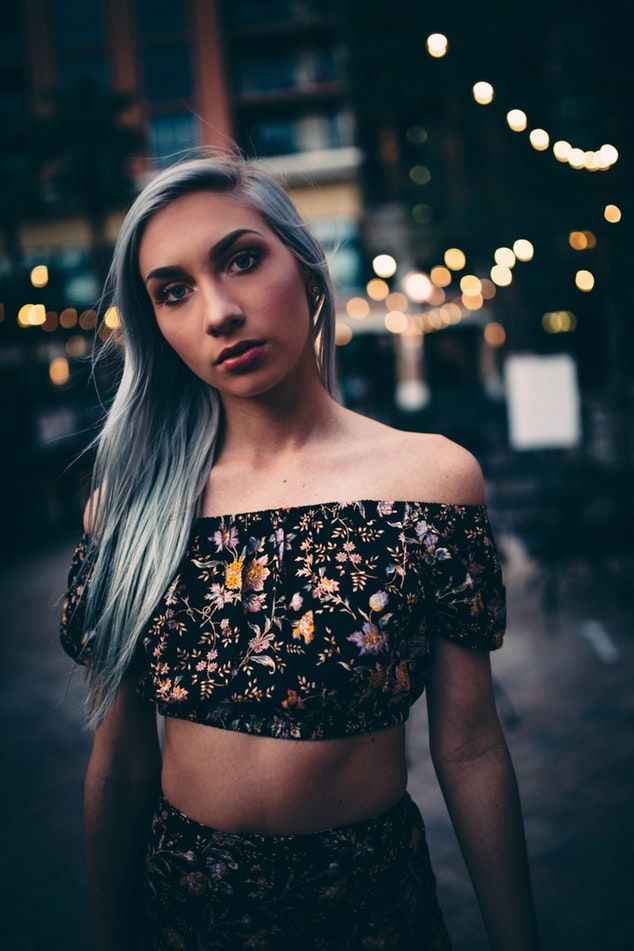
LANDSCAPE PHOTOGRAPHY
Shooting Light Streaks
Long exposure light streak tips from Canon Redline Challenge winner.
WILDLIFE PHOTOGRAPHY
Wildlife in low light
Discover the hidden life of animals with our top night photography tips.
If you see this message, you are browsing the Canon website using a search engine that blocks non-essential cookies. Only essential (functional) cookies will be used on your device. These cookies are essential for the website to function and are an integral part of our systems. To learn more, check out our Notice about cookies.
Delete item or clear [category] because there is a limit of 8 products. Press Change
Reset all selection?
Low light shooting: things to consider
Adjust the light in post! Download the PhotoMASTER program:
Download * trial version To learn more
For Windows 11, 10, 8, 7 and XP. Quick installation.
How to take pictures in low light
The author of the article: Evgeniya Sokolova
12/21/2020
In photography, light plays a critical role in creating the perfect shot. However, unfavorable lighting conditions are quite common, for example, when shooting at night or in a dark room, when there is no way to correct the situation with additional light. It is important to know how to use any shooting conditions in such a way as to achieve high-quality results and make the most successful pictures. About how to take pictures without a flash in low light, and will be discussed in this article.
General Tip: Shoot RAW
Regardless of the lighting and conditions in which you take your photos, the general advice is to shoot in RAW mode. This photo format gives the photographer more freedom in the post-processing process, allowing almost every aspect of the image to be corrected in the photo editing software.
As the name implies, a RAW file contains "raw" information. This is raw data that stores all the light intensity values collected from each pixel of your camera's sensor. How you will process this information depends entirely on your desire to create this or that composition.
Take pictures in RAW format - easier to process in photo editors
The alternative to RAW is JPEG, which gives photographers little control over processing. The generated image is the result of camera data and averaged values. Such photos can also be edited, but with great loss and limitation in the ability to edit different aspects.
If you're hesitant to switch completely to RAW shooting, take the first step by switching your camera to RAW + JPEG. You can compare these two formats later in the editing process.
Method 1: Set the correct camera settings
The easiest way to get more light on the sensor is to adjust the aperture settings, exposure time and ISO.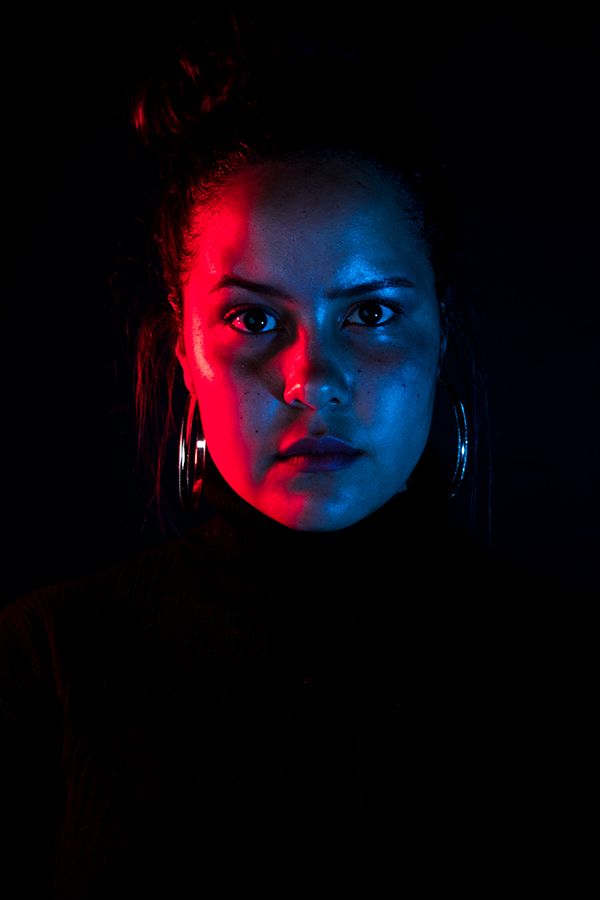
Extract
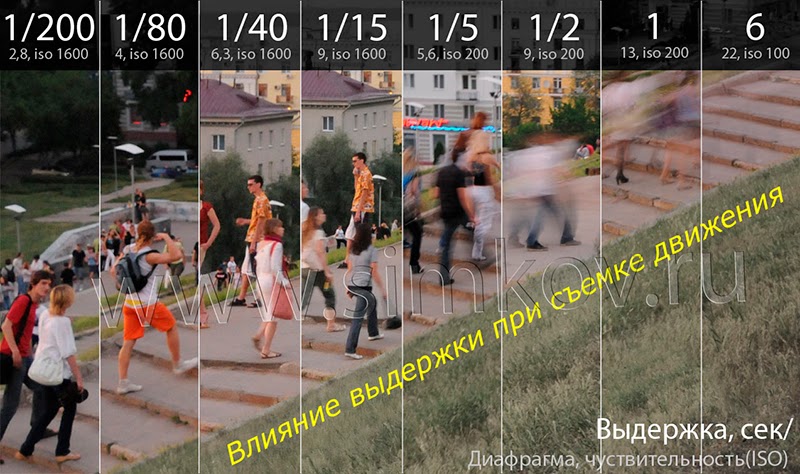
So how do you shoot in low light? It all starts with shutter speed, which determines the amount of time that light enters the camera. The lower the value of the parameter, the more light will hit the sensor.
As practice shows, in order to make a sharp image without blurring in low light conditions, you need to set the speed equal to a fraction of the focal length when shooting handheld. For example, to take a picture at 30mm, you must set your shutter speed to 1/30th of a second. It's worth noting that this rule only applies to full-frame cameras. If using the same 30mm lens on a crop camera, you will need to use 1/45th of a second instead of 1/30th due to your sensor's crop factor.
Diaphragm
Use a large aperture to open the lens wide and let in as much of the available light source as possible onto the sensor. The disadvantage of this method is that the allowable sharpness of the frame will drop significantly. Large objects cannot be fully focused with this setting. This method is suitable if you want to focus the frame on a specific subject that does not cover most of the image.
The wider the aperture of the camera, the more light reaches the sensors
ISO
The third setting that can help you get a brighter image is the ISO setting. This parameter determines the light sensitivity of the sensor. The standard value of this setting is 100 to 200, if the value is doubled, the light sensitivity of the sensor is also increased. At first glance, this may seem like an ideal solution in low light. But be careful: increasing the ISO value can lead to noise in the image and, therefore, to a decrease in quality.
Auto mode ISO
The best solution is to use automatic mode. Auto setting tells the camera to maintain a certain shutter speed and ISO. In this case, the settings are automatically adjusted depending on the situation.
When the light decreases, the camera compensates by slowing the shutter speed and increasing the ISO. For example, it can set limits to stay above or below a shutter speed of 1/100 or ISO 1600.
Auto ISO for sharp images in all lighting conditions
Proper settings can go a long way in producing sharp images with limited noise. To set auto ISO on your camera, set the minimum shutter speed you're comfortable with and set the acceptable ISO range based on your camera's specifications.
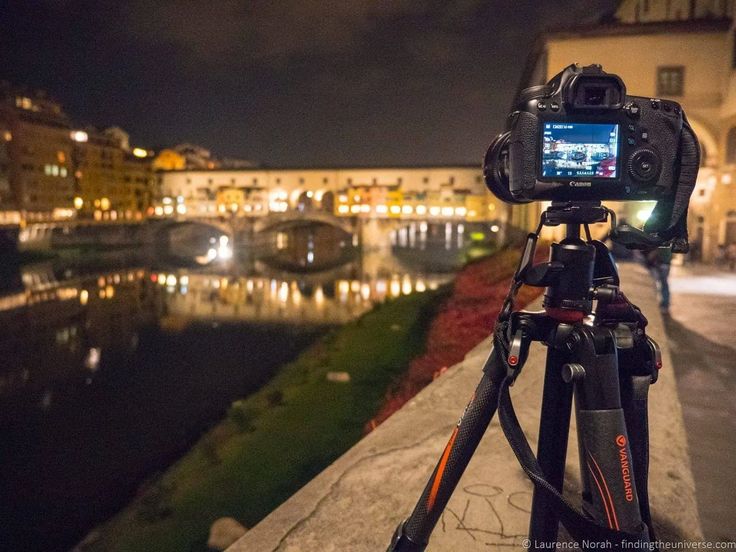
Method 2: Use a tripod as an aid
The longer the exposure time you set, the more light will hit the camera sensor. However, this solution has the disadvantage that high definition cannot be maintained. If your focal length is not too long, your shutter speed should be up to 1/60 second. However, for longer setups, you will need a tripod. By increasing the exposure time, you can close the aperture strongly despite low light, and thus capture subjects in full focus.
Use a tripod to help set shutter speeds suitable for shooting in a dark room
A tripod will protect your camera from natural hand shake, but simply pressing the shutter button can also cause camera shake. Therefore, in addition to the tripod, purchase a remote shutter release. This provides a higher chance of getting a sharp frame without blur.
Method 3: Choose the right lens
It is impossible to learn how to shoot in a dark room without the right lens. When shooting, the right lens to a large extent affects the final result of the work.
The first solution to the problem is to choose a fast lens. Powerful lenses offer particularly high apertures, allowing more light to enter the sensor. Such high apertures are often found in prime lenses due to their simpler design.
Camera with fast lens Leica Noctilux-M
Another possibility is to use a wide angle lens and get closer to the subject. The advantage of a wide-angle lens is a large depth of field even when the aperture is wide open.
Method 4: Discard the built-in flash
The natural solution for many beginner photographers when taking pictures in a dark room is to use the built-in flash. However, there is one big problem: usually the quality of the light they create leaves much to be desired. Therefore, for professional photographers to create high-quality images, it is extremely important to know how to shoot in a dark room without a flash built into the device.
Use of alternative light sources will help develop creative imagination
The default flash completely destroys the atmosphere of the picture and may add unnecessary color casts. As a result, you will get a photo of disgusting quality, which will be difficult to fix even in a photo editor. Use this method only if the aesthetic side of photography is not important to you.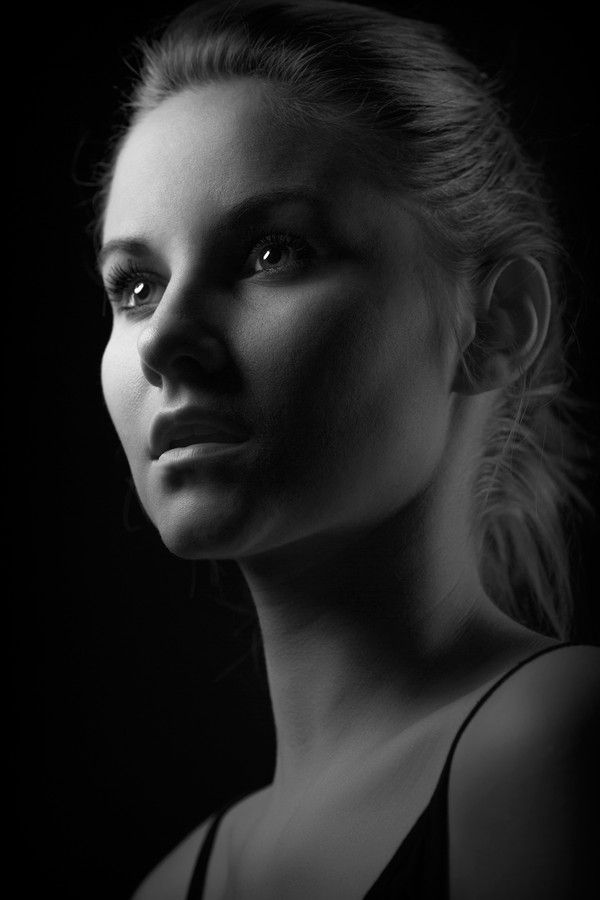 Ideally, you should try to use alternative sources, for example, point a lamp or lantern at the object.
Method 5: Use the TTL function
Still, shooting in a dark room is not complete without an additional light source. You have two options: soften the light of the "native" flash or use a portable technique. In the first case, reflect the luminous flux from the surface: wall, ceiling or reflector, etc. This will soften and expand the flow of light. A modifier cone or softbox will also help make the lighting more natural.
However, the most common solution in photo shoots is the use of an external flash, as the least resource-intensive method. Many flash units have a TTL function. It automatically selects the power of the pulse, which helps to balance the hardness of the supplied light.
TTL flashes help control light output
Sometimes the calculation of the TTL output is incorrect and there is too much or too little light on the object.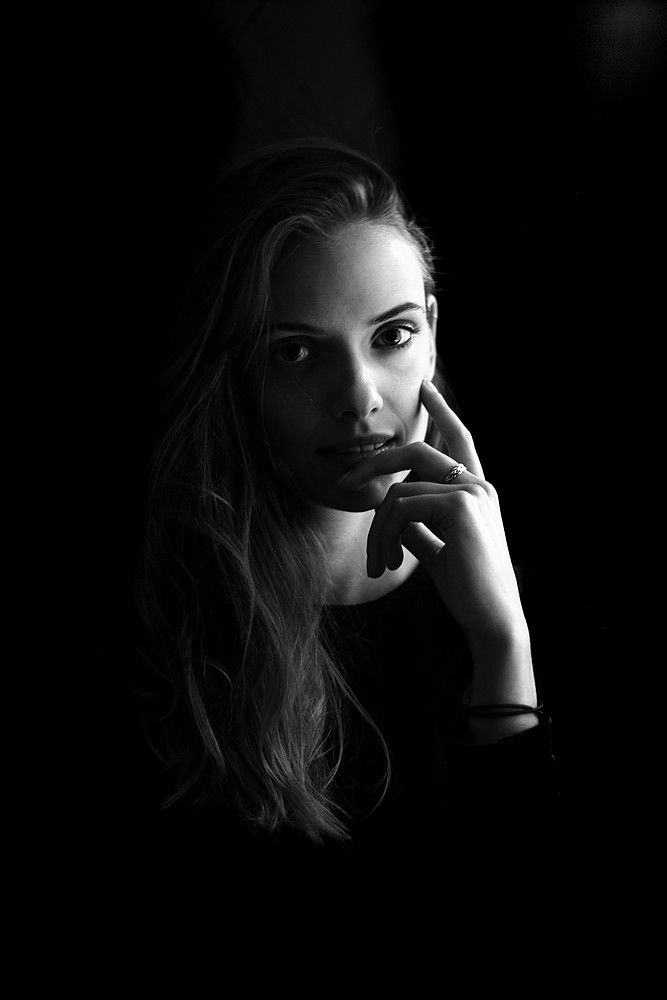 In these situations, switch to manual control, take a few photos and view them on the camera's LCD screen. Adjust the flash power level and experiment until you get the setting you want.
Method 6: Shoot in continuous mode
As mentioned earlier, handheld shooting in low light conditions may cause camera shake when the shutter button is pressed. When shooting in single shot mode, there is a risk of fuzzy images.
Take as many shots as you can so you have more choice
To fix this, switch to continuous shooting mode when the camera takes multiple shots after pressing the shutter button. This reduces the risk of camera shake after the first photo and allows you to choose from multiple images during editing.
Method 7: Fix lighting in post-processing
Even professional photographers who know how to take pictures indoors without a flash are not immune to mistakes.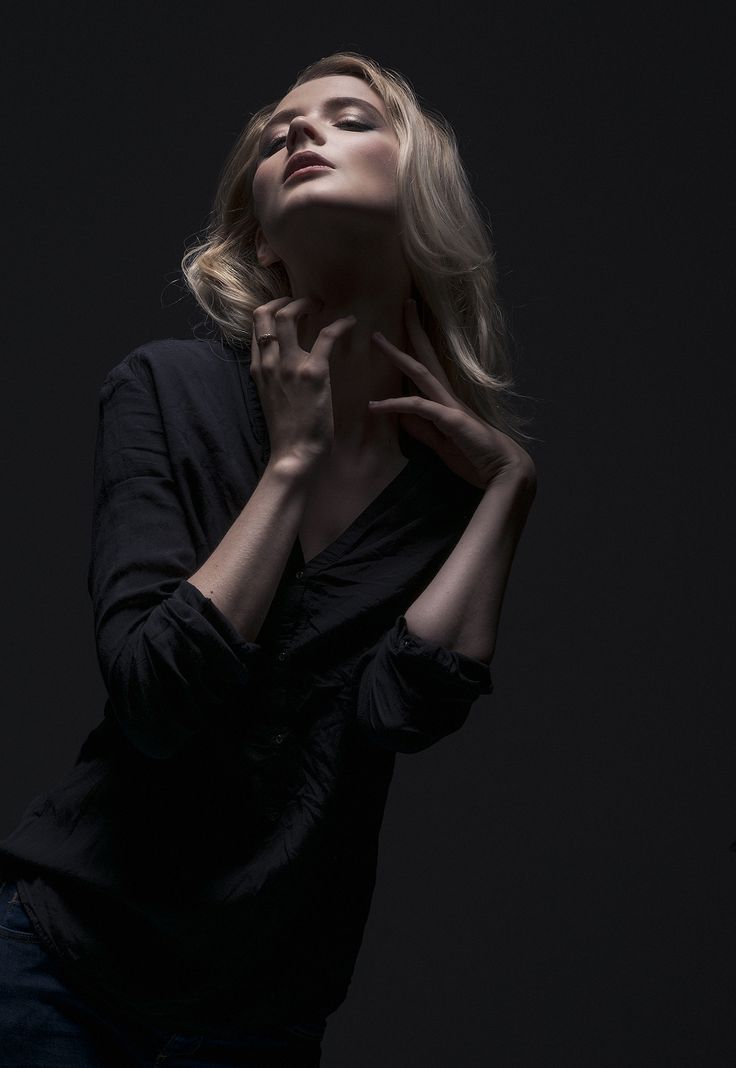 If none of the options worked or you didn't have time to prepare, the last but not the least effective way to fix dark pictures is to edit them in a photo editor.
There is a large number of software in which you can adjust the lighting with detailed accuracy. We will consider this process in the Russian-language program PhotoMASTER. It compares favorably with overloaded software in simplicity and ease of management and at the same time offers a large selection of advanced tools.
Manual brightness adjustment in the PhotoMASTER program
First you need to download a photo editor, and then upload an unsuccessful frame into the program. There are several ways to correct light imperfections in PhotoMASTER. The first is manual adjustment of brightness and exposure. This is done in the "Improvement" section. Move the sliders and watch the changes in the preview window.
If you are not sure about your skills, the auto-upgrade feature will help.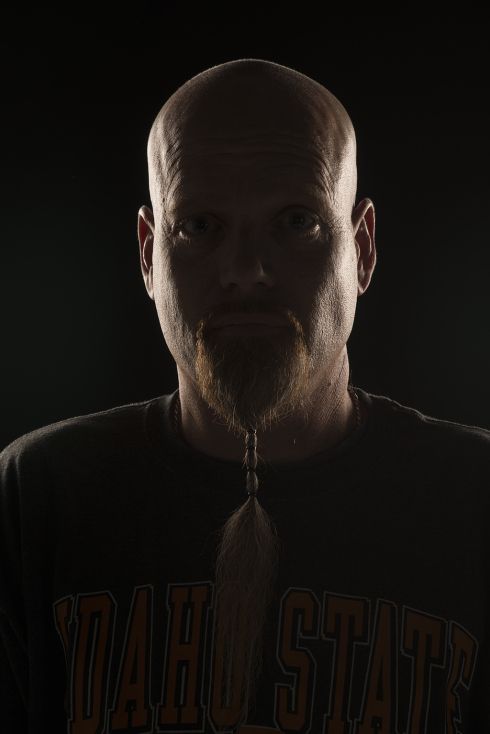 Click on the "Automatic enhancement" button, and the program itself will recognize and correct defects in the frame. By clicking on the nut-shaped icon, you can choose which item to apply the settings to in order to achieve the desired result.
Auto light enhancement
General Tips for Shooting in Low Light
A few more tricks for getting good shots in bad shooting conditions:
- Move the subject.
- Use all possible light sources.
- Experiment with composition.
- Disable zoom.
- Enable multiple exposure mode.
- Use additional lighting.
Whether you're shooting people or inanimate objects, if you can move your subject towards a light source, do it. Try changing the lighting angle.
Open the window and let in as much light as possible. If you work in a private home, open the doors. When shooting outdoors at night, look for the brightest places, such as shop windows.
Enlarging or moving closer to the subject will help eliminate areas with problem lighting.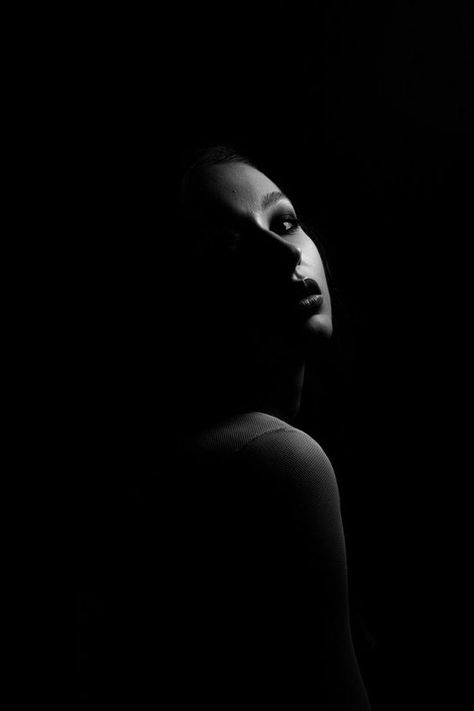 Try using a vertical frame rather than a horizontal one, or hold the camera at a non-standard angle.
Non-standard composition will hide lighting imperfections in the frame
When you zoom in on a subject, even less light enters the frame. Better come by yourself.
It is present on cameras with manual settings and allows you to create the effect of double exposure, that is, to take one picture on top of another. At the same time, twice as much light enters the frame.
Halogen lamp (spotlight) will be a good replacement for the "native" flash. Much cheaper than a professional off-camera flash, it produces a nice warm light that helps create the right atmosphere.
So, we have told you how to take pictures in bad light and whether it is possible to correct imperfections in the frame later.