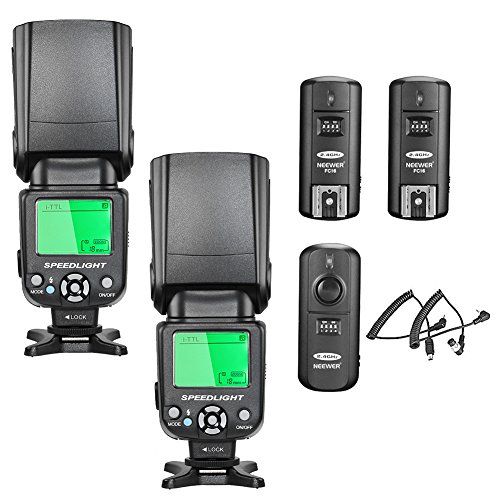
Off camera flash transmitter
Flash Triggers for Using On-Camera Flashes Off-Camera
By Marjorie Perlas | Tue, 05/10/2022
Share
It might be easier just to stick with natural lighting for portraiture, but there are times when a portrait needs more mood than the standard light or on-camera flash can provide. The on-camera flash is a great and portable way to brighten up a scene, whether it’s in the studio or on location. Combining it with a wireless flash trigger opens up many doors for creativity and allows a photographer more control over the results.
Syncing
Wireless flash triggers are usually configured in two parts: a transmitter, which is mounted on the camera—most often in the hot shoe—and a receiver, which is connected to the flash. First and foremost, make sure that both have fresh batteries, because low power can be the cause of misfires.
Make sure to turn on the trigger and receiver before the camera or flash. Once everything is on, select a channel to use and make sure the transmitter and receiver are both on that channel. With all your gear set up, it’s time to check your connection. Many transmitters will have a green and red indicator light that will let you know if the connection is successful. Many will have a “test” or “pilot” button, as well.
Adjust your camera settings as needed to enable flash in the same way you would with an on-camera flash. If you’re able to take a photo with the flash firing properly, you’re ready to compose your shot and set the correct exposure.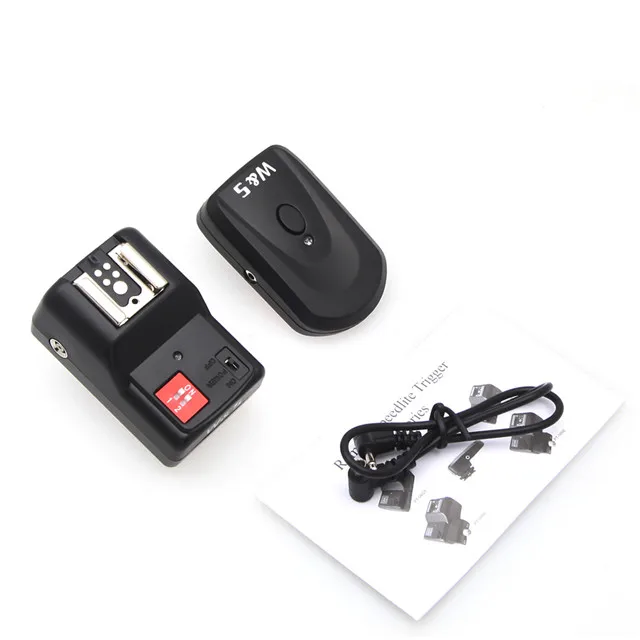
Lighting
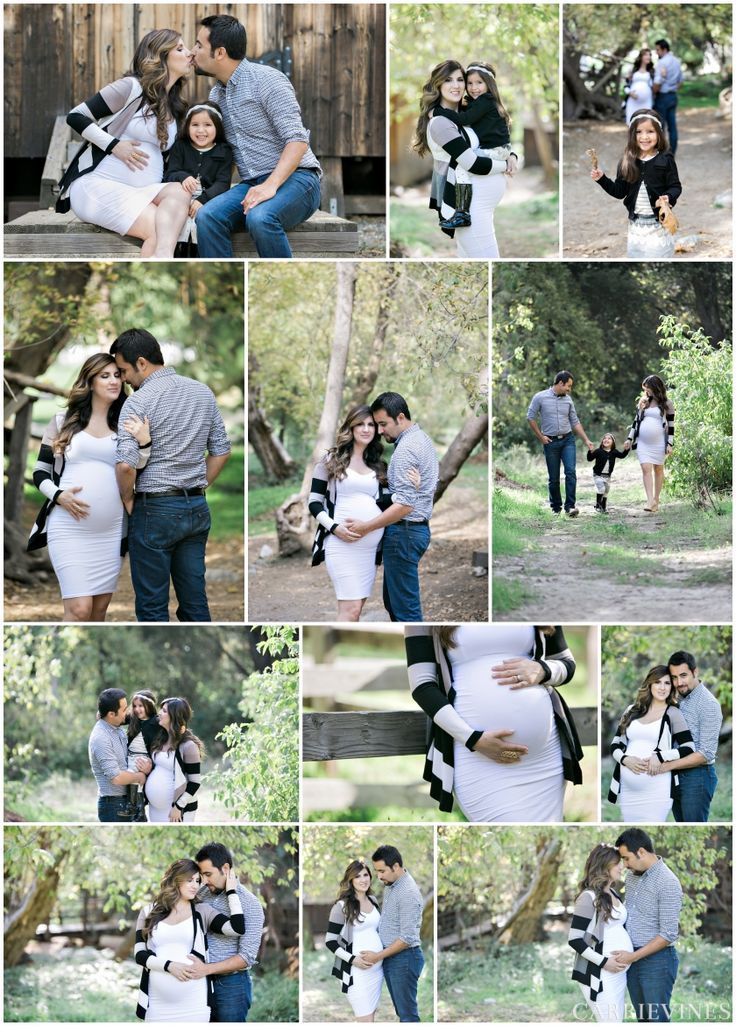
The off-camera flash can be used in a similar way to studio lights. Simply adjust the flash angle and height in reference to your model to create a variety of different lighting effects. Go ahead and experiment with different angles and heights to get more comfortable and confident with this new system. The camera’s aperture will control the flash exposure, and the shutter speed will regulate the amount of ambient light striking the sensor or film.
To achieve a simple fill light, the flash should be on a light stand at a relatively far distance from your model so that it covers a large area. It should point straight toward your model and can be adjusted based on how the shadows define the face.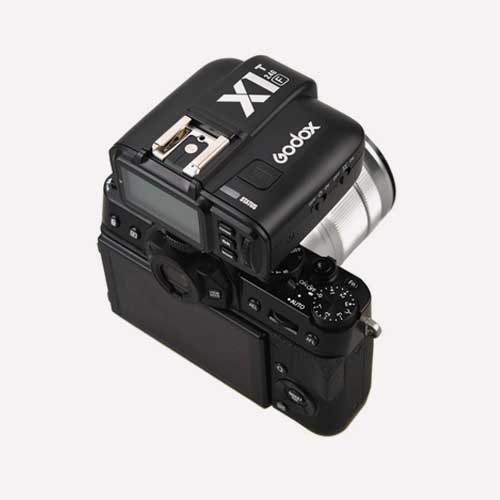 By filling the shadow areas slightly, you’ll shoot clearer images with more balanced lighting. To create a rim light, place the flash indirectly behind your model, in an outdoor setting. Using the sun as the main light source, the flash then creates the rim light. This luminous effect highlights the subject’s edges and adds more texture to the final photo.
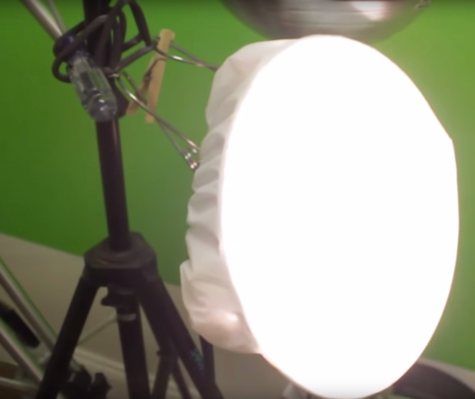
Modifiers
In addition to more creative freedom, one of the greatest advantages of the off-camera flash is that you are presented with multiple options for different types of light modifiers. When it comes to light modifiers, bigger is usually better for softer, more even lighting. While it’s possible to use a smaller modifier with on-camera flash, with an off-camera flash, you can use a larger diffuser to soften light even more. You can also use modifiers such as a grid to regulate the spread of light.
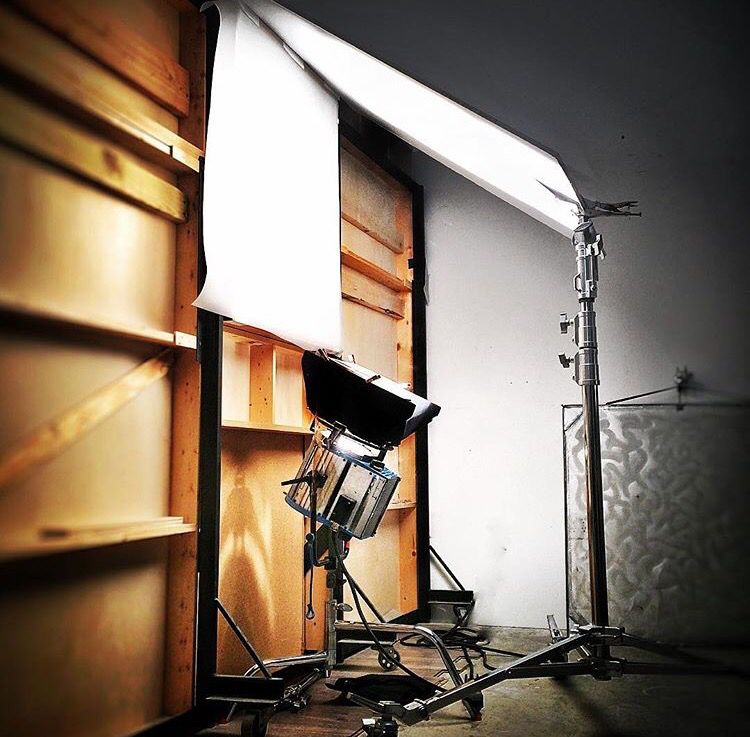
It’s also important to make sure you’re set up for different light modifiers. An umbrella mount will accept an umbrella shaft and enable adjustment of the light’s angle on a stand. Using the appropriate mount bracket will allow a softbox to be attached to a flash.
With such a variety of different lighting setups, flash settings, and light modifiers, the possibilities are endless when working with this system. Once you become more comfortable working with your off-camera flash setup, you can gradually add a second or third flash, or even mimic that same effect with a reflector.
Conclusion
Practicing with friends and family will help you become more confident in using new equipment and different lighting setups.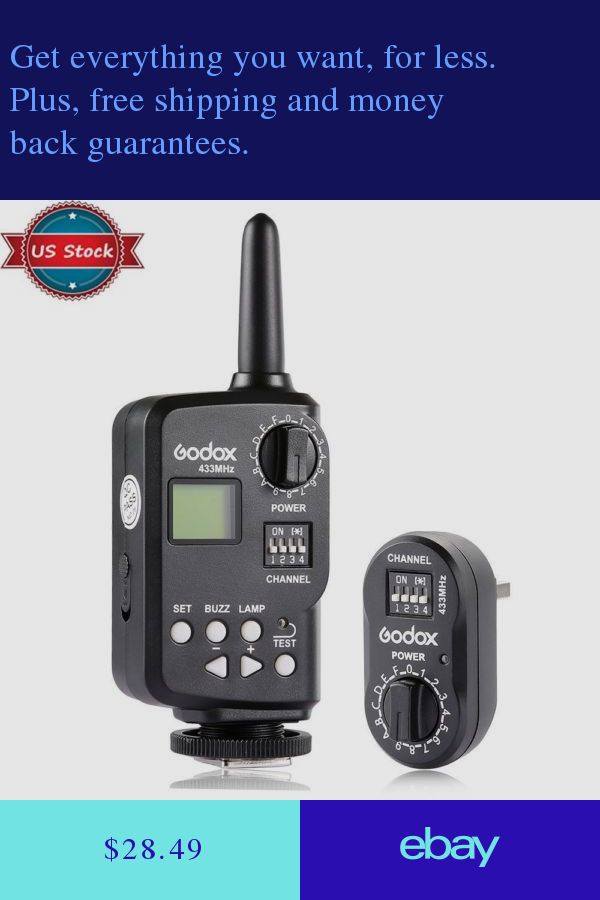 Make sure to continue to experiment with various angles, heights, and positions and note how the shadows change. As it is with mastering everything else, practice always makes perfect.
Did you find these tips useful? Let us know in the Comments section, below!
How to Trigger an Off-Camera Flash with the Pop-up Flash
A Post By: Simon Ringsmuth
If you have ever wanted to explore off-camera flash but don’t know where to start, I have some good news. Many consumer-grade cameras such as the Canon Rebel series and the higher end Nikons like the D700, D300, D300S, D7000, and D90 (the D3x00 and D5X00 models do not offer this) models have a fantastic feature that might be just what you are looking for.
One challenge with off-camera flash is that you need a way to fire them at precisely the right moment.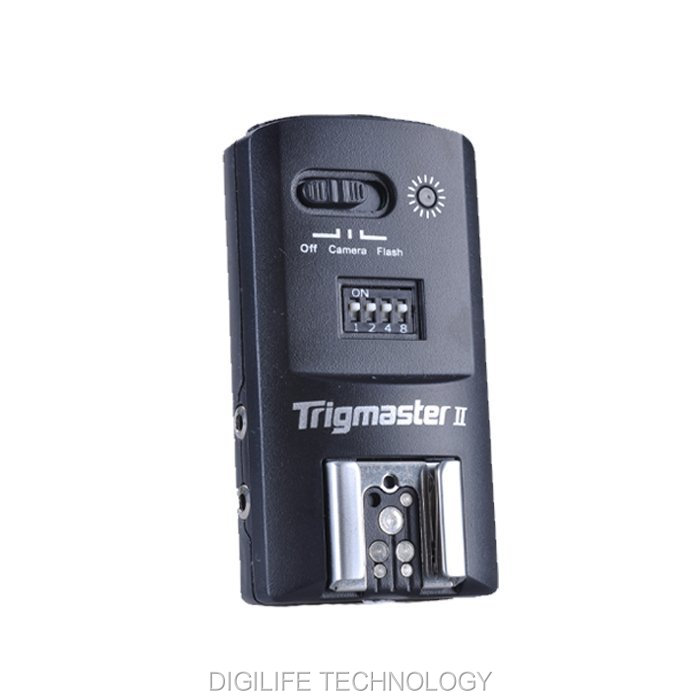 That usually means outfitting them with tiny little remote controls called triggers, that are tied into a transmitter unit affixed to the flash hot-shoe on your camera. When you want your off-camera flashes to activate, the transmitter sends a radio signal to them, and they go off at precisely the right time to give you the photo you want. Some triggers are inexpensive, while other, more customizable one,s will set you back hundreds of dollars. But, if you own one of the cheaper Canon or Nikon bodies, you already have a handy trigger built right in to your camera; the pop-up flash.
Your built-in flash can probably do a lot more than you might think.
Several manufacturers have this feature built-in to their cameras, but since Canon and Nikon are the most popular, those are what I’m going to focus on in this article. Both types of cameras require you to change a few menu settings that may seem a bit confusing at first, but get easier with practice.
Setup for Nikon cameras
On a Nikon camera the first thing you will need to do is set your internal flash to Commander mode.![]() This means it will still fire a burst of light when you take a picture, as a way of communicating with your external flashes. You will see this when you take a picture, but don’t worry, this brief burst is not bright enough to have much of an impact on your photo. This quick flash instead serves as a signal to your external speedlights that they need to fire. To do this, press your camera’s Menu button, then choose Custom Setting Menu (Bracketing/Flash) and the “Flash control for built-in flash” option.
This means it will still fire a burst of light when you take a picture, as a way of communicating with your external flashes. You will see this when you take a picture, but don’t worry, this brief burst is not bright enough to have much of an impact on your photo. This quick flash instead serves as a signal to your external speedlights that they need to fire. To do this, press your camera’s Menu button, then choose Custom Setting Menu (Bracketing/Flash) and the “Flash control for built-in flash” option.
Select the “Flash control for built-in flash” option
The default value for the “Flash Control” option is “TTL,” which means that your built-in flash functions exactly how you normally expect, and has no control or interaction with any off-camera flashes. Change this value to “Commander mode” which will then allow you to use it to trigger external speedlights.
Next, select “Commander mode” – press the right button to get to the next menu below
The final menu looks a bit complicated, but you only need to change a few settings in order to get everything set up initially. Change the Built-in flash option to display two dashes (–) and leave the rest of the values as shown below; Group A TTL, Group B TTL, and Channel 1.
Change “Built-in flash” to “–” and you’re all set.
You can do more complicated operations involving multiple flashes or even groups of flashes, but for a basic off-camera trigger setup not much else is required.
Setup for Canon cameras
If you have a Canon camera, the process is similar but involves a few different menus. Go to your main camera settings menu and choose Flash Control. Then select Built-in flash settings and choose the EasyWireless option. Make sure your channel is set to 1, and you’re ready to go. If you have a higher-end camera like a 60D you won’t see EasyWireless, so leave Flash mode as E-TTL II and change Wireless function to an image of two flashes with a colon between them. As with the Nikon settings there are other options you can change to customize how your external flashes behave, but this is enough to just get you started.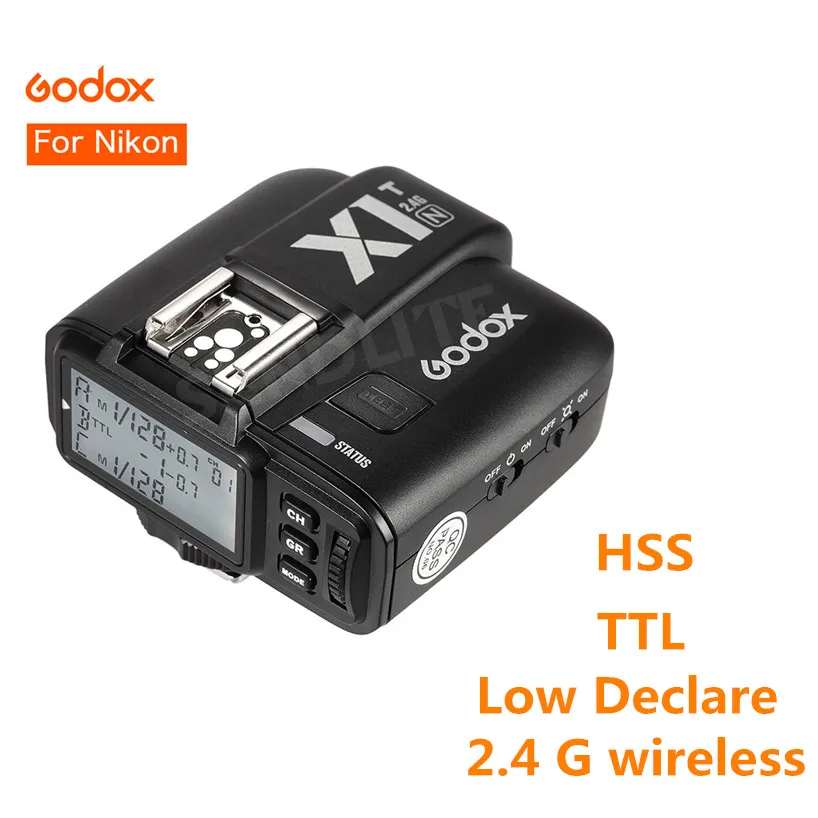
On Canon cameras, start by choosing the Flash control menu.
Next choose Built-in flash func. setting
Set Flash mode to E-TTL II, and then set Wireless func. to the icons displayed above. Alternatively, you can select EasyWireless if that appears as an option.
Testing your setup
Now that your camera is set up, all you need to do is put your flash in Remote (Nikon) or Slave (Canon) mode and make sure there is an unobstructed line of sight between the receiver on the speedlight, and the flash on your camera. Some speedlights allow you to twist the base so it faces a different direction than the flash itself which is useful if you want to get a little more creative with your lighting angles.
Before you get too far into all this you should be aware of two caveats: Canon cameras can only control Canon flashes, and same with Nikon cameras and Nikon flashes. Also, most third-party flashes such as those made by companies like Yongnuo are not compatible with the on-camera remote trigger setup described here.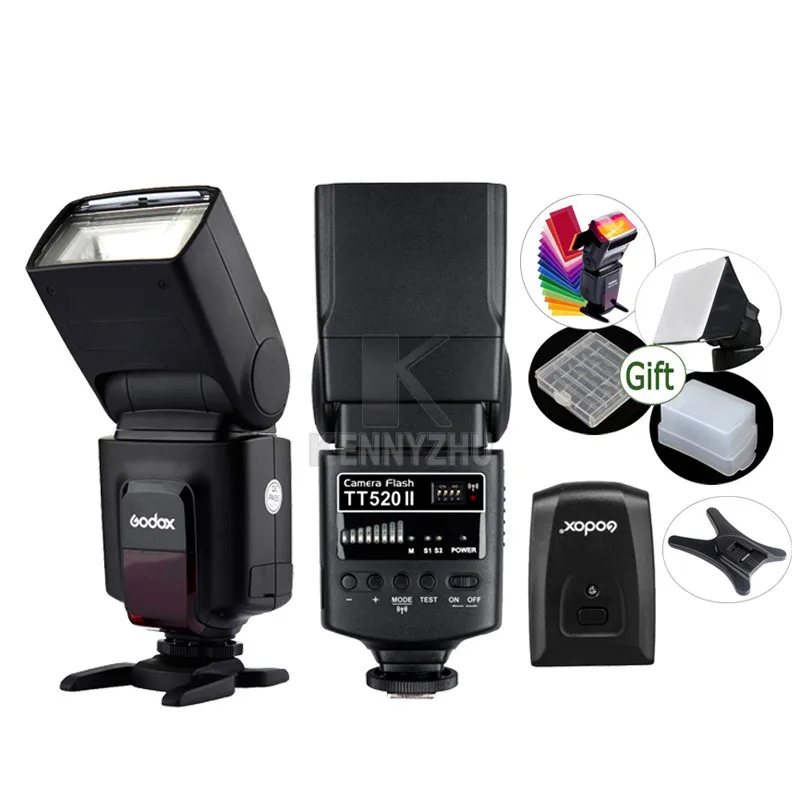 To use those you will need to purchase a remote flash trigger, but since the flashes themselves are cheaper than their first-party counterparts you should have a bit of money leftover to buy a trigger setup.
Makesure your external flash is set to “Remote” (Nikon) or “Slave” (Canon). It should also be in the same Channel and Group as your camera, but if you have never changed these then the default values should work fine.
As you get more experience with off-camera lighting you might find yourself wanting to expand your horizons with diffusers, colored gels, additional flashes, and more. But if you just want to get some basic experience with this technique, learning to use your built-in flash as a remote trigger is a fantastic way to get started.
Have you tried using this method before? What has your experience been like, and what are some of your favorite off-camera flash tips? Leave your thoughts in the comments below.
Read more from our Cameras & Equipment category
Simon Ringsmuth
is an educational technology specialist at Oklahoma State University and enjoys sharing his enthusiasm for photography on his website and podcast at Weekly Fifty.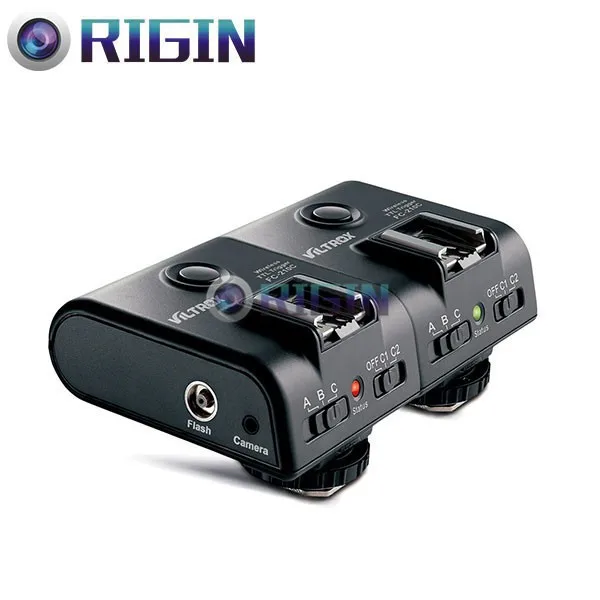 He and his brother host a monthly podcast called Camera Dads where they discuss photography and fatherhood, and Simon also posts regularly to Instagram where you can follow him as @sringsmuth.
Canon Speedlite ST-E3-RT Flash Transmitter
Canon Speedlite ST-E3-RT Flash Transmitter - Canon BelarusSpeedlite Remote Flash Control
With the ST-E3-RT, you can easily adjust multiple flash settings and control their firing remotely for easy photo taking. Ensure that multiple cameras fire simultaneously when remote controlled.
See full specification list
-
Reliable off-camera flash control
Control compatible Speedlites up to 30 m away. 2.4 GHz radio control works reliably even when shooting outdoors in the presence of obstructions - no line-of-sight required.
-
Multiple Flash Shooting
Create complex lighting patterns by firing up to 15 Speedlites simultaneously from a single ST-E3-RT Speedlite Transmitter mounted on the camera.
 The E-TTL II metering system makes it easy to control exposure.
 -
Remote camera control
Release the shutter on an EOS camera with a Speedlite ST-E3-RT transmitter attached from a second camera or a compatible Speedlite such as the Speedlite 600EX II-RT. Synchronized shooting allows up to 15 cameras to be released simultaneously.
-
Ease of use
The Speedlite ST-E3-RT transmitter is dust and moisture resistant to the same degree as professional EOS cameras and L-series lenses. Features an easy-to-read backlit LCD screen and is powered by two AA/LR6 batteries.
Watch the full list of technical characteristics
Supply set of
All necessary for the remote control of the outbreak and the creation
-
Professional Flash
Speedlite EL-1
State-of-the-art Speedlite system that provides superior reliability and high performance as well as weather protection.
More Speedlite EL-1
-
Professional Flash
Speedlite 600EX II-RT
Complete control even in the toughest conditions.
More Speedlite 600EX II-RT
-
Pro Flash
Speedlite 430EX III-RT
Powerful and portable radio control flash.
Read more
If you see this message, you are browsing the Canon website using a search engine that blocks non-essential cookies. Only essential (functional) cookies will be used on your device. These cookies are essential for the website to function and are an integral part of our systems. To learn more, check out our Notification about cookies.
Delete item or clear [category] because there is a limit of 8 products. Press Change
Reset all selection? I have a phone. No, not really a phone - it can read, write and speak, a smart phone, knows about all my contacts and meetings, but its main advantage is not in this.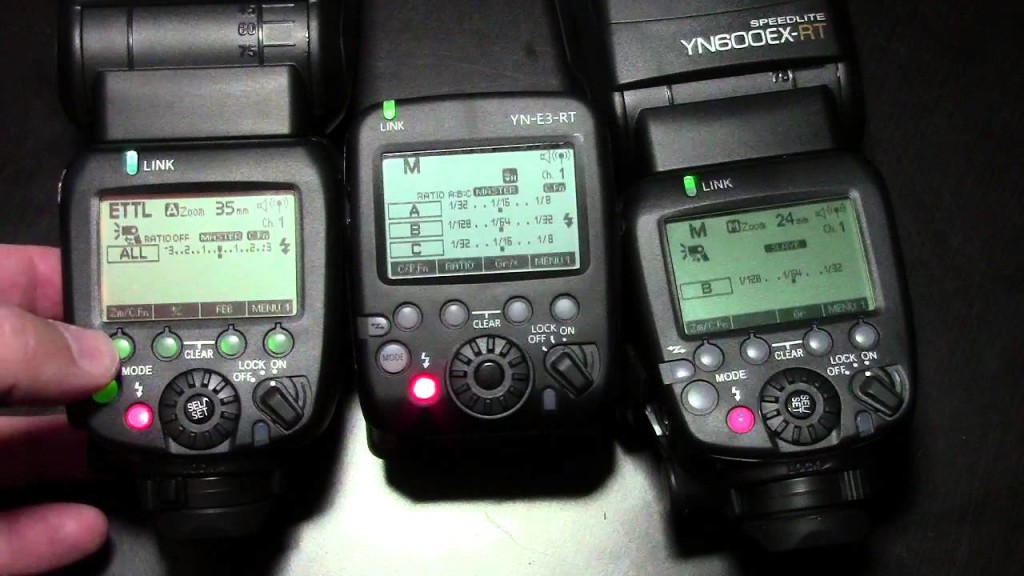 With all this, he knows how to store all these contacts on the Internet, next to the mail, somewhere on an American server. On the one hand, it is convenient, and on the other hand, it is safe. at the same time, contacts on the Internet fully correspond to contacts on the phone, the same data is stored in cards that are are synchronized by .
I changed the card in my phone, and once it was online, it ended up on the net. I worked with her online, and she took it and updated it on her phone!
Photo: Yandex.MarketTime has passed since the original article was written, and now no one is surprised by phone synchronization, but since flash synchronization is new for many, I will leave it for the future here as an eternal reminder.
I was not mistaken - anything can be called synchronization now, including the flash control system. Previously, all this was done by wire (the wire was called that, a sync cable), now wireless technologies are in vogue - telephone, telegraph, Internet .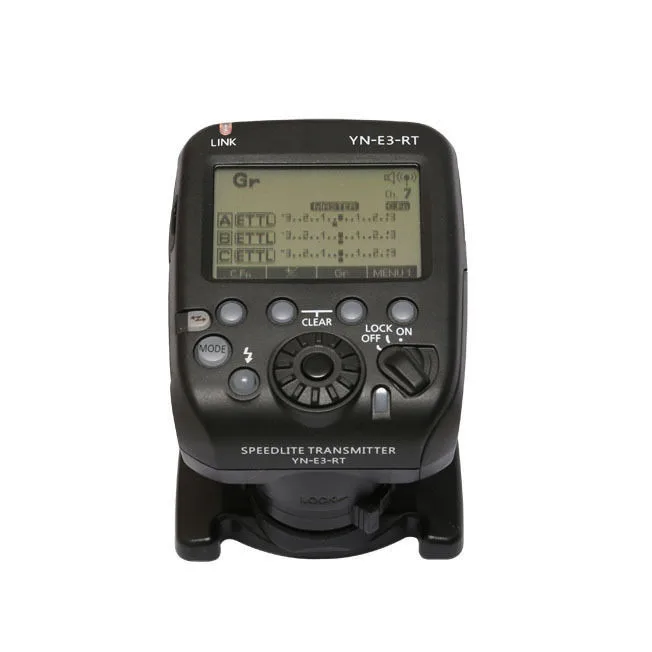 .. practically a scheme for capturing the world. Today, the amount of data transmitted over the air is growing by orders of magnitude every year. Since there are some differences today in the interpretation and use of the term "synchronization" in relation to outbreaks, we will talk first on the modes of operation of flashes , and then actually on how to ignite flashes .
Flash and flash modes
The flash is an amazing tool for photography. This is such a sun in your pocket, which, however, unlike the luminary, does not shine in all directions, but more or less in one direction. However, if we talk about our planet, here the sunlight also shines in only one direction and is quite hard. The only difference between a flash and the sun is that it does not shine constantly, but only for a limited time, which is usually limited to 1/1000 of a second. This period is called with pulse (an important flash parameter), and the flash is attributed to pulsed light because of this disadvantage / advantage.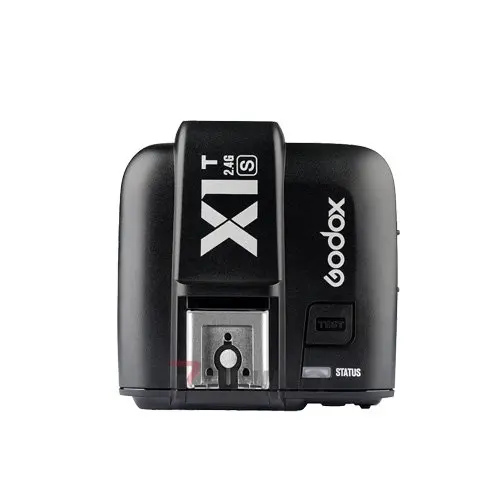 The sun, in contrast, refers to constant light (with a number of natural sayings that allow it to be attributed to natural light ).
They say that if you see an article on the Internet and repost it on your Facebook, the world will become one person brighter.
As you understand, 1/1000s is much less than most shutter speeds (although it is enough to illuminate the frame completely), but in mechanics there are a number of requirements when you need to set a certain error . That is why cameras used to shoot with a flash at a shutter speed of 1 / 60s - so that there is a margin of time for the operation of all mechanisms. When shooting only due to the flash pulse, the aperture is no longer so important, therefore it is selected for the desired depth of field. Now, due to the use of more precise mechanics, flash exposure can be raised to 1/200s, and there were cameras with electronic shutters that worked at 1/500s (Nikon D70, for example), and even now medium format cameras have a leaf shutter, working even faster, but it most likely does not threaten you. A fast shutter speed is a guarantee of fixing movement, for example, although usually the flash itself captures this movement.
If you know the mechanism of the shutter of a SLR camera, then there is no point in explaining about curtains, but for the rest we will spread a little.
The film (and now the matrix) was usually covered with a black curtain made of a rather dense material. When the exposure starts, this shutter moves to the side (usually up), when it ends, the film is closed again by the same shutter moving in the same direction. The curtain that opens the matrix is called the first (front), closing the second (rear). Under normal conditions, this is not critical, the flash impulse occurs somewhere between them.
By the way, this normal mode is called standard . When using it, the frame is illuminated completely due to the flash. Therefore, the amount of light here is always about the same (depending on the preliminary estimated pulse that follows immediately before the exposure), regardless of the shutter speed, at least 1/60s, at least 1/500s, because the flash has its own shutter speed.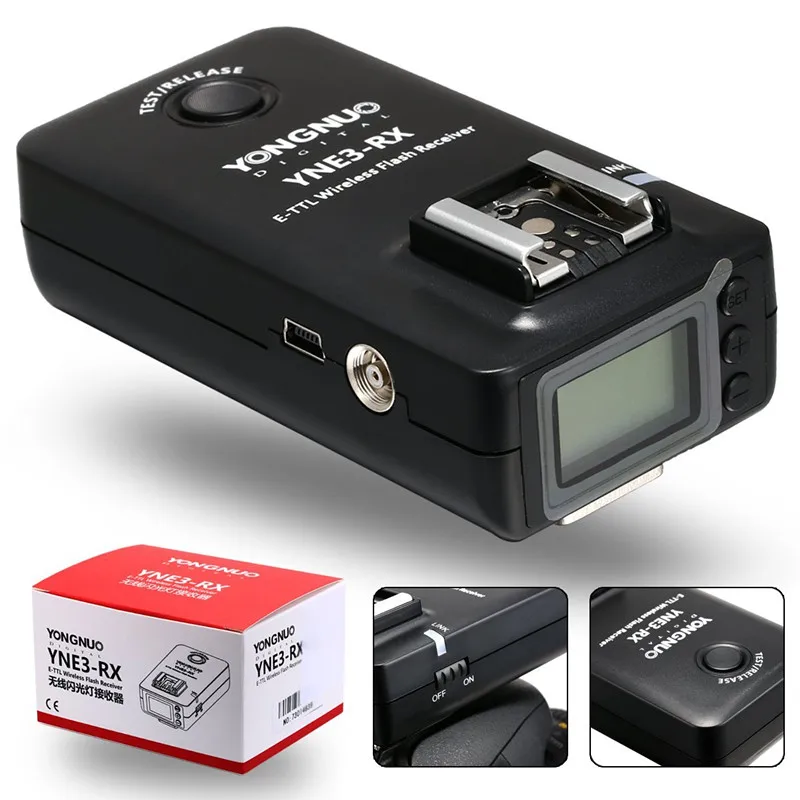 If you close the aperture, the flash will simply increase the power, you will notice the result of such a change only in the depth of field.
The disadvantage of this mode is that the flash obeys the current laws of physics and photography - light cannot propagate indefinitely, there is even a formula that for every additional 40% of the distance (i.e., 1.4 times further) it will reach 2 times less light (this is for manual mode, in order to calculate the power of sources in the studio). If you have thoughts about where such inconsistency comes from, remember the formula for the area of a circle, or at least the standard values of aperture numbers. In practice, this will be expressed in the fact that the face of the person being photographed will greatly exceed the background in terms of illumination intensity, i.e. the background will be black and the face will be overexposed. Despite the fact that this is the standard of photography in the days of film cameras, not everyone likes it.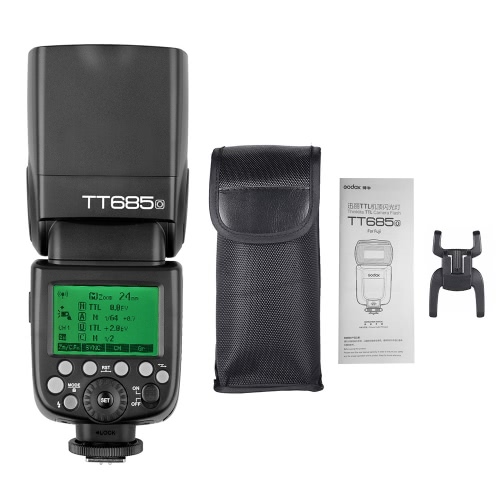
With external flashes, it is quite easy to get around this disadvantage - you just need to point the flash at the ceiling, from which all objects are equidistant, and there will be no noticeable difference in lighting.
However, there are other ways to evenly illuminate the frame. Since the flash pulse is rather short, it can be forced to be inserted at the beginning or end of the exposure, only the exposure is calculated based on the illumination of the frame without using the flash. This mode is called slow-sync flash (slow-sync, rear curtain, 1st/2nd curtain) . The frame is exposed in normal mode, and the flash only highlights what is next to it. In this mode, there are two options - when the flash is ignited at the beginning and at the end of the exposure. They got the name as synchronization on the first and second curtains (front and rear). In fact, their effect is noticeable when shooting motion at fairly slow shutter speeds - already at 1/50s and at 1/30s motion blur becomes noticeable.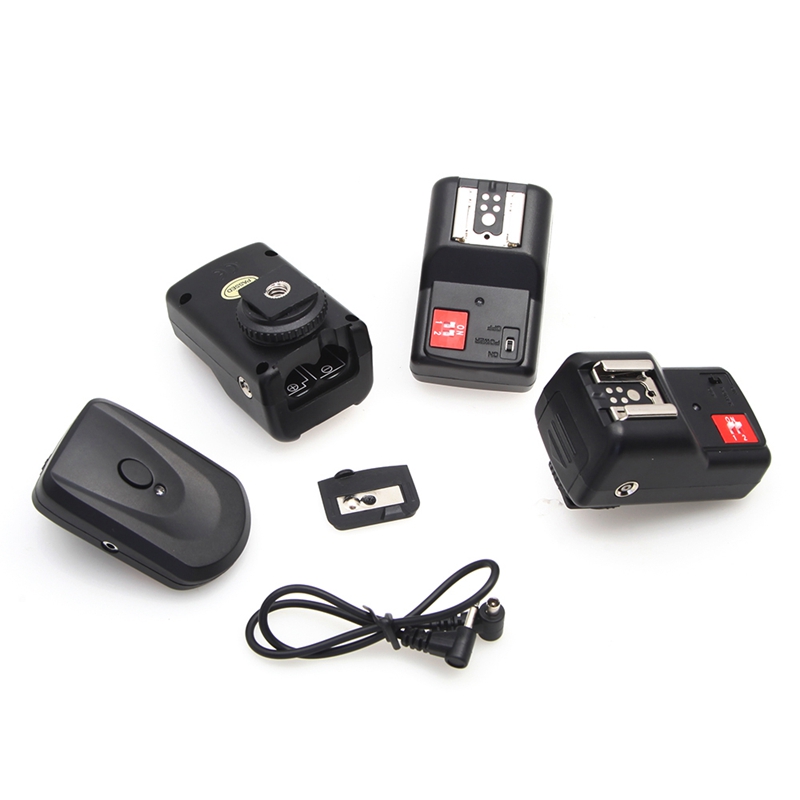
Flash, on the other hand, since it gives off quite a lot of light, “freezes” the object: when synchronizing with the first curtain, the object will be frozen at the beginning, and then a trail of blurred motion follows from it, and after the second one, first a trail, and then already an object, and the object itself clogs up part of the loop, which is why rear-curtain synchronization, in most cases, is preferred to the front one.
All cameras today shoot in TTL mode - when the camera's automatic device forces the flash to make a preliminary flash in order to assess the illumination of the frame and adjust the flash output accordingly. This happens all the time, both in standard mode and in slow sync mode. TTL helps automatics determine how much power the flash needs, but this power can also be set manually in some devices. Nikon allows you to set this right in the camera in Manual mode, other manufacturers - right on the flash. This is not fundamental, but it solves one important problem: 10% of the population has overly sensitive eyes, and when shooting with a flash, they react to a preliminary, evaluative impulse by blinking under the second, that is, when the frame is exposed. As a result, it turns out that a person enters the frame with closed or half-closed eyes. In manual mode, there will be only one impulse, and the person will blink already “behind the scenes”, it remains only to choose the right flash power.
If you try to shoot with flash on a bright sunny day (for example, to highlight a person's face against a bright background), then in semi-manual modes, especially in aperture priority mode, you may encounter a situation where the camera starts to swear that it does not can set the correct exposure (although it will shoot, however, with overexposure). The problem is that often in such cases he cannot set a shutter speed faster than the flash sync speed. Here comes the need to use high speed sync (FP sync/HSS) . This mode is applicable, however, only with external flashes - the manufacturer does not allow it to be used on built-in ones. Unlike the standard flash, in this mode, the flash does not make one pulse, but a series to get into the narrow gap between the curtains, because they move very quickly to provide the desired shutter speed.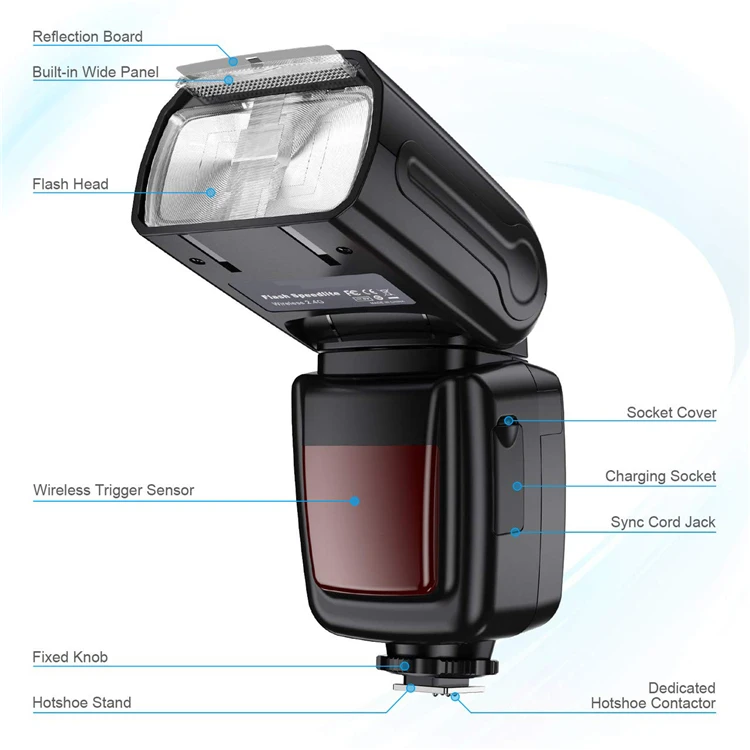 Banal physics suggests, however, that the flash power is then redistributed in favor of speed, i.e. just divided by the number of these impulses, falling by 10-20 times. As a result, the guide number (light penetration distance) is also reduced, since everything lives according to the same physical laws, and if the guide number of your flash in normal mode is 38, with fast synchronization it will drop to 2-3, and even then at best . It is clear that when shooting with a high-aperture portrait lens, it will no longer be possible to move away. The flash must be torn off the camera and brought closer to the face. This is where we run into the features of flash synchronization.
Flash synchronization in manual mode
Modern flash today has a light trap on the body , which gives the command to fire. They are everywhere, from top-end flashes from major manufacturers to cheap Chinese semi-manual specimens for 40-60 bucks (there are flashes and cheaper ones, there are simply no light traps). Such light traps are even in cheap flash bulbs, they are screwed into a standard cartridge and are powered by 220V. Light traps allow flashes to be divided into masters and slaves - these are not titles, but rather, something like positions. Today, you can assign one leader (usually built into the camera), and all the rest as followers, and tomorrow start a different order. The main thing is that the master flash can work in manual mode.
The master flash can be any device capable of delivering a fairly bright pulse - all the same built-in flash, external flash, infrared trigger, the pulse of which differs from a conventional flash only in a spectrum that, for example, is not visible to our eyes . It is interesting that if you line up flashes at a certain distance from each other in one line, they will be able to capture the impulse of neighboring flashes, set fire to it, and with their impulse set fire to the flashes that follow them, which the impulse from the previous ones could not catch. The flare guru, Joe McNally, somehow lit up an entire plane, and a very large one, with 53 flashes.
Such a system works thanks to one very important point: the actual shutter speed (that is, the pulse duration) of most flashes corresponds to 1/1000s , which is usually not required when shooting - we usually work at much slower shutter speeds (1 /30-1/200, in most cases), because we only shine with flashes when it is already quite dark. In other words, the flash just has a lot of time while the shutter is open to fire, and it doesn’t matter how much later the 53rd flash fires, even if at 53/1000s - it still falls into our shutter speed, and, accordingly, will be registered in frame.
Moreover, many remote flash units can be set to fire on the second flash instead of the first .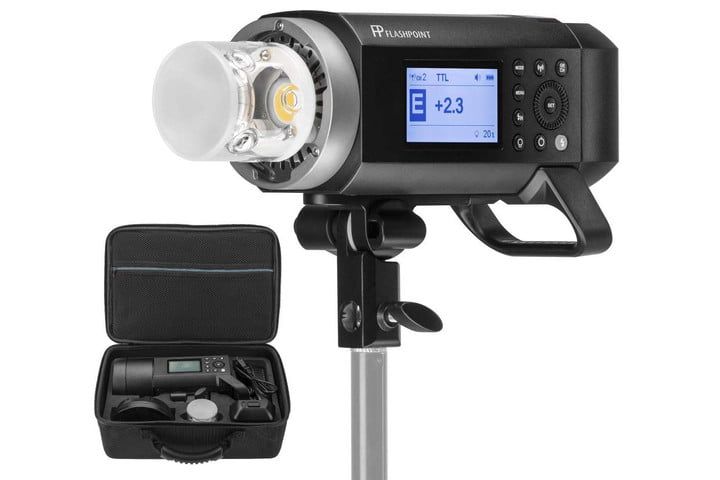 This is necessary when there is no way to turn on the master in manual mode, and it continues to work rather tediously in TTL mode. This is common in the case of ignition from the built-in flash in the Canon or Sony camp - in the first case, no one, and in the second, most cameras simply do not support the built-in flash in manual mode. Nikon is more democratic in this regard, as are many smaller manufacturers - some of them do not have flash control systems at all, so at least they provide synchronization. Nikon, on the other hand, is considered one of the coolest manufacturers in terms of proximity to the photographer, providing crowds of strobists with their cameras, thanks to the flexibility in terms of working with flashes. However, thanks to the same Chinese, this advantage can be leveled for just 10-50 bucks by purchasing an IR starter or a set of hand-held radio synchronizers, which we will discuss below.
The advantage of manual synchronization is that you set the power of each flash yourself, and you can incorporate as many of them into the lighting scheme as you want.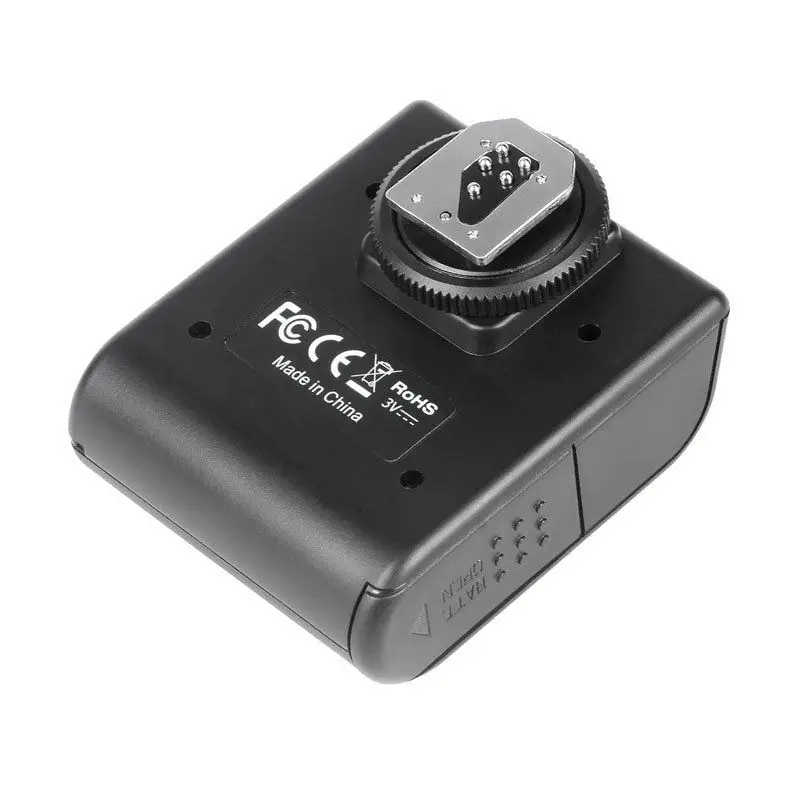 The power is adjusted, of course, in accordance with the characteristics of the flash itself. For example, the Rekam led "bulbs" from the Mini-light set always shine at full power. Slightly more expensive FalconEyes have two power levels: full and 1/2 full. The more advanced the flash, the more adjustment steps can be. So, for example, if a flash is indicated that it can adjust the power with an accuracy of 1 stop up to 1/64, this means that it has 7 power settings: 1, 1/2, 1/4, 1/8, 1/ 16, 1/32, 1/64 - even for a weak Chinese, this is very good. True, it should be borne in mind that “full power” is a relative concept here and represents the maximum power of each individual flash: for slave and studio flashes it is indicated in the form of NNN J, for portable ones in the form of a guide number, which, with a certain technical talent, can be and convert if required. You just need to remember one thing: slave "light bulbs" and studio flashes, in any case, will be more powerful than portable ones.
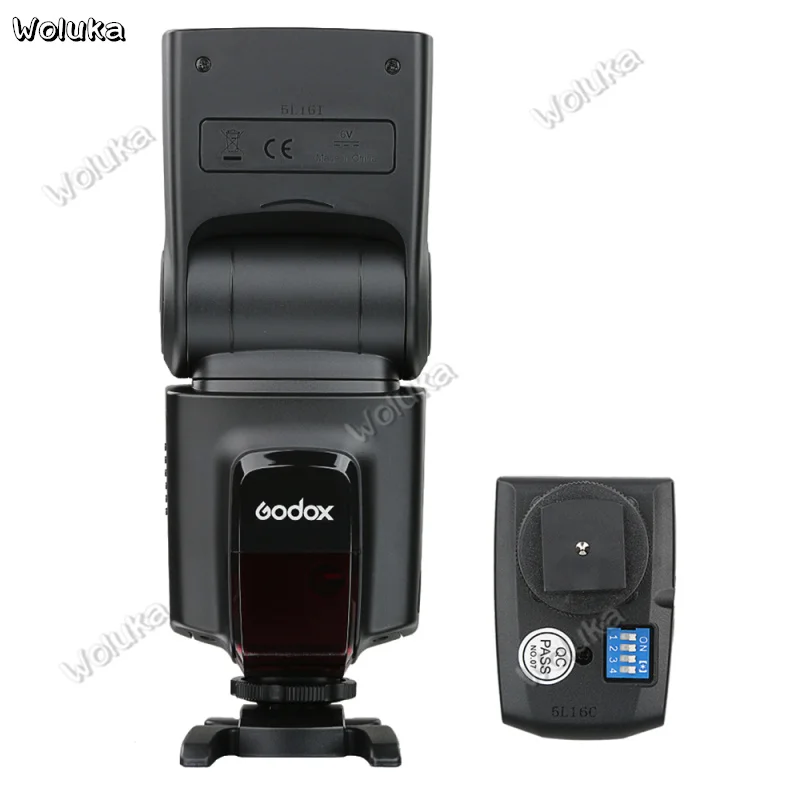
The disadvantage of manual sync is that you have to set the flash output manually on each flash. And it looks like this: they clicked on the portrait, ran, tweaked a couple of flashes, clicked again, ran again. In the absence of assistants, you will quickly realize the extreme inconvenience of this option, which will worsen with an increase in the number of outbreaks. There is, however, a variant of light control on the camera itself: out of three exposure parameters, at least two will be on your side, aperture and ISO. The aperture can physically reduce the amount of light entering the lens and affect the entire picture as a whole (we will lose shadows in the same way as the illuminated areas, please note), and ISO increase the susceptibility of the matrix to incoming light with an accuracy of 1/3 stop (modern flashes are also the same are able). That's why handheld flashes are extremely budget friendly for home photography or for some street portraits (especially if you're hosting a photography environment that includes both Kenonists and Nikonists and Minoltists and you need to let everyone shoot), but are not very suitable.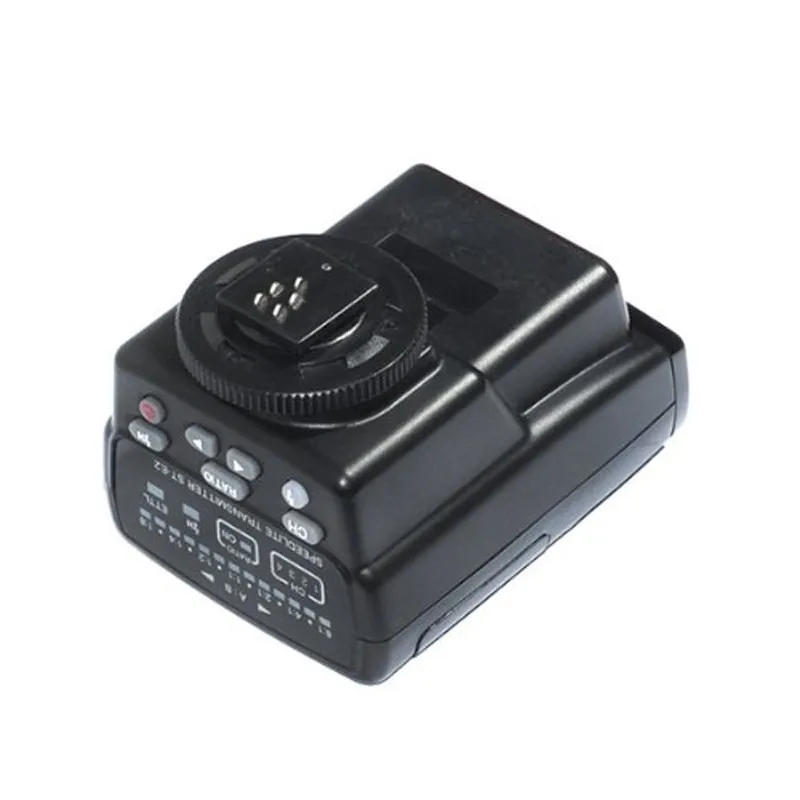 , if the model, together with the light, is a couple of tens of meters away from you.
Flash control
It's hard to say who invented the control of external flash (or flashes), but this Japanese engineer was clearly a genius. From simple synchronization (or ignition), which we considered above, he proposed to go even further than everyone took advantage. Canon, Nikon, Sony, Olympus, even Pentax have their own flash control system.
The meaning of flash control is as follows: since you can simply set fire to another flash by the flash pulse, why not use this optical signal for data transmission? Well, just like remote controls work - a certain sequence of pulses of various amplitudes and frequencies has a meaningful meaning. After all, there is no need to transmit a lot of information: only the power of puff, and that's it. An external flash works when controlled in exactly the same way as on a camera: the camera makes a preliminary impulse, a flash set aside fires on it, the camera evaluates the illumination of the scene, gives the flash a command how much to puff and when.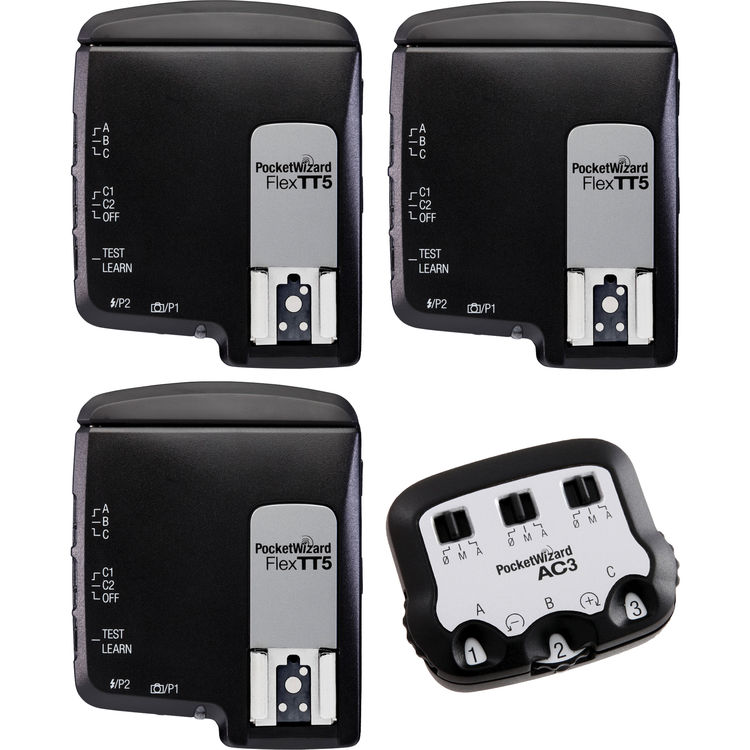 Theoretically, the impulse of the control flash should not affect the frame, if this is not provided for in the settings.
In reality, things are different: the built-in flash still fires at the moment of exposure, and either leaves light on shiny surfaces, or itself affects the exposure. Therefore, it is very desirable to try to cover it with your hand (not quite, of course, so that the commanding impulse diverges to the sides and re-reflects from the walls). There is another hack: just cover the flash with an exposed film, which is why it should puff in the IR range.
Built-in flash commander can be selected as an option on almost all modern cameras. When controlling another flash, you can use two basic firing modes from the built-in flash:
- Manually set the output of remote flash units . All flashes are divided into groups, and when controlling on younger models of cameras, you can control two, on older three groups of flashes in one of the 4 channels.
 Groups simply determine what parameters to set for different flashes - since the light is divided into drawing, filling, background, back, you can redistribute their power in the same way: more power for drawing, less for filling, the rest to taste. Channels are needed so that, for example, your flashes listen, if possible, only to you, if, for example, 3 more Nikonists with flashes work in the room, then you will not have conflicts.
The convenience here is clear: the flash shines the way you need, but you don’t need to run anywhere, everything is done in the camera menu, and the system only gives signals to whom what to do. - Set the output of controlled flashes automatically via iTTL / E-TTL and other TTL. Additional letters mean only one thing - remote flash control with full TTL metering support, just like if the flash was on the camera. The advantage is obvious: you don’t need to select the power, everything is done automatically, and you only need to arrange the roles, say which flash shines stronger, which is weaker - these are just exposure compensation coefficients, as is the case with a flash on a camera.
 The advantage is speed, but the disadvantage is that TTL is not a panacea, it is often mistaken, no matter how good it is.
What to choose, everyone decides for himself. Personally, I love iTTL, which allows me not to fiddle with power manually. However, in apartment conditions it is often annoying when the device tries to understand for you where it overexposed, and you have to change its processor to your head.
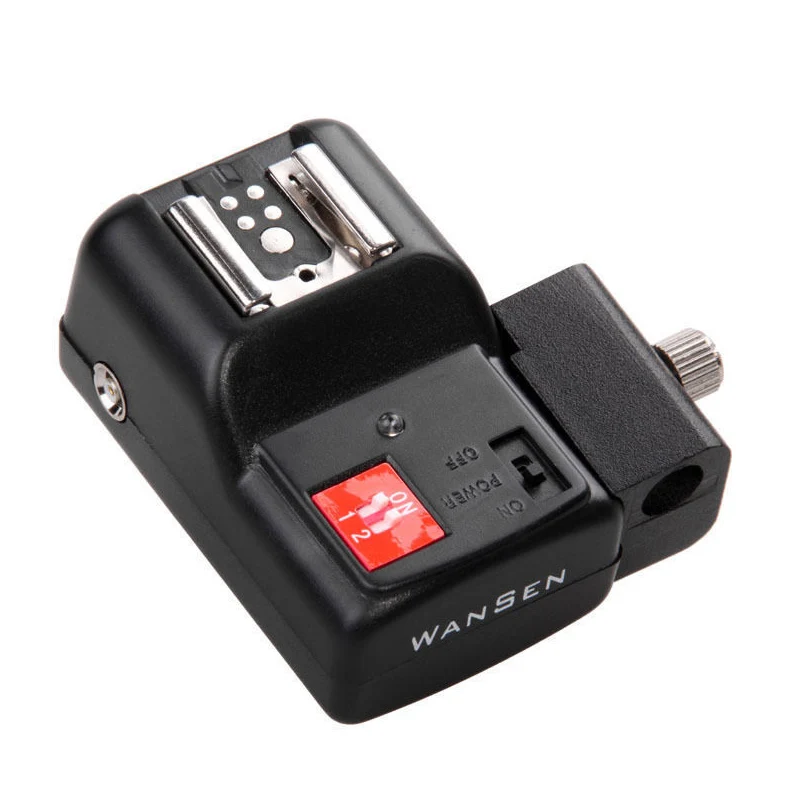
IR trigger
Photo: AliExpress Briefly discussed above, the IR trigger/synchronizer (IR trigger) is an extremely versatile solution for any studio. Moreover, they are always there by default - no one wants to toil with sync cables today, and they do it right. They are suitable for any system (Canon, Nikon, Pentax, Olympus - only Sony stands apart with the special design of its sync contact). It works only from two contacts, central and brought to the mounting bracket. It works when the camera takes a picture, you can’t turn it off - except, of course, if you accidentally burned it with a high-resistance Soviet flash.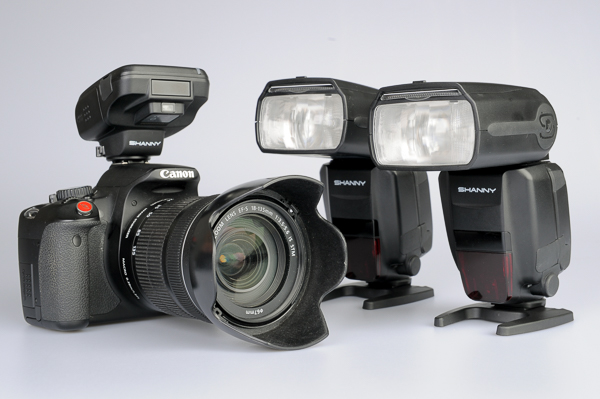 All flashes connected in slave mode (in Nikon called SU-4) fire on it, moreover, in manual mode. In other words, it replaces the usual optical synchronization in manual mode, it's just that the IR beam hits a little further, that is, it can be used outdoors, and it is not visible in the frame. Its huge plus is its versatility for absolutely all systems ... with rare exceptions, of course. The downside is the lack of TTL support and the fact that on the street the signal is still lost at long distances, and indoors it cannot shoot around the corner.
Manual radio synchronizer
Photo: AliExpress The radio synchronizer works a little differently: it takes the signal from the central contact, encodes it into a radio signal and sends it to the appropriate receiver. The receiver gives a command to the same central contact of the flash, the flash fires in manual mode (for this, it must, of course, be switched to manual shooting mode and set the power). The advantage is much greater flexibility - the radio signal is not afraid of sunlight and obstacles, like walls, which is why the receiver can be placed around the corner (there are situations when you want to bring a flash there, believe me), and with the whole set you can go outside to shoot .![]() .. they say the range of such is about a hundred meters, which is certainly a huge advantage. Support for all systems is also expected initially. The disadvantage is that you need a receiver for every flash you want to fire, and also that, even after taking the flash to a hundred meters, you still have to run to set the power.
.. they say the range of such is about a hundred meters, which is certainly a huge advantage. Support for all systems is also expected initially. The disadvantage is that you need a receiver for every flash you want to fire, and also that, even after taking the flash to a hundred meters, you still have to run to set the power.
There is a separate category of radio synchronizers that are not divided into “receiver-transmitter” pairs, but determine everything automatically, depending on what they are connected to - they are more expensive, but they work the same way. Their advantage is that when the transmitter dies, the former receiver can serve them - naturally, it is already included in the price.
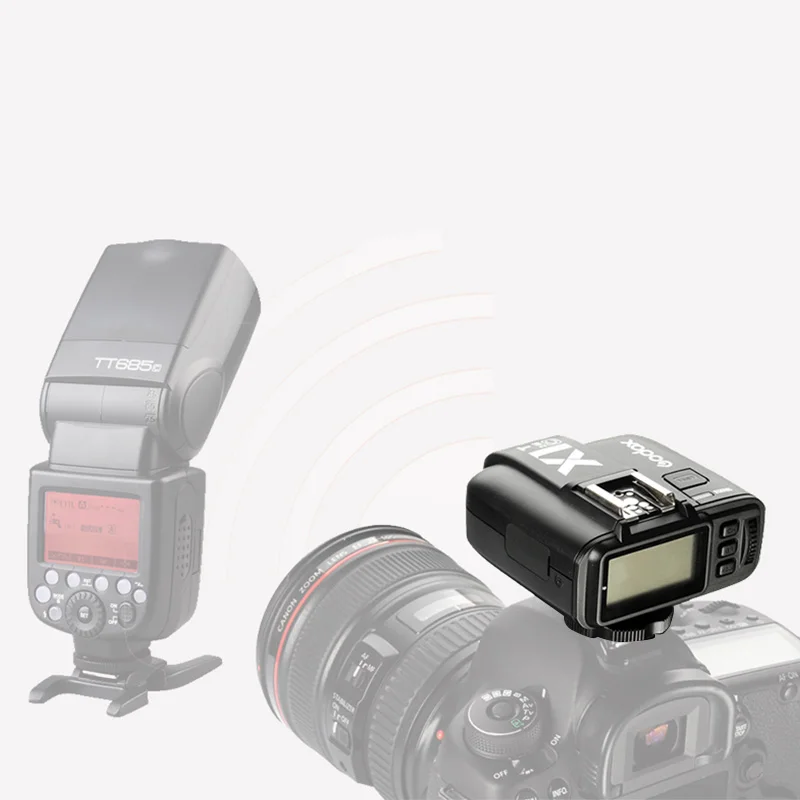
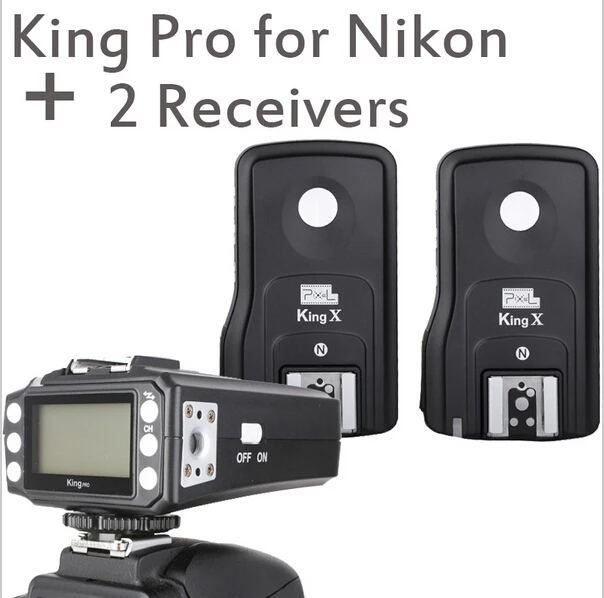
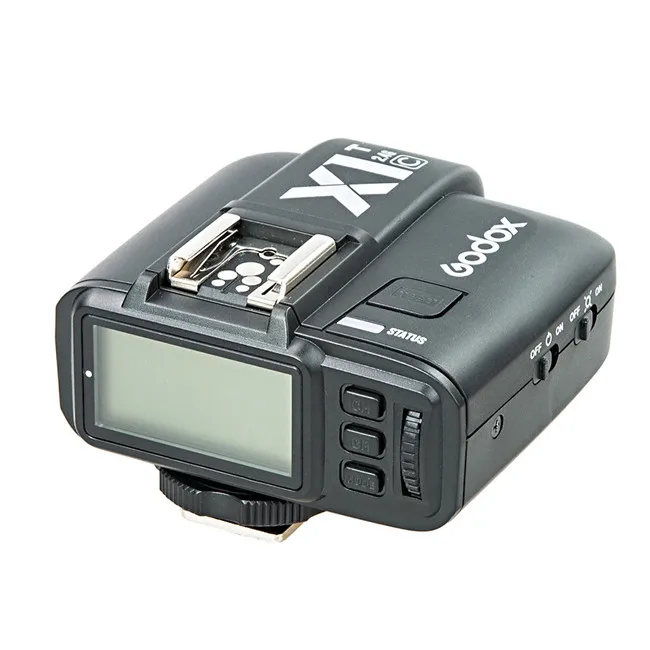
TTL Radio Trigger
Top of the range radio trigger that combines the benefits of TTL-enabled optical signal control with ignition reliability by not having to watch walls or sunlight. They all work the same, although each manufacturer simply has its own signal encoding so that there is no interference.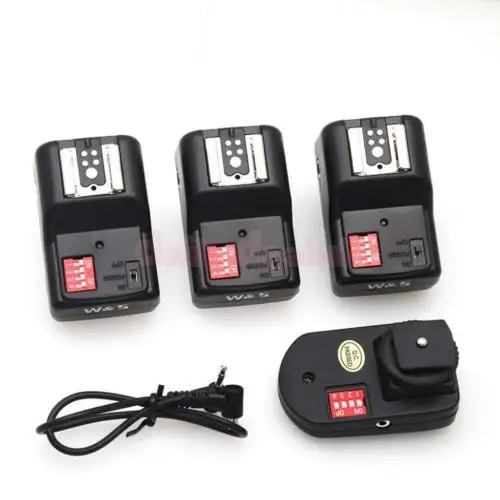
They are produced today both by the manufacturers of photographic equipment themselves and by manufacturers of flashes - ProPhoto, Broncolor, but there are also Chinese manufacturers Godox, Phottix, Pixel, Yongnuo, who came up with one system for everything - more precisely, they stole it and use it correctly.
Photo: Godox They work simply: the transmitter takes a command pulse from the "shoe" (sync contact) of the camera and transmits it to the receiver, which commands the flash. In fact, the “native” sync cable does the same - the camera at this time thinks that the flash is on it and works with it, as if it really was there. Naturally, all functions are supported, including control, including TTL. In other words, the best option. To date, the algorithm for the operation of control via TTL by large Chinese manufacturers has long been unraveled, and if the manufacturer does not change it (which is unlikely), nothing serious will happen. The disadvantage is that you are so attached to one manufacturer, whose synchronizers are forced to buy, and they are tuned only to its flashes, which use built-in receivers.