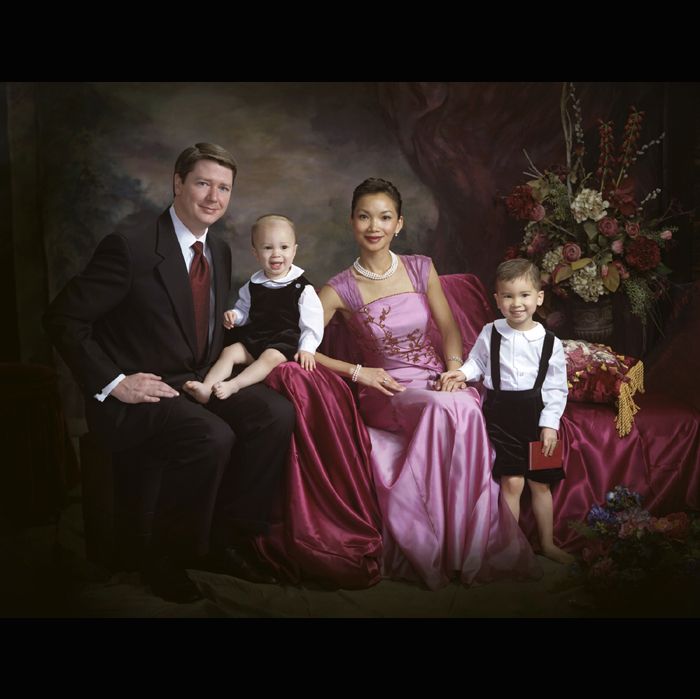
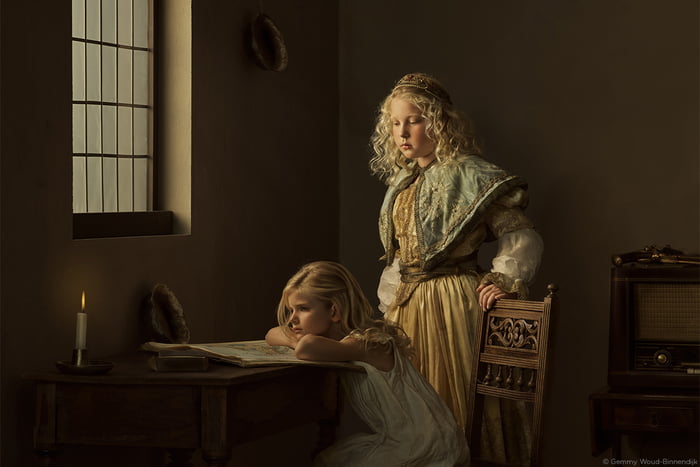
Rembrandt style photography
What is Rembrandt Lighting Photography? (And How to Use It)
By Andrea MinoiaA- A+
Download as PDF
Subscribe Below to Download the Article Immediately
You can also select your interests for free access to our premium training:
Business Basics
Cheat Sheets
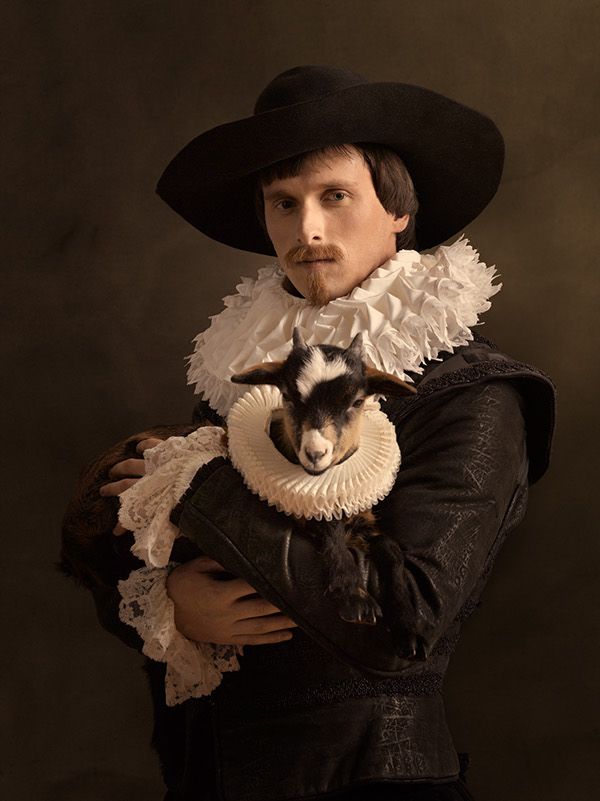
Child Photography
Colorful Cityscapes
Composition
Creative Photography
Creative Portrait Concepts
Digital Photo Collages
Fairytale Portrait Photography
Food Photography
Interior Photography
Landscape Editing
Landscape Photography
Lightroom Processing
Lightroom Presets
Long Exposure
Macro Photography
Milky Way Photography
My Camera and Photography
Organic Marketing
Pets
Product Photography
Sky Photography
Social Media
Still Life
Time-Lapse Photography
Travel Photography
Urban Photography
Wildlife Photography
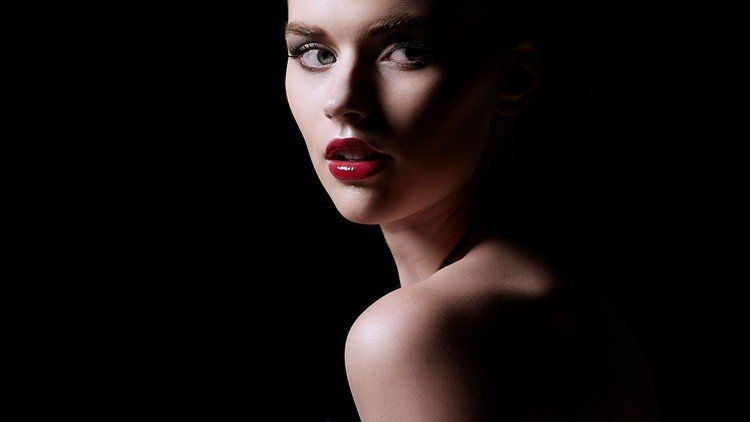
Your privacy is safe.Rembrandt lighting is one of the most iconic lighting techniques in portrait photography.
Read on to find out how to use the Rembrandt lighting technique. The effect only requires a few simple steps. You’ll end up taking amazing portraits full of drama.
The Rembrandt Light. Image Credit: Patrick Bogaert.What Is Rembrandt Lighting?
Portrait photographers have a few main classic lighting setups to choose from. You can create many of them in their most basic form with a single light source, such as a speedlight.
The type of lighting isn’t important. But it needs to be a light source you can control. Natural light isn’t easy to manage as the primary light source.
Self-portrait using butterfly lighting.Some of these setups include butterfly light and loop light. The names are often assigned after the type or shape of the shadows the light(s) casts on the model’s face.
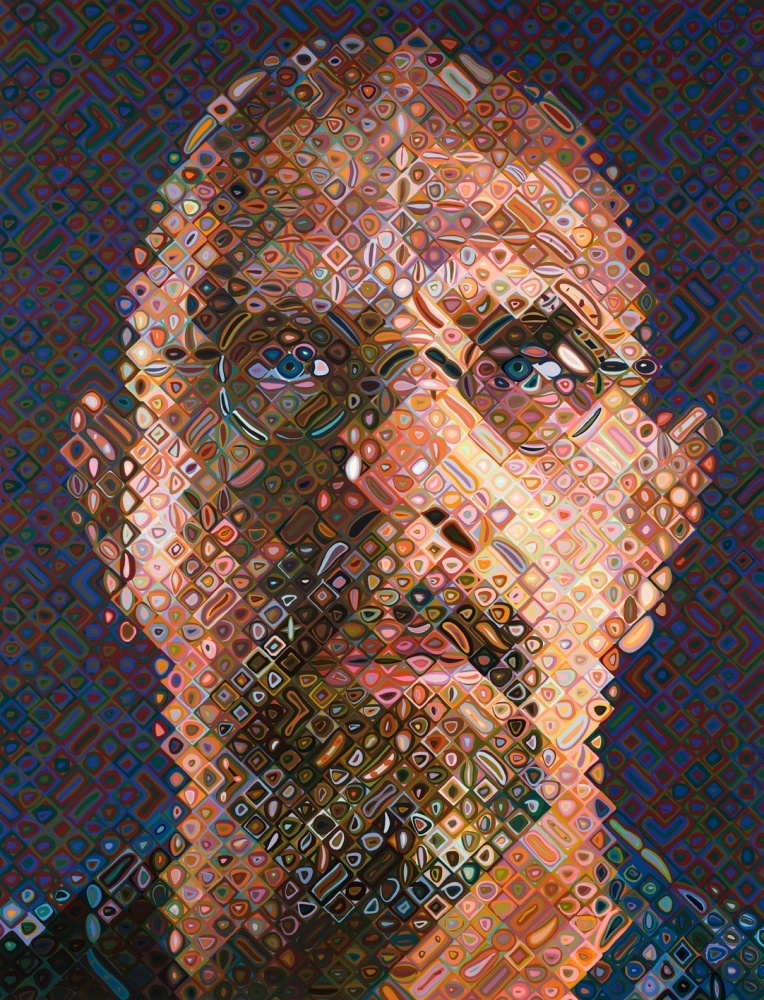
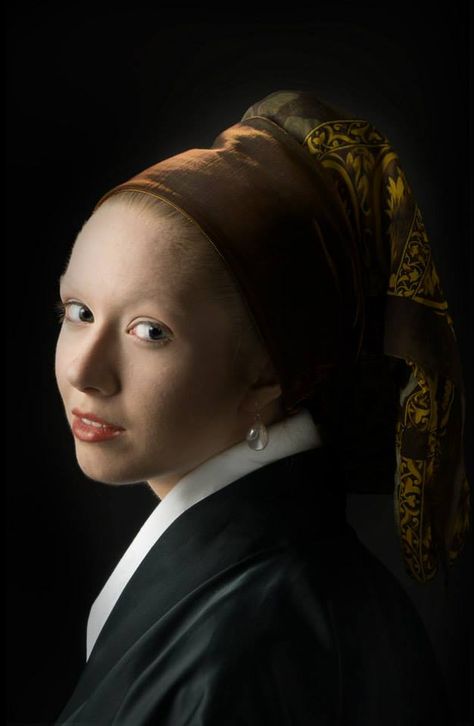
Rembrandt lighting takes its name from the famous Dutch painter Rembrandt.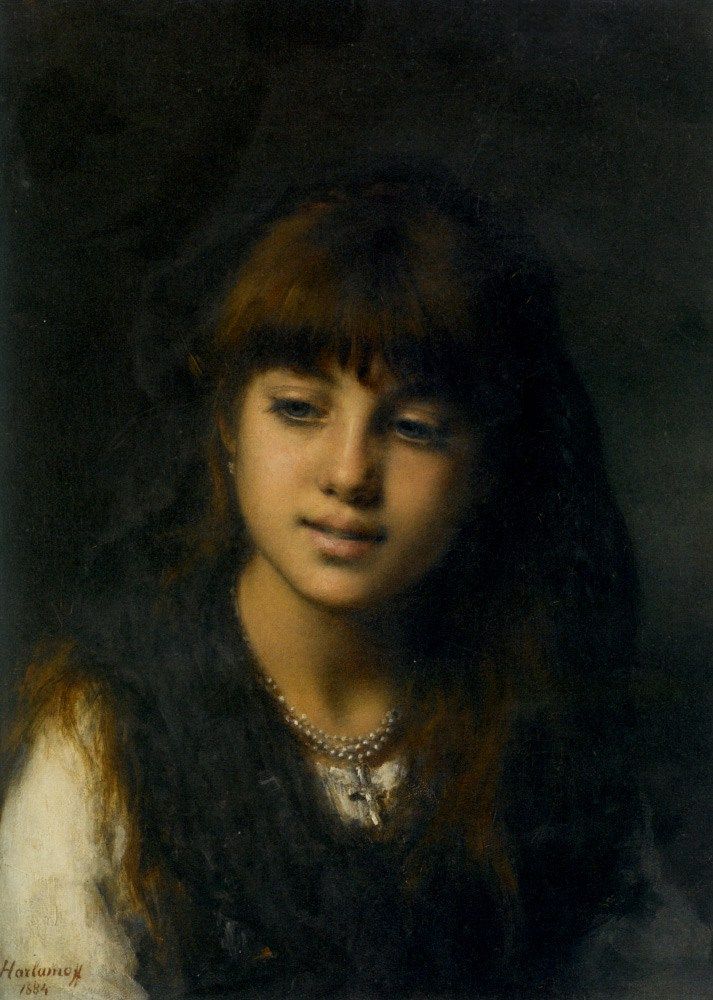 He was a master of the chiaroscuro technique. And he often used this kind of light in his paintings, particularly in his self-portraits.
Looking at his paintings, you’ll notice a single-light portrait lighting. How the short lighting hits the subject’s face is interesting.
As you can see from the image above, this lighting setup is a split light setup. It creates a triangle of light under the model’s eye on the shadowed side.
Why Use Rembrandt Lighting?
Rembrandt lighting is a dramatic light. It is one of those moody setups that plays with chiaroscuro. This technique from paintings uses the sharp contrasts between light and dark.
Example of Rembrandt light in a low key image.These are usually bold contrasts that affect the whole composition. As such, this is a kind of lighting that suits low key photography best.
Rembrandt lighting will draw the viewer’s attention where the light triangle is from.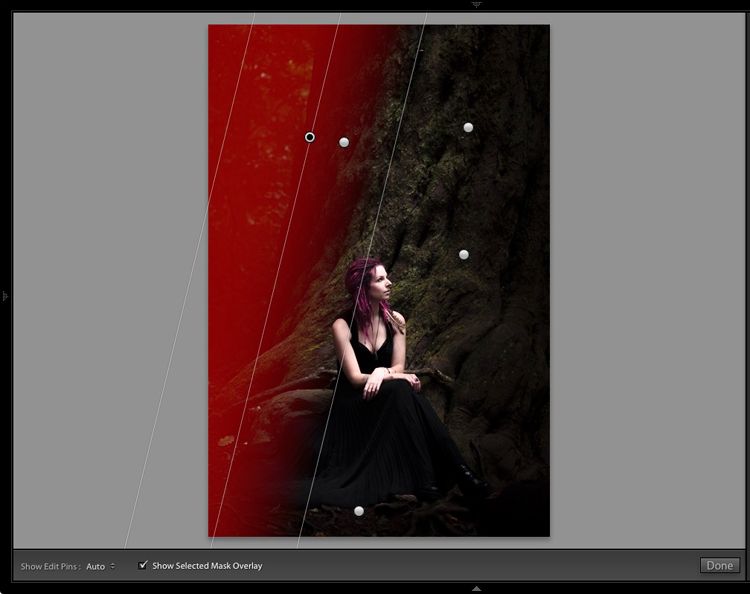 This is because of the contrast between the dark and the light.
It also adds a mysterious feel to the image.
On top of this, it’s a simple setup to master. And you can create Rembrandt lighting with a single speedlight, for a punchy portrait.
How to Create the Rembrandt Lighting Setup
When it comes to recreating a particular lighting setup, you have to remember one thing. The position of the lights in relation to the model defines the style. The angle you will photograph the model from doesn’t affect this.
For example, butterfly light will always be as long as the key light placed in front of and above the model. This is always true, regardless of the camera’s position.
Moving the camera to my side did not change the butterfly light pattern on my face.Don’t place the catchlight at eye level. Instead, use the portrait lighting to create the look you’re after.
The scheme below shows the position of the lights with respect to the model. These create the most common lighting setups.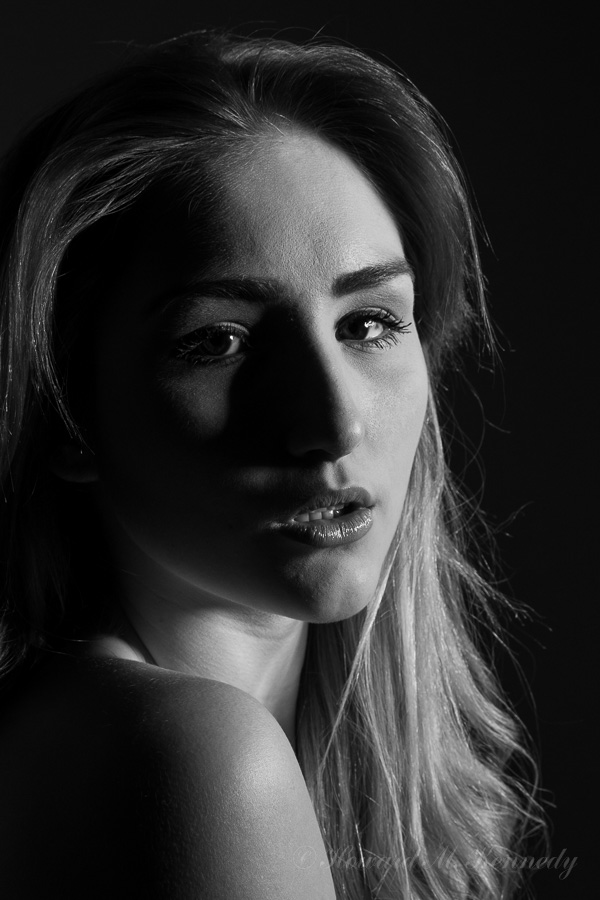
Rembrandt lighting is the right image in the second row. To create it, we need to place key light to the side of the model’s face.
When creating a Rembrandt lighting setup, it is easy to work with studio lights that incorporate a so-called modelling light. This allows you to have a preview in real-time of the shadows cast on the model’s face.
You can also put your smartphone on your speedlight and use your flashlight as a modelling light.
Where to Position Your Key Light
- Place your key light sideways, at a wider angle than 45 degrees, with respect to your model’s nose;
- Lift your light above the model, angled down;
- Refine the light position, height, and orientation. A triangle of light is visible under the model’s eye opposite to the side where the key light is;
- Check that the triangle will not be larger than the eye and that it will not “break” the shadow cast from the model’s nose. Otherwise, you will create a Loop light (the one above the Rembrandt lighting in the previous scheme).
 The triangle should not extend below your model’s nose.
Where to Position Your Camera
The angle from which you photograph your model does not affect the type of light that will appear. But it will alter the image’s mood. That’s because it will affect whether you are using a broad light or a short light.
Broad light means that the side of the face illuminated by the key light is close to the camera. Short light means that the side of the face illuminated by the key light is far from the camera.
With software like Set.a.light 3D by Elixxier, it is easy to practice lighting setups. You can see in real-time how the image changes when you move the lights and the camera around on the virtual set.
In the simulated setup shown above, you see the effect of moving the camera relative to the model. From left to right we have short, split and broad light.
As usual, you can try less conventional angles. Try shooting from below to give to your model some power.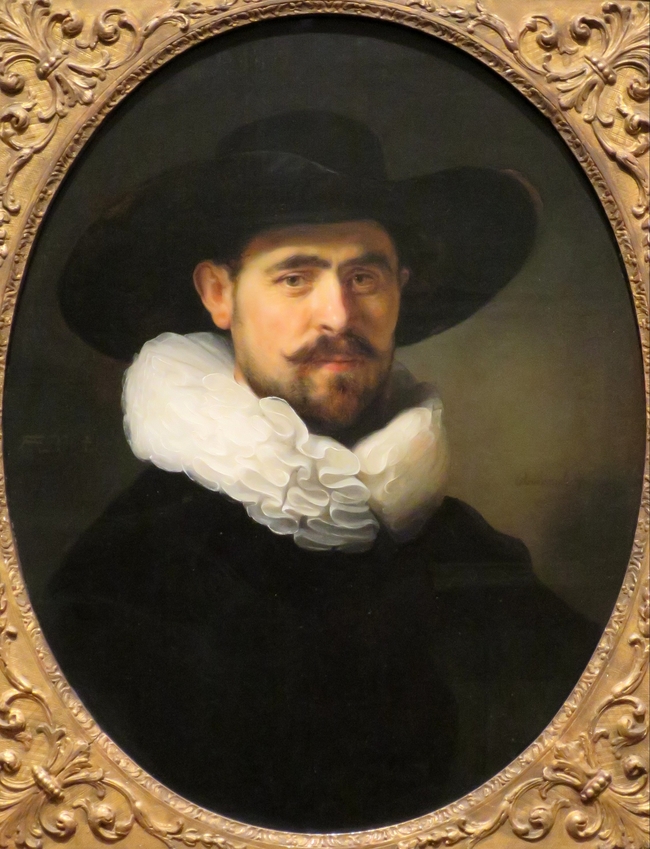
Sometimes, it’s easier to ask the model to move a bit than repositioning your light sources.
How and Where to Build the Basic Rembrandt Lighting Setup
You can create Rembrandt lighting even if you don’t have a studio. You only need to find a dark location or wait for the evening. Having access to a studio means that you don’t have to depend on the daylight conditions.
The basic Rembrandt lighting setup consists of a single speedlight with no modifiers. This will create a very hard light. It’ll result in very contrasted images that may be ok for some punchy male portraits.
A softer setup is more pleasant while retaining the Rembrandt lighting quality. Image Credit: Patrick Bogaert.Since the pattern of the shadow is created by the key light, you can use a fill light. This can be a second speed light, a reflector, or a wall to bounce back some light.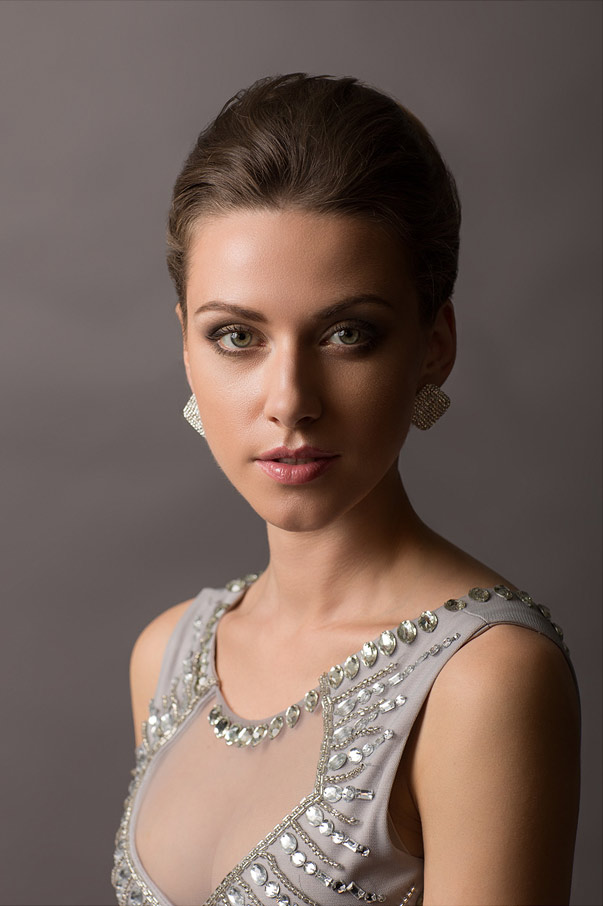 You can use this to fill the shadows for a gentler and more flattering setup.
A third light hidden behind the model and pointed at the background will act as a separation light. This will allow you to isolate your model from the background better.
Always pay attention to what is in the background. The best solution is a simple, black backdrop. It suits the mood that the Rembrandt lighting creates.
Conclusion
Rembrandt lighting is one of the most iconic lighting setups. It’s easy to use to add a unique twist to your low key portraiture.
Rembrandt lighting suits both male and female models. Especially if you soften the contrast in the chiaroscuro with a fill light. You can use it with both color and black and white photography.
To take your skills to the next level, read our Photography Unlocked book!
What Is Rembrandt Lighting and How To Use It in Your Portrait Photography
Classic photography lighting techniques are called classic because they are visually impactful and have stood the test of time.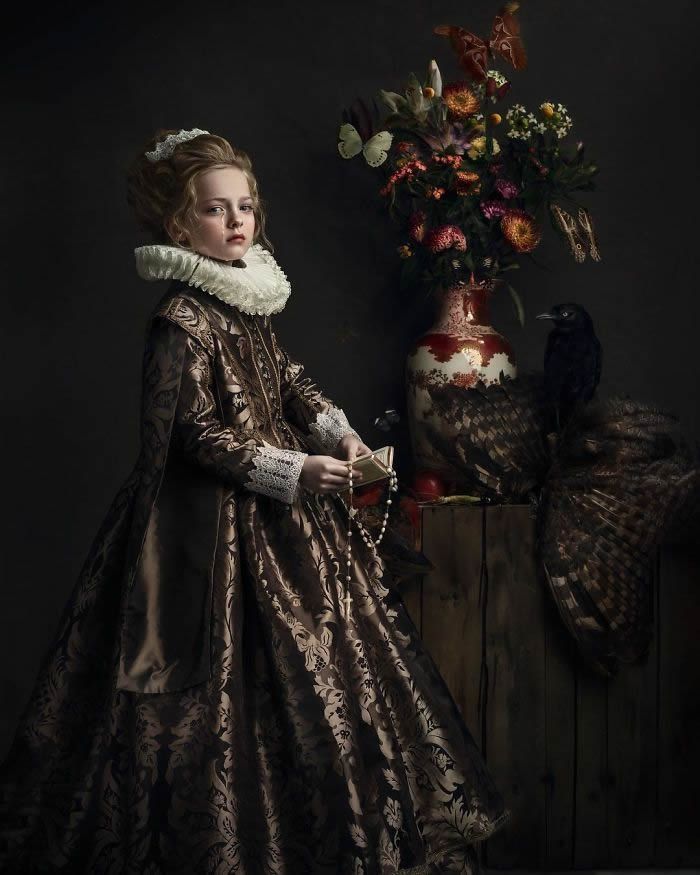 One such technique, called Rembrandt Lighting, is a single lighting source method that delivers a dramatic effect without involving a complicated setup. It is an especially popular studio portrait photography type.
This article covers the benefits of using Rembrandt lighting, options for setting up lighting for this method, and best cases for using this type of setup.
What Is Rembrandt Lightning?
Rembrandt lighting takes its name after Rembrandt Harmenszoon van Rijn, a 17th-century Dutch painter who was known for using earthy tones and golden highlights to frame the faces of his portraiture subjects. What made his painting style distinct was focusing lighting on the subject’s face and adding detail around it, tapping into an innate human attraction to the face.
His approach results in one half of the subject’s face is fully illuminated, while the other half is in partial shadow. One tell-tale sign of Rembrandt lighting is the presence of a small inverted triangle of light below the subject’s eye, usually along the cheek, which is a result of the lighting setup.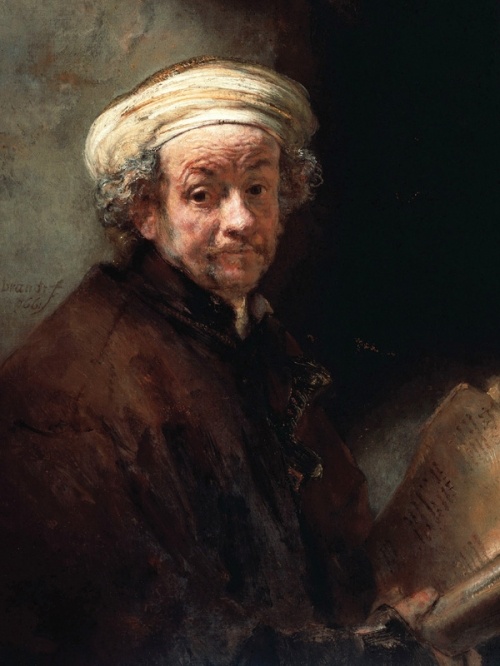 For perfect execution of this type of lighting, the triangle of light shadow must be no wider than the length of the eye, and no longer than the subject’s nose.
The Rembrandt lighting technique results in a moody and dramatic effect. This type of lighting technique often features a dark or black background behind the subject, putting the subject front and center.
Why Use Rembrandt Lighting?
Rembrandt lighting technique is considered one of the go-to photography lighting setups because it produces a dramatic visual effect without requiring a lot of setup. A more sophisticated version of this setup includes a reflector, which brings detail back into the shadows on the subject’s face, but even this setup requires minimal tools and associated costs. In this way, all renditions of the Rembrandt method are considered low-effort while producing high-impact photographs.
Secondly, one of the reasons professional photographers go with Rembrandt lighting is to achieve a dramatic visual effect called the chiaroscuro effect.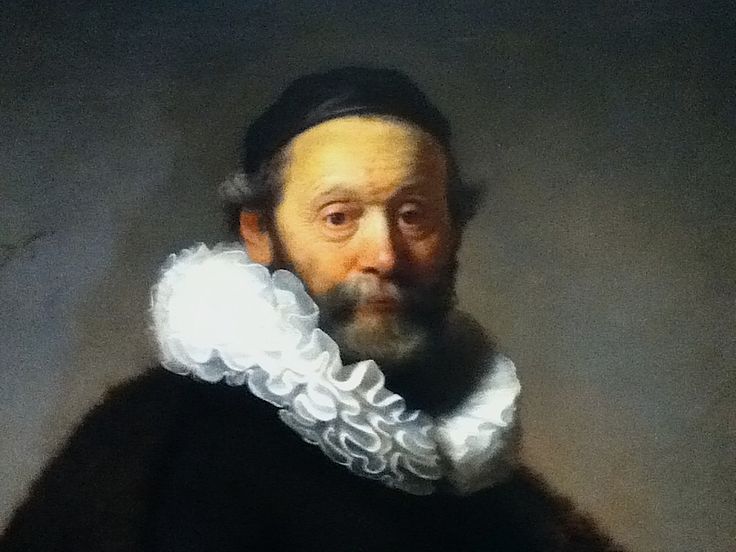 Favored in types of still life, street, and landscape photography, the chiaroscuro effect is one with the presence of shadows on parts of the subject matter with sharp contracts of lighting in others. For portraiture, this often means that the shape of the sitter’s face defines light, and the dark side of the face is defined in silhouette against a lighter background.
When they come together, light and dark can create tension. One of the things that make the chiaroscuro effect—and in turn, Rembrandt lighting—sought after is its ability to create an atmosphere and single out the individual and their character in a captivating way.
Rembrandt Lighting Setup Options
This beginner-friendly lighting method takes some finessing but requires minimal equipment to set up. There are two approaches to Rembrandt lighting, one using a reflector and one using only a light source. For the single light method you will need:
indoor studio environment
off-camera light source with stand
optional: 32” – 42” reflector or split light sources
At its most basic, Rembrandt lighting consists of a single light source placed on a 45 degree offset from the subject, about 5 feet away. Positioned roughly two feet higher than eye level, the light source is angled slightly downward and hits the side of the face that is farthest away from the camera.
Another key consideration in executing this lighting technique is ensuring that your camera flash does not interfere with the key light. To avoid this, consider adjusting the power of your built-in camera flash, which is sometimes called the ‘flash compensation.’
While the setup itself is simple, taking a couple of test shots to get the balance of light and shadow right on the sitter’s face is recommended. This method is most suitable for a dramatic look with ample contrast.
If You’re Using a Reflector
If you want to achieve a softer and more natural lighting effect, you will need to supplement your shoot with a reflector. Begin by setting up the key light as instructed above. To use the reflector, place it at eye level, opposite of the key light at a 45-degree angle, 3-4 feet away from the model. The light from the reflector should be illuminating the model’s face.
If You’re Using a Fill Light
If using a fill light, its strength should be no more than half that of the key light. When shooting, photographers use less powerful lighting, called a fill light, to fill in the high-contrast shadows that the key light creates on a subject’s face. Leveraging 45-degree angles, fill lighting is placed opposite of the key light in order to supplement it. A fill light is a great way to bring out more detail in the model’s face or to lighten up the moody atmosphere that using a single light source can cast.
After learning about its setup, it’s not hard to tell why beginner photographers rely on Rembrandt lighting for producing striking shots without using expensive equipment.
Best Places To Use Rembrandt Lighting
Achieving the Rembrandt lighting method requires a controlled artificial lighting setup. As a result, this lighting style is best suited to being shot inside a studio.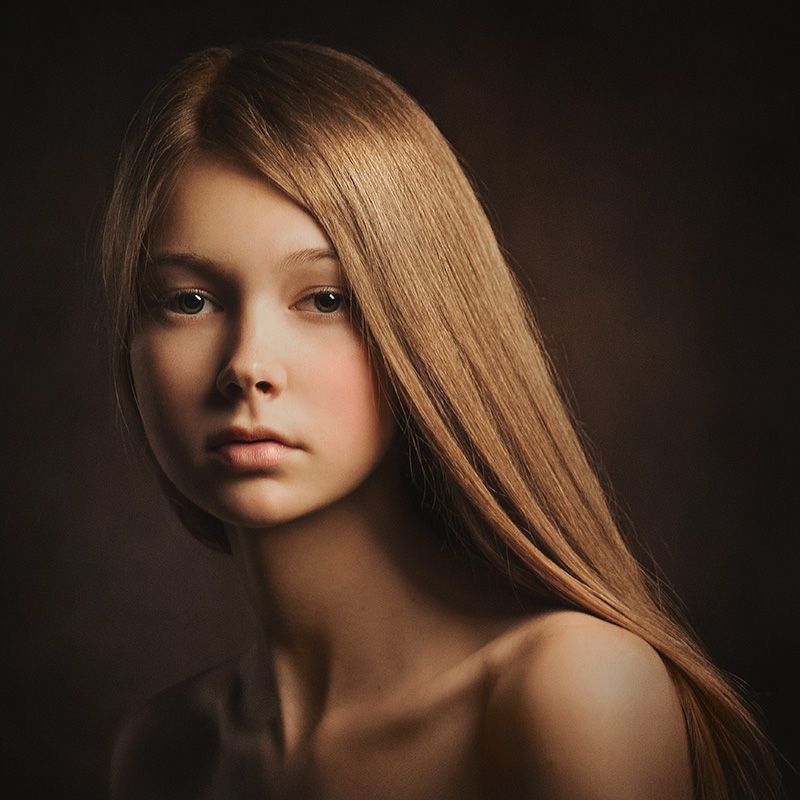 This is because outdoor environments can be unpredictable and let in too much natural light, making the contrast in light and dark harder to control.
If you own your own studio, it’s a good idea to place markers of the positioning of key elements (camera, model, reflector) and their angles in the studio so you can easily recreate the look as part of other projects. While the setup itself is simple, finessing the balance of light transfer between the key light and the reflector can be time-consuming, so marking down these key spots can help save you time the next time around.
6 Tips for Working with Rembrandt Lighting
When working with lighting setups, it helps to know the best ways to apply them. Here are some helpful tips for working with this type of portrait lighting.
1. Use a Spot Meter for Precise Control of Focus Point
Spot meters are a useful tool for working with harsh lighting with sharp contrasts. By using the spot meter function on your phone or camera, you control the focus point over the subject’s face. This means that the subject is captured in the light, while the rest of the shot is enveloped in shadow. This method is also helpful when you are shooting with a smartphone, allowing you to achieve the chiaroscuro effect in-camera.
In addition, using a spot meter is especially useful when capturing dramatic silhouette compositions. It helps capture the slivers of light while doing justice to the true black of the backdrop or background of the image.
2. Experiment With Multiple Light Sources
Rembrandt’s Baroque style of painting often depicted portraits whose features were lit up in ways that became the namesake for this lightning style. However, few people know that Rembrandt himself used multiple candles as fill lights when posting his subjects to create this look.
Similarly, you can introduce multiple light sources with the use of fill lights to produce different effects and ratios of negative space. You can also try using softboxes that produce diffused light to subtly brighten the facial features of the model.
3. Practice With Models or Yourself
Did you know Rembrandt’s most famous work, featuring a middle-aged man in a black beret looking directly at the viewer, is a self-portrait? Called Self-Portrait with Beret and Turned-Up Collar, this image is a classic example that practice makes perfect. Like the famous artist, you can hone your skills in this classic style of lighting by practicing capturing yourself or someone you know.
Note how the placement of the shadow on the subject’s face changes the aesthetic that is produced. This lighting effect has the ability to make a person look powerful or brooding, and learning its nuances can help you master all of its capabilities on set.
4. Practice Placing the Inverted Triangle of Light
Some Rembrandt lighting purists and professional photographers sweat the details when shooting with this method. According to them, not only should an inverted triangle shape be prominent below the subject’s eye on the side of the face that is prominently lit, it needs to adhere to other rations of the subject’s face proportionally.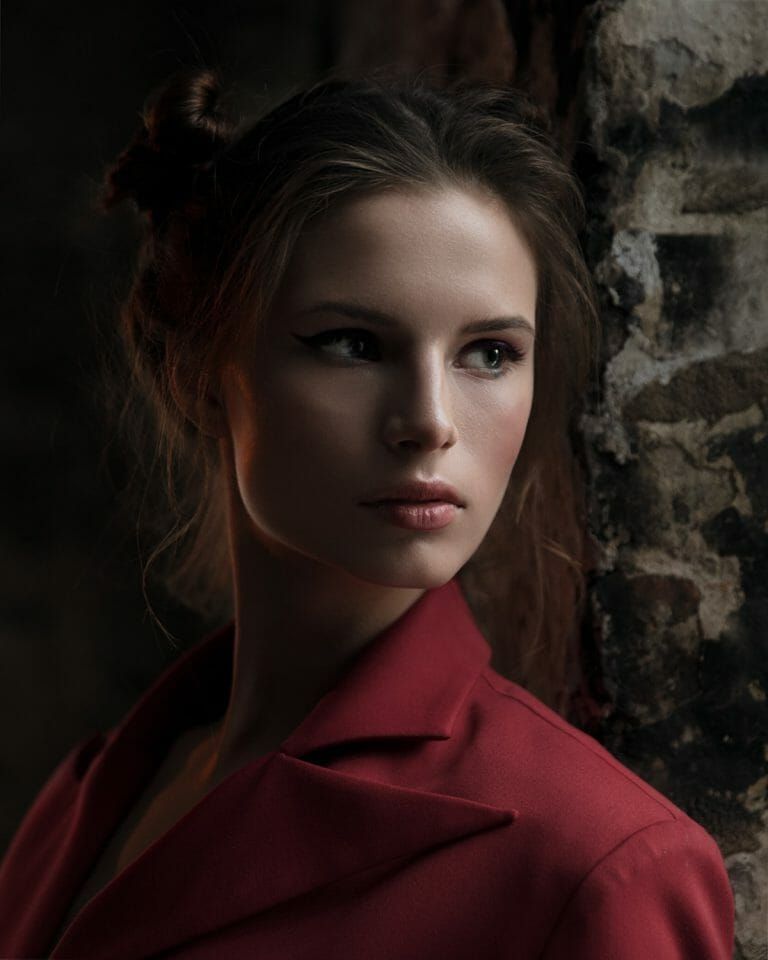 This means that the triangle of light should be no wider than the length of the eye directly above it, and no longer than the subject’s nose.
Photography is a deeply creative profession, and whether you choose to stick close to the conventions or experiment with them is entirely up to you. However, to master the traditional application of this lighting method, it helps to practice placing and sizing the inverted triangle on the subject’s cheek by manipulating the set lighting and body positioning of the model.
5. Shoot It Raw To Make the Most Of Lighting Contrast
Post-editing helps make images with contrast stand out even more. To help preserve maximum detail of your subject’s phase when using Rembrandt lighting, select the RAW format in your camera’s settings before beginning your shoot.
Then, use editing software like Photoshop and Lightroom to help bring out the subtleties in the image with detailed highlights. When editing for contrast, the choice before you is the retention of details and ensuring that the dark background pops around the silhouette.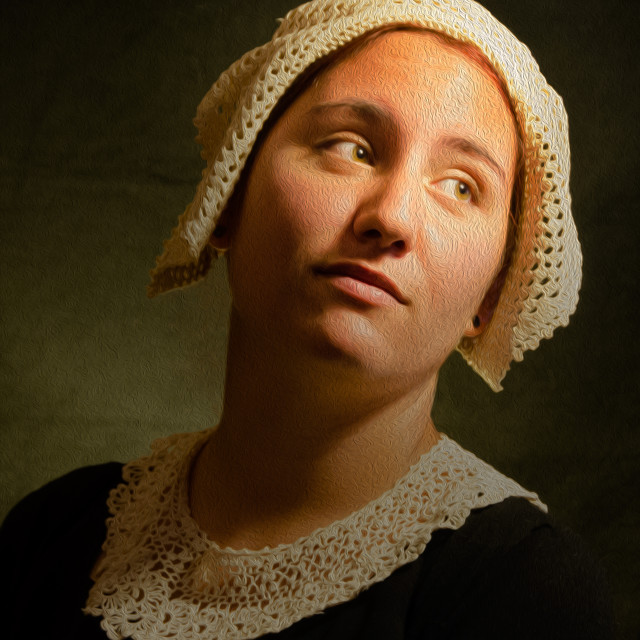
6. Occasions and Models Suited to This Lighting Type
Every photographer knows that different types of lighting are best suited to specific compositions. The same can be said for casting. When it comes to Rembrandt lighting, this setup is particularly flattering for round faces because it helps add definition. It is also universally flattering for individuals with long faces and helps accentuate high or prominent cheekbones. However, this lighting effect may be challenging to achieve if the model has a small nose, or if the bridge of their nose is flat.
When it comes to optimal occasions and settings to use this lighting method, it offers versatile applications as long as the look the photographer is looking to achieve is a dramatic one. Rembrandt portraiture has a tendency to make the subject look powerful, which is why it’s heavily favored for professional photos for authors, actors, and public speakers. On the other hand, it can also make the model appear moody and brooding, which may or may not be the desired effect.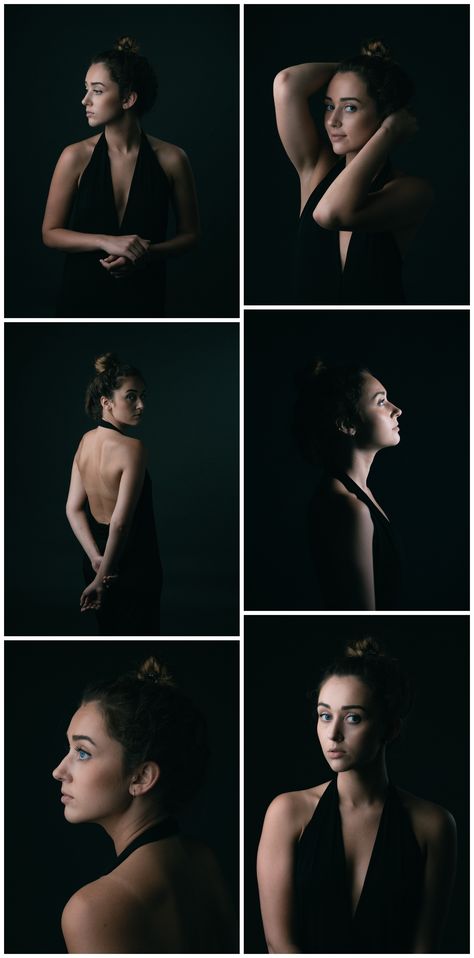
Overall, the Rembrandt lighting setup is both classic and versatile, making it a great fit for photographers of all specialties and experience levels.
Looking to do more with lighting? Check out some of our other pieces:
12 Types of Lighting in Photograph
Key Light Photography: A Beginner’s Guide
Silhouette Photography 101: Master The Basics
How to make a "Rembrandt" style portrait with Lightroom
Dutch artist Rembrandt Harmenszoon van Rijn is known for his dark and dreary portraits, characterized by a single source of light passing through an object in front of a dark background. This is an interesting, catchy style that is easy enough to reproduce in modern photography.
There are two steps to making a Rembrandt portrait. The first step involves proper lighting and composition. The second is using Lightroom to bring out the dullness created by the lighting.
Rembrandt style lighting is easy to achieve with natural light.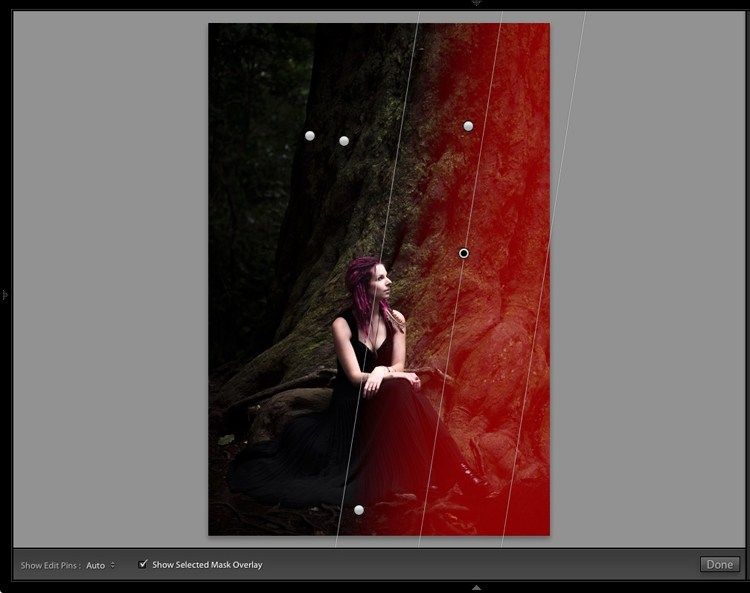 It is important that the light is directional. Take a look at these portraits to see how it works.
Portrait #1
This portrait was made with the model standing under the arch that is part of the building. We took the photo on an overcast day, so the light was quite soft and even, perfect for a portrait.
The light came from the model's left, through the archway, casting a shadow on his face. The right side of his face is dark, as there is no light from that side. The background is also dark as less light falls on it.
The photo looks like it was taken in a studio, but the light is formed by an arch, not a softbox.
Portrait #2
I took this portrait in the forest. The light came through the trees from above. The day was overcast, but the narrow gaps between the trees made the light directional. I asked my model to turn her face up towards the light so as not to create shadows under her eyes.
I chose these portraits because they are interesting from a post-production point of view. One of them is easy to process, while the other has more work to do. Can you guess which one is which?
Processing portrait No. 1
The first portrait was the easiest to process. Here is the Raw file directly from the camera.
Most of the work on this portrait was done in Lightroom's Adjustments module. Here are the main settings:
- Exposure +0.20. Slight slider movement to brighten up the photo.
- Shadows -27. This enhances the dark tones of the photo without affecting the light tones.
- Clarity + 41. This is a general setting to improve texture and detail, and to add a rough look to the male portrait (more delicate settings are needed for the female portrait).
You'll notice that I didn't use the Contrast slider to darken the background. The reason is that Contrast affects both dark tones and light tones. Therefore, it is better to use Lights and Shadows to control these areas separately.
Controlling dark areas with the Shadows slider gives you a choice when it comes to the tonal values of an image. You can also move the Black slider to the left, although this can block out some of the darker areas.
Remember that your goal is to create a Rembrandt-style portrait, so it's up to you how dark the shadows are. Here's a comparison where you can see what happened to the portrait when I set Shadows to -100 and Blacks to -22.
Local settings
as you would like them to be, you can then move the shadows and highlights to the left as well. In this portrait, the model's hair got too dark, so I used the Adjustment Brush to lighten it up.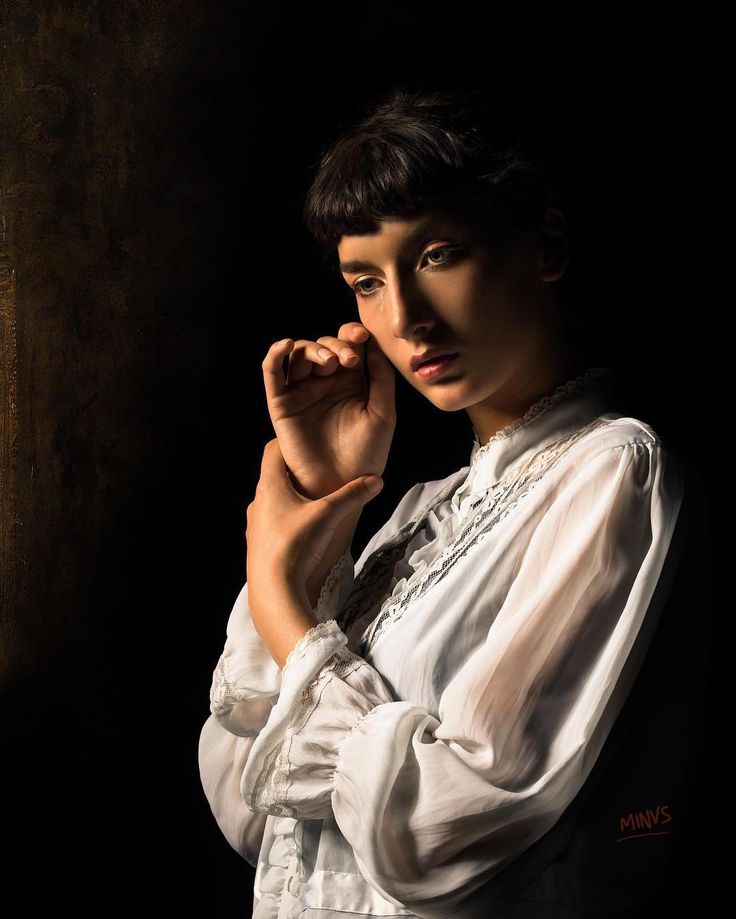 This screenshot shows the red mask created by the Adjustment Brush. I set Shadows to +71 to lighten the hair.
Processing portrait #2
The next portrait needed more work in Lightroom. You'll see why when you take a look at the original image below.
Although the light came from above, it was not as directional as in the processed version. An image like this requires a bit more work in Lightroom to achieve the dark background that Rembrandt's style lends itself to.
I made light adjustments with the following values:
- Exposure to -1.10
- Shadows up to -70
- Sveta +65
- Sharpness up to +23
Moving the Shadow and Exposure sliders to the left will make the image darker overall, and the background will look closer to what I want. Move the Lights up to +65 to make the highlights (in other words, the model's skin) lighter. Again, this increased the contrast, but in a more controlled way than using the Contrast slider.
And here is the result.
Local settings
Once you've done your best with the general settings, you should move on to the local settings. Lightroom has three local adjustment tools - Gradient Filter, Radial Filter and Adjustment Brush. Which of these tools (or combination) to choose depends on you and your tasks.
For this portrait, I applied five Gradient Filters and moved the Exposure slider to the left (to darken) for each one. The screenshot shows where I applied the Gradient Filter in this image.
It is best to make local adjustments by eye. This comparison shows the difference in how Gradient Filters affect the image. The key to recreating Rembrandt's style in Lightroom lies in analyzing the type of lighting used to create the portrait and thinking about how you can replicate it with Lightroom's tools. Keep in mind that light is just as important as Lightroom techniques. Get the right lighting and the rest will follow easily. Author: Andrew S. Gibson 0003 Did you like the lesson? Share with your friends! Rembrandt's self-portrait illustrating the lighting style named after himself. As you learn more and more about working with studio lighting and its placement, you must have heard about Rembrandt lighting or, as it is also called, the Rembrandt triangle. This is one of the most widely used lighting schemes along with short, long and split, butterfly, loop and shell light. If you're just getting started with portrait studio photography (or even just using controlled natural light, like large windows), by searching these terms online, you'll begin to better understand lighting schemes and how to create them. Rembrandt Harmenszoon van Rijn is one of the greatest artists of all time. His work depicts many different subjects and styles, ranging from portraits and self-portraits to landscapes, miniatures, allegorical, biblical, mythological and historical scenes, and animal studies. In addition to his profile work, Rembrandt is also known in photography circles for his very distinctive style of lighting. The Rembrandt square became popular long before the advent of cameras. Rembrandt did not invent this style of lighting as it was already being used by others. However, the artist was able to effectively and successfully apply the scheme when drawing portraits, for which she was named after him. This lighting scheme is usually defined by the presence of a small triangle of light on the cheek furthest from the light source. It is obtained thanks to the shadow from the nose and the cheek itself. Technically, the triangular island of light should not be wider than the eye and no longer than the nose. It is its presence that distinguishes Rembrandt light from the usual short one. However, everything does not end with one triangle. With this style, about half of the model's face is in shadow, while the other half is almost completely lit. At the same time, the aforementioned triangle appears just on the shadow side. This lighting scheme makes portraits more dramatic. Compare it to something light and bright like shell lighting and you'll see the difference. The triangle plays an important role as it allows the photographer to create a dramatic short light effect and still light up the eye on the shadow side. This characteristic makes it not as dark and ominous as split light leaving half of the face in shadow. This way you can express the specific effect you want. Small variations in the lighting scheme play an important role in conveying mood or personality. Let's say you're photographing portraits for a movie cover. The main villain should be shown in a separate light (with one side of the face completely in shadow), and another character, who at first seems bad, but then becomes a positive hero, can be shown in a Rembrandtian light, hinting at the presence of good features in his personality. All this can be achieved by simply changing the position of the light. A more common example would be a graduation album shoot. If a graduate wants a dramatic portrait, separate lighting will be too intimidating or even ominous. However, the Rembrandt Triangle is a great fit thanks to the smart combination of shadow and light. Although not so obvious, you can see a small triangle under the model's right eye. This style of lighting works very well for corporate portraits. It's easy to make. The diagram below shows that you do not need a lot of equipment. In practice, if you find the right place (for example, near the window), you can get the perfect Rembrandt triangle with only a camera from the equipment. If you choose artificial light, you need only one flash. You can tweak the arrangement to get the look you want, but at its core, Rembrandt light is a very basic, single source setup. Easy peasy. In addition to the minimum set of equipment, another advantage is the ease of installation. As you'll see in the photo below, it's very hard to mess up the setup if you're careful. It is also easy to identify. Largely due to the fact that only one light source is used. Thus, if you are trying to get a Rembrandt triangle, it will be clear whether it turned out or not. He looks great! Certain lighting schemes make a professional portrait shot different from an amateur one. Rembrandt light is one of them. Although simple, this lighting scheme looks very professional. Clients will appreciate your ability to create an attractive result, and viewers will see that the photo was taken with a specific idea and purpose. But also this style looks natural. Its creator used only the light from the window, so with the right approach, you get the feeling that when shooting using only natural light. In my opinion, this scheme is a unique combination of professionalism and purposefulness, but at the same time it looks natural. And also this style in most cases shows the model very well. In the simplest case, this lighting scheme is achieved with a single light source, including even just a window, as Rembrandt himself did. The basic setup consists of a light source rotated 45 degrees from the camera, pointed at the subject and raised above eye level so that the light falls from top to bottom. There are several reasons to do so. First, the light source shadows one half of the face and illuminates the other. If you do not raise it above eye level, there will be a sharp line between the halves of the face. A 45 degree turn is a good starting point for traditional Rembrandt light. The height of the light source plays a big role, because it is thanks to it that the famous triangle on the cheek is obtained. If you raise the lamp above eye level, some of the light will pass over the nose and illuminate a piece of the cheek on the other side of the face. This is what forms the style, which differs from the simpler short light. If you have a permanent or model light, it will be much easier to position it to get the triangle in the right place. Otherwise, the trial and error method has not yet been canceled. You can start by raising the light 0. If you are doing a commercial order, it is best to have someone be a temporary model (or do it yourself) to adjust the light position before the client arrives. Of course, he may have a different height or need to adjust the scheme a little, but preparing ahead of time can save a lot of time and create a sense of professionalism. It's also a good idea to put a reflector on the shadow side to soften the transition of light to shadow. A reflector (or even a fill light on the lowest setting) will help lighten up some of the shadows and add detail. Some say that using a reflector is not "real" Rembrandtian light. My answer is no one cares what they say. Do what looks best. There are no rigid boundaries in photography, and all the so-called “rules” are made to be broken. If you use natural light from a window instead of a flash, there are other things to consider. On an overcast day or with sunlight reflecting off the building opposite, the model should be seated closer to the window. We mentioned earlier that Rembrandt light is a very versatile method of lighting. I often use it as a base for corporate portraits. Then I can add additional components like a reflector or fill light. This scheme works for almost any photo, from waist-length shots to portraits like the one above. The flexibility of Rembrandt's light allows it to be used for more serious poses and even smiling portraits. This is one of the reasons why it can be used with so many types of shooting. You can try different facial expressions or poses while keeping the lighting constant. Don't be afraid to experiment with settings and options until you get the photo you want.
Conclusion Rembrandt's light in photography

What is Rembrandt light?
 Some sources claim that Rembrandt painted most of his portraits in the same room with a specifically placed window and planted his models in the same spot, creating a consistent and distinct style of lighting.
 How to recognize Rembrandt light?

Why Rembrandt light is popular
 The triangle on the cheek and the light around the eye on the shadow side of the face are characteristic and understandable features. You can adjust the position of the light and the model to slightly deviate from the canonical look and get a more suitable option in a particular case.
  Thanks to the shadow falling on the side of the face and the lower part of the chin, the face looks thinner, and the jaw line is favorably emphasized. This is especially useful for hiding a small double chin. Some models may want to draw attention to one side of the face or hide a pimple on the other. This scheme allows you to capture the details of the face, hiding some areas if necessary. With the right approach, almost anyone looks attractive in the light of Rembrandt.
 How to create a Rembrandt light
 The larger the angle of rotation relative to the model, the thicker the shadow and the sharper the transition. It is important not to go too far to the side otherwise the eye on the shadow side of the face will lose its luster. This will make it dark and lifeless, bringing the circuit closer to a split or short light.
 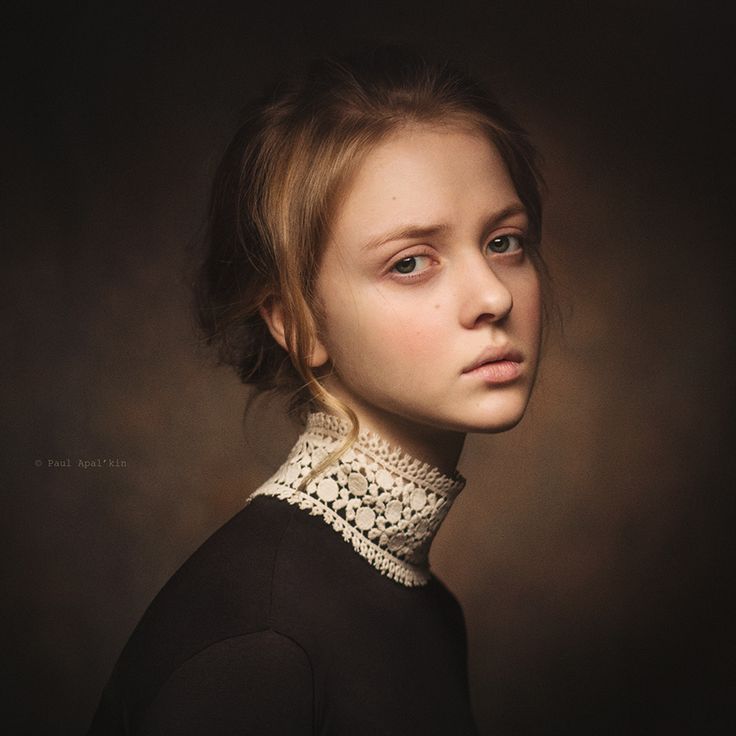 3-0.6 m above eye level and pointing it down.
  If the sun shines directly through the window, you should place the model further away to avoid harsh shadows. Of course, as I mentioned above, rules are made to be broken, so for a more dramatic transition from shadow to light, you can do the opposite. There are no right or wrong actions. What matters is not what you do, but why you do it and for what purpose.
 When to Use Rembrandt Light
Learn more