Umbrella vs softbox for video
Best one to buy – DIY Video Studio
DIY Video Studio is supported by its readers who use the affiliate links or ads on this site. As an Amazon Associate, I earn from qualifying purchases. Thank your support if you use any of the links.
Softbox and Umbrella lights are used for both photography and videography. You shouldn’t think of like a boxing match where it’s softbox vs umbrella lighting for video. Each has its own set of advantages over the other, and often you will find both types of light in a videographer’s kit.
Softbox and umbrella video lights are light modifiers that use a diffuser to produce soft light. A softbox is directional and can be made more directional by adding a grid. An umbrella light is less directional and will spill light in all directions. But umbrella lights are cheap, easy to set up, compatible with many light fixtures, plus compact for transport and storage. They are probably the best choice for beginners.
If you want your videos or photos to stand out, you don’t need to spend lots of money on a better camera or lens. Instead, get your lighting right and your videos will “pop”. You just need to know when to choose a softbox vs umbrella and how to exploit the benefits of each of them. I’ll explain more in my softbox vs umbrella for video buyers guide below and give you my choice of the best Softbox kit, Softbox Studio, and Umbrella lighting kit you can buy online.
In a hurry? If you don’t have much time, see below to quickly find the Best Affordable Softbox and Umbrella video lighting for you on Amazon. You can be assured we only choose the best products…
Click here to read the reviews.
Product
Best Softbox Studio
Linco 2000W Lighting Studio Kit
Best Umbrella Kit
Emart 600W Umbrella Lighting Kit
Bulb type
12x 40W CFL bulbs
3x 45W CFL Bulbs
Equivalent total incandescent power
Color Temperature
6400K Daylight
500K Daylight
Bulb screw base
E26/E27
Modifier Size
Three 20x20inch (50x50cm) softboxes
Four 33inch (83cm) umbrella
Light stand height
3x 77inch
2x 83inch & 1x 33inch
Delivery
Buy on Amazon
Buy on Amazon
Best Softbox Studio
Product
Linco 2000W Lighting Studio Kit
Bulb type
12x 40W CFL bulbs
Equivalent total incandescent power
Color Temperature
6400K Daylight
Bulb screw base
Modifier Size
Three 20x20inch (50x50cm) softboxes
Light stand height
3x 77inch
Delivery
Buy on Amazon
Best Umbrella Kit
Product
Emart 600W Umbrella Lighting Kit
Bulb type
3x 45W CFL Bulbs
Equivalent total incandescent power
Color Temperature
500K Daylight
Bulb screw base
E26/E27
Modifier Size
Four 33inch (83cm) umbrella
Light stand height
2x 83inch & 1x 33inch
Delivery
Buy on Amazon
Last update on 2022-10-13 / Affiliate links / Images from Amazon Product Advertising API
Table of Contents
Softbox vs umbrella lighting
So, what’s the difference between softbox and umbrella lighting? Softbox vs umbrella, which is better?
They are both good at producing beautiful soft light, and neither is better than the other, depending on your needs and the look you want to achieve.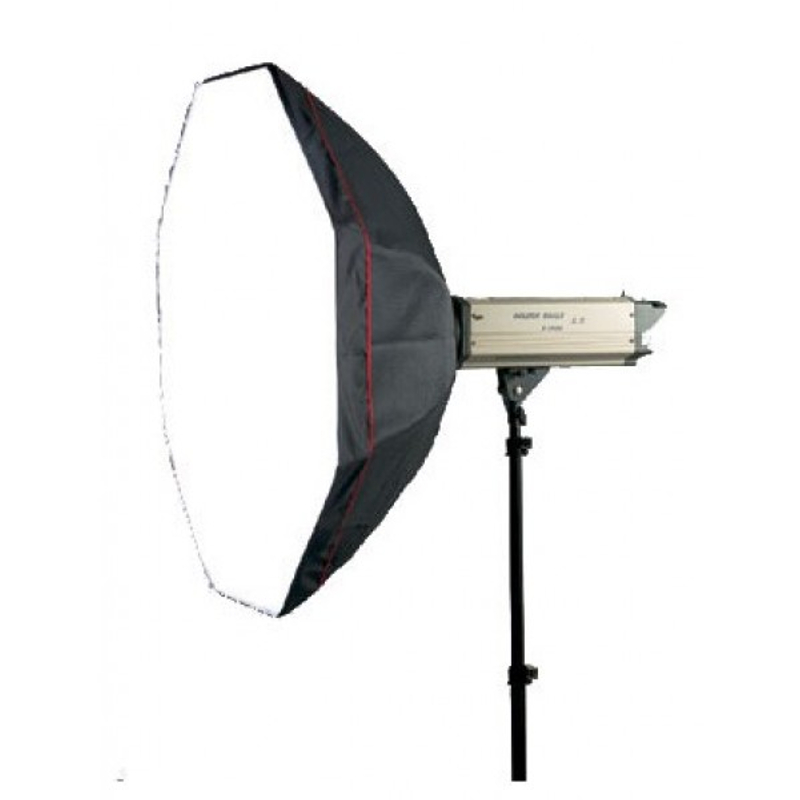
If you are starting out and have a limited budget umbrella lighting might be your best choice. You can create good lighting using just one cheap umbrella light. Since they are so cheap, you can get an umbrella reflector and swap out the shoot-through umbrella on your lamp to get a different lighting effect.
But if you need more control over where you place your light the directionality of a softbox would be your choice. Add a grid and you can light your subject without throwing light anywhere else. The downside is that the light will be bulkier and more expensive.
Here are the pros and cons of the two types of light.
Softbox lighting Pros and Cons
| PROS | CONS |
| Attractive soft light quality | More expensive |
| Good control over the light | Traditional designs can take longer to set up and take down |
| Can be made more directional by adding a grid | Heavier |
| Bulkier and so not as easy to store or transport | |
| Not as easy to use with other lamps |
Umbrella lighting Pros and Cons
| PROS | CONS |
| Attractive soft light quality | Poor control over the light |
| Cheap | Easy to use with other lamps |
| Quick to set up and takedown | |
| Not heavy | |
| Compact for storage | |
| Easy to use with other lamps | |
| Illuminates subject and background | |
| Can be used as a sun scrim |
Umbrella lights are a type of light modifier designed to be a source of soft, low-contrast light.
In shape an umbrella light is like a standard umbrella. However, there’s no handle at the end of the metal shaft and the canopy fabric is a translucent white nylon silk textile.
The shaft of the umbrella is passed through a hole in the lamp holder and secured with a screw, so the diffusion fabric is in front of the lamp.
These umbrella lights are known as Shoot-Through Umbrella Lights. The lamp faces the inner umbrella canopy, illuminating it. All the opposite side of the umbrella canopy, the outer surface, becomes the light source used to illuminate the subject.
The softness of light from an umbrella light can be adjusted by changing the distance between the lamp or bulb and the umbrella’s diffusion fabric. A smaller distance produces less diffusion, and so the light is less soft. A greater distance increases the diffusion, and so the quality of light becomes softer.
The softness can also be controlled by adjusting the distance between the umbrella light and the subject. The closer the softer the quality of light.
Because an umbrella light does not have a hood or enclosure, and because the canopy is curved, the light isn’t restricted to only falling on your subject. The light will tend to “spill” over a wide area.
The light spill can be a benefit or a nuisance depending on whether you also want to illuminate the background or not. If you can’t use separate lights to illuminate the background a shoot-through umbrella light may be the ideal choice. But if you want to isolate your subject and keep your background dark then you might want to choose a different light.
The white translucent shoot-through umbrella light is probably the one you’ll see most often but there’s also another kind. It’s the Umbrella reflector, also known as a bounce umbrella light or reflective umbrella light. This type is completely opaque, with black on the outer canopy to stop light from passing through, and white, silver, or gold on the inner canopy to reflect light.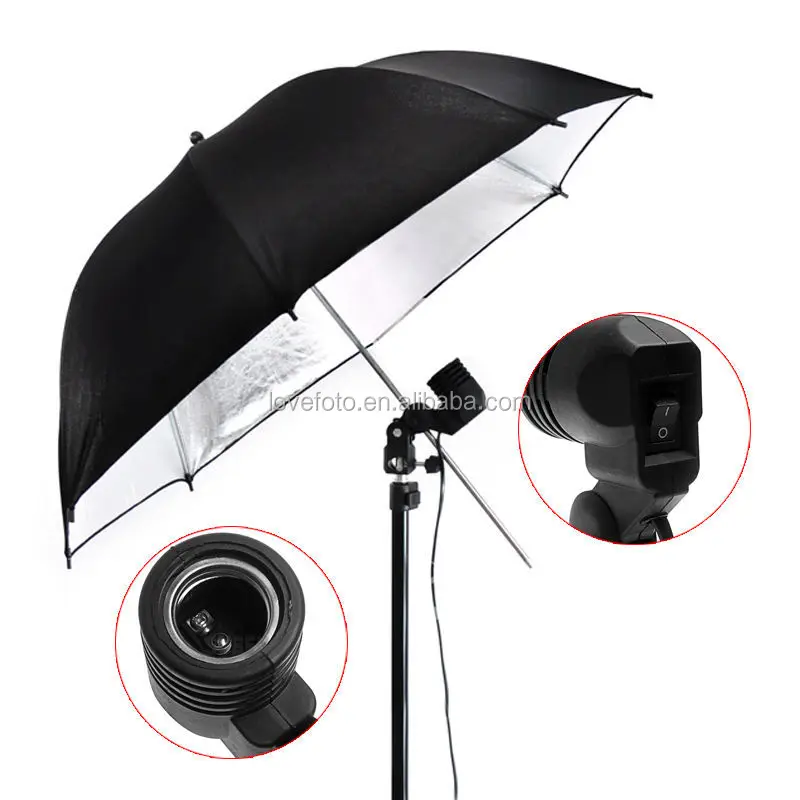 Like the shoot-through umbrella light, the bulb points inward.
As the name suggests, this type of umbrella light is a reflector, bouncing the light from the bulb forwards onto the subject. This is more directional than the shoot-through type and the light will be more “focused” on the subject and a bit more specular. Although you can’t fully control the light using a reflective umbrella, far less light is thrown around the room, especially to the rear.
The softness of a reflecting umbrella can be adjusted in the same way as a shoot-through umbrella. The position of the lamp on the umbrella’s shaft determines the level of softness. When close to the canopy only the central part will reflect the light. Further down the shaft allows more of the canopy to reflect light, so the light will have a broader area and hence appear softer.
A reflector umbrella can be used to light a group since more light will be thrown forwards without any being spilled to the rear and wasted.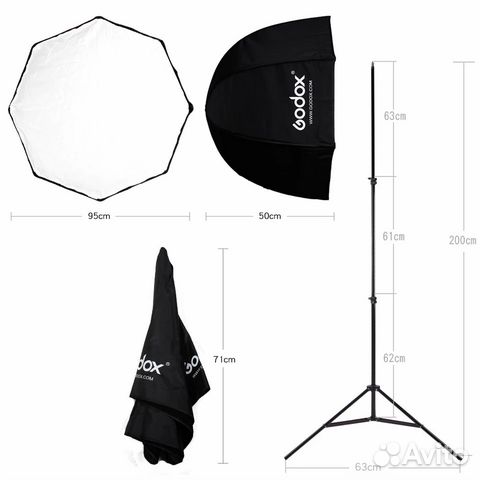 Place a reflective umbrella light at either side of the group pointing towards the group.
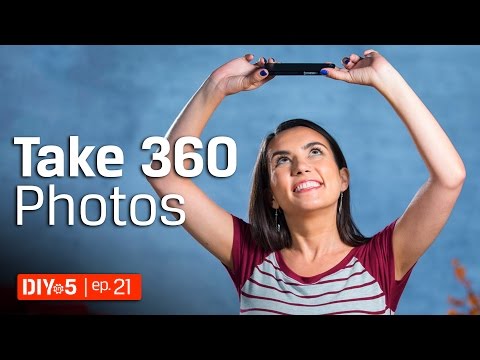
Here’s a video that discusses house to use umbrella lights. They talk in terms of photography but the details are still valid for video.
Don’t confuse a reflector umbrella light with a parabolic umbrella. Parabolic umbrellas, although they look like a normal reflector umbrella are more directional, a little like a softbox. Talking of softboxes, let’s now have a look at them now.
What is a softbox, and what does a softbox do?Softboxes used at a video shootA softbox is a light modifier that produces soft, low contrast light.
It has a hood, or “box”, that looks like a square or rectangular funnel.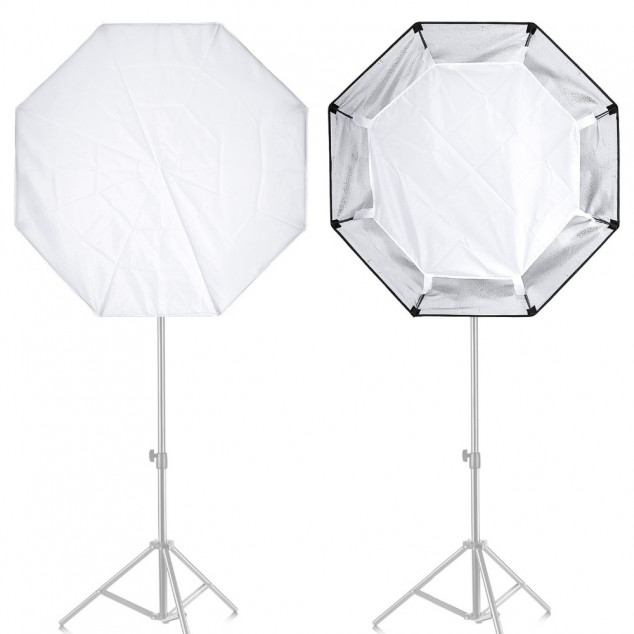 The lamp or bulb is at the narrow base and points toward the open end. The outside of the hood is opaque and black, but the inside has a reflective silver coating. The open mouth of the hood is covered by a flat piece of diffusion fabric, usually a translucent white nylon silk textile.
The square or rectangle of diffusion fabric becomes the light source, and being much larger than the bulb, it produces a soft low contrast light. Some softbox lights also have a second diffuser between the lamp and the diffuser across the mouth of the softbox. This helps to prevent the formation of a hotspot of light on the outer diffuser.
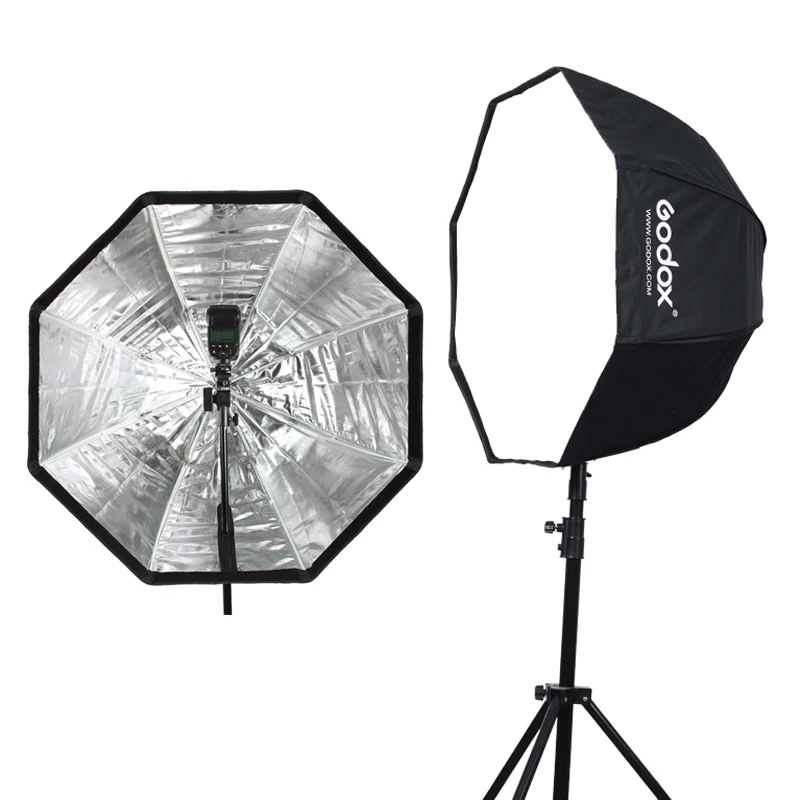
Softboxes are often square or rectangular but are also available shaped like hexagons and octagons. The later shapes often have the benefit of being collapsible like an umbrella and are quick to set up and take down. You might find them being described as umbrella softboxes. I own both traditional square softboxes and octagon softbox umbrellas and my preference is for the latter.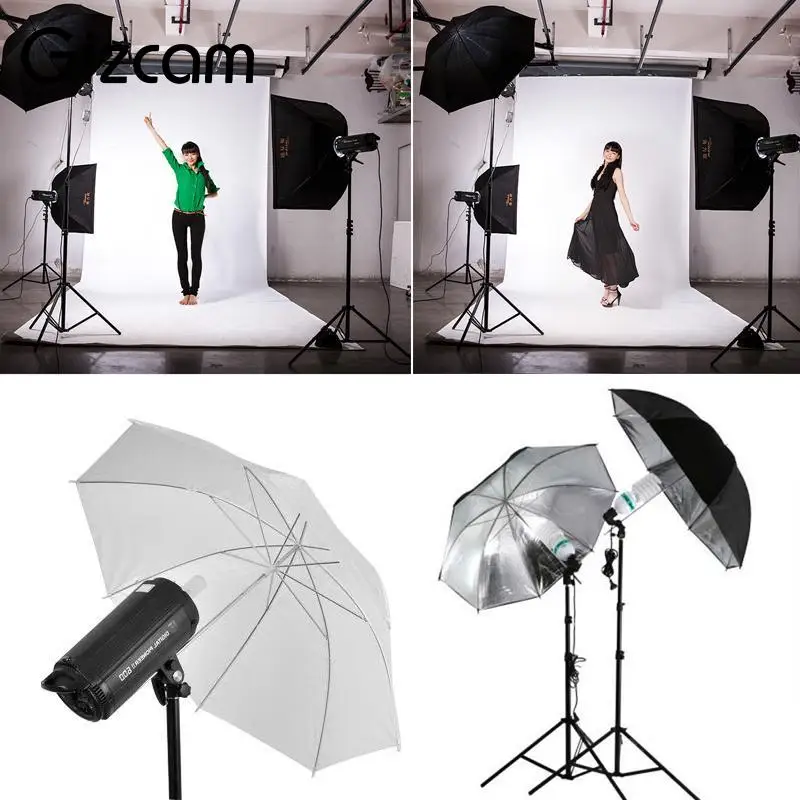 They are quicker to set up and even large ones are easy to handle.
Irrespective of their size, most softboxes have about the same coverage. Where size does make a difference is in the quality of the light. The larger the softer the light. So, a large softbox will produce light than wraps around the subject and produces smooth undefined shadows on the subject’s face and background. In contrast, a small softbox will produce light that is a little harsher and the shadows will be more defined.
The softness of the light can also be controlled by the position of the softbox relative to the subject. The light will be softer the closer it is to the subject and harder when further away.
Apart from the beautiful quality of the light, the feature photographers and videographers like about softboxes is the ability to control the direction of the light. They allow you to place the light precisely on the subject. You can make the light even more directional by adding a grid to the front of the softbox.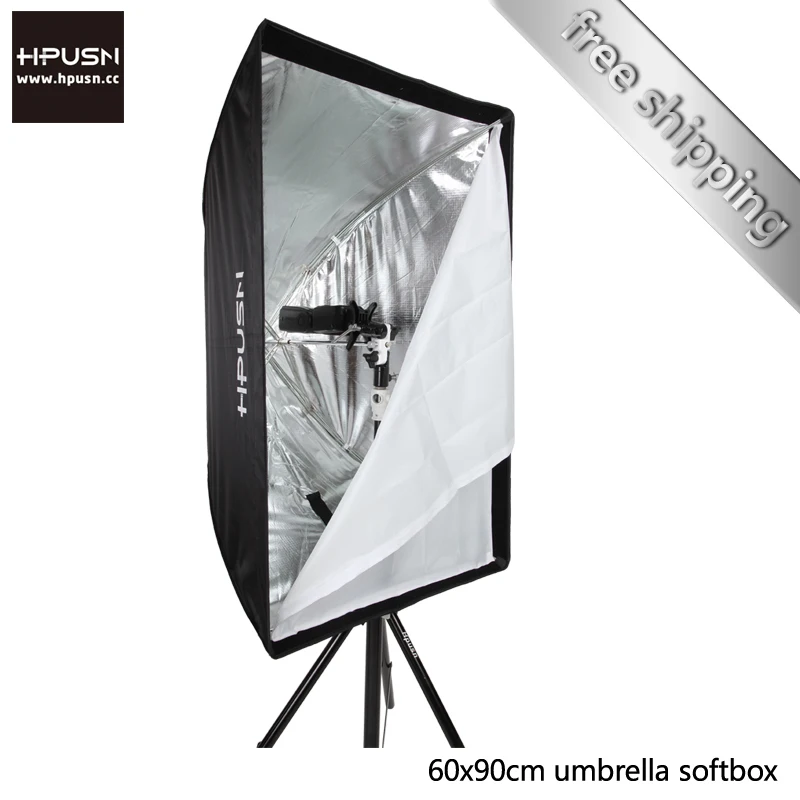 It is the controllability of light from a softbox that is the biggest difference between a softbox and an umbrella light.
Light from a bare bulb, lamp, or even sunlight on a cloudless day produces harsh shadows because the light is effectively coming from one point.
But on an overcast day, water vapor in the atmosphere diffuses the sun’s light.
The water vapor or cloud cover will scatter the sunlight, spreading it so it appears to come from all over the sky. With light coming from all directions, a shadow caused by light from one direction will be filled in by light from the opposite direction. So on an overcast day, we don’t see any shadows.
In photography and videography, this spreading of light over a larger area is called diffusion.
Why add Diffusers to video lightsJust like atmospheric water vapor diffusing sunlight, we can soften photography and video lights by adding diffusion material in front of the bulb.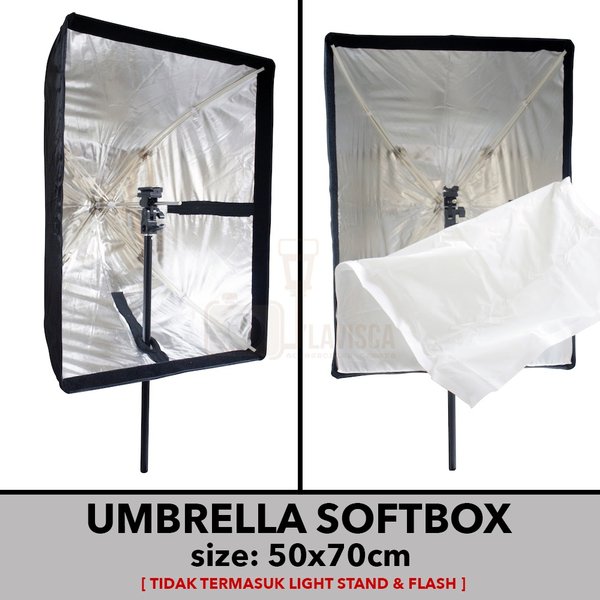
But why would we do that?
Hard light, especially on faces or product shots, does not look attractive, producing unflattering hard shadows. Hard light emphasizes facial lines, wrinkles, and blemishes. Not something your subject will thank you for.
By adding diffusion to your lights, you’ll create a soft light that feathers out shadows and even seems to wrap light around the subject. It produces a much more attractive and flattering look.
What is Diffusion MaterialThe diffusion fabric you are most likely to encounter is a finely woven non-yellowing white nylon silk textile that is translucent. The amount of diffusion depends on the exact material used. Since the diffusion fabric blocks some of the light it will reduce the available light ¼, ½, or 1 full stop.
Diffusion fabric is used in Umbrella lights, softboxes, or as large panels where several lights can be combined into a single soft or low contrast light source.
Review: ESDDI 900W Softbox Lighting Kit
Since 2015 ESDDI has been providing a broad selection of photo and video gear to customers across the globe.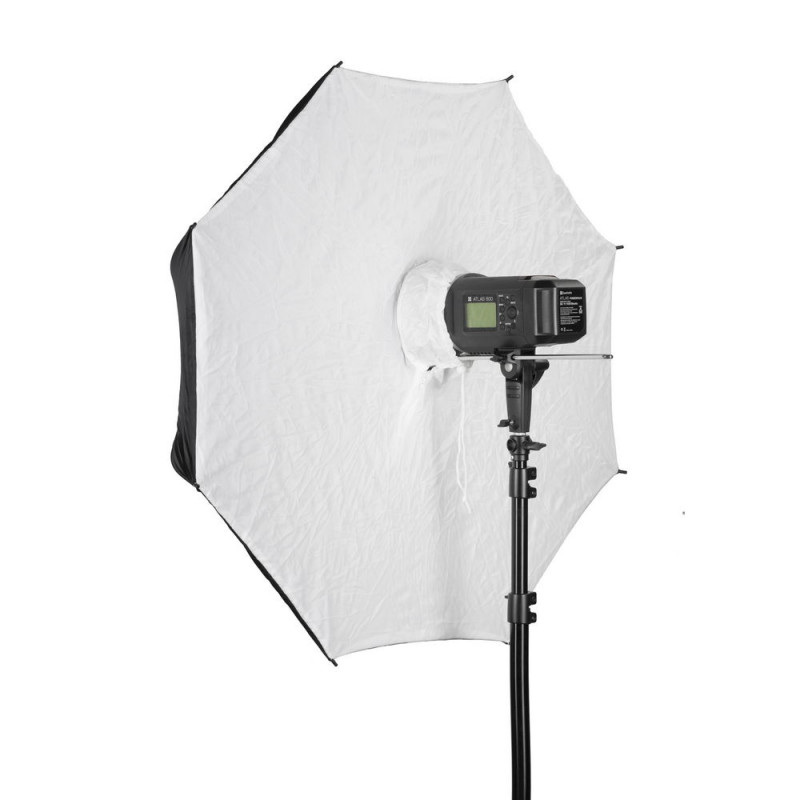
ESDDI’s product range includes much of what you’ll need in a photography or video studio. It includes photography and video tripods, backdrops and supports systems, various types of lighting, camera bags, field monitors, and microphones. In other words, they have the modern creator covered.
Their company tagline of “Make every shot a memory in your heart” suggests they see photo and video amateurs and enthusiasts as their client base. That means the build quality and price will match most ordinary people’s expectations and needs.
The ESDDI 900W Softbox Lighting Kit is ideal for a beginner streamer or YouTuber who wants to create a home studio. It would also be a superb purchase for anyone taking product shots for eBay.
What’s in the box…
| 2x 20”x20” softbox hoods with integrated standard E27 lamp holders and power cord |
| 2x Cool White LED bulbs with standard E27 screw base |
| 2x Light Stands |
| 2x 20”x20” diffusion panels |
LED BULBS
The two 50W LED bulbs are have a built-in dome-shaped diffuser, a little like and open mushroom. Each is equivalent to a 450W incandescent bulb and rated at 2020 lumens. At 3ft from the bare bulb they were metered at 1,200, that’s about 5x more than a household 100W bulb.
The color temperature is 5400K, so a cool daylight. The bulb lifetime is 25,000 hours, so in theory, if you used the kit daily for 3 hours, 5 days a week, the bulbs should last about 32 years.
The blubs are flicker free and unlike a CFL bulb, they are instant, and you don’t need to wait five minutes for them to get up to full brightness. Unfortunately, there is no way to dim the bulbs since the control on the power cord is a simple rocker switch that offers On or Off. The two fixtures are not connected so you can use the softbox lights separately.
The bulb design includes the dome diffuser, making them non-standard, and unfortunately, they are not sold separately. However, if you need replacement LED bulbs ESDDI says you can contact them using the email address printed in the user manual.
Although an LED bulb does not get as hot as CFL photography/video bulbs they do get warm after a while. Do not touch the LED start after you finish filming, give it a few minutes to cool down before removing it from the fixture.
If you intend to use this light kit with a green screen you shouldn’t have any problems. For best results make sure your green screen is evenly illuminated and get rid of any wrinkles or creases. If you’re unsure how to remove wrinkles, see my article here.
SOFTBOX
The 20”x20” square softbox incorporates a rotating mount/lamp holder, plus the metal ribs to stretch out the hood material. The softbox opens like an umbrella and snaps into position by pushing a small ring inward and over the fixture.
The outer part of the softbox is black while the inner side is a reflective silver with a granular stone pattern that aids in creating diffuse light. A square white silk diffuser can then be fixed over the open end of the softbox and held in place using Velcro.
POWER CORD
The power cord that is attached to the fixture is slightly over 9 feet long.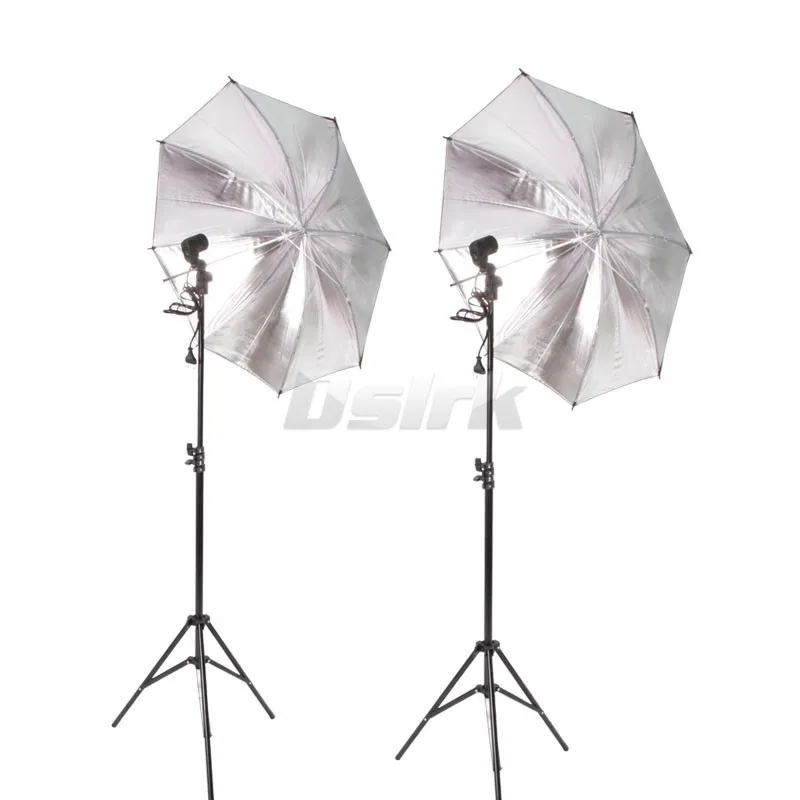 That sounds long but, like all kits like this one, you will need an extension cord. That’s especially true once you have raised the height of the light stand.
LIGHT STANDS
The light stands are the standard tripod type with a spigot and a standard camera ¼” mounting screw on top. The stands are made from aluminum alloy but very light weight. They are adjustable from 68cm/27” to 192cm/76” with locking knobs that keep them place. They feel light but are good enough to keep the softbox at any angle.
Since the stands are lightweight it would be a good idea to add sandbag weights over the legs in case of knocks. They aren’t of the highest quality, but they’ll do the job. However, they won’t take a lot of abuse.
CARRY CASE
I appreciate ESDDI has created this kit to a budget, but it would have been a nice touch to include a carry case for all the gear. Although the softbox canopies come with a carry case the stands and the bulbs do not.
Pros and Cons
| What we like… | What we don’t like… |
| Low-cost softbox | Not dimmable |
| Uses LED and not CFL bulbs | Bulbs cannot be bought alone |
| Bright cool daylight LEDs | Power cord could be longer |
| LED bulbs include a domed diffuser | No carry case for the light stands or bulbs |
| Super easy and quick to set up | Light stands could be stronger |
This softbox kit is not meant for a professional photographer or videographer.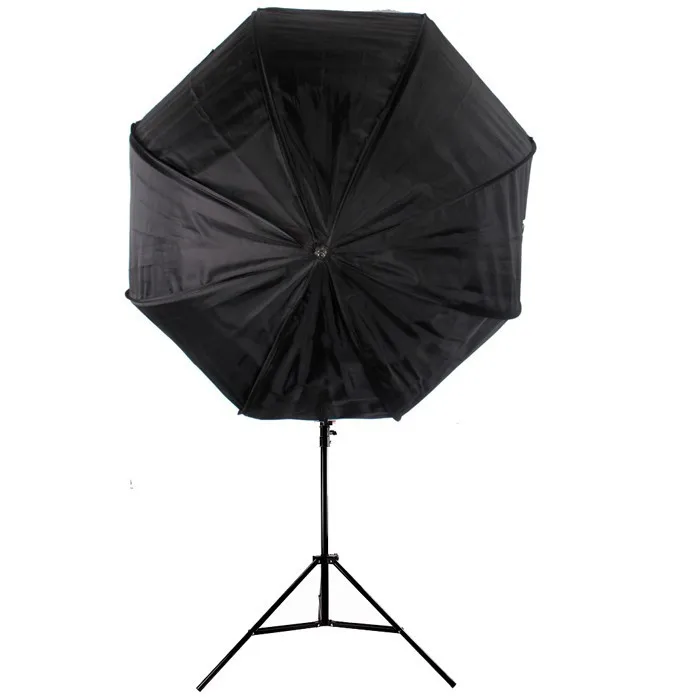 But for someone beginning to stream online, doing Zoom meetings, or starting a YouTube channel this would be an inexpensive lighting kit for a home studio.
Don’t expect it to illuminate a large area but for a one or two-person space it will be fine if you’re shooting with a smartphone or DSLR camera.
One of the things I like about this softbox kit is that the softbox opens like an umbrella. So, it’s quick to set up. I can have both lights ready for action in around 5 minutes.
If you can set up and forget in a permanent studio space these lights will last a good while. But don’t expect them to hold up if you’re always throwing them in the trunk for lots of location shoots.
Although you can’t buy the same LED bulbs the large diffusing dome means the light it produces is well on the way to being a soft light source. The granular silver reflecting surface of the softbox helps and the white silk diffuser for the mouth of the softbox completes the effect.
Review:
Linco 2000W Lighting Studio KitSale
LINCO Lincostore 2000 Watt Photo Studio Lighting Kit with 3 Color Muslin.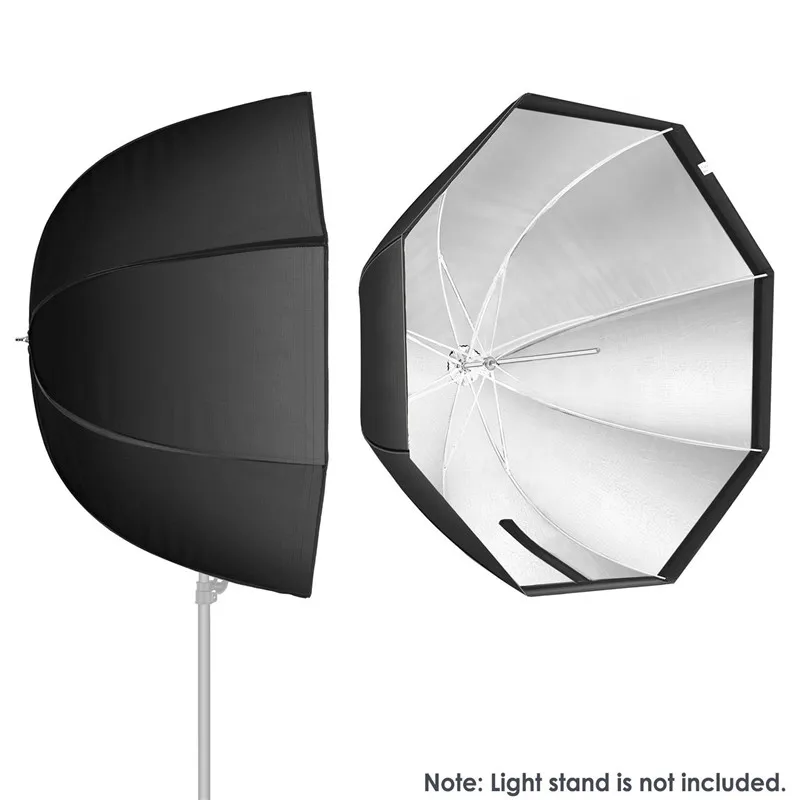 ..
..
- Only take 3 Seconds to Complete Set-up Process
- New Designed Flora X 4-Socket Light Head with Ceramic Base Protector and Cap
- New Designed Auto Pop-up Softbox with Diffuse and Flat Bag
- New Revolution Set-up: Turn Clockwise to Lock ; Turn Counterclockwise to Unlock
Last update on 2022-10-13 / Affiliate links / Images from Amazon Product Advertising API
Linco Inc. and Britek studio lighting equipment supply continuous lighting solutions for video and photography, light stands, backgrounds, background supports and accessories.
Linco Inc is based in Santa Fe Springs, California, and provides a full repair and parts replacement service for all their products.
The Linco 2000W lighting studio kit is ideal for any photographer, vlogger or YouTuber who wants their subject to look good. The one user I wouldn’t recommend this for, unless you plan other uses, is for remote workers wanting to light Zoom meetings. Using the kit for Zoom or video conferencing will work very well, but it would be like using a heavy hammer to crack a nut.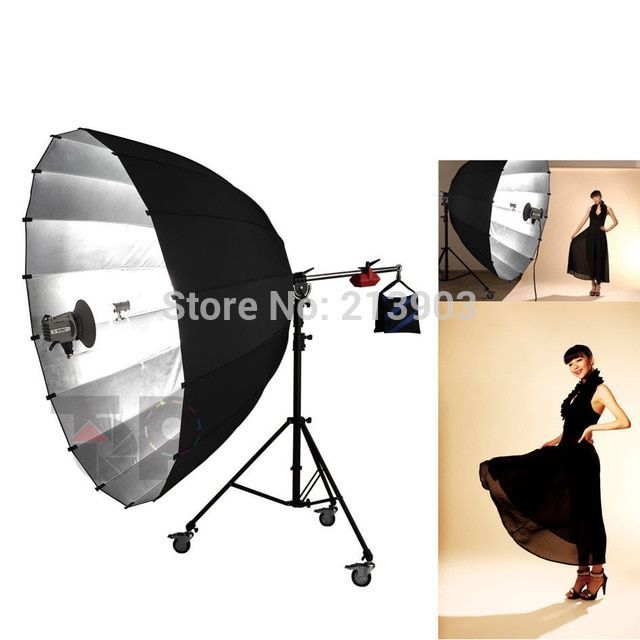
Strictly speaking, this is not a professional setup. However, if you are just beginning and want to spend most of your budget on a camera body and lenses than this lighting kit is a good starting point. You won’t want to regularly use this lighting kit for outdoor shoots, but it’ll perform perfectly well in your home or professional studio.
The softbox lights are easy and quick to set up once you’ve done it once or twice. Linco proudly says “only takes 3 secs to set up”, which is refers only to popping open each softbox. You’ll need much more time to assemble and get the entire studio kit up and running.
What’s in the box…
| 3x 20” Auto pop-up softbox | 1x Backdrop support system |
| 3x Flora X 4-socket light bank | 1x Green screen muslin background |
| 3x 77″ light stand | 1x White muslin background |
| 12x 40W Soft white bulbs (E26/E27 screw base) | 1x Black Muslin Background |
| 1x Boom arm | 1x Premium light kit carrying bag |
LIGHT BANKS (LIGHT HEADS)
You get three Linco #5140 Flora X Fluorescent light banks, each one with four E27 screw-in base sockets. With the four 40W CFL bulbs, giving you 160W per softbox. That should easily allow you to shoot video at f/2.8, 1/60 sec and an ISO of around 100-400. However, with more recent cameras you’ll be able to shoot at a higher ISO without noise becoming a problem.
Each of the E27 ceramic base bulb sockets has a rubber protector. These need to be removed before screwing in the bulbs.
The light banks will operate at voltages from 100V to 240V, so will work pretty much anywhere. But the bulbs in the kit operate at 110V and 60Hz. If used in another territory replace the bulbs designed for your local supply.
A large handle at the rear of the Flora X 4-socket light bank makes handling a lot easier. To attach to a pop-up softbox open the softbox and place the open end on the ground (or table). Position the light bank over the crossed metal strips at the rear of the softbox. Lift the softbox material out of the way and push down with the light bank and turn clockwise until you hear it click into place.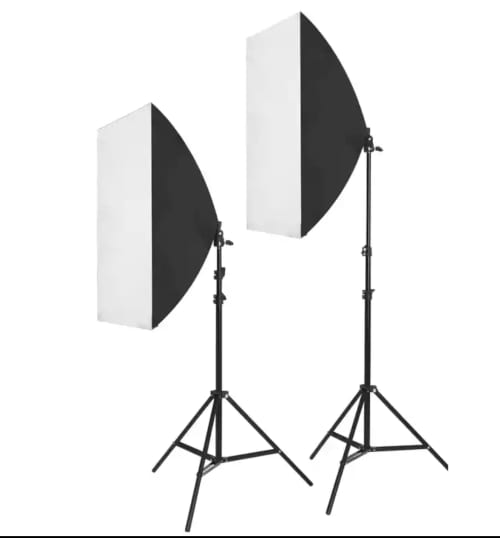
The Flora X light bank design incorporates a small but very useful addition. If you want to use the light banks with photography umbrellas the Flora X light bank has an umbrella shaft hole that runs through its center and handle, as you can see below.
Umbrella mounted on Flora X light bankThere is no dimmer switch on the base of the light bank and the unit is turned on and off using a rocker switch on the power cord. If you do want to vary the light output (if you are setting up as a keylight and fill light) you could simply remove a bulb or two from the light bank. But before doing so make sure the power cord is disconnected from the outlet before removing any bulbs.
The power cords could be longer for my liking. At about 7ft you will need an extension cord. That’s not really a massive problem since in my experience most lighting kits come with overly short cords.
SOFTBOXES
The actual softboxes are spring-loaded and pop open. With practice, they are quick and easy to put together with the light banks.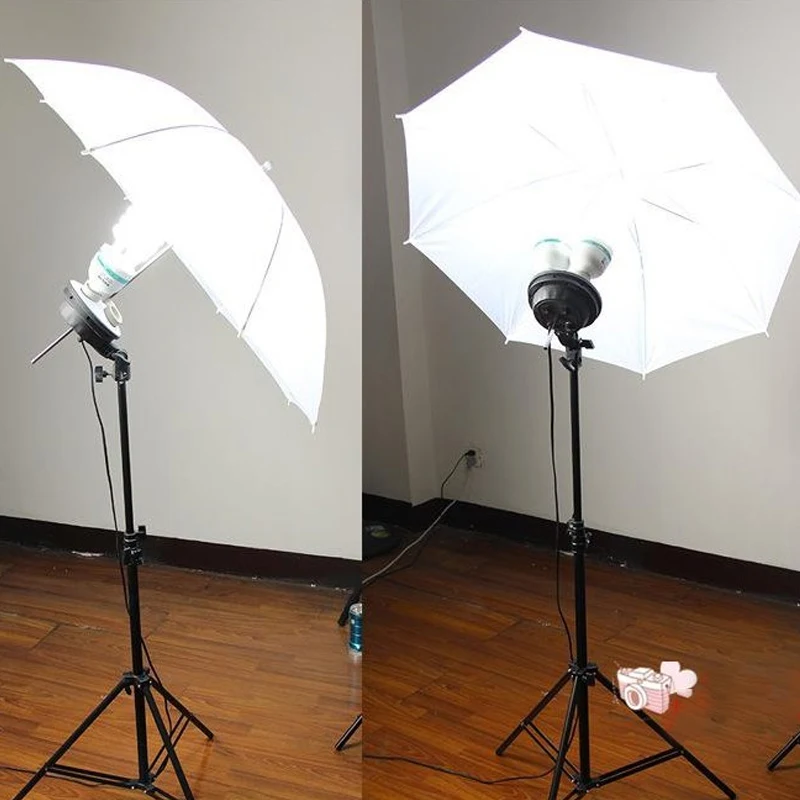 I would advise putting the light banks and softboxes together first before screwing in the bulbs.
Once the bulbs have been screwed into the ceramic sockets you can stretch the white translucent diffuser over the front of the softbox. The purpose of the diffuser is to produce a soft light source, rather than four hot spots where the bulbs are located.
Compared to many other softboxes, Linco’s Flora X system is easy to set up and take down. I own a few different brands of softbox light kits and the Flora X system is a joy to use. Instead of fitting steel rods to hold open the softbox reflector hood, which is time-consuming and fiddly, the Flora X softboxes pop open in just moments.
Attaching the light banks is quick and simple. It really is one of the quickest softboxes to set up.
BOOM ARM AND COUNTERWEIGHT
As with the other light stands, the boom arm comes with a zinc stud and 1/4-inch mounting tip. This is what you’ll attach the softbox and light bank to.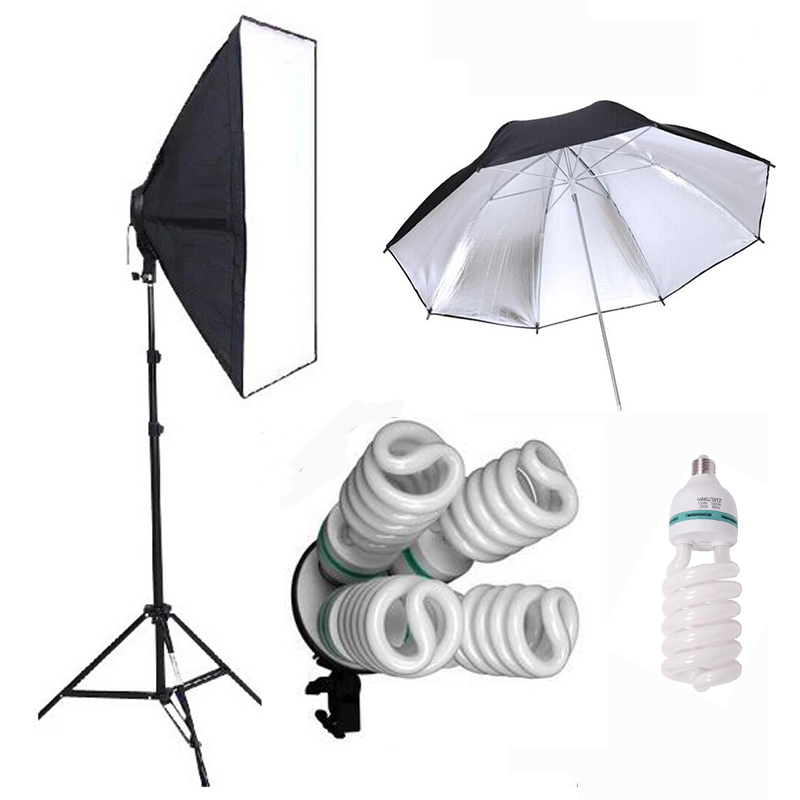
In total, the boom arm can be extended to 86-inches. To counterbalance, the weight of the light bank, bulbs, and softbox a counterweight sandbag is included in the kit.
I have filled the bag with gravel, but you can use sand etc. I would put the material inside a thick plastic bag and then put it in the counterweight bag to avoid the possibility of spillage. Hook the sandbag onto the loop at the end of the boom arm to balance the light bank and softbox.
LIGHT BULBS
This studio kit, as supplied, is for 110V electricity supplies. But if you were to relocate to somewhere that only has 220V you can still use the studio kit but the bulbs will need to be replaced with 220V rated bulbs. Alternatively, you could use a 110-220V converter.
Although this kit uses 40W CFL bulbs, you could replace them with LED alternatives. That is in fact what I did when my CFL bulbs needed replacing. I now use LOHAS A21 23W LED light bulbs. They are meant to be 150W-200W incandescent bulb equivalent (2500 Lumens) and have an E26 Medium Screw Base.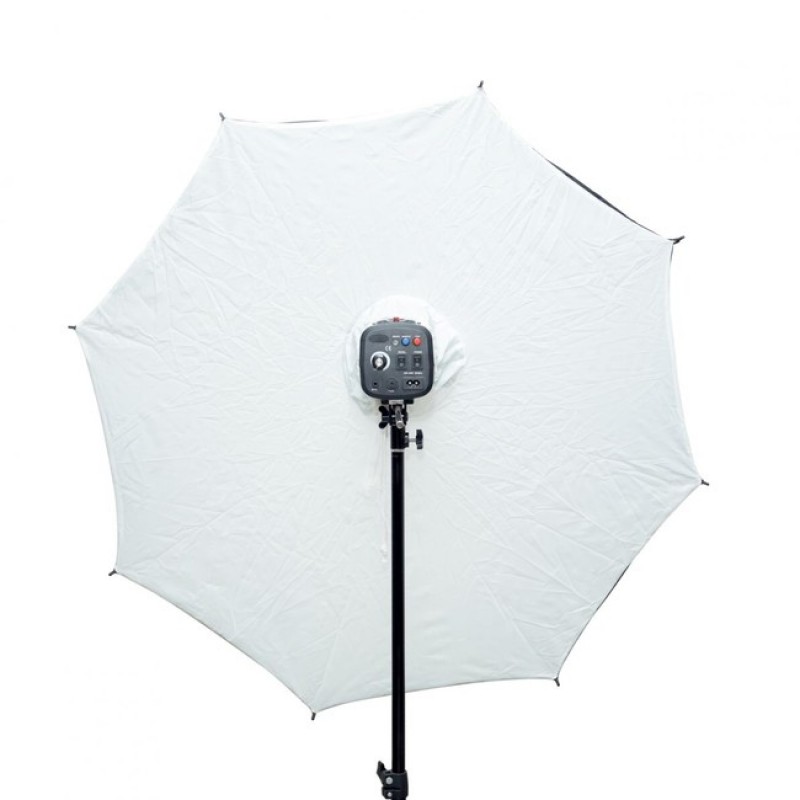 I use the Daylight White 5000K bulbs but you can also get them as Soft White 3000K bulbs.
The total light output using the LOHAS LED bulbs should be like the original CFL bulbs in the Linco light kit. The LED bulbs will use less electrical power, will last longer, and are more durable.
LIGHT STANDS
The extendable tripod light stands, and background support stands, are die-cast steel with plastic fittings. They feel the “cheapest” part of the kit and not the strongest. If you have bought a light stand online before that’s in the $12-$15 range that’ll give you an idea of what these are like.
If you are not careful, they can break. Having said that, most of my light stands are similar and I’ve been using them on jobs around the country for almost 10 years and they still work fine. The secret is not to be rough with them and not expect them to do the “heavy lifting” of a light stand that will set you back $30-$60. They are lightweight but they get the job done.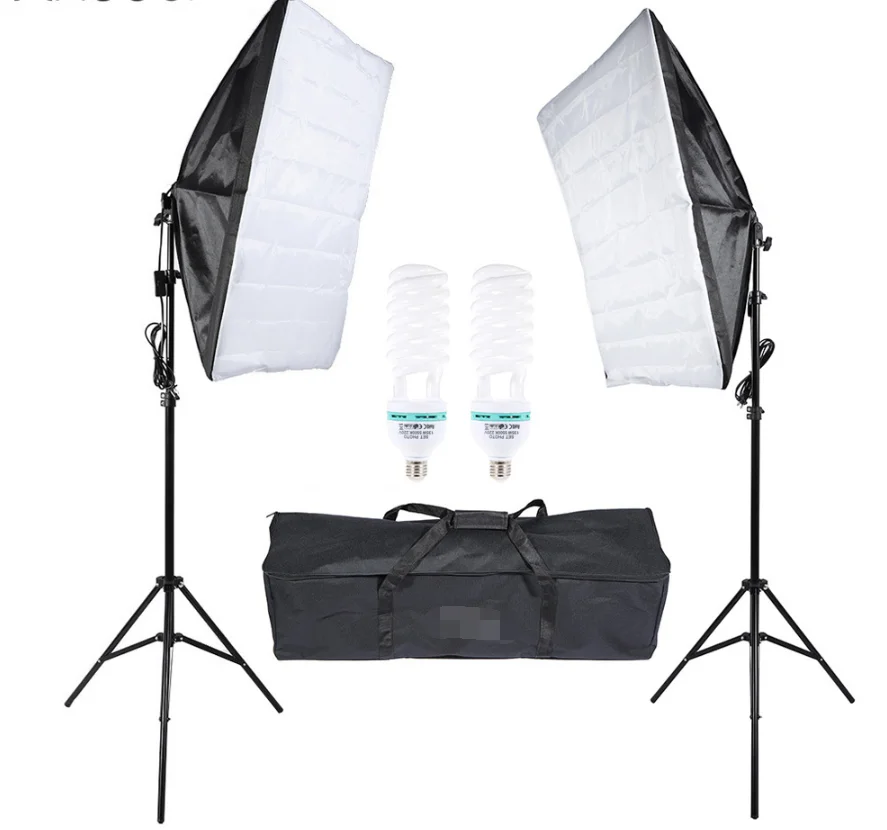
When you can afford to replace the stands with sturdier versions you can do so, but the ones in the kit are OK.
The stands extend from a minimum height of 32-inches to a maximum of 77-inches. The maximum load that can handle is 15lbs. The top zinc stud includes a 1/4″ standard screw tip, so you can attach something that has a standard ¼” camera screw mount.
BACKDROP SUPPORT SYSTEM
The support System includes two stands and a four-piece crossbar. The crossbeam sections are metal tubes that snap together. The cross beam tubing diameter is 1-inch and attaches to the side support stands using wing nuts.
Remember to put the five metal ring backdrop holders onto the crossbar before screwing down both ends. Yes, I’ve done that and it’s a real pain to have to take the crossbar off again in order to slip on the backdrop clip.
When using the supplied muslin backdrops, which are 5ft wide and 10foot long, you won’t need all four sections of the crossbar. Two or three will probably be enough.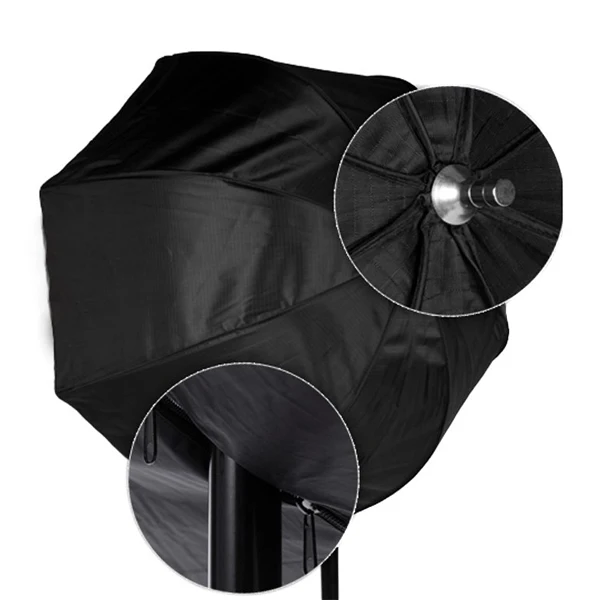 But if you upgrade to a larger backdrop you can use all four sections of the crossbeam.
With all four sections joined the backdrop support is 10 feet wide. If required, you could leave out one or two of the crossbeam sections to make it narrower. So, the width of the crossbeam could be 5-ft, 7.5-ft, and 10-feet.
MUSLIN BACKDROPS
These aren’t the best backdrops, but they are perfectly serviceable and reasonably opaque. In fact, they look quite good compared to some kit backdrops I’ve seen in the past.
The green backdrop is OK for green screen work, the black backdrop is probably more useful for photography, and the white backdrop gives you a clean looking background like the Apple ads of a few years back.
If you just use the lights in this kit the white backdrop will probably look a bit gray. That’s not a fault of the lights, it’s because for that pure white background look you need separate lights for the backdrop.
One thing you’ll notice when you unpack the musIin backdrops is that they are creased from being folded. This is inevitable and not a fault. Shadows from wrinkles on the white backdrop show more than on the green or black, but that’s just because the shadows are more noticeable on white. Fortunately, it’s not difficult to smooth out the creases, I explain how in my article How to get wrinkles out of backdrops: Seven methods that work.
If you don’t want the trouble of wrinkles and creases, consider using 9ft rolls of backdrop paper. Provided the weight of your paper roll does not exceed about 7lbs you should be OK. Just be aware the backdrop support in this kit won’t take heavy loads. Also, add sandbag weights to the legs of the support stands to prevent accidents.
Incidentally, a proper paper background system, like Savage Seamless, will cost as much if not much more than this entire kit, so the muslin backdrops are certainly worth it.
Pros and Cons
| What we like… | What we don’t like… |
| Good value for what’s included | Lights not dimmable |
| Lights run cooler than halogens | Power cords only about 7ft long |
| Backdrops are better than in many kits | Light stands could be stronger |
| Sufficiently bright | |
| Light banks include a mounting hole for an umbrella |
Conclusion
Even though this isn’t a high-grade studio kit it does fill a gap in the market.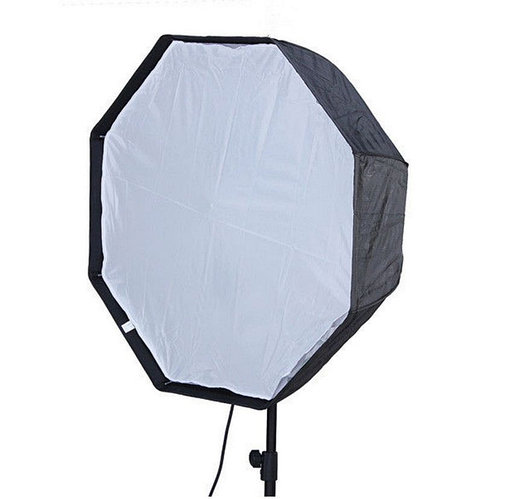 It also includes a lot of value and gets a big thumbs up from me. This softbox three-point lighting kit is reasonably quick to assemble and will improve the quality of your videos.
You get everything you need to set up your home studio lighting, including a selection of attractive backdrops including a green screen. The Flora-X system is a great improvement on traditional softboxes where you need to assemble the ribs in the softbox individually.
Eventually, you’ll want to improve your video gear, but this kit will get you going and be good enough for a long enough time.
REVIEW: Emart 600W Umbrella Lighting KitSale
EMART Umbrella Photography Lighting Kit with 700W CFL 5500K Bulbs,Soft...
- 45W Photo CFL Bulb: 3 * 45W(equals to 200W Incandescent Light) 5500K full spectrum energy saving CFL...
- White/Sliver Umbrella Reflector: White umbrella reflector works well to diffuse the light from any.
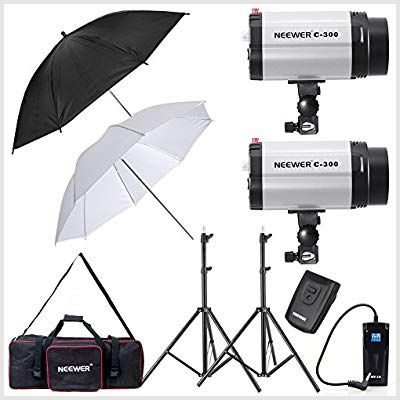 ..
.. - Adjustable Light Stand Kits: 2 * 83 inch+1 * 33 inch photography light stands, professional...
- All-In-One Carrying Bag: Whole kit can be put in, convenient and easy to store. Meet your needs when...
Last update on 2022-10-13 / Affiliate links / Images from Amazon Product Advertising API
Established in Los Angeles in 2014, EMARTUS supplies a range of photography and video accessories. These include green screens, backdrops and stands, ring lights, soft boxes, light stands, and several other types of accessories for creatives.
This complete Photo Studio Lighting kit for Portrait Photography or Shooting Video would suit someone starting as a photographer or videographer, streamer, or YouTuber. If you don’t want to spend too much cash but still need to get good value for money this is the kit for you.
The umbrella lighting kit has obviously been made to a budget, but none-the-less it’s surprisingly good. You also get more in this lighting kit than from in similarly priced kits from other suppliers.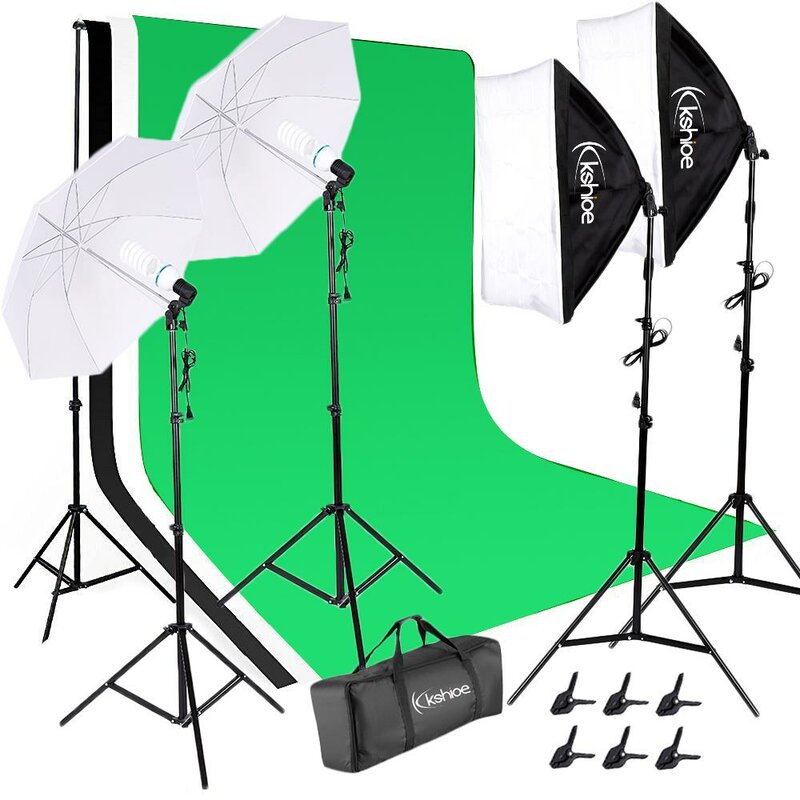 What I would say, is that you shouldn’t expect it to take lots of abuse. But if you take care of it you’ll get plenty of use from the kit.
This is a continuous light kit. So, the bulbs provide steady continuous light. If you’re a photographer, these are not strobe or flash. However, you could use a flash alongside these lights. The umbrella lights produce soft light that would be ideal for portrait photography, product photography, and shooting video with just a few people in the scene.
So, let’s have a look at what you get.
What’s in the box…
| 3x 45W CFL continuous photo bulbs | 3x Single head bulb sockets |
| 2x 33-inch Black/Silver Reflector umbrellas | 2x 33-inch Translucent white umbrellas |
| 2x 83-inch light stand | 1x 33-inch light stand |
| 1x Bulb storage case | 1x Heavy duty carry case |
Here’s a video of reflector umbrellas being used.
LIGHT BULBS
Emart 45W CFL bulb mounted in the light holderThe included bulbs are daylight energy saving photo bulbs with a color temperature of 5500K. The CRI value of 80-85 is typical of Compact Fluorescent Lamps (CFL) and render colors well enough in most situations. The included bulbs are for 110V supplies and carry a RoHS and CE certificate.
In terms of quality, the supplied bulbs match the quality of other CFL bulbs I’ve used in my other lighting kits. But you should know that, like any other CFL bulbs, they take a few minutes before they are fully bright.
The lifespan of the bulbs is 8,000hrs, which is typical of CFL bulbs. However, that’s an average. You may be lucky and get them to run for longer, or you could be unlucky, and they could burn out sooner. The actual lifespan will depend on your electricity supply, how often you turn the lights on and off, the ambient temperature, and humidity.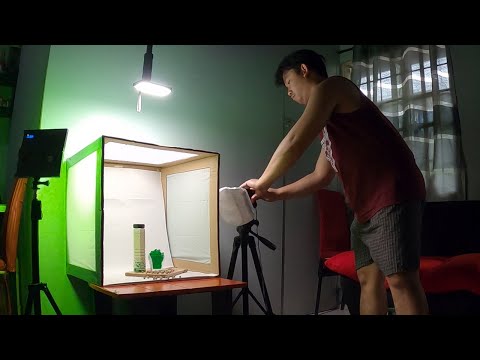
Emart says that each CFL bulb is equivalent to 200W, and so the three 45W bulbs are equivalent to 600W of incandescent lighting. I think that’s pushing it a little. I would guess each bulb is closer to being equivalent to a 150W incandescent bulb. This is fine to get you started, especially if you have a little ambient light and you’re not trying to photograph or video a large group.
SOURCE: Wikipedia
One of the things I like about this kit is that you can expand the light output. The light holders will take any bulb with a standard E26/E27 screw base, but only use CFL or LED bulbs. Never use incandescent/halogen bulbs, which will get far too hot. Emart says you can go up to the company’s 105W CFL bulb (available on Amazon) in each holder, so you could easily double the light output.
My preference would be to go for LED replacements since they are even more energy-efficient than CFL bulbs, are far less fragile, do not produce as much heat, and they don’t use mercury as CFL bulbs do.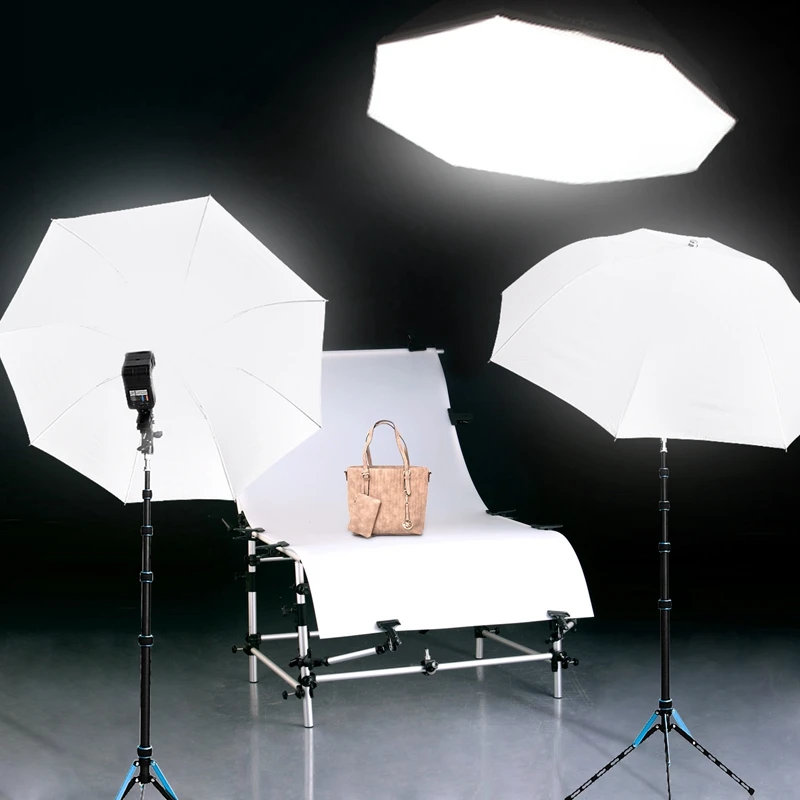 If you do replace the bulbs keep them all the same. If you mix different types of bulbs the color temperature is unlikely to match, even if they all are meant to be daylight equivalent. The trouble is daylight can have a color temperature from around 4000K to 7000K. That leaves plenty of scope to have daylight bulbs producing light of different colors.
SINGLE LIGHT HEADS
Emart single light head with E26/27 screw socket and umbrella mounting holeEach light head, or bulb holder, is made from black plastic and takes a single bulb.
I’ve heard that some people find it tricky fitting the bulbs into the holder, but I’ve not has any problems at all.
Rear view of the Emart light headThere’s an on/off rocker switch on the back of the light head, a screw knob to secure the head to the top of the light stand, a knob that allows for adjusting the angle of the light, a mounting hole for the umbrella, and a small knob to secure the umbrella shaft.
Umbrella modifier attached to light headAll these parts work fine, although the screw know for securing the umbrella shaft screws into plastic threads.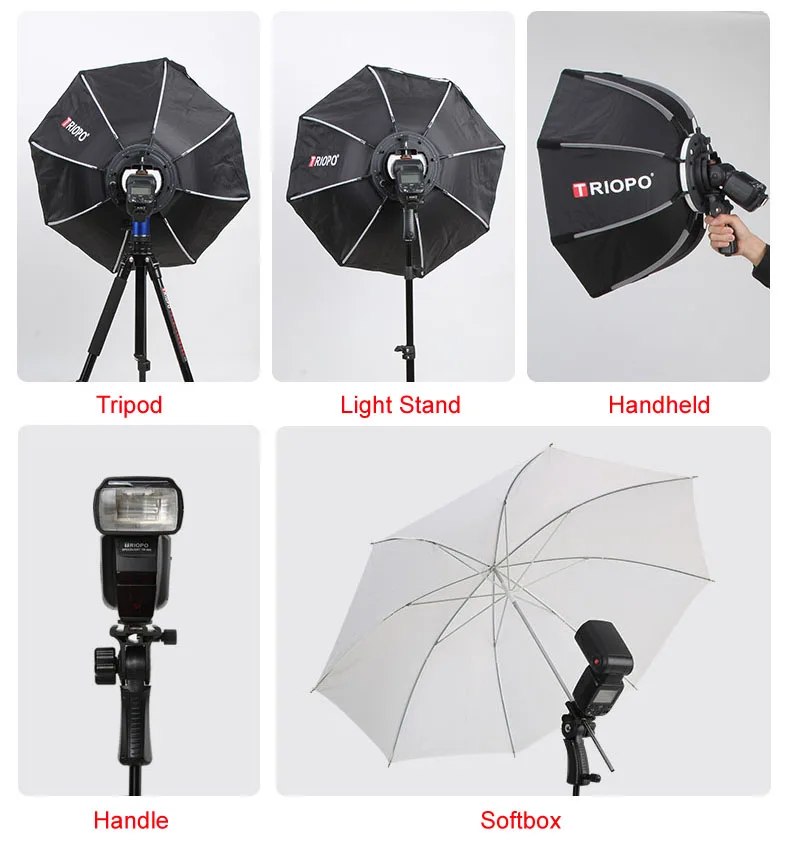 I would much prefer that a threaded brass insert had been used instead since plastic thread are much easier to strip. Even so, I’ve not had any problems despite setting up the lights over a dozen times.
As I mentioned earlier, the maximum wattage that these bulb holders will take is 105W. So, you have plenty of scope when it comes to increasing the light output of the kit.
My only gripe about the light head is the length of the power cord. The length is 9.2 feet/2.8m, which sounds generous but once you have the light stands extended to full height there’s barely any cord left to get to an outlet. You will need extension cords and a power strip. However, this is an issue with every budget light I’ve ever bought.
WHITE & SILVER/BLACK UMBRELLAS
Although you get three light heads in the kit, you get four umbrellas. Two translucent shoot-through umbrellas and two silver reflector umbrellas.
Both types of umbrellas produce soft light but unlike a softbox, umbrella lights tend to spread light everywhere, especially the shoot-through type.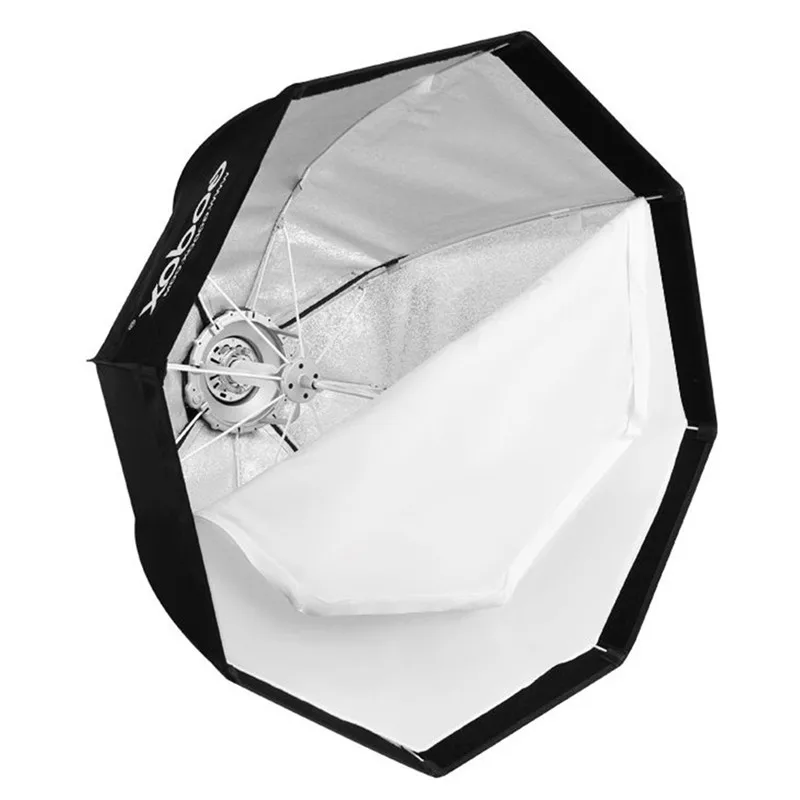 Again, that’s not a fault with these umbrella lights, it’s typical of this type of light. However, with the silver reflecting umbrellas you’ll not spill any light to the rear.
Quality-wise, these umbrellas are fine at this price point. They aren’t the best in the world, but I’ve seen many that are inferior to these umbrellas from Emart. The metal of the shafts is relatively soft, so don’t try screwing down on them too tightly. I’ve never had to tighten the know too much to secure the umbrellas, so you shouldn’t have any problems.
LIGHT STANDS
Three light stands are included in the kit. Two extend to a full height of 83-inches, the third only extends to 33-inches. The third stand is meant to be short.
The stands are made from an aluminum alloy and are lightweight but sturdy enough. The two tall stands can extend from a minimum height of 33-inches to a full height of 83-inches. The smaller “mini” stand extends from a minimum height of 16-inches to a maximum of 33-inches.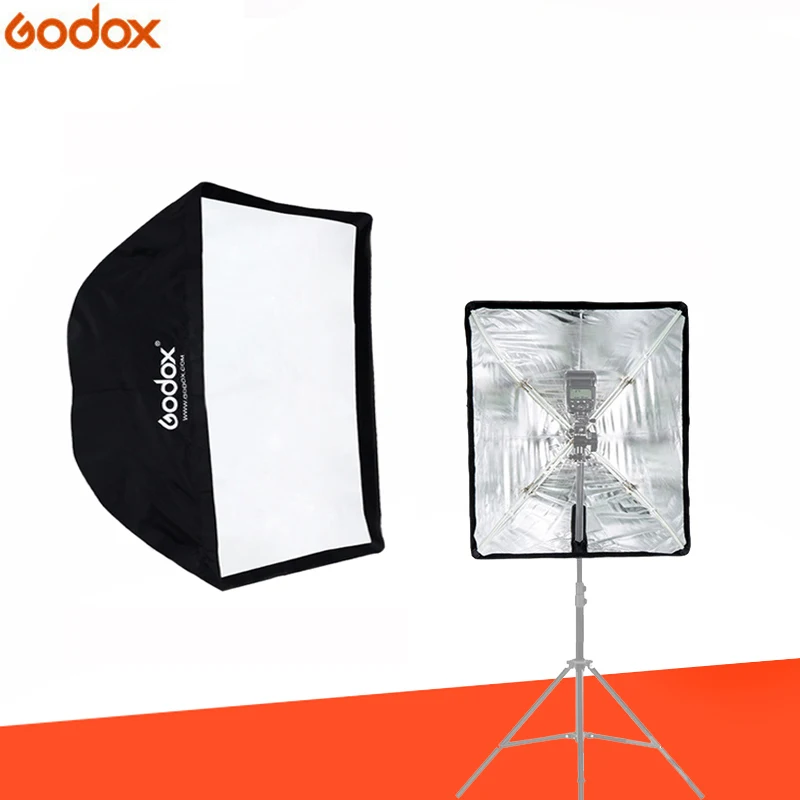
Once extended the sections are locked in place using a buckle design rather than a screw knob that’s typical in many other light stands. Personally, I like the buckle locks type. They are quick, you don’t have screw nuts falling out, and they do lock the sections into place.
Each stand has a standard camera tripod metal ¼-20 screw tip. Although you’ll not need it with the gear in this kit, you can use the stands with other equipment that include a ¼-20 tripod mounting hole. I’ve mounted my Yongnuo YN300 and YN600L LED video light panels.
1/4-20 screw head on Emart light standCARRY BAGS
The kit includes two bags, a bulb case, and a heavy-duty carry case that stores the entire kit. The bags are made from premium quality nylon and are adequate for storing and transporting the lighting kit.
PROS and CONS
| What we like… | What we don’t like… |
| Good value for money. | Brighter bulbs would be better.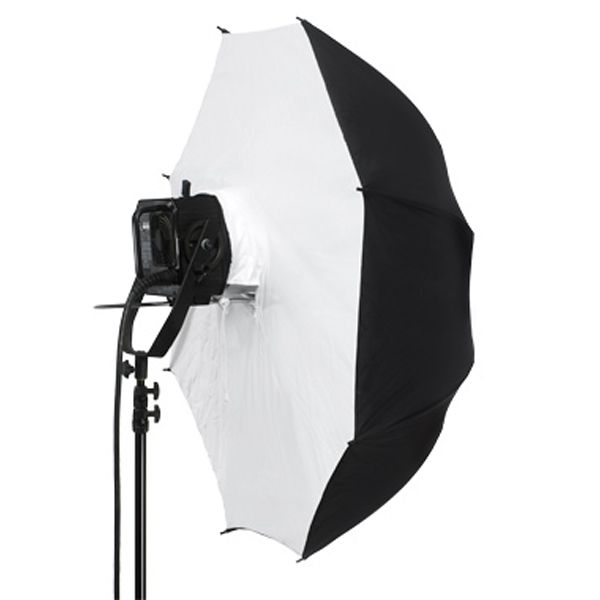 |
| Set up is easy. | Plastic bulb holders. |
| Despite being lightweight the light stands are sturdy. | Cords could be longer. |
| The umbrellas are reasonable quality. | |
| Storage carry bags included. |
Product
Best Softbox Studio
Linco 2000W Lighting Studio Kit
Best Umbrella Kit
Emart 600W Umbrella Lighting Kit
Bulb type
12x 40W CFL bulbs
3x 45W CFL Bulbs
Equivalent total incandescent power
Color Temperature
6400K Daylight
500K Daylight
Bulb screw base
E26/E27
Modifier Size
Three 20x20inch (50x50cm) softboxes
Four 33inch (83cm) umbrella
Light stand height
3x 77inch
2x 83inch & 1x 33inch
Delivery
Buy on Amazon
Buy on Amazon
Best Softbox Studio
Product
Linco 2000W Lighting Studio Kit
Bulb type
12x 40W CFL bulbs
Equivalent total incandescent power
Color Temperature
6400K Daylight
Bulb screw base
Modifier Size
Three 20x20inch (50x50cm) softboxes
Light stand height
3x 77inch
Delivery
Buy on Amazon
Best Umbrella Kit
Product
Emart 600W Umbrella Lighting Kit
Bulb type
3x 45W CFL Bulbs
Equivalent total incandescent power
Color Temperature
500K Daylight
Bulb screw base
E26/E27
Modifier Size
Four 33inch (83cm) umbrella
Light stand height
2x 83inch & 1x 33inch
Delivery
Buy on Amazon
Last update on 2022-10-13 / Affiliate links / Images from Amazon Product Advertising API
Tosh Lubek runs an audio and video production business in the UK and has been using the Canon EOS R since it was released in the Autumn of 2018.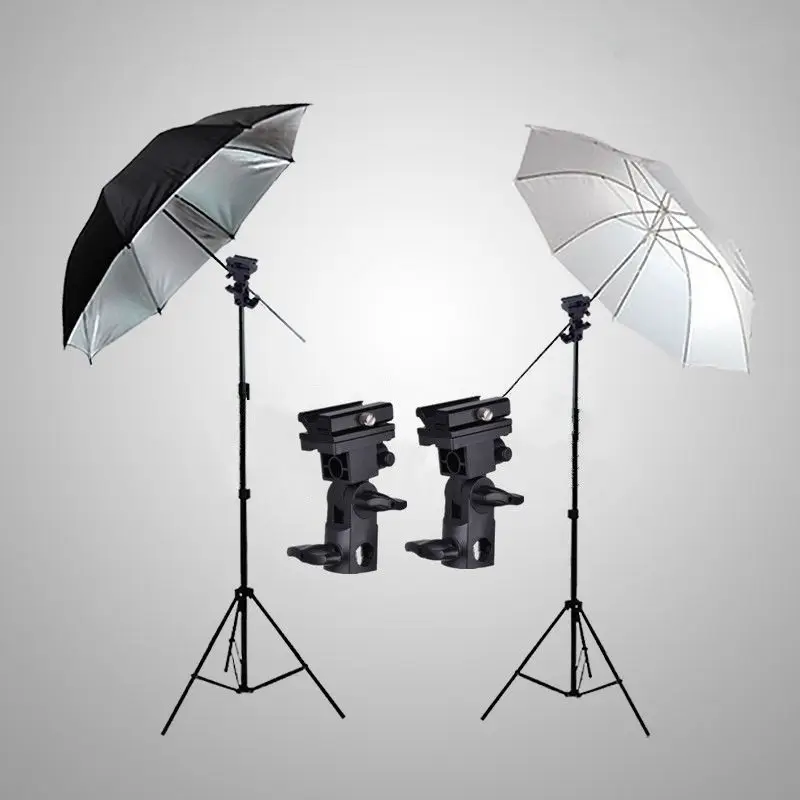 He has used the camera to shoot TV commercials for Sky TV, promotional business videos, videos of events and functions, and YouTube creator content. He has also won international awards for his advertising and promotional work. You can meet him by visiting his “video booth” at HashTag business events across the country.
Recent Posts
link to What Does a Pop Filter Device Filter Out from Voice RecordingsWhat Does a Pop Filter Device Filter Out from Voice Recordings
If you have ever recorded some speech or a vocal, you will know the perils of saying certain words when you are close to a microphone. It is all too easy for recordings of those words to start with...
Continue Reading
link to Do Pop Filters Reduce Background Noise When RecordingDo Pop Filters Reduce Background Noise When Recording
If you have been looking at online listings for pop filters in the hope that they will help reduce background noise, I have some disappointing news for you.
Continue Reading
Softbox vs. Umbrella: Which Should You Use to Light Your Videos?
You’ve decided that you really need to take the plunge and buy yourself some lights. Excellent! This means that your filmmaking is going up a notch, and you’re growing in confidence and capability. But where is best to put our money? Will softbox lighting work best for you? Or will umbrellas make the most of your money? We’re here to look at the advantages and disadvantages of softbox light vs. umbrella light.
What is an umbrella?
Lighting umbrellas really do resemble umbrellas that you’d use to keep the rain off you, although mixing them with water probably isn’t recommended.
Umbrellas for lighting come in 2 forms: reflective and shoot-through. Reflective umbrellas have a black “outside” (the convex side) and a shiny inside (the concave side), which is often silver or gold. Shoot-through umbrellas are made of lightweight white fabric that light can pass through easily.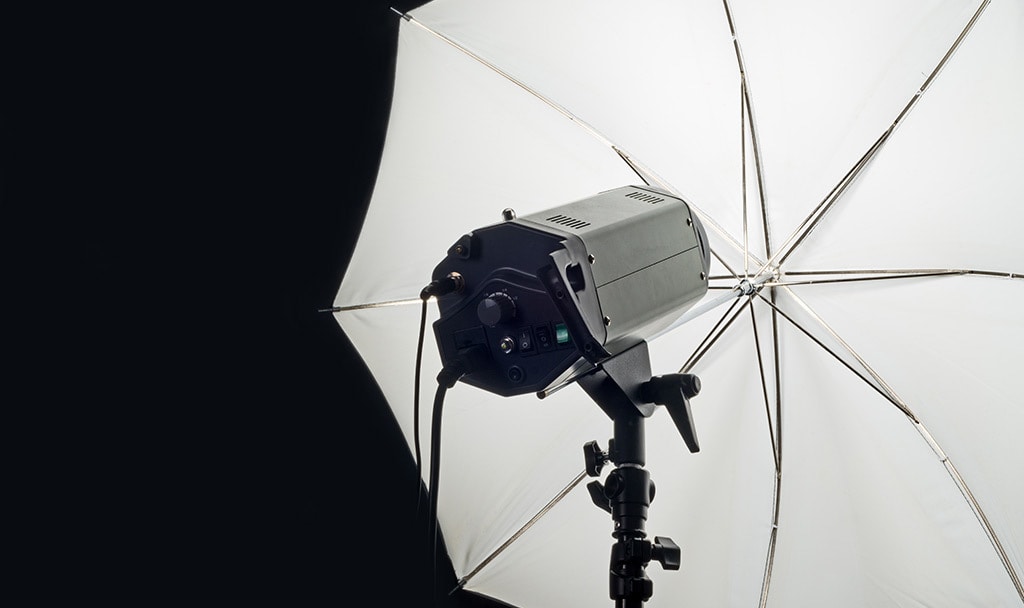
Reflective umbrella
Photo by william f. santos on Unsplash
You use a reflective umbrella by angling the shiny side toward your subject and directing your light toward the reflective surface. The light bounces off the reflective surface and diffuses out across your subject.
Shoot-through umbrella
Tony Webster from Portland, Oregon, United States, CC BY 2.0, via Wikimedia Commons
As the name might suggest, you direct the outside of your umbrella toward your subject. Your light source sits behind the umbrella, shining onto your subject through the fabric. Shoot-through umbrellas are very easy to use and recommended for beginners. They create lovely soft light, but it does spill easily.
Umbrellas can be regular shaped or parabolic. Parabolic umbrellas are constructed using more panels than regular umbrellas and are often larger. They tend to produce light with an even better wrap-around quality than regular umbrellas.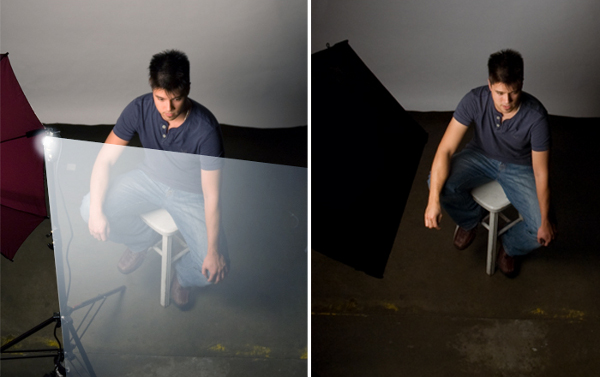
Whether you choose a reflective or a shoot-through umbrella, remember that the larger your umbrella, the softer your light will be. And the larger your umbrella, the more powerful a light you will need to fill it.
When should I use an umbrella for lighting?
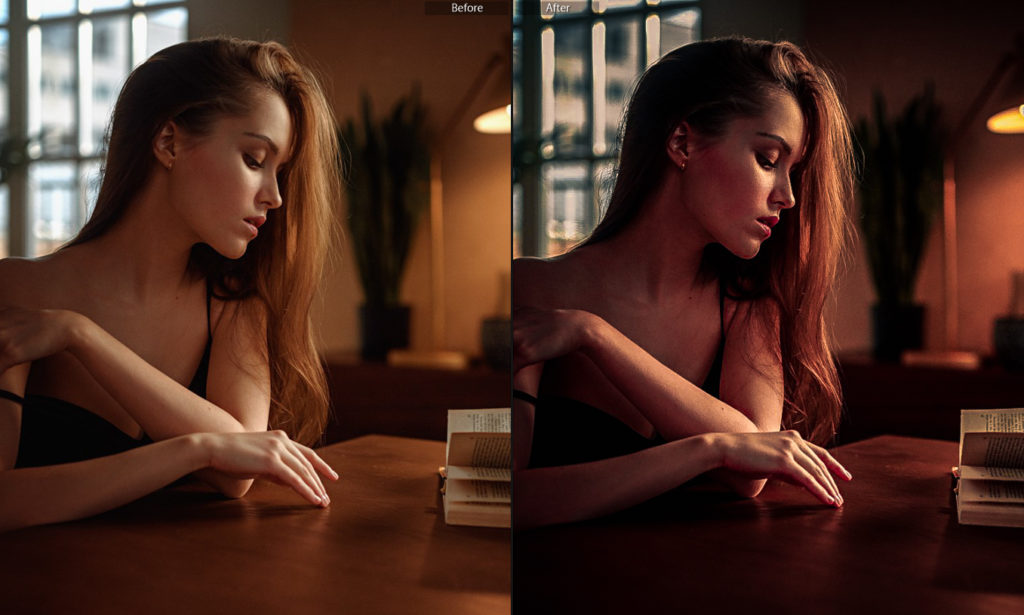
Image lit with an umbrella. Credit: Daniela Bowker
Umbrella lighting is very broad and soft, uncontrolled and uncontained. You might think it resembles outdoor light. And if you use a reflective umbrella with a gold-colored lining, you can create light that resembles golden hour sunlight.
If you want to spread soft, even light over a large area without worrying too much about having to direct it or prevent it from spilling, then an umbrella is a great option. In addition, umbrellas are an excellent option for shooting interiors.
Umbrellas also have the advantage over softbox lighting kits because they tend to be lighter, quicker to set up and dismantle and easier to transport and are often cheaper than softbox lights.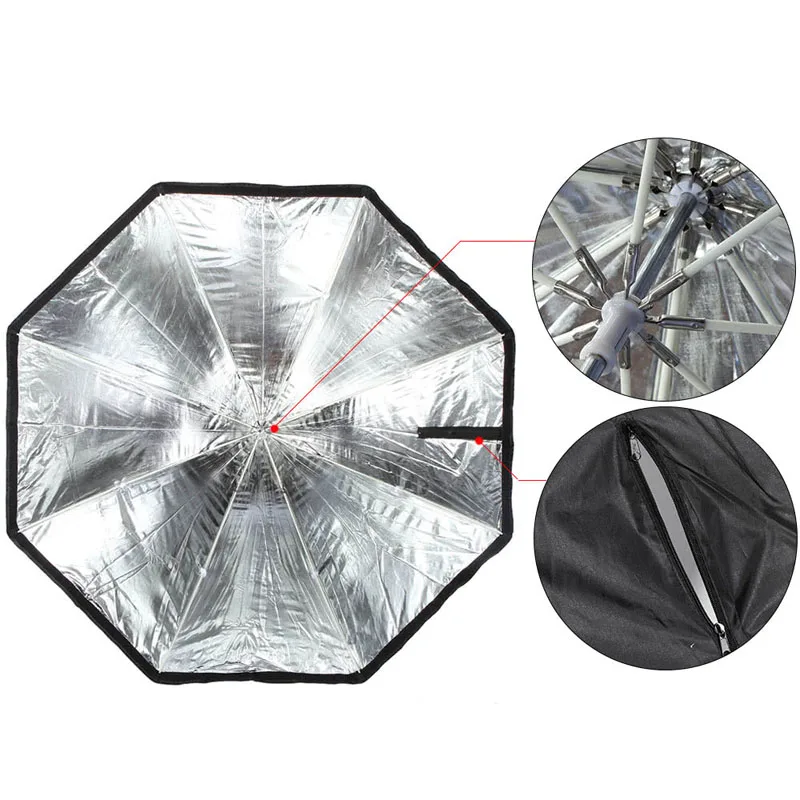 So if you are looking for an easy-to-use system for lighting YouTube videos that you shoot from home, an umbrella kit might be the best option.
What is a softbox?
A softbox is effectively a box into which you place a light source. One side is semi-translucent so that light can exit it and illuminate your scene. The semi-translucent covering softens and diffuses the light, creating beautiful wrap-around light with gentle shadows for your subject. Softbox lighting is easier to control and direct than umbrella lighting.
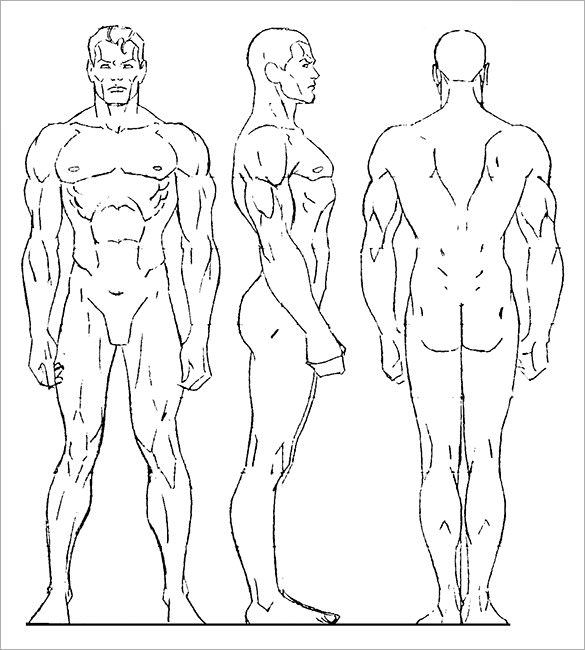
Softboxes come in a variety of shapes: square, rectangular or octagonal, as well as in different sizes. Different shaped softboxes produce different shaped catch-lights in people’s eyes. If you’re wondering what size softbox you need, portrait photographers work on the principle that your softbox needs to be roughly the same size as your subject.
When should I use a softbox?
Image lit with a softbox. Credit: Daniela Bowker
Softbox light is often described as resembling light coming through a window.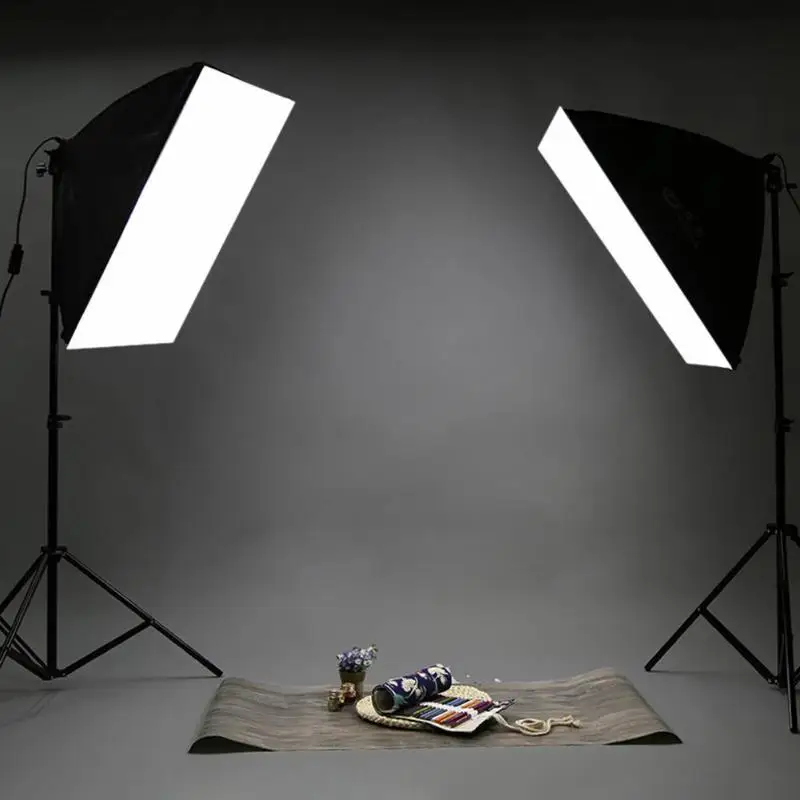 It’s soft and diffuse, but it has direction. You might notice that it molds more to your subjects and provides a little more definition than an umbrella. Softboxes give you the option to apply light modifiers, such as grids, honeycombs, or louvers. If you want soft, even light, but you need to be a little cautious about where it falls, then use a softbox. By placing a honeycomb over a softbox, you can really make a subject stand out from the background. The controllable light from a softbox makes it a better choice than an umbrella if you need an artificial light source for backlighting.
Softbox vs. umbrella: pros and cons
Whether you choose a softbox lighting kit or an umbrella setup, both will work to diffuse light and can be used as part of a 3-point lighting setup. What’s important to remember is that your light’s proximity to your subject will always determine its quality. The closer the light is to the subject, the broader and, therefore, softer it will be. If you move the light away from your subject, it will become harder with more defined edges and shadows.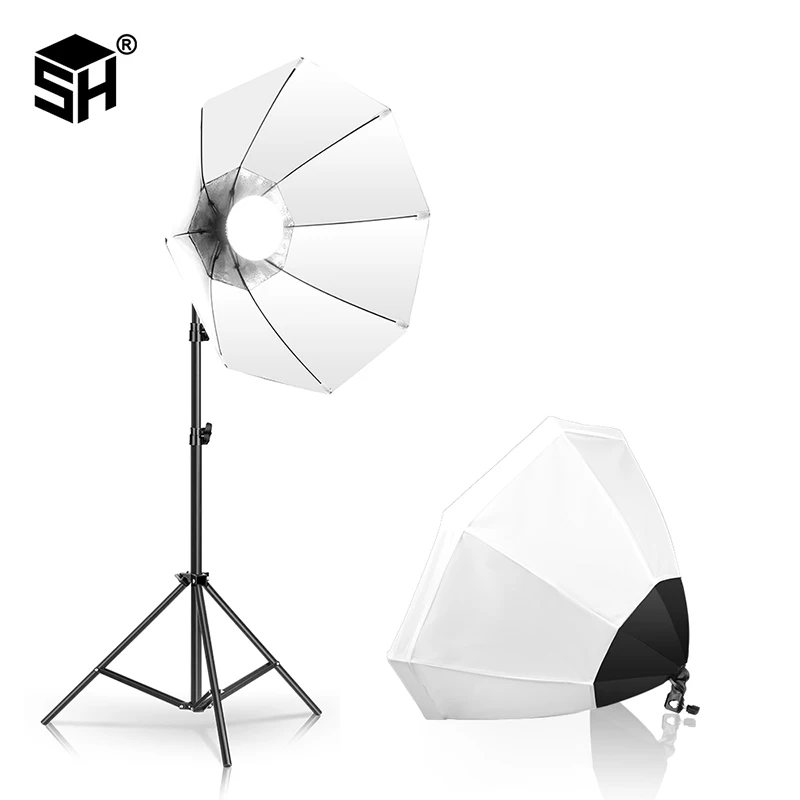
When it comes to softbox vs. umbrella, there isn’t really a better or best option. It’s what works best for you.
Affordability
When comparing the cost of umbrellas vs. softboxes, umbrellas tend to be cheaper.
Advantage: umbrella
Storage, portability and ease-of-use
Umbrellas are easier to set up and pack away and lighter if you need to transport them. Softbox lighting kits work best if you have a dedicated space where you can leave them established. However, shooting outside with an umbrella on a windy day can be nightmarish: imagine trying to hold on to an umbrella walking down the street in windy conditions.
Advantage: umbrella
Control
Umbrella light is much more “free” than softbox lighting and spills more easily. In a white studio, umbrella lighting can be used to produce the softest light as it bounces off of multiple surfaces. If the walls of your set are colored, having more controlled softbox lighting will be easier to manage when it comes to spill and reflection.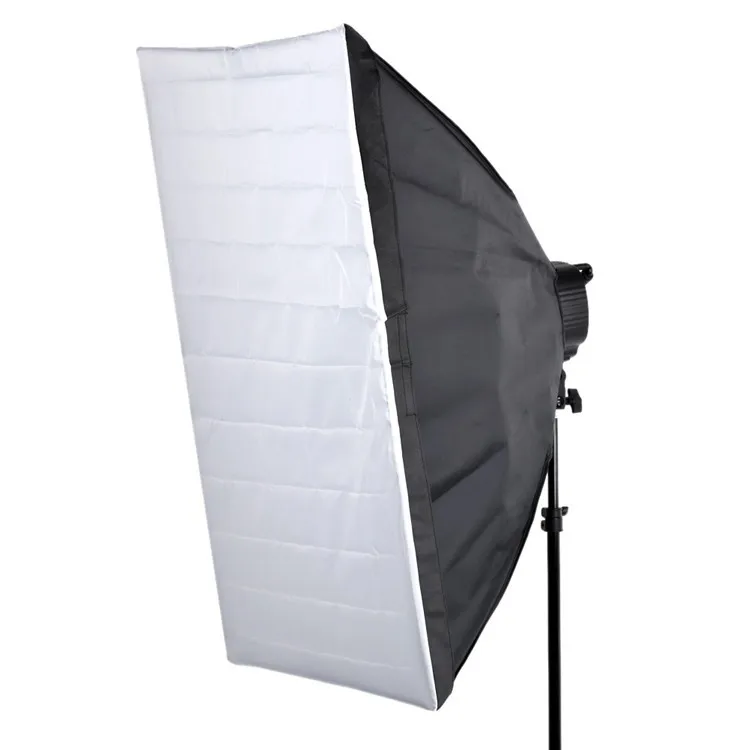 With a softbox, managing lighting your background will be easier, too.
Advantage: Softbox
Light modifiers
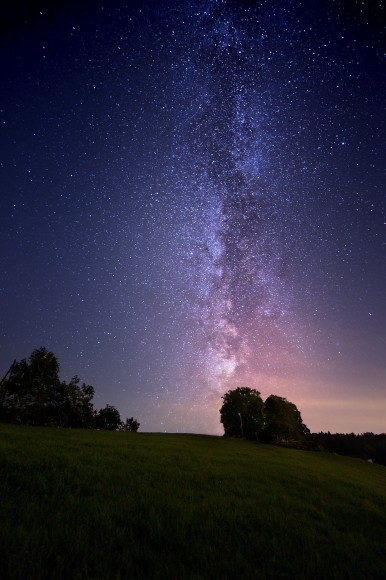
Softbox lights are easier to modify than umbrellas, too. You can use grids or honeycombs to help to create soft but directed light. It makes it much easier to ensure that your subject is lit and the background isn’t! This is particularly useful when doing night videography.
Advantage: Softbox
What’s best for high-key and low-key lighting?
If you’re thinking about high-key vs. low-key lighting and umbrella vs. softbox, the wider spread of light from umbrellas is excellent for high-key lighting. However, the control you get from softboxes will work much better for low-key lighting.
Advantage: Tie
The softbox umbrella
Image via https://savageuniversal.com/
If you are struggling to select between softbox vs. umbrella, you might want to consider the softbox umbrella.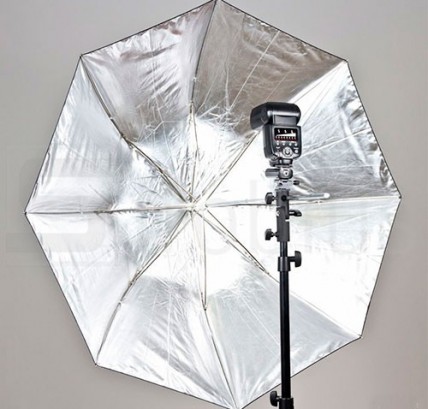 As the name suggests, they are hybrids of the umbrella and softbox. Shaped like an umbrella, they are covered, like a softbox.
Taking the plunge
There’s no right or wrong when it comes to choosing between a softbox vs. an umbrella. It’s whatever meets your needs and budget. You might well find that softbox lighting techniques provide you with more versatility, but starting out with umbrellas gives you the grounding you initially need. And there’s nothing to stop you from using both umbrellas or softboxes as the need arises.
What to choose: softbox or umbrella?
Everyone who starts photography sooner or later comes to the same conclusion: you need to improve the quality of your work. Having studied articles on the Internet, watched a bunch of videos, played enough with aperture and shutter speed, a novice photographer goes to a photo studio. There he is met by a huge number of light-forming nozzles, which are difficult to figure out for the crane.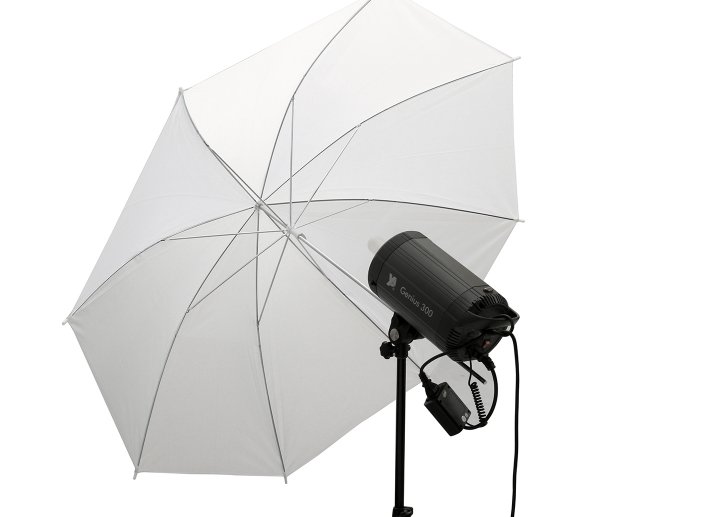 And it is not possible to search for information without knowing the name of this or that object.
In studio lighting, light is divided into two main types - hard and soft. As a rule, those nozzles that are soft to the touch are designed for soft light, hard, metal for hard. Professionals and novice photographers recommend starting with soft diffused lighting. In this case, attachments such as softboxes and photo umbrellas will successfully help them.
In most cases, a person takes all ideas from nature, as for example, a lens is created in the likeness of an eye, and a softbox is created in the likeness of a cloud through which the light of the sun comes through. Professional photographers know that if they are shooting outdoors, it is not sunny and bright weather that is preferable, but overcast afternoon lighting. In this case, the pictures are obtained without contrasting shadows, but light and airy. Softbox works the same way.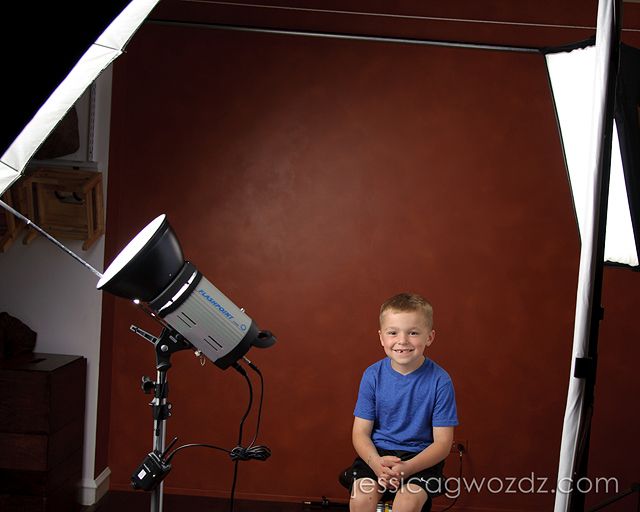
There are softboxes of different sizes, different shapes, they have different names and purposes.
Octobox - Round in shape, 18 to 60 inches in diameter. From them, the flow diverges almost evenly, filling the space. Small is more often used for a large portrait, and gives a harder light, it is more mobile and easier to use in the wind (if shooting outdoors). A large octobox gives softer and diffused lighting, which has a more fruitful effect on the quality of images, but its minus is that it is bulky. Also, it gives beautiful round highlights in the eyes of the model.
Softbox - has a square shape, its dimensions vary from 10x13 cm (for on-camera flashes) to 120x120 cm for studio lighting. The principle of operation is the same as the octobox, there is a difference in the form of highlights and reflection on glossy surfaces. If you need beautiful clear square highlights, for example on a metal object, it is better to use a softbox.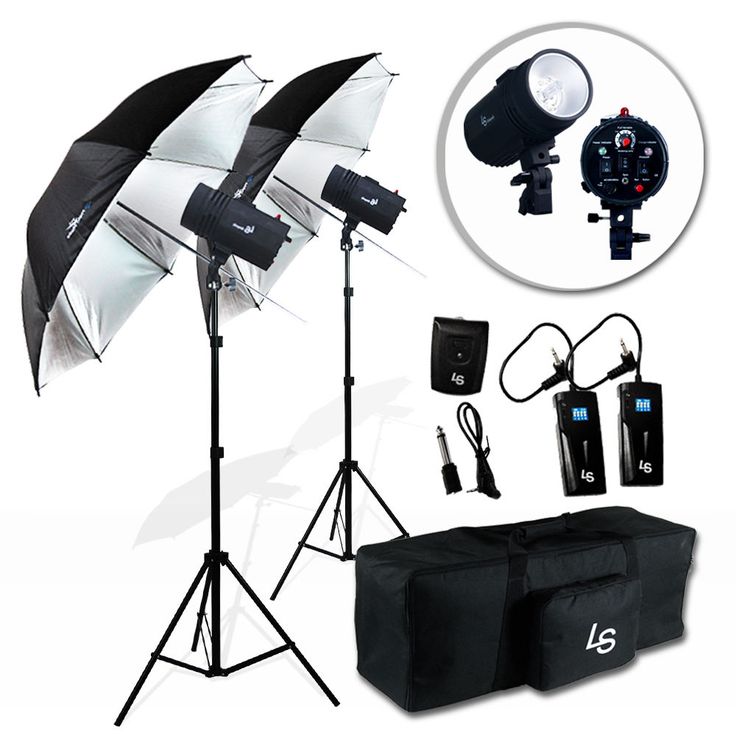
Stripbox - from the English "stripe", has a narrow long rectangular shape, from 120 cm to 200 cm along the long side, is used for full-length portraits when you need to illuminate the model from the side or from the side a little behind, it is also very convenient for uniform background lighting, if you put two sources from different sides.
Photo umbrellas are an alternative to softboxes. Their main difference from softboxes is that they can work both in reflection and in transmission. Sizes from 70 cm (light and compact), up to 215 cm (studio parabolic).
Skylight umbrella - made of white transparent fabric, like a softbox, it is installed with the inside towards the flash and directed towards the model with the outside. Gives diffuse lighting and round highlights like an octobox.
Reflective Umbrella – is attached with the inside to the flash and directed with the same inside towards the model.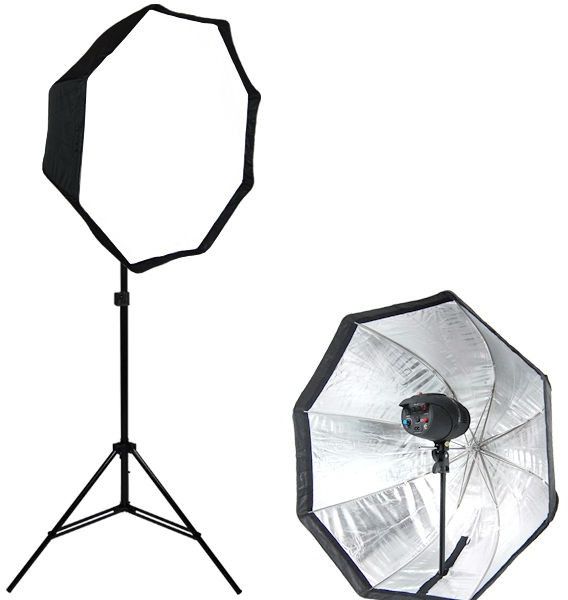 It has three main colors - white, silver and gold. White gives natural light, silver is cool, gold is warm, which is suitable for portraits, as it gives the skin a pleasant golden hue.
Depending on the goals set, the photographer himself must choose the tools to solve the problem. It is difficult to say which is better than a softbox or an umbrella, each of them has its own advantages and disadvantages. Umbrellas are easier to use, easier to transport, they can provide both soft diffused lighting and harder directional lighting, and another not unimportant point - they are more pleasant in price. More often used by strobists, for shooting in the open air and in mobile home photo studios.
Softboxes are more versatile in form and have a wider range of uses, from portraiture to product photography. Unlike umbrellas, they have a more directional light and are easier to control. They are most often used in professional studios, but they can also be used for on-camera flashes.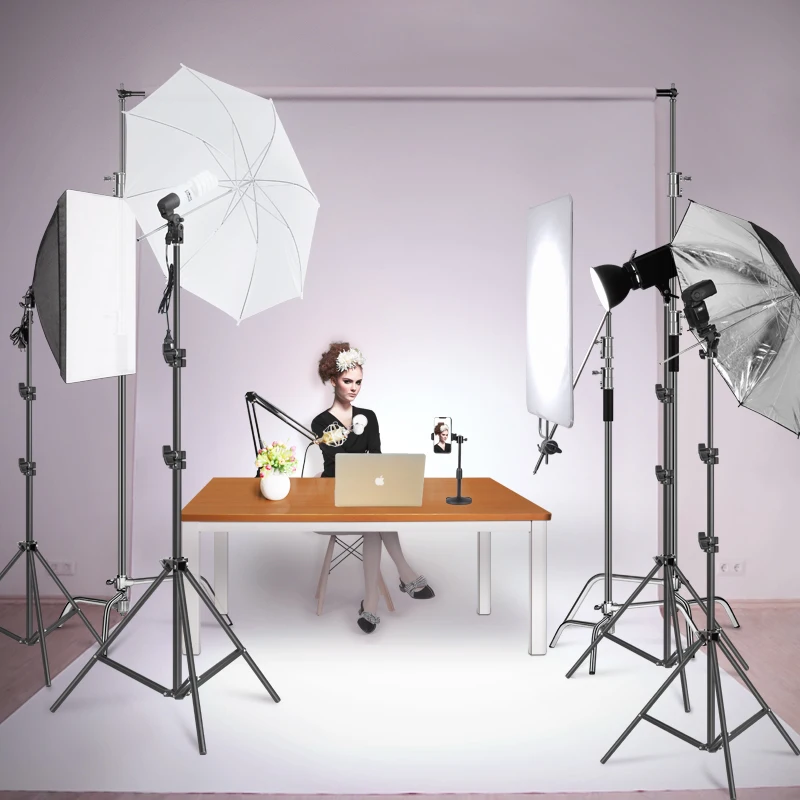
Light control: softboxes, umbrellas and reflectors | Articles | Photo, video, optics
Source: danscamera.comLight is a powerful tool for a photographer. It can help to "rejuvenate" the model for ten years or, conversely, "age". Proper lighting will help to “throw off” a few kilos of weight or add them. Light allows you to create a special atmosphere for a portrait - from bright and cheerful to gloomy and ominous, create various visual effects, highlight the important and remove the secondary into the background. Knowing how to control light will help you become a better photographer and take better pictures. That is why it is so important to understand the basic tools that allow you to manipulate and control light. First of all, this will be true for studio photographers, but you can also use the devices that we will discuss below when working outdoors.
Lighting accessories allow you to modify and mold the light as you wish. The variety of such devices is very large, which can easily confuse not only beginners, but also more advanced photographers. In this article, we will look at several basic accessories for modifying lighting - softboxes, umbrellas, reflectors and reflectors (often "reflector" and "reflector" are used interchangeably, but in this article we will consider two completely different types of device). We will hardly touch on the issue of lighting sources, flashes and constant light, as this would make the article too voluminous.
First, let's look at the two most common modifiers that help create soft diffused light - softboxes and umbrellas.
Umbrellas create a wider diffused light (similar to natural light on the street), while it is not localized and cannot be changed at will. Softboxes, on the other hand, create controlled direct lighting that is more like light in a room from a window.
Umbrellas are probably the most popular light control tool due to their portability, low cost, and ease of use. If you've ever used a regular rain umbrella, you'll probably already be familiar with the basics of using photo umbrellas to create artificial lighting.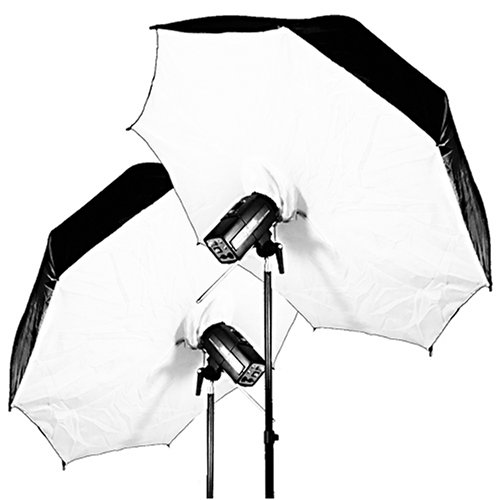
Umbrellas provide wide, soft lighting that is most like natural light. Unlike softboxes, which give you control over the direction of the light, umbrellas create less limited lighting that spreads throughout the room.
There are two types of umbrellas: reflective and translucent. While they are basically similar, there are a few differences between them in how they look and how they are used.
Raylab Reflective Umbrella SU-04 Reflective umbrellas are opaque on the outside but use reflective materials on the inside. To use this type of umbrella, you simply need to set it up so that the inner reflective part is facing the subject, then flash the reflective material so that the hard light bounces off of it, resulting in softer, wider, and more even illumination that falls to your subject. Silver and white reflective umbrellas, such as the Falcon Eyes UR-32WB, do not distort the color temperature. Umbrellas with a gold finish, like the Raylab SU-04 combination (gold+silver), allow you to lower the color temperature, making the lighting warmer, like the light of the afternoon sun.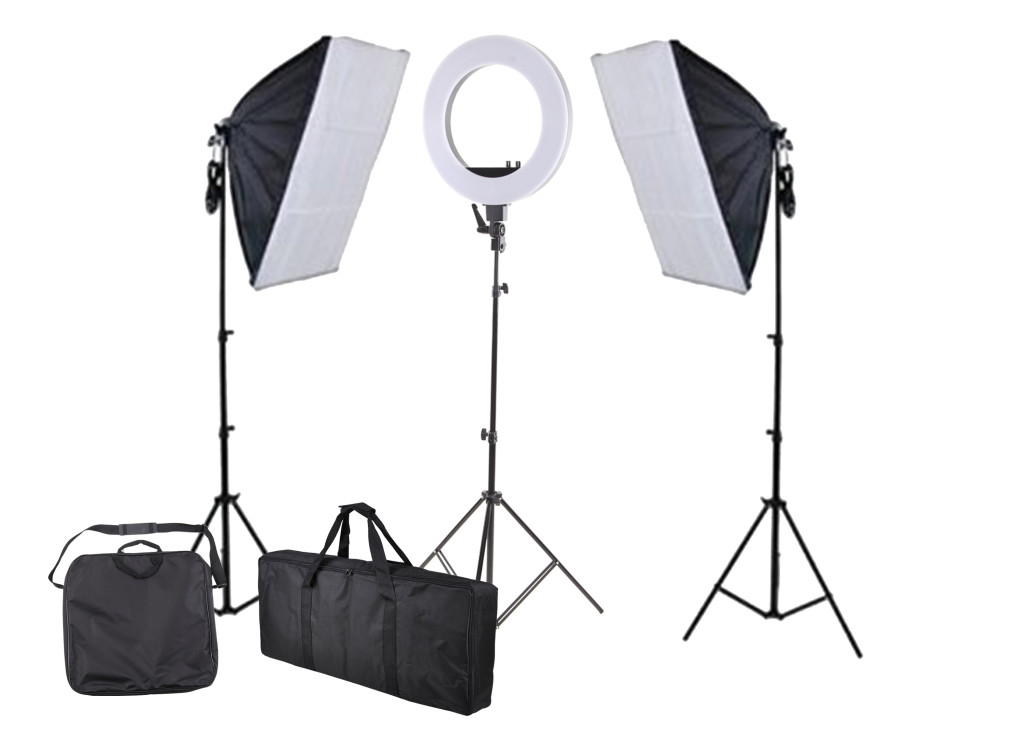 At the same time, both gold and silver surfaces make the light flux a little more rigid and contrasting.
Raylab SU-01 Translucent Umbrellas are made from translucent material. To use it, you need to direct the outer part of the umbrella at the subject, "shooting" the flash through the umbrella, so that the light passing through the translucent material is softened. Lighting is a little easier to control when shooting "through the light" than when using a reflective umbrella.
One of the advantages of umbrellas over softboxes is the round highlights they create in the model's eyes, as opposed to the less natural looking square or rectangular softbox highlights (but this does not apply to octoboxes).
A softbox is a special case that is installed around an artificial light source, such as a flash or halogen lamp. Its reflective interior enhances light output and projects the light beam through the front diffuser screen.
Early softboxes were made from hard materials like plywood, but modern models are made from lightweight fabrics like polyester or nylon.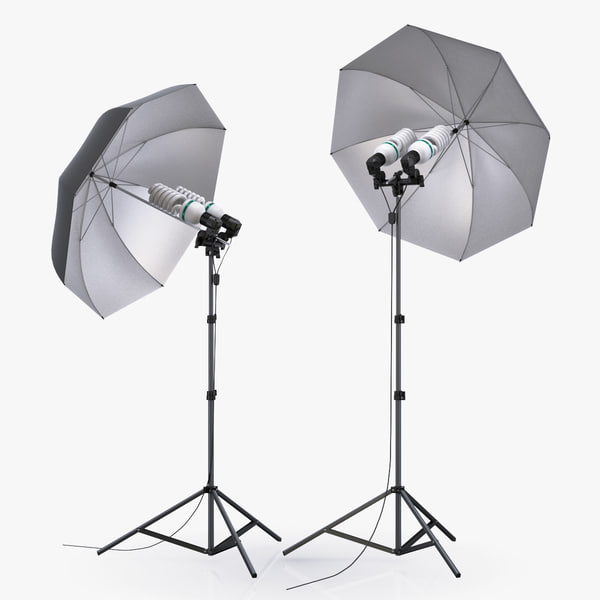 At the same time, the concept remained unchanged - the light is restrained, reflected from the walls inside the case, and scattered through a translucent white panel. This creates lighting that has long been prized by photographers and videographers - as mentioned above, the softbox creates a soft light, reminiscent of natural light from a window.
Although softboxes come in a variety of sizes and shapes, they generally provide better diffused light than umbrellas, and allow you to adjust the amount of diffusion to suit your needs. Softboxes are available with a removable front diffuser panel or with the ability to attach accessories such as honeycombs to give you more control over your lighting.
The softbox can be attached either directly to the flash (with Velcro, on a gel base with an elastic band or with a special adapter) or on a separate stand using a bracket. It depends on the size - small units can be mounted directly on the camera flash, while larger models require a separate mount.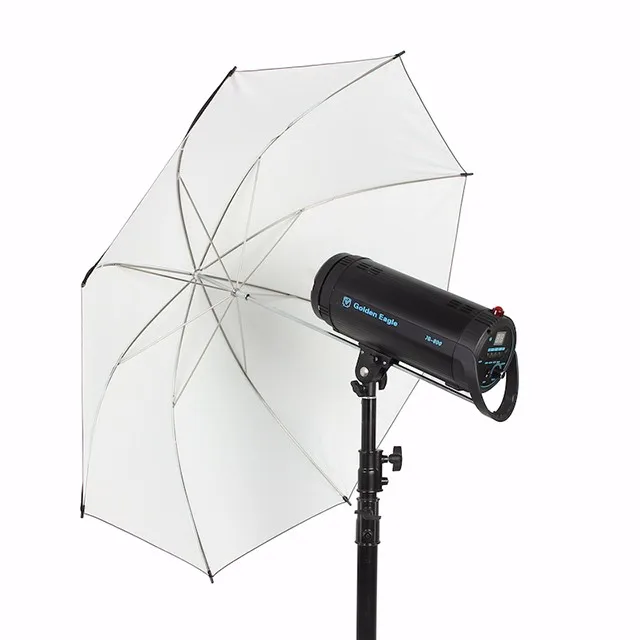 In the second case, the flash is attached to a softbox, which in turn is mounted on a stand. It is attached either to the shoe or to the head.
As in umbrellas, softboxes use different types of inner surface - white or silver, which somewhat changes the quality of lighting. The silver fabric gives a little more contrast, and the white lining works well for keeping the neutral colors.
Different types of softboxes come in different sizes and shapes. Choosing the size of a softbox depends on how much light coverage you need for your subject, as well as the quality of that light. In general, you shouldn't use a 30 x 40 cm softbox for a full-length portrait, just as you shouldn't use a large softbox for a shoulder-length portrait. On the other hand, it must be taken into account that the quality of light also depends on the size. The larger the light source, the softer the light will be, the beam will be wider, and therefore the coverage will increase.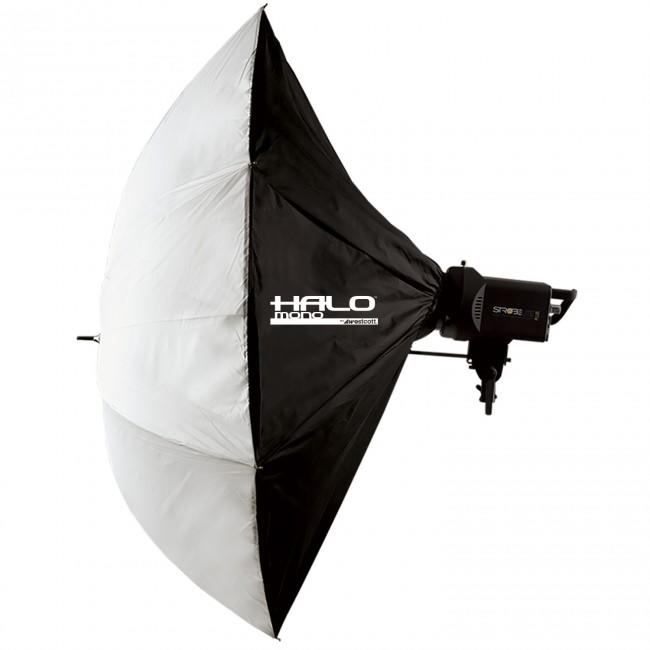 And the closer you move the softbox to the subject, the softer the light becomes.
Shape is another important characteristic of a softbox. Rectangular are exactly the devices that people usually think of when they imagine a softbox. Longer on one side, they are great for full-length portraits and vertical compositions in general. A device of this shape casts window-shaped glare on reflective surfaces of objects, however, in the eyes of the model in a portrait shot, they do not look perfect.
Raylab SPG6090 Rectangular SoftboxRaylab SPG609 Rectangular Softbox0 60cm x 90cm is used for flashlights with Bowens mount. The design uses an additional honeycomb attachment that narrows the light beam while maintaining its softness. We will talk about honeycombs and their use below.
Raylab SPG6060 Square Softbox Square softboxes are a studio favourite, as this shape works well with most subjects, although it does come with a few downsides: full-length shots are more difficult and their highlights look more like an elongated rectangle.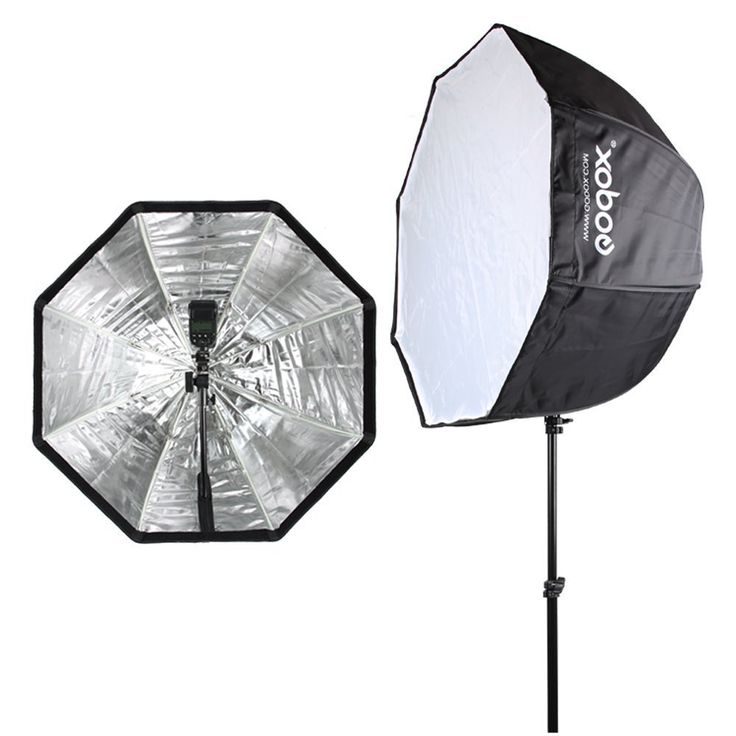 Square softboxes like Raylab SPG6060 are good for studios with low ceilings (including home ones), their shape is ideal for shoulder-length portraits, as well as small group shots.
Very long rectangular softboxes stretched along one side are called stripboxes - they help to get less intense shadows than a square softbox. While rectangular models have an aspect ratio of around 1:1.3, strips have an aspect ratio of around 1:4, making them great for illuminating edges and silhouettes, effectively separating the subject from the background. They are also sometimes used as an additional source for lighting the model's hair. This shape is also useful for lighting the background from above or below. In addition, stripboxes create long, elegant highlights on reflective surfaces.
The Raylab SPG35140 and SPG30120 strips, as well as the Raylab SPG6090 rectangular, come with a honeycomb attachment that attaches with Velcro and attaches with a Bowens mount.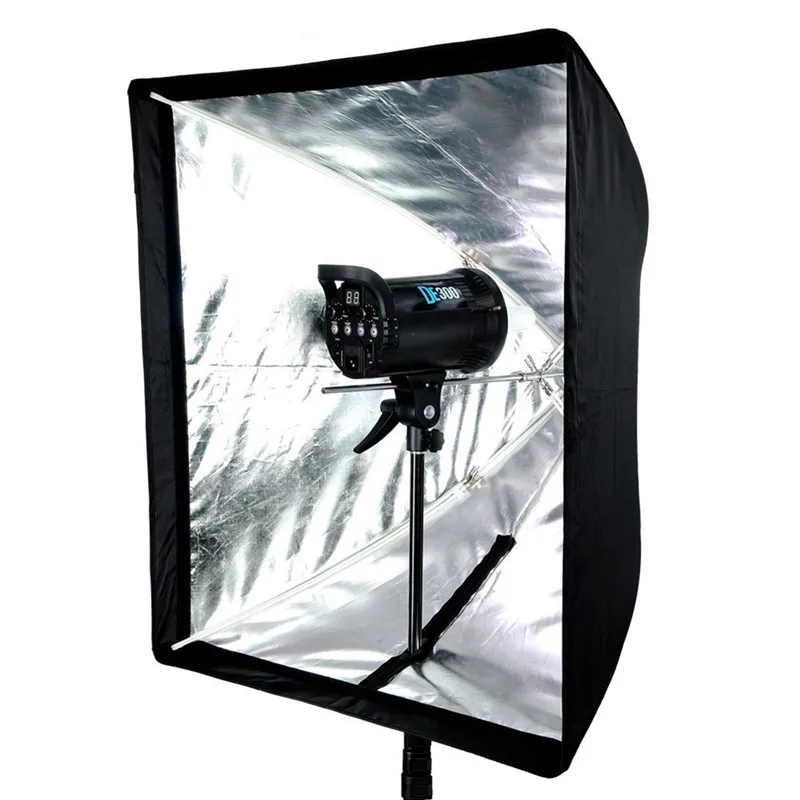
Octagonal (octagonal) softboxes have become popular due to the soft, streamlined light they create. It is octoboxes that, perhaps, allow you to get the best natural round highlights in the eyes of the model, while, unlike an umbrella, without visible spokes / frames.
Raylab SPG120 and SPG150 Octoboxes (120cm and 150cm respectively) include reflector, UV coated outer and inner diffuser, bayonet shank and honeycomb. These octoboxes effectively soften shadows and also provide an even light output.
Octobox Honeycomb
As for the honeycomb (fabric grid that is mounted on the softbox), they allow you to narrow the size of the light spot, while maintaining the characteristic softness of the light and suitable contrast. They sharpen the edges of the light, making it easier to control the direction of the light. When used in the main light, the honeycomb beautifully highlights the object from the background.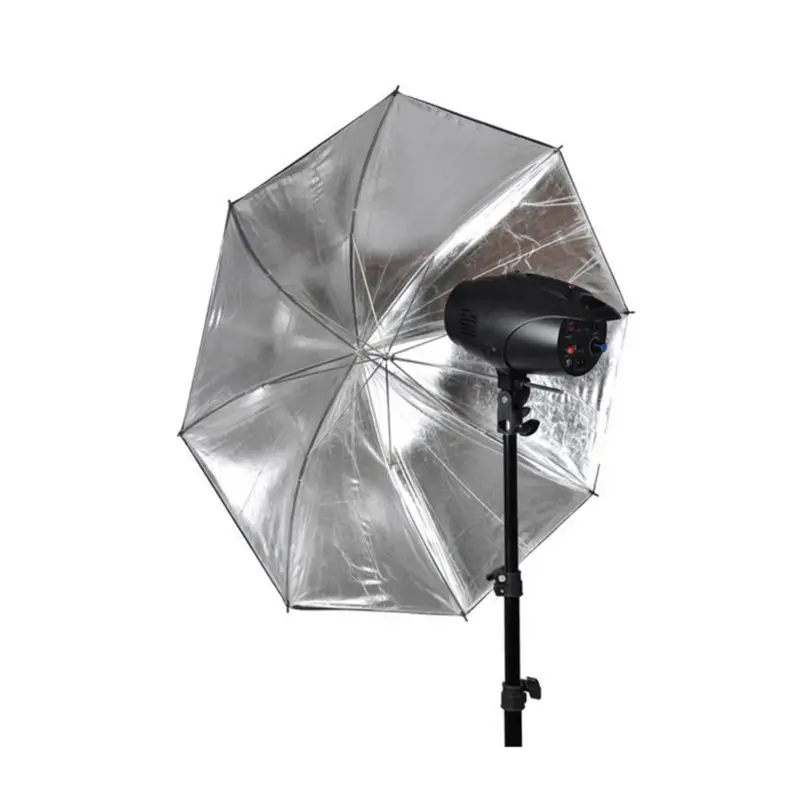
Another tool for controlling the light output is the reflector. This is a flash attachment designed to limit the light flux in an angle and create a concentrated beam of light. Often they are used in combination with curtains, honeycombs and filters.
There are several main types of reflectors. Umbrella reflectors are the most common - they are used together with umbrellas, eliminating stray light and effectively directing the light flux into the umbrella. The main advantages of such a kit are compactness and low price.
Standard reflector Falcon Eyes R-175 BW Standard reflectors can work as a stand-alone unit without an umbrella, creating a hard directional light with harsh shadows. Filters, honeycombs (for example, a set of Raylab FA006 honeycomb nozzles) and curtains (like Falcon Eyes BD-205) can be installed on standard reflectors, which allow you to further modify the luminous flux for specific tasks. When purchasing additional accessories, the diameter of the reflector must be taken into account.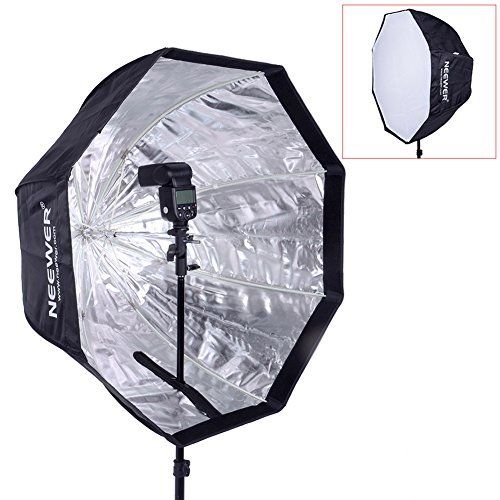
Backlight reflectors are specially designed for backlighting in a studio or other location. They provide uniform illumination of the background, and also exclude light from entering the camera lens.
Beauty dish Falcon Eyes SSA-SRB42There is also a special type of reflector - a beauty dish, which is a modification of the standard reflector with a large diameter and an additional part (baffle) that distributes the beams from the flash, going straight, over the entire area of \u200b\u200bthe device . As you might guess from the name, beauty dishes (or as they are also called, soft reflectors) are most often used for shooting portraits, as well as for advertising photo shoots.
Finally, one of the simplest yet most effective light control accessories, which is particularly recommended for beginner photographers, is the reflector. It is used to bounce the light coming from a source onto the subject - a well-placed reflector can greatly improve the quality of a photo.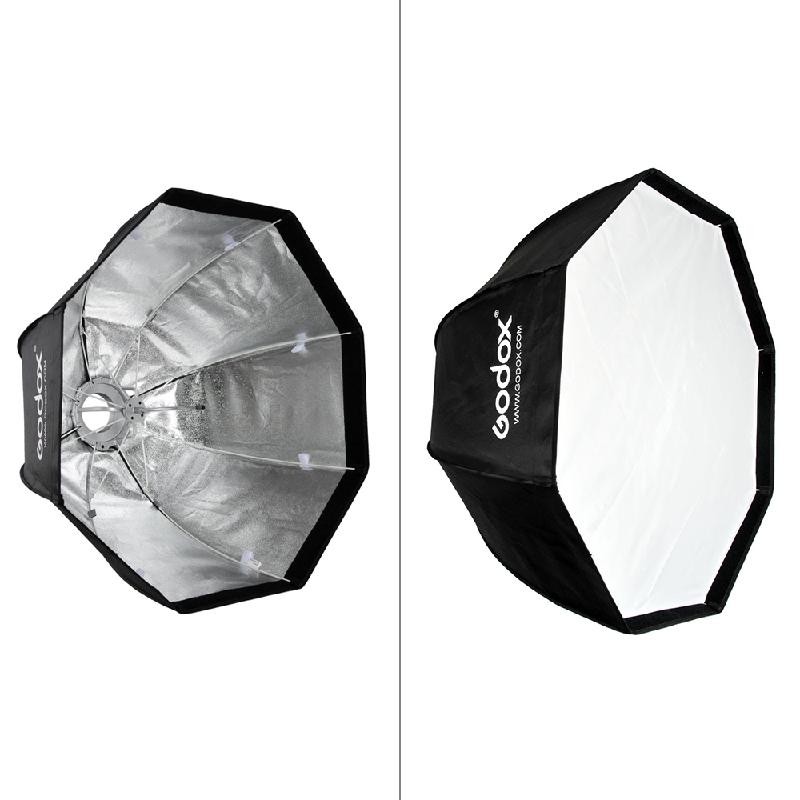
Using a reflector in natural light. Source: digitalcameraworld.com
It's inexpensive (especially by camera standards) yet remarkably versatile. Reflectors come in a variety of shapes and sizes, from 2m rectangular models to compact 30cm discs. Compact reflectors are used for shooting shoulder-length portraits or highlighting small objects. Meter - for shooting a model to the waist. Large rectangular reflectors are suitable for full-length portraits and shooting large objects.
Flexible frame folding reflectors can be folded neatly to accurately reflect the light onto the object. Reflectors allow you to work effectively with natural light sources - one or two reflectors can be much more convenient to transport than a whole set of lighting fixtures.
When choosing a reflector, you need to pay attention to two main characteristics: color and shape. Today you can find many types of reflective surfaces, among them white, silver and gold are most common. If you want the hardest light, silver is fine, for a softer effect, white, and for warm light, gold.
Round reflectors are the most commonly used and are especially good for portraits as they create nice round highlights in the model's eyes. Rectangular reflectors are used for larger objects that require increased light coverage.
Raylab RF-01 in gold and silver finishesThe Raylab RF-01 reflector is available in both round and rectangular shapes, with two reflectors: silver for bright hard reflected light and gold for a warm tint.
When working without an assistant, you may need stands that allow you to set the modifier at the desired distance and adjust the light output yourself. Another solution is to use a triflector, which provides a more comfortable grip, unless, of course, it is difficult for you to shoot with one hand.
Some reflectors use a flexible frame with translucent fabric as a base support and a set of several reflective surfaces in different colors that can be used to modify the lighting. The translucent material can be used as a diffuser to reduce brightness and soften the light. In the studio, such kits are also useful for reflecting and scattering artificial lights, as well as blocking out and modifying ambient lighting.
Thus, the Raylab RF-05 5-in-1 round reflector consists of an elastic frame covered with a translucent diffuser, complete with four light-modifying surfaces. The white reflector is used to illuminate the shadow side of the object and does not change the color temperature, the silver reflector is used for brighter hard reflected light. The gold reflector also provides intense light but with a warmer tone, while the soft gold modifier is similar to gold but produces a softer light. The black side of the reflector is used to exclude the object from the light zone and add shadows.
Summary
Source: profoto.com The right use of lighting can take your work to a whole new level.