Diy photography backdrop stands
DIY Backdrop Stand for Photography, Weddings, and Paper Flower Walls
Learn how to make a DIY backdrop stand that meets your needs from start to finish!Whether you’re a photographer, a party planner, or home decorator, sometimes you just need an easy and sturdy backdrop stand! You can make these yourself from either PVC pipes or wood and in virtually any dimensions you need. I’ve made a PVC pipe stand that is 8 feet wide by 7 feet tall, as well as a wood backdrop stand that is 8 feet wide by 8 feet tall. Both can breakdown for easy transport, too! I used my wood backdrop stand to support my large paper flower backdrop and it does a marvelous job, but you can also use these backdrop stands for product shoots, portrait photos, and even studio lighting! I can show you how to make a backdrop stand for photography, weddings, graduations, and more with my tutorial.
Here is the 8’x7′ PVC pipe backdrop stand that is perfect for lightweight things, such as fabric curtains and photography backdrops. The PVC version is a lightweight stand that is arguably the most easy DIY backdrop stand to make! And the best part is that you get an adjustable width and height simply by using a different length of PVC pipe. Need a banner stand? Just shorten the width of the horizontal PVC pipes and you’ve got one with little effort.
And here is the 8’x8′ wood backdrop stand that is more stable and better suited toward heavier things like the panels of a paper flower wall. The wood version is very heavy duty and is perfect for our studio work. We came up with an ingenious design with a built-in locking mechanism for this wood backdrop — this is an original design for our own DIY backdrop.
Here is how I used my wood DIY backdrop stand to hold my paper flower wall — it’s strong, stable, and looks amazing! This is my new backdrop to use in my photos and videos!
These DIY backdrop stands are great with fabric backdrops for photo shoots in both a home studio or photo studio. Either stand can be made at different sizes and will accommodate a cloth backdrop or something more substantial. I made both of mine eight feet wide, as I feel a wide backdrop is a lot easier to take photos and videos in front of.
The PVC Backdrop stand can accommodate a curtain or curtain hooks on its top pipe. To put up a curtain or hang things like 9-foot rolls of seamless paper on the wood backdrop stand, you’ll want to use strong clamps at the top for the best results.
Now the question you may have is — which backdrop stand is better? The PVC pipe version is an excellent choice for those short on time and money — it’s a great, portable backdrop for amateur photographers and DIY photo booths. The wood backdrop stand’s construction, on the other hand, is good news for anyone concerned about stability — the wood version has a strong base that accommodates heavier backdrops and is easier to weigh or stakedown as necessary.
Either backdrop stand version can be made with basic tools from your local hardware store — like a PVC cutter or a handsaw — in a few simple steps.
Ready to make a DIY backdrop stand using my plans? It’s easier than you think! This post contains some affiliate links for your convenience (which means if you make a purchase after clicking a link I will earn a small commission but it won’t cost you a penny more)! Read my full disclosure policy.
Quick Links to Information in this Post
How to Make a DIY Backdrop Stand from PVC Pipes
Materials
- Four (4) 1" diameter 120" long PVC Pipes, cut to size (see sizes below) — the higher the tensile strength and PSI, the stronger your backdrop will be
- Two (2) PVC 90 Degree Slip Elbows for 1" pipes
- Four (4) PVC 90 Degree Tee Connectors for 1" pipes
- Four (4) PVC Caps for 1" pipes
Tools
- PVC Cutter
- Rubber mallet
Instructions
STEP ONE: Cut Your PVC Pipes
Cut your 120" long PVC pipes to the following lengths using a PVC cutter:
2 - 74" long pipes (for the top uprights)
2 - 3" long pipes (for the bottom uprights)
2 - 92" long pipes (for the top and bottom horizontal pieces)
4 - 24" long pipes (for the bottom base pieces)
STEP TWO: Connect Your PVC Pipes to Make a Backdrop Stand
Push the four caps on the ends of the four 24" long PVC pipes.
Push the other end of the 24" long PVC pipes into the sides of a Tee connector. Tap with a mallet to get it into the connector snugly. Repeat for all four 24" long PVC pipes until you have two bases.
Push the 3" long PVC pipes into the tops of the two Tee connectors attached to your bases.
Push another Tee connector onto the other end of the 3" PVC pipe, but this time it should go in the other way. Again, tap with a rubber mallet to make sure everything is as tight as can be.
STEP THREE: Assemble Your PVC Backdrop Stand
Place your two bases on the floor or ground about 8' apart.
Place your 74" long pipes and 92" long pipes, along with the two elbows near the bases.
Push a 92" long PVC pipe into the empty slot of one of the Tee connectors on the backdrop stand base.
Be sure to tap it firmly into place with a rubber mallet.
Repeat with the other end of the 92" long PVC pipe, connecting it to the other base.
If you want to thread a curtain onto the top of your PVC pipe, this is a great time to do it.
Push the two elbow pieces onto the end of the other 92" long PVC pipe.
Attach the two 74" long pipes to the elbow pieces of the 92" long PVC pipe you just assembled.
This next step will work best with a helper.
Push the ends of the 74" long PVC pipes firmly into the Tee connectors on your base. I recommend holding the base down with your foot while you push it down.
Make sure everything is really firmly in place and enjoy!
Notes
The finished size of the PVC Pipe Backdrop Stand in this tutorial is 7' high by 8' wide.
You can make the backdrop stand more stable by making sure all pipes are push down as far as they will go and then weighting it down with sandbags.
This frame can be disassembled into a bundle for transport!
How to Make a DIY Backdrop Stand from Wood
Materials
- Four (4) 2" x 4" x 8' long studs
- Three (3) 2" x 3" x 8' long studs
- 4-6 carriage bolts (3/8" x 5" long)
- 4-6 3/8" washers
- 4-6 3/8" wingnuts
- Six (6) - 3 1/2" wide hinges (we used security door hinges)
- (Optional) Stakes or sandbags to keep your backdrop stand in place in windy conditions or unstable ground)
Tools
- A way to cut the wood (such as a handsaw or jigsaw)
- Metal triangle square
- Tape measure
- Drill
- 3/8" Speedbor Drill Bit
- Safety equipment (gloves, eye protection)
- Pliers -or- nail & hammer (to remove hinge pin)
- Pencil
- Rubber mallet
Instructions
STEP ONE: CUT YOUR BACKDROP STAND WOOD
Gather your materials and tools.
Don't forget your six 3.5" hinges and their included screws -- these are the "secret sauce" for this breakdown wood stand.
Measure and mark two (2) 2x4 studs at their halfpoint, which should be 48".
Cut the two (2) 2x4 studs you marked in half with a saw (you can use a handsaw or a bandsaw). These two cuts are the ONLY cuts you need to make.
This leaves you with two (2) 8' long 2x4 boards and four (4) 4' long 2x4 boards, along with your three (3) 8' long 2x3 boards which did not need any cuts.
STEP TWO: ATTACH BASE & SUPPORT BOARDS
Take two of the 4' boards (support board) and and attach a hinge with the included screws to connect them end to end.
Ensure your boards are placed far enough away from one another that you can fold the two boards so that they lie flat against one another.
Repeat for the other two 4' boards.
Mark 12" from the end of the two of your attached 4' long 2x4 boards. These are your base boards.
Take a close look at your hinges. Here are the parts labelled.
Dismantle four of the hinges by removing the pin with pliers or a hammer and nail. To use pliers, get a firm grip on the pin end and work it out. To use a hammer and nail, fold the hinge closed, place it on the end of a board so that the knuckle overhangs it, insert a nail into the knuckle hole, and hit it with a hammer.
Attach one half of a dismantled hinge with three knuckles parallel to the marked line on your 4' long board with the included screws. Position the hinge so that the knuckle end is against the marked line, oriented so that the screw holes are toward the longer end of the board.
Repeat this for the other set of 4' long boards that are hinged together.
Here's what your boards should look like now, along with the names we'll be using for each part from here on out:
Attach one half of another dismantled hinge with three knuckles to the end of the support board. Repeat for the other support board.
Here's what your boards should look like now:
STEP THREE: PREPARE UPRIGHT BOARDS
Attach the other half of the dissembled hinge with two knuckles on the very end of an 8' 2"x4" upright board, so that the knuckles are flush with the bottom of the board.
Repeat for the other 8' 2"x4" upright board so your boards look like this:
Put one 8' board on top of one of your base boards, butted up against the hinge. It should be a perfect angle of 90°.
We used a square to make sure the angle was correct. You can do this step with your 8' board standing vertically (with a helper) or with everything laying on its side, but you must make sure this is square.
Slide the hinge pin back through the knuckles of the two hinge leafs.
Repeat the above steps for the other upright board.
Swing up the end of the support board until it rests against the upright board.
Get a disassembled hinge leaf with two knuckles and fit it into the hinge leaf at the end of the support board.
Screw the hinge leaf to the upright board. Repeat for the other upright board.
STEP FOUR: PREPARE HORIZONTAL BOARDS
Remove the pins connecting the upright boards to the baseboards. Fold the baseboard and support boards closed and set aside.
Using your 3/8 drill bit, drill one hole 1.5" from the top of the upright board. Repeat for the other upright.
Drill a second hole 1.5" above the hinge ot the bottom of the upright board. Repeat for the other upright.
Drill a third hole 1.5" above the hinge in the middle of the upright. Repeat for the other upright board. Here are all locations of the three holes:
Using your 3/8 drill bit, drill holes 2" in from either end of your 2"x3" horizontal boards.
Note: You can have more horizontal boards if you want -- these horizontal boards help prevent the DIY backdrop stand from twisting. But I only used three -- one at the top, one at the bottom, and one in the middle.
STEP FIVE: ASSEMBLE YOUR BACKDROP STAND
Note: This step works best with two people. It is possible for a tall person (like Greg) to set this up alone, but it's awkward to do. It's safer and easier to have two people for assembly.
Slot the upright boards' hinge knuckles into the baseboards' hinge knuckles and insert the pins.
Swing up the support assembly boards so that the two hinge leaf knuckles meet and insert the pins. They should be able to stand unsupported now.
Insert a carriage bolt through the bottom of the baseboard so the bolt thread is facing up on both support assemblies.
Take a 2"x3" horizontal board, and insert its ends through the bolts on either end of the stand, connecting the support assemblies. Thump the carriage bolts with a rubber mallet to recess them into the wood, which keeps the bolt from freely rotating in the frame.
Put a washer and wingnut on each of the carriage bolts, and tighten firmly. Once this is done, the entire backdrop stand should be freestanding.
Insert two more carriage bolts through the ends of another 2x3 horizontal board. Take this horizontal board and insert the protruding bolt ends through the holes you drilled above the upper hinges of the upright boards. Put a washer and wingnut on each of the carriage bolts, and tighten firmly.
Insert the last two carriage bolts through the ends of the last 2x3 horizontal board. Take this horizontal board and insert the protruding bolt ends through the holes you drilled at the top of the upright boards. Put a washer and wingnut on each of the carriage bolts, and tighten firmly.
And that's it -- your DIY backdrop stand is assembled.
STEP SIX: ENJOY YOUR DIY BACKDROP STAND
Your backdrop stand can be weighted down with sandbags or even a cinderblock. Or you can stake it down with rope and long railroad nails. We did not need to do this.
You can hang things from this stand -- it should be able to support at least 100 lbs., and could probably handle more than that. We used our stand to hold a paper flower wall which weighed about 66 pound and it had no problems.
For transport, you can break this backdrop stand down by removing the hinge pins where the baseboard connects with the upright boards and where it connects with the middle horizontal board (total of four hinge pins). You do not have to separate the baseboard from the supports, as they just fold down, so don't remove those hinge pins. Once everything is bundled up, you can use bungee cords or shrink wrap to keep it all together for easier transport. I recommend putting the hinge pins in a bag so you don't lose them during transport.
Notes
Finished backdrop stand size is 8' wide by 8' tall
Questions About Making a DIY Backdrop Stand
Can you put these backdrops in a carrying bag?
Neither of these break down short enough to go into any standard carrying bag. If you need a backdrop stand that breaks down that small, go for a professional backdrop stand with adjustable height — here is what I think is one of the best backdrop stands on Amazon. There are some more high-end models, but this one is a good price and well reviewed.
What’s the best backdrop stand for a fabric backdrop?
You can hang fabric from the PVC pipe backdrop stand a little easier, and if your fabric is sheer, it tends to look a little better as there is no distracting cross brace.
How do you keep your backdrop stand from falling over outside?
This is a very real concern, as the PVC pipe version WILL fall over with even a slight breeze (the wood version should fare much better with it’s heavier, stronger base). To keep a backstand stand stable, put sandbags on the legs. Alternatively, you can tie rope to the sides and stake it down. If you’re using the wood backdrop stand, you can drill holes at the ends of the base and hammer a 12″ long railroad nail through the hole in the wood and into the ground to keep it in place.
How do you make a flower wall backdrop?
There are many ways to make a photo backdrop for weddings, baby showers, bridal shower, birthday party, prom, or other special events, but I believe my paper flower backdrop wall tutorial is is easiest, most straight-forward way to go. I show you how to prepare the free flower design files, share tips for cutting the flowers fast, and tell you how to hang them all up together onto your DIY backdrop stand no matter your location.
Get my instant download digital files for my free paper flower backdrop designs!
I’d love to see your DIY backdrop stand projects and what you’re doing with them! If you make a DIY backdrop frame, please share a photo in our Facebook group, email it to me at [email protected], or tag me on social media with #jennifermaker.
Love,
Want to remember this? Save the DIY Backdrop Stand Tutorial to your favorite Pinterest Board
How to Make Your Own DIY Backdrop Stand
By Taya IvanovaA- A+
Download as PDF
Subscribe Below to Download the Article Immediately
You can also select your interests for free access to our premium training:
Business Basics
Cheat Sheets
Child Photography
Colorful Cityscapes
Composition
Creative Photography
Creative Portrait Concepts
Digital Photo Collages
Fairytale Portrait Photography
Food Photography
Interior Photography
Landscape Editing
Landscape Photography
Lightroom Processing
Lightroom Presets
Long Exposure
Macro Photography
Milky Way Photography
My Camera and Photography
Organic Marketing
Pets
Product Photography
Sky Photography
Social Media
Still Life
Time-Lapse Photography
Travel Photography
Urban Photography
Wildlife Photography
Your privacy is safe. I will never share your information.
 A DIY backdrop stand can let you take creative photos of people and products in the comfort of your own home.
Photo backdrop stands are relatively cheap to make and are very easy to assemble. Read on to find out how you can make your own DIY backdrop stand!
Image via Etsy/FunOnAStickMaterials and Measurements for Your DIY Backdrop Stand
To build your DIY photo backdrop stand, you will need PVC pipes. You will be able to buy these from any hardware store.
- Four T-pipes (Non-threaded)
- Six elbow pipes (Non-threaded)
- Four 1-metre pipes
- Four 50 cm pipes
- Two 2.5-metre pipes
The materials above will create a large backdrop frame that’s almost as tall as an average wall. If this isn’t what you’re looking for, you can use a shorter PVC pipe.
Something that’s half as large as the backdrop will be enough for still life and portrait photography photos. The measurements for that would be:
- Four 50cmm pipes
- Four 25cm pipes
- Two 1.
 25-metre pipes
You might not be able to find a PVC pipe with these specific lengths. In this case, you can buy a PVC cutter and make accurate cuts at home.
Image via Pinterest/Jennadesigns1. Create a Strong Base for Your DIY Photo Backdrop Stand
The first step is to assemble the legs. Your backdrop’s legs can’t be shaky or flexible.
When you look for PVC pipes, make sure they’re not wobbly. The first ones I used seemed sturdy at first, but they ended up wobbling and falling apart. Don’t make the same mistake!
To assemble the legs, you’ll need the following tools:
- Four elbow pipes
- Two T-pipes
- Four 50cm pipes
- Two 1-metre pipes
Take one T-pipe and place two of the 50cm pipes on either end, so they are parallel to each other. Repeat this with the other T-pipe and 50cm pieces.
Then add the elbow pipes to the open end of the 50cm pipes to form feet, for extra stability.
Next, you will need to place the 1m pipes into the remaining open end of the T-pipes.
You should now have two T-shaped legs.
Image via thebudgetsavvybride.com2. Attach the 2.5m Pipe to Two T-Pipes to Create a Balanced Middle
Place two T-pipes on top of the 1-metre pipes (your backdrop’s legs). Then, attach one 2.5-metre pipe to the horizontal T-pipe ends.
This structure will strengthen the backdrop’s legs and create a balance. Without the middle PVC pipe, your backdrop stand will fall apart.
Image via http://socialwiki.ru/3. Create the Top Part of Your Backdrop Stand by Using the Remaining 5 Tools
You’ll use the top part of your backdrop stand as a hanger for backgrounds. You’ll need:
- Two 1-metre pipes
- Two elbow pipes
- One 2.5-metre pipe
Put the remaining 1-metre pipes on top f the T-pipes. Attach one elbow pipe on each side. Finally, attach a 2.5-metre pipe to both elbow pipes.
You can use this drawing as reference for the entire backdrop stand:
Image via http://socialwiki.ru/4.
 Hang Your Background Fabric Over the Top Pipe to Create a Mini Studio
You’re almost done! All you need to do is hang a large piece of fabric over the highest part of the backdrop stand.
To make sure that your background doesn’t slide off the pipe, you can use pegs or binder clips.
If you simply hang your background over the stand, it might move around too much. This movement might not be a problem in casual photoshoots. If you’re shooting professionally, this might be a big obstacle.
When you hang the fabric over the pipe, leave a little piece behind it. Then, clip the remaining fabric to the one in front of it. Make sure you do this under the pipe, not on top of it.
Do this on both sides of the pipe to keep everything in place.
Image via thebudgetsavvybride.comHandy Tips for Using Your DIY Backdrop Stand
Save Space and Time by Avoiding Hot Glue
A backdrop stand with the measurements above will be huge and will take up a lot of space. You’ll find it much easier to disassemble everything every time you finish taking photos.
You should use hot glue only if you use smaller measurements or if you have a storage space where your backdrop won’t get in the way.
If you make a relatively small backdrop stand, you should probably use hot glue.
Experiment With Different DIY Backgrounds to Boost Your Creativity
You don’t need to use professional fabric for your photoshoots. Unless you’re working for a client that asked you to use a specific type of material, feel free to experiment with what you have.
Experimenting will improve your creativity and give you lots of exciting photo opportunities.
You can use materials like curtains, bedsheets, and even large sheets of paper. If you enjoy drawing or painting, you can make custom backdrops for your stand.
Custom backgrounds are also perfect for family and wedding photoshoots. You can write something personal to your models so that your photos look unique.
Combine Ironed and Textured Backgrounds to Keep Your Photos Interesting
When you take professional studio photos of people and products, your background needs to look fresh. You should iron the background material before the shoot to get rid of wrinkles. Also, use a lint roller to remove dust and fur.
If your photo shoot is a little more creative, you can experiment with textured backgrounds. These are great for fine art photography and conceptual photography.
The background in the picture below might look fancy, but it’s actually a huge bedsheet! I hung it over my backdrop stand and posed in front of a large window. It was cloudy outside, so the light ended up soft and even.
Don’t Use Your DIY Backdrop Stand Outside to Avoid Accidents
Using a DIY backdrop outside can be problematic. Unless your PVC pipes are extra sturdy, they’ll probably fall apart on a windy day.
For the best results, use your backdrop stand in a large room with lots of space. You should be able to walk around and experiment with different angles.
Use Natural Light to Enhance Your Background Stand Photography
If you don’t have artificial light, place your DIY backdrop stand next to a large window.
The sunnier it is outside, the more effective your results will be. If needed, use curtains to soften the light. Place your subject right in front of the window for a soft look.
For something moodier, you can change the position of the backdrop stand so that half of your subject is facing the window. This will add depth and mystery to your photos.
Common DIY Backdrop Stand Questions
What PVC Size Do I Need for a DIY Backdrop Stand?
The size of the PVC pipe depends on how large you want your stand to be. Generally, the diameter should be around 40mm.
Where Can I Buy a DIY Backdrop Stand?
You can buy everything you need for your DIY backdrop stand in your local plumbing supply store.
If you want to buy a new backdrop stand, you’re likely to find a lot of great deals on Amazon and eBay. Many of the backdrop stands there cost less than $20 and are easy to assemble.
Conclusion
DIY backdrop stands aren’t challenging to make and can provide you with many fantastic photo opportunities.
You can use professional backgrounds to take stunning studio photos. You can also experiment with curtains, blankets, paper, flowers and custom signs to give your photos a unique feel.
Invest a little bit of time and money in your DIY backdrop stand. You’ll be able to take creative photos, no matter where you are.
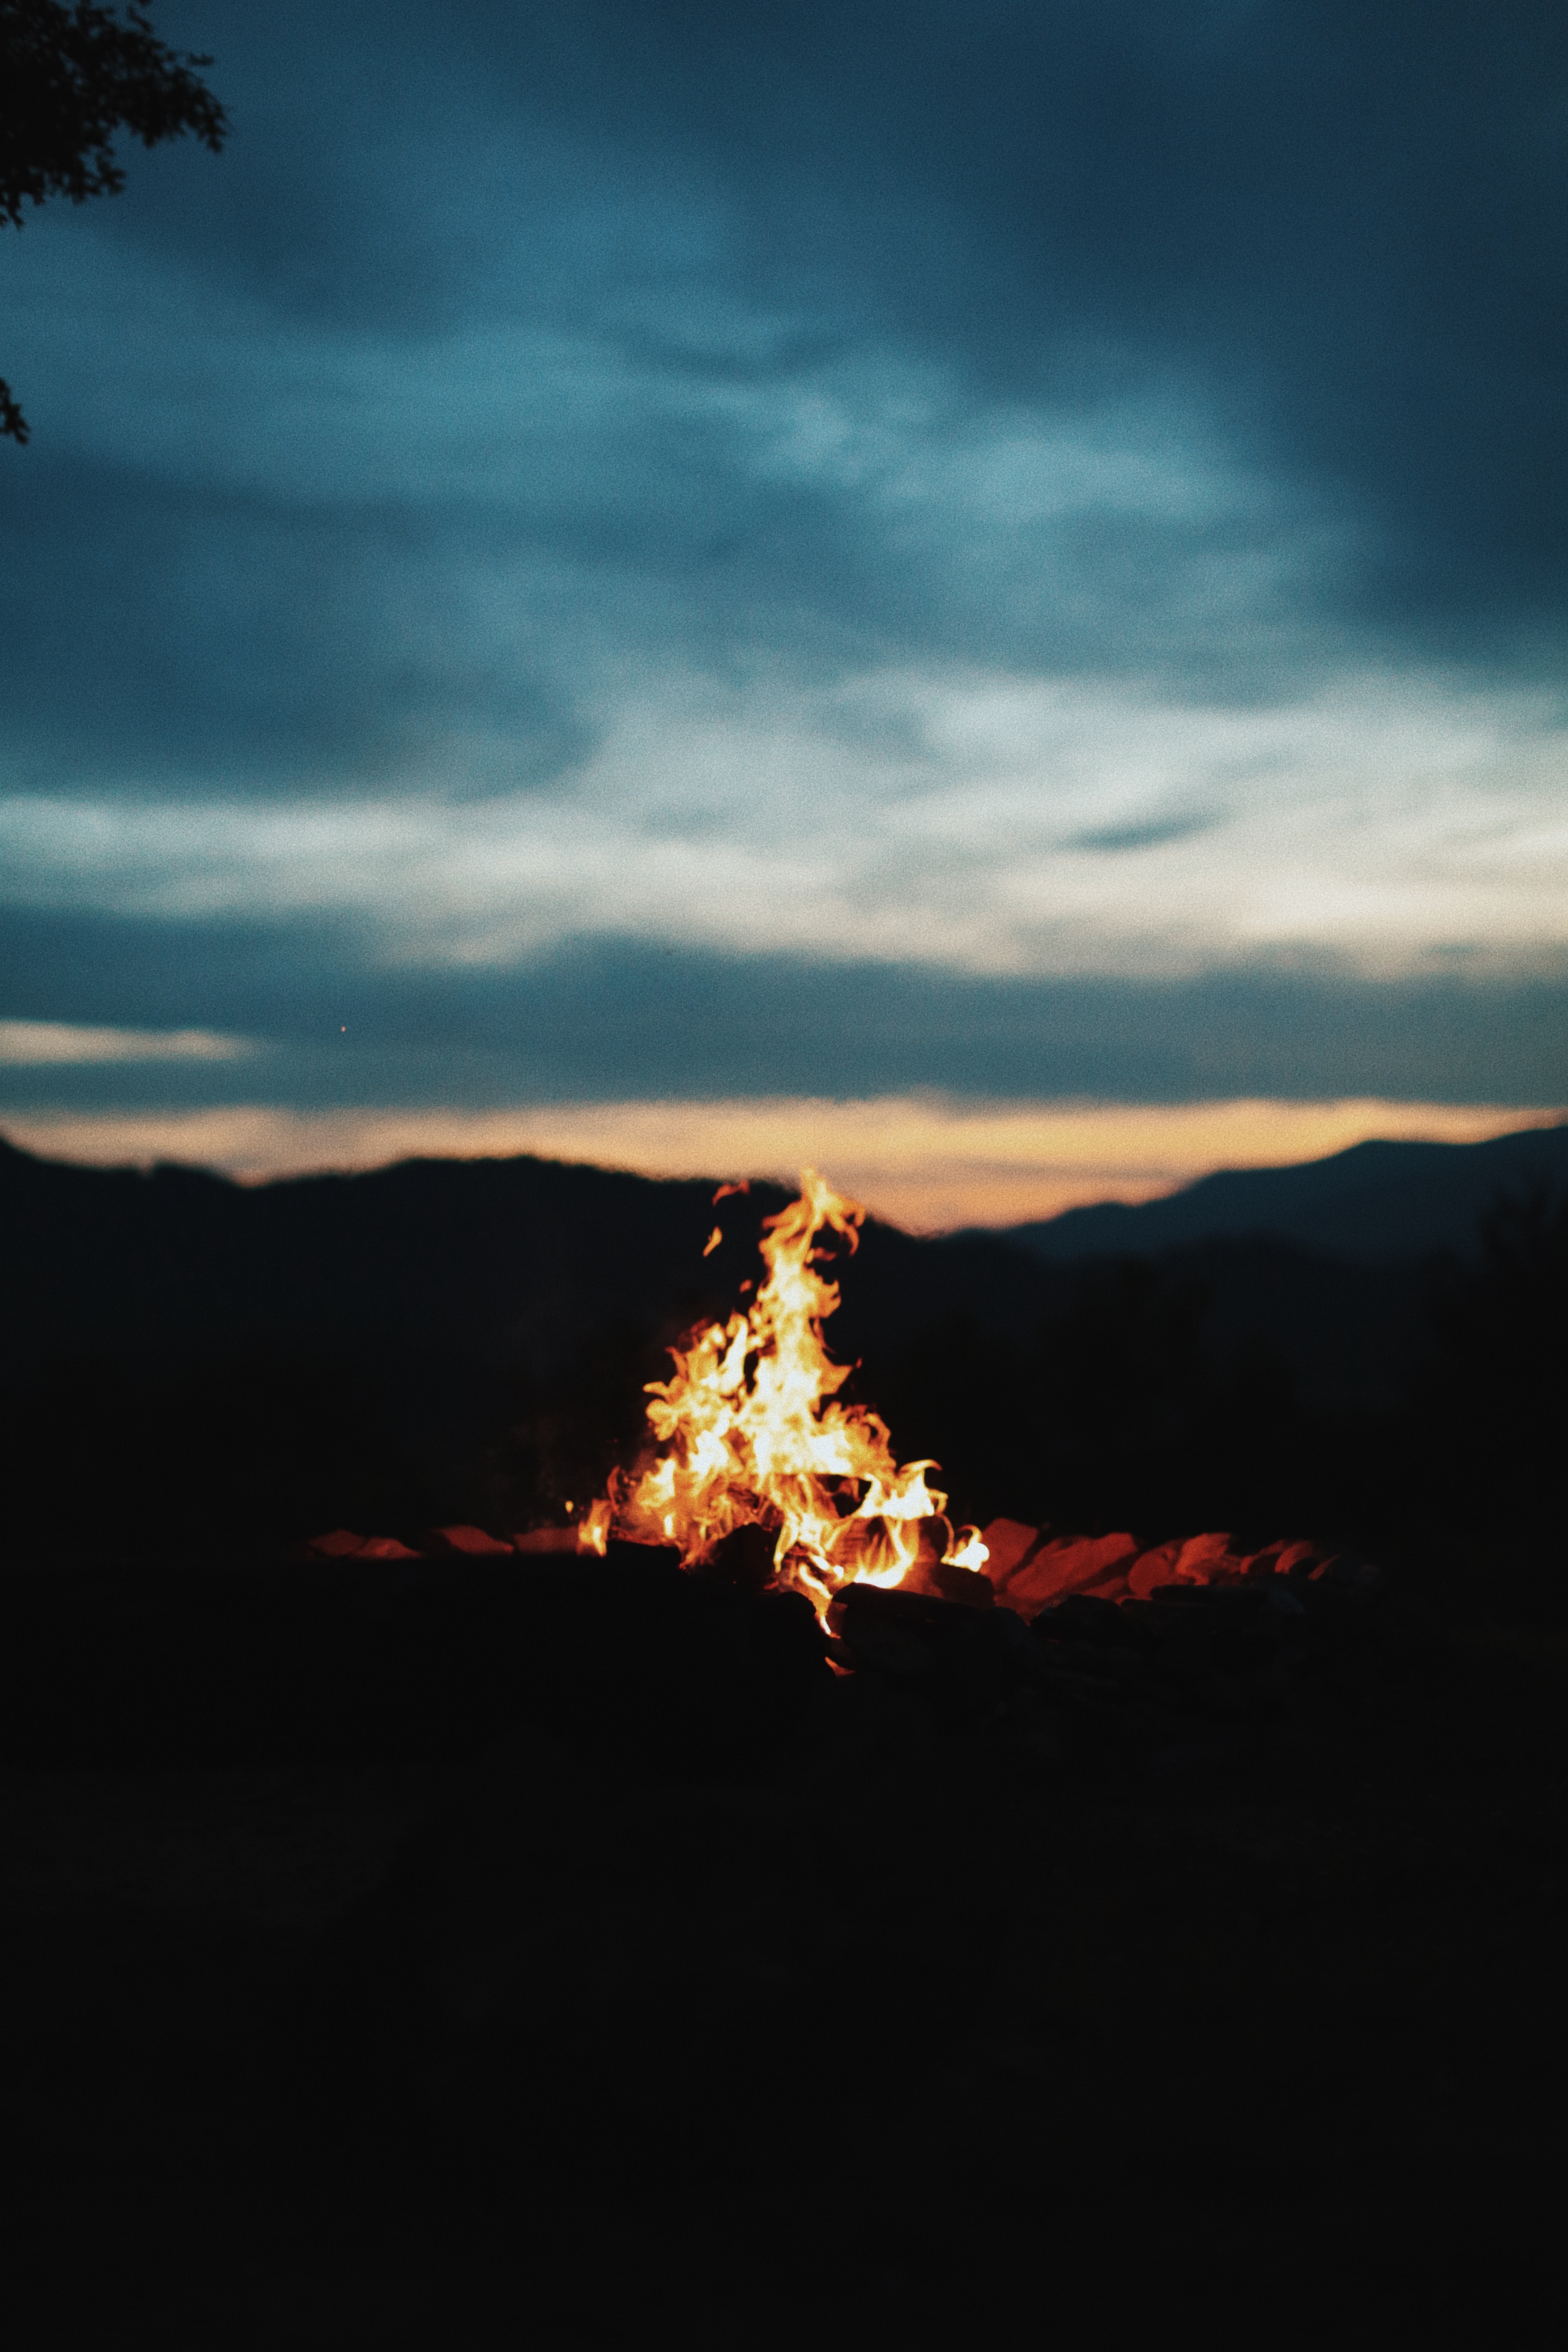
For more creative photography projects, check out how to make a DIY photo booth or our tutorial on shooting dark and moody flowers!
DIY stand - 71 photo ideas of original information stands
What is the stand for? This tool is designed to put important information in a way that is interesting and accessible.
Stands are placed in shopping centers, educational and other institutions. Currently, many companies are engaged in the manufacture of stands to order, but you can make it yourself, while choosing the most suitable material and size, as well as decently save money. nine0003
Contents
- How to choose the material for the stand?
- How to make a do-it-yourself information stand?
- Recommendations for making a stand
- Do-it-yourself stand: features and principles of manufacturing
- Photo of the idea of self-made information stands
How to choose the material for making the stand?
Cork is the most popular information board material. This material has a lot of positive characteristics and is suitable for use in institutions of any type. It is cork that is chosen for stands for kindergartens, as it is a safe and hypoallergenic material. We also note other advantages of the cork board:
- Moisture resistant;
- Durability, wear resistance, resistance to mechanical damage;
- Excellent impact retention;
- Resistant to chemical detergents;
- Fire resistance;
- Resistant to fungus and mold growth;
- Fairly long service life.

A thin sheet of plywood or fiberboard can be used to decorate the reverse side of the stand.
How to make a do-it-yourself information stand?
It is absolutely not necessary to have special knowledge and skills to build a stand on your own and add it to a room, a group in a kindergarten or a school class. In order for the product to harmoniously fit into the interior of the room, it is necessary to carefully consider its design. You can experiment both with the main shade and with the design of the stand design. As the main finishing material, you can use paint, fabric, self-adhesive film and much more. nine0003
For framing the stand, you can use a frame made of wood, plastic, aluminum, foam, cable channels, suitable in width, and so on.
The method of fastening must also be taken into account during production. For more convenient use, a suspended mounting method is recommended, since mounting with glue can cause a lot of inconvenience in the future.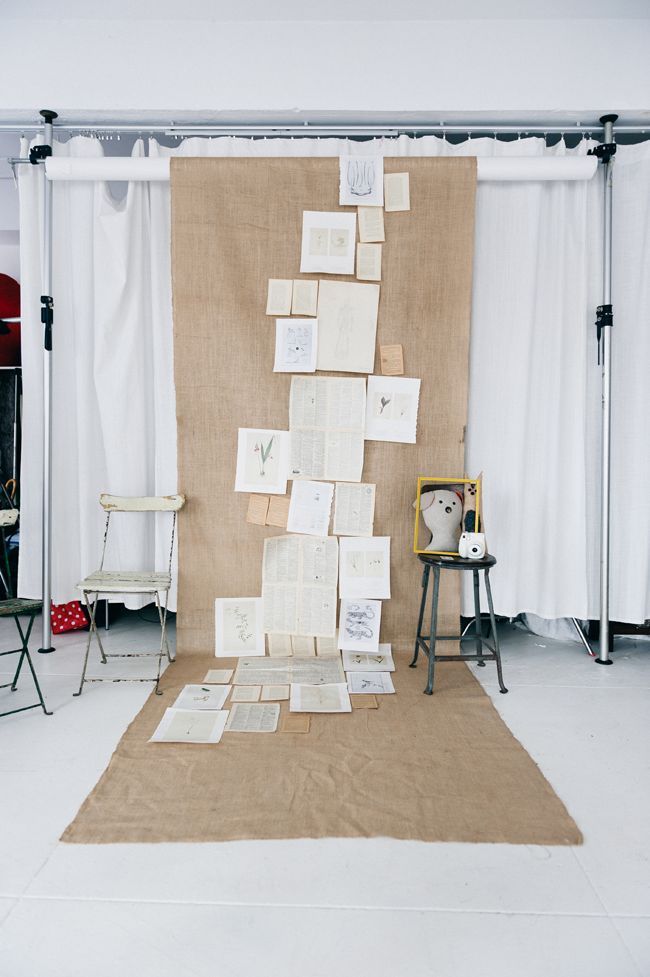
Recommendations for the manufacture of stand
- Choose the location of the structure responsibly. It should be well lit and accessible to the public. Try to visualize its location in the chosen place. nine0012
- A booth designed in bright colors will look much more interesting and attractive, but its main design should still match the style of the room.
- Take care of the reliability of fasteners in advance.
- Make sure you have all the necessary tools, including a sharp knife, before you start making.
- After choosing the location of the structure, determine its size and prepare the materials that will be needed for decoration. nine0012
DIY stand: features and principles of manufacturing
So, the first thing to start with is the basic design. After the size of the stand is determined, it is necessary to select a cork board and plywood of a suitable size and glue them together with glue or liquid nails. Next, the workpiece must be painted, covered with a cloth or film, and you can proceed to the design.
It is necessary to start the design of the structure with pockets in which sheets of information will be placed. For this purpose, you can use plexiglass of a suitable size or durable stationery files. The number of pockets can be absolutely anything. nine0003
Next, you need to define the theme of the design. This can be both a lesson schedule, and a healthy lifestyle corner, congratulations on the holiday, and so on. The name of the stand is an important part of its design. The headline should be bright, large and eye-catching. Remember that the information stand is the business card of the organization, so special attention should be paid to its design. Letters for the title can be cut out of bright plastic or from unnecessary magazines.
nine0090
Don't forget about the framing of the stand. With a frame, the design will look more aesthetically pleasing and concise.
Sheets with information and other important information can be attached to the stand using buttons or safety pins, but if we are talking about a childcare facility, then it is worth looking for an alternative method.
Benefits of making your own stand
- The ability to create a unique, original, inimitable design, convenient location, shape and size. nine0012
- By making the structure yourself, you can choose materials that are ideally suited to the interior of the room.
- You will have the opportunity to place on the stand only the information that you need, as well as to choose the optimal location of the pockets on the board.
- Making a board for information with your own hands, you will have the opportunity to choose the color scheme that best suits the overall style of the room.
- You don't have to adjust to a patterned design, as you can position the pockets and information fields as you see fit.
 nine0012
 - Handmade work is a great way to emphasize individuality, add zest to the image of the room.
Making the structure will not take much time and will not take much effort. In just 30 minutes you can make a simple design of a small size. Larger and more complex stands will take a little fiddling, but rest assured that the result will exceed all your expectations.
Stands are actively used by people both at home and in educational, medical, transport and other institutions. nine0003
Important information, plans for the future, commemorative photos, an organizer, a list of employees, a schedule of classes and this is not an exhaustive list of information that can be placed on the stand.
Photo idea of self-made information stands
Author of the article:
DIY stand - 61 photo ideas for beautiful information stands
Content
- The main thing is to choose the material for the stand
- Algorithm for performing work on making a stand
- Recommendations for work
- Designing the base
- Photo of the idea of self-made stands
The main thing is to choose the material for the stand
The first step in creating a stand is to choose the material for its base.
Cork board is in the first place among all materials. Differs in affordability, its practicality. The basis of this material will last more than one year. nine0003
Stands for children's institutions are made from cork oak bark. The material is safe for health and has a number of other advantages:
- moisture resistance;
- resists mechanical stress;
- withstands impact;
- chemical resistance;
- resistance to fire;
- total resistance to mold and mildew;
- easy to keep surfaces clean; nine0012
- long service life.
The reverse side of the stand can be plywood and fiberboard.
Algorithm for making the stand
Stands are made in 3 types:
- The simplest design with a minimum number of elements.
- Complex design with many elements.
- Combined design consists of pictures, objects and text.
Work tips
- It is important to choose a location that is well lit and visible to all.
 Visually imagine that the stand will fit perfectly into the interior of the room.
 - Flowers are welcome. But the edging on the stand should fit into its overall design in color.
- Stand frame can be made of plastic strips, wooden slats. A metal profile is used.
- A strong fastening mechanism is essential.
- In the process, you will need tools, including a knife with a sharp blade. They need to be prepared.
- Based on the location of the future stand, you can determine its size.
- Cork wood cut to selected dimensions.
- Cork board with back material is glued together with “liquid nails”. Before that, they are degreased.
- The resulting stand base can be covered with material.
- A frame is attached to the front. nine0012
- Attached to the back are hinges for a removable stand.
- If the stand will not be removed from the wall, it can be placed on the wall using double-sided adhesive tape.
- The stand is ready for registration.

A very easy way to create a stand for information sheets, posters, announcements with a ceiling molding. The material is affordable. One plinth strip is the top of the stand, the second strip will be the bottom border. Between them there is a gap to the height of an A4 sheet. Sheets with information are attached to the strips with buttons or pins. nine0003
If you need to place a lot of information in a small space, then a stand-book will be an ideal option. It is called a demo system or a system for demonstrating information. Such stands are common at railway stations, bank premises, exhibition halls, shopping centers.
They differ in location: wall, floor, table and universal stands, more about these features are described here. But such stands can also be organized for the exhibition of creative drawings at school and in kindergarten. nine0003
Making the base
Making the base must begin with "pockets". Pieces of plexiglass and files are used as the main material for them. They are attached with double sided tape. The number of "pockets" directly depends on the size of the base of the stand itself.
For information boards, the design of the "pocket" is more necessary. For example, a board with information about the menu: the information sheet changes in the “pocket” every day. You can create an information board about the schedule of performances of children's groups, duty in the school class of students, passing exams at an educational institution. nine0003
- The theme of the booth design is chosen: music school and its educational process; corner of a healthy lifestyle; congratulations on the holiday and many other options. The heading of the stand should be brightly designed. It can be compared to a business card. Therefore, a bright design and a catchy name will not hurt. Letters can be cut from plastic or printed matter.
- The stand can be with information about future events and reporting information, a "pocket" for wishes and suggestions can be created.
 nine0012
 - Information sheets are attached to the base of the stand using buttons, pins. But with these tools you need to be careful in children's institutions.
Tip: bright pictures will help convey information. Especially if this needs to be conveyed to children. But they must correspond to the subject of the text. Heroes from cartoons will help bring information closer.
- Information stands are placed in places with high traffic. Stands with information of an entertaining nature should be in places of recreation where children relax and communicate more. nine0012
- A display stand for children's creative achievements can also be placed at home. The child will be able to share his victories with his parents. To create such a corner, you do not need to have great skills at all. But for the family, this is a big push for unity.
- There is another type of stand - a demonstration stand. Their function: to act as exhibition shelves for photographs, souvenirs, pictures.

Learn more