Take moon pictures
How To Photograph The Moon (With 10 Great Examples) Moon Photos
Share:
Learning how to photograph the moon has long been one of the greatest joys of a photographer's journey in learning. For centuries the moon has captivated people, given direction and provided hours of enjoyment and wonderment. Being the brightest object in the night sky, it's something photographers of all levels can shoot however, it does take planning and preparation to accomplish. In this article, we will look at how to photograph the moon along with some amazing moon images in the end for inspiration.
Attention: Grab your free cheat sheet for Moon photography! Click Here
If you have previously attempted to photograph the Moon and it came out too small or looked like a plain white spot, don’t be overly frustrated! Every photographer has to go through similar difficulties when shooting the moon for the first time. This sub-genre of astrophotography can be very challenging and frustrating.
Moon photography or Lunar photography is an amazing learning experience, especially if you are willing to experiment a little. You can learn various useful techniques along the way – reducing camera shake in low-light conditions, manually setting your camera (using manual mode), using the looney 11 rule, stacking photographs in Photoshop and even incorporating the moon into other shots.
The moon is bright, but it isn't bright enough to simply snap a photo if you're looking to see much detail in the moon. Moreover, the moon has different phases throughout the month and each phase will need a different exposure time because of the difference in brightness.
Image by Orion 8Attention: Grab your free cheat sheet for Moon photography! Click Here
Many photographers are fascinated by the full moon and love to photograph it when it is full, but during the other phases, the moon is less illuminated because of its position relative to Earth and the Sun. The phases other than the full moon are because of how the moon is illuminated by the Sun and the shadows help exaggerate the surface features or details of the moon.
To achieve a nicely exposed photo, one where the moon doesn't appear flat nor like an out-of-place object and where you can make out some craters and whatnot, we need to consider many facts to get the exposure right for brilliant pictures of the moon. For example, a crescent moon requires a longer exposure compared to a half moon and a half moon requires slightly longer exposure compared to the full moon.
Once you start to watch the moon, its position and phases over a few months, you will be able to tell when there will be a full moon and when there will be a new moon. You will also know when to watch out for moonrise and moonset and also know the best times to photograph the moon at night or during the day.
If you still struggle with keeping track, there are various apps that will help you to plan when photographing the moon. We have discussed a few later in this article.
Planning For Moon Photography
Before photographing the moon decide on when you want to shoot the moon and how you want to shoot it – close-ups or moon in a landscape. Once you have decided on this, the next step is location scouting.
If you are in a relatively dark area and if you are looking for close-up shots, you can do it easily from your backyard, but if you are looking for a landscape along with the moon, then you need to scout for locations and choose a favourable one. Moonrise and moonset times are the best for moon photos with landscapes.
Decide on what phase of the moon you want to shoot. Depending on this, you will have to choose the time and date. Also keep an eye on the weather so you have some clear skies to photograph the moon. Although scattered clouds can help create dramatic moon images, sometimes it can cause haziness and generate a noisy image.
To accomplish a great moon shot, let's first look at the basic gear you'll need.
The Best Camera Gear
Tripod
A secure base and workstation for your camera are essential to capturing the image of the moon and avoiding camera shake. While you may be able to get away with hand-holding your camera, your best results will, without a doubt, come from mounting your camera on a tripod. (See our article on how to choose a tripod for some good tips).
A Telephoto Lens or Long Zoom Lens
In order to help fill the frame and properly show off the moon, the longer your zoom lens, the better. You don't necessarily need the fastest lens, because you'll be on a tripod, but it's best to use telephoto lenses, at least 200mm focal length or longer. Many beginners may also have a 70-300mm telephoto lens in their kit. So it can be a great one to use on crop sensor cameras as it will give an equivalent focal length of about 450mm.
If you don't have a telephoto lens, but your lens can be used with teleconverters, then it is a cheaper option to increase the focal length of the lens effectively giving you a long zoom lens. If you don't have a lens that long, but want to capture some interesting moon shots, you might want to consider using shorter or wide-angle lenses by incorporating foreground elements into the shot (more on that below).
Image by chuttersnapShutter Release Cable
A remote shutter release or a cable release is a great accessory for moon photography. This is not an essential piece, but it's nice to have and helps avoid camera shake and capture better images of the moon. If you don't have one, you can cheat and use the self-timer function on your camera.
Camera
While almost any camera will work, point and shoots rarely produce top-quality photos of the moon, mostly due to the small size of the sensor and it overheating during longer exposures resulting in digital noise. That largely rules out smartphones and iPhones (to a degree). However, there are bridge cameras that come with very long focal lengths that can be used to photograph a better photo of the moon compared to a point-and-shoot, if you use it on a tripod.
A full-frame camera is usually preferred here with a telephoto lens on it. DSLRs, Mirrorless cameras or any interchangeable lens cameras are suitable for taking pictures of the moon. The make is not really that important – Canon, Nikon, Sony and many others all make very respectable cameras in this range that can take great moon shots. Cameras with smaller sensors make it tough, but they can still be used. Recent cameras with small sensor sizes have better low-light performance. Use the camera that you have in hand for a start.
Shareable Moon Images for Pinterest
The Best Camera Settings For Photographing The Moon
No preset or auto function of your camera will be able to properly meter the moon, so ideally you should consider shooting in full manual mode. At the very least, choose Aperture Priority mode. Also, your geographical location and the current phase of the moon will have an effect on what your camera settings will be, and you will need to adjust for the season of the year and the clarity of the sky. You will also need to take into account the potential for camera shake.
General Camera Settings
- Always shoot raw so you can get as many details from the moon and make adjustments to white-balance when post-processing.

- It is good to use manual focusing instead of autofocus. Zoom in on live-view and focus to get the images in sharp focus.
- Turn off image stabilization when the camera is on a tripod.
- If using a DSLR camera, make use of the mirror lock-up feature to avoid camera shake due to mirror slap.
ISO
Digital camera settings should be set to 100 ISO or lower. Film shooters should shoot film of 100 ISO or slower to eliminate noise and grain. Some cameras will have the lowest setting of ISO 200. If you are using a very long telephoto lens, you will need to make the shutter speed faster comparatively to avoid capturing the movement of the moon across the sky. In that case, or if the sky conditions are not too good, you may have to slightly increase the iso.
Aperture
Because you're after crisp, clean shots, shooting at f/11 to f/16, depending on your lens, will be the best place to start. Research your lens' sweet spot to find the sharpest aperture. Using narrow aperture values will require increasing the iso during the waning and waxing phases of the moon, especially when the moon is less than a quarter. When conditions are bad, you can open up the aperture to about f/8 or f/5.6 but make sure that the images are acceptably sharp.
Shutter speed
The variables are many and include those mentioned earlier, such as the phase the moon is in, geographical location and desired shot, but on a clear night starting at about 1/60th to 1/125th shutter speed on your camera settings should be a great starting point. Depending on the brightness and focal length as well, you will need to make adjustments to shutter speeds.
Attention: Grab your free cheat sheet for Moon photography! Click Here
What Is The Looney 11 Rule?
There is a “rule of thumb” that is easy to memorize and should get you close to good exposure of the face of the moon – the “looney 11 rule.” This rule is a method of estimating correct exposures without a light meter. For daylight photography, there is a similar rule called the sunny 16 rule.
The looney 11 rule is a very simple guideline intended to give the photographer a baseline to start from when shooting the moon at night.
The Rule: For astronomical photos of the Moon's surface, set the aperture to f/11 and shutter speed to the reciprocal of the ISO setting.
For example: f/11 at ISO 100 and 1/100th second shutter speed.
Another example: f/11 at ISO 200 and 1/200 second shutter speed.
The looney 11 rule is worth keeping in mind for getting good exposure when you photograph the moon.
Moon Photography – Choosing A Location
A word about where you choose to shoot. Picking a spot to shoot the moon is one of the most important factors in achieving a quality shot. Locations with minimal light and air pollution are the best for night sky and moon photography. Locations with higher elevations will help you to avoid low-lying clouds, fog, etc. , so find those locations if possible.
Ideally, if you want to showcase the moon itself, which means the moon without any foreground features, you will want to avoid any other ambient light, including street lights and traffic. This may require you to go off on a remote road or into a public park after hours – your backyard may not be the best location for these types of shots, but if you are left with just the backyard for some reason, turn off all surrounding lights and position yourself in a comparatively dark location.
Besides the above, try to avoid days when there is moisture in the air, dust, and haze as these can make the moon appear wobbly without well-defined edges. If you wish to stack the moon, these factors can make it quite difficult or even impossible. Colder nights are the best for capturing close-up images of the moon.
On the contrary, if you are trying to include a city skyline under your moon shot, you'll need to find a lookout that allows for the twinkling lights below and do further test shots to nail the exposure properly for both the foreground and the moon (bracket your exposures).
The Best Mobile Apps To Choose Location And Time For Shooting The Moon
When you are photographing the moon, sometimes a handy app or two can make life easier and also help you make accurate plans for your photoshoot. So, here are some apps and websites that can help you plant your next moon shoot without any hassle.
PhotoPills
Photopills is an excellent iOS and Android app which can be used to determine the position and phase of the moon as well as the position and elevation of the Milky Way. So, besides photographing the moon, this app can also help with photographing any night sky objects. It also helps you to plan the position of the moon with respect to any foreground subject and this can be achieved using its augmented reality feature.
This night photography app is known for its constant upgrades and very useful functions. It is a great find for all astrophotographers. When it comes to the moon photography in specific, it lets you see rise and set times, calendar, phases and Supermoon dates.
The Photographer’s Ephemeris:
iOS and Android users can also use another great photography planning app alternative which is The Photographer's Ephemeris. This is free for the desktop
If you want to explore more apps, check out the following ones:
- SunSurveyor – The interface of this app focuses on visualization rather than raw data, which can be extremely useful. It is available for both iOS and Android
- DeluxeMoon – This app visually defines the amount of light the moon will be reflecting in the sky. It also helps you check whether the chosen time of your photo shoot corresponds to the moon’s cycles.
- Sky Guide – This app for iOS gives accurate locations for objects in the night sky.
- Dark Site Finder – this helps to locate a dark sky area near you.
- Light Pollution Map – this helps you to explore areas with less light pollution
- Dark Sky Website – This website helps to locate a dark location near you.

Composition And Technical Tips
The composition is just as important when you are taking shots of the moon as for any other type of photography, and you have some decisions to make. For starters, the decision to shoot just the moon or to incorporate elements such as landscape foreground into the shot. Knowing how to photograph the moon with the foreground requires a few different considerations.
Bear in mind that a compelling and sharp image of a lonesome moon is great, but once you’ve seen one – you’ve seen them all! It's important to master the perfect close-up of the moon, but you should also try to get creative by placing the moon within a more challenging composition. Your shots don't have to be boring and predictable!
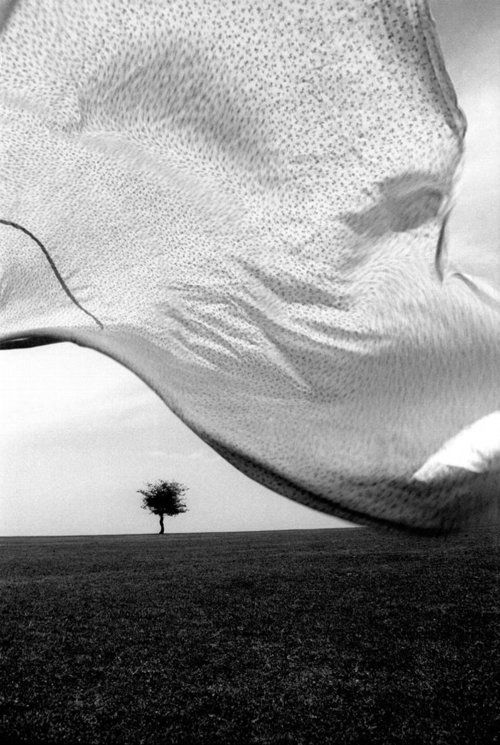
For instance, you can try framing the moon behind trees and buildings, or reflecting it off the surface of a lake or sea! Placing other objects in the foreground gives the moon context and scale that it lacks on its own. It can be really useful if you can think of the moon as a single element which should be incorporated along with other compositional elements.
Steps To Photographing Just The Moon
Time needed: 5 minutes.
How to Photograph Just the Moon:
- Select a long lens
Use a long lens (> 200mm) and zoom in as far as you can
- Set the ISO
Set the camera to ISO 100
- Choose aperture
f/11 to f/16 (find the sweet spot for sharpness)
- Choose shutter speed
Shutter speed around 1/60th to 1/125th
- Set the focus
Manually focus on the moon or Manual focus set to infinity
How To Shoot The Moon With Foreground
When you photograph the moon with the foreground included, you will probably notice that you end up with the moon as a totally white blob with no detail. It is very difficult to expose both the foreground and the moon correctly in the same shot. For that reason, most of the photographs of the moon with a foreground that you see are actually composite images. There is a useful, if somewhat dated, tutorial on creating moon composites here.
- Use whichever lens allows you to get your composition (probably slightly wider than most telephoto lenses)
- ISO 100
- f/11 to f/16
- Bracket exposures to +2 and -2 (this may take some experimentation)
- Create a composite of images in Photoshop.
Post-Processing
Post-processing your photos is really straightforward, and in most cases auto white-balance will do you just fine, however, photographs of the moon also make stunning black-and-white images. So consider how you want the outcome to look – have a play around in Lightroom and see what looks best – colour or black & white?
If you have photographed just the moon, when you import it into Lightroom, you are probably going to want to concern yourself mainly with the contrast and clarity sliders. These should get you close to a finished product without too many problems.
If you have included elements of the foreground in your moon image, then you will probably have bracketed your shots and will, therefore, have some work to do in Photoshop. There is a good tutorial on creating composite images of your moon photographs here.
While there is no specific workflow you have to stick to in the case of moon photography, there are a couple of things you should bear in mind.
Make sure to shoot raw and adjust the colour temperature in Lightroom properly. The colour temperature used for the moon photography is tricky, and it takes a little playing around until you get it right.
Once you’re satisfied with your choice of colour temperature (white balance), you can proceed to adjust saturation and vibrance. The moon photographs often look too desaturated, and you can make them much more vibrant in post-processing.
If you shoot with a low enough ISO, you can increase saturation without adding much noise. Even if you set your saturation slider at 100 and vibrance slider at let's say 80, you might end up with a noiseless image if you used the lowest possible ISO. This is a very useful trick for moon photography! If your image looks really bad after altering saturation and vibrance, it’s likely because your ISO was too high or your colour temperature isn’t correct.
If you want to take it even further and print your moon photos, then you might like to look at our article on the best photo printer to use for the task!
If you are looking for creative ways to photograph the moon, here are some very interesting topics for you to explore:
- Photographing the moon along with a landscape can be any photographer’s dream and this gives rise to some of the most surreal images. Careful planning, patience and a lot of practice will help you master this art. Here is a very informative article on “How to Photograph Moonscapes.”
- Did you know that you can use just the moonlight to illuminate the landscape at night for dreamy photographs? Stay out in the night in a dark area and see how moonlight beautifully illuminates the landscape and try to photograph it too.
- When there is a total Lunar eclipse next time in your location, do not forget to get out and photograph. This is the only time when you can photograph the blood moon.
 If you want to photograph the blood moon, this article has all the necessary information on “How to Photograph a Total Lunar Eclipse.”
 - Did you know that the surface of the moon has various minerals and these minerals contribute to some interesting colours on the moon? Next time, when the sky is very clear, zoom very close into the moon and observe the lunar surface. Besides the Maria and the Highlands you will be able to see some colours on the surface of the moon. You can even photograph details in the lunar surface. If you are interested in just stacking moon images for more surface details or to bring out those beautiful colours, check out this article that teaches “How to Photograph and Edit a Mineral Moon.”
- Lastly, if you are looking to photograph a perfect moonrise, this article has “3 Tips for Capturing a Perfect Moonrise.”
How To Photograph The Moon – Key Takeaway Tips And Ideas:
- Capturing the full moon is great, but the moon looks better with surface details when there are shadows on the moon's surface.
 So try photographing the moon during its various phases.
 - Play with composition aside from shooting the moon on its own
- Get low and shoot through the rising stalks in a cornfield (for example) and create a composite
- Catch the reflection of the moon in the ocean while on the beach
- For extra-sharp detail, wait until the moon is at its highest
- Use a tripod
- Use manual focus
- Use low ISO to avoid noise
- Research the sweet spot of your lens
- Allow time to set up – you don't want to be moving once the moon is in position to shoot
Other Great Moon Photography Resources Online:
Here are a few links that you should definitely take a look at that don't repeat too much of what we have already covered. If you are serious about getting better at shooting the moon, they area good start.
- A visual guide
- Eclipse photography
- Moon photography calculator
Tools And Apps For Moon Photography:
- The Photographer's Ephemeris
- Golden Hour One
- Did you know that the moon is tidally locked to Earth? This synchronous rotation means that we get to see only one side of the moon all through the year.
 As a result the far side is called the “Dark Side” of the moon but in reality, the far side of the moon is not in permanent darkness.
 - Because of the moon’s elliptical orbit around the Earth, the distance between the moon and the earth varies throughout the year. When the moon is at its closest point to the Earth called Perigee, the moon can look up to 10% larger and 30% brighter compared to when it is at the farthest distance away from the Earth called apogee.
- There are different names for the moon depending on various occasions and relative position of the moon with respect to earth.
- Supermoon – this happens when the moon is closest to the earth
- Blood Moon – this happens during a total lunar eclipse. The moon shines with a blood red colour when totally eclipsed by the Earth.
- Blue Moon – if there are more than one full moon in a month, the second full moon that occurs in the same month is called the blue moon.
- Full moons in each month have a name.
 Here is an interesting read about the special names for full moons and what they mean. Why not make it a project to photograph every full moon in a year?
As Inspiration, Here are 10 Great Examples of Moon Photography!
Image by Alexis AntonioA gorgeous Golden Color full moon captured here with some impressive detaiImage by Mike Petrucci
Shooting with monochrome in mind can produce some beautiful results. A lovely finish here with tremendous detail – almost looks like fine art. I personally like the absolute central composition of the full moon here, it works really well.Image by Bessi
Add some foreground elements to really enhance your composition. This is a great example of a silhouette on the full moon.Image by Guzmán Barquín
Foreground elements again show some beautiful results, this time using the full moon's bright reflection on the ocean. Rivers, lakes (even large puddles) could achieve alternative “reflection shots.”Image by Shawna SchillImage by Nathan Anderson
Another black and white example, however, this time with a slightly different composition technique – this time, using some negative space and applying some techniques from the rule of thirds as well as capturing more detail of the lunar surface, makes the moon really stand out!Image by Reynaldo
More foreground usage can be seen here, this time a cityscape shot of the full moon.
 It's almost as if the moon and colourful lights are competing against each other for outstanding beauty! The long exposure has provided not only detail of the moon, but a smoothened silky feel to the water.Image by Aron Visuals
 A foreground element used again, however, this time it's in the form of a silhouette. This photograph of the full moon shows it hiding from the viewer, creating a somewhat mysterious feel?Image by Joonas kääriäinen shows that not all nights with clouds are a bust for moon photography.Image by nousnou iwasaki
Lastly, we have a crescent shape captured here.
A dramatic shadow falls across the moon, which from a distance looks as though only a quarter is ever present.
Don't forget to check out our other collection of inspiring moon photos.
Moving Beyond Moon Photographs With Other Night Sky Photography Resources
Shooting the moon is only one part of night sky photography. You can take it a lot further with astrophotography, star trails and perfect star shots too. Attention: Grab your free cheat sheet for Moon photography! Click Here!
It's hard to take a photo of the moon: here's how to do it better
Everybody loves a full moon. And everybody wants to take the perfect picture of one, only to have their phones render something more like a streetlight than the gorgeous sphere in the sky. While National Geographic photos might be the province of experts, I'm quite sure you can take a solid photo of the moon to show your friends and family — and all you need is your smartphone. I'll be straight with you: your smartphone won't capture the stellar photo of a supermoon that an astronomy photographer can get with a professional camera. But you can get creative and take a successful photo of the moon that feels like your own.
Get started with the equipment you'll need:Your fully-charged smartphone. Be sure to give the lens(es) on the back of your phone a clean with a lint-free cloth before heading out.
A tripod for your phone. This could be a fancy store-bought tripod designed to hold your phone — or a DIY tripod made at home. The number one rule in nighttime photography is: always use a tripod! (Without a way to externally stabilize your phone, all photos you take at night will be blurry.)
Optional:
An app: If you'd like a little more control over your phone's camera settings, download a specialized camera app. This will allow you to manually adjust things like ISO and shutter speed. Yamera, for example, is free and available for both iOS and Android.
Pro tip: Save some data bandwidth by downloading any camera app before you leave your home.
Extra lens: Purchase a clip-on zoom lens for your smartphone. This isn't required, it's just helpful.
A pair of binoculars or a small telescope: This might look weird to people watching you carry surveillance devices at night in their neighbourhood, but try to focus on the fact that you have, in effect, a set of portable zoom lenses.
Moonrise is your new best friend! It's the time of night when the moon visibly rises above the horizon. The beginning of the moon's trip across the sky creates something called "moon illusion" — an optical trick that makes the moon appear significantly larger when it first becomes visible in the sky. It is always best to view and photograph a supermoon during moonrise. Learn what time moonrise is where you live (on this handy website). It can also help you to find out what direction the moon will move across the sky, which will further assist you in planning your shot. Keep in mind that if you want the moon at its most visible, you'll also have to wait until it clears the tallest building in the skyline.
Where you set up to take your photo plays a huge role in ensuring its success. Maybe you already have a secret moon-viewing spot you plan on visiting. But if you don't, this may help you find the perfect one:
-
Open spaces like parks or parking lots help avoid trees and buildings that can block the horizon line in your photo.

-
Spots that are elevated offer a better view of the horizon (this includes your apartment's rooftop or balcony). Spots like benches and picnic tables are elevated and can help to stabilize your camera and tripod. Of course, make sure you're safe if you're standing on top of something.
-
Shorelines are particularly great! If you live near one that aligns with the moon's path, you are pretty much guaranteed a perfect unobstructed view of the moonrise.
-
If you live in a city, venture to a suburban or rural location with less light pollution for a brighter sky.
- Set up your phone on your tripod of choice.
- Open the camera app.
- Turn off your flash.
- Start to think about photo composition. Do you want this to be a photo of the moon alone? Do you want to have trees and/or buildings in the shot as well? Are you taking the photograph with portrait orientation (your phone is upright, so the height of the display area is greater than the width) or landscape orientation (your phone is sideways, so the width of the display area is greater than the height)? Get creative and plan a few different ideas.
 Then, position your phone as you've planned, to frame the moon. Plan to take a few different kinds of shots for variety.
 - Zoom zoom zoom! If your phone has a telephoto camera lens, switch over. Pinch and zoom (or do whatever move it takes to make your own camera zoom). An important note: the more you zoom, the more resolution you will lose. Try a few zoom lengths to see what looks best and lets you retain clarity.
- Once you zoom in and get the moon properly framed, you'll want to lock and manually adjust the exposure. Right now, the moon is probably looking like a huge white blob: this is because it's overexposed! You can fix that by locking the auto exposure control on your phone. If you don't, your phone will keep thinking the scene is too dark (it's night, after all) and it will try to compensate by increasing the brightness of the only lit object — the moon.
How to do this:
On iPhone: Long press on the area of the screen that frames the moon. A yellow square will appear over the moon with a small sun icon to its right. A yellow rectangle will also appear at the top of your screen that says "AE/AF LOCK." Your phone's exposure is now locked! Place and hold your finger just to the right of the small sun icon and slowly drag downward. The further you drag your finger down, the more the moon will slowly decrease in brightness to a point where you can (hopefully) see some surface detail. You can now remove your finger; the exposure will be locked in. Tap anywhere on the screen to exit the exposure lock. It takes a bit to get used to the controls but this trick can be applied to all photography, both night and day. It works especially well with sunsets! Be sure to practice this a few times before the night of the supermoon.
On Android: This is a little bit trickier! Each Android brand has a different native camera app. Do some research into your brand and how to lock its exposure. Some brands even control the lock by long-pressing the shutter button.
-
Now your shot is framed. The moon is exposed properly and the exposure is locked in place. What are you waiting for? It's time! Take the shot! Using your phone's photo timer is always ideal, but if you want the least amount of shakiness, press the shutter button while holding your breath. Remember, you have time to experiment — moonrise lasts a while and you can play around to make the shot feel like your own.
Pro tip: Did you bring along those aforementioned binoculars? Set up your shot using steps 1-6. Treat the camera's lens as if it were your eye and place the eyepiece of your telescope or binoculars directly atop the camera's lens. Look at your phone screen and adjust the binocular/telescope until you get the moon in the frame. For the best result, zoom out completely on your phone's camera.
One more tip: You can practice this all ahead of time if you pretend a bright overhead outdoor light is actually the moon.
There you have it! You now know the basic rules and tricks to take a solid crack at shooting April's supermoon (April 26, 2021). If the clouds block the moon this month or you don't have the time to take photos, don't fret! There is an even better supermoon happening at the end of May (May 26, 2021). It coincides with a lunar eclipse, so West Coast Canadian residents have the special opportunity to view the May supermoon as a blood supermoon. (Don't be scared – this just means it will have slight reddish tones.)
Stay COVID-19-safe when you are shooting: distance yourself from other photographers and pedestrians. And don't forget — look at the moon with your own eyes! Don't get so lost in your camera lens that you forget to behold the monumental beauty of astronomy right in front of you.
One last thing! Use the hashtag #hellospringcbc when you post your supermoon so everybody can enjoy your newfound skills.
Click here for more scenes from spring across the country. Show us your spring with the hashtag #HelloSpringCBC
How to photograph the moon? Queen of the Night in the Frame / Beginner Photography / Photography Lessons
NIKON D810 / 70.0-200.0 mm f/4.0 SETTINGS: ISO 640, F8, 1/2 s, 350.0 mm equiv.
The moon is a beautiful and mysterious satellite of our planet. You can just admire her, or you can try to take interesting shots with her participation.
In this article we will analyze the creative aspects of shooting a night luminary, learn how to make the most clear pictures, how to beautifully and expressively show the queen of the night in the frame.
What should a photographer know about the Moon?
Schedule . The Moon is a natural satellite of the Earth. As in the case of the Sun, the inhabitants of our planet can watch its sunrises and sunsets. It moves across the sky according to its own schedule and can rise both late at night and during the day. To take beautiful photos, you need to know this schedule.
Moonrise in the dead of night. On the right is the planet Jupiter.
Why does the moon glow? Moon phases . The moon or part of it begins to glow when the light of the sun is reflected from them. When changing the relative position of the Earth, the Sun and the Moon, the boundary between the illuminated and unilluminated parts of the Moon's disk shifts. Therefore, the illuminated part can grow or shrink.
Everyone knows that the moon can be full, or it can appear before us in the form of a crescent. There are eight key phases of the moon.
| New Moon: The moon is not visible. | |
| Young Moon (Waxing crescent). | |
| First quarter: half of the moon is illuminated. | |
Waxing gibbous: More than half of the lunar disk is illuminated. | |
| Full Moon: The moon is fully lit. | |
| Waning Gibbous: more than half of the moon is illuminated; the illuminated area of the lunar disk gradually decreases. | |
| Last quarter: half of the moon is illuminated. | |
| Old Moon (Waning crescent) |
The phases of the moon give only a general idea of what part of it will be illuminated by the Sun on certain days. For example, the first and last quarter will include both 70% of the illuminated area and 95%. Therefore, the area of the illuminated part of the Moon is often measured as a percentage of its total area. On a full moon, this is about 100%, and with a thin month in the sky, a few percent.
The size and color of the moon. Big moon illusion . The surface of the moon itself is gray in color. Reflecting sunlight, it becomes yellowish. Also, the lunar disk can change its color due to the Earth's atmosphere (passing through the air column). Sometimes the moon rising above the horizon turns bright red, while it seems much larger. Note that this is the best time for a photographer to create beautiful shots with the moon.
NIKON D810 / 70.0-200.0 mm f/4.0 SETTINGS: ISO 800, F8, 1/8 s, 400.0 mm equiv.
Planning the shooting: choosing the time, place and conditions
First of all, you should decide what phase of the moon you want to shoot. Any lunar calendar will help you get acquainted with the schedule of the moon's movement in the sky. The ideal option would be special programs for photographers that track the movement of celestial bodies. It is convenient to use the TPE web application on a computer.
Please note: when it is deep night outside, and the Moon is high above the horizon, you can get boring shots of the lunar disk without any interesting plot or background. In my opinion, such photographs will be of interest only to astronomers. And they have already seen the lunar surface thousands of times.
A picture of the moon taken late at night. The night is dark, and the crescent moon is very bright. Therefore, neither the sky nor any background in the photo will be visible.
To be able to fit the Moon into some kind of landscape, to photograph it against the backdrop of a city, nature or clouds, it is better to photograph at dusk. Wait for the moment when the moon will rise or set (immediately after sunset or just before sunrise).
On the other hand, if you just want to shoot the Moon against a black background, then it's best to photograph late at night in clear weather, when the Moon is high above the horizon.
Shooting the Moon at dusk allows you to photograph it not by itself against the background of blackness, but to fit it into the surrounding reality.
NIKON D810 SETTINGS: ISO 100, F8, 1/3s, 400. 0mm equiv.
From personal experience: either the full moon or a thin moon with less than 15% of the illuminated part looks most expressive in the frame.
A good time to take pictures of the moon will be during the white nights. When the contrast between the bright moon and the environment will not be so great. At this time, you can make landscapes like this. This shot was taken on the northern coast of Lake Ladoga.
It is also important to choose the right shooting point. To capture an interesting shot, find a spot with a good view. The programs mentioned above will help determine where the moon will rise from. In the city, you can choose some kind of elevated point with a view of its attractions. In my case, they were the Ostankino Tower and the Picturesque Bridge. It is advisable to arrive at the shooting location in advance, because the rising moon "jumps out" from the horizon very quickly, so you will have very little time to shoot - a few tens of minutes.
Necessary photographic equipment
Let's make a list of photographic equipment that will definitely come in handy for shooting the Moon.
- Camera with manual settings
Photographing the Moon is quite a difficult task, so it's better to adjust at least some of the parameters yourself. It is good if the camera has a wide dynamic range. This will help when shooting the Moon against the background of other objects - it will not be overexposed, and the background will not be too dark. SLR cameras are perfect for such shooting: both the simplest ones (for example, Nikon D3300, Nikon D5500) and advanced models (Nikon D750 or Nikon D810).
Hyperzoom compacts (eg Nikon COOLPIX P900) are also a good budget choice for amateur photographers. They have manual settings and such a zoom that DSLRs never dreamed of. The same P900 can give a magnification equivalent to a lens for a full-frame DSLR with a focal length of 2000 mm.
- Lens
If you want to show the Moon in a frame large enough, then you need to use telephoto lens . The longer the focal length of the lens, the larger the Moon will be shown in the frame. The footage for this article was shot with a Nikon 70-200mm f/4G ED AF-S VR Nikkor lens with a NIKON AF-S TC-20E III 2x teleconverter. The focal length in the photographs is 400 mm. A good compact and budget telephoto lens is the Nikon 70-300mm f/4.5-5.6G ED-IF AF-S VR Zoom-Nikkor.
NIKON D810 / 70.0-200.0 mm f/4.0 SETTINGS: ISO 640, F8, 1/2 s, 350.0 mm equiv.
Don't forget: the longer the focal length, the more difficult it will be to get good shots. But more on that below.
Shot taken with a 110mm moderate telephoto lens. In my case, it was the same Nikon 70-200mm f / 4G ED AF-S VR Nikkor, but without a teleconverter.
NIKON D810 / 70.0-200.0 mm f/4.0 SETTINGS: ISO 400, F7.1, 1 s, 110.0 mm equiv.
The moon can also be photographed with wide-angle optics. At the same time, in the frame it will not be so large, but in this case, you can show some kind of landscape in the photo with it. It is appropriate to use lenses with a focal length of about 35mm for a full frame or 28mm for a crop. That is, almost any universal or whale zoom lens is suitable for such shooting.
Morning landscape with the Picturesque Bridge and the setting Moon. The frame was taken with a lens with a focal length of 30 mm.
- Tripod
If you want to get high-quality sharp pictures of the night star, then you definitely need a tripod. An exception will be shooting the moon during the day with standard or wide-angle optics. During regular hours (early in the morning or late in the evening) and at night, the shooting of the Moon takes place at shutter speeds long enough for handheld photography (there may be “stirring” from camera shake in the hands). If you are working with telephoto lenses with a focal length of more than 300 mm, then it is advisable to use a tripod even during the day. Otherwise, grease cannot be avoided. After all, the narrower the viewing angle of the lens (the closer it zooms in), the more the picture in the viewfinder will “shake”. When shooting with a telephoto lens, a tripod is needed to stabilize the image. It must be very powerful, able to reliably, without hesitation, hold the equipment.
- Remote control
It is a useful accessory when shooting with a tripod. The remote control is needed in order to avoid camera shake when pressing the shutter button. So we insure ourselves from getting blurry frames. If you do not have a remote control, you can set the camera to self-timer so that at least a few seconds elapse between pressing the shutter button and the actual shooting. If your camera, like Nikon D5200, Nikon D5300 or Nikon D7200, supports Wi-Fi remote control, then your smartphone can serve as a remote control.
Shooting parameters. Technical difficulties and ways to solve them
Beginners' problem #1. "Shevelenka" when shooting handheld . Beginning photographers hold the camera in their hands or on a flimsy, shaky tripod. And if they shoot with a telephoto lens (with a large zoom), they almost always get a blurry image. To shoot handheld with a large approximation, you need to greatly shorten the shutter speed. That is, when shooting with a telephoto lens, the maximum shutter speed should be shorter than 1/250 s. Sharp shots will help to get optical image stabilization. If your lens has a switch labeled VR, IS, or Optical steady shot, set it to ON.
How to calculate the maximum shutter speed when shooting handheld, described in one of our lessons.
If you are a beginner and didn’t understand anything from the previous paragraph, because so far you are using only automatic mode and scene programs, to photograph the Moon with a strong “zoom in”, select the Sport scene program - it guarantees shooting at a fast shutter speed. If you shoot the Moon in a general plan, without a strong “zoom”, you can use the “Night Landscape” scene program.
Issue #2. The moon moves across the sky . How is shooting the moon different from other landscape photography? The fact that we shoot a very fast moving object. If you photograph it at a slow shutter speed, it will be smeared.
The moon was smeared from its own motion at a shutter speed of 30 sec. It is easy to see how far she has traveled across the firmament during this time.
How to correctly determine the maximum shutter speed for shooting the moon so that it turns out clearly? Typically, shutter speed is determined experimentally by taking test shots. The general pattern is simple: the longer the lens you have, the faster the shutter speed is needed. Therefore, it is very difficult to photograph with super telephoto lenses - the Moon literally flies through the frame - have time to catch it. Exposure in this case will be required quite short.
Those who are familiar with astrophotography know about the "rule of 600" for determining the maximum shutter speed when shooting stars (if the number 600 is divided by the equivalent focal length, we get the optimal shutter speed in seconds). But when shooting the Moon, this rule will not work, because it moves through the sky faster than the stars.
To take a good picture of the Moon with a telephoto lens, it is recommended to use shutter speeds faster than 1 s. If we take pictures with normal lenses, then the maximum shutter speed can be 2-3 seconds without loss of sharpness. Since we are photographing at relatively short shutter speeds in night or twilight conditions, the ISO will have to be raised. From my own experience, I can say that shooting the Moon usually takes place at ISO 400-800.
Issue #3. Exposure adjustment and lack of dynamic range . We have already mentioned this problem: at night, the Moon is brighter than everything that surrounds it in the frame. Therefore, the photographer will have to choose - to show either the Moon or the surrounding landscape in the photo, greatly overexposure to the night star. When shooting at night, you will have to choose only from these two evils. The article has already seen illustrations of both situations. Let's look at them again:
The picture shows a night landscape with a rising moon. Although the landscape was shown, the moon turned out to be completely overexposed. So I decided shamefacedly to hide it behind a tree.
The exposure is set to the moon. Its surface is not overexposed. However, I had to say goodbye to the heavens: in their place was blackness.
And this is just an overexposed disk of the Moon, taken with a telephoto lens. All the details on it are lost. This is an exposure error. Avoid such shots. If the moon is overexposed, make the frame darker in order to preserve all the details on it.
If you shoot at night with a telephoto lens, focus on the moon, show all the details on it. If you're shooting with a wide-angle lens, it's best to focus on the landscape.
To prevent such a choice, it is necessary to choose lighting conditions under which the contrast between the Moon and the environment is not so high. This is, first of all, twilight - the time when the moon is already beginning to glow, but not yet as bright as at night.
The camera's dynamic range can be slightly expanded. This will keep more details of different brightness in the frame. If you shoot in JPEG, then Nikon has Active D-Lighting technology to expand the dynamic range.
Also, some cameras allow you to create HDR-pictures (for stitching together several frames with different exposures). Remember that the Moon moves relatively quickly across the sky. And so that the final HDR image is not blurry, each individual frame will have to be taken at significantly faster shutter speeds.
How to correctly determine the exposure when shooting the moon? I don't think anyone ever managed to get a perfectly exposed frame the first time around. In such difficult conditions, any method of exposure metering can fail. Always take test shots and adjust the exposure based on them, making the following shots either darker or lighter. Use the Live View screen, so you can see the future brightness of the frame right on the camera display. In order not to depend on the quirks of automation, it is best to shoot in manual mode, independently controlling all shooting parameters.
Easy to use exposure bracketing. This function will allow you to take several (from 2 to 9) frames with different exposure (brightness). From this series of shots, you can choose the most accurately exposed one and work with it. You can also merge your shots using HDR or exposure blending on your computer.
In conclusion, I would like to wish the readers interesting shootings and bold photo experiments! Remember, the ability to take pictures does not end with the ability to press the buttons on the camera. You need to find interesting subjects for shooting and choose good conditions for photographing. Pay attention to preparation for shooting, planning. This is the key to successful shots.
See also:
-
Solar eclipse in the frame. How to shoot the sun?
-
How to shoot the northern lights?
-
How to photograph lightning?
How to Photograph the Moon - Canon UK
How to Photograph the Moon - Canon UKARTICLE
Andrew Fusek Peters is always looking for new, unexplored ways to capture the moon. In this article, he shares his tips for creating extraordinary moon shots and how the right equipment helps him realize his creative ideas.
Andrew Fusek Peters mounted a Canon RF 600mm F4L IS USM lens on a Canon EOS R5 to capture the moonrise over Munstone Rock, the top of Stiperstons in Shropshire, UK. “A good tip for photographers of the moon is that you can capture it during the day, a few days before the full moon, since it rises in the early evening,” he says. “With enough light, you can take great pictures.” Shot at 1/500 sec, f/9 and ISO 100. © Andrew Fusek Peters
Whether it's a glowing orange sphere rising above the horizon, or the outline of a silver moon against a city skyline, the moon, the brightest and largest object in the night sky, has long captured the imagination of photographers. Full moons and events such as the full moon before the autumnal equinox, blue moons, blood moons, and eclipses often trigger a flurry of photos on social media. These are mostly close-ups, but photographers on the hunt for more creative shots can take inspiration from Andrew Fusek Peters' tips and techniques for capturing the moon.
A British photographer whose work appears regularly in national newspapers and magazines, he prefers to photograph the moon as part of a larger frame, thus telling a whole story. "I'm always looking for an interesting foreground to capture the moon within a landscape or create a special environment," he explains.
His approach is worked out in such detail that sometimes people mistake his pictures for artificially created compositions. In fact, every element of the photo is captured on camera in RAW format. And this is not an easy task, because it requires careful planning, the use of the right equipment and the ability to be in the right place at the right time. In this article, Andrew shares tips for capturing original photographs of the moon at different times of the year.
Try to include the surroundings by creating an interesting foreground, as in this shot of the moon behind a radar and telephone tower on Titterston Klee in Shropshire, UK. “I saw the moon rising behind the tower, but until I started processing the image, I didn’t notice the similarity between the gray satellite dishes on the tower and the spots on the surface of the moon, which creates a stunning reflection effect,” says Andrew. Taken on a Canon EOS 7D Mark II with a Canon EF 500mm f/4L IS II USM lens at 1/500 sec, f/4 and ISO320. © Andrew Fusek Peters
1. Choosing a suitable shooting location
The first step is to understand where and when the moon will rise. Previously, this required tedious calculations, but today there are special programs that will do this work for you. Andrew uses Photographer's Ephemeris 3D, a visualization tool for landscape and location photographers. “The app allows you to plan a location within 50 meters and see where the moon will rise and what objects it might be hiding behind,” he explains.
Do you have Canon equipment?
Register your equipment and get access to free expert advice, equipment maintenance, exciting events and special offers - join the Canon Professional Services program.
Join CPS
2. Choosing the right time
It may seem like the best time to shoot is the full moon, but Andrew says that's not always the case. “Start filming a few days before the full moon,” he says. “This way you don’t have to rely on outlines and silhouettes because you still get enough light on the scene.” As an example, he cites his photograph of Clan Castle in Shropshire (below). “You can see the waxing moon in the photo as it rises over the castle at sunset, so I was able to capture a lot of the surrounding details,” he explains.
Moon over Clan Castle in Shropshire, UK. “The picture was taken in November, so the moon gives off an amazing yellow glow,” says Andrew. “It definitely has an autumnal feel to it, and I like how the moon is positioned in relation to the building. It was in this case that the idea came to me that the moon does not have to be large, you can come up with a more original composition. Taken on a Canon EOS 6D Mark II with a Canon EF 100-400mm f/4.5-5.6L IS II USM lens at 1/80 sec, f/9and ISO 100. © Andrew Fusek Peters
3. Constant improvisation
“No matter how carefully you plan everything, in the real world you constantly have to quickly adapt to circumstances,” says Andrew. “Shooting the moon is like shooting wild animals in their habitat,” he explains. You must understand the principles of their behavior. The moon is shy, and will never appear at the moment you need. Even small clouds can spoil the picture."
Andrew's 2016 Supermoon (below) on the cover of Britain's national newspaper The Times may not have come out at all. The weather conditions were not suitable for shooting, and he decided to give up the idea and was already heading home. “Suddenly, driving up to Church Stretton in Shropshire, I saw that the sky had cleared up,” he says. The moon was behind a volcanic structure that I now know is called Three Fingers Rock. This spectacle really impressed me.”
“I knew that with a Canon EOS 7D Mark II, a Canon EF 500mm f/4L IS II USM lens, and a Canon Extender 2x III with an additional 1600mm, I could get the maximum focal length possible. I used a fence as a tripod, and in this way I took a series of three shots. I knew where the focus point was, so I decided not to position the moon in the center of the frame, but to create a leading compositional line, and the first shot turned out exactly as I intended it. ”
Andrew's supermoon behind Three Fingers Rock in Shropshire, UK is featured on the cover of The Times. “It was pure coincidence: I did not know that the moon would rise in this place. But I quickly reacted to the situation. The most exciting moment was when I returned home, when I realized that the frame was not cropped and only minor processing was required from me, ”he says. Taken on a Canon EOS 7D Mark II with a Canon EF 500mm f/4L IS II USM lens + Canon Extender 2x III at 1/60 sec, f/8 and ISO800. © Andrew Fusek Peters
4. Consider Atmospheric Clutter
Andrew learned an important lesson from the Supermoon image for The Times. “When the photo was taken, the moon looked fuzzy and a little blurry,” he recalls. - I remember, I then thought: "It's because I'm a bad photographer." But someone said to me, "Not at all. There's a lot more atmospheric pollution in the air at moonrise to shoot through, and don't forget the Earth's atmosphere. That's why the moon looks washed out. " When it's high in the sky, the atmospheric noise isn't as strong and you can take a clear picture."
5. Don't use a tripod
Andrew says a tripod is great for starry sky photography, but handheld photography is better for moon photography. “The main problem with shooting with a tripod is that the moon may not appear where you expect it to appear,” he explains. “You need to be able to react quickly and change your position so that the moon is positioned exactly where you want it in the frame, just like with a remote shot of the sun setting behind the hills. You will have very little time not to miss the optimal lighting - twilight light. So to capture your perfect shot, you'll need to shoot handheld."
6. Best Camera Settings for Taking Pictures of the Moon
When it comes to settings, Andrew advises you to maximize your camera's potential. “Check the light areas regularly. This is where the electronic viewfinder comes in handy. Choose your exposure very carefully. And one more reliable rule, which is especially true for shooting at dusk: when choosing an exposure, focus on the moon, and not on the general landscape. If you set the exposure depending on the scenery, the moon will look dim.
“Of course, you should shoot at the lowest ISO possible, but you also have another challenge: getting the perfect shot,” he adds. “If that means shooting at a faster shutter speed, like when using a long lens, then that’s exactly what you should do.”
On the dark side: photography in low light
Valteri Hirvonen developed a distinct style of photography while working in his native Finland through the long, dark winters. In this article, he shares tips for shooting in low light conditions.
Find out more
“The photo was taken in January at sunset, around 6:00 pm, in my garden,” Andrew recalls. — I climbed onto the roof of the greenhouse, and it was one of the rare cases when the bird did not fly away. The moon peeks out from behind the bird and its beak. This is one of my best photographs." Taken on a Canon EOS 5D Mark IV with a Canon EF 500mm f/4L IS II USM lens at 1/640 sec, f/8 and ISO1600. © Andrew Fusek Peters
7. Best lenses for photographing the moon
When exposing the moon, the amount of scenery detail you can capture will depend on the quality of your lens and the performance of your camera when shooting in low light - these are the aspects that will help capture objects in shadows with high detailing.
People regularly ask how photographers manage to capture the moon so big. The basis of this effect is the compression of perspective by a telephoto lens. Andrew uses the Canon EF 100-400mm f/4.5-5.6L IS II USM and EF 500mm f/4L IS II USM lenses with the Canon Extender 2x III, which are perfect for his purposes due to their high magnification and high accuracy. “To get a good close-up of the moon,” he explains, “you need a big lens.”
However, he recently got to work with a Canon EOS R5 and a Canon RF 600mm F4L IS USM lens. “It's incredible clarity and fast focus. The level of detail is really impressive,” says Andrew. The in-lens image stabilization equivalent to 5 stops of exposure was also a big advantage for Andrew when shooting the moon. “I was able to work with fairly long exposures,” he says. “It is necessary because the moon is moving fast. I literally follow her, so I really need this feature.”
Moonrise over the Devil's Chair, the largest and most famous rock outcropping on Stiperstons Hill in Shropshire, UK. “The dynamic range on a camera like the EOS R5 makes it possible to increase the level of brightness for landscapes captured after dark,” says Andrew. Taken on a Canon EOS R5 with a Canon RF 600mm F4L IS USM lens at 1/500 sec, f/8 and ISO100. © Andrew Fusek Peters
8. Best Cameras for Taking Photographs of the Moon
Canon's EOS R5 and EOS R6 full-frame mirrorless cameras offer excellent low-light performance, and Andrew was impressed with the EOS R5's results when he attached a Canon RF 600mm F4L IS USM super telephoto lens. “This is a significant step forward,” he says. “This combination provides an incredible level of detail. The 45-megapixel full-frame image sensor allows you to zoom and crop the frame while maintaining high detail.”
For Andrew, when shooting the moon, the electronic viewfinder was an added bonus. “The electronic viewfinder is incredible, because it allows you to set the desired exposure to the moon and immediately see the result,” he says. “Because I’m handheld, I need to keep an eye on what’s going on with the viewfinder and I can quickly assess the situation.”
Andrew was particularly impressed with the Canon RF 600mm F4L IS USM 5-stop image stabilizer, which allowed him to photograph the moon at night without a tripod, even with an extender. The Canon RF 600mm F11 IS STM and Canon RF 800mm F11 IS STM super telephoto lenses are also compatible with Canon RF extenders. Taken on a Canon EOS R5 with a Canon RF 600mm F4L IS USM lens + Canon RF Extender 2x at 1200mm, 1/200 sec, f/10 and ISO400. © Andrew Fusek Peters
9. How to take clear moon shots at long focal lengths
New telephoto lenses such as the Canon RF 600mm F4L IS USM and Canon RF 400mm F2.8L IS USM feature sophisticated image stabilization systems that reduce camera shake to an effect of up to 5 exposure steps, but handheld moon shots still require a photographer to be a master without a tripod.
“There are a couple of ways to achieve the desired result,” says Andrew. - First, you can use the head as a balance point - the camera is balanced in relation to the forehead, and the head is used as a base. Secondly, if you have the opportunity to take a picture while walking in nature, it is best to use a fence post as a tripod. Finally, you can lean the camera on your knee. The knees help a lot: you can quickly crouch down and rest your elbow on your knee for extra static.”
10. Spend enough time in post-processing
As Andrew points out, creating a detailed RAW image of the moon and surroundings is only part of the equation. You will also need to do a lot of work in post-processing your photos. “If you get the exposure right, the moon will still look dim,” he explains. - You will need to pay special attention to highlights, whites and shadows, use radial filters [which allow you to correct individual areas], and also highlight a lot of details. And of course, you will need to work on the foreground, working on the shadows and perhaps applying various graduated filters. ”
Andrew also adds, “You do your best to bring your RAW file to life. Ansel Adams famously said: "A negative is like sheet music, but an imprint is like a whole concert." This also applies to shooting the moon when it comes to RAW files and processed photos.”
By Tom May and Phil Hall
Andrew Fuzek Peters Equipment
Equipment Professionals Use to Take Photos
Canon EOS R5
Professional flagship full-frame mirrorless camera with 8K video and high-resolution stills.
More information
Canon EOS 7D Mark II
Designed for those whose element is speed. Be the first to capture a unique moment. Capture moments that other photographers miss.
Additional information
Canon EOS 6D Mark II
Whether you're looking to create more ambitious projects or decide to become a professional photographer, the EOS 6D Mark II has everything you need to take your next step.
More information
Canon EOS 5D Mark IV
Whatever the shooting situation, you can rely on the robust design and versatility of this camera.
Additional information
Canon EOS-1D X Mark III
Andrew's next generation EOS-1D X camera is the ultimate creative tool, featuring deep learning autofocus, 5.5K RAW movie shooting and efficient shooting in low light.
Additional information
view more0009
Super telephoto lens with high optical performance and class leading portability and optical performance.
More information
Canon EF 100-400mm f/4.5-5.6L IS II USM
Professional L-series zoom lens with Image Stabilizer and ASC coating for exceptional sharpness in sports and wildlife photography.
Additional information
Canon EF 500mm f/4L IS II USM
Super-performance L-series lens with Image Stabilizer and f/4 aperture, ideal for wildlife photography.
Additional information
View More Hide Additional
CANON RF 2X
Exteader RF 2x provides high clarity and universality due .
More information
Canon Extender 2x III
Ideal for photojournalism, sports and nature photography, providing improved focus accuracy and improved interaction between camera and EF lens.
Additional information
view more Hide Additional 0238 Pro tips for perfect low-light exposure
Lorenz Holder, Redline Challenge Mentor, shares three of his favorite flash techniques at sunset and at night.
Learn more
ARTICLE
The best mirrorless cameras and lenses for landscapes
Nature photographer and Canon Ambassador Radomir Jakubowski explains how the Canon EOS R System has expanded his creative possibilities.
Learn more
ARTICLE
Capturing Tokyo at night with the Canon EOS 5D Mark IV
See how art director and photographer Liam Wong was able to capture the special atmosphere of vibrant cityscapes with the Canon EOS 5D Mark IV.
Learn more
ARTICLE
Capture the night sky with the Canon EOS Ra
astrophotographer Fergus Kennedy discovers how Canon's new full-frame mirrorless camera is changing the rules for capturing the night sky.
Find out more
Subscribe to our newsletter
Click here for inspirational stories and exciting news from Canon Europe Pro
If you see this message, you are browsing the Canon website using a search engine that blocks unnecessary files cookie.