Tips for outdoor photography
Ten Tips for Outdoor Photography — Washington Trails Association
Ten Tips for Outdoor Photography Even though Washington's backcountry is filled with awesome scenery, sometimes it's not so easy translate that beauty into an awesome photo. To help you with your outdoor photography, professional photographer Mike Matson shares his top ten tips for good outdoor photos. https://www.wta.org/get-involved/events/photo-contest/how-to-take-better-outdoor-photos https://www.wta.org/get-involved/events/photo-contest/how-to-take-better-outdoor-photos/@@download/image/538544f7-69eb-48b8-8ce0-baec0273ac37.jpg
Even though Washington's backcountry is filled with awesome scenery, sometimes it's not so easy translate that beauty into an awesome photo. To help you with your outdoor photography, professional photographer Mike Matson shares his top ten tips for good outdoor photos.
- First Place Flora and Fauna, 2010 Northwest Exposure Photo Contest.
Fern macro taken in Olympic National Park by Kathy Fournier.
Even though Washington's backcountry is filled with awesome scenery, sometimes it's not so easy translate that beauty into an awesome photo. Getting a good outdoor shot requires practice and patience. You might get lucky and snap an award-winning photo, but more often than not, a great photo is a combination of careful planning and good timing.
>> Got a great photo? Submit it to Washington Trails Association's Northwest Exposure Photo Contest - accepting entries from mid-August to mid-October each year.
To help you with your outdoor photography, professional photographer Mike Matson shares his Top Ten Tips:
- Carry a tripod. The easiest way to improve your photographs is to use a tripod. You'll get clearer photos, and a slower shutter speed can allow you to take a deeper depth of focus.
- Shoot during the "magic hour." Plan your hikes around good light. The hours at the beginning and end of the day will yield exceptional photos.
 The rest of the day pales in comparison.
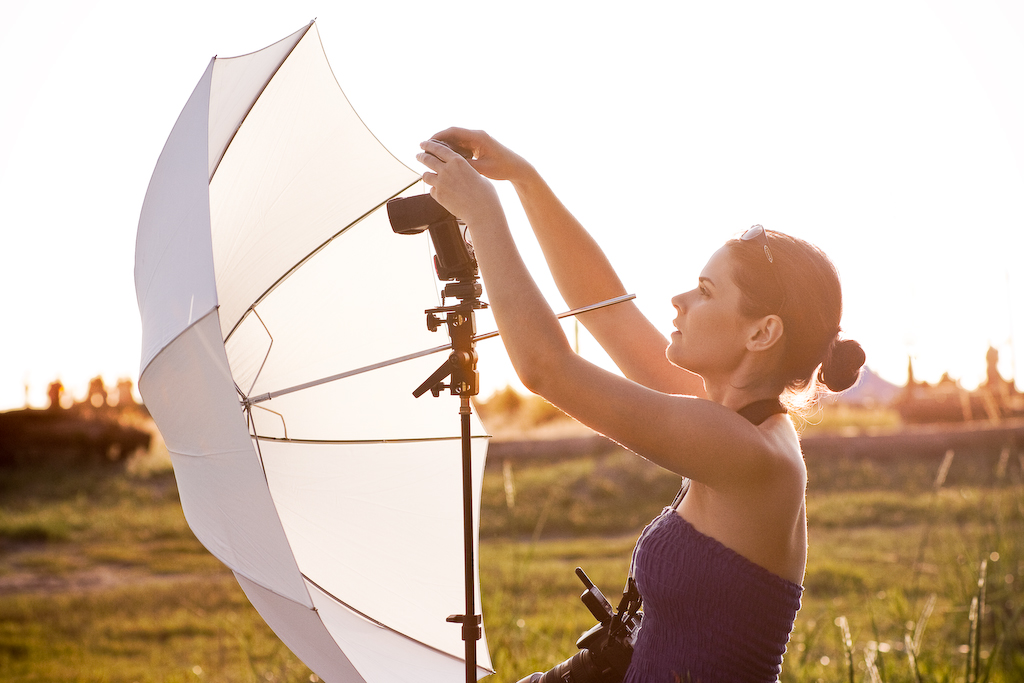
 - Use supplemental lighting. Sometimes nature's lighting isn't the best for photography. Simple, supplemental lighting from fill-flash, reflectors, and even strobes can do wonders for your photos.
- An example of composing a photo using the 'rule of thirds.'
- Avoid the "bullseye." When composing your photo, throw things off center on purpose. Use the "rule of thirds," which imagines your photo divided into a three-by-three grid, with the horizon and important elements of the photo found within or along the lines of that grid.
- Less is more. Simplify your photos. Pick out the most important element you see and focus in on it.
- Add a human touch. Humans are part of the landscape, so don't be afraid to include them in your outdoor photos. People add scale, personality, and interest to landscape photography. Run ahead on trail and take photos of hikers facing the camera rather than walking away.

- Catch the action. Try techniques such as panning with a moving subject, slow shutter speeds, fast shutter speeds, or moving the camera on purpose. These can all add the perception of dynamic action to your outdoor photos.
- Watch the water. The Cascades and much of the Northwest are defined by moving water. Use a tripod and slow shutter speeds to capture the beautiful, blurred motion of moving water.
- Change your point of view. Galen Rowell called this "participatory photography." Finding new perspectives is one way to boost the creativity of your photos. Try a chest harness, an extension arm, or helmet cam to get a different point of view. Or simply crouch low or stand on a rock for a different perspective on a familiar subject.
- Add a filter. Two simple, inexpensive filters can often improve your photos. A polarizing filter can deepen the color of the sky and allow you to see into lakes and streams. A graduated neutral density filter, when used properly, can help you avoid the common problem of underexposed forest and overexposed white mountains in the same photo.

How to Take Outdoor Portrait Photography: 10 (Simple) Tips
The relatively controlled and static nature of a studio is often the most ideal place to shoot a portrait. After a while, you get a feel for the studio; it’s space, the light and how your equipment interacts with it. However, there is an undeniable sense of dynamism when you take your portrait photography outdoors.
Outdoor portrait photography can be spontaneous, producing results that can even exceed your expectations as a photographer. When you’re outside, you have a blank canvas and each natural element brings with it an entirely new color to your palette.
While you may not be in full control of the colors at your disposal, a good photographer learns to be quick on their feet, working with what they get. While studio portrait sessions are all about control, outdoor portrait photography is about catching lightning in a bottle.
What is the best camera setting for outdoor portraits?
Photographers may disagree on the “best” of anything related to their craft. Like any tool, there’s a time and a place for almost anything. And like any craft, there’s also the freedom to break with tradition and forge your own path.
However, a fundamental principle of outdoor portrait photography is often this — shoot with a lens longer than 50mm, shoot with your aperture wide open (for great use of natural light and background blur) and never use your automatic setting.
10 simple tips for how to take outdoor portrait photography
Beyond your camera’s settings, there are a few other outdoor portrait photography tips for beginners to learn that will lend themselves well to successful outdoor portrait photography.
1. Use a fast lens with a wide aperture
You want a fast lens that’ll focus and shoot with precision but you also want a wide aperture (the f setting on your camera lens.) The faster you shoot and the wider the aperture, the more blurred your background will be. In the industry, we call this blurred effect “bokeh” and it’s a popular component of outdoor portrait photography — it gives your subject perfect clarity while removing much of the background detail.
2. Shoot at the widest aperture
Along those same lines, you’ll always want to adjust your camera settings so that you can shoot at the widest aperture possible. Your ISO settings and shutter speed settings can be adjusted on-the-go to achieve this. Simply setting your aperture to the widest setting will end up with lackluster results, so ensure you compensate for it.
3. Shoot on an overcast day (if possible)
Outdoor portrait photography lightning can be counterintuitive. Amateur photographers might assume that a sunny day means more light and that more light is a good thing. However, the exact opposite is true. The more light you have to work with, the more unwanted glare, shadow and squinting you’ll have to deal with on your model.
A cloudy day brings with it a more natural, diffused lighting that will photograph cleaner.
4. If shooting on a sunny day, shoot in the shade
Some days you schedule a shoot and have no choice but to bear with the overwhelming light thrown off by the sun, especially in the summertime. You can’t always reschedule a shoot, so you’ll often be forced to forge ahead even under less than ideal conditions.
However, outdoor photography isn’t mean to provide you with perfect conditions — it’s supposed to challenge you to improvise, and who knows, at least your photo will have beautiful warm tones. Shooting in the shade or using a light reflector will help you overcome the sun’s glare.
5. Shoot in RAW format
RAW format is an uncompressed file format that most DSLR cameras should allow you to shoot in. Believe it or not, even when you shoot manually and in high resolution on your DSLR, your camera is still making key decisions about the color contrast and exposure. Your camera will ultimately compress that high-resolution photo, thereby lowering its maximum quality.
Shooting in RAW tells your camera to not touch anything when you snap a photo — your camera will leave it exactly as it is, allowing you more control in post-processing to fine-tune what you want without anything else getting in the way.
6. Wait for the “Golden Hour”
You might have heard the term “golden hour” thrown around even without completely understanding it. To put it simply, the golden hour is an hour (or less) where the sun begins to drop on the horizon before it officially sets. It is right before night time. As the sun lowers, its light diffuses through the atmosphere in such a way that it casts a magical, delicate orange light over the world.
You might have seen it with your own eyes — you might have even stopped in your tracks and thought “everything looks particularly beautiful right now” without realizing that what you were expiring is a coveted 1-hour window for photographers all over the world.
7. Invest in wardrobe & makeup
Whether you do makeup and wardrobe, your model does it themselves, or you hire a professional to tag along on your shoot, you’ll want to make sure that both wardrobe and makeup are intentional components to your shoot.
While it’s great to get a “natural” look with some of your photography, you’ll need to prove that you can control a session and do the kinds of things the professionals do, like intentionally dress and make up your subject in a way that complements your surroundings, tells a story, or exudes a certain something that shooting naturally often misses.
8. Shoot outside the box
You made the jump from shooting inside a studio to shooting outdoors, so ensure you’re taking advantage of the biggest perk of outdoor photography — the sheer amount of spontaneity. Don’t keep your focus so narrowed on your subject that you forget to look around you.
When you’re outside there are plenty of opportunities to improvise and go against your initial plans. And sometimes those photos are the ones that elevate your subject matter into something else entirely.
9. Take many, many photographs
Gone are the days where you need to pack rolls and rolls of film on a shoot. We have portable storage that can exceed a terabyte of space, which gives you plenty of opportunities to shoot to your heart’s content.
The best photographers on the planet take thousands of photographs, for which they may only have a total of ten that they keep. Keep that in mind when you’re photographing a subject — you have plenty of space to take photos, so don’t skimp.
10. Learn to post-process
Most photographers agree that there is an 80/20 ratio to photography. 80% of your photograph is created at the moment when you’re out there photographing your model. The other 20% is created afterward in front of your computer.
If you haven’t already, learn software like Adobe Photoshop. Understand the fundamentals of retouching and post-processing. Once you understand it, get good at it. Most photography today is adjusted on a computer — that’s why you shoot RAW.
If you want to just use a photo editing app, there are also many options to download, including free ones.
Useful tips for shooting outdoors | Articles | Photo, video, optics
Whether you shoot portraits, landscapes, animals or reportage, if you shoot outdoors, you have to obey the laws of nature. Lights, shadows, environments and backgrounds are not up to you, and yet, the task of creating the perfect frame remains key. Today we will talk about what techniques and useful tricks will help you subjugate the environment and achieve the most successful shots. And also, we will definitely note possible unforeseen situations and ways to protect against them.
Best Time
Whenever it comes to any genre of outdoor photography, we always start at the golden hour. Although this concept is too voluminous and does not limit your possibilities, it is still worth choosing the time wisely. Shooting at midday is quite inconvenient. This applies to both landscapes and portraits. It is during these hours that you will find too bright light, too sharp shadows, the likelihood of overexposure and the fact that the model will squint. In order to get a more or less acceptable photo at such a time, you will have to use the help of reflectors and even some ingenuity. Modern accessories will most likely allow you to correct the situation, but still, if possible, it is best to avoid the middle of the day when the sun is at its zenith.
Therefore, photographers generally prefer gold watches - a few hours in the morning and a few hours in the evening. At this time, both the light and the shadows are softer, and the sky often gives unforgettable reflections on objects. Both landscapes and portraits taken at this time are likely to be successful without unnecessary lotions.
Better weather
Actually, weather can fix what time does. In other words, when the sky is covered with clouds, it is much easier to shoot portraits than on a clear day. Landscapes are also often successful in such weather. But the clear sky in the middle of the day is not our friend at all. Without the help of filters, most likely, it will not be possible to cope. But the good news is that most defects can indeed be corrected with filters. ND and a polarizing filter, for example, will add realism to colors and remove glare from water or glass. And the Gray Gradient Filter will help darken a sky that is too bright. All three can be purchased together in a set from Polaroid.
But back to weather conditions, you will probably want to shoot in the snow, and in the rain, and in the heat at some point. So, you can shoot in any conditions, and even at any time, because the main task is only to choose the exposure settings as correctly as possible. There is no ideal weather for filming.
Natural light
We've already talked about reflectors, and for good reason. When shooting outdoors, especially in portrait photography, you have to work a lot with natural light. And you will have to not only rely on these conditions, because sometimes it is simply impossible, but also use the light in the most beneficial way for yourself. Forget the flash, of course. It is of little use on the street, unless you have got a diffuser, for example MR-0912T by Falcon Eyes. Therefore, we are interested in reflectors and camera settings. Accordingly, if you are shooting a portrait during the day, then the reflector is simply indispensable in order to soften the light and choose the most suitable shade (you can use reflectors of different colors for this). Whether you're shooting at night, portrait or landscape, you'll have to rely entirely on your own exposure control. Portraits in the dark are not recommended, with rare exceptions. But for landscapes, you should get a tripod and patience, because you will have to shoot at a slow shutter speed.
The right lens
This, of course, is much more a matter of genre than location. When shooting natural or urban landscapes, a wide-angle lens is the best option. Portrait for portraits, telephoto for animals, etc. Even a novice photographer knows this for sure. But on the street, to all the difficulties of the photographer, one more will be added. Changing the lens will be quite difficult. Changing a lens is already a rather difficult process, and dust, dirt and moisture on the street can quickly get into the camera structure. So it is better to keep all sensitive parts covered and that is why the lens should ideally meet your requirements. If you need to use different lenses, it's best to use a second camera. Borrow it from a photographer you know, or rent it. In any case, it is important to protect all elements of the camera from outside influences.
Adjusting the white balance
One thing you definitely have to do manually when shooting outdoors is adjusting the white balance. It is worth considering that on a sunny day you will have to face bright light and numerous areas that may be overexposed. Therefore, depending on what result you are striving to obtain, you will have to build a balance. In this case, it is always good to have a color chart with you, such as the X-Rite ColorChecker Classic.
But in order not to worry too much about white balance, it is better to shoot in RAW format, in which you can correct the white balance even in post-processing.
Be sure to experiment with shutter speeds
If you're shooting landscapes, it's always worth trying a slow shutter speed. This applies more to night shooting, as the light creates interesting effects when you photograph cityscapes. Also, shutter speed works well in shooting water: the waves are smoothed out and in general, the photo takes on a more solid look. Also, the shutter speed is great for shooting waterfalls. Remember that when you shoot water, a polarizing filter will come to the rescue. And when you shoot a landscape with a strong difference between the lightest and darkest areas - a gradient filter. An ND filter is good for long exposure photography because it neutralizes areas that are too bright.
Horizon
This is a rule that everyone knows but many people forget. The horizon should always be as level as possible. This is important in order to build the composition of the frame. And this applies not only to landscapes, but also to portraits in which the horizon line is visible. But to raise or lower the horizon in the photo - this question depends only on your artistic intent. We recommend relying on it as often as possible.
Careful preparation
Shooting outdoors is a process that always requires careful and detailed preparation. First, you need to make sure that all the equipment is charged, it is worth stocking up on a replacement battery in case the main one runs out, and an additional memory card if you plan to shoot a lot. Take only the lenses you plan to use with you. Do not take up extra space in your bag.
Keep the weather conditions in mind, of course. If you are going to shoot in rainy or snowy weather, be sure to have a protection for your camera, for example, Falcon Eyes RC705 because it shrinks faster in the heat, condensation can accumulate inside in the cold, the same can happen in the rain. Sometimes you can take a red light flashlight with you, especially if you are shooting at night. Such a flashlight will not damage the frame, but will help you illuminate the buttons on the camera.
Do not forget about the necessary filters that will help make the frame brighter and more saturated. And be sure to purchase a protective filter for the lens.
All of these tips are extremely simple, but are extremely useful when you go to shoot. The main thing is to always remember the purpose of shooting and enjoy the process. Some details you can fix later, some should be foreseen in advance. And the most important thing of course is to practice, because in the end, all acquired skills will be brought to automatism.
5 tips for beautiful nature photography
Nature photography has a fairly wide range of scenes and objects that you shoot outdoors, and includes elements such as landscapes, wildlife, plants, trees and flowers. Whether you're shooting general scenes or close-ups of flowers, nature photography is great for developing photography skills. In this photography tutorial, we will give you 5 tips on how to get beautiful photography in this genre.
Focus on the foreground
Shooting outdoors can be good for more than just developing photography skills. Fresh air, beautiful places - all this is a great incentive to walk outdoors with your camera.
When shooting beautiful scenes in nature, pay attention to what is directly in front of you, under your feet. Don't forget to work in the foreground. When you find a magical landscape to photograph, include something interesting in the foreground. I often see photographs of nature in which “empty” landscapes, yes, yes, without a filled foreground, your landscape will often be empty and uninteresting.
Don't get me wrong. Nature shots can look great with atmospheric skies and an attractive overall view. But adding foreground elements to the frame will help make your image deeper and more interesting. Fill the foreground with rocks or flowers and the photo will become much brighter. In this photo, I've included dandelions in the foreground to emphasize the scene.
Photo balance
Have you ever been disappointed with the photos you get from shooting outdoors? I think it happened. So my next tip is to make your photos more balanced. When shooting nature and composing a shot, carefully control what you include in it. All elements in the frame require balance.
For example, you might be able to combine parts of the landscape to enhance the scene, such as trees and fog, or trees and wildflowers. When you're shooting plein air, can you spot what would make your shot more visually pleasing?
Use the correct lens
Depending on the subject or scene you are photographing, it is important to choose the correct lens to get the most out of your shots. For close-ups of insects or flowers, a macro lens is best, which will allow you to get as close to your subject as possible. When you are faced with a large open area, use a wide angle lens to get more of the area into the frame. It can also work the other way around, an ultra-wide lens can remove and fit a large scene into the frame, and a long lens can pull the right scene out of the scene in the open.
Also, if you are shooting wildlife, telephoto and zoom lenses are best as they can help you get closer to your subject.
Here, too, everything can be the other way around. For example, if you are photographing animals in a zoo, a wide-angle lens may be better than a telephoto lens if you want to capture more than just the animal in the frame, or if you are close to it.
Shooting in different seasons
The advantage of nature photography is that it can be done at any time of the year and in different seasons. Summer is a great time to capture lush landscapes and green foliage when everything is in full bloom. Spring is the time when everything blooms. Autumn in cooler climates brings atmospheric weather and fogs, as well as all the foliage turning yellow-red, giving us bright photo opportunities.
Winter is another great time to catch the sparkle of nature. While this time can be harsh and cold, it can also be strikingly beautiful. Almost any object covered with snow always looks good in nature photographs.
Snow can add great contrast to landscape shots. For example, the snow in this scene helps to bring out the dark silhouettes of the trees. I also find snow-capped mountains to be great subjects for photography during the winter season.