What is a flat lay photo
Flat Lay Photography — The School of Photography
In this tutorial, you’re going to learn flat lay photography and how to make your photos look like a pro has taken them. And we’re only going to use budget equipment.
I’ll show you how to get great flat lay photography using just a window, a cheap second-hand camera or phone and a piece of polystyrene!
Get access to ALL our online courses - 1000’s of videos, worksheets, critiques of members work, personalised support and much more with our monthly membership.
get unlimited access to all our courses here
What is Flat Lay Photography?
Flat Lay Photography is a photograph taken from directly above looking down on usually products or food. It gives a bird’s eye view of what it is your photographing and is an extremely popular genre of photography on social media. It’s a great way to show off products from a small business, plates of food from restaurants or just to have a bit of fun at home.
Food Flat Lay Photography - Credit – ReplicaSurfaces.com
Flat Lay Photography - Credit – ReplicaSurfaces.com
Theme and Feeling
The first thing you need is a theme or feeling you want to achieve. Try not to go in blind, what mode would suit the things you want to photograph? Is it a dark moody scene of mechanical products or a bright fresh theme for coffee and cake.
Food Flat Lay Photography - Credit – ReplicaSurfaces.com
Food Flat Lay Photography - Credit – ReplicaSurfaces.com
Flat Lay Photography with Cameras
What to photograph?
What you choose to photograph will also dictate the feeling of the shot. If it’s for your business or restaurant then clearly what you sell will be the focus but if doing it for yourself try to choose something that’s personal to you or something you have a passion for.
We are a photography training company so for our example I’m going to use my loving collection of old classic cameras.
Flat lay Backgrounds
Your flat lay background is going to be an important part of your shot and you need it to match the mood you’re going for. You can use anything for a background, piece of wood, table, piece of vinyl etc., or you can get backgrounds that are specifically made for flat lay photography which are the ones we use for our example supplied by ReplicaSufaces.com.
These ready-made backgrounds are great as they’re made ridged and come in a variety of styles making your job a lot easier when creating flat lays.
Check out the range of backgrounds available from www.ReplicaSurfaces. com
com
Flat Lay Lighting
All photographs need light and flat lay photography is no different. The rule here is the lighter the better and generally, it’s a soft light that works best for this type of photography. Use a big window for your main light source and if there is harsh light coming through the window you can simply put net curtains or chiffon fabric onto the window which will diffuse the light, making it soft.
Then you need to use a reflector to fill in any shadows or dark areas. In my example, I simply use a piece of white polystyrene (a white piece of card will also work) and a silver reflector to bounce back the light and fill in the shadow areas.
Softening light with chiffon fabric
White card or polystyrene for reflector
No reflector
With white reflector
Balance
The next thing is to set out your products in order so they will look good. In photography, this is called composition and it’s a really important part of any photograph. For more in-depth knowledge on composition click here.
In flat flay photos, the main thing to get right is the balance of the shot. Think of it like a set of scales, what you have of one side of the shot, try to have the same or similar on the other side. This is not an exact science and it’s good to experiment but just don’t have a big object on one side of the shot and nothing on the opposite side.
Flat Lay Photography with clothing - Credit – ReplicaSurfaces.com
want 10% off your first course? click here
Camera
So, you can use any camera for this from a mobile phone to a DSLR. If it’s just for Instagram then a mobile phone will do fine, but if it’s for more professional use like on websites or print, I recommend using a DSLR camera.
This is because using a phone can sometimes give more noise in the image and on a DSLR you can control things like focal length and minimalize camera shake.
Credit – ReplicaSurfaces.com
Food Flat Lay Photography - Credit – ReplicaSurfaces.com
Camera Settings for flay lay photography
You don’t need to know the ins and out of photography for this type of shot but just knowing a couple of things will improve your photography greatly.
Lenses, particularly mobile phone lenses, can obscure the scene and flat lay photos suit what’s called an ‘as your eye’s sees’ focal length. This means the objects and scene will look as close to the real thing as possible.
On most DSLR cameras this will be a focal length between 30-35mm. This can be different on cameras with different sensor sizes and to find out the exact as your eye sees focal length on different camera click below.
Camera Sensor Size Comparison – Which one is right for you?
To avoid camera shake set your camera to its Tv or S mode which is called shutter speed priority. Then set the camera’s shutter speed to 1/125th of a second. If you’re still seeing a slight blur at this setting change it to 1/250th of a second.
Then put your ISO onto Auto and make sure you have plenty of light available.
In summary
Camera mode – Tv or S (Shutter Speed Priority).
Set the shutter speed to 1/125th or 1/250th.
Put your ISO on Auto.
Put your lenses focal length to 30-35mm.
Make sure you have plenty of light.
To get more in-depth knowledge on photography click here.
Camera Settings for Flat Lay Photography
Camera Settings for Flat Lay Photography
Leave space for graphics
Adding graphics to flay lay photographs is a great thing to do, so make sure you set up the scene leave space for any text. And if you want to use a different aspect ratio set the scene for that size, e.g. if it’s going to be for a 16:9 ratio (TV Screen) set the scene for this.
Flat Lay Photography with a Graphic
Post-processing for flat lay photos
Lastly, you will need to do some post-processing on the image. This could be as simple as cropping and adding contrast using phone or free PC apps or, if you want a more professional look you can take the pictures in Raw format and post-process them in a program Lightroom or Photoshop.
For my example, I created a Vintage preset in Lightroom.
Lightroom Presets Free Download
Classic cameras without preset
Classic cameras with vintage lightroom preset
Like this? - Check out similar tutorials below
I hope you liked this tutorial, please leave us a comment and support us by sharing it with your friends and subscribe to our newsletter at the bottom of this page for more.
We also have an excellent learning community on social media so please join us there as well.
Thanks for watching and remember – Learn more at The School of Photography.
About the Author
Hi, I’m Marc Newton and I’m a photographer, educational speaker, author, teacher of photography and the founder of The School of Photography. Follow my personal work on Facebook and Instagram.
Photography, For SchoolsThe School of PhotographyFlat Lay Photography4 Comments
0 LikesFlat Lay Photos: 10 Tips for Acing the Look
Creating a flat lay photo is one of the easiest ways to take your Instagram posts from “nice” to “Are you a production designer? This looks like it was in Vogue.” Whether you want to create some sweet Facebook ads for your small business or up your personal branding game, we’ll take you through all the steps to creating the perfect flat lay photo. Peep this video to get started quickly, or scroll down for some in-depth tips.
What is flat lay photography?
Flat lay photos are images shot directly from above. Think bird's eye view, with said view consisting of a beautiful arrangement of objects. Great flat lay photography tells a story through its objects, colors, and organization. It's become immensely popular over the past few years, showing up frequently on social media. Personal brands use flat lays, company brands use flat lays...
...errrybody uses flat lays. Now let's walk through some flat lay photography ideas to learn how to use 'em yourself.
1. Get inspired by flat lay photos
If you’re not sure where to get started, or what direction you wanna take, we suggest browsing Pinterest or Instagram with the #flatlay to get an idea of what looks you like. Or browse our Pinterest pins and other templates for inspo.
2. Assemble your props like a pro
Just like props exist in theatre to amplify the scene, props are used in flat lay photography to amp up the pic. Follow these intuitive tips to assemble your best-laid photo (pun intended).
Appropriate theme
Consider the focus of your flat lay photo. If it's business-driven, maybe you have a beauty blog and the answer is super straightforward (cosmetics!), or maybe you’re going for something a little less concrete (like trying to capture the feeling of excitement before an impending journey). Whatever it might be, establish a theme and keep it in mind while selecting your props so you end up with a cohesive look.
Prop type
Let's talk prop type. Props can be neutral or universal objects like plants, books, paperweights, or everyday knickknacks you'd find around the house that photograph well. You don't want to detract attention from the main subject – only to have complementary objects that will enhance the photo.
If you're in the health and wellness field, consider stones and crystals, or yoga-focused objects. Decor with motivational quotes is always a good idea, too. Consider what energy or vibe different objects give off as you begin to assemble them. And put yourself in your ideal audience's shoes – how does this flat lay make you feel to observe it from the opposite perspective?
Prop volume
Don't be shy – pick a lot of props (more than you would conceivably use) so that you can swap things in and out while you compose your shot. As you begin to shoot, you don't want to have to go back to your in-home shopping spree. The small adjustments you make can be intuitive and result in the perfect, marketable flat lay photo.
Prop color
As you peruse your home for props, it helps to have a color palette in mind. Different colors prompt different moods and feelings in an audience, so consider color theory as you prep. How does your variety of props make you feel as they lay together? How would you like to feel? Let these decisions inform your focus.
Diverse shapes and sizes
Lastly, go for objects of varying shapes and sizes in order to prompt visual interest. What just looks good together? Trust your gut. Maybe too many bulky objects clash. Maybe alternating objects as big, small, big, small, looks too staged. Create balance in your photo by mixing smaller objects with larger objects in a subtle way and placing objects of similar colors on both sides of the image.
This is a great time to consider diversifying textures as well — whether that pertains to your background or the objects themselves. Soft, rough, hard, smooth. Just like we desire foods to have a balance of salt, sour, bitter, and sweet, the same is true here. Balance is key. As you keep finding inspiration at home and on social, you'll get clear about what exactly feels right.
Pro Tip: If you don't feel you can capture everything all in one shot (we believe in you) – have no fear! Use PicMonkey's countless photo editing tools to sharpen, brighten, adjust colors, crop, resize, and more post-photoshoot. We also have some thoughts on adding in texture before sharing your creation with the world, which can be found here.
Be fluid, be creative, be flexible!
Some of our favorite flat lay photos look more “candid” because they include people (or, more accurately, body parts). If you want to create a look that has a sense of movement and action, consider enlisting the help of a friend. It’ll be way easier/less impossible than trying to pose and photograph yourself.
4. Pick a flat lay friendly background
When choosing a background, it’s best to keep things simple. A plain white background works well because it won’t distract from your props, but you can also pick something neutral like a wood floor or table. If you want to use a colored background, you can get crafty by taping some matte wrapping paper on a floor or table.
Or, if you'll be doing flat lays consistently, consider investing in some vinyl backdrops to easily create a rustic look. You can also magically erase any background you have after the photo shoot and put in a new one with our automatic background remover tool.
5. Stage your flat lay photo
Now that you have all your props and your background, it’s time to get organized. Set up next to a window and try to shoot in the morning or late afternoon when you’ll get the best light. Try not to use a flash, as this will create shadows.
When setting up your shot, leave a little bit of space between each object. This will help highlight each prop and keep your shot from looking cluttered.
If you plan on posting your photo to Instagram, a square layout looks really nice. If you’re shooting with your phone, it’s easy to set up a shot by picking the square setting in your camera.
6. Leave space for text and graphics
You might want to leave some space where you can add text or graphics in post-production. If you’re creating an ad, this is where you can add your brand name and logo. Or if you’re going for a more inspirational look, you can stick in a quote.
7. Shoot from above
Climb up on a ladder or step stool and get to shooting. Creating distance between you and the flat lay will help you fit everything into the shot. This is also one of the only ways to ensure that your photo actually looks flat.
Once you’re up there, take a few test shots and don’t be afraid to keep moving props around until it looks just right. When you have your perfect shot, it’s time to edit!
8. Work some basic editing magic
Start your flat lay design quickly with one of our designer-made templates.
You might have a great photo (we knew you could do it), but a few simple edits to your image's colors, exposure, and clarity can seriously up the wow factor.
To make these edits in PicMonkey:
Open your image in PicMonkey's editor and find Edits on the left menu.
Size your image correctly (if needed) with the Resize tool. Or start your project with a pre-sized blank canvas or template before adding your photo. PicMonkey subscribers can also use our lightning-fast Smart Resize tool to output your design in multiple formats, all while keeping its quality intact.

Colors: Adjust the Saturation slider to make your colors pop.
Exposure: Use the Contrast slider to either brighten your image or make it a little more sultry.
Sharpen: If needed, use the sliders available to make your image crystal clear.
If you want a one-click solution, you can also try out the Auto adjust button at the top of the Basic Edits menu and let PicMonkey work its magic. If you don’t love the results, just click the Undo button in the bottom toolbar.
9. Add text and graphics
If you left space in your image for text and graphics, now’s the time to add them in.
To add text and graphics in PicMonkey:
Go to either the Text tab (T icon) or Graphics tab (shapes icon).
Add your text and/or graphics.
Use the respective tool menus on the left panel to customize.
To learn more about our text and graphics tools, check out:
All About the Text Tools Menu
All About the Graphic Tools Menu
You probably didn't spend all this time on your flat lay photo just to let it sit. Time to share with the world! When you're all done designing in PicMonkey, you have two options:
Click Download on the top toolbar to download your design to your computer as a JPG or PNG (or PDF for Pro subscribers).
Click Share to post directly to social.
Note that the latest version of your design is automatically saved to Hub, PicMonkey's cloud storage, so you can always return to it at a later time. Now get out the sunscreen to protect your skin from the shiny glow of your social feed on fiiiiire! And, while you're out there checking all of your social media praise, be sure to download the PicMonkey mobile app if you haven't already so you can access, save, and edit your designs on the fly!
Get the PicMonkey Mobile App!
What is flat light?
Photographers often use language that is completely incomprehensible to ordinary people. This is a secret cipher, thanks to which others do not know what is happening in our special world. It's actually not all that bad and intentional, but it's reasonable to mention that there are a lot of terms in the field of photography that are poorly described. I hope this article will help you understand and clarify some aspects.
We often use the term flat light. Everyone has probably heard this: “this is a great photo, but the light is a little flat” or “never shoot at noon, otherwise the light will be terribly flat.” But what does this term actually mean? The phrase "flat light" is often misunderstood, moreover, both the meaning itself and its merits, along with the features of the work. Flat light can be very useful in certain situations, but sometimes it's best to avoid it. There are some very subtle aspects of understanding this term and there is no one perfect description or rule, but in this article I will try to explain everything in as much detail as possible.
What does the term itself mean?
Flat light refers to lighting that creates minimal contrast, i. e. there is little or no difference between shadows and highlights. Everything is simple here.
In fact, this is often called not the light itself, but a photograph that loses the feeling of three-dimensional space due to a lack of contrast. Flat light shots often lack depth and interest, even with the right technical compositional elements. Any intrigue or character is lost, and attention is diverted from the history and influence that the photographer sought. High-contrast shots between shadows and highlights give the illusion of height and depth, making the photo appear larger. We will talk about this a little lower.
Flat light is different from hard and soft
To be clear, the term "flat light" has absolutely nothing to do with hard or soft lighting, or "hard" which is a completely different topic. Check out the video Improve Photography's Lighting in a Flash, which explains the concepts of hard and soft light well, because it's impossible to cover this topic in detail here. In short, hard light is one that produces a very sharp contrast, and a momentary transition from shadow to light creates a clear line. Soft light provides a very smooth transition and is generally considered more pleasing to the eye in some types of photography. However, it is worth saying that there are many examples of creative use of hard light and effects that can only be achieved with its help. Sometimes it's just necessary for amazing results.
Flat light is often considered a rookie mistake, but this is a misconception. Whether it's effective or not, flat light is entirely dependent on the intent and context of the shoot. This type of lighting can be used to your advantage, just like more contrast and any other type.
What are the causes?
This shot of Buachaille Etive Mòr in Glencoe, Scotland is a great example of flat light.
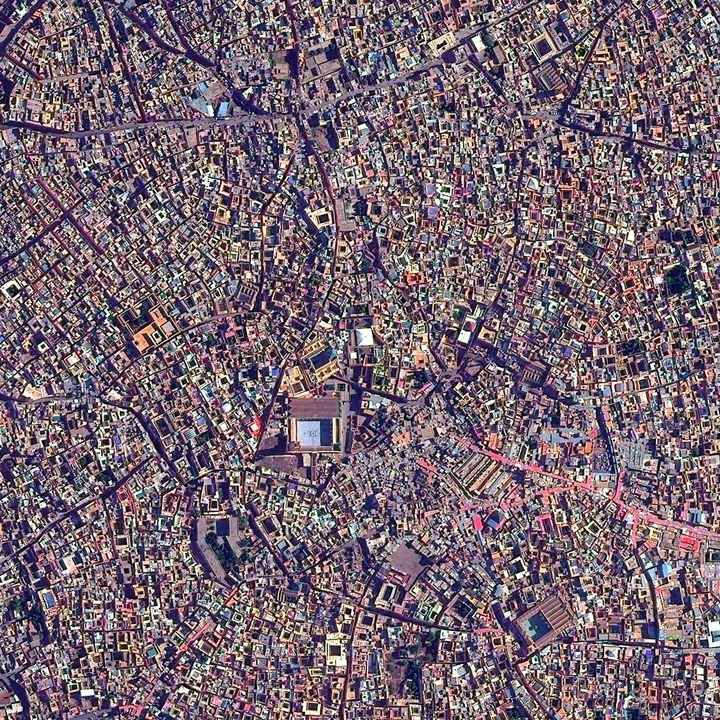
There are a lot of misconceptions and a lot of misunderstanding when it comes to flat light and what causes it. This is easy to understand due to a lot of conflicting information and as I mentioned before, there are some subtleties to be recognized. It's worth saying that flat light is more likely to show up in certain lighting conditions, but each frame brings its own unique challenges. Flat light is due to the uniform illumination of the landscape, however, sometimes even in such conditions you can get a three-dimensional shot.
Cloudy skies
Often when the sky is covered with clouds, the lighting looks flatter, but sometimes this situation can be beneficial by creating soft lighting. A cloud cover is a giant softbox that turns a relatively small light source, the sun, into a massive lighting fixture by scattering its light. If on a cloudy day there is still a certain direction of illumination, such as less dense areas of clouds or light clouds, the contrast between the shadows and the illuminated areas will immediately appear. Shooting on cloudy days has its advantages and disadvantages. Thanks to the soft light, on such days it is convenient to shoot portraits, but it can be paid for with a less effective and intriguing shot. More on this later.
The same mountain, but with different lighting conditions, resulting in a less flat and more contrasting image, although both photos were taken at about the same time.
Direct Flash
Pointing the camera's flash directly at the subject produces flat illumination. For this reason, this technique is not recommended, and many professional photographers prefer to use an external flash. This applies to external hot shoe flashes and the camera's built-in flash. However, direct light can create quite a stark contrast if you don't use an umbrella, softbox, or other diffuser. With a flash aimed directly at the subject, if there is no tilt angle, the light is evenly distributed and a flat effect is created. If the model turns its head or you change the angle, deep shadows will appear in some areas, and the lighting of the frame will no longer be called flat.
The same effect is observed for light painting and when placing the light source directly behind the camera. This is a common mistake that I myself have made several times. If you want to get into light painting, Improve Photography has a tutorial with great tips to help you avoid flat lighting when working with this area of photography and create an impressive shot.
Shooting at noon
This is a common misconception. While the midday sun can make a subject look flat, it's very hard. When working in the daytime, the contrast between dark and light areas is simply colossal, the shadows are almost completely black, and the highlights are white. Such an image is often considered to be very "non-flat". If your subject is looking directly at the sun, their face will be evenly lit and the contrast will be minimal, but still present to the surroundings. The same happens with the built-in flash, any angle between the light source and the subject creates a sharp contrast.
Benefits of flat light
As I mentioned earlier, flat light can be used to create great effects and take professional photographs. For example, flat lighting techniques are often used in fashion or beauty photography. This helps to hide imperfections in the skin, soften its surface and not draw attention to warts or moles. Therefore, flat light is better than other types that emphasize the fine details of the face. Many beauty photographers deliberately use this technique to create the “perfect” look, and in post-processing add contrast to the desired areas using techniques such as lightening and darkening.
Flat light is also used when shooting models against a white or light background, as this creates more contrast between the face and the background.
Disadvantages of flat light
As mentioned, flat light is often considered a safe lighting method for beauty photography and is a good place to start for beginners. It can appear dull, dull, and lifeless compared to the bright results that can be achieved with other types of lighting, such as edge lighting, which creatively accentuates contrast in the right details.
Flat light brings no depth or intrigue. On the contrary, it fully justifies its name, creating a flat, two-dimensional image in which the eye has nothing to catch on. It is clear that this is not at all suitable for landscape photography, where impressive contrast between highlights and shadows is needed. For this reason, the ideal time to capture the surrounding scenery is at sunrise or sunset.
5 Tips for Dealing with Flat Light
These five tips will help you avoid flat lighting, but don't forget that you can use it to your advantage. However, if depth is needed and the lighting conditions are "flat", these tips will help you fix the situation.
1. Add your own "non-flat" light
If your lighting conditions make it impossible to create dramatic lighting, create your own light. Electronic flashes offer a lot of flexibility and, combined with relatively inexpensive modifiers, can give you the look you want for a more professional shot. Set the flashes to emphasize the desired details, add depth and interest. It's impossible to cover all the ins and outs of flash in this article, there are plenty of other articles on the subject, but it's worth mentioning that using an external flash can greatly improve the look of your shot and give you the flexibility to take great photos regardless of natural lighting conditions.
2. Pick a time
Each type of shooting has a certain ideal time of day. In some hours, the light is warmer, more dramatic and more voluminous. Sunrise and sunset, with their golden hour, are great times to shoot with minimal chance of flat light. The time of day when the sun's rays fall at an acute angle is preferable. As already mentioned, you can get good shots with flat light, and some subjects or photographs look better in it, which leads us to the next tip.
3. Study the area
Regardless of the lighting conditions and the subject, whether it is portrait or landscape photography, it is worth studying the place where you are going to photograph. A plan made in advance will provide the best starting point if there is a risk of running into a flat light and help develop a back-up solution. Knowing the area can be of great help in this matter. You can also think about what will work and what will not work in flat lighting and discuss it with the client. If the client insists on shooting at a time of day where flat light is most likely to be encountered, or lighting conditions are not suitable, you can share the results of the study with him and reschedule the location or time. Sometimes you just have to agree when faced with uncomfortable lighting conditions. In such a case, it is always better to have a plan.
4. Check the weather forecast
The weather can play a role in lighting when you arrive at your location. The white cover of the clouds is not very suitable for photographing landscapes, creating a flat effect. The same will happen when shooting at noon, when the sun is high above the horizon. However, as I mentioned before, none of the items guarantee flat light.
5. Come back another day
If the lighting isn't good and there's no chance of a good result (remember, flat light is sometimes useful), just quit. There is nothing wrong with putting up with inappropriate lighting, as it is impossible to take an epic shot in the conditions provided. Obviously, if you are traveling or away from home, you want to get the most out of it, as it may not be possible to return. However, this is not the last day. Relax and come when the conditions are more favorable.
Don't give up anyway!
This topic always causes controversy between opponents of flat light and those who use it to their advantage. Regardless of the lighting, you should always try to make the most of the available conditions, either for your client or for yourself. If you love photography as much as I do, you will enjoy shooting in any conditions. Just get out of the house and take pictures!
Author: Matt Gavin
27/07/2017 Views : 25400 Source: improvephotography. com Translation: Alexey Shapoval
4 Ways to Add Depth and Dimension to Photography
One of the challenges of photography is the 2D environment we use to capture the 3D world. Creating a sense of depth and dimension in an image helps to engage viewers and draw their attention to photographs. In this article, we offer you four tips for creating depth in your shots.
Use the right shooting angle
The first thing you can do to add depth to your photos is to stand in the right place and point the camera in the right direction. When you take a photo while looking straight at a flat object, your photo will also look flat. Look at the example below. The photo was taken at dawn from one side of the river bank, overlooking the other bank. Notice how the river "draws" a straight line right across the image. In fact, there is nothing here that could attract the attention of the viewer.
A beautiful sunrise or sunset is not enough to make an impressive photo. This shot lacks depth due to the shooting angle used.
When the next shot was taken, all that was done was to turn the camera slightly to the left so as not to shoot directly across the river.
This shot is slightly better than the first shot.
Now let's look at what happens to the same shot if the photographer just moves a little. Moving only a couple of meters away from the original point of view and facing along the river, instead of looking directly through it to the other side, you can get a better angle.
See how the river attracts the eye?
Okay, this is better, but you can go one step further. Let's add a hillside to the frame. See photo below.
See how the river takes your eyes out of the frame, and not back?
It felt like the river was working against the photographer in the composition above, so he flipped the final image (mirroring it horizontally). The river now enters the image on the left and meanders. The human eye reads from left to right, top to bottom, so try to keep your compositions moving in that direction as well. This will be convenient for the viewer, and keep his attention on the photo.
The river leads the viewer into the image, the details on the hillside are interesting
Note the noticeable difference between the first image and the last image in terms of depth.
Layer
The next thing you can do to add depth to your shots is to add layers. This technique means that there are objects in the frame that are at different distances from the camera. Basically, you want a foreground element (something close), a midground element, and a background (something far away).
Human eyes perceive depth, so we can see both near and far objects at the same time. Your task is to take the picture in such a way as to add the correct elements for the overlay. The easiest way to do this is to find the subject you want to photograph, then step back and add something to the front. Let's look at a few examples.
In the image above, the edge of the river bank has been added to the foreground, and the entire valley is visible. But that doesn't work very well, see? There are three separate elements in the image - the sky, the grass in the foreground, and the valley. But they don't seem to be related. And yet - the edge of the hill and the horizon are straight lines, too static here.
The photographer has now focused on the bush in the foreground, and the valley behind has become a background supporting it. This shows the depth of the frame much better.
What to focus on
Where to focus?
In the examples shown, the main subject is in focus, but the foreground or background is blurred. But you can even swap the focus and still create depth in the frame.
Focus on small bush in foreground, valley here in background
Focus on grass
Use light to add depth
The next thing to consider when you want to add depth to your shot is lighting. Look at the light that illuminates the subject. Does it add a sense of three-dimensionality to the image, or does it remain flat and lifeless? In photography, lighting is everything, light complements the scene, adds mood and feeling to it.
Backlight to highlight an object
Backlight is one way to highlight an object, separate it (or them) from the background, and add depth to an image. Consider examples.
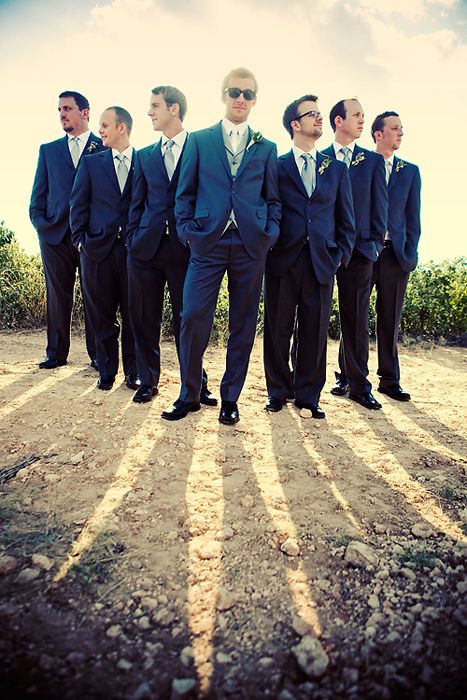
Here the strong light from the window outlines the man in the old mine and makes him stand out. This is the same technique used by portrait photographers in the studio.
The same technique is used. The girl is backlit by the sun, which highlights her beautifully and separates from the background, adding 9 layers0003
These happy, dressed-up girls are highlighted and separated from the background of the frame
The shadow of the bicycle shows another element of depth yellow leaf to illuminate it
Side light to show size and shape
Light from the side allows you to emphasize the shape, texture and size of your object. In the image of the building below, you would not be able to see the corner of the house, and therefore its shape, if both sides of it were evenly lit.
In a portrait of a Turkish man, side lighting adds character to his face.
Other ways to use light
There are many ways to use light in photography, and here are a few more ideas. Fog can create interesting effects, and if you bring together all the other elements of an image - foreground, midground, and background - it can add depth to your shot.
Layers in the fog at Machu Picchu, Peru
Use framing in your compositions
The way you compose an image can also create a sense of depth. One element of composition that is particularly useful in this area is framing. By stepping back and adding something to the front, you are already adding layers. But what if you could take this technique up one more notch? If there is something that can serve as a frame around your subject - it will add zest to the composition.