Cosmetic product photography
6 Cosmetic Product Photography Ideas
If you’re looking for some fresh inspiration and new cosmetic and makeup photography ideas, look no further.
I’ve put together a list of six ideas that you can try next time you’re shooting product photographs. The best part? Most of these ideas don’t require much space and only need some basic equipment. They’re also a great way to practise and refine some important product photography skills while getting creative.
If you’re new to cosmetic product photography, you might want to take a look at these tips to start.
1. Make a simple product arrangement
Sometimes less is more, so why not try and create a simple arrangement of cosmetic products.
For example, perhaps you want to shoot a close up of a logo embossed in lipstick or a geometric arrangement of eyeliner pencils.
Get creative with different backgrounds (why not try a mirrored surface or use a juxtaposing colour), experiment with different shooting angles and perspectives, or think about how to create a certain mood using lighting. Challenge yourself to focus just on the product and try to minimise any props or supporting items.
Simple shoots like this can be a great way to practise your product photography lighting, experiment with different composition techniques, or try out different backgrounds. All you'll need is your product(s), a background (and maybe some simple props) and some lighting.
For more inspiration on how to get creative using minimal lighting check out my ‘One light challenge product shoot' live show. Or, for ideas on how to get creative with easy lighting techniques, watch my ‘Lighting control' live show.
2. Get creative with cosmetic swatches
From fashion magazines to billboards, photographs of cosmetic swatches are everywhere.
While these eye-catching images may require some patience, they’re deceptively simple to shoot and don’t require much equipment at all. If you have one light (this could be a speedlite, studio flash or even continuous light) and a background, then you have all you need to get started.
As you’ll see in our ‘How To Create & Photograph Cosmetic Swatches’ live show, there are endless ways that you can get creative with this type of photography. Why not try creating interesting shapes with different products, or experimenting with different colour backgrounds? If you’re feeling like a bit of a challenge, you may want to try to incorporate the product in the shot for a real advertising-style image.
3. Shoot an advertising-style image to test your skills
If you already have some experience shooting cosmetic products, why not set yourself the challenge of recreating a certain brand’s style, as I did for our ‘Clinique-style advertising shoot’ product photography class.
This is a great way to try new techniques, practise different skills and push you outside your comfort zone.
Take a look at brands such as Clinique, Estēe Lauder, Dior, Dove or Maybelline to get a feel for their imagery. Instead of using your own creative ideas, try to stick to styles and concepts used by the brand. Think about the style of their images, the lighting and the mood.
Creating mood boards and pre-visualisation sketches can be a good way to identify potential challenges and plan how you’re going to shoot the products. Using this sort of workflow will also give you a sense of what it’s like working for a client and executing their ideas.
4. Experiment with monochromatic product photography
Colour plays an important part in photography, but instead of opting for bold, juxtaposing colours, why not try a more simple monochrome style.
Shooting monochromatic product images can be a great way to experiment with different approaches to colour and improve your understanding of how colour can impact the mood and feel of images.
You don’t need a lot to get creative with this idea. Simply experimenting with different backgrounds can completely transform an image. Why not try, for example, shooting products on textured card and then smooth matte acrylic and see the difference.
This idea will also put your lighting skills to the test; shooting monochromatic images often requires good rim lighting (particularly when shooting black products on a black background), but you can also get creative with exposure, the hardness or softness of the light, shadows and mood.
5. Create a flat lay arrangement
Flat lay photography is a style used by many cosmetic brands, particularly for their makeup photos, and it’s an easy one to try at home.
You don’t need a lot of space or equipment (I’ve done a flat lay photoshoot using two lights), but you can get really creative experimenting with different colour and texture backgrounds and different compositions.
6. Go back to basics and shoot a white background product shot
This might sound like a somewhat simple idea, but don’t discount the benefit of going back to the ‘basics’.
Creating white backgrounds isn’t always as easy as it may sound, so it’s a great test of your lighting skills. It’s also an opportunity to perfect your techniques for creating the clean, fresh images favoured by so many cosmetic brands.
If you’re already confident creating white backgrounds, why not take it a step further and experiment with interesting shadows, shapes and patterns.
© Karl Taylor Education. All rights reserved. No content on this page may be used or shared by third parties.
To learn more about cosmetics photography, make sure to take a look at some of our additional product photography classes, which you can find here. These classes cover everything from the styling to the lighting and you'll also find related post-production classes.
How To Make Photos For Cosmetics & Beauty Products
The global cosmetics market is forecasted to reach over 569 billion in 2020 with skincare being the leading category, followed by hair care and make-up accordingly.
Cosmetics & beauty product photography is the driver of the marketing campaigns for this massive industry with e-commerce photos serving as a visual bait & a purchasing trigger.
There are dozens of ways how professionally executed cosmetic photography can increase a makeup store’s CTR, boost conversions, decrease returns, just like the product photography overall, whose impact we have already detailed for our readers.
If you are tasked with a mission to create a perfect selling batch of images of lipsticks, creams, powders, hair products, you might find this piece useful, as we will vivisect down to a pixel the following topics:
- Beauty product photography ideas
- How to photograph makeup swatches
- Nuances of skincare product photography & lipstick photography
- How to take pictures of cosmetic products to minimize post-production
The quality of the makeup product photography lies in the balance of so many factors, from perfect cleaning of the product, creating perfect swatches, choosing the right light setting to use a mix of water & glycerin for perfect droplets.
Let’s now get right down to the insider secrets and magic of the beauty product photography tips without further ado.
Below we represent the internal Squareshot guidelines we share with all new cosmetics photographers joining our team – so you know these come from years of experience and can see the resulting images in our portfolio.
There may be as many lighting sources as 5 or 7 for a shoot of a few make-up objects. Can it be done with just 1 lighting source? For sure. But those Picolites allow a beauty product photographer to direct extremely narrow rays of light just where an accent is needed.
Neither overexposed nor underexposed images look good. This is why it may take a few tries to set each of the lighting sources at the right power level.
Many surfaces of lipsticks and mascara have a reflective surface that needs to be monitored to ensure minimal post-production.
If there is a category in product photography, that accepts dozens of items in one shot – this is certainly cosmetics images. Just check out the Google search with the respective title below.
It should be noted, though, that the product page will still require several images with a standalone item, possibly an item, and a box. For commercial marketing purposes, props and droplets may be added too.
The truth is: however hard you polish those reflective surfaces, the space dust will still end up sticking to it [of course it’s space dust, where else would it come from in a spotless lab of a makeup photographer?].
But if you pay attention to all the spots and blemishes on the surfaces of lipsticks, creams, makeup boxes, you will spend less time photoshopping them.
You need to be consistent not only with shooting 1 item but throughout the entire session. It is best not to move lighting much and to place items in the same very spot time after time again without moving the camera.
Ideally, a photographer will tweak the distance between the photographed objects, equipment, source of lighting, diffusor, softbox once to achieve a perfect desirable effect before the entire shoot.
The items in the beauty product e-commerce category are mostly small, but carry elaborate designs with lots of small print and exquisite decoration. This is why the high resolution is even more important for this category than across the board.
1024X1024 pixels is the minimum requirement here, but 2400X2400 will ensure you have a levy to play with if needed.
What do they consider to be a beauty product? There are a few categories, that fall under this e-commerce domain:
- Skincare products
- Hair products
- Makeup products
- Fragrance
- Bath & Body
Each of these categories will have multiple subcategories, just see the image below with this extensive Beauty Counter menu of skincare products.
- Small size.
- Reflective surfaces of the packaging.
- More often than not, multiple items from the collection can be shot.
- Use of props & colorful backgrounds.
- Macro shots and close-ups are usual for cosmetics shoots.
- Use of water droplets on items [50%/50% water and glycerin], water sprayed out in the air, and smoke in the background.
- Shoots of makeup swatches and crushed products to render color and texture.
Those are just a few characteristic aspects that are encountered by professional product photo studios while doing the images of makeup and cosmetic products.
Postproduction is so time consuming and expensive. So is time on the shoot.
Thorough preparation for any shoot can reduce both: time on site for the shooting crew as well as the expensive post-production cycle.
- Order a wet cleaning of the photo studio on the day before. We joke that the dust comes from space, but those specks of dust that appear from nowhere are a huge nuisance to photoshop. By ordering a cleaning, you reduce the chances of the dust around – so ultimately on your products as well.
- Orderly unpacking. If you were to spot the differences between the technical specification of the shoot and the available products, it would be at this stage. While unpacking, it’s time to place all the items in order of a scheduled consequence.
If the boxing is not part of the future image, place it away but in such a spot, so that you can later recover the matching product. - Triple check if all the items and all the cosmetic product categories are lined up for the smoothest shoot flow. Lipsticks, powered, creams, mascaras, toners, highlighters should all be aligned so that photographers can quickly grasp the logic of the shoot.

- Assemble the props and colored backgrounds respectively – so that they are at hand but not in the way, laid out in the consequence they appear on site.
- Clean the products with a wet cloth and polish with a dry microfiber cloth. It is paramount to keep them as tidy as possible for the shoot. Always keep a dry tissue and cloth on set to remove last-minute spots.
- Wear white gloves for the best effect – not to leave any fingerprints on the glassy parts of the lipstick.
- Choose the right shooting background:
- If you need your cosmetics item with a drop shadow, use the white paper background.
- If you need a reflection, then use a white acrylic backdrop.
- If NO SHADOW mode is requested, then consider using a tall object or stand to place a photographed item on – to prevent much post-editing.
Camera Set-Up
Whichever camera brand you use, makeup product shots will benefit from such settings:
- ISO 100 [max 100-200]
- 1/125s
- F 11 [if impossible, F 5,6 - 18]
- Focus distance 30-90 cm
- Check camera and image sensor for cleanness
- Use the remote control to avoid smudging
- Pictures must be in RAW format [.
 CR2]
CR2]
Tripod
Tripods are cheap, so even if you are DIYing your beauty product photoshoot, you should ensure you have access to a tripod for the shoot. The most basic working examples are available on Amazon for as little as 30 dollars but bring the much-needed consistency to the series of images.
Lighting
If you have a reference image, setting up the light to mimic the lighting on such an image may take a few test shots. Experiment with the power of lighting, the distance between an object and a camera as well as with the positioning of diffuser or reflector to create the desired effect.
Changing a lighting setup between the shots of the same series is a big no-no. So, once you achieve the right balance of light and shadows, ensure to use a remote for lighting and keep the camera on the tripod unchanged throughout the shoot.
Natural light is a preferred source of light for many photographers, specifically those who lack the equipment or want to ensure the absence of harsh lines in the resulting images. Ideally, you would have a big window as the source of light in such a case and ensure the session moves quickly to avoid much movement of the light in the process.
These are some of the empirical cosmetic photography ideas for you to play around with.
- Buy Plastic Clay Tools To Create Makeup Swatches
- Stock up on items for experiments [lipstick, eyeshadows, powder, etc.].
Always ensure you have enough lipstick, powder, highlighter samples so that you can play around with composition, creating makeup swatches, cutting the tips of the lipstick, etc. The last thing you want to experience is that you have an amazing idea you cannot embody because you don't have extra lipsticks you can destroy for the shoot.
3. Ensure lots of cleaning material on set
Get plenty of clean cloth and paper tissues to clean the white and transparent background you may need to be using.
4. Experiment with textured backgrounds and colored backdrops
There’s plenty of mood and ambiance in the makeup and cosmetic products, but sometimes the boxing may be laconic and classy, so you may want to vivid up the image with something extra.
Some brands may have the specific colors in their brand book that they would like to use, so ensure to get the exact HEX color backgrounds before you begin the shoot.
Textural backdrops may also help render some nuance, specifically in the close-up mode.
5. It's all in the Props: fine-tune the mood of the shot
It could be flowers, dried lavender, glasses, glossy magazines, fake eyelashes, hay, glitter, candles, purses, precious metal chains.
6. Use cosmetic products ingredients as props
If a cosmetic product contains pomegranate or lemon, you may get an amazing shot with some ingredients as well. Green tea, chamomile, mint leaves can all bring the much-needed nuance to a shoot AND have the informative layer to them.
7. See if water, spray, and smoke could benefit your products
It is not uncommon to use 50/50 water/glycerin solution sprayed or meticulously placed drop by drop on beauty products.
Smoke may become a surprisingly great shooting buddy for an item shot against a black background solo with a single source of lighting.
If you do a fragrance shoot, capturing the mist coming from the bottle may yield stunning results too.
Matte Objects: easiest to shoot, as there are no reflections. Use one source of light to ensure the object's shape and texture are rendered correctly.
Glossy Objects: watch the reflections. Use gloves. Try using semi-transparent reflectors. Always double-check reflections before proceeding with another product.
Reflecting objects: direct the light onto an object it reflects, not the product itself. This is one of the most intricate objects to shoot, as it requires a combo of semi-transparent and white diffusers. Simply put, we recommend you not to DIY it, but to entrust it to a professional photo studio.
You can also look into CGI companies that can take on incredibly complex setups and work with many variables at the same time.
Ideally, you will be on your best behavior during the planning of the shoot and the shoot itself. Otherwise, you are shooting yourself in the leg [pun intended].
You know how tedious and expensive post-production may get, so save yourself some crispy dollars by cleaning items, position so that there are no reflections, overexposure, etc.
What can be corrected during the post-production stage:
- Positioning [minor tweaking is possible to adjust objects relative to each other, image sides, etc.]
- Inadequate Exposure [you cannot fix an overly overexposed image, but some slight correction is possible]
- Consistency [cropping and leveling of the image may help bring consistency into a series of photos].

An extensive chapter in this thorough piece on How to photograph clothing covers image SEO optimization in detail. Here is a shorthand:
- Use alt text tags and descriptions for each image.
- Use JPEG format wherever possible.
- Resize images according to e-commerce platform requirements, ensuring a balance between quality and weight.
Also, make sure that you know the necessary types of product photography for your online-business.
We are a makeup products photography studio in NYC, that executed dozens of shoots featuring cosmetics with stunning results.
Check out our collections of:
- Beauty product photography
- Cosmetic swatches photos
- Makeup images
Makeup is only lightweight, so even if you are looking for a cosmetic product photography service in the USA, not necessarily a photo studio in New York, Squareshot will be delighted to provide you with a custom quote, that includes shipping.
If you are you are using a Shopify platform, check out this app of ours, that helps users order and upload images right to their store.
Your products make this world a healthier, more beautiful place? Let us show the world, how beautiful your products are!
Email us, call us or chat with us to get you started on your mission to make this world a more harmonious place: lipstick after lipstick again.
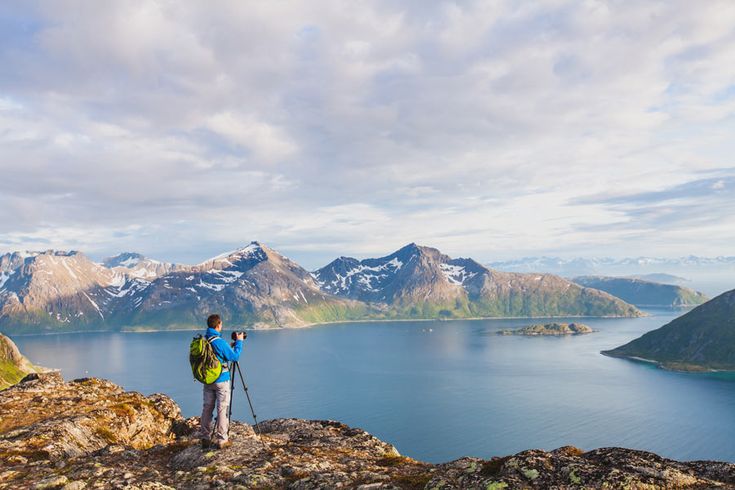
photographer shooting in a photo studio in Moscow
There are studies of marketing companies and online stores that clearly show that high-quality photos play a big role in increasing conversion. Professional bloggers on Instagram and VKontakte also use this "chip". You yourself can notice that on the pages of popular sites and bloggers, there are only high quality pictures from different angles or layouts. This is because cosmetic products are more often bought by females. For them, beautiful presentation of products is important - this allows them to successfully sell products with a higher price. If you decide to photograph objects yourself, then you should be aware of the following nuances of subject photography and shooting with a model. nine0003
Incorrectly selected background
It is desirable to use a white background for posting photos on the site - it is universal. Marketplaces have different requirements, but product photography for online stores in 99% of cases takes place on this one. Such a background completely concentrates the buyer's attention on the product, it should be white, without gradients and impurities. Photographing for Instagram takes place on a white background, on green or blue (chroma key background). This is necessary in order to be able to add various graphic and text information to photos. nine0007
Lighting for still photography
The ideal photography room, windowless or curtained so that natural light does not interfere with the shooting process. In such a photo studio, a professional photographer will choose the right light. In some cases, "hard" light is needed in order to see the sharp and dark shadows cast by the subject of photography. More often, “soft” light is set up with light and diffused shadows - such photos are easier to perceive by the human eye and are well suited for placement in online stores. nine0003
Overkill with photo editing
In model and object photography, there is a golden rule - "the less retouching, the better". A professional photographer will be able to create a high-quality image by properly setting up the equipment and flashes. Do not abuse the capabilities of the Photoshop program, otherwise the photo will become unnatural and the buyer will doubt. This mistake is made by beginners more often when processing photos with models. Remember! You are shooting an object for sale, and not doing a photo shoot with unusual shots. Everything should be in moderation. nine0007
Excessive glare and reflections in the photo
More often it concerns subject photography of products with mirrors, bottle glass or reflective surfaces. A professional photographer in this case must take into account the shooting angles and the location of the subject when photographing such products. On products, bright glare is undesirable, which would interfere with perception.
Low-quality retouching and visible flaws
In addition to overworking with photo processing, there is another side to this process. During photography, it is difficult to discern the small nuances that are visible during processing. Therefore, it is necessary to remove the villi and extra hairs that accidentally fell into the frame. The object in the photo for instagram, online store and catalog should look great. nine0003
The color in the photo does not match the product
This item is especially important when photographing foundation, powder, lipstick, mascara and makeup pencils. A significant proportion of the return of goods occurs due to the fact that it does not match what was seen upon delivery. Although the color reproduction depends on the display of the client’s device, the specialists of the photo studio or you yourself, when shooting on your own, must convey the shade of the object as accurately as possible. Otherwise, you can accidentally mislead your potential buyers. This will lead to the appearance of negativity that will have to be fought. nine0003
Wrong perspective and unnecessary angles
Wrong shooting perspective is a common mistake among amateurs, especially on Instagram. Choose the right distance from the subject and shooting angles, otherwise your subscriber or site visitor may get the wrong impression of the product. If photographed incorrectly, the products will look big or small, elongated or wide. Unusual angles can also hurt conversions.
Other errors and nuances of photography
- Adjust the focus correctly otherwise the subject will be fuzzy;
- It is not enough to take only one photo per item, preferably 2-3 angles;
- Pay attention to the shades in the photo, keep the natural balance and contrast;
- Light or dark photos;
- Correctly choose the pose and facial expression of the model, do not forget to photograph at eye level;
- An object to be placed in an online store must stand level, tilts are allowed during image advertising shooting; nine0042
- The shadow must not be conspicuous and distort the perception of the product;
- Photo resolution should be high to avoid graininess;
- The uniqueness and safety of images must be respected, but you should not go too far with watermarks on the photo;
- Be sure to wipe the product with cloths or tissues before taking a picture to ensure that there are no prints on them.

Now you know how many nuances and little things there are when shooting for a catalog or website. It is best to order product photography from professional photographers in a reliable photo studio with high-quality equipment. In our content studio you will receive high-quality product photos with a model or layout for Instagram, VKontakte, online stores, aggregator sites. Fill out the brief and we will announce the exact price of photography. nine0003
cosmetic products / Shooting for beginners / Photography lessons
In the previous articles, we managed to get acquainted with the features of advertising product photography.
Now I propose to consider in more detail the specifics of shooting cosmetic products. Thanks to the prosperity of the beauty industry, it is quite in demand in the modern photo market. Promotional subject photos of decorative and care cosmetics are required for placement on websites, online stores, advertising layouts, glossy magazines, as well as for use in packaging design and printing. nine0003
NIKON D800 / 24.0-120.0 mm f/4.0 SETTINGS: ISO 100, F20, 1/200 s, 120.0 mm equiv.
The range of leading cosmetic brands is regularly updated, and all new items need a promotional subject photo session. At the same time, as in any other field, shooting cosmetic products has its own peculiarities, techniques and unspoken rules. Some of them will be discussed in this article.
NIKON D800 / 24.0-120.0 mm f/4.0 SETTINGS: ISO 100, F20, 1/200 s, 120.0 mm equiv.
NIKON D800 / 24.0-120.0 mm f/4.0 SETTINGS: ISO 100, F20, 1/200 s, 120.0 mm equiv.
Pictures of goods on a white background "for clipping" are most in demand in such photography. In this case, the most common is the frontal shooting point with the optical axis of the lens passing strictly through the center of the object being shot. This avoids perspective distortions in the geometry of the object. Bottles taken from such a point, among other things, are conveniently arranged in layouts of joint compositions. They look harmonious and stand in the same plane on the catalog page or in the website section. nine0003
Individual photos of skin and hair care bottles:
Mock-ups in which individual product photos are assembled by the designer in general compositions:
As the main product photo, as a rule, photographs of bottles without packaging are used. But quite often, customers are asked to take additional pictures of the packaged product or it next to the packaging. All this is negotiated individually.
Shooting makeup and nail polish has its own specialty. Major cosmetic brands such as eyeshadows, lipsticks, lip glosses, lip and eyeliners, powders, blushes, and nail polishes have a wide range of colors. The design of the bottle and packaging for products of the same series is usually identical - only shades differ. When working on such an order, the main task of the photographer is to optimize the shooting and post-processing process in order to obtain the highest quality and fastest results. nine0003
Let's take a look at how you can speed up the process of capturing and processing makeup images using a nail polish collection as an example. Bottles with polishes from the same collection have the same shape and cap with the brand logo; differ only in the shades of the product inside. No matter how evenly we try to arrange these bottles when shooting, they will still differ slightly in the location of the logo on the lid. You can shoot all the polishes from the collection and trim each bottle individually. But neither you nor the customer needs such “naturalistic honesty”. It is important for the client that the products in the photo look as attractive as possible, the bottles and logos are perfectly even, clear and identical. nine0003
To do this, the easiest way is to choose a photo with the most appropriate location of the logo on the cap (or remove it separately), in Adobe Photoshop, clip, retouch and color correct the cap on a separate layer (let's call it “Cap”), move the glass bottom of the bottle to another layer ("Bottom") and create an additional layer with a mask that will limit the area for filling the bottle with color ("Mask").
Now, just by substituting new layers with polish colors from different frames and saving all the files, we will quickly get ready-made photos of 8 different shades of the collection! nine0003
This method will significantly speed up and make it easier for you to retouch almost all decorative cosmetics. In the example below, the red dotted line in the photo highlights the areas that I replaced in Adobe Photoshop on a separate layer to get new shades of shadows, lipsticks and lip gloss.
Some customers prefer to place one main product photo on websites and in catalogs, and present the palette of shades either as refills (eye shadows, powder, blush), or as a close-up of a part of the product where the color is clearly visible (the tip of lipstick, pencil for lips or eyelids). nine0003
Another popular way to represent the palette of shades and textures of cosmetics is to shoot brush strokes.
It is used most often by large brands that can easily provide consumables for such photography. Indeed, after drawing strokes with pencils, lipstick, pouring foundation and other similar manipulations, all these products lose their presentation.
NIKON D800 SETTINGS: ISO 100, F16, 1/200 s, 85.0 mm equiv.
NIKON D800 SETTINGS: ISO 100, F14, 1/200 s, 120.0 mm equiv. nine0003
Products with a not too liquid texture will be more convenient to apply on a sheet of white thick paper. Foundation, nail polishes and other liquid cosmetics are best poured onto a sheet of white matte plastic. After all, paper quickly absorbs liquid and gets wet, making it impossible to correct the shape and volume of the stroke properly; the edges will fray. In any case, it will take more than one take to create the perfect stroke of the most attractive shape.
Many shades of pencils and foundation do not differ much from each other. In such cases, I paint and shoot a stroke of one color, and then adjust it in Adobe Photoshop to match other shades of the palette. nine0003
High-quality optics and a camera are very important for a clear transfer of textures and shades of cosmetics when shooting. Otherwise, you risk getting a "soapy" indistinct image with minimal detail. I shoot with a Nikon D800. This camera has a high resolution of 36.3 megapixels and allows you to take photos of 7360x4912 pixels.
For individual strokes, it is best to use macro lenses with high sharpness and minimum focal length, such as AF-S DX Micro NIKKOR 85mm f/3.5G ED VR, AF-S VR Micro-Nikkor 105mm f/2.8G IF-ED, Nikon 105mm f/2.8G AF-S VR Micro-Nikkor. I also use the Nikon AF-S 85mm f/1.8G Nikkor and Nikon AF-S NIKKOR 24-120MM F/4G ED VR when shooting compositions from brush strokes and cosmetic bottles. I originally bought the 24-120 zoom as a universal zoom lens. But it gives such a high image quality that I often use it in the subject advertising studio shooting. nine0003
NIKON D800 / 24.0-120.0 mm f/4.0 SETTINGS: ISO 80, F22, 1/200 s, 120. 0 mm equiv.
Most beauty products have optimal shooting angles and compositions found in many brands. This allows you to present the product being sold in the most advantageous way. For example, it is customary to shoot mascara and lip gloss with a brush or applicator standing next to them - their shape is of great importance for customers, which is why it is so important to present this product in a photo. Eye and lip pencils should also be removed uncapped so that the color, shape and thickness of the tip can be seen. nine0003
Eye shadow, blush and powder are usually removed half open. At the same time, the top cover should not lean back too much, but should be slightly on the area with the products.
I talked about the most common techniques used in photographing cosmetics. Different brands may have their own individual characteristics and requirements for creating a photo. Therefore, when starting work, it is very important to study the task in advance, discuss the number and format of personnel for each product and other nuances with the customer.