Light tent photography
Best Tabletop Photo-Shooting Tents and Light Boxes – ARTnews.com
If you purchase an independently reviewed product or service through a link on our website, we may receive an affiliate commission.
If you tend to shoot a lot of objects, it’s a good idea to invest in a lightbox. Like your own scaled-down studio, these contained spaces are designed to offer clean backdrops and lighting; most come with their own lighting system that the photographer can control. In this enclosed space, you won’t have to wrestle with light angles or battle your own shadow, and since your images will have greater color accuracy, you won’t have to spend as much time editing them. Whether your photography practice is for clients, your own e-commerce business, or just for fun, our picks will help you find the best light box.
1. ESDDI Photo Studio Light Box
ESDDI’s lighting booth is an impressive mid-range box with features that will satisfy a wide range of needs. Setup is easy, as it consists of a single piece with collapsible walls that attach via Velcro. Plus, the cube features built-in LED lights, so you only have to plug it in to use it. These line the ceiling to evenly distribute light, and a control dial gives you complete control over the brightness, which changes seamlessly. You can also shoot from multiple angles: straight ahead or through a hole in the ceiling. Or, set up the fourth wall and shoot through a flap. The cube is sturdy and feels like it will last for years.
2. Neewer Photo Studio Shooting Cube
If you prefer to use your own light sources, we like Neewer’s cube, which excels at filtering light. Made of a translucent fabric, it casts beautiful, soft light on interior objects while eliminating reflections. You can either place your lens through a front slit or remove the door for a wider angle. It also folds into a small rectangle and immediately pops back out into its cube shape when you’re ready to use it again.
Buy: Neewer Photo Studio Shooting Cube $54.99
Buy it
3.
 Fotoconic LED Light Box Photo Tent
 This compact three-sided box is a good option for basic, undemanding shoots. It features a ceiling ring of LED lights that you turn on in three modes: white light, soft light, and warm light. You can further adjust the environment by pressing a +/- button to adjust the brightness on a 0 to 100 scale. Because the walls snap into place, the construction is a little flimsy, but this is an economical option for learning the ropes before you invest in something higher end.
Buy: Fotoconic LED Light Box Photo Tent $21.99
Buy it
4. AmazonBasics Photo Studio Box
This light box offers both size and quick assembly. It is large enough to fit a cat or small dog, and all four walls collapse into a thin carrier case that resembles a portfolio holder. Yet, they are structured and feature holes that allow you to shoot from the top as well as from the front door, which is also easily removable. The integrated LED lights have good distribution, but they are not as strong as those in boxes of comparable size, like Havox’s. The vinyl interior also tends to attract dirt, so it’s important that you wipe it down before each use.
Buy: AmazonBasics Photo Studio Box $100.49
Buy it
5. HAVOX Photo Studio
If you’re ready to invest in a top-quality box to call your one and only, we recommend Havox’s booth, which allows you to fine-tune your shoots to attain complete color accuracy in the moment. The box features luminescent LED strips that you can rotate slightly to make micro adjustments, and each has its own control dial to adjust individual light levels. It also comes with a diffuser to create soft, bright light. We also like that there are many access points: shoot with the front open, through one of two front flaps, or through a ceiling flap. Because the materials are so sturdy, you can’t simply collapse this box, but the parts can be assembled and disassembled in a straightforward, ten-minute to 15-minute process.
Buy: HAVOX Photo Studio
Buy it
The Pros and Cons of Light Tents
Are you thinking about taking your product and still life photography to the next level, but can’t decide if it’s worth buying a light tent? Lighting options can be confusing, especially if you’ve only ever used natural or ambient light. It can be tempting to buy a light tent, as they seem to make it very easy to get beautiful photos – but do they really?
First off, what is a light tent? Contrary to popular belief, light tents aren’t temporary shelters that photographers live in when they’re down on their luck; I learned this the hard way.
A light tent is basically a wireframe cube covered in thin white fabric, creating a very soft, diffused lighting environment inside. One side is left open so you can point your camera in and photograph whatever’s inside. They come in a variety of sizes, with standard ones being a foot or two wide. For reference, the one that I’m inside of is 4 feet wide.
As mentioned above, photographers are often drawn to light tents since they promise to make lighting simple and pain-free. This is actually pretty accurate. Light tents are like giant lighting equalizers; no matter how you position lights around it, you’ll get something fairly well lit. If you want to take photos using the ambient lighting in your room, or small lamps, a light tent eliminates the hot spots that the lights would otherwise cause and generally makes everything look a little bit nicer.
PRO: Diffuses ambient lighting into a more flattering light.
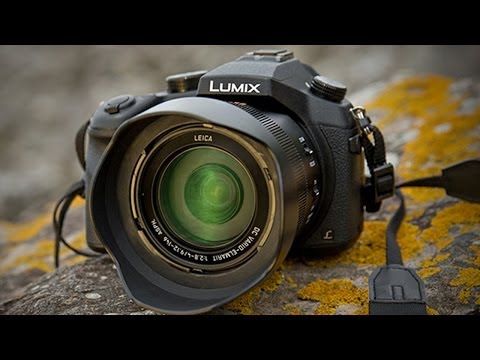
For this reason, light tents are very useful for small business owners and less serious photographers who don’t want to mess around with fancy lighting and just want some photos that show what an object looks like. Lots of photos for eBay and other e-commerce listings use light tents, as simple white backdrop product shots are so easy to do with them. As an example, I took two photos of a GoPro. One’s in a light tent, the other uses a couple foam-core reflectors positioned around it.
In the light tent:
With custom set-up:
The two photos are very similar, though you can see some slight differences due to the perspective and how I lit it. To get the two looking exactly the same would take a fancier lighting set-up than I used, though it would be possible. I actually think the light tent photo turned out best here, and it took less time to set-up. So for simple shots like this, a light tent really is a great option. Plus, it allows for great consistency – as long as you don’t totally change the lighting outside the tent, every shot will be lit in approximately the same why. This is another huge advantage for people selling many items online.
PRO: Consistent results.
Unfortunately, the light tent has a huge weakness. It’s not something that really matters for people who are selling on eBay, but for creative photographers, it makes the light tent pretty much useless.
Light tents are boxes.
Yep, that’s the big weakness. You can’t do anything with a box – you have a finite amount of room, and anything happening outside of that box is irrelevant. Want to include a background in the photo? Too bad. Hoping to use some of those cool lighting tricks from Lighting 101/201? The light tent dashes your dreams to the ground.
CON: Light tents limit creative potential.
If you’re seriously interested in creating beautiful photos, you will find yourself limited to mediocrity by the light tent. You simply can’t manipulate light the way you need to when you’re stuck working in a tiny box. You’re much better off with pieces of foam-core, tracing paper for reflectors, and cheap speedlights or even desk lamps for light.
Here’s an example, using a whiskey bottle as the subject. There’s nothing all that fancy about this shot, but you can see that reflective objects like glass and jewelry will be problems for a light tent.
In the light tent:
Arguably, it fits the brand since it kind of looks old and dirty, but I’m going to guess that most people would prefer this next shot, taken with a custom lighting set-up:
The only difference is that I had the flexibility to place lights and reflectors in different locations; places that the light tent would have blocked. For highly reflective objects, it’s impossible to get a beautiful shot inside a light tent. You need very precise control over where every light is, and trying to work around a translucent box of fabric will just give you headaches.
Conclusion
Light tents are great tools for people who want to simply show an object, and have consistent lighting between photos without having to think about it. It’s perfect for getting shots of things you’re selling online. For photographers who are looking to create beautiful images that truly showcase the subject, a light tent will just slow you down. Do yourself a favor and don’t spend money on a light tent – buy some foam-core and diffusion screens instead, and learn how to assemble lighting set-ups that bring out the best in whatever you photograph.
What do you think? Does a light tent have a place in your bag, or are they a waste of money for your style of photography?
Lauchlan Toal
Lauchlan Toal is a food photographer in Halifax, Nova Scotia. When not playing with his dinner, he can be found chasing bugs, shooting sports, or otherwise having fun with photography. You can follow his work online, or hunt him down on the blogs and forums that he frequents.
winter tents? - Services and services in Moscow | Search for specialists
Tuning, repair, seasonal storage and maintenance of tents, tents and awnings. Fabric and frame repair, frame production, seam gluing, zipper repair or replacement, structural tuning, routine maintenance. Operational repair of classic, automatic and inflatable tents, tents and awnings made of polyester, tarpaulin, PVC, etc. Fulfillment of urgent requests. Seven days a week. Mon-Sun: 08-24 You can come and hand it over for repair daily from 10 am to 9 pm, at the address: Moscow, Skolkovskoye shosse, 31, building 1, Sport-Hit TVC, 2nd floor, from the escalator to the left and on the right side - Pav. No. 23. Instead of a tent, you get a certificate of acceptance! Call the Courier to the address to pick it up for repair today (Moscow and region). Send by a transport company or by mail from another city in the Russian Federation or the CIS. All work is carried out according to the protocols of material compatibility and the nature of damage, this standardizes the repair procedure, which guarantees 100% waterproofing and mechanical resistance under permissible loads. We will eliminate all fabric and frame problems: fabric with defects or partially destroyed, the frame is lost or broken, mold and fungus, add ventilation or fittings, leaks at the seams, etc. Action plan: 1. Diagnostics. 2. Coordination. 3. Repair. Sequence of work: The frame and tarpaulin are examined for damage, with an assessment of the degree of wear on several parameters, including UV fatigue of the fabric and micro cracks in the frame. In the process of diagnostics, photo / video recording takes place to attach to the estimate. Before the start of the repair, the Master will send you the footage and reasonably report the results of the diagnosis in order to agree on the scope and cost of the repair or its feasibility. Upon completion of the work, the Master will send a photo / video report of the work performed.
 Do you optimize costs? Deciding between buying a new one or refurbishing an old one? We guarantee that after repair, your old product will work no worse than the new one (guarantee for all work up to 3 years). We accept payment from legal entities and individual entrepreneurs. Also: Marquis repair. Welding of aluminum and steel tent structures. Repair of self-inflating mats. And other equipment. Repair of tents and tents of any manufacturer: Alexika, Acamper, Ahma, Alaska, Alpika, Alpinus, Arctix, Artlina, Atemi, Avi-Outdoor, Bestway, Bask, Bergans, Bergen Sport, Best Camp, Big Agnes, Black Diamond, Body Sculpture , Btrace, Burton, Canadian Camper, Camp, Campack Tent, Camping Life, Campingaz, Campland, Campmor Outdoor, Campri, Campus, Caribee, Catfishmaster, Chinook, Cliff, Cloud, Coleman, Columbus, Comfortika, Commandor, Condor, Crusoe Camp, Denton, Easy Camp, Ecos, Envision, Eureka, Eurotrail, Fenet, Ferrino, Fieldcandy, Fishtool, Fjallraven, Fjord Nansen, Flagman, Forrest, Freetime, Greenell, greenwood, Gelert, Golden Catch, golite, Great Land, Green Glade, Green Land, Green Way, Greenhouse, Halti, Hanlu, Hannah, Helios, Hi Gear, Higashi, High Peak, Hilleberg, Hobbit, Holiday, Holiday Fishing, housefit, Husky, Indiana, Inesca, Irtex, Jack Wolfskin, Kaiser Sport, Karrimor, Kilimanjaro, kingcamp, Korum, Ksl, L.
 A. Trekking, Lafuma, Lanyu, Larsen, Limpopo, Loap, Lotos, Ma verick, Marabut, Marmot, mckinley, Merrell, Metso, Moon Camp, Moose, Mountain Hard Wear, Msr, Nova Tour, Naturehike, Nemo, Nessen, Nordisk, Nordway, Norfin, Normal, Novus, Onlitop, Ortik, Outdoor Project, Outventure , Outwell, Palisad, panalp, Pinguin, Premier, Primus, Prival, Prologic, Quechua, Quick Stream, redfox, Rab, Raffer, Rapala, Red Point, Reisen, Reking, Retki, Robens, Rock Empire, Rock Pillars, rockland, Ronin , Safe Flourishing, Salewa, Savarra, Saxifraga, severeland, Sivera, Siweida, Snow Peak, Snugpak, Sol, Solbei, Sputnik, Talberg, Totem, Tramp, Trek Planet, Tatonka, Tengu, Tentipi, Terra Incognita, Terra Nova, The North Face, Time Eco, Tourbox, Trailside, Trimm, Turbat, Usa Style, Vango, Vaude, Verticale, Virtey, Warta, Wechsel, Wehncke, Wild Country, woodland, Shore, Vek, Cedar, Camping, Bear, Mitek, NK-Galar , PIK 99, Penguin, Putnik, Saross, Scout, Equipment, Alloy, Stokrat, Stack, Therma, Turlan, Ural-Expedition, 4F Sport Performance, etc.
 . Kamchatka
Place
12 seats
READS
from 24.07 to 04.08.2023
Tour
Dates
Large Journey
in Kamchatka 2023
Book 9000
description of the tour
003
"Kamchatka is an absolutely amazing place.
There is unique nature here, which cannot be found anywhere else in the world. Only in Kamchatka, you can see geysers, volcanoes, fumaroles, an incredible number of bears, rivers full of fish, alpine meadows and snow-white peaks "The ice peaks and the flames of volcanoes are like beacons for romantics and tourists of all stripes. This is the edge of the world where every self-respecting adventurer should visit. And we give such an opportunity - to try on the role and be a pioneer. Discover Kamchatka with us!"
VALERY STEPANIUK - Photographer, traveler, company guide
WHAT WILL WE SEE AND WHAT WILL WE DO?
We walk along the shore of the Pacific
We take a swim in the hot springs
We walk along the lava fields of the Tolbachin eruption
See the Klyuchevskiy Sopa and other volcanoes of the Klyuchevskoy group
We will try fresh marine delicacies, cook the earfrence of fresh fish
We will visit the boat walk, visit the boat walking, we will visit the boat.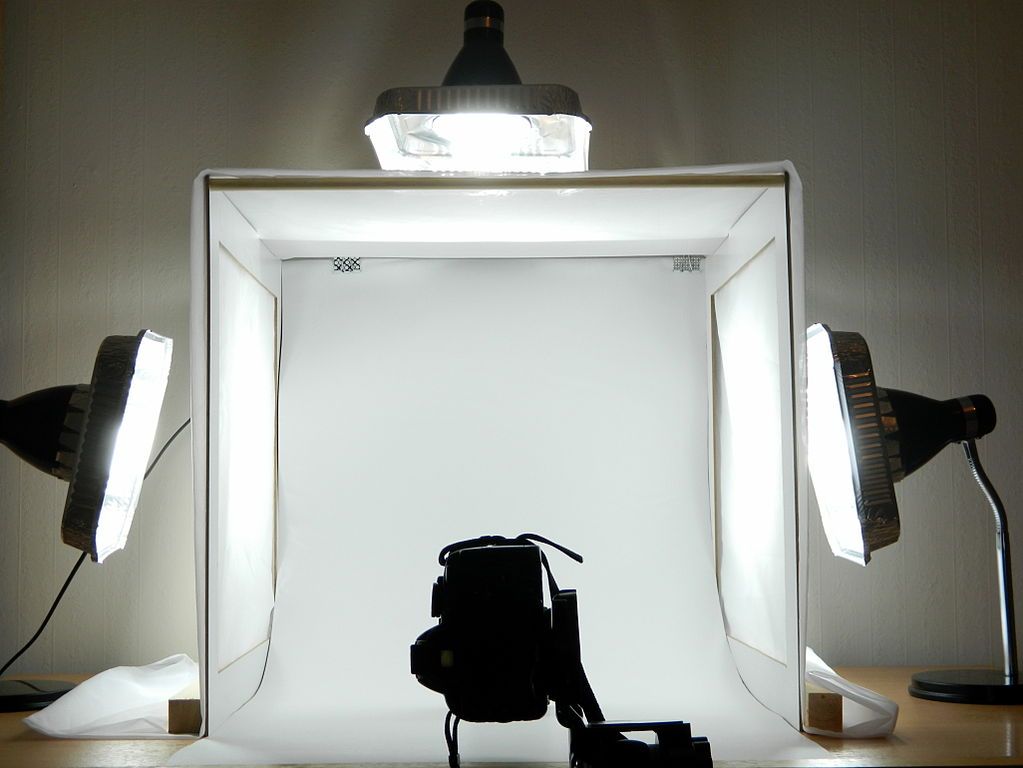 we will see killer whales, sea lions, seals and other marine life
We will climb the crater of an active volcano
We will admire the unique nature of Kamchatka from the first to the last day of the trip
Included in the price
Not included in the price
Work of a guide-instructor
Permit to visit the nature park
a set of products, (except for meals in roadside cafes 3-4 times)
Medical insurance
Sea trip
Transfers according to the program, off-road - shift Kamaz or Zil-131 with a comfortable soft interior
Group transfer to / from the airport
Souvenirs
Drinks
3-4 Lunches at roadside cafes along the route
Air flight to Petropavlovsk-Kamchatsky and back
Rent of public equipment and equipment (tents, fire pit)
2-3 x Local accommodation in the hotel, breakfasts and dinners in the hotel; (Three nights)
Any other expenses not included in the price
Dear participants!
Travel fee advice:
What you need to take with you when traveling: here we want to talk about those things that are necessary for sure, then at your discretion. (the main, approximate, list of equipment is on the "List of necessary things" section)
- Warm clothes!!! (jacket with insulation, pants, hat)
- cape or rain jacket
- comfortable shoes for walking (sneakers or boots, in case of wet weather you can take short boots)
- Light shoes for walking around the camp (slates)
- warm sleeping bag (comfort mode at least -2-3 / This does not mean that it will be so cold, just the temperatures declared by the manufacturers do not correspond to reality.)
- tourist mat
- sunglasses
- flashlight
- Backpack or suitcase (which is more convenient to travel with)
- pad
- warm socks
- fleece, sweater
- sunscreen
- swimsuit (for hot springs)
- dishes ( plate, mug, spoon)
- individual first aid kit
- mosquito repellent (Maybe useful, maybe not)
Almost the entire part of our trip will take place in the mountains, where the weather is significantly different from Petropavlovsk, so please do not look at weather forecasts and be prepared for any weather. In Kamchatka, it is unpredictable, as the ocean has a great influence.
Accommodation:
Accommodation is provided in tents for 2 persons. We will provide tents. (if you wish, you can take your own)
The first overnight stay and the last one before the flight home will be at the tourist base.
Communication while traveling: Cellular communication will not be available every day, so please warn relatives and friends not to worry.
Charging batteries: There will be a 220 volt charger in the car. Batteries and phones can be charged on the go.
Booking is carried out after making an advance payment in the amount of 30% of the tour cost. Full payment is due at least one month before the start of the trip
The movement of participants throughout the route is by car, the walking part provides only one-day excursions without backpacks.
Additional conditions for participation:
1. All participants, at the request of the organizers, provide the necessary information in a timely manner for paperwork.
2. All participants equally take part in cooking, equally engaged in other household chores.
3. All participants are required to take good care of group gear and equipment.
4. Participants are obliged to comply with all the requirements, instructions and recommendations of instructors-guides on the route, this is due to the specifics of observing safety in the mountains.
5. The travel itinerary may be slightly changed due to weather and road conditions.
Approximate list of necessary things and equipment:
Backpack for radial day walks (small)
Sleeping bag (designed for negative temperatures). For this trip, it is recommended to have a sleeping bag with a comfort temperature not higher than -5 degrees. (This does not mean that it will be so cold, just that the declared temperatures do not correspond to reality. You can order in advance for rent)
Shoes - trekking boots and a change - sandals or sneakers.
Windbreaker or windbreaker
Jacket (light puff)
Set of warm clothes (sweater or fleece, pants, socks, hat, gloves)
Raincoat
Headlamp + batteries.
Sun glasses and sunscreen.
Telescopic poles - optional. Convenient for maintaining balance when walking with a backpack, crossing rivers, relieve the load from the legs.
Spoon. Plate. Cup. Knife
Toiletries: toothpaste, toothbrush, towel (small, light), soap, mirror.
Means of protection against blood-sucking insects
Program
Scroll to the left
-
MEETING IN P-KAMCHATSKY. SIGHTSIGHT TOUR
Day 1
Meeting at the airport of Petropavlovsk-Kamchatsky. We go on a short tour of the city (a view of the city and Avacha Bay from the observation deck), then we move to the Pacific coast (Khalaktyrsky beach), wetting our feet in icy water (in warm weather and in the absence of wind, the most hardened ones can swim), we feel ourselves on the edge of a huge abyss that occupies more than a third of the surface of the globe.
 In the evening, transfer to the hotel (in PARATUNKA), double occupancy toilet, shower on the floor, hot meals included (dinner, breakfast), pool with natural hot thermal water.
*Tourists who arrived in Kamchatka before 13-00 (AEROFLOT flight from Moscow) go on an excursion to the ocean, the rest are also met, but in this case only a transfer to the hotel is provided. -
TRANSFER TO THE KLYUCHEVSKAYA GROUP OF VOLCANOES
Day 2
Early in the morning we leave for the north of the peninsula, where the largest, highest and perhaps the most interesting volcanic group of Kamchatka is located. Here, on a relatively small area, there are: the highest active volcano in Eurasia - Klyuchevskoy (4750m), the Kamen volcano most difficult to climb in Kamchatka, the place of the most powerful eruption in the 20th century - Bezymyanny volcano, as well as new and old Tolbachinsky volcanoes, Ovalnaya Zimina, Bolshaya Udina, Krestovsky, Ushkovsky, in good weather you can see the Kizimen volcano in the distance.
 In the evening we arrive at the parking lot near Mount Kopyto. We set up camp. Overnight in tents.
This group is the largest cluster of volcanoes in Kamchatka. This is due to the fact that it is located on the border between the Aleutian and Kurile-Kamchatka island volcanic arcs. All 14 fire-breathing mountains are located close to the center of the Kamchatka Peninsula, in the lower reaches of the Kamchatka River. The total area occupied by the Klyuchevskaya group is 6.5 thousand square kilometers. Not all volcanoes are active, there are only four active among them: Klyuchevskoy (4835 meters), Ushkovskaya (4108 meters), Plosky Tolbachik (3085 meters), Bezymyanny (2800 meters ). Shiveluch, adjoining the group from the north and distinguished by violent eruptions and prolonged activity, can also be counted among them. Klyuchevskoy is the highest volcano, not only in the Kamchatka group, but throughout Eurasia. For 8 thousand years, its cone sharpened and acquired a beautiful straight shape. Strong eruptions occur every 5-6 years, although there are periods when they occur for several years in a row. It is the most active among Klyuchevskiy volcanoes after Karymskiy. The summit and side craters, of which the volcano has more than a hundred, throw huge columns of ash and gases into the atmosphere.
 -
HOOT MOUNTAIN. KLYUCHEVSKAYA GROUP
Day 3
Exploring the surroundings in the region of Mount Kopyto. From here, in good weather, the entire Klyuchevskaya group of volcanoes is visible.
-
TRANSFER TO TOLBACHIK
Day 4
After breakfast, we pack up the camp and arrive at the area of the Great Tolbachik Fissure Eruption (BTFE), which occurred in 1975 and formed a new volcanic desert. From November 2012 to September 2013, the New Fissure Eruption took place here, the lava fields will cool for more than one year, the consequences of the eruption can be observed for many years.
 Ascent to one of the craters. We put up a tent camp in the parking lot "Claw".
Visit to the Dead Forest and lava caves. The Dead Forest in Kamchatka is an amazingly beautiful and sad place at the same time. This area acquired its current frightening appearance as a result of the Great fissure eruption of the Tolbachik volcano, which began in 1975. The volcano did not calm down for a year and a half, and during this time, some part of the taiga was literally burned by hot lava. But there were also territories that were not affected by hot lava, but were completely covered with ash and slag.
A multi-meter layer of volcanic dust then covered a huge part of the forest, and all vegetation died precisely because of its abrasive impact from the outside. After the eruption, only black dead skeletons remained from the trees that were previously buoyant with greenery, and the area received the eloquent name "Dead Forest".
The landscape here is really shocking: the desert area with the bare remains of bizarre trees against the backdrop of the Kamchatka hills looks really depressing, but at the same time it also has a certain gloomy appeal. And the gray volcanic desert, which ends the forest, leads to associations with cosmic landscapes. The specificity of this area was accompanied by the fact that in Soviet times the so-called “Lunar rover base” was even organized here: at this test site, scientists tested rovers and lunar rovers.
 -
DEAD FOREST, LAVA CAVES
Day 5
Tolbachik lava fields, Dead forest. Cone of the Great Fissure Tolbachik Eruption.
-
TRANSFER TO MALKI (HOT SPRINGS)
Day 6
In the morning, gathering camp and a long drive to the village of Malki. We set up camp at the campsite. Bathing in hot springs. Relaxation.
-
TRANSFER TO GORELY AND MUTNOVSKY VOLCANOES
Day 7
After getting up and having breakfast, we will go to another group of Kamchatka volcanoes - Gorely and Mutnovsky.
 We set up a camp at the foot of the Vilyuchinsky volcano on the bank of the Spokoyny stream. Walks and photography in the vicinity of the camp.
 -
Malaya Giser Valley
Day 8
Touring to the Mutnovsky Geothermal Power Plant and a Low Gisers Valley
-
Volcano Mutnovsky
Day
Today we are waiting for the existing volcano crater.
The absolute height of Mutnovsky is 2323m, one of the largest volcanoes in the south of Kamchatka, during the historical period of time the volcano erupted at least 16 times. The most powerful eruption occurred in 1848. The most recent eruption occurs in 2000. It has a complex structure - several fused craters. Through the destroyed wall of one of the craters, we will go inside past high sheer cliffs and see intense fumarole activity inside.
Return to camp in the evening -
TRANSFER TO PARATUNKA
Day 10
This morning we pack up the camp and go to Petropavlovsk-Kamchatsky. Night at the hotel in Paratunka.
-
SEA RISE
Day 11
Boat trip. (The distance and time of the boat trip depends on the weather)
Russkaya Bay is located in the southwestern part of the Avacha Bay. Russian Bay - fjord type. Until 1952, it bore the Itelmen name - Ahomten. Narrow, deep into the land, the Russkaya Bay, with steep slopes of the hills breaking off to the water, is one of the most picturesque places in the vicinity of the city of Petropavlovsk-Kamchatsky. Russian Bay is famous in Kamchatka not only for its beautiful landscapes, but also for sea fishing. Not far from Russkaya Bay there is a rookery of sea lions.
Learn more