Low key pictures
Incredible Tips & Tricks for Beginners
Low key photography is one of the most challenging forms of photography, for any range of shooters. Every now and again I see photographers getting mixed up between high and low key photography.
Therefore, to set things straight, and cast away any shadows of doubt, I have decided to create a full tutorial to focus attention on how to shoot low key photography.
The one thing I particularly like about low key photography is the ability it holds to add drama and hard-hitting emotion within a shot.
What You Will Need to Shoot Low Key Photos
• Camera
• Tripod (or steady surface) – optional
• One light source (natural or artificial)
• Black background or dark setting
Individual camera settings will depend on you as a photographer, this is under your control. We recommend that you start with a small F/number to take in the most light and then adjust from there accordingly.
For low key shots, depending on what source of light you are working with, it is best to use faster shutter speeds – especially if using triggers.
Although high and low key photography is covered within the iPhotography Course in Module 9 (Black and White), don’t feel that this technique is restricted to only black and white photography; sometimes a pop of colour really brings your photographs to life.
What Makes a Good Low Key Photo?
To get the best out of your low key photograph, you need to bear in mind illumination and elimination.
Because very little will be visible in the image, it is important to carefully consider where you want the light to fall; this also means you have to control where the light doesn’t fall.
Remember, low key photography requires a dark background. Here are a few tips to help achieve this:
• Use a black backdrop, this is the easiest way to have a successful dark background.
• Keep your subject forward, the less light that hits the background, the darker it will be. If you are using an isolated source of light you want to make sure that it is hitting your subject in the right way.
• Keep your ISO as low as possible, this will keep the image noise-free, and for this particular exercise, you don’t want to be taking in too much light.
• Start by practising using a static object, such as a teddy bear or piece of fruit.
If any of your background does shine through, don’t worry, this can be adjusted in post-production using a brush tool and by darkening the levels.
Check out this example below:
• On the left you can see the image before post production with some background elements still shining through.
• On the right you can see the same image after the burn and brush tool have been used in post-production/Photoshop editing.
How to Set up Low Key Lighting
In order to obtain high contrast in your low key images, side lighting your subject will work much more effectively than illuminating front on.
There is no ‘correct’ side to shoot from, this is down to you as the photographer to choose which side of your subject you want to keep dark, or which side you decide works more effectively.
Certainly within portraiture photography, you may discover your subject has a strong personal opinion or preference regarding which side or angle they would prefer you to shoot from.
Never make an assumption, but listen to your subject’s insecurities and take them on board. If they have a distinctive marking, scar, birthmark or blemish that they wish to disguise, low key photography works extremely effectively.
And let’s not forget, almost all of us have a preferred ‘good’ side or angle that we would rather be photographed from.
Side Lighting
When lighting from the side, you will have to experiment with angles and reposition your light, depending on how it falls. If one side of your subject is completely dark, this is called split lighting.
However, most low key photographers opt for the Rembrandt style of lighting. Named after the Dutch painter, where a triangle of light falls on the ‘dark’ side of the subject. This style of lighting will also create a catch light in the eye of the darker side of the face, making the image look more effective.
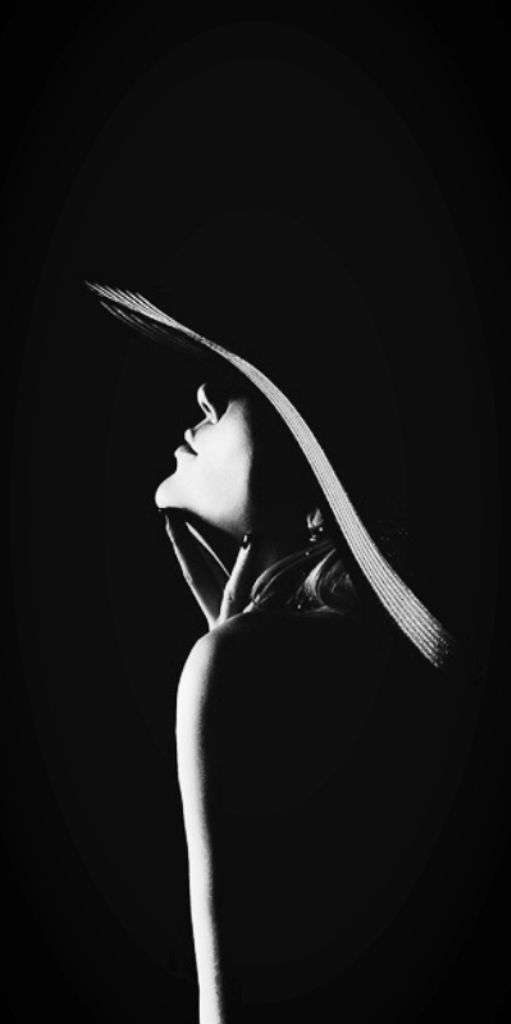
Altering the position of your subject, as well as the light, can add some interesting shapes to your photography. Your subject doesn’t have to be facing the camera face on, shooting side-view can create a more abstract image, especially if you can manipulate the light.
As a photographer, you are often told to avoid harsh shadows, particularly in portraiture. Low key photography is a perfect chance to break these rules and create your own boundaries or contradictions.
Tell a Story with the Light
However, remember your main goal is to highlight a specific area within the image – you don’t want to lose the purpose of the shot.
This can be done by manipulating and positioning your subject and light, so that your shadows fall in the right place; this will ensure you obtain that dramatic, dark and hard-hitting imagery that you are seeking.
Low key photography is extremely effective at adding emphasis on texture, depth and contrast; consider nature shots, animal photography and portraiture shots. It can be used to emphasise textures such as hair or movement in the skin.
Use it to draw attention to specific key details – like the lines and creases within aged skin or detail within rough textured fabrics or objects.
Abstract Ideas in Low Key
Consider manipulating low key photography when shooting abstract body shapes; it really helps to define and highlight shape and form. It is a wonderful way to artistically celebrate the curves and lines of the body.
This technique is popular in boudoir or nude photography, as it beautifully enhances the body’s natural arch, shape and form. Your subject will feel much more at ease, knowing the emphasis is on angles and curves – particularly if they wish to remain anonymous and aren’t keen on the audience knowing who the person is in the shot.
Highlighting body form can also be a useful skill if you are interested in shooting commercial fitness and health shots. Low key photography teaches us manipulation of light to draw attention to a specific part of the subject.
By keeping large amounts of shadows, you can add depth to the figure, making muscles look larger and more defined.
Using low key lighting when photographing objects can create some beautifully abstract shots. By illuminating certain areas, you could either distort the subject or draw attention to a specific element.
For example, this shot below has been designed to make the golf ball look larger than we would expect, and the light highlighting the grooves makes it seem more abstract and unusual.
Low Key Wildlife Photography
For all those wildlife photographers out there, don’t worry, we’ve something for you too. Natural light can be manipulated to work in your favour if you’re patient enough. The key with animal low key photography is to make sure that your subject is softly lit in front of a dark, shadowed background.
Low key animal photography can be achieved in post-editing, so long as your depth of field is shallow enough to throw the background out of focus. You can then edit the contrast and shadows to create a dramatic shot.
And of course, you can practice these techniques at home with your pets first, before coming face to face with a tiger.
Low key photography is the perfect beginning to understanding light and is certainly a skill you can implement through all aspects of your photographs.
Remember:
Low Key = Dark (low amounts of light)
High Key = Bright (high amounts of light)
Low Key Photography: Final Words
I hope this guide to low key photography has left you with plenty of room for thought. Now it’s your turn to learn and enter the dark side!
I look forward to seeing your results within the iPhotography member feedback gallery.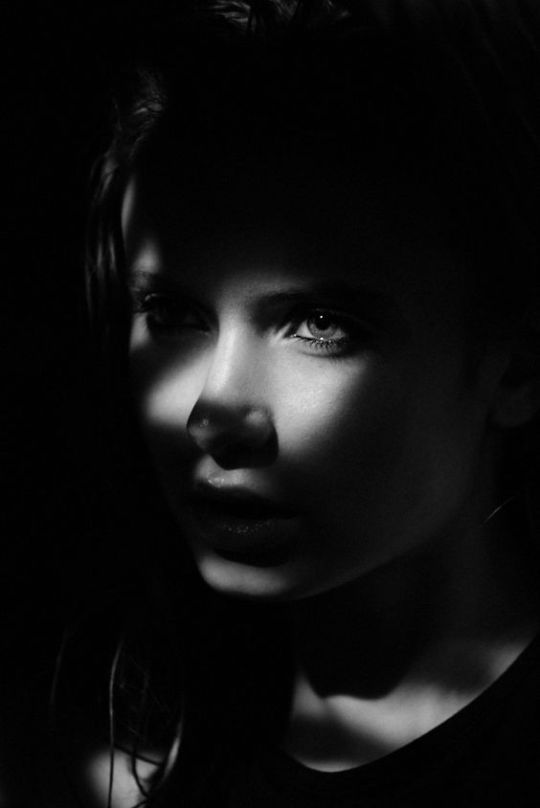 If you are a member of our iPhotography Course, you’ll see on module 9 there is a chance to flex your low key camera skills.
Use the submission filter under the module to send us a low key assignment photograph for your course tutor give review.
WHAT'S INCLUDED
Low Key Photography for Beginners
Share:
Low key photography is a terrific challenge for both the novice and the experienced. It is a very simple technique that brings instant drama to an image but could take a lifetime to master. Like most other forms of photography, it is all about illumination and elimination.
A low key image is one that contains predominantly dark tones and colors. Like high key images, low key photography conveys atmosphere and mood. But where a high-key image feels airy and light, a low-key is usually dramatic and full of mystery. And where high-key lighting over-lights the subject to reduce contrast, low key lighting creates striking contrasts through reduced lighting. Shadows are now the primary element of the composition.
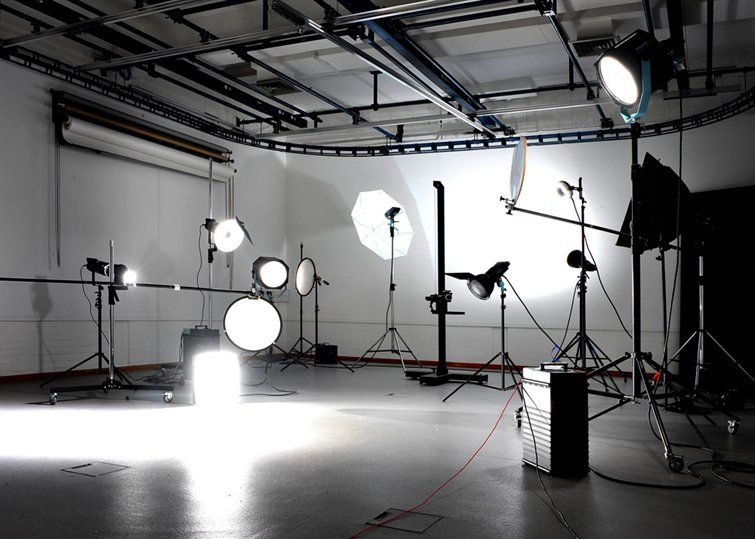
You don’t need any elaborate equipment to shoot amazing low key images. To create a low key image, all you need is your camera and one light source. Depending on the results you are looking for, you might also make use of a fill light or reflector. If you are lucky enough to have your own photo studio – fabulous! This will give you a reason to use it. If you don't, no worries, you definitely don't need one.
Now we’re going to cover a couple of parameters you need to understand in order to capture low key images you’ll be proud of!
Xuan NguyenLow Key Meaning
To understand the meaning of low key photography, it’s good to have a basic knowledge of the history of painting. Low key visuals were used in Renaissance and Baroque – they were represented by different painting styles including sfumato and chiaroscuro used by artists like Leonardo da Vinci, Rubens, Caravaggio and Rembrandt. These artists are well-known for paintings in which darkness is predominant and the light comes from only one source – the result are truly dramatic scenes!
Low key photographs, just like paintings, often have a rather dark dramatic quality to them. The strong contrast between light and darkness emphasizes enigmatic, mystical atmosphere. One of the most famous photographers who used low key approach regularly is Yousuf Karsh – his splendid low key portraits made him one of the 20th century's greatest portrait photographers.
In order to make the most out of low key photography, you need to experiment with different light intensities until you achieve the desired effect. Not all low key photographs have the same meaning – depending on your subject and the light intensity, you can achieve different vibes such as mystery, fear, elegance, suspense or grandeur. Low key photography requires a lot of practice and in addition to experimenting with light, you should also work with diverse subjects.
Karsh's portrait of Winston Churchill, titled The Roaring Lion – image via WikimediaGear
The gear you’ll need for low key photography is quite basic:
- Full-frame camera and fast lens
- Tripod (optional)
- Light source such as flash
- Dark background if you’re in a studio
- Light modifier (such an umbrella or softbox)
Even though you can shoot low key images with any kind of lens (even the cheapest one!), you should know that the maximum aperture of a standard kit lens is somewhere around f/3.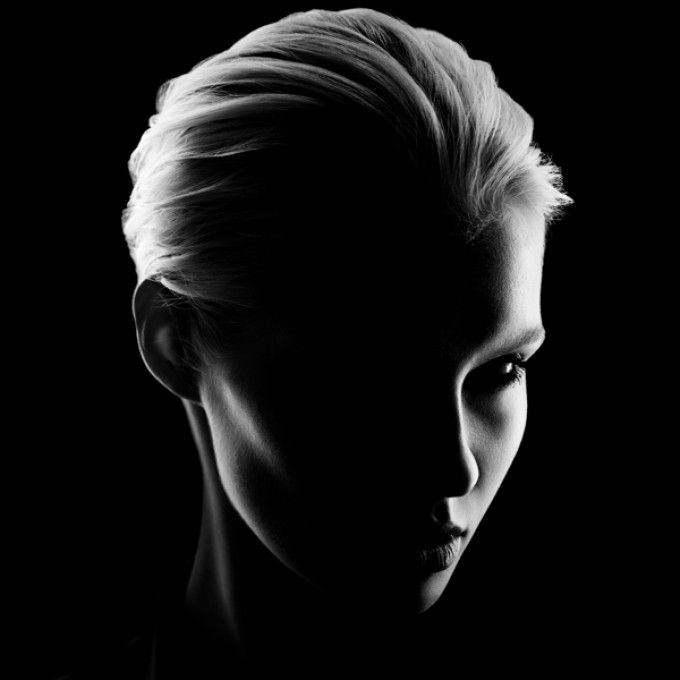 5. This aperture won’t let in enough light for optimal results and you’ll need to rely on flash every time you decide to shoot in low light.
Buying an affordable yet effective prime lens will solve this issue. Prime lenses with a maximum aperture of f/1.8 are ideal for low key images because setting your lens to stop at f/1.8 lets in 4 times more light than f/3.5, which is a significant difference.
Some of the commonly used prime lenses for low key photography are:
- Canon 50mm f/1.8
- Canon 85mm f/1.8
- Sigma 50mm f/1.4
- Tamron 45mm f/1.8
- Nikon 50mm f/1.8
- Sony 35mm f/1.4
- Sony 55mm f/1.8
It’s also useful to know that using a full-frame camera will help capture scenes with less noise, which is important in low light photography. This means that you’ll be able to increase the ISO to capture more light without compromising the image quality.
Sometimes you’ll need to use an external flash for low key photography so you should make sure to learn how to use it properly. It’s best to bounce the light off of a wall or ceiling or to use a diffuser to make it less harsh, especially when you shoot low key portraits in the studio. Check out this 10-minute video tutorial to understand better how to use flash in low light!
Camera Settings
When it comes to ideal camera settings for low key photography, you should try to keep your ISO low and aperture wide open. You can start by setting your ISO to 100 or as low as possible on your camera. This is quite important because low ISO will make your image dark and noise-free. Once you’re satisfied with your choice of ISO, you can adjust your shutter speed and aperture and achieve the desired effect for the light you've chosen.
You can set the aperture by starting with the smallest f-number, such as f/1.4 or f/1.8. This will allow you to take in the most light and adjust from there. You will be able to use a relatively fast shutter speed if you stick to the widest aperture, but you will surely have to adjust your shutter speed depending on the light source you’re working with.
Vinicius AmanoYou can also use an auto-exposure mode and apply negative exposure compensation when shooting low key images. If you decide on using an auto-exposure mode with exposure compensation, you should switch the camera's metering mode to spot metering. Spot metering only uses a small area to calculate the exposure which means the camera won't take the dark background into account when calculating the exposure, but only your subject – that’s exactly what you’re looking for.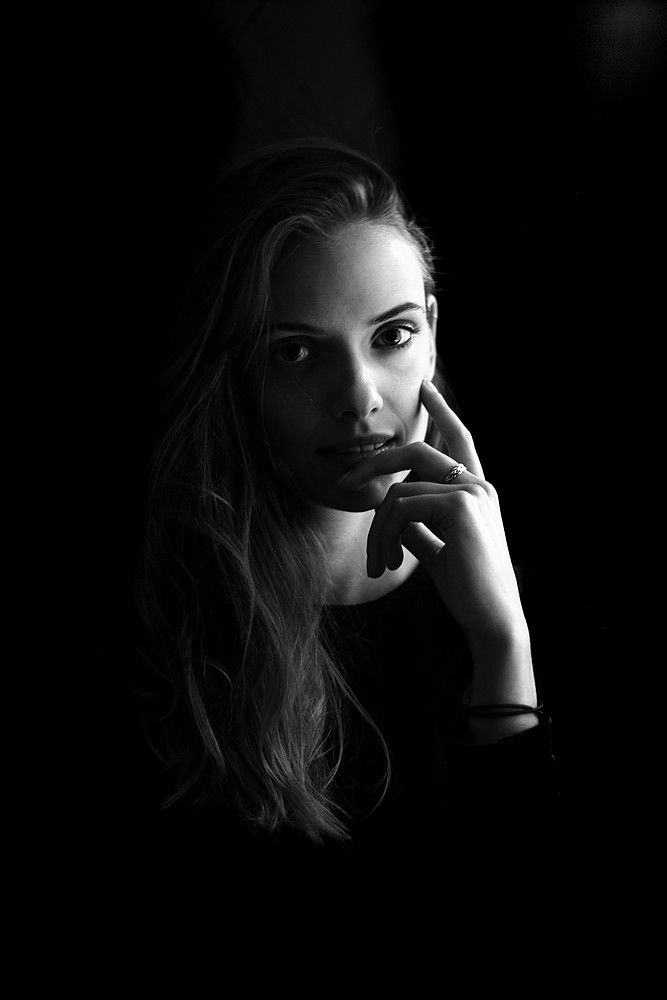
Lighting
Using low key lighting is ideal for dramatic portraits. It can add a certain depth and mystery to the subject and composition. Dark shadows and strong contrast can easily alter the mood of the entire scene and make it more alluring.
A choice of light and its strength and direction is up to the photographer. The only rule you should follow when shooting low key is to never allow light to reach your background. In addition to that, most photographers also try to avoid casting dark shadows on the faces of their subjects. Even though low key portraiture is dramatic, it should be flattering for your subject.
Wadi LissaIf you have a studio, you can use a butterfly or Rembrandt lighting pattern in your low key portraits. These two types of lighting are often used in studio portrait photography and it’s not complicated to achieve them – you need just a light and a reflector, or perhaps two lights if you want more elaborate results.
Keeping The Background Dark
No matter what lighting pattern you choose to experiment with, you should make sure that the background is dark enough. In case your background seems light and distracting, you should move the model and the light evenly away from the wall. If you do that, you’ll notice the light on the model stays the same, but the background gets darker – and that’s exactly what you need!
Another way to make the background darker is by moving the light to the side. In this scenario, the background will darken even more and your portrait will look more dramatic, which is great if you’re looking to achieve something really bold.
In case you have a grid in your studio, you can control the light even more by using this handy light modifier. The grid restricts the light to whatever is in front of the light only, which means the light won’t spill on the background.
Ali MarelEven if you don't have a studio, you can still shoot amazing low key images. A popular way to do this is to use two separate rooms. Block off all light in one room so that if the door is closed, you could see nothing. Use the adjoining room as the light source. You can use the door to help control the incoming light. Try to keep the light from hitting the camera or the background!
Using Torches Or Candles
Another great (and affordable!) way to use low key lighting is by experimenting with candles or torches. This type of lighting can be ideal if you want to elicit a gothic or romantic feel. Both candles and torches are easy to use and definitely cheap.
In order to make your candlelight photography truly great, you should use a tripod and make sure to spread your candles evenly. Using a single candle or positioning multiple candles closely together will result in harsh shadows! While this may be what you’re looking for, in most cases you’ll want an evenly spread light.
ActionVanceLow Key Outdoor Photography
What’s really great about low key photography is the fact that you can create low-key images any time of day. You can do it in the midday sun if you are indoors or outdoors on a dull, overcast day – you don’t have to wait for dusk! For instance, an overcast day and an industrial, urban scene provide a perfect backdrop for capturing something dark and ominous.
Low key landscapes are maybe not as popular as low key portraiture, but you should give them a try especially if you enjoy unusual landscape photography. Make sure to capture clouds – they make the sky less bright, but they also create dynamic light patterns on the ground.
You will need a tripod in case you decide to shoot low key landscapes since you probably won’t use the widest aperture for landscapes (you need a deeper depth of field!) and your shutter speed won’t be really fast. Low key landscapes often look really stunning when converted to b&w, so make sure to explore various b&w options while post-processing these images, such as color filters in b&w photography.
Karsten WurthIn addition to low key landscapes, you can also shoot wildlife in low key. Such photographs are quite uncommon, but they can look very elegant and painterly, almost as if they were shot it a studio. A low key approach to wildlife and bird photography gives a totally different perspective and it works wonderfully for animals with lightly colored fur or feathers. Using reflections can make such images even more magical – for instance, you can try to photograph a swan pond in low key.
In case you want to shoot low key images of wildlife at night, all you need is your camera and one light source that will create directional light. Depending on your location, this directional light can be produced via flash or with a hand-held spotlight from a nearby vehicle.
Fabio JockLow Key Macro Photography
Macro photography is another genre of photography that can look stunning in low key. With a simple set-up consisting of just a camera attached to a tripod with a single flashgun, you can create gorgeous close-ups which resemble studio shots.
Typical subjects for low-key close-up photography tend to be small enough to be illuminated by a single flash, which is really great – you don’t have to rely on a complicated setup!
When it comes to settings, you should make sure to underexposure the image (remove all natural light!) and then use your flash to illuminate your subject. The best way to achieve this is by switching your camera to manual mode and selecting the lowest ISO and narrow aperture (such as f/18 or f/22). When it comes to shutter speed, you can use the normal speed for flash synchronization (such as 1/180 – 1/250 sec).
Low Key Product Photography
You have certainly seen many gorgeous product photographs with a perfectly dark background and well-lit product itself. Low key lighting is very popular in product photography because it adds a certain aura of luxury – it works really good with jewellery, watches and various gadgets such as cell phones and tablets. You can watch this video to learn more about lighting setup for low key product photography:
Low key lighting coming from the top and from the bottom of the product is a great choice and it can create a bold look – bright core of the image and dimly lit space around it! In order to achieve such look, you need to use two lights, mount them on both sides of the object and tilt them down to control the light spill-off.
Editing Low Key Photography
You can do wonders for your low key images if you know how to edit them properly.
Follow these steps in order to make your images even more alluring with skilful editing!
1. Brighten Your Subject
Your subject is probably the only bright part of your low key photo. You may need to brighten your subject a bit more especially if you didn’t use a flash! To do this, you should adjust the Exposure, Highlights and Whites in Lightroom.
2. Adjust White Balance
White balance in low key images often tends to be off – if you’re using a flash it might be too cool and if you’re using indoor lighting it might be too warm. Because of this, make sure to check and adjust white balance during post-processing.
3. Reduce Noise
Noise is one of the typical issues in low key photography. Even though we should keep our ISO low, sometimes it’s impossible to avoid cranking it up. Bear in mind that noise reduction should be used carefully because it blurs the photo. Use it only when it’s truly necessary.
4. Play With The Colors
If your image contains both cool and warm tones, you can play with the colors by using the HSL panel in Lightroom. Feel free to shift the colors and create a bold and playful contrast between cool and warm parts of your image.
5. Add A Vignette
Low key photographs, especially portraits, are ideal for experimenting with vignettes. You can use the Radial Filter in Lightroom to create vignettes – it actually works better than the Vignette Tool because this filter allows you to easily control where your vignette should be placed.
6. Fix Backdrop Pleats Or Wrinkles
If you’re shooting in a studio, you probably want your black background to be impeccable and wrinkle-free. In order to achieve such a uniform background, you will need to adjust the Shadows and Blacks sliders until you get a wrinkle-free black background. Bear in mind that these two are global adjustments and that they will affect the subject too – you might need to use the Adjustment Brush to bring back some details.
Ultimately a low key image is just one that contains predominantly dark tones. There are many ways to achieve that – always feel free to experiment!
In closing, I'll add that although we are trying to capture darkness, it is the application and control of the light that makes a great low-key image. The lack of light puts all focus on what light is allowed to stay. All your lighting decisions will show in your image so although it can be fun and whimsical, this type of photography requires a good knowledge of light, shadow and tone. Precise lighting is required in order to control the very important shadow detail.
Manipulate your lighting and placement of subject until the shadows fall exactly as you want them. It's that easy. And difficult. If you want to go even further and start printing your low key photographs, then take a look at our guide to the best photo printer for the job.
See you on the dark side.
If you want to learn more about low key photography, check out the following links!
Further Resources For Low Key Photography:
- Essentials To Getting Started With Low-Light And Night Photography
- Master Low Light Landscape Photography
- How To Get Low-Key Lighting And Exposure Right Every Time
- Use High Key, Low Key and Moderate Adjustments
- Mastering Low Light Portraits
- Getting Started With Low Key Portraiture
The Basics of High and Low Key Shooting
If you want to create a certain mood in your photography, you should pay attention to shooting in high or low key.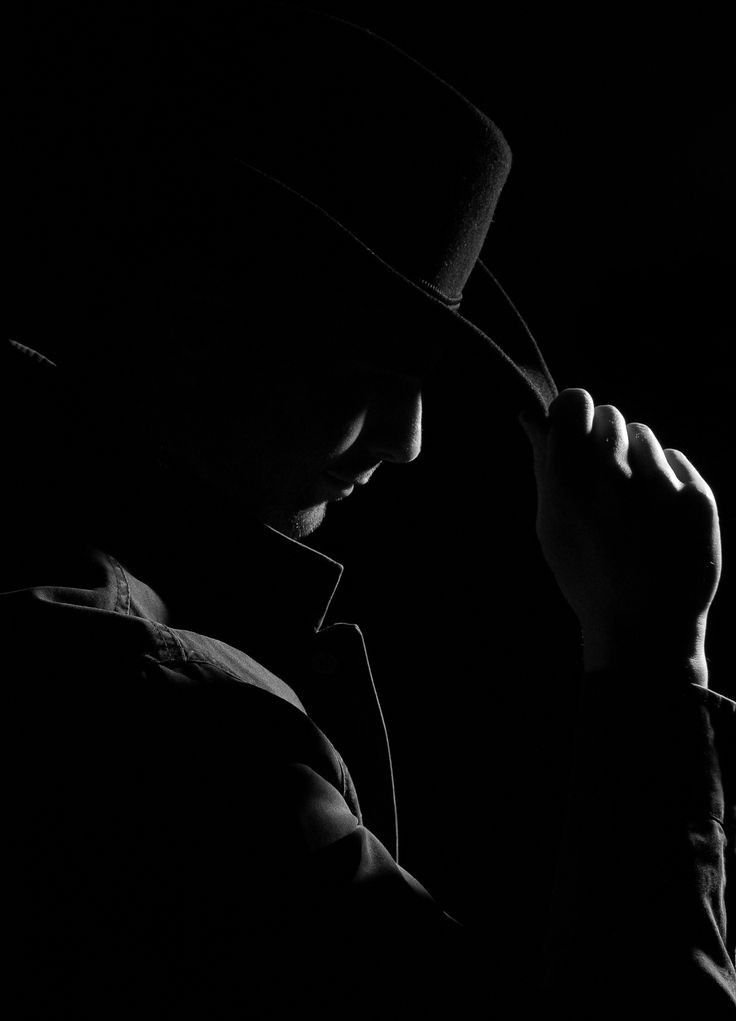 High key and Low key effects are important to be able to use in order to be creative and learn how to control the atmosphere and style of the frame. Photographer Michael Gabriel shows that this type of photography is not limited to just using a white background and lower or higher contrast. In that case, what is it?
Low and high key lighting detection
High key lighting was originally used to improve contrast. However, it is important to note that the concept of key lighting has its origins in the film industry. The operators used the term "key light" whenever they referred to the main light used for a particular scene. Along with the key light, they also used a backlight and a fill light to create the lighting effect they intended for the scene. Of course, more advanced lighting technologies are being used in filmmaking these days, so the three-light technology still in use has paved the way for more sophisticated lighting setups.
When talking about high key lighting, we are talking about scenes that have a whole range of whites and highlights. Such images have a minimum of midtones and blacks. If you use high-key lighting in your photos, the midtones or mid-range tones become white. Whites meanwhile become even whiter. High-key photography isn't devoid of black tones at all, it just has a minimal amount of said tone. For example, if you are shooting a portrait of a child, your subject's eyes will still have black pupils (not white).
High key lighting is used to produce images that promote a cheerful and optimistic mood for the viewer. The photographs are youthfully light, simple, but at the same time refined.
On the other hand, low key lighting creates images that are the opposite of high key photos. This technique involves a lot of dark tones, shadows and blacks (really deep blacks). Therefore, photos taken in low key have a minimum amount of halftones and whites.
Low key images create a mysterious and dramatic mood. They can convey a different range of even deep negative emotions. But, of course, the overall effect depends on the particular scene, subject, and theme being depicted.
Briefly about the dominant characteristics of high and low key lighting
High key lighting
- Bright and illuminated lights dominated by a range of whites.
- Blacks and midtones are kept to a minimum.
- Optimistic, cheerful, youthful, light and airy mood.
- Mainly used in portrait, wedding, fashion and newborn photography.
Low key lighting
- Lots of deep blacks, darks and shadows used.
- Whites and midtones are kept to a minimum.
- Striking contrasts.
- Dramatic and mysterious photographs.
- Lots of shadows.
High Key Shooting Tips
Basically, if you want to create bright high key images, you need a good and reliable studio lighting kit. This means you will need a fill light, two lights for the background (which should be one stop brighter than your main subject) and a key light that will at least double the brightness of your fill light.
The most common background color for this type of shooting is white, although you can also use pastel colored backgrounds. Although the model's outfit does not have a significant effect on lighting, it is still recommended to stick to white or light colors.
If you can't afford studio lighting, you can always take a high key shot using natural light. The best time to shoot in a high key is on an overcast day. Just make sure there is no thunderstorm or rain in the forecast.
Before shooting, take the time to experiment with the settings or take test shots of backgrounds in natural light or outdoors. Make sure that the selected background does not have deep blacks or dark tones, any shadows. The more creative your idea, the better the final effect will be.
Be careful not to create images with a lot of dark shadows.
Low Key Shooting Tips
You can also shoot images with low key lighting inside the studio, however you will only need to use one light source instead of the three used for high key shooting.
Avoid bright or white backgrounds. Give preference to deep black or a shade commensurate with it. To get the maximum effect you want, make sure you don't light the subject and background.
As with High Key Low Key, you can also shoot with natural light. The best time for such a photo shoot, of course, is at night. Just don't forget an extra source of bright light. Perfect for this, for example, car headlights. You can also take pictures near the fire. Street lights can provide the bright light you need, but usually the level of illumination depends on the specific street.
Daylight shooting is not excluded for low key, but you must know how to properly position the subject so that it receives some sunlight even if the background is dark. In addition to this, you will have to improvise and create your own background. Perhaps you can bring a piece of deep black cloth or something similar. Finally, take a tripod and a camera with a flash.
When to use a high key and when to choose a low key
Let's look at a few situations where you can use high key lighting and when low key photography is more appropriate.
High key lighting
- Portrait photography: when photographing a person doing their professional work; for photographing a child or newborn; for fashion photography; for wedding photography; professional or just fun close-ups. Wedding photography, especially bridal photography, is ideal for using high key lighting.
- For professional portfolios (corporate employee profiles and model shots).
- For nature shots.
- For cinematographic shots.
- For promotional photography (brochures, booklets, posters, billboards, etc.)
Low key lighting Low key
- . A close-up of a crying person is a good example. It is also worth noting the use of Low key in journalism and documentary photography.
- When you try to highlight some part of the subject's face or body, such as its aqua eyes.
- If you want your subject to look spectacular in black and white.
- When there is intense action in the frame, such as in sports photography.
To achieve the best results in high or low key photography, practice as often as possible. In photography, practice makes perfect.
Low key: what it is, how to shoot, lighting schemes | Articles | Photo, video, optics
Low key (from the English low key) is a shooting technique when the whole photo is taken in dark colors. The frame is immersed in shadows, with the exception of certain details on which the photographer specifically emphasized. For example, a completely black background and a portrait, where only the eyes of the model are visible in a thin strip of light. Such photographs are usually taken against a black background with objects of dark colors or with a model dressed in dark clothes.
We tell you what and how to photograph in a low key, and also share simple working schemes of light.
A feature of low key photography is the use of narrowly focused hard light, which gives a strong contrast of chiaroscuro, dark and deep shadows / Source: unsplash. com
com
Low key photography - what to shoot
- Fashion photography. Low key photos with sharp textured shadows, bright highlights allow you to make spectacular and dynamic “glossy” shots. In addition, the dotted backlighting, characteristic of low key, gives room for experimentation.
- Product and food photography.
Contrasting and "juicy" photos in a low key emphasize the texture of the material and allow you to focus on the object, which draws the viewer's attention to it / Source: unsplash.com
- Silhouette. We can say that the silhouette is a classic manifestation of the low key technique. A thin strip of light that emphasizes the shape is suitable for product photography, and for a minimalist still life, and for shooting people.
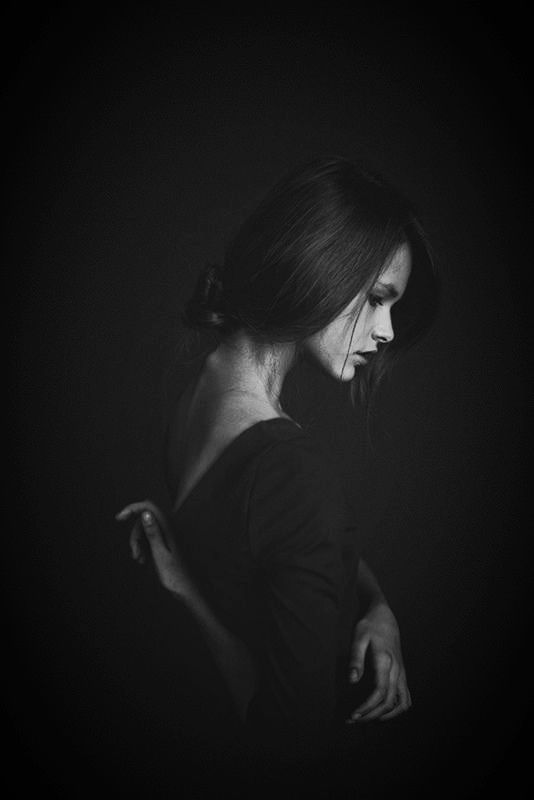
- Portraits of women and men. Low key in photography allows you to get high-contrast shots filled with energy, as well as dramatic psychological portraits.
How to Shoot in Low Key - 9 Tips
Shooting in low key seems easier than shooting in high key. Indeed, underlighting the scene seems easier than strongly and at the same time gently brighten the frame. Also, the dark key is easier to “twist” in post-processing.
The biggest difficulty of the low key is to place the light accents in such a way that they shine pointwise, but at the same time highlight the compositional centers. Below we share the secrets of how to make shooting in low key easier for yourself.
– For low-key photography, choose dark, preferably black backgrounds. In an apartment, such a background can be a room with the lights off, in which you put the model. In this case, the light should enter through an open door from another illuminated room.
- Ask the model or stylist to select black or dark clothing and accessories for the shoot. At the same time, do not forget that it is not necessary to go into black and white in terms of colors - leave room for a bright color accent. For example, you can take a noir retro portrait, where the model will focus on bright lips.
- Give preference to light shaping attachments that produce hard light - reflectors, tubes, beauty dishes. With them, the shadows in the photo will turn out dark and deep, and the directional light will illuminate only those parts of the composition that are needed.
Illuminate the shadow half of the model's face with a reflector / Source: unsplash.com
- To narrow the light beam and direct it more precisely, put a honeycomb on the light shaping nozzles. This is a grating that will further reduce light scattering. By the way, for reflectors you can ask not only honeycombs, but also curtains.
- Use gobo masks to create patterned shadows, or let light through narrow holes. For example, cut a thin strip in a sheet of cardboard and attach it to the reflector with tape. So you get a patterned strip of light, and everything else will be immersed in darkness.
- Set the key light to the side at a 45 or even 90 degree angle from the camera, and don't forget the backlight to emphasize the shape.
- Make sure that the light falling on the model does not illuminate the background. To do this, place the subject at least 1.5 meters from the background.
– Shoot at or near ISO 100. To further darken the frame, slow down the shutter speed and close the aperture.
Small bright accents enliven the picture and add juiciness to it / Source: unsplash.com
Also remember that a fast shutter speed freezes movement, which is useful when shooting people in dynamic poses (jumping, dancing, etc.), loose materials, liquids. A closed aperture not only darkens the frame, but also allows you to capture more objects in the field of sharpness.
- Shoot in RAW to darken shadows without loss of quality in post-processing, even out the light parts of the frame and increase contrast. To do this, use the sliders Contrast / Contrast, Shadows / Shadows, Blacks / Blacks, Lights / Lights, Whites / Whites , and also Curves / Cruves in Lightroom or Adobe Camera Raw.
Lighting Low Key
Due to the fact that the goal of shooting in low key is to get a dark frame, the lighting schemes for this technique are simple and require a minimum of light sources. Moreover, all or almost all of them can be repeated even at home, without spending money on a photo studio.
Versatile Lighting Scheme: Low Key Studio Shooting
A simple single light scheme suitable for any genre from portraiture to minimalist still life. Instead of studio light, you can use an ordinary external flash and easily repeat the scheme at home - as long as there is a dark background.
Illustration: Elizaveta Lentchevicha, Photostore.Expert
You will need:
- a beauty dish or reflector to get hard contrast light. To enhance the effect, ask a photo studio employee to bring the smallest honeycombs;
- a reflector on the side and slightly behind the model will give a neat backlight that will separate the figure from the background.
 If you want to add more mystery to the frame, remove the reflector. Instead of a reflector at home, you can use a sheet of paper, whatman paper or white cloth.
Contrasting light scheme low key
Light directed directly from the side of the model will give an interesting and contrasting pattern of light and shade. If you photograph a person from the front, half of the face can be in a hard shadow, and the reflector on the side will give a light backlight. If full face coverage is important, take a profile picture of the client.
Illustration: Elizaveta Lentchevicha, Photosklad.Expert
You will need:
- Monobloc with beauty dish or honeycomb reflector set at 90 degrees;
- a reflector that is directly opposite the light source on the other side of the model.
Light scheme: low key home photography for product photography
A simple lighting scheme that is easy to implement at home. The main thing in it is to make sure that the light from the window illuminates the subject, but does not fall on the background. This scheme is suitable for still life, product and food photography.
Illustration: Elizaveta Lentchevicha, Photostore.Expert
You will need:
- a black background and a surface on which the object will stand. Even plain ironed black fabric will do. The main thing is to clean it of wool - it's much faster than "vacuuming" dozens of frames in post-processing;
– window next to which the object will stand. If it is sunny at the time of shooting, soften the light with tulle;
- a black flag, a reflector with a black surface or any other dense dark object that can effectively protect the background from the light falling from the window.
Lighting scheme low key for portrait photography at home
Lighting scheme quite difficult for a beginner in low key. Suitable for creative portrait photography. The door through which the flash will “beat” can play a key role here. By opening or closing the door, you will get a wider or narrower strip of light.
Illustration: Elizaveta Lentchevich, Photostore.Expert
You will need:
- dark room. A room with thick blackout curtains or a bathroom is suitable, where there are usually no windows and it is easy to achieve complete darkness;
- monoblock with reflector or beauty dish or standard external flash;
- a black flag or reflector that will block the light reflected from the walls and falling from the window in a bright room.
Low key silhouette lighting scheme
A simple lighting scheme that can be implemented both at home and in a photo studio. Suitable for creative portraits, still life and minimalistic product photography.
Illustration: Elizaveta Lentchevicha, Photostore.Expert
You will need:
- black background.