Make a home photography studio
How to Set Up a Home Photography Studio (Easily & Cheaply)
Many photographers dream of having their own home photography studio to practice their craft. Now you must be wondering, how can I make a photography studio at home?
Well, what if I told you it’s easy to get started? Here are some tips on how to set up a low-cost photo studio at home!
MSMK Photography Lighting Kit
This kit provides everything you need to create a professional portrait studio in the comfort of your own home.
Buy from Amazon
×
MSMK Photography Lighting Kit
Amazon
$199.99
Buy Now!
[ExpertPhotography is supported by readers. Product links on ExpertPhotography are referral links. If you use one of these and buy something, we make a little bit of money. Need more info? See how it all works here.]
How Do You Set Up a Home Photography Studio?
Planning how to set up a home photography studio can be overwhelming. With so many elements to consider, where do you start?
The first step for me was to do some research on the photo studios near me. Of course, I didn’t have to visit those places physically. A simple internet search was enough.
A photo studio near me even had images of their facilities. Seeing their setup allowed me to figure out how to arrange my equipment at home.
Remember that it would take years to acquire the expensive equipment you see in professional studios. So for now, don’t be afraid to start small with the essentials.
Which Is Better: A Fixed Location or a Portable Studio?
Think about how you intend to do your photoshoots. Do you want to stay in a single place? Or do you see yourself shooting in different locations a lot?
If you’re not doing photoshoots on a regular basis, you can get away with a clean wall and window light. That’s all you really need for simple portraits.
But what if you’re shooting product photography several times a week? Then a dedicated home photography studio would be ideal.
It would be best to invest in equipment that is compact and easy to store. That way, you have to option to have a permanent studio and still have the ability to move around gear to locations.
How Big Should Your Photography Studio Be?
You don’t need to have access to a 100-square-meter venue to take studio portraits. You can convert a spare room or even a tool shed into a home photography studio.
Working in smaller spaces can be quite challenging. It demands a good deal of flexibility, the ability to make compromises, and a lot of creativity.
But then again, you are not going to need a lot of equipment for your home studio. In most cases, even a 100-square-foot room is enough to fit all of your photography gear. Place your background stand against one of the walls, set up the light stands in front, and that’s it!
One factor you need to consider for your studio is the number of people you can fit in it.
Do you like to photograph groups of people? If so, look for big spaces that allow for unobstructed motion.![]()
For single-person portraits and headshots, a few square meters are enough. Portraits of newborns and toddlers are possible almost anywhere.
You should also beware that the size of your home studio may affect the light in your photos.
It’s easier to control artificial light in large photography studios. In very small places with low ceilings, stray light can be more of a problem.
So if your space is small, it would be best to stick to window lighting. It creates pleasing light no matter the size of your studio.
How Do you Manage a Small Studio Space?
Building complicated lighting sets can be trickier to do in small studios. This is because of the lack of space.
For the same reason, your expensive 70-200mm f/2.8 could end up being too “long” for your space. Due to this, you will only be able to take headshots (at best).
In small photography studios, it may be better to invest in lenses with shorter focal lengths. Try any option between 80-100mm for taking larger portraits.
Finally, your home photography studio setup should have a few power sockets around.
You’ll likely have to plug in gear all the time when taking pictures. These could be lights, laptop (if you shoot tethered), and chargers. You may even need fans for cooling your place or for portrait effects.
What Is The Basic Gear Setup for a Small Photography Studio?
There are tons of studio gear to choose from. It can be difficult to know which ones to buy first. So what equipment do you need for a photography studio?
Don’t obsess over buying all the gear as you start building your studio. It’s quite surprising how little equipment you need for most photoshoots.
Here is a handy list of basic gear setup for a small home studio.
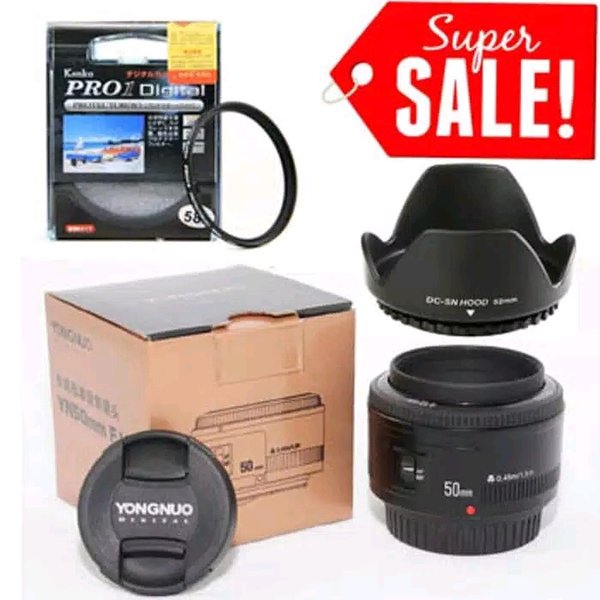
- Lights—One light and one reflector are enough to start. But three lights will give you the best flexibility. Those lights can be three cheap manual Speedlites. Try the Yongnou 560 IV, or studio strobes such as Godox strobes.
- Flash Trigger—This tool is necessary to trigger your flash units remotely.
 You’ll need a specific model that’s compatible with your strobes and your camera. Otherwise, it won’t work at all.
 - Lighting modifiers—A reflector and umbrella are a must. Neewer and Godox produce cheap umbrellas, softboxes, and octaboxes. These are quite good and fold into small, easy-to-store packages.
- Light stands—You need one stand for each light. As a rule of thumb, the heavier your light is (along with the light modifier), the sturdier your stands need to be. Don’t invest in cheap gear or you will risk your lights being too unstable and wobbly. I prefer stands that extend to 2.4 meters and higher. Especially since the lights need to be above the model. But it is also useful to have a small stand. This can light the model from below or hide your rim/background light behind the model.
- Background—A collapsible background is a good place to start. That is if you cannot install a permanent background. Impact and other brands are not too expensive. Especially when compared to Lastoline collapsible backdrops.

Other Optional Gear
It’s best to have more than just photography equipment for your home photography studio. You should also get these everyday accessories you’ll need for your shoots.
- Step ladders—Ladders are useful to change your point of view on your model. But also to change the orientation and settings of your lights.
- Fans—A fan can introduce some motion into your portrait (think wind-blown hair or clothes). But they can also make it comfortable to work in hot studios. Continuous studio lights and strobes with modeling lights generate a fair amount of heat. A fan helps provide some relief from the heat.
- Extension cords and power strips—If you use studio lights other than portable lights, think about getting extension cords and power strips. You’ll need space to plug in your lighting equipment.
- Furniture—If you are going to do portraits larger than headshots, you should consider having some furniture around. Chairs and stools are must-haves.

How Much Does it Cost to Build a Photography Studio?
When it comes to how to build a photography studio, you want to ensure your equipment meets your needs. Do not spend a lot of money on a light that you’ll never use.
The good news is you can find plenty of home studio kits online for a reasonable price.
Most kits include two light stands, two modifiers, a background stand, and muslin backgrounds. The stands can be a bit flimsy, but they will last you years if you keep them in your home studio. If you plan on shooting in different locations, I suggest getting sturdier professional options. They may be more expensive, but at least they’ll last longer.
You should also beware that the lights from the kit are simple white bulbs and aren’t bright at all. But you can easily swap them out with the Speedlites you already have.
Setting Up a Home Studio According to Portrait Photography Style
Think about the types of portraits you plan to take and how you want them to look. Do you like working with natural light? Then you will need a home studio with big windows.
Are you a flash photographer? Then an empty wine cellar or basement is great for shooting studio portraits.
How to Choose the Best Lighting Equipment for Your Home Studio
You have plenty of options when it comes to lighting in your home studio. We’ll discuss the two most popular ones below.
Speedlites
Pros:
- Perfect in small photography studios and for portable setups.
- Lightweight and small.
- Cheap—particularly manual units like Yongnuo, Phottix, etc.
Cons:
- Low power.
- Lack of modeling light prevents you from seeing where the flash beam goes and fine-tuning your autofocus.
- Can have a long recycle time, particularly at full power, making it hard to shoot in burst mode.
Some of the Speedlites’ shortcomings can be overcome by using flash units such as the Godox V850II. These are much more powerful than Speedlites, whilst remaining portable. Unfortunately, these units are quite expensive.
Photography Studio Flashes
Pros:
- Powerful light.
- Can have built-in a modeling light.
- Includes an AC plug for batteryless operation.
Cons:
- Price.
- Heavy and bulky.
- Need sturdy light stands.
- Cheap units can overheat and stop working until they cool down.
So how many lights should you have? I would say three lights. These will give you a great deal of flexibility in your work.
Whatever option you choose, remember that you’ll need one light stand for each flash unit. In most cases, two or three should be enough.
But don’t let the shopping fever get you. Start with one light. Learn the basics and build up your equipment once you need more flexibility. You can also take great portraits with a single Speedlite as you can see in the example below.
Must-Have Light Modifiers
- Reflectors—They bounce light back into the scene. 5-in-1 reflectors provide various types of reflective surfaces. In one package, you get silver, gold, white, black, and translucent.
- Umbrellas—These are the cheapest light modifiers you can buy. They soften the light from the flash. But the problem with them is that they let light spill everywhere. As a consequence, they reduce your ability to control the light, particularly in small studios.
- Softboxes/Octaboxes—They’re more expensive than umbrellas, but they allow you to have better control over your light. They also produce a softer glow in general.
- Grids—Grids concentrate the light in tight beams, making light very directional.
- Gels—Gels are sheets of semitransparent materials. They come in different shapes (to adapt to your light source) and colors. They change the background color when used on a background light. And they introduce light effects in your portrait.
 They are cheap too.
 - Flags—They stop stray light from bouncing around the set. Flags can be from anything that is black. A panel, cardboard, a curtain, a cloth, etc. work really well. 5-in-1 reflectors have a black side allowing you to use them as flags.
Bear in mind that, the larger the light modifier is, the softer (but weaker) your effective light will become.
DIY Speedlite Flash Modifiers
If you have a Speedlite, why not try creating DIY modifiers?
Creating softboxes at home means that you get to try different ways to light your portraits. All without spending a lot of money.
With a few small pieces of plastic, you can create a few different modifiers. Other items you might have laying around the house.
You might need to buy a pack of Pringles, but then you can enjoy them too!
How to Choose a Background for Your Home Studio
There are two kinds of photography studio backgrounds you can choose from. The first is a collapsible portrait backdrop. The second is a professional photography studio backdrop on a support or on a rail/roll system that’s fixed to a wall or ceiling.
Collapsible Backgrounds
Pros:
- Relatively cheap.
- Fold in a compact, portable package.
- One side is black for low-key portraiture. And the other one will turn it into a white photo backdrop for high-key photography.
Cons:
- Small, most suitable for headshots or single-person portraiture.
- The tissue can have creases.
- Folding them is an art difficult to master.
Professional Portrait Background
Pros:
- Paper, vinyl, or tissue backgrounds.
- Comes in many background sizes.
Cons:
- Often large and heavy.
- Cheap models will not support heavy backgrounds, such as a 3 x 11 m paper roll.
As for the background color, they come in black, white, and grey. For small studios, a grey backdrop is often the best solution. It can be black or white depending on your lighting setups
Gels can also work to change the color of the background in your images.
How to Get Rid of Ambient Light
Keep in mind that when you work with a flash indoors, you do not want natural ambient light. This can contaminate your photographic studio lighting setup.
Of course, not using ambient light does not mean you should work in total darkness. But it’s good to have a low level of ambient light. This will improve your portrait home photography studio setup.
You can achieve this by shielding the windows with curtains or by using flags (any kind of black panel or tissue). This will stop unwanted light from bouncing around the set.
To ensure your ambient light will is not affecting the photo, do a few test shots. Set up your camera to take a photo without firing your flash. Make sure that the resulting image is completely black.
You can then manipulate your lighting to achieve the exposure you want.
I usually photograph at f/8, ISO 200, and 1/125 s. I then use a flash meter or a trial-and-error process to set the power of the lights to match my target exposure.
How Do You Start a Home Photography Business?
Having a small studio is enough to start a business. Once you’re comfortable with your lighting setup, ask your friends if they need professional portraits.
Remember that presentation and professionalism are crucial elements for success. So if you’re not ready yet, stick to the people you know first. They’ll be more forgiving with your location and are always excited by your talents.
So what if taking paid portraits of strangers is still not possible? There are also tons of brands out there that need pictures of their products. You can ask local businesses if they need e-commerce photos and photograph their items for sale. Use the money you earn to buy more equipment and eventually rent a real studio for your business.
Conclusion
I hope these tips give you a good idea of the basics you’ll need to build your own home photography studio.
My advice is to not get too stuck on the idea of the perfect photography studio and equipment. What counts the most is your creativity and your willingness to squeeze the most out of what you have to work with.
Everything You Need To Know About Setting Up A Home Photography Studio
- Photography Business Tips
Do you dream of setting up a home photography studio of your own? For lots of photographers, this is a major goal that would open up tons of opportunities. Being able to produce high-quality studio work from your own home means you can avoid transporting large, heavy, cumbersome equipment to a rented studio location. It also means having total control of your shooting environment. A photoshoot studio setup at home can definitely help your photography business thrive, and take your online photography portfolio to new heights.
There are certain kinds of photography that are best suited to a studio environment. If you shoot portraits or headshots, you probably do a lot of your work in studio, so setting one up in the comfort of your own home would be a huge plus. Portrait and headshot photography is an awesome way to make money as a photographer because there are so many potential clients out there. Everyone needs good portraits of themselves for LinkedIn and other social media profiles, so the gigs are just waiting to be snapped up! If you want to learn more about portrait photography, check out our complete portrait photography guide.
If you set up a versatile home photo studio, you can also handle other kinds of portraiture. More and more people love seeing their furry friends looking their cutest in professional portraits, so pet portraits are another great way to make more money with your new home studio set. You don’t need a large home photo studio setup to do some super-cute newborn shoots. If you’re lucky enough to have room for a slightly larger home photography studio, you can handle engagement shoots and wedding shoots, maternity photo sessions, and family photos. Your portfolio is about to be overflowing with gorgeous images! So, how do you get started with setting up that home photo studio?
Home photography studio setup.
The first thing you should consider before buying a single piece of home studio equipment is: what is your goal for this photo studio setup? It’s really important to get clear on what your goals are for your personal photography portfolio, and what types of photography gigs you want to land. That way, you can make sure that you don’t waste time and money building a professional photo studio that’s not actually going to serve your needs.
For example, if you know you want to do large family photoshoots, that tiny spare bedroom probably isn’t going to cut it. You’ll need to clear out a bigger space or have an area of your home that you can convert into a photography studio for each shoot and easily tear down in between shoots. On the other hand, if your business is all about shooting tiny babies, they really don’t take up much space! That means you can use a small space wisely and still have an awesome home photo studio setup.
You’ll also want to give some thought to your own personal style. If all of the photos in your portfolio are sunny and naturally lit, it’s a good idea to make sure that your home portrait studio has plenty of natural light or that you’re prepared to do your research and get some high-quality home studio lighting that will help you achieve a similar effect. If you’re all about dark and moody photos with dramatic, low key lighting, you’ll need to consider a space where you can effectively block out any unwanted ambient light. The best portrait photography portfolios have a distinct and recognizable photographic voice and style, so it’s always a good idea to think about what your signature look is.
Remember, this home photography studio should serve you and your business needs, not hold you back! One other consideration before you start planning your photography studio setup is what your electricity needs will be. Make sure you choose a space that either has lots of reliable outlets or where you can easily reach with a good quality extension cord. Consider as well that running power cords all over your studio space will create tripping hazards, so if you’ll have people in your home studio you’ll need to consider how to manage that from a safety point of view.
Home photography studio equipment.
Now, on to the good stuff! Since you’ve figured out what space in your home is best suited to a home photo studio and fits your business needs, you can start thinking about what equipment to look for.
The good news here is that, no matter what your budget is, there are tons of seriously good options out there.
Home studio lighting setup.
One of the most important pieces of equipment in a home photography studio is, of course, the lighting. A basic home photography studio lighting setup can consist of just one light (either a speedlight or a flash), and a reflector, such as an umbrella.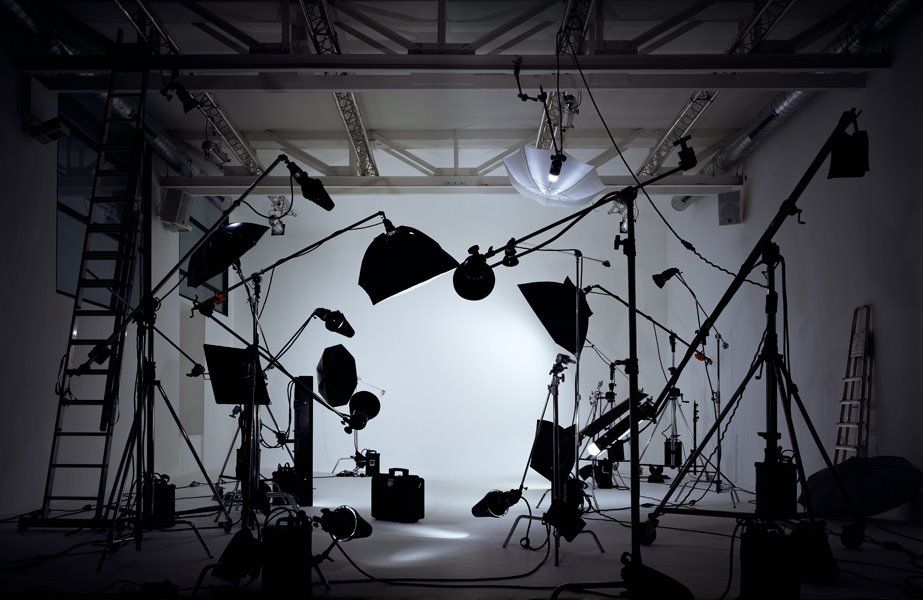 If you’re planning to get more advanced with home studio lighting, you’ll probably need to increase how many light sources you have so that you can achieve more complex lighting like a three-point portrait lighting setup. Increasing the number and type of light modifiers can really open up new lighting effects that you’ll be able to achieve from your home photo studio.
For the lights themselves, the two main options you have are speedlights and strobes, although there are also a lot of incredible continuous light options. They each have their own benefits and drawbacks, so, again, you’ll have to refer back to your own goals for this home photography studio.
Home photo studio speedlights.
Speedlights are great because they’re on the smaller side and tend to weigh less than strobes. If you need to take your home photo studio setup down between shoots, you might like being able to easily tear down and put away your speedlights. They’ll also be ideal if you have a very small space because they tend to be smaller themselves. Another huge perk? There are some perfectly good options available for really low prices. Brands like Yongnuo and Neewer make inexpensive options to get you started, and, if you’re willing to pay a bit more, you can get even more power and features.
Although they’re inexpensive, light, and small, speedlights do have some shortcomings you’ll want to consider before buying them for your photography studio. They’re definitely not as powerful as strobes, so you won’t get as much light out of them and will have to make up for it with your camera settings, which could result in slightly less crisp images. (A really great portrait photography camera will take care of that problem.)
They also take longer than your typical strobe to recycle between shots, which means you can’t shoot a big burst of shots in a row. That’s only a problem for certain kinds of photography, so it might not even be something you have to worry about. Unless you’re trying to capture a specific moment in a motion, such as a hair flip, for example, you probably won’t notice the slow recycle time too much.
A final point about this type of light is that, unlike strobes, they don’t come with a modeling light. A modeling light is a bulb located close to the flash tube that gives you an idea of how the flash will light the image when it does fire. You will end up knowing your home photo studio like the back of your hand, so this won’t be a problem in the long run, but it does mean you’ll need to do some experimenting to get a really good sense of the light your speedlights will produce. You definitely don’t want to be doing too much experimenting when you have an actual client in the home portrait studio!
Home photo studio flash.
If you choose to go for strobe lights instead of speedlights, your lights will definitely be more powerful. That’s great if you want to get the best quality light and clearest images possible. They’re also ideal for a photoshoot studio setup in which you want to be able to capture lots of little moments since they do recycle much faster than speedlights. This can be handy if you’re shooting bigger groups: it’s hard to get everyone to look their best at the same time, so, by getting more shots, you’re increasing your chances of nailing that perfect image!
You’ll also get the benefit of a modeling light. Modeling lights are great to be able to visualize how the light from the flash will look on your subject’s face in the final image. It also helps with focus and will make sure your subject’s pupils are not too dilated. There is often not a lot of ambient light in the studio without the modeling light so your subject’s pupils can look very dilated. The modeling light will help make the eyes appear more natural.
Strobes are, of course, more expensive than speedlights, so that’s something you’ll have to consider when you’re deciding what your budget is for your home photography studio setup. They also tend to be heavier, so they will be more cumbersome to set up and take down. If you’re lucky enough to have a space you can dedicate solely to your home photo studio, that won’t be a big problem for you, and strobes might be a great choice. There are some portable, battery-powered options but these options have their own drawbacks and would behave similarly to the speedlight options already discussed.
Home photo studio light stands.
Don’t forget the light stands. These usually take up a bit of floor space, so if you know you’ll be working with three-point lighting, make sure that you have enough space for all three lighting stands. It’s important to remember with some lighting setups the lights are behind the subject so you will need to make sure to have space behind your subject as well as enough space in front for you to still shoot and get the framing you want.
This is another type of home studio equipment that can really vary a lot in price. As a general rule, this is one piece of equipment in your home studio setup that you should probably spend a bit of money on. Although the stands may seem less important than other portrait photography accessories, cheap light stands can cause some serious headaches when you’re shooting.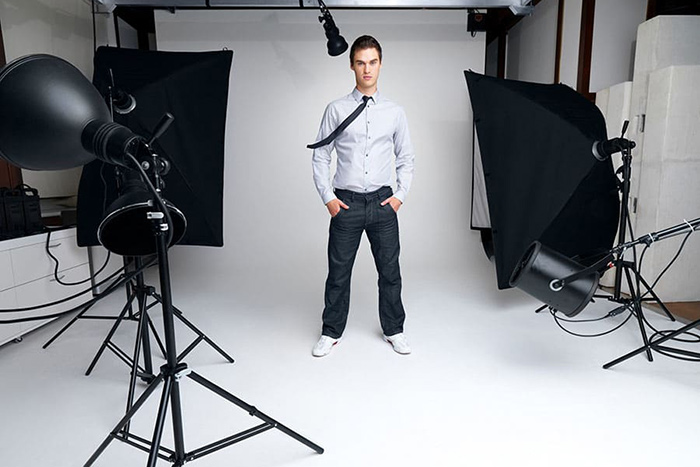 They can topple over and hurt someone, and you don’t want those lights you just bought to come crashing down either.
Invest in some heavy-duty, sturdy light stands for your home photography studio setup, and you’ll get your money’s worth for years to come.
Home photo studio backgrounds.
Your home studio setup should include a few background options that you can use again and again for different types of shoots. The first background to buy is a collapsible one that gives you the option of both black and white, since those are versatile and will work for tons of different portrait gigs. You might also want to get a background support that can hold your collapsible background as well as any seamless rolls you start collecting.
Home photo studio modifiers.
This is a fun part of setting up your home photography studio because modifiers can really take your images to the next level. There are tons of options to choose from, so instead of getting carried away and clicking “add to cart” on all of these, consider what kind of effects you’re going for and what kind of images will really be portfolio-worthy for you. Light modifier options include:
- Metallic or white reflectors: Create the effect of having a whole other light in your scene. Reflectors will bounce the light onto your subject to fill in deep shadows and can also create either a cool glow or, in the case of gold reflectors, a warm glow that could easily trick the eye into thinking it’s sunlight.
- Softboxes: These can help you diffuse light so that it falls evenly on your subject, creating an attractive and even look. Light from a softbox, as the name implies, is a beautiful, soft light that translates to a flattering way to light your subject. A softbox can be used to mimic window light or natural light so your subject doesn’t necessarily look like they’re sitting in a home studio.
- Gels: Colorful sheets of gel paper change the color of your light sources. An orange or red gel will give you a warm glow, and a blue or green gel will give the image a cool cast; you can play around with different combinations of gels to get some really cool and artistic effects.
 The great thing about gels is that they’re relatively inexpensive, so you might as well have a bunch on hand in your home photo studio if playing with colored light is your jam.
 - Umbrellas: Like a softbox, an umbrella will help you diffuse and soften light. It’s important to note here that they typically have more contrast, and do not create as diffuse a light source when compared to softboxes. You’re better off using umbrellas if you have a large space; in a small space, they won’t contain light in the same way a softbox might. There are different types of umbrellas, such as shoot-through umbrellas, and reflector umbrellas. Each has a different quality of light so you’ll have to do a bit of research to decide which is the best fit for your style. Even better, there might be a photographer in your community who uses them and would be willing to “talk shop” or let you test theirs.
Home photography studio kits.
After reading about all these different components of your home photography studio setup, you’re probably wondering if you’d be better off just getting a home studio set that contains all the necessary pieces. That all depends on your budget and goals.
If you skip the kit and buy the individual pieces, you’ll almost certainly end up paying more overall. Kits tend to offer lower-quality components, but you can find some seriously good deals. And, if you do your research, you’ll be pleased to find that there are actually some great options out there. If you’re a beginner and don’t have any equipment yet, a home photography studio kit can help you get up and running quickly. Then, you can add or switch out pieces of equipment as you go along and learn more about what you like and what works for you. Here’s a list of a few highly-reviewed options, but keep in mind that the options below are continuous lighting options (not strobes):
- The Neewer Continuous Lighting Kit
- The Studio FX Continuous Lighting Kit
- The Fovitec Studio Pro Continuous Lighting Kit
Chances are, once you start getting more and more gigs, you’ll find the kits don’t quite cut it anymore. But for someone early in their career, they’re an awesome option!
Setting up a home photography studio on a budget.
If you’re on a budget but the home photography studio kits just aren’t going to cut it for your home photo studio needs, there are lots of other ways to get a high-quality setup without breaking the bank. Second-hand options can save you a ton, and, as long as you get them from a trusted source (and hopefully with some warranty), you can save big bucks on powerful lights and other pieces of equipment that cost a lot more fresh out of the box.
Looking at refurbished options from retailers online or in your area is another way to avoid paying the sticker price for those high-cost pieces of home studio equipment. There are probably some things you can DIY as well—the internet is full of genius ideas for things like DIY reflectors, for example, which can make your photos look really professionally lit.
Another way to keep costs in check is to work with natural light, if possible. If you’re lucky enough to have a space with a reliable amount of daylight, lots of portraits will look stunning just using that available natural light, with no need for fancy strobes. You can even use DYI light modifiers to enhance the natural light and get creative with the final look of your images.
Small home photography studio tips.
If your space is extra-tiny, don’t despair! Small spaces, if set up properly, can still be perfectly usable photo studios. A few useful tips:
- Keep extra lights to a minimum. Use window light whenever possible, so you don’t have to fill up precious space with light stands.
- Make use of light modifiers, especially reflectors. It’s amazing how a couple of reflectors can make your portrait look totally filled with light as if you were using a three point light setup. Play around with reflectors and bouncing the available light and see what works best in your small space.
- Choose the right portrait lens. You probably won’t want a zoom lens if there isn’t room to zoom, so a high-quality prime lens that allows you to capture your whole subject from the distance you have available to you in your home photo studio will do the job.
 You’ll need to consider how the focal length will affect your framing, as well as how your subject looks in frame. Keep in mind, 35mm is generally the widest you want to go when creating portraits in tight spaces; anything wider will have noticeable distortion of the subject’s body – unless that is the look you are going for! The decision of what lens to buy is an important one, and something you’ll need to research for the style, and look you want to achieve.
There are a few other things you can do, no matter what your space and budget, to make your studio a comfortable place to be. You want to make sure your clients leave raving so that you can get that valuable referral business, so make sure your studio has:
- Water and light snacks: Photoshoots can be surprisingly exhausting, and having a hot light (or three) on you all day can get pretty uncomfortable. Make sure your clients don’t feel like they’re about to faint by having refreshments on hand.
- A mirror: It’s nice to be able to quickly and easily do a once-over and make sure you’re looking good before a shoot.
 If it’s mounted on the wall, you don’t have to worry about it taking up space.
 - Some translucent powder: You don’t have to be a top makeup artist to make your client look a whole lot better by removing the shine from their nose and forehead.
Show off those gorgeous portraits.
Make sure you set up an online photography portfolio so that you can start booking gigs in that new studio! If you don’t have one yet, no worries. Look for a website builder that allows you to create the perfect website for your business in just a few minutes. Video and blog posts are an awesome way to create SEO-friendly content, and if you’re building a home photography studio that would make for an awesome video series. Look for a website builder that has built-in video hosting so that you can share your adventure. Client proofing is also a valuable feature for portrait photographers since it allows your clients to give feedback, select their favorites, and buy printed products right from your website.
Ready to build an online portrait photography portfolio that will kickstart your portrait photography career? We’ve got you covered. Start your free trial with Zenfolio today!
For more tips, check out this guide to building a portrait photography portfolio, as well as these handy tips for how to get started marketing your portrait photography business.
Now, it’s time to open your home photo studio for business—good luck!
Want more tips for portrait photographers?
How To Be An LGBTQ2+ Inclusive Photographer
Posing tips for fun and natural images
20 Cool Self-Portrait Ideas
5 tips from professionals - Russian photo
How to create a photo studio at home:
5 Tips from the Pros
December 18, 2021
Photo: Depositphotos
What if we said you don't have to shoot in a professional studio to get studio quality shots? It is quite possible to do this in comfortable conditions and at minimal cost. A home photo studio will allow you not only to save money, but also not to worry about time. In it, you can work whenever and as much as you like, constantly honing your skills.
At first glance, creating a home photo studio may seem like a very difficult task. But it is easy to deal with it using the most elementary means at hand. About the main steps that will make your dream of a home workspace a reality, read the article from the international photo bank Depositphotos.
Decide on a goal
Before you start creating a home photo studio, you need to answer the main question: what will you shoot. Do you want to diversify your portfolio with new content or do photo shoots for clients? Arranging a photo zone takes time, because you need to think through a lot of nuances and, as a result, put everything together. Therefore, it is better to plan right away and make sure that the efforts will not be spent in vain.
You may think that at home the space for creativity is very limited. In fact, you have a huge selection of topics and subjects for shooting. This is not a complete list of genres that you can practice at home:
- subject photography;
- food photography;
- portrait photography;
- newborn photography;
- abstract photography;
- macro photo;
- animal photography;
- interior photography;
- lifestyle photo;
- backgrounds;
- art photography.
The choice of a suitable space for a home photo studio directly depends on the object of future shooting. The main thing at this stage is to realistically assess the possibilities.
Choose a location
If you have a separate unoccupied room where you can set up a photo studio, great. But a living room, bedroom, kitchen, loggia are also suitable - any free place in which you can create a photo zone.
In case you plan to shoot full-length portraits, group shots, additional lighting and reflectors, you will obviously need a large room. At the same time, for product photography, macro shots or photos of babies, you can get by with a corner in the room.
The second important factor when choosing a location is the lighting conditions. The rule is simple: the more light, the better. We advise you to work with natural light whenever possible. Firstly, this is saving money on equipment, and secondly, saving space, which is especially important for small rooms. The window acts as a softbox, filling the room with soft light. This creates excellent conditions for shooting and allows you to get more "lively" shots. But it is also important to consider that the light changes during the day and is highly dependent on the weather. Try to catch the "golden hour" - the time after sunrise and before sunset.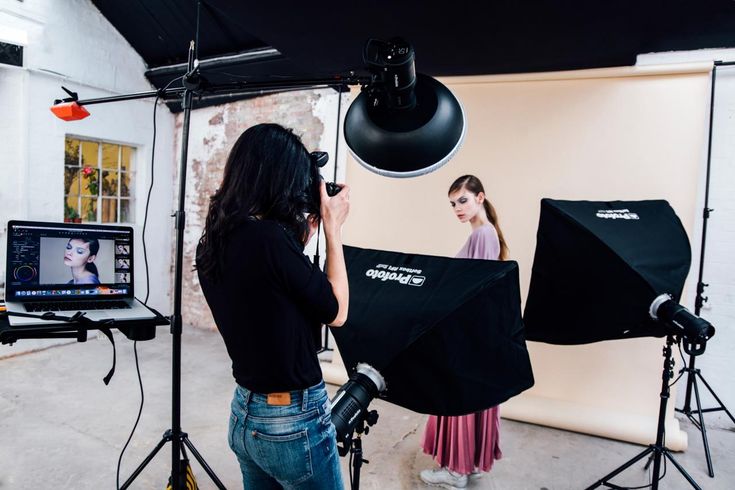
Free up space
Once you've decided on the perfect location for your home photo studio, you're ready to start building it. Since we are talking about a work area, it is important that nothing interferes with you. Also, you are unlikely to be pleased with the unplanned appearance of household items on the frames. Therefore, free the selected room or part of it from all that is superfluous.
Keep only what you need during the shoot. It can be a table (if you are shooting subject, food or macro photography), a chair or sofa (for portrait, lifestyle or animal photos), as well as other objects that fit into the theme and plot of the shoot. Don't forget about props: indoor plants, home decor and clothing items, accessories, mirrors - all this will create interesting and atmospheric shots.
Prepare your equipment
If you are shooting at night or want to have full control over the lighting conditions (for example, during product shooting), you will need additional light sources in addition to the camera and tripod. You can find many ready-made home studio kits online, but a flash and reflector will suffice to get you started.
If you're on a tight budget, look for used gear options from other photographers or rent them. There are a huge number of lessons on YouTube, for example, how to make a softbox from improvised means. And finding a cheap alternative to a reflector is easy: try using white paper, cloth, a sheet, foil, or a mirror.
It is important to think ahead where you will place the equipment so that there is enough space and it is convenient for you to work. If you plan to shoot portraits, and even more so group or family shots, this must also be taken into account.
The room where your home studio will be located should have enough outlets. After all, you will probably use additional light sources, a laptop, chargers, or, for example, a hair dryer for the effect of developing hair in portrait photography. If there are few outlets, prepare a reliable extension cord.
Don't forget the background
If your room has a neutral white, gray or black wall, use it as the main backdrop. If there is no suitable background, you can always easily find a replacement for it. The easiest option is a plain white sheet or a roll of white paper. Curtains, tablecloths, vinyl wallpapers, self-adhesive films are also suitable. There is one rule in choosing a background: it should not distract attention from the object.
Keep in mind that the background affects the overall perception of the frame, just like the light. At the same time, here you have enough space for experiments. You can try different colors to enhance the right mood, or use stylish backgrounds with simulated textures that will add depth to your shots and make them more expressive.
Want something a little more out of the ordinary? Try to create a background with your own hands. This is an exciting activity. In addition, the result will always be unique. DIY videos on YouTube will again help you with this. Such a background does not require much time, nor special artistic skills, nor high costs. At the same time, as a soft accent, it harmoniously complements the subject.
Summary
We have described the main steps that will allow you to create a home photo studio. Decide what you want to shoot, find a suitable location, prepare it for work, decide whether you will use natural or artificial light, make a list of furniture, props for shooting and create a photo backdrop. After that, get down to business. In the process, you will probably want to adapt something or do it your own way. Don't be afraid to experiment. After all, this is your photo studio, the main thing is that you feel comfortable working in it.
Remember that a home photo studio is an investment in the development of your business, which allows you to create the most convenient working conditions and gives you complete creative freedom. It will require advance planning, time and effort, but in return you will receive a powerful impetus for growth, you will be able to hone your skills, master new genres and reach a higher level.
Photo studio at home: how to set up, instructions
Equipped place for pictures is useful not only for professional photographers, but also for those who like to create content for social networks
Last year's quarantine turned many Russians into photobloggers involuntarily — being within four walls, people used social networks to the maximum to communicate. For those who would like to further develop in this capacity, we advise you to take a closer look at the tips for creating a home photo studio.
- Place for a photo shoot
- Lighting and space
- Natural light
- Lighting work
- Appliance connection
- Decorative background
- Tripod
- Furniture and other articles
Location for a photo session
If the apartment is small, it is important to choose the right angle for shooting. Those who plan to photograph not only portraits and Flat Lay compositions (a popular Instagram genre for shooting objects randomly laid out on a surface), but also full-length people, will need more space.
If there is very little space, it is worth considering the option of a mobile photo zone, which is collected for each new work. But it should be understood that with a limited space, the photographer will not be able to fully use the zoom. For full-length shots, the ideal distance is 5-6 meters. If you can’t provide it, it’s better to concentrate on other genres.
Photo: Pexels
Lighting and space
In addition to the size of the room, the height of the ceiling and its color are of great importance. Most often it is white - it reflects artificial and natural light to the bottom of the photo. As a result, there is too much light. To avoid this, you need to carefully select light sources, controlling their interaction with the reflective ceiling.
If the ceiling is low, on the contrary, this may create a shortage of space to highlight the top of the photo, where the model's head is. It is worth thinking about how to compensate for it with the help of additional light sources. But if high lamps are used, you need to remember: there must be at least a meter between them and the object.
Photo: Pexels
Natural light
It's best to take pictures near a window. This way the light will be soft and there will be no need for a flash, which often "erases" the details of the picture. But it is important to choose the right shooting time: direct sunlight is too bright, especially if the window faces east or west.
Yellow incandescent bulbs often used at home give an unnatural tint to photographs, for shooting they are better replaced with white ones that mimic daylight. If natural and artificial light are used at the same time, care must be taken to ensure that the effect of the lamps in the room does not overlap with the glare from the window.
Working with lighting
Standard home lighting is not enough for high-quality shooting - it is worth worrying about professional equipment. The minimum set for a photo studio includes:
- umbrellas. They are attached to the lamp and act as a reflector. As a rule, white, silver or gold color - depending on their shade, the effect on the photo changes;
- softboxes. Designed to diffuse light, create soft highlights and shadows;
- lamps. For a full-fledged photo studio, there should be two of them. Lamps with constant or pulsed light are placed on both sides of the model or subject;
- reflectors. In addition to an umbrella, you can buy several portable reflectors. It is convenient to use them for portrait shooting, bringing them close to the face. If you have an assistant, you can entrust the accessory to him, or you can buy a special stand on which the reflector is attached;
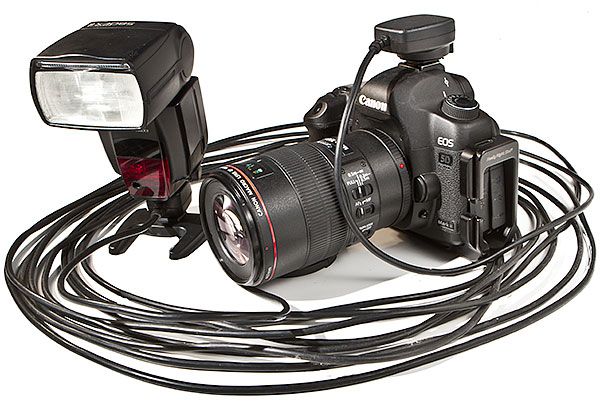
- synchronizer. It is needed in order for the pulsed light to work simultaneously with the camera shutter.
 There are wired, infrared, radio synchronizers (the latter are cheaper). When choosing a synchronizer of any type, you need to study the reviews for the compatibility of the model with a particular brand of camera.
Photo: Unsplash
Appliance connection
Chargers, auxiliary lights, synchronizers - in most cases, all these require sockets. It is worth considering in advance where and how the equipment will be connected, so that in the process of work you do not stumble over the wires. Adapters and pilots must be removed from the field of view and make sure that the extension cords are not in the foreground of the photo zone. A convenient connection system will allow you not to be distracted from work.
And you should always remember the main rule of a photographer - charge all the necessary equipment with batteries before shooting.
Photo: Unsplash
Decorative background
Photographing "in the natural environment" is quite difficult. Every time you have to remove unnecessary objects from the frame. And if at home you manage to find a suitable angle in all respects (usually a large clean kitchen or a bright bedroom), ideas for a photo will be very limited. Therefore, photographers prefer to buy ready-made backgrounds - "backs" without joints and patterns. A monochromatic canvas can be pure white, with the help of helium light its shade changes.
Neutral tones, small drawings, colorful printing are relevant. It’s good if you can buy several backgrounds and allocate space for storing them. On sale there are special racks and mounting devices that are mounted on the wall and allow you to hold up to three rolls of "backdrop". Backgrounds can be fabric and paper, and if the plans include digital post-processing of images, green and blue chromakey will do.
Photo: Unsplash
Tripod
A tripod is necessary for the photographer to take pictures of himself, but also useful when working with the model. The presence of a tripod allows you to experiment with shooting techniques - for example, increase the shutter speed without interference. At the initial stage of work, especially if photography is nothing more than entertainment and a hobby, stacks of books or a bookcase shelf are suitable as a stand. But if your plans go beyond great selfies for Instagram, you can think about professional equipment.
Photo: Aris-Tect Group\shutterstock
Furniture and other objects
When the photographer's task is to take creative shots, and not just assemble a lookbook against a neutral background, accessories are needed, and ideally, spectacular furniture. The choice is large - from a sofa and bar stools to potted plants, a bookcase and a vacuum cleaner. You can create a home "creative workshop" by choosing decorative elements and props for each new shoot. Particularly interesting are the original items in retro style - old suitcases, bird cages and old corded telephones found at a flea market.