Photography with sparklers
How to take Sparkler Pictures — The School of Photography
In this tutorial, I will show you how to take sparkler pictures with ease. I’m also giving away a Free Guide to sparkler photography to ensure you get shots while you’re out and about. Sparkler photography is actually a really simple thing to do, you just need to get your camera settings correct, then it’s all about practicing and having fun.
This is a fun thing to do at a fireworks night, Independence day, New Year’s Eve or just in your garden with left over sparklers.
Hope this tutorial inspires you, if it does we’d love to see your examples of sparkler photography. If you want to show us, tag #theschoolofphotography on Instagram and Twitter and @theschoolofphotography1 on Facebook.
Download our guide to sparkler photography below.
Free How to Photograph Sparklers Guide
Simply complete the form below and your free Sparkler Guide will be attached to an email sent to you. Don't worry you can unsubscribe anytime.
Your Free Resource is now on its way to your inbox. If it's not there, check your spam/junk folder. For more of our free content click FREEBIES at the top of this page.
First Name*
Please complete your first name.
Last Name
Email*
Opt-in*
We pride ourselves on providing the best photography training money can buy and this is a taster of things to come. By clicking the button below, you understand you will be added to our mailing list and sent information on our products and services.
Get access to ALL our online courses - 1000’s of videos, worksheets, critiques of students work, personalised support and much more with our monthly membership.
get unlimited access to all our courses here
The Best Equipment for sparkler pictures
It’s best to keep your camera still whilst photographing sparklers in movement. For this you will need a good sturdy tripod to take the weight of your camera. Avoid using cheap flimsy tripods as these could cause your camera to move in the wind or make your set up top heavy. Having said this, you can also get some good effects hand holding your camera. Give them both a go and chose your best technique.
You will also need a camera that can used in fully manual. A DSLR or good mirrorless camera will do the trick. Learn how to use a camera in fully manual mode here
Camera setting for sparkler photography
Set your camera needs to be on manual mode.
Set your Aperture of f.22
Set your Shutter speed to 15 to 30 seconds
Use an ISO of 100
Set your camera to manual focus.
White balance - daylight sparklers have an orange glow to them, if you put your white balance on to daylight then you can catch the orange glow of the sparklers more accurately.
To learn about white balance, apertures and other camera settings, click here
WANT 10% OFF YOUR FIRST COURSE? CLICK HERE
Tips
Go to a really dark spot, the darker the better!
Set your shot up and frame it correctly first. Get the person who is to be holding the sparklers to stand in the middle of your frame.
Make the model aware of the middle of the picture so they know the space they have to move around in.
Focus on them and then switch your camera on to manual focus, this will keep the focus point in the same spot and stop the camera having a hissy fit next time you focus!
Use a torch to find the focus point if it is too dark.
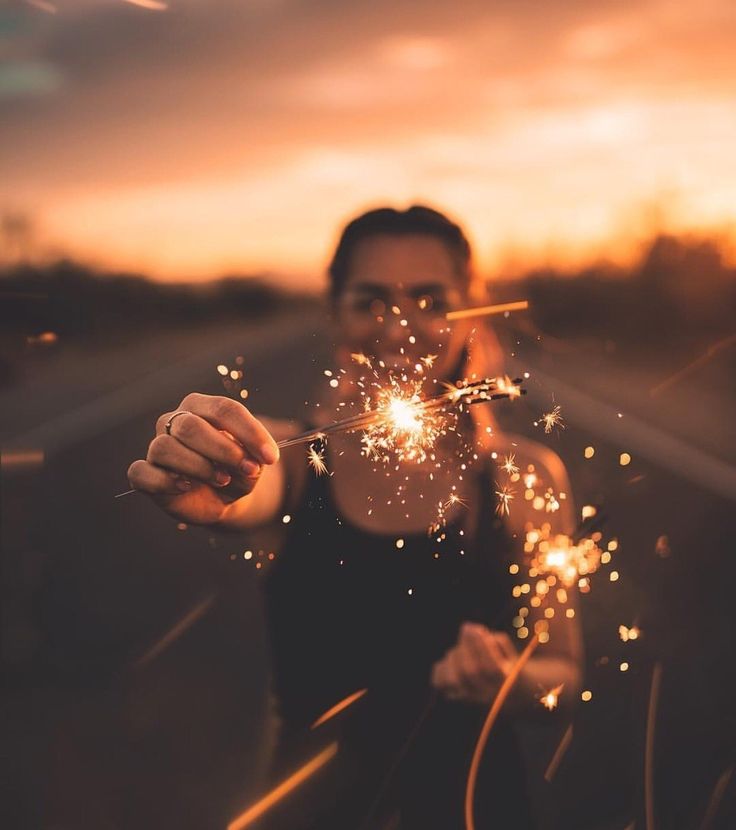
Examples of Sparkler photography
Get access to ALL our online courses - 1000’s of videos, worksheets, critiques of students work, personalised support and much more with our monthly membership.
Get unlimited access to all our courses here
Like this? - Check out similar tutorials below
I hope you liked this sparkler tutorial, if you did please leave us a comment and support us by sharing it with your friends and subscribing to our newsletter at the bottom of this page.
We also have an excellent learning community on social media so please join us there as well.
Thanks for watching and remember – Learn photography online at The School of Photography.
Photography, For SchoolsThe School of PhotographyLight painting, sparklers8 Comments
0 LikesHow to Take Awesome Sparkler Photos • The Blonde Abroad
When I set out on my first solo trip six years ago, I knew little to nothing about photography. Over the years, I’ve spent countless hours watching tutorials, practicing new techniques and teaching myself the art of photography.
One of my favorite techniques that I’ve picked up is night photography and taking sparkler photos. While it seems complicated at first, once you know the settings, it’s really easy!
Here is my guide on how to take awesome sparkler photos!
Find Your Manual Settings
Auto settings won’t cut it for sparkler photos. You’re going to need to shoot with a long exposure of a few seconds. So, if you’ve never shot on manual, watch a tutorial on your camera settings to see where to adjust your ISO, shutter speed and aperture.
Each camera is different, so YouTube is usually your best bet for finding tips on your specific camera model. I’ll give you shooting settings in another step, so find your manual adjustments, then keep reading!
Read More: The Beginner’s Guide to Photographing in Manual Mode
Use a Tripod
When shooting a long exposure, you need a tripod to stabilize your image. If you’re holding the camera, your photos are going to come out blurry.
If you don’t have a tripod, you can leave your camera on top of a rock, your bag, or a table. As long as it’s a stable surface, you won’t have any problems getting perfect sparkler photos!
Read More: The Best Photography Gear for Travel Blogging
Make Sure It’s Dark
To get the best results from your sparklers, you need to make sure it’s dark. Move away from any traffic, house or street lights. The long shutter will capture and exaggerate any other light sources, and your sparklers won’t come out as vibrant.
While you can shoot at sunset or just before it’s fully dark, it is a little trickier to capture. Try practicing in a dark space outdoors first; then you can try different lighting scenarios!
Camera Settings for Painting with Sparklers
If you want to capture an image where you draw or write in the air with sparklers, you’ll need to adjust your settings to allow for a long enough shutter speed to capture the full movement.
Along with your shutter speed, you’re also going to want to adjust your ISO and aperture. There’s no exact setting because it will depend on the environment you’re in and if it’s completely dark vs. some other light sources creeping in.
I usually start with these settings and adjust accordingly:ISO: Start with ISO 400. We won’t need to worry too much about ISO because we’re going to use our shutter speed to determine how much light we let in.
Aperture: Start at F/4. It should give you just the right amount of depth of field and keep you and the sparklers in focus. The lower you drop your f-stop, ie. F/2.8, the more ‘sparkly’ and thick your lines will appear. The higher you bring up your f-stop, ie. F/8, the more refined and thin your lines will appear. It’s personal preference, and you can play around with it to see what you like!
Shutter Speed: Start with a 5-second shutter speed. That means, once you press your shutter, it will stay open for 5 seconds. So whatever you want to draw, you have 5 seconds to do so! Take a practice shot and increase or decrease your shutter speed to get the right lighting.
Helpful Tips:
-
- Make sure you set a 2-second timer, so your camera is nice and stable before it starts shooting. This way, you can also give your subject a countdown!
-
- Your timer will start when you press the shutter and give you 2 seconds before it starts shooting. Set the time, press the shutter halfway to focus on the sparkler, then a full press to start the timer and it will automatically start to shoot when the timer finishes.
-
- You should also have your shutter speed open for the length of time it takes to draw or write! If you finish writing and hold your sparkler still while the shutter is still open, you’ll likely get a “great ball ‘o fire.” Reduce your shutter speed if this is the case.

- You should also have your shutter speed open for the length of time it takes to draw or write! If you finish writing and hold your sparkler still while the shutter is still open, you’ll likely get a “great ball ‘o fire.” Reduce your shutter speed if this is the case.
Don’t worry if you don’t get it the first time! It takes practice and a lot of sparklers to get the perfect shot!
Tips for Writing with Sparkler Photos
If you want to capture words or a date with your sparklers, you need to write backward from right to left. This is because the camera is facing you and will pick up the writing from left to right.
It’s a bit tricky at first. Spend a few minutes practicing to perfect your technique! You might need a few people to help you write out something long.
Also, cursive writing works best!
Camera Settings for Still-Photos with Sparklers
If you want to shoot a portrait or still photo with a sparkler, you’ll still need to switch into manual shooting, but you won’t need quite as long of an exposure.
ISO: Start with ISO 400.
Aperture: Start at F/4. You may adjust this slightly lower or slightly lower depending on the depth of field you want. If you want the sparkler in focus with your subject blurred, drop to F/2.8. If you find that your subject is more blurry than you’d like, increase the f-stop.
Shutter Speed: A 1-2 second shutter speed should do the trick! You’ll need to ask your subject to stay VERY still, and I find the most beautiful shots are when the sparkler is close enough to light up the subject’s face (but not too close that they’d get burned)!
Be sure to use a tripod and a 2-second timer as well! Press halfway to focus on the sparkler before shooting!
Taking Sparkler Photos with Your Phone
You don’t need a DSLR to take sparkler photos. There are apps like Slow Shutter Cam that can help you manually override your smartphone’s settings to take the picture.
The newer model Android phones also have a ‘manual’ or ‘pro’ mode. This lets you adjust the shutter speed and the ISO like you would with a standard DSLR.
You can even take long exposures with newer models of a GoPro!
If you’re using an iPhone with iOS11, use the Live mode to capture sparkler photos. Once you’ve taken a Live picture, swipe up to reveal the effects menu and select ‘Long Exposure’.
Your phone will create a new image by layering the three seconds of Live footage.
Read More: iPhone Photography Tips for Travel
Edit Your Sparkler Photos
Once you’ve taken your shots, import your photos in Lightroom or an editing app of your choice. You can quickly improve your sparkler photos by adjusting the brightness, contrast, and highlights. By playing around with those settings, it will help make your photos pop.
Check out my Lightroom Presets to instantly add a beautiful aesthetic to all of your images!
Overall
While it seems confusing at first, sparkler photos are easy to master. All you need is a little bit of practice and patience, and you’ll be taking beautiful photos in no time!
Do you have any tips for taking sparkler photos? Let me know in the comments below!
Shop My Travel Essentials!
How to photograph sparklers
Seeing sparklers , we begin to experience bouts of nostalgia. Having matured, we are waiting for the New Year holidays to be able to wave them in the air. I propose to consider the possibility of saving your memories and transferring them to wonderful photographs. So, we wait for the onset of darkness and start shooting!
What you need for a good shot:
- SLR or compact camera
- sparklers and matches;
- tripod;
- flash;
- assistants, they are friends;
- external flash (optional).
1. Set up the tripod in a dark place. Find a dark corner outside. Extraneous light sources (street lights, headlights of passing cars) will only interfere, in our shots the main focus is on sparklers.
Mount the camera on a tripod. The presence of a tripod is mandatory, since the shooting will take place at slow shutter speeds, otherwise the pictures will come out blurry. But if you don't have a tripod, use what you have on hand to stabilize your camera.
2. We make a choice between the presence of a flash and its absence. If you want to see only sparklers in your photos, you don't need a flash. But if you want to take pictures of your friends along with the lights, then you will definitely need a flash. And it is important to think in advance about the patterns that your friend will draw in the air with the help of sparklers.
3. Set up the camera. Be sure to change the white balance. We select the mode "cloudy" or "cloudy", as a result, the sparklers will have an orange tint. You can experiment with different white balance settings until you get the desired hue. But if you leave the white balance on automatic, your sparklers will be white in the picture. Colored sparklers - as an option!
If you are using a compact camera, you can set the night mode. And then you do not have to set the aperture and shutter speed. And if your camera has the ability to manually set the aperture and shutter speed, use this feature.
For a SLR camera, select manual (manual) mode. Set the aperture to f5. 6 and ISO 100. In this case, the shutter speed can vary from 8 to 25 seconds. Shooting without a flash, 25 seconds of shutter speed will allow you to make a beautiful shot of sparklers , and your friend, since there will be enough light.
4. Installing the flash (optional). If you decide to shoot with flash, you will need a fast shutter speed of about 8 seconds. Using the built-in flash, select the rear-curtain (rear flash) synchronization option. In this case, the flash will fire at the last second of the exposure, that is, when the shutter is closed. When using an external flash, you won't need rear-curtain sync by manually pressing the shutter button.
5. Focus on our subject. In the dark, autofocus will not work, use a flashlight to illuminate the subject itself. Most cameras focus already when the shutter button is pressed halfway. At the moment of focusing, switch the camera to manual mode, while not moving it, otherwise you may lose focus.
6. Paint with light! When ready to shoot, give your friend a couple of seconds to turn on the sparklers. Feel free to press the shutter button and all attention to the dance of sparkling lights.
7. Edits and experiments. Maybe. That your frame will come out too light or blurry, then make the shutter speed shorter. Conversely, if the sparklers in the picture look dim, slow down the shutter speed. Having achieved the perfect exposure, start shooting a holiday with the participation of sparklers.
Try it and have fun!
Bengal Lights Photo Ideas
Bengal lights are statistically one of the most mentioned symbols of the new year. At almost every New Year's celebration, these simple, but very effective pyrotechnics are present. It doesn't make much sense to tell what sparklers look like. First, everyone knows this. Secondly, there is not much to tell: it is a long, elongated stick with a special structure at the end. These are barium nitric acid, aluminum powder and magnesium. It is this composition that begins the reaction after heat is released from a match or other source. But it is pleasant for everyone to watch the reaction: these are beautiful, bright, colored, large sparks, which are almost completely safe if you follow the precautions. But today we will not talk about safety, but about how to capture such a beautiful moment of burning Bengal.
Wedding photo with sparklers
At wedding photo shoots, it is customary to use various decor items. Wedding photography has become so commonplace that it's hard to imagine a wedding without it. Photographers and young couples themselves are behind the scenes competing in a creative approach to this event. Pyrotechnics only helps with this. There can be many ideas for use - it all depends on the imagination of the newlyweds and the photographer. For example, you can take a photo in a darkened room, where the newlyweds will kiss each other, and their faces will be illuminated by a sparkler, which they will hold together, between themselves. This will be a symbol of the bright love that broke out between them. But the main use of sparklers is drawing. All photographers are well aware of the delay effect, when the camera catches the movement of a sparkler, and then connects the frames and a solid line is obtained. In this way, very beautiful and bizarre shapes can be obtained, for example, a spiral or a heart shape. Also, the corridor with lit sparklers looks very impressive. The guests line up and light the fires, the newlyweds walk along it - the photos look fantastic. Of course, such shooting is best done at night or at sunset.
Christmas photos with sparklers
Of course, New Year's Eve remains the most popular place to use sparklers. In general, it is difficult to imagine a New Year's holiday without a cute, cozy, bright, glowing stick. The secret of happiness is really very simple. But how exactly to be photographed with sparklers. The problem is that just lighting a stick on fire and taking a photo is not the best idea. First, not enough creativity. Secondly, without matrix and light settings, you will get just an incomprehensible luminous ball, instead of thousands of small and large sparks. But we will return to the settings and shooting rules, but for now a couple of ideas. You can try a close-up photo with a lit sparkler and a glass of champagne. First, these are two symbols of the new year. Secondly, shiny balls play in the glass and the color is incredible. The more light and sparklers the better, so try taking a picture with your friends. If you cross several burning sticks in the center, you will notice the flash, the photo will have a stunning effect. Otherwise, everything is limited only by your imagination, the venue of the holiday and technical capabilities. Bengal lights can become an adornment of any photo, so bring to life all the most interesting ideas.
Bengal photo ideas
Now we will talk about ideas for photos with sparklers. Wedding and New Year's holidays do not count, as we have already discussed this. Now it remains to pick up a few ideas that the sparklers will successfully fit into, or, conversely, you need to take a sparkler, and build a beautiful story around it, which can only be captured on camera.
Magic wands
The idea will especially appeal to fans of the Harry Potter books, as well as to all lovers of fantasy and magic in general. You probably associated sparklers with magic wands. With the help of a delay on the camera, as well as a little creativity, you can get the effect of a battle with magic wands. You can successfully portray a duel, a battle on sticks: just stand opposite each other, come close and touch with sticks. Set fire to them and step back: the camera should be in delay mode. At the end point, freeze and become a duelist. The result will be beautiful and amazing. You can complement the whole picture with the costumes of your favorite characters.
Creative lettering
We have paid attention to the special delay effect many times. But these are the realities, photos with the participation of sparklers turn out really spectacular and beautiful in most cases using this effect, so we will apply it now. Get together with a group of friends, stand in a row and draw one letter each with your hand, preferably at the same time. As a result, the photo will have an inscription. In this way, you can say hello or wish you a happy birthday. The inscription is an optional condition, only suggestions for the implementation of the idea. Ultimately, you can "draw" any figure you want, make any composition.
For romantics
What do you associate sparklers with? In most cases, you will get the answer: "New Year". But let's think further why this holiday is so loved, why it is always remembered with a smile on the face. Because it is associated with warmth, homeliness, and a festive atmosphere. So let's create it, with the most important attribute of the holiday right in our hands. You can take a photo yourself, you can attach a partner to yourself. Many interior items are not needed. But, if we draw parallels with the New Year, then it must certainly be mittens, a knitted sweater, a dark evening or a house, a large, cozy carpet. Arrange sparklers around the room or take them in mittens, create a cozy atmosphere and take the cutest photo of your life.
How to take a photo with sparklers: tips
So, we answered the question "What to shoot", now let's talk about the practical part and decide how to shoot. Beautiful lines, whole words, brilliant lights, where each spark is visible individually - it all looks incredibly beautiful and easy, but it is not so easy to repeat it. So, to get the highest quality and predictable result, you need:
- Tripod. We are not talking about the fact that you definitely need to purchase a professional camera, but you will need a tripod for stable shooting, for stabilization.
 If you are going to use the phone, you will have to purchase a tripod for it or do something with your own hands. In the end, our task is to make the phone stand evenly and steadily.
 - Flash or no flash. Here everything depends on our tasks. Bengal lights look beautiful in the dark, there the color is richer, there is more contrast. Therefore, if only silhouettes are important, then you can try to take a picture without light. If the face of a person is important, then you can try the option with a flash, with it you can get a really beautiful picture, in which sparks from a Bengal fire are perfectly visible and a person’s face is visible.
- Camera setup. We have repeatedly mentioned the "delay" mode. Without this feature, photos with lines and inscriptions simply will not work. The delay time will have to be chosen experimentally. For example, in order to have time to draw a whole inscription, for example, the word "LOVE", then it is worth choosing a maximum value of about 1/30 second or more.
 For a normal line, you can limit yourself to smaller delay values.
 - Balance setting. Here the logic is simple: we are trying to create the most comfortable and warm atmosphere, the atmosphere of a hearth, so warm colors should prevail in the photo. Change the white balance to "overcast" or "cloudy".
- Aperture setting. These settings apply to a professional camera. Here we will not go into technical details, just write indicative values. Try to put a value from f5:6. Now let's move on to the ISO value, here we need to set the minimum value, it will be 100 or 200, depending on the minimum on your camera. When you set the right settings, it remains only to exercise your imagination and creativity. You will have a lot of opportunities to realize your ideas. Fortunately, sparklers cost quite a bit, so you can buy new copies without holding back.
In connection with the Resolution of the Council of Ministers of the Republic of Belarus dated August 11, 2020 No.