
Real estate home photography
24 Tips for Stunning DIY Photos
Let’s face it, using your own DIY real estate photos in your MLS listings is risky. Chances are you’re not a professional photographer, you don’t have amazing gear, and well—real estate photography is not as easy as it looks.
If you’re reading this, you’ve probably decided to learn how to take real estate photos the right way—yielding pro-level results that will impress agents and buyers on both your local MLS and on Zillow. We curated this list of the best real estate photography tips from experts across our industry to help you level up your skills.
Real Estate Photography: Preparation & Planning
1. Schedule Adequate Time for Your Shoot
Emile L’Eplattenier, Managing Editor, The Close
“One of the biggest mistakes agents make in real estate photography is to only schedule a few minutes and rush through the shoot. This is almost always a bad idea. First, because framing your shots properly can take time, and second, because you never really know what state the listing is in before you show up. There might be issues that will take time to fix. Also, schedule time when the weather is cooperating and at a time of day when the light is advantageous (and not waning swiftly). Giving yourself a very short window limits your chances of success on both fronts.
“The same goes for photo editing. Don’t scramble at the last minute to find a professional image editor, if that’s not in your skill set. And don’t rush this process. Plan ahead by pinpointing a skilled photo editor to polish your images on sites like Fiverr, where talented freelancers look for work.”
Visit Fiverr
2. Neutralize & Declutter Before You Start Shooting
Alayna Summanen, Realtor, Coldwell Banker Vanguard Realty
“We explain to our sellers that some design features and elements that look great in person may not photograph well. For example, bold accent wall colors, or collections, or a photo collage. We advise to clear everything off counters and leave minimal decor for the professional photos. It may look plain to the sellers, but it will really make the home shine in the photos. For over 93% of homebuyers, the first showing is online and the photos are what make them decide whether or not to schedule a time to view it in person.”
3. Always Stage a Home, Even if It Means Simply Rearranging Current Furniture
Fallanne Jones, The Property Girls Team at Keller Williams
“Staging your home for listing photos is absolutely crucial. If you are currently living in your home, rearrange furniture in a way that lets potential buyers see the potential. Buyers won’t be able to envision themselves living there if they can’t see past crowded furniture or dated decor. For a quick fix without breaking the bank, try adding trendy rugs or pillows to your existing furniture. If the house is vacant, consider hiring a professional stager. They know what is in style and proper placement. Contemporary furniture and decor will bring your house to life and help buyers visualize the space. ”
”
[Related article: The Best Virtual Staging Software & Tips for 2022]
4. Ask the Homeowner to Keep Pets Out of the Home
Emile L’Eplattenier, Managing Editor, The Close
“Even if your homeowner client has an incredibly photogenic pet, avoid the temptation to take listing pictures with them in the shot. Sure, buyers with pet owners may love it, but what about all the other buyers who check out your listing? Some people see a cute dog or cat and immediately think of allergies and bad smells. So that snuggly picture of your homeowner’s Dalmatian by the fire just might alienate a significant percentage of your buyers.
“Of course, if your listing is well priced in a seller’s market, this might not keep them from touring the home, but why risk it? After all, it might keep them from being excited about the home, which could very well hurt your bottom line when they’re crafting an offer.”
5.
 Pay Attention to the Smallest Details
Jlyne Hanback, Realtor, Keller Williams
“Pay attention to the details! There is nothing worse than a fabulous home photo with a crumpled, crooked bedspread or an open, dirty toilet! Put away toiletries, straighten bedclothes, and always look over the photos for small details that will turn off a potential buyer.”
6. Shoot Your Virtual Tour on the Same Day as Your Listing Pictures
Emile L’Eplattenier, Managing Editor, The Close
“If your schedule allows for it, always have your virtual tours shot on the same day, and preferably in the same lighting as your real estate photography. Consistency is important, but also, your virtual tour needs to look just as good as your real estate listing photos.
“Speaking of quality, the image quality of some virtual tours might not look as good as pictures taken with your high-quality camera. This makes lighting even more crucial.
“If you’re on a DIY budget, Asteroom is an excellent way to make DIY virtual tours with your phone. Asteroom means you can offer virtual tours for even your cheapest listings.”
Visit Asteroom
7. Always Notify the Neighbors Before Drone or Exterior Photography Sessions
Daniel Tirado, Aerial Photographer
“As a rule of thumb, I always inform the neighbors that a drone will be flying in the area to capture real estate photos as it can ease unnecessary anxiety for both the neighborhood and the pilot.”
Real Estate Photography: Choosing the Best Equipment
8. Invest in a Wide-angle Lens
Erin Attwood, Real Estate Photographer, Dune Life Photography
“A wide-angle lens is a must-have for shooting interiors, but most of the ultra-wide range zoom lenses run well over $1,000. Unless you are shooting the Taj Mahal, this isn’t necessary. I would recommend a 24mm wide-angle to help ‘open up’ rooms, and they won’t break the bank at only around $130.”
9. Keep It Steady With a Tripod
Emile L’Eplattenier, Managing Editor, The Close
“Today’s cameras are so impressive you don’t need a lot of fancy equipment. However, I recommend that you invest in a good tripod in addition to a wide-angle lens. Real estate photography is all about precision. A tripod will keep your camera steady and your photos clear.”
Real Estate Photography: Lighting, View Planes & Framing
10. Keep Your Verticals Straight (by Holding the Camera Level)
(Source: Adam Taylor, Interior Architecture Photographer in Hawaii)
(Source: Adam Taylor, Interior Architecture Photographer in Hawaii)
(Source: Adam Taylor, Interior Architecture Photographer in Hawaii)
(Source: Adam Taylor, Interior Architecture Photographer in Hawaii)
Adam Taylor, Interior & Architecture Photographer in Hawaii
“If you decide not to hire a professional photographer, make sure your verticals are straight. If your camera isn’t level, the vertical lines like walls and cabinet edges will appear to be slanted and the entire room will start to look like a fun house. Sometimes you’ll have to raise the camera higher or hold it a bit lower to capture your intended subject, and that’s OK … just make sure to level out the camera instead of tilting it up or down. Most cameras (even smartphones) have an option to turn on grid lines that will help guide you.”
11. Get Your Lighting Right
(Source: Douglas Elliman)Anne Jones, Owner & Realtor, Windermere Abode
“Make sure the sun is on the front of the house. Your cell phone camera is good, but you lose the details when homes are backlit. I also love high-contrast homes. Bright colors photograph better than neutral ones—almost the opposite of interior photography rules. You may not like the fake grass and clouds, but blue skies and green grass make compelling thumbnails!”
12. Be Mindful of What’s in Your Line of Sight Through Windows
Michael Edlen, Edlen Team Coldwell Banker
“Photographers and agents sometimes neglect to consider what is in the line of sight through windows when shooting interior spaces. If one is not careful, the shot may inadvertently include scruffy landscaping across the street, an old van in someone’s driveway, or a patch of weeds in the sidewalk area. Worse yet, it may be a shot that includes a window with a large bush blocking most of the outlook, making the room feel closed in.”
13. Never Fake Views Through Windows
Emile L’Eplattenier, Managing Editor, The Close
“Although it may be tempting to Photoshop in a pastoral green meadow or weeping willow to cover up a drab backyard visible through the windows, don’t!
“First and foremost, you will likely be flirting with violating National Association of Realtor (NAR) rules, but more importantly, you’ll be starting your relationship with a potential buyer with a lie. A white lie to be clear, but a lie nonetheless.”
14. Make Sure the Windows Are Clean
Kenneth Er, Compass
“I think one of the little details that a lot of people miss is to remove the window screens and clean the windows inside and out. This just makes rooms look so much bigger in photos and in person with the right light.”
15. Open All Curtains & Blinds
Daniel Tirado, Aerial Photographer
“As a professional drone photographer in the real estate business, I always recommend opening all of the interior window blinds. While these may be outdoor photos, opening the blinds makes the house look more inviting and bigger from the outside by allowing potential buyers to see the exterior and interior of the home in one picture. From a photographer point of view, opening the blinds dramatically reduces any glare that may shine back at the drone camera when capturing pictures and videos.”
Real Estate Photography: Marketing Your Listing
16. Include Images of the Lifestyle Your Listing Exemplifies
(Source: AJ Canaria, Creative Producer, MoxiWorks)AJ Canaria, Creative Producer, MoxiWorks
“Include community images to give a feeling of the neighborhood,” says AJ Canaria, Creative Producer at MoxiWorks.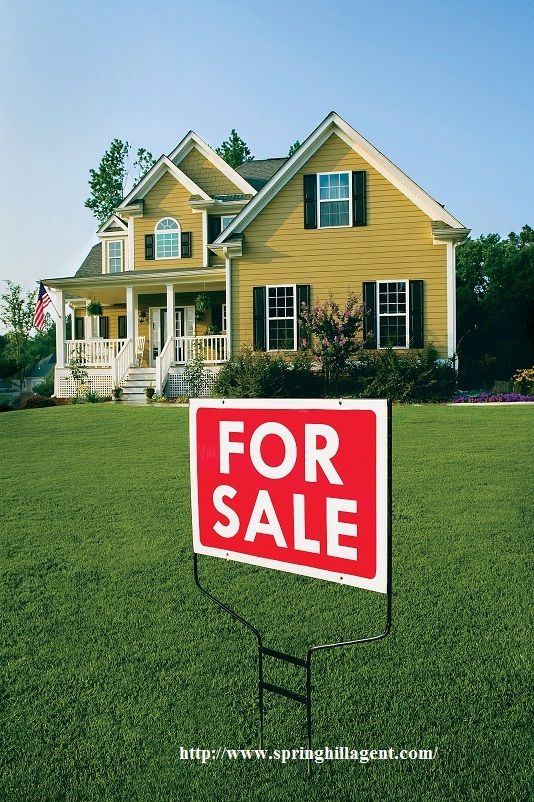 “People don’t only want to envision their life in that home, but also want to envision the life they can live around the community. This is especially important for homes with great walk scores and for consumers who aren’t as familiar with the community.
“As a photographer for the industry, it’s always important to give a sense of the location, especially when I travel for real estate events. If a listing is near a notable landmark and the community photos present it appropriately, it can help increase the value and help the consumer envision a life in that community. Also, showcasing nearby recreational areas, amenities, gyms, pools, and schools can influence the homebuyer’s decision to purchase that home.”
17. Avoid Using Stock Photos Provided by Developers
James McGrath, Co-founder NYC Brokerage Yoreevo
“The vast majority of the time, interior stock photos are terrible. When someone has been looking long enough, they’ll associate these irrelevant pictures with a low-quality listing. The same can be said for stock photos of the building’s amenities—you’re diverting attention from what the viewer actually cares about—which looks suspicious.”
18. Ask the Homeowner if They Have Shots of the Home in Different Seasons
Angel Pointek, Associate Broker | VP of Marketing Coldwell Banker Elite
“Ask the sellers for any photos they may have showing the home in different seasons. Show off that beautiful winter wonderland scene in the winter or the gorgeous red maple in the fall. Our job is to tell your home’s story, and those seasonal photos can be used in creative ways.”
19. Sometimes Less Is More
Todd Andrew, Red Oak Realty
“Sometimes less is more. Don’t show too much. For instance, if the floor plan isn’t ideal, show individual spaces. The goal is to get buyers into the home. Let them decide when they get there whether they want to make any compromises the property may entail.”
20.
 Post Just the Right Number of Photos
Katie Messenger, Realtor With Keller Williams Realty
“There is a quantity sweet spot. Too few photos may leave buyers wondering what isn’t being shown, or confuse them on the layout and features. Too many photos may cause buyers to lose interest.
“Around 20 pictures will give a pretty accurate depiction of most homes without being too overwhelming. However, a lot of it depends on the size and square footage. For instance, 10 would be far too few on a 10,000-square-foot house, but could be just fine for a one-bedroom condo.”
21. Take Photos of Your Photos
Christopher Linsell, Real Estate Writer, The Close
“Documenting the real estate photography process is a great way to build excitement about a new listing. Use your social media platforms to let everyone know that there is something new on the horizon, and give just a little glimpse of the work behind the scenes.”
Real Estate Photography: When to Hire a Pro
22.
 Hire a Pro to Edit Your Photos for Just $5
Christopher Linsell, Senior Real Estate Writer, The Close
“The gig economy is flourishing, and experts who are ready to take your photos to the next level are just a click away. That means prices are lower than ever, making it possible to have all your listing pictures edited by a professional.
“At last check, there are 960 freelance editors on Fiverr (and that’s just in the United States) who will take your DIY real estate listing photos and give them the polish your listings deserve. With prices starting at just $5, how can you afford not to?”
Visit Fiverr
23. Whenever Possible, Hire a Professional Listing Photographer
We think Sunny Lake Hahn, Partner at 7DS Associates, the most well-respected (and trusted) real estate consulting firm in the country, explained it best:
“Professional photographers understand the importance of light and how to capture a space at the right time for the highest visual impact. Based on the position of the property, they know if it’s best to shoot at sunrise, sunset, or anywhere in between. They also have the ability to blend the same photo taken with different exposures to create the perfect image.
“In our digital, mobile world, professional photographs have the ability to stop the consumer from scrolling through listings. Beautiful images capture attention and get people to click through. Being able to get and keep the consumer’s attention is highly valuable in our instant-gratification world.”
24. Relax!
Emile L’Eplattenier, Managing Editor, The Close
“Believe it or not, one of the keys to real estate photography or any photography, for that matter, is to leave the stress from your day in the office. When you’re stressed out and rushed, everything you need to do to take great listing photos becomes harder. Choose angles to shoot from, keep a steady hand to keep pictures sharp, and especially coordinate with homeowners about dogs, cats, clutter, and all the other annoying things that will get in between your camera and the beautiful pictures of your listing on Zillow.
“So relax. Schedule your shoot on a day when you’re not frantically rushing from showing to showing, and take a few deep breaths before you walk into the house, camera in hand. You already got the listing, so the hard part is over, right?”
Over to You
What do you think: Is real estate photography something that amateur agents should try on their own? If so, what are some great real estate photography tips our experts missed?
[Related article: 33 Cringe-worthy Bad Real Estate Photos Agents Actually Posted]
How to Get Into Real Estate Photography in 2022
So you’re considering a career in real estate photography.
Whether you’re already a working photographer looking to dive into a new niche or you’re brand new to the world of photography, this guide is for you.
You likely have some burning questions you want to be answered before you take the plunge, like how much do real estate photographers make a year, is real estate photography profitable, and how do you figure out your photography pricing? Should you get into real estate drone photography? And what’s the best lens for real estate photography?
Lucky for you, we have everything you need to know on how to start a real estate photography business right here. Let’s get started!
Realtor photography involves more than you might think.
You can venture into the world of house photography or commercial real estate property. When you’re contemplating how to start a real estate photography business, you have to be prepared to wear many hats.
In addition to taking photos, real estate photographers should be prepared to spend additional time and resources on things like house staging, photo editing, marketing, sales, and admin work.
If you’re used to taking your time when editing images, then you won’t have that luxury when shooting real estate properties.
Realtors usually need a quick turnaround time on the real estate photos, with deadlines of 24 to 48 hours being most common. The main way to work in the real estate photography business is by working alongside real estate agents, photographing homes or commercial real estate for online listings.
However, you may want to consider dipping your toes into real estate stock photos as well.
By making your real estate stock photos available online through resources like Shutterstock, you can add an additional income source that is entirely passive, meaning less work for you in the long run.
When setting your real estate photography pricing, make sure to consider the work you’ll put in outside of the real estate photography itself, like preparation, travel, and associated fees, and the amount of time it will take you to edit the photos. Of course, suppose you don’t already have all the necessary equipment for real estate photography. In that case, you’ll also need to factor in those expenses (like, say, if your camera doesn’t have the best lens for real estate photography).
Don’t underestimate the amount of time a particular job might take you, either—for more advanced real estate photography. You may be asked to make significant edits that can eat into your time and your profits. You should also consider setting a higher rate for super-fast turnaround times.
At this point, you might think, “is real estate photography a good business?”
The answer will depend on a number of factors, including your working style. You have to be willing to put yourself out there to find new business opportunities and be flexible on your turnaround times.
Real estate photography rates will also vary depending on where you live—unfortunately, a small-town real estate photographer just won’t be able to charge as much as someone doing real estate photography in a big city.
However, always make sure you’re valuing your work by paying yourself a fair wage, regardless of where you’re located, your skills, and the equipment you’re using.
You can also ask your local photography community (MeetUp, Facebook Groups, etc.,) to ask how much does a real estate photographer earns specific to your area. This can give you a good starting point and give you an idea that real estate photography can be lucrative.
As professional photographers, you have to consider the expenses you have that allow you to edit photos and account for your costs. This may include your camera equipment, insurance for your camera equipment, editing software, your experience, your transportation, and marketing.
Like any creative business, real estate photography rates will differ based on location and experience, but here are some basic tips you can follow.
You might charge under $200 for homes 3,000 square feet and under and over $200 for 3,000 square feet and up.
Shooting high-quality real estate photography at sunset or in the dark will involve more equipment and editing than daytime shoots, so get all the details before you provide your client with your final rate.
Suppose you’re photographing a home that will be listed at upwards of $1 million. In that case, your real estate photography pricing should reflect that—your rates could jump from around the $200 mark to closer to $500, depending on the value of the real estate listing.
Here are some real estate pricing photography tips:
- Some people also set their real estate photography rates based on square footage, using a pricing formula of around nine cents per square foot.
- If you do real estate drone photography, you can charge more than regular photos, with one minute of professional video costing anywhere from $200 to $400.
- Video tours of home interiors and individual rooms should cost upwards of $1,000.
 When you set your real estate photography pricing, base them on deliverables (i.e., 25 high-quality images, one minute of drone video) rather than an hourly wage, and work the time your efforts will take you into your pricing formula.
When it comes to home photography, there are certain beginner’s mistakes that can easily be avoided using these tips.
Every room will have one key feature you can focus on, whether it’s a beautiful picture window or a rustic fireplace. What separates professional real estate photography from “amateur hour” is to hone in on what makes each room special and emphasize that to the viewer.
If you’re skilled in photo editing, you may be able to account for unforeseen weather forecasts, and you can turn cloudy skies into beautiful sunsets. As a skilled editor, this should also reflect in your real estate photographer pricing.
While wide-angle is great for capturing the extent of the space and making a room look bigger than it is, you want to stay away from fisheye lenses as it adds too much distortion and looks unnatural.
You should also remember that you will probably be shooting indoor and outdoor real estate photography, so choose a camera setup that works with both. With that in mind, let’s take a look at some options for the best lens for real estate photography.
- Nikon AF-S FX NIKKOR 16-35mm f/4G ED
This Nikon lens can shoot at 16mm for interiors and go up to 35mm for exterior real estate photography.
- Canon EF 17-40mm f/4L USM
The ultra-wide-angle lens and range of focal length from 17-40mm make this one of the best lenses for real estate photography.
- Sigma 1-24mm f/4 DG HSM
This lens is made for Canon cameras, and with zero distortion and fast focusing, it’s an ideal lens for real estate photography.
- Canon TS-E 17mm f/4L UD
This is an ultra-wide tilt-shift lens, which allows for unique real estate photos that stand out.
In addition to real estate pictures, video can be an extremely lucrative option when pursuing a career in real estate photography.
Dramatic, eye-catching visuals can be created using real estate drone photography, which can help a property stand out from the pack online. Camera drones can be great for creating a virtual tour, moving through each room of a property so an online viewer can experience the space.
Drones can also create sweeping landscape shots and showcase a large property, but they won’t take the place of your trusty DSLR camera—when it comes to interior shots, your best bet is still traditional real estate photography.
If you’re interested in adding real estate drone photography to your repertoire, be aware that drones can be pricey, generally starting at about $1000 and going up from there.
Other than the cost of equipment, there are other factors that prevent people from becoming drone operators. To legally fly drones in the United States, you must first obtain an operator’s license. You need to spend some time learning how to use the drone before trying to fly it yourself. So it’s best to contact a real estate drone photographer if you’re just beginning.1
- Drones will take longer to set up than traditional cameras and require more equipment. You need to be ready for long video segments and then cut them into shorter clips in post-production. To produce high-quality videos, you’ll require a three-axis gimbal for holding your camera steady as your drone moves around. It gives you more control over your real-estate drone photography by allowing you to zoom and pan your shots.
- For real estate drone photography, be prepared for the weather conditions to change throughout the day. Make sure to take multiple shots of each perspective so that you don’t miss any potential views. If you want to take good photos of the property, you should aim for a calm day when there aren’t any strong winds.
- You should always be able to preprogram your drone before flying so that you don’t have to make any last-minute adjustments midflight. Make sure you’re careful when flying near things like wires and trees because they could damage your drone and cost you a lot of money if something goes wrong.
Along with a general property photography contract, you’ll need a specific drone-operating contract since there are additional legal requirements for drone operators.
Here’s an example of the shots that you may include in your shot list:
- Front exterior (at multiple angles and distances)
- Wide-angle shots of the bedrooms, family room, kitchen, and den
- Shots of feature rooms (laundry, pantry, garage, basement)
- Backyard/deck photos
Of course, every home will have its unique features, so ironing the required shots ahead of time with your clients will help speed your working process when it comes time to shoot and provides a seamless client experience working with you.
If the homeowners are there, you can also ask if they can move objects, furniture, or declutter areas that may become a distraction in the image. The less editing work to remove clutter or other imperfections in the image, the better for your overall workflow.
Flash photography may be required to get the rooms in the house looking their best. The problem is those flash units on a camera can create harsh lighting and shadows, which means you’ll have a lot of work post-production to even out the vignetting (dark edges of the photo and a bright center).
We recommend you use a flashgun rather than your camera’s standard pop-up flash so that you can move around its position. Try turning the flash on the camera so that it’s facing a wall to reflect light. Having the light bounce off the walls will create softer light for a more even look.
Luckily, programs like Adobe Lightroom make it easy to correct lens distortion in a matter of clicks. To minimize how many adjustments you need to make when editing, make sure you’re shooting your rooms straight on—use a tripod and your camera’s leveling meter if you have to.
Once you’ve got the shots, it’s a good idea to review the photos with the real estate agent while you’re on-site to avoid any unhappy clients and having to revisit the property for missed shots.
You can count out the images from your setlist to ensure you’ve gotten the complete list of promised shots and that all looks good in the viewfinder before leaving the property.
As the hired creative professional, you can’t assume that everyone understands your process or the photos you’ve taken. Make this time the opportunity to explain why you like the particular shots and what they can expect them to look like after you’re done editing them.
There’s no one place to get started.
There are plenty of real estate photography courses available online through platforms like Udemy or Coursera that help you understand the basics of technique and business aspects.
Additionally, seeking out online photography groups to learn from colleagues and get practice is an excellent way to get real-life experience and practice with your camera and equipment. Look for Facebook or Meetup groups to connect with and learn from other photographers in your area.
Running a real estate photography business is much more than just taking professional real estate photos. You’re solving a problem for real estate agents, and they’re going to you for professional expertise as well as your deliverable photographs.
You’ll also need to set up an invoicing system, photography contracts and spend time and effort looking for new freelance clients. A big part of working as a real estate photographer is also developing a social media strategy to get your work seen.
The #1 way to promote your real estate photography business is to set up an amazing online photography portfolio. This way, prospective clients can see all your real estate photos and real estate drone photography in one place—along with your real estate photography pricing page.
A portfolio website as a photographer is a valuable tool for demonstrating your credibility and professionalism.
On top of this, a well-built website can also serve as a marketing tool that finds you new clients. Search engine optimization (SEO) is a key component in helping to increase your web page’s visibility when users conduct searches for local real estate photography services.
Don’t have one yet? No worries—just use a website builder to create one in minutes.
Make sure to pick an online portfolio website that offers beautiful templates so your real estate photography website will make a strong, stylish impression. Another great feature to keep an eye out for? A built-in online store, so clients can purchase your real estate photography packages immediately.
Looking to book more photography clients? Create a stunning photography portfolio website to wow your clients with beautiful galleries and deliver your client work with our powerful private proofing tool. Start your 14-day trial with Format today, no credit card required.
Congratulations—you now have all the information you need to start your very own real estate photography business! Soon, you’ll be right at home in the real estate photography world and landing your dream clients.
Want more tips on making money with photography?
How to Start a Successful Photography Business
10 Ways to Promote Your Portrait Photography Business
The Ultimate Photography Hashtag Cheat Sheet
How to photograph real estate using natural light
Ability to photograph real estate: houses, apartments, interiors, etc. very useful and will come in handy more than once. There is something special about the way light illuminates a room or space. Surfaces are flooded with light, metal fixtures flicker, wood details glisten, and upholstery edges glow. The natural shadows produced by various objects convey a sense of depth. The natural light image gives you an idea of what you would actually see. nine0003
Next, you will get a general understanding of the equipment needed, how to deal with contrast and mixed light in a room, and how to use the HDR technique to successfully photograph real estate using natural light.
Real Estate Equipment
Shooting in natural light has the advantage of a short list of required equipment. A camera, tripod and wide angle lens are all you need. nine0003
- camera: DSLR camera with auto bracketing will increase your speed and ease of use.
- Tripod: Your tripod must be stable enough to keep the camera still if you need to manually change its settings while shooting a series of bracketed images.

- Wide angle lens (with lens hood): For crop sensor cameras, the Tokina 11-16mm lens is the ideal choice for real estate photography. The Canon 10-22mm is also a great option. You'll be able to handle any real estate situation with one of these aspherical lenses. For full frame cameras, you'll need a lens in the 16-35mm range. A hood will be needed to prevent glare. nine0021
- Optional, but definitely desirable: polarizing filter. In addition to making blue skies deeper, a polarizing filter can be very helpful in reducing glare from windows, foliage, and pool surfaces.
Outdoor Sunlight
Sunny Day is the best canvas for your outdoor photography. Try to schedule your shoot at a time of the day when the sun is shining on the front of the house. Ask your client (or check Google Maps) which direction the house is facing. You need to capture the front exterior of the house in the best possible light, as this is often the photo that is used as the front of the property listing. nine0003
If you can't shoot the exterior in sunlight, don't despair. Shooting in HDR (explained later) will help bring the shady house view to life.
Regulation Cameras In rooms
Usually there is only one ideal place for placing the camera to demonstrate the best angle. It usually shows:
- As much of the room as possible;
- The most aesthetic furniture and/or architectural elements.
For photos with natural light, finding this spot depends on two things: free space and window brightness.
Most importantly, you need to choose a seat that you can physically occupy. For small houses and rooms, quite often your only choice is the doorway, as that will likely be the only place you can position your tripod and squeeze enough room into the frame. By capturing three walls in the frame, you will give the viewer more of an idea of the size and space of the room. nine0003
Large rooms that offer more than one shooting location often lack blackout windows or curtains. Choose a location where a very bright window is more than 45 degrees from the center of view of your lens. This will help you avoid high contrast and potential lens flare, which in turn will reduce your post-processing time.
This image is shot near a bright window at a 90 degree angle to the lens, minimizing contrast while also filling the scene with pleasant sidelight. An off-screen kitchen window provides additional lighting to the right. nine0085
This patio door faces directly onto a leafy hill, resulting in less contrast between the interior and exterior, as well as post-production effort.
Work with windows
Windows in smaller rooms, such as bedrooms and bathrooms (where your location is limited), usually have blinds or curtains. If the windows are bright, then try to close them at least partially to reduce the contrast between the interior and exterior, especially if the view from the outside is not an additional plus for selling the house. This reduces the overall contrast of the scene, while still leaving the room lit. It also prevents direct rays from entering the lens, minimizing flare and ghosting. nine0003
The louvres are angled at 45 degrees to reduce scene contrast.
The blinds on the brightest window are partially closed, while the blinds on the patio door are left open.
Shooting HDR
Natural light can make great images, but they actually need more work in post. It is rare that a single exposure can cope with the contrast created by an interior space with windows. The HDR technique will help eliminate dark corners and bright windows by properly exposing all parts of the space. nine0003
Single exposure.
Image HDR created from nine bracketed images.
To create an HDR image, you need to take a series of bracketed shots. For small rooms with no windows, such as a closet or closet, 3 images in 1-1.5 steps are usually needed. In most rooms, 5-7 images will work well. For rooms with high contrast, containing bright interior lighting and/or windows, nine images may be needed. For rooms with a street view, HDR programs have a hard time conveying contrast, and no matter how many bracketed images you take, their combination will look unnatural. nine0003
In general, it is difficult to achieve naturalness in images of rooms with a view. For more precise control over the interior/exterior merging process, take a picture with the window view exposed, and then use Photoshop to mask the view in the HDR blended images.
HDR composite image .
HDR with an additional image exposed to the view from the window and masked in the windows when processed in Photoshop .
Even if the difference is not large, the potentially distracting overexposed window is now closer to the right level, making it more pleasing to the viewer's eye when moving from interior to exterior and back again.
Mixed light indoors indoors
One of the difficulties of working with natural light is situations with mixed light sources. If enough light comes in through the windows, you can leave the lamps off, resulting in a uniform color temperature throughout the image. Lights turned off work especially well when the light from the window sufficiently illuminates the room, the lights are out of frame, and the palette of the room is mostly white. nine0003
Turning off the light in this bathroom creates a fresh and clean look.
There was so much light from the window in this bedroom that the use of lamps would have made the scene unnatural.
No interior light was used to avoid mixing electrical and natural light. The use of lamps would have added too much illumination, as the sunlight was sufficient. nine0085
If there is not enough sunlight in the room or there are chandeliers and sconces to show, then turn them on. You end up with a few color casts that need to be adjusted in post, but at some point simplifying the lighting just for the sake of quick post-processing can detract from the atmosphere of the room.
The mixed light in the living room above and the bedroom below needed a lot of color grading in post, but the result is a more inviting and warm space. nine0003
You can reduce color grading time by applying masks to places where lights are on, as well as the view outside the window. Take a picture of the room with the lights off and then on. Make two HDRs for each situation, then mask out the lighting. This works great with lights that produce a small amount of light but need to be on.
HDR with chandelier off. nine0085
HDR with chandelier on, masked in Photoshop
Conclusion
Shooting real estate with only natural light brings a beautiful, natural aesthetic to images. When preparing to shoot, remember:
- The wide-angle lens is a must along with the camera and tripod.
- If possible, photograph the exterior in sunlight. nine0021
- Avoid shooting directly near very bright windows.
- Use curtains and blinds to control the contrast in the room.
- Decide how to work with mixed light and shoot different options so that later in post-processing you have options to choose from.

Author: Lauren Schroeder
Translation: Tatyana Saprykina
Share with your friends!
Text sign showing Home Assessment. Conceptual photo Determines the real value and valuation of real estate . Stock Photo ©artursz 371247820
Home Appraisal text sign. Conceptual photo Determines the real value and valuation of real estate . Stock Photo ©artursz 371247820Sign In to See December Specials
Images
VideosEditorialMusic & Sounds
Tools
Business
Our Prices
All images of
LoginRegister
Download this image,
by registering an account
Already have an account? Log in
I accept the terms of the User Agreement Receive news and special offers
Text sign "Home assessment". Business photo text Identifies real estate value and valuation
— Photo by artursz
- Find similar images
- 371247820
Similar royalty-free images:
Show moreShow more
Same series:
Show more
Usage Information
property value and appraisal ." for personal and commercial purposes under the Standard or Extended License. The Standard License covers a variety of uses, including advertising, UI design, product packaging, and allows printing up to 500,000 copies. The Extended License covers all use cases as the Standard, with the right to unlimited printing, as well as the use of downloaded stock images for merchandise, resale and free distribution.0003
You can buy this stock photo and download it in high resolution up to 6000x4005. Loaded: May 920,
Depositphotos
- On Photo Stock
- Our plans and prices
- Business
- Blog Depositphotos
- API
- New Image 9002 New Image New Image New images
- Supplier registration
- Sell stock photos
- ไทย
- Norsk
- DANSK
- SUOMI
Information
- Frequently asked questions
- is available in
- BIRD in FligH Contacts
- +49-800-000-42-21
- Contact Us
- Depositphotos Reviews
© 2009-2022.

Learn more


