Shooting real estate photography
19 Real Estate Photography Tips
Real estate photography can be a great way to build up your career as a shooter and add some variety to your online portfolio website. With the busy housing marketing, real estate agents are always in need of high-quality images to help sell or rent a property. Real estate photographers are often rarely short on work or clients, and are able to make a living shooting real estate photos that sell a space.
Ready to try your hand at shooting real estate photos but not sure where to begin? From gear to shooting to pricing, we’ve compiled a list of tips to help you take your real estate photography to the next level and ensure your images exceed industry standards and client expectations.
The Best Gear for Real Estate Photography
Real estate photographers often invest in a few key pieces of gear to ensure they get great shots that will impress clients. To prepare for a real estate shoot, make sure you follow these gear tips:
Go for a DSLR Camera with a Wide Angle Lens
A full-sensor DSLR camera is great for real estate photography because it allows you to shoot manually, with a quick response and an easy view of your shots as you take them. Using a DSLR also gives you more options when it comes to editing your real estate photos post-shoot.
When it comes to real estate photography, a wide-angle lens is a must have item of gear. A wide-angle lens allows you to capture great images in tight or narrow spaces, such as a small room. It also makes rooms appear more spacious, a big plus for real estate photography.
Use a Tripod
A tripod is a solid item of gear for real estate photography, as it gives you the option of setting up your camera at the same, consistent height, room to room. It will also ensure your real estate images appear clean and in focus, with no blurriness or haze caused by a sudden movement of your camera or a shaky hand.
As well, if you plan to take long exposure images of the house’s exterior, which can create a beautiful shot that real estate agents will love, a tripod is a must.
Invest in a Flash
Photographing real estate, you never really know what you’re walking into and it’s good to be prepared, especially in low light settings. A flash, such as a monolight or a flashgun, will help to compensate for low light and make it easier for you to take bright, clean photos.
If you decide to invest in a flash, check if it has a built-in receiver that you can trigger so the flash goes off with the touch of a button. If it does not have a built-in receiver, get a flash trigger you can attach to the flash so you can trigger it without having to touch it.
Buy a Remote Trigger for Your Camera
In real estate photography, you are often shooting with a low shutter speed to ensure you capture the detail and light of a room or area. If you accidentally touch the camera at this setting, it can cause the image to shake and create blur or other imperfections. Avoid this issue by investing in a remote trigger for your camera so you can have a touch-free set up for the shoot.
Get a Drone for Aerial Images
Most real estate shooters can start with a bare-bones set up of a camera, a wide-angle lens, a tripod, and a flash, and make sure just fine. But to take your real estate photography aerial, you will need to invest in a drone. Drone photography can be a great way to get stunning exterior images of property from above, revealing the entire property and the surrounding area.
Real estate agents often appreciate the option of aerial images to give potential buyers a full sense of the property. If you’re looking to expand your real estate photography skills, investing in a drone as well may be the way to go. However, drones can be pricey, in the $1,000 range, so you may decide to invest in this gear once your real estate photography business is up and running.
Shooting Real Estate Photography
Once you’ve invested in some gear, you’re ready to take photos of real estate for an estate agent and practice your shooting skills. Follow our estate photography tips to capture stunning images:
Schedule the Shoot for Late Day
Timing and weather are both key factors for creating great real estate photography. Shooting too early in the day or after sunset can result in poor lighting for both exterior and interior photos. Try to schedule the shoot for a period in the daytime where the sun is sitting behind the house to ensure you have sufficient natural light to get some beautiful images. This also gives you the option of shooting the exterior during the golden hour, right before sunset, which can result in some stunning photos.
Check the weather before the shoot to ensure there is no rain or storm clouds in the forecast, as these factors can make it challenging to get the lighting you need.
Do a Walk-Through Before Shooting
Set aside 30 minutes to an hour to walk through the property and get a sense of each room or interior. Take note of how the property is styled, most real estate agents will stage a home or apartment to highlight its best features. Ideally, each room will be clean and uncluttered, with just enough furniture and decoration to make it feel lived in and not too sparse.
During the walk-through, make note of any potentially challenging rooms to shoot, such as a small, tight room or an awkwardly laid out bathroom. Consider how you can shoot these tricky areas in the best light possible so they shine like the rest of the property.
Create a Shot List
Stay organized for the shoot by making a list of shots you plan to get for the property. Though your shot list may vary depending on the property type, in general, a real estate photo shoot should include:
Two wide-angle shots of bedrooms, the kitchen, and the living room
One photo of the bathrooms, unless it is spacious or stunning enough for more than one shot
One photo of features like the laundry room, the garage, and the pantry or walk-in closets
One to three photos of the backyard
One to two shots of the front of the home to highlight the curb appeal
If you have a drone for aerial images, you can also include them in your shot list.
Make the Rooms Bright and Well-Lit
Low lighting in a room only results in dark, hard to view images that can turn off potential buyers or renters. Open windows and blinds in the property to ensure natural light filters in. Adjust the light in each room by turning on or off certain lights. Overhead lights can make a room look harsh so try to shoot with natural light as well as your flash. Keep in mind the shutter speed and white balance on your camera should be set correctly to ensure your photos get enough light.
In real estate photography, images should have warmth and brightness to attract buyers and renters. Keeping the rooms well-lit will ensure they do not appear too cold or dark. Make sure the lighting for all rooms is consistent, and there are not varying light temperatures from shot to shot, as this can make it challenging for you to edit the photos properly.
Showcase the Best Feature of Each Room or Area
Look for the selling point of the room or area and focus on that detail when you shoot. This could be a large window in the room or a spacious walkway. Or you may notice a great feature like built-in bookshelves or a curved window frame. You could also shoot with the vertical lines of a room in mind to highlight this feature. Try to always showcase the best feature of a room or area so the property looks impressive to a buyer.
Shoot From a Variety of Angles
Avoid relying on only one angle or composition when you shoot real estate photography. Go for variety so you have lots of different shots to choose from when you package them up for a client. Rather than shoot just from corners of the room or at one angle, mix it up.
Try shooting in the doorway of a room or shooting towards a doorway. Position yourself in the center of the room or at a slight angle. Make sure you stay at a height of 5 feet when you shoot, as going too high can skew the image and going too low can result in a cramped image.
Regardless of the angle you shoot from, check that your camera is straight and stable. This will prevent any distortion in your images.
Be Adaptable and Flexible
One of the best real estate photography tips you can learn is to be a flexible shooter and adapt to your surroundings. Though you may do your best to schedule the shoot on a bright, sunny day, you may get to the property and be faced with clouds or a storm. To get the shots you need, you may need to come back later in the day or on another day. You may also show up to a property that has a small, awkward living room or a strange feature, but your job is to photograph it so it looks its best and makes your client happy.
When it comes to succeeding as a real estate photographer, try to stay open and flexible to any changes or surprises. Your clients will appreciate your ability to pivot and come up with a great shot, no matter the circumstances.
Always Edit Your Photos
One of the downsides of using a wide-angle lens for real estate photography is that it can create some distortion in your photos and make certain areas in an image appear warped or slightly off. But the upside is that you can correct this issue when you edit your photos using a program like Adobe Photoshop or Lightroom. Shoot your images in RAW and then set aside some time to edit them to perfection, or outsource the editing to a professional editor if you have the means and are short on time.
Easily adjust issues like distortion by using the lens correction feature in the editing software to ensure your images look clean and distortion-free. You can also remedy any varying light temperature issues in your images, such as one room that has hot lighting or yellow tones that don’t look great. Use the adjustment brush feature in the editing software to fix this issue. Make sure all of your real estate photos have consistent lighting so they look professional.
There are also free presets you can apply to your real estate photos to improve the contrast, vibrance, sharpen specific areas, and adjust the light in each image.
Pricing Your Real Estate Photography
Pricing your photography can be a bit of a head scratcher, especially if you’re new to the real estate industry and are unsure about standard rates for photographers. We’ve compiled several tips to help you price your real estate photography services accurately and fairly:
Factor in Your Services, Your Gear, and Your Time
When you begin to consider your pay rate, keep in mind your total rate will need to cover not only your photography services but also your photography gear and your time spent on the project, from answering emails to client meetings to the actual shoot day. It can also cover your photo editing time, and any travel expenses or fees related to the project. Most photographers prefer a flat rate based on deliverables for a client, such as 10 high-quality photos of a property, rather than an hourly rate.
Regardless of whether you decide to go for a flat rate or an hourly rate, be sure that this amount feels like it is enough to cover every facet of your work on the project. After all, you want to feel your expenses and time spent on the project are covered, as well as feel you can sustain yourself as a photographer and invest back into your business with each project you take on.
One way to determine your rate is to start with the living wage amount in your local area and add on a flat amount for your gear and your other expenses to come up with a fair rate for clients. Real estate photographers can make around $40,000 a year on average to start, with more experienced shooters making closer to $93,000.
Set Your Rates Based on the Property Type
Your rate sheet may include a breakdown of rates based on the different types of homes and spaces you will be shooting as a real estate photographer. For example, if you are shooting a small apartment that is 500 square feet, you may charge $200 for the project total. And if you are shooting a 1,500 square foot home, you may charge at least $300 for the project, adding on $50 per 100 square feet.
This approach is effective because it accounts for the time and gear required to shoot a bigger space, rather than a smaller space or area.
Base Your Rates on the Time of Day
Shooting at sunset requires more gear and prep time than shooting in late-day with natural light. Golden hour images often also require more editing time than a straightforward, daytime shoot. As a photographer, set your rates so your extra gear and time are covered depending on the time of day you are shooting. Provide your clients with several options, such as a golden hour shoot and a daytime shoot, so they can decide how much they are willing to spend.
Charge More for High-End Listings
A high-end listing like a mansion selling for millions of dollars means you will need to create real estate photography that will appeal to a high-end buyer. And this means you will likely need to invest more time, gear, and energy into these images. Set your rates to reflect the high-end nature of the project, as this will show clients that you are prepared to do an incredible job to create photography that will catch the eye of a buyer.
For example, if you are shooting a $1 million dollar home, you may bump your standard rate up from $200 to $500. Or you may use the formula of charging per square foot, at 9 cents a foot, and calculate your rate based on the high square footage of the home.
Increase Your Rates for Drone Photography and Video
If you do real estate drone photography, you can increase your rates and charge more than a regular photo. Typically, one minute of professional drone video can cost between $200-$400. As well, if you are able to offer video tours of the property, they can cost $1000 and up, as they can be a great selling tool for real estate agents and make more of an impact than static images.
Sign a Contract Before Shooting
One of the most important real estate photography tips, which can also be applied to any photography work, is to always get an agreement with a client in writing before you start a gig or project. Draw up a simple contract, with an estimate of your services, gear, and time, and ask the client to sign off on it ahead of the shoot. This will ensure there are no issues once the project is completed and you send the client your invoice, as an agreement is already in place.
The world of real estate tends to move pretty fast, so ensure you get paid quickly and on time by having a signed contract with every client you work with.
Start Building Your Real Estate Photography Portfolio
Now that you’ve read up on real estate photography tips, you might feel ready to start booking clients and taking on real estate shoots. One of the best ways you can connect with clients is to create an online portfolio that showcases your stunning real estate photography. This way, you can direct potential real estate clients to your online portfolio, and take on more real estate photography projects.
Looking for other photography resources?
How to Make a Watermark For Your Client Photos
Lightroom vs. Photoshop: Which One is Better?
How to Get More Photography Clients
12 Tips for Impressive Real Estate Photography
Real estate photography is always in demand, with houses going on and off the market daily all over the world. Every agent is battling for homebuyers’ attention with the best real estate photos.
Shooting professional photography for real estate can seem a little tricky at first. But with these simple real estate photography tips, you’ll produce beautiful, consistent property photos. These will have your local real estate industry agents calling you back in no time!
Sigma 12-24mm f/4.0 Art DG HSM
This wide angle lens is perfect for capturing the grandeur of real estate interiors, with its superior optics and fast maximum aperture.
Buy from Amazon
×
Sigma 12-24mm f/4.0 Art DG HSM Zoom Lens for Nikon F-Mount
Amazon
$1,299.00 $2,000.00
Buy Now!
[ExpertPhotography is supported by readers. Product links on ExpertPhotography are referral links. If you use one of these and buy something, we make a little bit of money. Need more info? See how it all works here.]
What Is Real Estate Photography?
Hearing about professional real estate photography might be surprising for some of you. Why would people take photos of houses?
But the truth is, there’s a lot of demand for real estate photographers given the current housing market in many parts of the world. This specialized genre may seem simple, but it does require certain skills to take effective and compelling photos of homes for sale.
Is Real Estate Photography Profitable?
Since it’s a niche discipline, it’s not as popular as landscape or portrait photography. But this means you’ll have better chances of getting more clients and earning more than photographers in other niches, especially if you learn how to market your real estate photography business, too!
Also, as there are plenty of real estate agents, we know there won’t be a shortage of houses to photograph. Estate agents will sometimes keep old photos but are more likely to commission new photographs when selling a house. This is because changes may have been made to the building or garden, and they want to be as accurate as possible.
How Much Does A Real Estate Photographer Make?
Like any other type of photography, real estate photography pricing is tricky and depends on a few variables.
In real estate photography, the location and the size of the house play a significant role in determining the price. Of course, your experience also comes into play. It makes sense to charge a bit less than more seasoned photographers if you’re still starting.
On average, a real estate photographer will charge about $200 or less for properties under 3,000 square feet. For larger houses, they could charge between $250 and $500.
If your area is a prime spot for real estate (think major cities like New York, London, Paris, et al.), this could be the perfect photography career!
What’s Necessary for Real Estate Photography?
Real estate photography doesn’t require a lot of equipment with much of it being quite standard. Let’s go through the list below to see the tools you might have and might need.
Camera
You’ll need to have a camera that can shoot manually for real estate photography. Any crop or full frame sensor DSLR or mirrorless camera would be perfect for the job.
Lens
A wide-angle lens helps you capture tight spaces. The unique optics tend to make rooms look more spacious. The best options you have are the NIKKOR 16-35mm for Nikon and the EF 16-35mm f/4 for Canon. You may want to consider the Sigma 12-24mm f/4 Art Lens known to be the current industry standard. Sigma produces mounts for both Nikon and Canon, so check them out before you buy!
If you have the budget, consider getting a tilt-shift lens. This option is perfect for real estate photography because it eliminates the distortion that a wide-angle lens causes. It tends to be more expensive than its regular counterparts. But you can always buy a used one.
The best lenses for real estate photography include the Rokinon TSL24M-N 24mm, Canon TS-E 17mm f/4L, and Nikon PC-E FX Nikkor 24mm f/3.5 ED.
Tripod
A tripod stabilizes your camera and ensures you don’t have motion blur in your images. It also helps retain the perspective in your shots. If you set it up at five feet, all your images will be the same height.
Remember that consistency is a top priority, especially in real estate photography.
Remote Trigger
If you’re shooting with low shutter speeds, it’s best not to touch the camera. Even pressing the shutter to take a photo can introduce an unwanted camera shake. I suggest using a remote trigger for touch-free operation.
Flash
Strobes or flashes are among the most essential but often overlooked tools in real estate photography. They are invaluable, especially in poorly-lit homes.
There are two main types of flashes—monolights and flashguns. You can start with flashguns because they’re cheap. But as you photograph more spacious properties, monolights would be the best option since they have a brighter light output.
There are tons of choices, from the entry-level Godox TT600S to the top-of-the-line Profoto B10.
Flash Trigger
You’ll need a flash trigger when using an off-camera flash for your photography. You attach the transmitter to your camera’s hot shoe and the receivers to the flash units.
It’s worth noting that some strobes already have built-in receivers. Once you finish connecting all of them, press the shutter, and the flash will fire simultaneously.
Light Modifiers
Bare flash often creates unappealing results in real estate photography. In most cases, all you have to do is point them toward the ceiling to soften the light they produce. But what if the roof is too high or you’re not getting enough light bounce?
Then consider using light modifiers. In most cases, shooting umbrellas are enough to do the job. They’re small, lightweight, and portable. And they don’t get in the way when photographing in small spaces.
Light Stands
Of course, you’ll also need light stands to support your flash units. A regular light stand will often work for lightweight flash heads. But more rigid C-stands may be necessary for bigger monolights. Depending on the location, you may need one to four of these to light up an area.
All you need to start with real estate photography is a camera, lens, and tripod. All the other items mentioned will help you get better results and finish at a faster pace though. But you don’t have to acquire all these tools at once.
Before the Real Estate Shoot
1. Have a Standard Shot List for Each Property
While no two homes are identical, there are typical shots that every professional real estate photographer will take.
Knowing what to cover is an essential tip in learning how to shoot professional real estate photography.
- Two wide-angle shots of each bedroom, the kitchen, and the living room.
- One photo of the bathroom, unless it’s incredibly beautiful or spacious.
- One to three photos of the backyard, unless it has some unique features. And then one to two shots of the front of the home to show off the “curb appeal.”
- One shot of each feature includes the laundry room, garage, and pantry.
This list will help make sure you have a point of reference to hit all your must-have real estate shots.
You can also give your list to the real estate agent, so they know what to expect.
2. Prepare Your Gear the Night Before
Preparation is crucial in real estate photography. There’s nothing worse than being at a shoot and finding that you forgot something. You may be knowledgeable enough to work around it. But having a few items missing means that you need to work on your feet a little more. Here are some more preparation tips:
- Always take your charger. A dead battery is a dead shoot.
- If you have a secondary camera, take it.
- Prepping your photography gear includes charging all batteries, formatting your memory card, and packing your bag.
- Look up the address to ensure you’ve scheduled enough time for the drive.
- If you have backup gear, be sure to pack those items as well.
On the Property
3. Declutter
Decluttering is one of the most important real estate photography tips. We get used to bits of clutter building up over time in our own homes. But all those small items that we don’t notice will stand out in a photo. Ensure that homeowners keep the surfaces as clean as possible—countertops, coffee tables, desks, etc.
When shooting interiors, don’t photograph closets unless they’re spacious or customized. Most of the time, a closet is a perfect spot to stash those small items until you’re done shooting. If you want some decorative items, leave one to three.
Sometimes you’ll arrive, and there’s still clutter that you know will not look appealing in the photos. There’s nothing wrong with suggesting hiding a few things. A professional real estate photographer will spend up to an hour constructing the scene for one perfect shot.
4. Walk Through the Home Before You Start Shooting
Each home is different. Getting a feel for space before picking up the camera will give you an idea of how to shoot it. Mentally note the best angles and what small items you may need to move. Doing so also allows you to ask the homeowner to move objects.
Remember, real estate photography is about making the building look good, not making the current interior look good!
Additionally, it lets you know which spaces are ready. And which rooms may need a few more minutes of tidying up. Knowing this will let you know in what order you’ll want to start taking real estate photos.
If you’re not good at remembering details, take notes. It makes it easier for you to organize the rooms before doing your real estate photography work.
5. Lights On or Off?
There are valid points for having the lights on or off when doing real estate photography.
Turning the lights on makes the space feel warmer and more welcoming. But it introduces varying color temperatures. You will then need to adjust the white balance in post-processing.
Leaving the lights off gives you an even light temperature. But it also often gives off a cold feeling in real estate photos.
I take it one property at a time and decide based on what each home requires. If the property has large windows, consider opening them to let light inside. Natural light looks best in most situations.
But what if the property doesn’t have enough windows or has low lighting? Then that’s when you use the interior lights or external flash units.
If the light bulbs in the house have different color temperatures, turn them off and use flash instead. Warm incandescent and cool fluorescent lamps don’t mix well in real estate photography. Of course, you can turn on a desk lamp for effect as long as it doesn’t cast any lousy shadow.
Whatever decision you make, be consistent throughout the entire home!
Taken with onboard flash, turned to bounce light off the wall behind.During the Shoot
6. Use a Flash and Bounce to Diffuse
Agents and homeowners usually rush to put the listing online. And budgets don’t allow for many photography hours for one listing.
Using a flash unit attached to your camera is one way to keep you quickly moving from one space to another. When using a flash on your camera, bounce the light off the walls to soften it.
If we point the camera flash directly into the room, we get a dreaded bright area in the center. And then a quick drop to shadow around it. This is known as vignetting, but it’s undesirable for real estate photography.
Turn the flash so that it bounces off a wall behind you, the ceiling above, or even one of the side walls. This way, you allow that light to diffuse into the space and give a more even look. You can also try attaching light diffusers to your light source.
Of course, these positions aren’t possible with a pop-up flash on your camera. So I suggest buying a flashgun that features a multi-angle flash head.
I also recommend using your flash on manual mode. Doing so gives you complete control of its strength. I use 1/16th power as a starting point and adjust from there. You may want to go as high as full power if you’re shooting towards bright windows.
For larger spaces, install your flash units on your light stands. Position them out of the frame and angle them toward the ceiling.
Ultimately, the position of your lights depends on the size and shape of the room. You can place your strobes in the corners or even behind you in most cases. But if those areas don’t work, you may have to try other spaces until you get even illumination.
7. Shoot Straight for Less Distortion
This tip is crucial when shooting real estate photography.
When shooting different angles, be sure to keep the camera straight. Doing so helps avoid distortion that you’d later need to straighten in Lightroom or Photoshop. You should use a sturdy tripod or adjust your live view settings to display the virtual horizon (or virtual level).
You’ll notice that the vertical lines start to slant if you point the camera ever-so-slightly up or down. They’ll distort in one direction or the other.
The ideal height for real estate photography is about 5 feet. Each home is different. But this is the height that looks most natural and feels most balanced.
If you go too high, you start to see too much ceiling and not enough liveable area. If you go too low, you begin to see too much furniture and not enough of the actual room.
8. Use a Drone for a Bird’s Eye Perspective
Modern real estate photography has reached new heights, quite literally, using drones. Drones can reach a unique perspective that would have been impossible or amazingly expensive only a few years ago. The height will be able to give a view of the whole property and its borders.
Drone real estate photography is often used when a unique selling point of the house is the location and surroundings. These real estate photos allow you to show off the amazing views while having the property in the shot.
You will increasingly see that real estate agents now use video as well as real estate photos to advertise their properties. Adding a drone option to your bag of tricks is a great way to make your real estate photography business stand out. And it can help increase your real estate photography pricing!
Editing Real Estate Photos in Lightroom
9. Correct Distortion Using Lens Correction and Transform
One of the downsides of using wide-angle lenses in real estate photography is the presence of distortion. This type of optics tends to make everything look warped.
Make sure to apply a lens correction and correct your verticals first. These two settings will make the photo look more polished.
You can find the Lens Correction module within the Detail module. Check the box that says “enable profile corrections.” Ensure that the lens you used appears in the drop-down menu under Lens Profile.
Next, jump down to the Transform module. Check the box that says “constrain crop.” Then click on Auto. After clicking Auto, you’ll see that box darken, meaning it’s applied.
Double-check that it corrected all of the lines. If not, you can manually use the sliders in that module to make adjustments.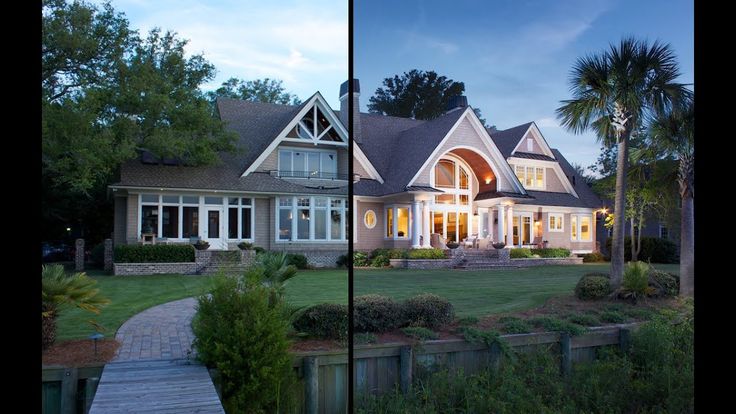
10. Making the Basic Adjustments
The main adjustments I make are lowering highlights, brightening shadows, deepening blacks, and increasing clarity.
It will take a bit of time to develop your style and workflow. So go ahead and experiment with your real estate photography. Over time, you might just have the right Lightroom preset for every shot.
11. Make the Light Temperatures Consistent
When it comes to real estate photography, getting accurate colors is essential. If you leave lights on inside the rooms, you’ll have some yellow tones. These will look quite different from the bluer sunlight. It’s best to balance these light temperatures in Lightroom or Photoshop. That way, the photo has a more polished and professional look.
The Adjustment Brush is ideal for this scenario! Select a brush and adjust the light temperature towards blue for warmer light. Do this until it looks neutral and blends with the surrounding area.
If you use the Adjustment Brush, increase the brush size, feathering, and brush strength. This method allows for even softer blending.
You can also balance the light temperatures in-camera using a color checker or a grey card. All you have to do is take a photo of the card in front of the scene you’re about to shoot. Once you load your real estate images to Photoshop, open White Balance, click the grey on the card with the Eyedropper tool, and Photoshop will automatically adjust the colors.
Remember to do white balance and color correction for every shoot. Doing so conveys to your clients that your photography is consistent and professional.
12. Make it Composite
The number one piece of advice I can give you when working in real estate photography is to make Photoshop composites out of your images.
As a real estate photographer, you will spend most of your time preparing the shot with the camera on the tripod. This means you will be able to seamlessly stitch together different sections of your composition as long as you don’t move the camera.
This is particularly useful if you don’t have a range of different flashguns for different areas of the photograph. You can walk around the frame with a flashgun in one hand and a remote trigger in the other, taking a selection of images. Remember, it won’t matter if you’re in the photograph or not. You can edit yourself out!
I would suggest that you start with a base image of your composition. Then fill in each section of the room with a flash—the doorways, the walls, the dark shadows created by furniture, and any other points of interest.
You can correctly expose the indoor light in tricky situations by making a composite. This method is like creating your custom HDR image, but you provide the added light yourself!
You can also use this method for an exterior photo. Use the flash to illuminate different sections of the house at different times. This completely dispels the myth that you need multiple flashes. The truth is, it can all be done with one.
The key to this method is blending the images to look like one image. Great real estate photographers will have you believing their pictures are from a single exposure.
This method does rely heavily on your Photoshop abilities. Get familiar with Photoshop composites before using this method in your real estate photography jobs.
Conclusion
To make real estate photography a reliable income stream, or if you want to be a professional photographer in this field, maintain consistency in your process and practice!
Don’t obsess over photography equipment when starting. You don’t need a lot to achieve beautiful real estate pictures. Top-level real estate photographers can do a whole job independently without any assistants.
With all the tips discussed above, you’ll be on your way to creating a full portfolio!
Check out our Effortless Editing with Lightroom to master all of our techniques!
Real estate photography - how to photograph correctly, secrets
Interior and exterior photographs taken from the ground and from the air are an excellent base for the author's portfolio, but even more so it is a valuable visual content that can be used in advertising, image, corporate purposes.
How to make photos of real estate as attractive as possible?
The primary task of the photographer is to clearly define the purpose of the photograph. When it comes to commercial shooting, it is important to show the subject in the most beneficial, but realistic way, including using wide-angle lenses and additional light. If the shooting of a real estate object is carried out for a different purpose (for example, shooting for a catalog), then the transfer of atmosphere, emphasis on details, creating a beautiful “glossy” picture using complex angles, etc. come to the fore.
When the target is determined, preparations for shooting can begin. This stage should fall entirely on the shoulders of those who order photography. We are talking about putting things in order in the premises and around the facility. The photographer should raise this issue in advance when discussing photography with the client, so that they do not have to waste time ironing curtains and bedspreads, cleaning plumbing and screwing in light bulbs.
Five Tips for Shooting Real Estate
The ideal time to shoot is on a day when sunlight is plentiful and artificial lighting can be dispensed with. If there is not enough light in the room, then you should use a tripod and a slow shutter speed. nine0003
1
Evening time for real estate photography is best used when you need to show interesting scenarios of artificial lighting, conceived by the designer. In this case, you should wait for the so-called blue light , when the sky after sunset becomes a rich blue color.
2
When photographing interiors, the first thing to do is take long shots. Professional photographers first shoot the entire room, and then move on to the details. nine0003
3
It's important to pay attention to the little things. Even a thorough cleaning before shooting does not guarantee that there will not be something superfluous in the frame. A small spot on the sofa may go unnoticed in place, but it will definitely come to the fore in the photo. The task of the photographer is to notice such defects and mask them in time (if not during shooting, then in post-processing).
4
In real estate photographs, nothing should betray the presence of the photographer: whether it be a reflection in mirrors, a shadow or the presence of a wire in the frame. nine0011
5
What to shoot real estate for
There is no universal answer to this question, because for shooting real estate it is not so much the camera itself that is important, but the presence of a good tripod, light and, most importantly, a wide-angle lens. For what? With the help of the latter, you can easily create the feeling that the viewer is in the very center of the scene. This significantly enhances the effect of presence in the interior.
The purpose of photographing real estate can be different. But in order to achieve a first-class result and not scare away potential customers with low-quality images, it is worth entrusting this work to professionals. The Gelio Media team knows thoroughly what it is to shoot real estate both from the ground and from the air, and also has real experience in conducting such surveys in Moscow and the regions of Russia. nine0003
Need a property photography?
Leave your contacts and we will contact you
10 tips for beginners in real estate photography
Do you want to make money with photography? Try yourself in the real estate market.
The real estate market is always in demand for high-quality photography of houses and apartments for sale. Each realtor is interested in effectively showing housing for sale. Shooting real estate professionally may seem a bit daunting at first glance, but we have some simple and actionable tips to help you take great photos. nine0003
Since this is a niche field of photography, it is not as popular as landscape or portrait photography, but it also means that you have a good chance of getting more clients and making a steady income.
What photo equipment do you need?
- Camera
Any crop or full frame DSLR or mirrorless camera is ideal for this job.
- Lens
A wide-angle lens will come in handy to capture even tight spaces. Its unique optics will show the rooms more spacious. If you have the budget, consider purchasing a Tilt-Shift lens with increased field of view. This option is well suited for real estate photography as it eliminates the distortion caused by a wide-angle lens. It is quite expensive, but you can look for cheaper used ones. nine0003
- Tripod
A tripod is always useful when shooting at slow shutter speeds. It stabilizes the camera and also helps keep perspective in the frame. If you fix it at a height of one and a half meters, all images will be taken in the same way and from the same angle of view. Remember that consistency in the set of photos is a priority, especially when it comes to real estate photography.
- Shutter remote control
If you are shooting at a slow shutter speed, it is best not to touch the camera. Even the slightest pressure on the shutter button can cause unnecessary shudder, so it is convenient to use the remote control for contactless shutter release.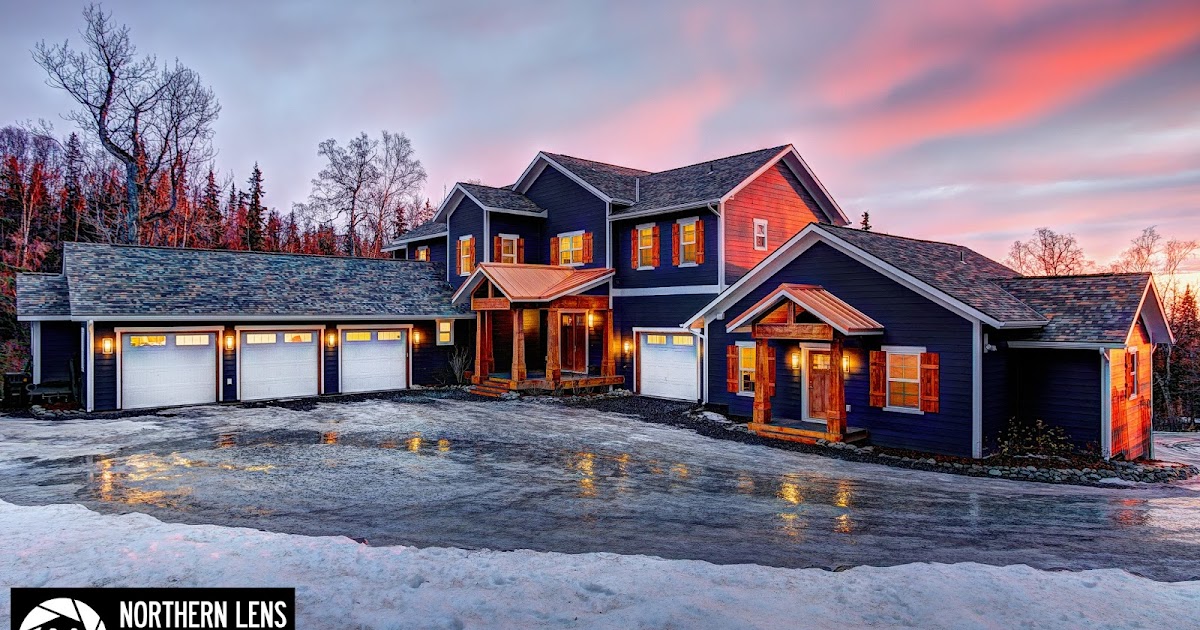 nine0003
- Flash
An off-camera flash is one of the most important tools in indoor photography. Flashes are especially valuable when shooting in low-light areas.
- Flash Synchronizer
When using an off-camera flash, you will need a device to synchronize the firing of the light pulse and the camera shutters. You will need to connect the transmitter to the camera's hot shoe and the receiver to the flash. It is worth noting that some flash models are already equipped with built-in receivers. nine0003
- Light modifiers
Photo umbrellas are sufficient in most cases. They are small, light and portable, so they do not get in the way when shooting in small spaces.
- Light stands
You will also need light stands to support your flashes. For heavy monoblocks, stiffer racks may be needed, pay attention to the load capacity. Depending on the shooting location, one to four studio stands are needed.
What to do before shooting a property
There is a standard short list of photographs for each property.
- 2 wide-angle shots in each bedroom, kitchen and living room.
- 1 bathroom photo.
- 1-3 photos of the backyard, even if it doesn't have any unique features. 1-2 shots of the front of the house.
- 1 picture of each utility room, such as laundry room, garage, and storage room.
This list is the starting point when shooting a property.
Preparing for shooting
Preparing the area for filming is required. In our homes, we get used to a little clutter. But all those small things that a person usually does not notice will stand out in the photo. Keep surfaces as clean as possible - countertops, coffee tables, etc. If you need some decorative items, leave 1-3 items. When photographing interiors, don't photograph cabinets unless they're special and custom-made. nine0003
Walk around the house before shooting
Every home is different. Feeling the space before shooting will give you an idea of how you want to photograph. You will begin to mentally note the best corners of the house and interesting interior items. Take a notebook and take notes, it will make it easier for you to conduct a photo shoot.
Decide whether to turn the lights on or off
Turning on lights in rooms instantly makes the space warmer and cozier, but it introduces different color temperatures into the shot that you'll need to balance in post. If you turn off the lights, the temperature will be even, but this often creates a feeling of cold in photographs of rooms. nine0003
If your home has large windows, consider opening them to let light in. In most situations, natural light looks best. If there are not enough windows in the house, use interior lighting. If you notice that the light bulbs in your home have different color temperatures, turn them off and use a flash instead. Warm incandescent bulbs and cool fluorescent bulbs don't mix well.
Things to remember when filming
- Use a flash and diffuser
Using an on-camera flash will help you move quickly from one room to another. Here it is necessary to use the reflection of light from the walls to soften the sharp stream of light. If you shoot the flash directly into the space of the room, you get a bright area in the center and dark shadows around.
Rotate the flash so that its light bounces off the wall behind you, the ceiling directly above you, or even one of the side walls. The light will be more even and diffused. It is better to get a flash that can be moved at different angles. It is preferable to control the flash in manual mode. For example, you can use 1/16 power as your starting point and tune from there. For larger spaces, you can mount flashes on stands and point them, for example, up towards the ceiling.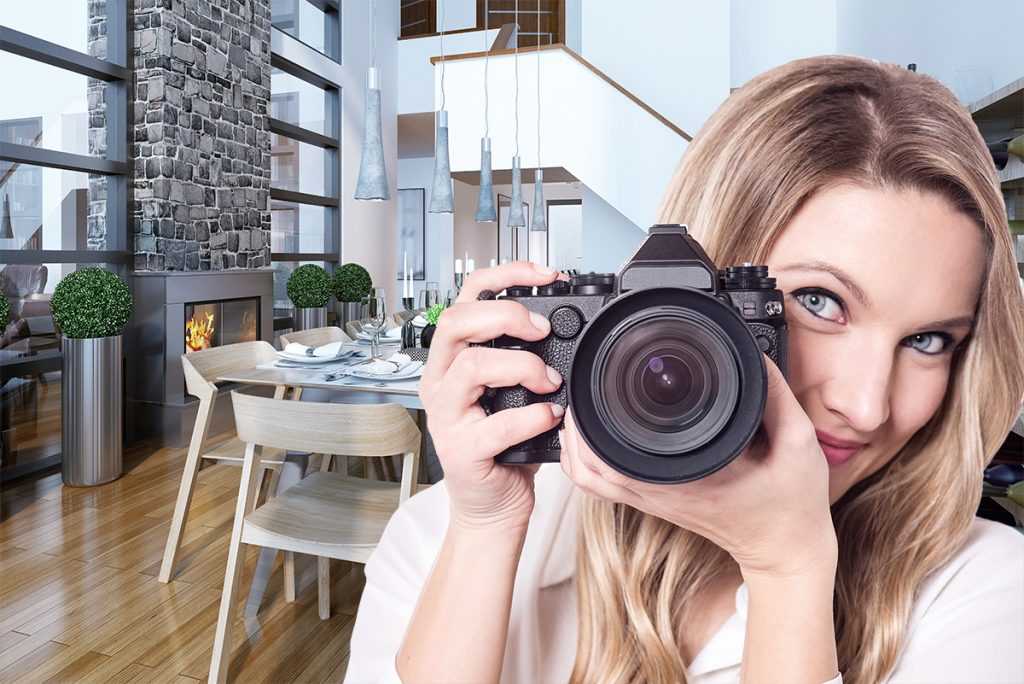 nine0003
As a result, the position of the lights depends on the size and shape of the room. In most cases, you can place them in corners or even behind you.
- Hold the camera straight for less distortion
This is a very important tip. Be sure to hold the camera straight when shooting from different angles. This helps to avoid distortion that will have to be corrected later in post-processing. If you point the camera slightly up or down, the vertical lines will begin to tilt, distort in one direction or the other. nine0003
The ideal camera height for real estate photography would be around 150 cm. Each house is slightly different, but this camera position will produce the most natural and balanced shots. If you raise the camera too high, there will be too much ceiling and not enough living space in the frame. If too low, then the frame will be filled with furniture and there will not be enough real room in it.
Photo post-processing
One of the disadvantages of using wide-angle lenses when shooting indoors is the presence of distortion (geometric distortion).