Best camera for infrared photography
Recommended Cameras for Infrared Photography :: Spencers Camera
What should you look for when choosing a modified full-time/dedicated infrared camera? We have a few recommendations and suggestions for you. As the old saying goes, "The best camera is the one you have with you." Well, we have a lot more specific and detailed recommendations when considering which camera to purchase and/or have modified as a Dedicated/Full-Time Infrared camera.
Most important is build quality. Why spend hard earned money on something that will not last or won't handle everyday use. Most major manufacturers produce great camera models but some are better than others. Simply said, weight comparative to size is one somewhat reliable way to determine if the camera is mostly plastic or if it was manufactured with more metal construction. Also, in most cases, you pay for what you get. You can't realistically expect a $300 camera to produce equivalent quality images as a $4000 camera. Personal budget is a consideration as well. We recommend buying a camera that you can afford but without cutting corners on quality.
Functionality limitations are a problem with some cameras. You don't want to send money on a conversion/camera only to be frustrated because it doesn't perform well when capturing in infrared. For instance, some cameras won't work very well with custom white balance settings after being modified. Some are very "noisy" when capturing infrared images. Some have limitations which can affect the use of RAW files and its ability to retain accurate white balance info/settings when importing to Lightroom, Camera RAW or Photoshop. Others work seamlessly in almost every circumstance and almost never cause headaches when shooting or post processing.
Obviously, a camera brand that has a complete line of high quality and fully supported lenses or adaptability of quality lenses is important. Electronic viewfinder vs. optical viewfinder is something to consider. Battery size/capacity, availability of accessories, software compatibility, built-in functionality, white balance capabilities, etc. .. There are many other factors that need to be considered when choosing which camera is best for you. Over the years we have tested almost every make and model, kept notes and test results, considered personal preference and likability, and have compiled a list of the more recent camera models that we recommend for Infrared only use.
NEW!! Spencer's Camera & Photo now offers reinstallation of the Sensor Cleaning/Dust Reduction System for most camera models . Simply select the re-installation option within the internal filter section when ordering your conversion/camera and the cleaning system will be reinstalled during the conversion process.
**** The Dust Reduction System of most camera models is removed during the conversion process but can be reinstalled at an additional charge. If you don't opt to have the system reinstalled please be sure to disable this function within the settings of your camera. Failure to do so may result in a temporary camera error. If your camera displays a Dust Reduction System error you can still disable the function within the camera menu. ****
Highly Recommended IR Cameras:
These cameras are proven to be the best models because for excellent performance at IR sensitivity, custom white balance functions, overall build quality, compatibility with software and accessories, built-in functionality, battery capacity, and expandability. For the best astrophotography results and performance we recommend that you choose from this list:
- Canon EOS Digital Rebel SL1
- Canon EOS Digital Rebel SL2
- Canon EOS Digital Rebel T5i
- Canon EOS Digital Rebel T6i
- Canon EOS Digital Rebel T6s
- Canon EOS Digital Rebel T7i
- Canon EOS Digital Rebel T8i
- Canon EOS 60D
- Canon EOS 70D
- Canon EOS 77D
- Canon EOS 80D
- Canon EOS 90D
- Canon EOS 6D
- Canon EOS 6D Mark II
- Canon EOS 5D Mark II
- Canon EOS 5D Mark III
- Canon EOS 5D Mark IV
- Canon EOS 5DS
- Canon EOS 5DS-R
- Canon EOS 7D
- Canon EOS 7D Mark II
- Canon 1D X
- Canon 1D X Mark II
- Canon EOS M3
- Canon EOS M5
- Canon EOS M10
- Canon EOS R
- Canon EOS R5
- Canon EOS R6
- Canon EOS RP
- Fujifilm X-E2
- Fujifilm X-E2s
- Fujifilm X-T1
- Fujifilm X-T2
- Fujifilm X-T10
- Nikon D500
- Nikon D600
- Nikon D610
- Nikon D700
- Nikon D750
- Nikon D800
- Nikon D810
- Nikon D850
- Nikon Z6
- Nikon Z7
- Olympus OM-D E-M1
- Olympus OM-D E-M1 Mark II
- Olympus OM-D E-M10
- Olympus OM-D E-M10 Mark II
- Olympus OM-D E-M5
- Olympus OM-D E-M5 Mark II
- Pentax K-1
- Pentax K-S2
- Sony A6000
- Sony A6300
- Sony A6500
- Sony NEX7
- Sony A7
- Sony A7 II
- Sony A7 III
- Sony A7R
- Sony A7S
- Sony A99 Mark II
Recommended IR Cameras:
These cameras are great but simply are not quite as good as the "Highly" recommended cameras. They may lack slightly in performance, build quality, image quality, battery capacity, or other minor reasons. For the most part they will perform very well for Infrared Photography.
- Canon EOS Digital Rebel T1i
- Canon EOS Digital Rebel T2i
- Canon EOS Digital Rebel T3i
- Canon EOS Digital Rebel XS
- Canon EOS Digital Rebel XSi
- Canon EOS 10D
- Canon EOS 20D
- Canon EOS 30D
- Canon EOS 40D
- Canon EOS 50D
- Canon EOS 5D
- Canon EOS M
- Nikon D90
- Nikon D3300
- Nikon D3400
- Nikon D5200
- Nikon D5300
- Nikon D5500
- Nikon D5600
- Nikon D7100
- Nikon D7200
- Nikon D7500
- Nikon D3**
- Nikon D3s**
- Nikon D4**
- Nikon D5**
- Olympus Pen Series cameras.

- Pentax K-30
- Sony A7R Mark II**
- Sony A7R Mark III**
- Sony A7S Mark II**
- Sony A7S Mark III**
- Sony NEX-5
- Sony NEX-5N
The list above isn't meant to be a complete list. It's a list of cameras we know you can use for infrared photography and will be happy with the results. If you are considering a certain camera and have questions concerning its functionality or quality, please contact us. (Which cameras are best for Nightscape and Astrophotography? Here's our recommended Nightscape and Astro camera list: Recommended Cameras for Nightscape and Astrophotography)
**These cameras have a design flaw that will create an infrared light leak after the modification. An infrared emitting sensor built into the shutter mechanism will "bleed" light onto the imaging sensor and is detectable by the sensor once it has been modified to be Infrared Sensitive. This will cause a very poor imaging result especially when shooting long exposures with high ISO settings.
Order an Infrared Conversion Here.
As always, please contact us with any questions regarding this or any other product or service we provide: [email protected]
IR Cameras For Sale >>
Choosing a Camera for Infrared Photography – Kolari Vision
Education
Choosing a Camera for Infrared Photography
Author: Ilija Melentijevic & William Martinez
November 1, 2022
The first step in choosing a camera is deciding which type works best for you.
The first step in choosing a camera for infrared photography is deciding what type of camera works best for you. There are three major varieties of digital cameras: point-and-shoot, DSLRs, and mirrorless.
Below, we will go over the pros and cons of each type of camera.
Point-and-Shoot
Point-and-shoot cameras are a great starting point for infrared photography. They are small, easy to use, and inexpensive. Their small, lightweight form factor makes them perfect for travel, and they can easily be stored in your pocket or camera bag alongside a larger camera.
They’re mighty capable for beginners, but the image quality may not be sufficient for more serious shooters or quality prints.
Pros
Infrared converted point-and-shoot cameras have accurate autofocus through the entire zoom range of the lens. Since the camera uses just one sensor for imaging and metering, IR light meters as accurately as visible light does on an unconverted camera. Like a mirrorless camera, you can also preview how the scene will look in infrared via the system’s live view and viewfinder. Unlike a DSLR, point-and-shoot cameras can compose, focus, and meter via the viewfinder even after adding an opaque infrared filter in front of the lens.
Cons
One of the most significant downsides to using point-and-shoot cameras is their small sensor size and even smaller pixels. These small pixels have higher noise levels and smaller maximum true resolution. Infrared photography can have increased noise, which will be much more noticeable with a point-and-shoot camera.
Due to the smaller sensors and lower resolution than DSLR and mirrorless cameras, it is not recommended to print large images from photos taken on point-and-shoot cameras. If you’re looking to print images and need a better image quality camera, we recommend going with a DSLR or mirrorless camera, especially if you want to take professional IR images.
(Many point-and-shoot cameras do not come with filter threads and will require a filter adapter to mount external lens filters to the lens.)
Converting a DSLR camera to IR or full-spectrum is a great way to bring new life into an old camera. They can take high-quality infrared images while touting the flexibility of interchangeable lenses, manual settings, and RAW files. Whether you want to shoot IR landscapes, print your images, or dabble in a new hobby, DSLR cameras are very effective for both intermediate and professional photographers.
Pros
DSLR cameras produce very high-quality infrared images. They do not have the resolution or noise issues of point-and-shoots and can be used for vivid color infrared photography. They offer the flexibility of multiple lenses, more manual control options, and customizable menu settings.
The many lenses available for DSLR cameras allow you to play with different focal lengths. Whether you’re looking to shoot wide-angle or telephoto IR images, you’ll be sure to find a lens tailored to your shooting style. You’ll also be able to shoot panoramas, time lapses, HDR, and in most cases, high-quality videos that look great on desktops and mobile devices.
Cons
While the image quality is better, DSLR cameras have their own set of problems when it comes to infrared photography. They stem from using separate sensors for auto-focus, exposure, and imaging. Glass usually bends wavelengths of light in different amounts, so some lenses will exhibit a focus shift when shooting in IR.
For a camera to auto-focus properly after an infrared conversion, we use custom glass filters for each specific camera model with the appropriate thickness required to compensate for the focus shift. While this works very well for point-and-shoot and mirrorless cameras, it does not work universally across all lenses when using an IR converted DSLR.
Since DSLRs focus with a different sensor than the imaging sensor (which still focuses to visible light after a conversion) when using the viewfinder, the camera cannot automatically compensate for a lens with an irregular IR focus shift. Using a lens with an irregular focus would then require stepping up the aperture, manual focusing, or having the camera calibrated for that specific lens during the conversion service.
DSLRs additionally use this secondary sensor for exposure controls. The 720nm filter usually requires an exposure consistent with visible light and provides properly exposed images. Sometimes, particularly with other filters, the visible and infrared light in a scene differs, so exposure compensation is necessary.
Another issue with DSLRs and infrared photography is the inability to use the viewfinder when using an opaque filter on the lens. Not only does this prevent the use of the viewfinder, but it also causes problems with auto exposure and autofocus, which all utilize visible light.
However, all these problems can be avoided if the DSLR has a live view function. When using live view, the camera uses the imaging sensor for autofocus, exposure, and preview, resulting in flawless infrared performance.
Mirrorless
As time progresses, mirrorless cameras are becoming the new industry standard for both IR and visible light photography. Moving forward, most camera manufacturers are dedicating their efforts to putting more mirrorless cameras on the market while discontinuing the production of older DSLR models.
Systems like the Canon R lineup, Sony’s coveted A7 series, and many other mirrorless camera models from the big brands combine the best features of point-and-shoot and DSLR cameras for infrared photography.
There’s a plethora of mirrorless cameras to choose from, and many new models are being released every couple of months. Whether you’re a fan of Canon, Sony, Nikon, Fujifilm, Olympus, Panasonic, or anything in between, you’ll be sure to find a camera that suits your IR needs.
Pros
Mirrorless cameras use the same sensor for imaging, focusing, and metering, making them capable of accurately composing, autofocusing, and exposing IR images within the viewfinder and live view. This also means that, unlike DSLR cameras, external IR lens filters can be used without affecting any of these features.
Additionally, these cameras use APS-C, mirrorless, or medium format sensor sizes, which do not have the noise or resolution problems most point-and-shoots have. Technology is advancing faster than ever before, resulting in features that have never been made available to DSLR cameras, like 8k video, IBIS, etc. Each of these features will work regularly in IR.
They’re usually much smaller and lighter than DSLR cameras, making them great to travel with and easier to carry for extended periods. Additionally, it is much easier to use adapted lenses with mirrorless cameras, giving you access to a large army of optics that include both new and vintage lenses as long as you use the appropriate adapter.
Not too long ago, we also released our Kolari Magnetic Clip-in Filters, which allow you to place filters behind the lenses of Canon, Sony, Nikon, and Fujifilm mirrorless cameras. This allows photographers to use one filter across multiple lenses with varying diameters resulting in money saved and less clutter from having to purchase multiple sizes of the same lens filter.
Summary
Point-and-Shoot | Mirrorless | ||
|---|---|---|---|
Autofocus Issues? | Some lenses (when not using live view) | ||
Exposure issues? | Occasionally (when not using live view) | ||
Noise Performance | Can be poor | ||
Reduced True Resolution? | Sometimes | ||
Compose via Viewfinder with External IR Filters? | Yes, if they can be mounted | ||
Color IR Performance | Poor to very good | Good to very good | Good to very good |
Physical Size | Small – Medium | Medium | |
Low – Medium | Medium – High | Medium – High |
Education Infrared Photography
Related Posts
March 25, 2022
One of the most common questions we get at Kolari is “What is the best infrared camera?”
January 14, 2022
UV filters were initially created in the days of film to block out ultraviolet light.
June 17, 2022
You need to work with tools that fit your style of shooting, budget, and the landscape.
March 18, 2022
One of the more well-known applications for an ND filter is taking long exposures. Here’s how that works.
Painting a mirrorless camera in infrared
Due to “you should not copy-paste on Geektimes texts that were previously published on other resources (even if you are the author of such a text)” in the rules, I can’t write about the details of reworking each camera model here, these articles have already been published in others places. But I can write general recommendations that are valid for most of these cameras.
To begin with, why even remake the camera for IR? Then, that in the infrared range, you can take very unusual photographs. Traditionally, these are landscapes:
But you can also shoot portraits:
At least a selfie!
You can even see the own thermal radiation of objects if they are heated to a temperature in the region of 300 degrees or higher:
But why exactly redo it, there are IR filters, you put it on a regular camera - and shoot?
Then, that the landscape above was shot at a shutter speed of 1/320. To get such a frame on a standard camera with an IR filter would require a shutter speed somewhere in the region of 3.2 s ...
Why mirrorless? Because with them you immediately see how the frame will look, autofocus and exposure meter work correctly without unnecessary “dancing with a tambourine”, etc. With a mirror, everything will be much more difficult. Well, or it will need to be used in LiveView mode, and then it is not clear why the mirror is needed.
And so, you decided that you want to shoot infrared photos, bought a used mirrorless camera for this (well, you won’t remake a camera that is still under warranty). Where to begin?
First you need to disassemble the camera. There are disassembly instructions for almost any camera on the Internet. IMPORTANT : when disassembling, do not forget to discharge the flash capacitor through the resistor as soon as you get to it! Otherwise, you can get a "charge of vivacity for the whole day."
You disassemble the camera to get to the matrix module. It looks something like this:
Now we need to remove the filters installed in front of the matrix.
It is important to remember that there are usually two filters:
- a fairly thick gluing of an anti-moire filter and a filter that reduces the sensitivity of the camera to yellow, red and near-IR radiation
- a thin "thermal mirror" ("Hot-Mirror"), which reflects the main part of the ultraviolet radiation and almost all (99.9%) infrared radiation
They look like this:
It can be seen that the ultrasonic dust shaker, which cleans the matrix from dust, is mounted on a thermal mirror. Alas, in most cases, you will have to come to terms with the loss of this useful device.
Now you have to decide what you want:
- get a camera purely for infrared photography, which, in principle, will not be able to shoot in any other;
- get a multispectral camera that can, depending on the filters installed on the lens, shoot in the ultraviolet (I warn you right away: it’s very difficult to find the right filter ), visible or infrared range, or immediately in the entire spectrum from about 360 to 1000 nm.

In the first case, you will need an infrared filter for lenses during the rework. It is easy to buy in photo shops or order on AliExpress.
I recommend using a filter with a cut-off wavelength of 720 nm or so. Although such a filter formally passes part of the visible red radiation, you will get all the infrared effects with it, while you can get color photographs. By adjusting the white balance on a piece of white paper in your photographs, the blues will correspond to the relatively far IR, and the yellows to the very edge of the visible red. In which case, it will always be possible to install an additional filter on the lens, removing the visible spectrum completely.
Use a regular glass cutter (if you haven't dealt with it, practice on an unnecessary piece of glass) to cut a piece of the filter with the same dimensions as the camera filter gluing, and install instead of this gluing. Depending on the design, the filter will either need to be simply inserted into the frame, or glued instead of the native filter torn from it. You should learn something like this:
Now just assemble the camera back. It will immediately give excellent infrared photographs!
In the second case, the purchase of filters can wait. But, on the other hand, alterations of the camera turn out to be more difficult ...
You need to measure the thickness of at least the gluing of the filters, but better the gluing and the thermal mirror together.
Now divide this number by three - get the minimum distance that you need to bring the matrix closer to the lens so that the camera can focus correctly. It was at this distance (assuming their refractive index is approximately 1.5) that the filters optically brought the matrix closer to the lens.
How to move?.. With a file! More precisely - a file. It will take about 0.5-1.0 mm, depending on the thickness of the filters, to grind off the seats for the mounting screws and, possibly, some other elements. You need to grind as much as possible in the same way, controlling the process with a caliper with an accuracy of no worse than 0. 05 mm, because skewed matrix will lead to different focusing distances in different parts of the frame.
The work requires maximum accuracy, not only because of the required accuracy, but also because of the risk of damaging the matrix itself or its surrounding elements. Of course, upon completion of work, it is necessary to thoroughly clean the matrix module from metal dust.
Well, that's all, now you can put the camera back and enjoy beautiful pictures in all ranges!
Infrared with B+W filters – a journey into a “new dimension”
Hello, friends!
This year, summer somehow didn’t work out for most due to quarantine, so I decided to please you with new pictures from my travels. And not just pictures, but infrared pictures taken with B+W filters. This is the material that I have been collecting for several years and today I am glad to share it with you.
I have previously written about infrared photography, talking about the technical characteristics of B + W filters, analyzing transmission curves and giving some examples of IR shooting. I have also explained in detail why images "like infrared" cannot be obtained without special infrared filters. And today I will show even more interesting, in my opinion, examples of IR shooting from my travels in Indonesia, Turkey and Germany, because it is very important to see what everything was started for!
Indonesia - infrared photography
Indonesia is quite far away from us (12 hours flight time) so I took with me a good and large set of equipment, which also included a decent set of filters.
On the right in the picture, three of the four filters are infrared.
Indonesia is interesting for infrared photography because the sun almost always shines there and the UV index almost never drops below 6, and most often it stays stable at 9, which means that there are no problems with the lack of infrared spectrum at all. In addition, this place is equatorial and therefore many interesting tropical trees grow here, which look beautiful in the pictures.
iPhone SE back camera 4.15mm f/[email protected](29mm to 35mm equiv.) , f2.2, 1/3800s, ISO 25
Here you see the most banal shot of the beach, if photographed in the usual way. And below is an IR shot taken with the B + W 093 filter. These two photos (IR and normal) were taken almost simultaneously.
Canon 1200D + TS-E24mm f/3.5L II@24mm, f4, 1/125s, ISO 200 + filter B+W 093
Contrast shots are similar to those shot by Ansel Adams, and for good reason he also liked to use IR filters. As you can see, in the frame taken with the B + W 093 light filter, the blue sky became almost black, the green grass in the background turned out to be light gray, in contrast to the usual black and white photo, where it would be dark gray (here's about as in places where a shadow falls on it). The foliage on the nearest tree looks like fluffy balls on a stick. And light sand reflects the infrared spectrum well and therefore turns out to be white. In fact, he is not white at all.
Photographing in Indonesia is not easy, especially with a tripod, as the sun is merciless and it's easy to get sunstroke if you're not wearing a hat.
And the original photo with infrared filter 093 looked like this...
It needs to be converted to black and white. Nothing good will happen with the 093 filter, because it leaves only one color channel. But other color filters, starting with 092 and contrast filters (they are just for black and white photography, but often there is an interesting result in color) can look like shots from an old movie.
multispectral camera without filters
Shooting with filter B+W 403 (ultraviolet)
yellow contrast filter
Orange contrast filter
I liked the lined coconut palms, but a normal shot would be spoiled by the debris that lies under them.
iPhone SE back camera 4. 15mm f/[email protected](29mm to 35mm equiv.) , f2.2, 1/2000s, ISO 25
Yes, the tropics have not become more beautiful with the advent of a “civilized” person. But in the infrared image it is possible to shift the focus to the palm trees.
Canon 1200D + TS-E24mm f/3.5L II@24mm, f8, 1/200s, ISO 100 + filter B+W 092
Waterfall in Bali.
Canon EOS 5DS R + TS-E24mm f/3.5L II@24mm, f8, 8s, ISO 200
The problem with shooting such a place is usually the abundance of people. Someone climbs into the water next to the waterfall and stands there for half an hour. I don’t know what purpose is pursued in the usual standing, but the body covered with fat clearly does not decorate the landscape, therefore I spent about an hour at the waterfall with a camera trying to take pictures where people could at least be retouched. There is always more than one person in the frame, and if he is relatively close to the camera, then, as a rule, he cannot be removed from the frame - you have to wait. Asking such tourists is usually useless if you do not want to enter into lengthy discussions about what and how to do at the waterfall.
I shot a regular shot at a slow shutter speed, hoping that people would move and they would not remain in the frame, but I still had to crop it a lot. The colors in the picture are saturated because the B+W HTC polarizer is used.
Canon 1200D + TS-E24mm f/3.5L II@24mm, f11, 1/8s, ISO 200 + filter B+W 093
I liked the infrared version of this image better. Pictures in the normal spectrum often turn out dark, but in infrared, the greens magically come out bright and the picture turns out to be contrasting. The most successful combination is a waterfall (will be gray) + rock (white and black stones) + leaves / moss (white). In this frame, I don’t have enough rocks, but still, in my opinion, it turned out well.
You still need to try to photograph a beautifully ordinary cottage (this photo was taken on a smartphone and does not pretend to anything).
iPhone SE back camera 4.15mm f/[email protected] (29mm to 35mm equiv.) , f2.2, 1/370s, ISO 25
The camera did not turn out much better, and I decided to try to shoot in the infrared spectrum, which will better convey the feeling of summer, which, in fact, does not end in Indonesia, and we were there in late October or early November.
Canon 1200D + TS-E24mm f/3.5L II@24mm, f5.6, 1/50s, ISO 200 + filter B+W 093
Such a shot resembles a frame from American classic (40s, 50s) black and white films.
Sometimes completely simple things look completely different in the infrared spectrum. In this case, a primitive shepherd's tent.
Canon 1200D + TS-E24mm f/3.5L II@24mm, f5.6, 1/30s, ISO 200 + filter B+W 093
Shooting in infrared gave it a "summer feel" and hid from us debris on the ground and so on that we didn't want to see. Something reminded me of Thor Heyerdahl's 1949 film about his sailing on the Kon-Tiki raft across the ocean.
Different plants in the infrared spectrum can look different, so it turns out to be a good technique when heterogeneous leaves, grass and flowers are found in the frame.
Canon 1200D + TS-E24mm f/3.5L II@24mm, f5.6, 1/80s, ISO 200 + filter B+W 093
Trees come in different shades of gray in the infrared spectrum. Those exposed to direct sunlight tend to be light gray most of the time, while those in shade are closer to dark grey. The contrast is added by the blue sky, which, when filtered through a red filter (IR filters are also red), looks very dark and sometimes even black. Then the white foliage looks good on it. If you pay more attention, you will notice goats under the tree in this frame.
When traveling, you should not be lazy and go where you think you can get good pictures.
Canon 1200D + TS-E24mm f/3. 5L II@24mm, f9, 1/15s, ISO 100 + filter B+W 093
Infrared Indonesia CV
Lighting in Indonesia is more than enough, which allows you to take short exposures. Most likely, infrared shooting will be possible on conventional cameras with a filter B + W 092. But I still recommend modified cameras so as not to limit myself to tropical countries. Not everywhere the sun is so hot.
It is difficult to say in advance what equipment will be needed, but in Indonesia, almost everything came in handy for me, especially light filters.
I got the most good shots with the B + W 093 filter, but this is because I saw tropical landscapes through the eyes of photographers of the early 20th century, where the pictures were black and white and high contrast.
A separate "life hack" is the use of a polarizing filter, it adds contrast to the picture. At the same time, it is desirable to have a “light” polarizer, such as the new B + W HTC, since not so much light passes through the dense (093) infrared filter anyway.
And the important point is that without an interesting plot, you won’t get a beautiful picture, that is, you need to be able to see the plot and build a composition knowing the nature of the materials. For example, combine dark tree trunks with light leaves or contrasting rocks with light leaves and a dark stormy sky.
Often, in order to find a good subject for shooting, you have to go and climb into places where ordinary people do not climb. To help yourself, I recommend getting either a small tripod or a light one. One of the two, but both are better.
Germany - infrared photography
Traveling in Germany, I went on a photo tour of the castles. To be honest, I did not imagine that there are so many of them, about 25,000 pieces.
Taking pictures of European castles with a regular camera is not very productive, since thousands of tourists with cameras visit them every day and there are enough ordinary pictures, you can even sort them by seasons. But I didn’t find infrared shots, and therefore the idea arose to shoot something of my own, unique, using B + W 092 and 093 light filters.
Neuschwanstein Castle is located in the German Alps, very picturesque and has a small bridge to photograph it. Nevertheless, there are a lot of tourists on this bridge and everyone has about the same shots.
The photograph in the visible range is strongly affected by the weather, in cloudy weather it makes no sense to try to shoot at all. But an infrared photo in partly cloudy can give a good result, as in this picture.
Another castle in Germany - Sigmaringen - is very beautiful, but facing the "wrong" side to the east. As a result, half of the day the sun illuminates the inner side of the castle, which is normally not photographed.
The best shot can be again, from a “secret” place on a hill.
For infrared shooting, the castle is also attractive because it is entwined with vegetation, which brings its own light spots to the gray walls of the castle. However, good lighting here sometimes has to wait all day...
Next stop is Hohenzollern Castle, near Stuttgart.
This castle is different in that it cannot be photographed from a convenient distance, it is surrounded by tall trees. There is a winding path leading to the castle, where you can also take a bunch of beautiful infrared shots. Without special filters on the track, nothing interesting.
The castle is made of a different stone than the previous ones, and therefore comes out dark in infrared images! The more contrast the image is, where the foliage of trees acts as light spots.
Another castle - Heidelberg is also a building that is inconvenient to get close to, so the best place to shoot is across the river.
Below you will find more examples of IR shots. Who would have thought that sometimes a banal plot of a winding road could be such a successful combination of light and shadow for an infrared image.
The cut-off pattern here is influenced not only by sunlight and shadows, but also by tree species. Different trees have leaves and bark that reflect the infrared spectrum with different intensity, therefore they have different tones.
"Golden Autumn" is good, but trite. And here is the plot "a la Adams", which can please many owners of cottages or hotels.
I saw similar pictures in expensive hotels where I once stayed. They fit perfectly into a sophisticated interior thanks to black and white colors, contrast and abundance of details.
Germany Infrared Resume
Germany is a fertile place for infrared photography and difficult to compete for conventional photography. By God, everything has been filmed there for a long time before us. If in Indonesia you can still find almost deserted places, then in Germany there are no such places. But by stopping a little in creating clones of photographs of other people, which are obtained as a result of shooting from the same places, you can diversify your creativity with infrared filters.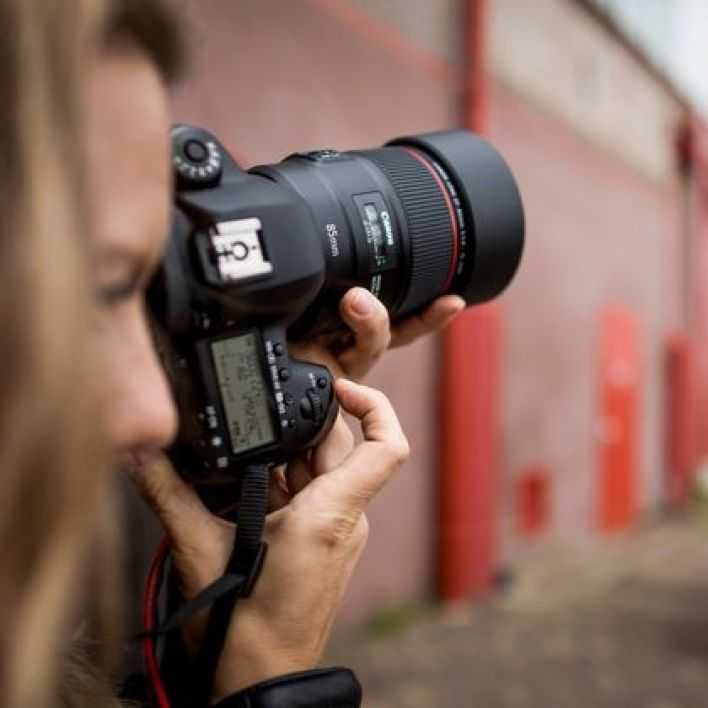 Most of the visitors to these places generally shoot on a smartphone and do not use filters, so IR shooting is a good trump card.
Plots for shooting in Germany weight. I chose what was interesting to me. Separately, I note the Alps, where nature is very beautiful and you want to walk, take pictures and generally live there. Especially with a view of the snow-capped mountains.
Turkey - infrared photography
Turkey is a warm country. Here in the summer there is a lot of sun and, accordingly, the infrared spectrum. When I went to Turkey on a family vacation, I had no idea that there was still something to see and take pictures of, but I took an infrared camera and filters with me (you never know).
It turned out that there is something to shoot here - the ruins of Roman cities, dwellings of cavemen, underground cities and so on. In fact, Turkey was pleasantly surprised by the abundance of photogenic places.
In Turkey, for example, there is such a world-famous place as Cappadocia - an area with an interesting landscape, cave dwellings of early Christians and underground cities.
Taken with a B+W F-Pro S03 MRC Pol-Circ 9 polarizing filter0007
But taking pictures here with a regular camera again makes little sense, since Cappadocia hosts a huge number of tourists every day and many of them are photographers. It is enough to type the name in the search engine and see the photo. The most popular are shots where balloons fly over the landscape. It seemed to me a very hackneyed plot, and I still didn’t get to launch balloons, but cave dwellings are what you need for infrared photography!
Below are other examples of infrared photography with B+W filters.
It's hard to believe, but people lived here. And, in fact, if the Turkish government had not expelled people from such dwellings in 2018 as an ultimatum, they would still be living now (not in these specific ones, but there were similar ones nearby).
Interesting. that these dwellings were built in the first millennium BC, but, as it turns out, they are relevant even now. This is to the question of how humanity develops. Someone wants to fly into space, and someone else lives in caves.
In Turkey, many mountains are limestone, so they look white in infrared photos, contrasting with cave entrances and various inclusions of other rocks. Specifically for Turkey, the B + W 092 light filter showed itself very well, most of the pictures were taken by it. Although it has less contrast than B+W 093, the terrain itself sets the contrast in these images. You just need to remember which materials give which shade in the infrared black and white image.
At the same time, water in infrared images most often turns out to be black, since it does not reflect, but absorbs the infrared spectrum. The exception is splashes. Therefore, if you are shooting water, then it is good to combine it with trees and other greenery, which will become light in the infrared image.
But the same picture in the usual spectrum is not at all interesting.
On the same small waterfall, I took other pretty good IR shots.
Another interesting place for IR shooting is the city center of Tarsus, which has many attractions.
The city of Tarsus in the province of Mersin, in which the "Gate of Cleopatra" is located, was founded in 600 BC. In the era of the Roman Empire, Tarsus flourished, as it was on an important trade route from Cilicia to Syria and was the capital of Cilicia. It was presented by the Roman commander Mark Antony (at that time one of the co-rulers of the Roman Empire) to the Egyptian queen Cleopatra as a wedding gift and there is a legend that they passed under this gate. From that moment on, another co-ruler Octavian began a campaign against Mark Antony, condemning him for distributing Roman lands. But the beautiful and tragic love story of the Roman commander and the Egyptian queen has survived to this day (both died almost simultaneously, like Romeo and Juliet).
There are also a lot of photos of this gate on the Internet, but I tried to photograph them in my own way, in the spirit of black and white films of the 50s.
Turkey Infrared Resume
Turkey is a great place for infrared photography. Particular attention should be paid to the ruins of Roman cities, of which there are many. I did not hit the most significant, and the size in this case is important. The taller the building, the better the contrast spreads over the area of the frame. For example, the steps of the amphitheater rise well up high, and I managed to visit a fairly modest amphitheater, where most of the building lay in ruins. If only there were columns... But in Turkey there are hefty amphitheaters in good condition - go for it!
The second part of a possible photo tour is the ancient settlements. Who didn’t live here ... I visited Cappadocia and found out where real troglodytes lived (!). There are a lot of limestone mountains with caves around, you can shoot Star Wars, the planet Tatooine (actually filmed in Tunisia, but here, in my opinion, it is even better and very similar landscapes).
Results
Infrared photography as an application to amateur photography is a unique tool that opens a window to a "new dimension" for us.
When you're looking at a landscape, but the lighting conditions tell you that a normal spectrum shot won't be interesting, try mentally looking at it in the infrared spectrum, it might be much better.
Like any other type of photography, infrared photography cannot replace all others, but it can successfully complement them.
In the few years that I have been doing infrared photography, I have taken quite a few pictures that I am not ashamed of and could have been put on display.
And these are pictures, looking at which many people say “WOW!”, which is rarely expected when viewing pictures in the usual spectrum, which are largely “bored” by everyone.
The viewer loves to be surprised, opened up new horizons, so I recommend that you diversify your photographic experience with infrared photography.