Blue pixel on screen
5 Ways to Fix a Stuck Pixel on Your Screen
That annoying dead pixel on your TFT, OLED, or LCD screen might just be stuck and easy to fix. We'll show you how to do it. You can still return your monitor if this doesn't work; nothing we recommend here will void your warranty.
Let's see how you can fix hot, dead, or stuck pixels on your screen.
How to Test New Screens for Stuck or Dead Pixels
Yes, you should test any new monitor for bad pixels. You can simply run your screen through a palette of basic colors, as well as black and white in full-screen mode using a tool like EIZO Monitor Test.
1. EIZO Monitor Test
EIZO Monitor Test is an online tool that lets you find and eventually fix stuck pixels. It packs many options into a single test window, but it's easy to use once you have an overview.
To test your screen, check all the boxes you want to include in your test. We recommend the default setting of having all boxes checked. If you're testing multiple monitors, you can open the test on an additional monitor. When you're ready, click Start test to launch the full-screen test window.
Below you see the first test pattern. Each screen has an explainer in the bottom right detailing what you should look for. Next, you'll see a menu that lets you go from one test to the next on the left. Move through the black and white screens and all the solid colors (green, blue, and red) and check our screen. To exit, press the ESC key or the exit symbol in the top right.
If you discover a bad pixel, we recommend using a tool like UDPixel or JScreenFix to flash it.
2. Online Monitor Test
This is a very thorough test not only meant to identify bad pixels but also powerful enough to test the quality of your monitor. Unfortunately, with Flash no longer supported by most browsers, you'll probably have to use the executable version to make it work.
You can choose between three different modes to test your screen. When you run the executable, here is what you should see:
Move the mouse to the top of the test window, and a menu will appear. There is an info window that you can turn off with a button in the top right corner of the menu. Then click on the Homogenuity test point and move through the three colors as well as black and white.
Fingers crossed, you won't discover anything out of the ordinary. In the unfortunate case that you do, let's see whether it's a stuck or a dead pixel and what you can do about it.
Is It a Stuck or Dead Pixel?
What if you spot an odd pixel? Is what you see just a stuck pixel, or is it, in fact, a dead pixel?
A stuck pixel, sometimes wrongfully referred to as a hot pixel, is defective because it receives incomplete information. Hence, it appears in one of the colors that its three sub-pixels can form, i.e., red, green, or blue. Strictly speaking, hot pixels only appear in digital cameras when electrical charges leak into the camera's sensor wells. Sometimes, stuck pixels fix themselves.
In a dead pixel, all sub-pixels are permanently off, which will make the pixel appear black. The cause could be a broken transistor. In rare cases, however, even a black pixel may just be stuck.
So if you're seeing a colored or white pixel, you might manage to fix it. And if you see a black pixel, chances are low, but there is still hope.
Let's turn to the methods to fix a stuck pixel.
How to Fix Dead or Stuck Pixels
Unfortunately, you can't fix a dead pixel. You can, however, fix a stuck pixel. As I explained above, it's hard to tell the two apart. Either way, these are the methods you can try:
- First, identify dead or stuck pixels by viewing your monitor in different color palettes.
- To fix a stuck or dead-looking pixel, use a third-party tool to flash the pixel with multiple colors. We recommend UDPixel (Windows) or LCD (online).
- Finally, you can try a manual method that involves rubbing the stuck pixel with a damp cloth or a pointy but soft item, like the rubber/eraser at the end of a pencil.
Let's look at these methods and tools in detail.
1. JScreenFix (Web)
JScreenFix won't help you find a stuck pixel, but it can help you fix it. Just click the Launch JScreenFix button at the bottom of the page.
The tool will load a black browser window with a square of flashing pixels. Press the green button in the bottom right to go full-screen. Drag the flashing square to where you found the stuck pixel and leave it there for at least 10 minutes.
By triggering each pixel's different sub-pixels, the graphic may massage a stuck pixel back into life.
2. UDPixel (Windows)
UDPixel, also known as UndeadPixel, is a Windows tool. It can help you identify and fix pixels using a single tool. The program requires the Microsoft .NET Framework.![]() If you're not on Windows or don't want to install any software, scroll down for the online tools below.
If you're not on Windows or don't want to install any software, scroll down for the online tools below.
With the Dead pixel locator on the left, you can easily detect any screen irregularity that may have escaped your vision until now.
Should you spot a suspicious pixel, switch to the Undead pixel side of things, create sufficient amounts of flash windows (one per stuck pixel), and hit Start. You can drag the tiny flashing windows to where you found odd pixels.
Let them run for a while and eventually change the Flash interval.
3. PixelHealer (Windows)
Aurelitec built this Windows app as a companion to its InjuredPixels tool to detect dead, stuck, or hot pixels.
The PixelHealer lets you flash a combination of black, white, all basic colors, and a custom color in a draggable window with customizable size. You can even change the flashing interval and set a timer to close the app automatically.
To close the app, click the Close PixelHealer button in the bottom right.
4. Dead Pixel Test and Fix (Android)
This Android tool can both test and fix dead or stuck pixels on your Android device.
3 Images
Let it run through all colors in Auto mode to spot whether you have any weird pixels on your screen. If you do, start the fix, which will rapidly flash your entire screen with black, white, and basic color pixels.
5. Manually Fix Stuck Pixels
Should none of these tools resolve your stuck or dead pixel issue, here is one last chance. You can combine any of the tools detailed above and the magic power of your own hands. There is a very good description of all available techniques on wikiHow. Another great step-by-step guide can be found on Instructables.
Let's go through one technique real quick:
- Turn off your monitor.
- Get yourself a damp cloth so that you won't scratch the screen.

- Apply pressure to the area where the stuck pixel is. Try not to put pressure anywhere else, as this may trigger the creation of more stuck pixels.
- While applying pressure, turn on your computer and screen.
- Remove pressure, and the stuck pixel should be gone.
This works because, in a stuck pixel, the liquid in one or more of its sub-pixels has not spread equally. When your screen's backlight turns on, different amounts of liquid pass through the pixel to create different colors. When you apply pressure, you're forcing the liquid out, and when you release the pressure, chances are the liquid will push in, spreading around evenly as it should.
What to Do If You Can't Fix Your Stuck or Dead Pixel?
Image Credit: LGWhen all attempts to revive your bad pixel fail, the next best thing you can do is to make peace with it. One ugly pixel won't break your screen, and eventually, you'll forget about it. If the defect affects more than a single pixel, however, or just bothers you a lot, you can always replace your monitor.![]()
First, check the warranty. The manufacturer or the marketplace where you purchased the monitor might cover dead pixels. Note that most manufacturers define a maximum number of allowable bad pixels for specific resolutions, and the warranty won't apply until your monitor crosses that threshold.
Here is LG's Pixel Policy:
Bright or dark sub-pixels can occur during the production of the LCD Monitor panel but does not affect the LCD Monitor functionality. The customer may notice the bright or dark spots if the film of the liquid crystal does not perform as expected while customers uses the LCD monitor. However, this is not considered a defect unless the number of bright and dark subpixels exceeds the maximum allowable threshold (...)
On a monitor with over 12 million pixels (Wide QXGA+, 2560x1600 pixels), for example, LG's pixel policy says that 12 bright or dark sub-pixels is the maximum you have to tolerate.
All Pixels Report to the Screen
Should all of these approaches fail to fix your dead pixel warrior, at least you'll now know it's not simple to fix, and, you might actually have to replace the screen.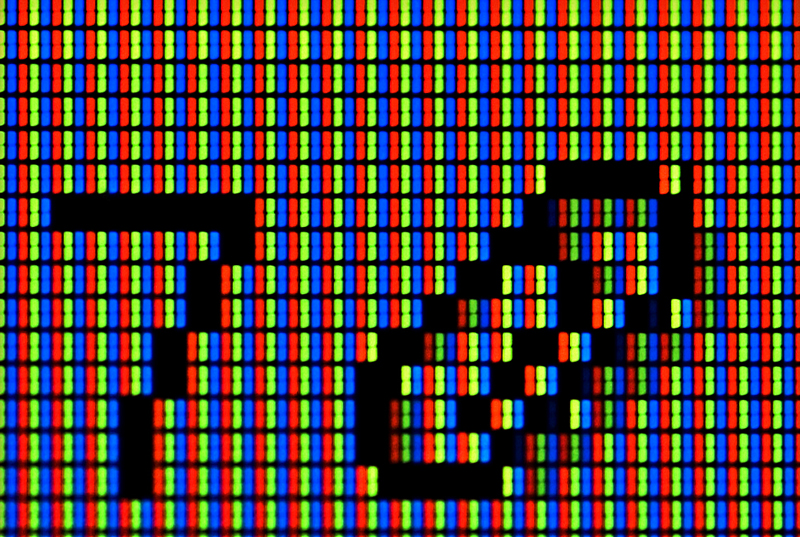
Repair Stuck (Red, Blue, Green) Or Dead (Black) Pixels On Screen
Noticed a tiny discolored spot on your screen that just doesn’t seem to go away? Chances are you have a stuck/dead pixel. What now?
- Stuck pixels are really annoying and just plain look bad. However, fixing them is easy and usually takes only a couple of minutes.
- To begin with, we make use of a software tool to flash the pixel with multiple colors. We recommend using JScreenFix (All Devices), Pixel Repair (Windows), or Dead Pixels Test and Fix (Android).
- Next, we try a manual method that involves rubbing the stuck pixel using an object with a blunt, narrow end, such as the tip of a pencil eraser or a phone stylus.
Fix Stuck Or Dead Pixels On Android, iPhone, Laptop, and TV
Contents
1. The Software Method
=> JScreenFix (All Devices)
=> Pixel Repair (Windows)
=> Dead Pixels Test and Fix (Android)
2. The Manual Method
=> Gently Massaging
=> Tapping
=> Hot Wet Cloth
Modern LCD and OLED screens are made up of millions of tiny dots of color, called pixels. Each pixel is comprised of three subpixels (red, blue, and green) that mix together and produce various colors you see on the screen.
Over time, any of these subpixels can become stuck or dead.
While “stuck” and “dead” are often used interchangeably for malfunctioning pixels, stuck pixels can be fixed, but dead pixels cannot be fixed.
A stuck pixel is a single color (red, green, or blue), while a dead pixel is just black.
There are also white pixels called “hot” pixels, which are principally similar to black dead pixels.
So, if you spot a stuck pixel on your laptop or phone screen, don’t go sending it for costly repairs or buying a new one just yet! Fortunately, there’s an incredibly simple fix that will likely get rid of any stuck pixels within 20 minutes.
1. The Software Method
We make use of screen-fixing software that plays a random combination of red, green, and blue hues at a very high rate in an attempt to correct the stuck pixel back into its usual cycle.![]()
There are several free screen-fixing software available on the Internet. We recommend using JScreenFix, Pixel Repair, or Dead Pixels Test and Fix.
Hazard Notice! Since screen-fixing programs display rapidly flashing lights in an erratic fashion, you’ll want to avoid looking at the screen when the program is running. People suffering from seizures or with a family history of epilepsy are strictly advised not to stare at the flashing screen.
i. JScreenFix (All Devices)
- JScreenFix is a web app that uses HTML5 and JavaScript in your browser. You don’t need to download anything.
- Launch the web app, drag the flashing box over the damaged pixel, and leave it there.
- The app can repair most of the stuck pixels in less than 20 minutes. Some users have reported that JScreenFix can even fix dead pixels!
- JScreenFix reports a success rate greater than 60 percent in restoring the stuck pixels. Try using it a couple of times if the first run wasn’t successful.
- It works great on Microsoft Windows, macOS, Android, and iOS.
ii. Pixel Repair (Windows)
- It is a handy tool that can help you locate stuck/dead pixels as well as repair them.
- The Dead pixels locator section is useful in identifying the stuck or dead pixels. It features eight color buttons that display different colors on the screen.
- After you have located the stuck pixel – choose the “Color mode,” press “Go!” and place the flashy window under the stuck pixel.
- Leave it on for 30 minutes and then check if the pixel is rectified. Try this a few times if necessary.
- The tool is lighter on system resources and runs faster.
iii. Dead Pixels Test and Fix (Android)
- It is a good app for fixing the stuck pixels.
- This free app features an interface that is both self-explanatory and easy to navigate. Just follow the onscreen instructions.
- Let the app run for at least 30 minutes before finishing.
 Repeat the process if necessary.
 - This app displays way too many intrusive advertisements. So, turn off the Internet before running the app.
Remember – The success rate of screen-fixing software is usually above 50 percent. So, it isn’t guaranteed to work every time.
2. The Manual Method
Should none of the above software tools resolve your pixel issue, there is one more method you can try.
It involves wielding the magic power of your hands.
i. Gently Massaging
- It may sound like voodoo sorcery, but gently massaging the stuck pixels seems to work like a charm.
- Get yourself an object with a blunt, narrow end, such as the tip of a pencil eraser or a phone stylus. You can even use the tip of a folded soft cloth.
- Using the object, apply gentle pressure to the area where the stuck pixel is present. Turn off your screen, wait for 5 seconds and turn it back on while still applying the pressure.
- The stuck pixel should be repaired back to normal.

- Repeat this process a few more times if necessary.
ii. Tapping
- Get yourself an object with a blunt, narrow end such as the tip of a pencil eraser or a phone stylus.
- Using the object, start tapping gently on the area where the stuck pixel is present.
- Increase the pressure on the taps gradually for 5-10 taps until the pixel corrects itself.
iii. Hot Wet Cloth
- Turn off your screen.
- Dampen a soft cloth with hot water.
- Put the hot cloth in a plastic bag and seal it. Make sure no water seeps out of the bag.
- Hold the bag against the stuck pixel and apply gentle pressure. Make sure not to hold the bag against the pixel for more than a few seconds at a time.
- Now, check the pixel. If it’s fixed, you’re done.
Note – Understand the risks associated with these methods. While many people have reported successfully repairing their stuck pixels by applying pressure on them or using heat, doing so at times can harm your screen and void warranty.
Check Warranty
If your device is new, check your manufacturer’s warranty for information about the return or replacement policy. Many manufacturers offer a repair or replacement for screens with a certain number of stuck or dead pixels.
So, your best option is to take advantage of the warranty rather than trying to fix it yourself.
RELATED:
- 10 Proven Tips: Solve The Mobile Phone Overheating Issue
- Check If Your Dry Cell Battery Is Good Or Dead In 3 Seconds
- Is It Bad To Leave Your Laptop Plugged In And Charging All The Time?
5 ways to fix a stuck pixel on the screen
How to remove a dead pixel on the monitor: What is and how to remove dead pixels?
What is a dead pixel?
How to remove a broken pixel on the monitor?
How to remove a dead pixel on a TV?
In the age of intensive development of technology and the Internet, almost every inhabitant of our country has at his disposal a computer, laptop or LCD TV.
However, the dynamic development and introduction of more and more new technologies into everyday life has a downside, as, for example, on popular and sought-after liquid crystal monitors, after a certain period of operation, non-working pixels may occur.
This phenomenon is called dead pixels, which can occur as a result of mechanical stress on the monitor, as well as for a number of other reasons.
In this article we will try to figure out why dead pixels occur and how to restore the monitor when they appear.
What are dead pixels?
Before we begin to tell what the phenomenon of dead pixels is, we suggest readers to understand what it is in general.
At its core, the pixel is a small dot on an LCD monitor responsible for displaying an image. Such a point contains three parts, called subpixels, which can be red, blue or green.
It is the pixels that create the full image on the LCD monitor and allow the owners of a computer or TV to watch movies, play computer games and work on a PC.
In turn, dead pixels are dots that constantly glow in the same color range or do not work at all, due to which the convenience of viewing pictures and videos on the screen is reduced.
It is worth noting that in some cases not the whole pixel may not work, but only one part of it, namely, one of the subpixels that we talked about earlier in the article.
If a pixel is completely dead, it is black and only noticeable if the monitor displays white or light images.
Main problems
The main problems of monitors - dead pixels, strong light, tint and uneven backlighting . We will look for them.
Checking for dead pixels consists in displaying solid backgrounds of black, white, red, green, yellow, cyan, violet and blue colors on the screen. This will detect defective pixels. In principle, white and black are enough for a basic check, but it is easier to see a contrasting “stuck” pixel on colored fills.
An ordinary magnifying glass is useful for searching for dead pixels. Seeing them on a 4K monitor, and even more so in a bright room, is a difficult task. Manufacturers allow a certain number of defects, but a principled buyer can always refuse a product if he finds at least one. If you find a dead pixel, do not panic in advance - it may just be a speck.
According to the ISO13406-2 standard (in Russia - GOST R 52324-2005), a certain number of defects is allowed for each class of monitors:
- 4 quality class — up to 50 hot pixels, up to 150 dead pixels and up to 500 others;
- Class 3 - up to 5 "burning", up to 15 "dead" and up to 50 pixels with other problems;
- Class 2 - up to 2 "burning", up to 2 "dead" and up to 5 "stuck" pixels;
- Class 1 - no dead pixels.
Most modern monitors are of the second class and usually do not have dead pixels.
Highlights look at a dark background at the maximum brightness level.![]() It is advisable to do this in the dark. It is better to use a dark blue fill, as some modern monitors can dynamically adjust the brightness of pixels against a black background. Do not doubt that there will be flashes, but they should not interfere with the consumption of dark content.
It is advisable to do this in the dark. It is better to use a dark blue fill, as some modern monitors can dynamically adjust the brightness of pixels against a black background. Do not doubt that there will be flashes, but they should not interfere with the consumption of dark content.
Worrying about backlighting, which is a characteristic feature of LCD matrices, uneven backlighting is often forgotten. If your light-colored monitor looks mottled or looks like a wrinkled rag, run, you fools! it is better to refrain from buying. At the same time, we are looking for pink and green spots - tint.
What are the most common types of dead pixels?
Most often, broken subpixels appear on LCD monitors, which are a dot constantly glowing in one color.
It is worth noting that such a dot can have a red, green, blue and yellow color scheme, in a professional environment this phenomenon is called “stuck pixels” .
If one of these pixels appears in a visible place on the screen, then it is really very annoying, especially if it has a red color.
In the event that three subpixels do not function correctly at once, then they look like a white dot on the monitor screen.
It must be said that due to failures, dead pixels can either appear or disappear on their own, while such dots can be present on the monitor immediately after making a purchase in the store, and they are far from always noticeable during a test view.
When you see dead pixels on your monitor, you need to understand that they can be of one of two types:
- Stuck pixels . This concept refers to the presence of a failure in one or more subpixels that glow in the same color, regardless of which picture is present on the screen. In the event that all three subpixels are damaged, then the dot will be white.
- Dead pixels .
This variety includes those monitor pixels that are broken and can no longer be resuscitated. Dead pixels are black, no matter what image or picture is on the screen. If such dots appear on the screen of your computer, laptop or TV, then the most reasonable solution in this situation would be to replace the monitor.
How can I fix dead pixels on my monitor?
Restoration of monitor pixels can be carried out both in the laboratory and at home, while in both cases two different methods can be used to carry out the resuscitation process:
- software ;
- mechanical .
Regardless of the chosen method, dead pixels of the monitor will be removed by changing the color gamut located next to the damaged object.
As a result of such an impact, a large amount of electricity is immediately supplied to the damaged pixel, as a result of which it starts working again in normal mode.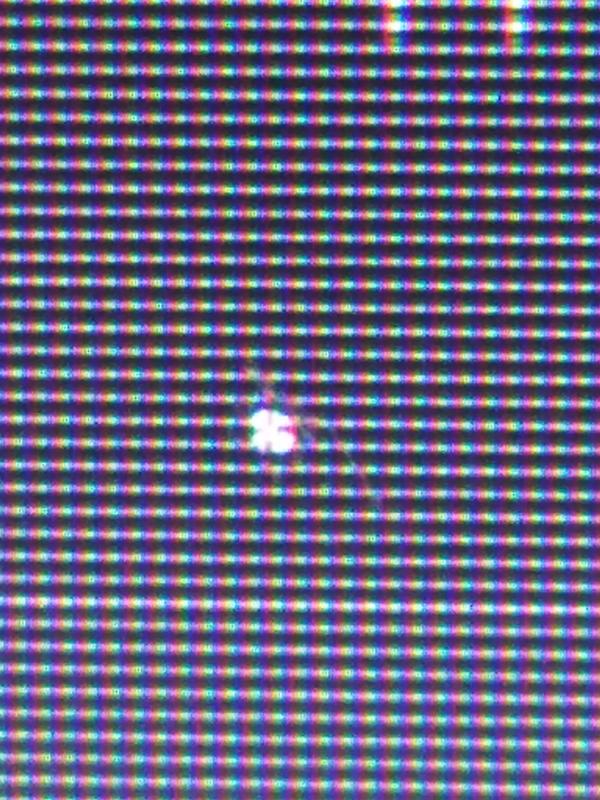
It is believed that using these technologies, the user gets the opportunity, without resorting to the services of professional masters, to restore 95% of dead pixels.
At the same time, having decided to independently remove the dead pixels of his laptop, computer or TV, the user must understand that the process of rehabilitation of each damaged point may require a different period of time. So, if the first time it was not possible to restore the damage, then it will be necessary to conduct a series of experiments in order to achieve the desired result.
At the same time, our readers need to understand the word "experiment" as changing the speed of changing colors, as well as the time of using the software.
Having carried out a complete restoration of the pixels on the screen, you need to understand that after some time, with intensive use of the monitor, another failure may occur and then the restoration will have to be performed again. At the same time, it may not be possible to restore the operation of some dead points.
Recommended reading: LCD monitor calibration program
UndeadPixel - find and remove dead pixels on the LCD monitor
.
The user can download this program by going to the official website of its developer. The download field from the official website of the developer of this software should be installed on the hard drive of your laptop or computer.
Speaking directly about the functionality of this program, it allows users to find and reanimate dead pixels on LCD monitors. Finding broken points present on the screen is performed by filling it with a certain color scheme.
So, for example, at the request of the user, the screen can be filled with the following colors:
- white;
- blue;
- lime;
- red;
- yellow;
- black.
Such an abundance of one-color screen fills is necessary for the software due to the fact that different broken points are better visible when a certain color gamut is present on the monitor. After the broken points present on the monitor have been found using this program, you can use it in the process of checking their performance.
Pixel removal by the program is performed using a specialized algorithm, however, in order to run it, the user needs to move the program cursor to the screen location where the problem point is located.
After the cursor has been moved, the user needs to decide on the recovery option:
- Flash windows . Selecting this option allows the user to tell the utility exactly how many problematic pixels it intends to fix.
- Flash size . Allows the user to specify the size of the square in pixels, which can be 1x1 or 5x5. Since it is quite difficult to specify a square that has a size of 1x1, it is best to specify a 5x5 square when resuscitating even one point.
- Flash interval . The interval for updating pixels by the restoration algorithm.
When choosing this option to remove pixels, the user must take into account that the shorter he sets the update time, the faster the speed will be.
After all the recovery parameters have been set, you need to run the program algorithm, and then move the squares that appear to the problem areas present on the screen.
If, after moving the square, the broken dot starts to change colors or blink, then this indicates that it has begun the recovery process, it just needs a certain amount of time for this.
In the event that the restoration did not give the desired results, then it is necessary to increase the speed of the algorithm and set a long time for the program to work.
It is worth noting that in some cases the recovery process can take up to 10-12 hours. The main feature of this software is that the user can continue to use the computer for other needs by carrying out the process of reanimating the screen using UDPixel.
Also know:
How and with what to clean the TV screen at home?
What should I do if my TV has no picture but still has sound?
JScreenFix - checking LCD TV for dead pixels
At its core, JScreenFix is not software, but a specialized site that allows you to remove dead pixels on a computer screen for free. Due to the fact that JScreenFix is not a program, but a website, it can be used to restore the screen of almost any device (including LCD TV displays) that have access to the world wide web.
In order to start the process, you need to scroll to the bottom of the site page on the screen and click on the “Launch JScreenFix” button.
It should be noted that the recovery algorithm using this site is almost identical to the UDPixel program. True, the site does not allow changing the parameters of the removal process. In addition, a user who has started treating dead pixels on his device using JScreenFix cannot simultaneously use a laptop or computer to solve other problems.
While restoring using JScreenFix, you need to move its cursor to those parts of the screen where there are non-working points. In the event that they are outside the window that is present in the browser, then you will need to start full screen mode. The full screen mode is launched by pressing the green color button.
It should be said that the creators of the site JScreenFix recommend their visitors to carry out mandatory preventive work to remove dead pixels in order to avoid their appearance. To do this, it is recommended to go to the site with a certain level of frequency and test the monitor.
Dead Pixel Buddy
This is another online tool. It offers 12 colored tiles for testing dead or stuck pixels. Click on one of the tiles to fill the entire browser window with the corresponding color. Press F11 to go full screen, then scroll through the colors using the left and right arrow keys. When you have checked all 12 colors, press F11 again to exit full screen mode.
If you find a stuck or dead pixel, use UDPixel or JScreenFix to fix the problem.
Bad Crystal - dead pixel removal and prevention
Bad Crystal is a powerful, modern and functional software that has shareware distribution.
In order to start using this program to restore broken points of your monitor, the user needs to visit the official website of the program and download its free version for a period of 30 calendar days or purchase the full version of the utility.
It is worth noting that the version offered by the creators for free download has very limited functionality, and therefore it lacks the most modern and technological recovery methods.
You should start working with this utility by selecting the device that needs to be repaired. Such a device can be a smartphone, tablet, computer monitor or plasma TV.
For tablets and smartphones, the program creates a specialized file containing video of a certain resolution.
In order to perform broken point recovery on a TV, you need to write this file to a flash card and then activate it on the device using the “Full Screen” function.
If dead pixels need to be restored on a conventional computer motor, then in this case the “Computer Monitor” button should be selected in the program.
In order to get acquainted with the additional menu present in this software, you need to move the mouse cursor to the top of the software.![]()
It is worth saying that the program has four modes:
- CCM,
- SMF,
- CFV,
- PPM.
At the same time, if you install the free version of this utility, then only two modes will be available to the user, namely CCM and PPM.
And it is these two modes, which are absent in the free version of this software, that allow you to remove most of the problem points.
If restore by default, then the program will prompt the user to use the CCM mode.
After activating this mode, the user must press the "Launch" button, and then move the cursor to the area of the screen where there are damaged areas.
After starting the mode, you must wait until 15 minutes have passed and check if there are any problems on the screen. In the event that it was not possible to restore the pixels, you should increase the speed of this software by clicking on the “Speed Up” button and let the program carry out one more recovery procedure.
According to the assurances of the developers, the program they created not only makes it possible to restore 99% of dead pixels, but also allows users to remove color stripes and spots from monitors.
However, such deletion is only possible if such stripes represent a failure of a large number of pixels. In addition, the creators of this program recommend that users who have performed point recovery using their utility, to prevent the occurrence of dead pixels in the future, activate the automatic prevention procedure.
Typically, this process is carried out twice a month and prevents the formation of new malfunctions.
Test programs
All monitor test programs are very similar. Once the most famous was the Nokia Monitor Test. However, finding a version compatible with modern operating systems proved difficult. Among the programs popular today, one can note the built-in diagnostic utility for the monitor in AIDA64.
Dead Pixel Tester is focused on finding dead pixels. The program can be downloaded for free, it does not require installation. After launching the application, select the mode in the "Pattern" section and the fill color using the "Color Selector" button. Everything is simple and intuitive.
IsMyLcdOk also does not require installation. During the launch, an instruction appears, and the tests themselves are activated by the buttons with numbers and the F2-F5 keys. The list of available testing modes includes the display of colored stripes, rectangles, vertical or horizontal lines.
Hardcore gamers who are afraid of sillage can additionally advise EIZO Motion Blur Checker . A small program will check if the matrix smears the picture. For the same purpose, video clips containing dynamic scenes (sports, games, etc.) are used.
If you have the Internet, use simple and convenient online services with many test options - monteon. ru , tft.vanity.dk or EIZO Monotor Test.
Carrying out the restoration of broken screen pixels using a mechanical method
In the event that after the restoration of broken points it was not possible to correct the situation, then the next option would be to try to reanimate them using a mechanical method.
It is worth saying that this method is quite risky and it is best to entrust the restoration of broken monitor points to professionals.
However, if for some reason you are unable to call the wizard to diagnose the device, then you will need a regular cotton swab.
Taking this cotton swab, you need to use it to start making massage movements of the place on the screen where there is a broken dot.
During this mechanical impact on the monitor, try to press with the maximum level of accuracy, but at the same time so that small streaks begin to appear on it.
It is necessary to perform such a mechanical action on the place where there is a dead pixel for thirty minutes or until the moment when it starts to work normally again.![]()
In the event that after such an impact the pixel began to function normally again, it would not be superfluous to perform screen prevention using the Bad Crystal program, which has a free download mode and a fairly simple interface.
If, after mechanical pressure, the point still does not want to function normally, you can try to start the removal process with Bad Crystal and, at the same time, work on the problem area of the screen with a cotton swab.
In this case, it is necessary to carry out a mechanical impact on the damaged area of the monitor for 20 minutes, and then leave the program to work for 12–15 hours.
Additional tests
If after looking for dead pixels your eyes are still unable to adequately assess reality, you can do a few more tests.
Color accuracy measures how well the screen renders primary colors and tones.
Transitions between colors should be displayed without steps and drops.
You can see the gradients for the primary colors.
The correctness of the "geometry" of the matrix will help to check grids, straight lines and "chess".
How I removed dead pixels 💻
Summer has begun, the heat and new jokes have begun. I have a one-room apartment and, think for yourself, I decided to put a second computer in the kitchen with a 19-inch TFT monitor! And where does the summer and dead pixels? And here's the thing. 36 degrees outside, stove, oven and high humidity did their dirty work - a couple of dead pixels appeared on the monitor.
Dead pixels are permanently lit or vice versa - non-working dots or parts of a dot (subpixels) on the monitor. If the pixel does not work at all, then it always looks black and is only noticeable on white and light colors. This is the most harmless type of dead pixels, but it is almost impossible to treat.
The most common dead sub-pixel is when a bright red, blue, green, yellow, cyan or magenta dot is constantly lit. They are also called "stuck" pixels (stuck pixels). If such a pixel pops up in a prominent place, it is very annoying, especially red 🙂 If all three subpixels are buggy at once, then a white dot will glow on the screen.
By the way, defective pixels can either appear or disappear on their own. On my main monitor from the purchase itself, there were three multi-colored dots in the middle of the screen. When buying, I either did not notice them, or they appeared already at home, I don’t know. But I didn’t bother about this, because. they were absolutely invisible to the eye, if you do not peer. In 4 years of working with this monitor, I never noticed them, although they were in the middle of the screen.
I think this is due to the fact that my monitor is on an MVA matrix, and not on the common TN. Probably, the specificity of the matrix is such that minor defects are not noticeable. So, I recently decided to check if these pixels can be removed in a new way. I checked and they weren't there! We all left somewhere in formation 🙂
Contents
Programs for repairing dead pixels
It is not worth talking about high-tech methods used only in laboratories. Is it possible, in principle, to get rid of multi-colored dots at home? Yes it is possible! And I made sure of it myself. There are two ways to eliminate dead pixels - software and mechanical.
Restoration occurs due to fast color change of adjacent pixels. Thanks to this process, a large amount of energy is supplied to the sub-pixels and they come to life. This technology promises to restore from 55% to 90% "stuck pixels". True, each case may require a different amount of time, you will have to experiment if you can’t remove the damaged pixels from the raid. Experiments mean changing the speed of changing colors and the running time of the program.
The repaired pixel may get stuck again after a while, especially in hot weather. Then the treatment process will need to be repeated. In some cases, such a pixel cannot be completely cured.
UndeadPixel will suit most
Go to the official website and download the program installer. I recommend the installation version, not the portable version.
Download UDPixel
In the main window of the program, it is proposed to start by finding dead pixels by filling the screen with solid colors: red, lime, blue, white, black and yellow. Different dead pixels will be visible on different backgrounds. If you already know where your pixels are, then we immediately proceed to recovery.
UDPixel works like this: a square appears in which colors change rapidly, i.e. the pixel recovery algorithm works there, and we need to move this square to the problem area of the screen. In the "Undead pixel" section, you need to set the parameters:
- Flash windows - the number of squares, i.e. how many problem areas are you going to treat at the same time
- Flash size — size of one square in 1x1 or 5x5 pixels. Since it is very difficult to set a 1x1 square to exactly 1 pixel, a 5x5 area will do to restore even one pixel
- Flash interval — pixel update rate by algorithm. The shorter the time, the faster the speed.
 Maximum speed at 3ms.
Press Start and move the flickering square(s) to the defective places, see the video below. When the pixel starts flashing, then this is already an application for victory, just leave it for a longer time. If everything is unchanged, then select the maximum speed and wait until the pixel disappears. In the worst cases, it can take 10 hours, there is no point in waiting any longer.
The peculiarity of UDPixel is that during the restoration of pixels, you can continue to work if the squares are not large and do not interfere.
JScreenFix for the browser
This is not a program, but just a website, a free service on the Internet. Thanks to this, JScreenFix can be run on any device with the Internet: computer, laptop, tablet, MacBook or LCD panel.
Go to JScreenFix
Scroll down the page and press the "Launch JScreenFix" button. The JScreenFix script restores dead pixels in the same way as UDPixel, only without the ability to change the parameters, and it will not work at this time at the computer.
You need to move the iridescent square to the problem pixels, and if they are outside the browser window, then go to full screen mode using the green button. Look at the video how Undead Pixel and JScreenFix work:
Watch this video on YouTube
The manufacturers of these programs recommend doing preventive maintenance to your monitor, occasionally launching a “recovery process”. I don’t know how justified it is to spend my attention on this, but for plasma panels this can be really useful.
Bad Crystal — combine harvester all in one
On the site you can both download the program and buy it. The free version runs for 30 days in limited functionality mode, which does not work with more advanced technologies. You can find a version without restrictions on the Internet 😉
Download Bad Crystal
The program starts by selecting a device: computer screen, mobile phone, game console or plasma panel.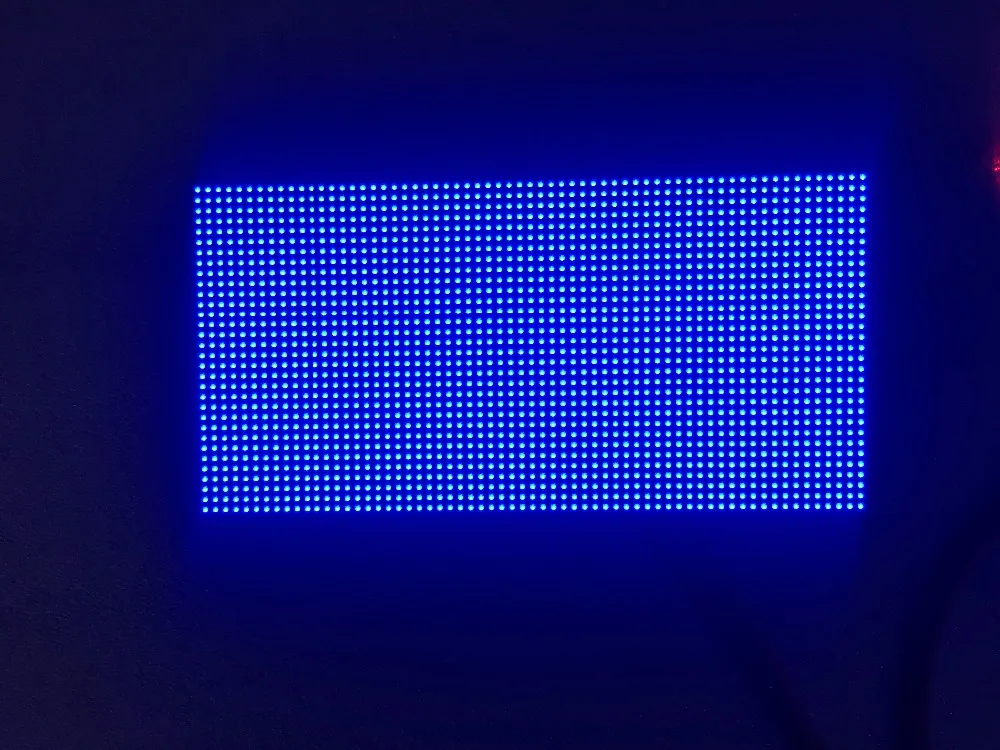
For mobile phones and game consoles, a video file is generated for the selected resolution. It will need to be played in repeat mode on a smartphone. For the TV, you can burn a DVD-ROM or flash drive with the finished video, or connect it to a computer and run it in Full Screen mode.
If you have a regular monitor or laptop, select "Computer Monitor". To display the additional menu, move the mouse to the top of the window. Four modes are available here: Common Clearing (CCM), System Modified (SMF), Complex Force (CFV), Personal Protection (PPM). The free version only works with CCM and PPM. The remaining two modes should provide a higher percentage of recovered pixels. CCM is selected by default.
Press "Launch" and move the window to the area of dead pixels. We wait 5-10 minutes and check. If the point remains, then increase the speed using the "Speed Up" button, which appears if you move the mouse to it, and wait another 10-15 minutes.
The developers claim that their algorithms can not only treat pixels, but also eliminate spots on the screen and even stripes. But this is in the case when these are simply clusters of pixels that do not work correctly. Watch the video:
Watch this video on YouTube
Further, in order for the pixels not to get stuck again, it is recommended to turn on the automatic prevention mode - PPM. In this mode, the colors on the monitor change over time. The process starts 2-3 times a month when no one is working at the computer.
Mechanical method
I have not tried this method, but I have seen many reviews in its favor. If the programs could not cope, then it's time to massage the monitor 🙂 Exactly. Take an ear stick and start doing massage on the site of a broken pixel. Just press not very hard, but so that stains appear, and massage the causal place. The case requires perseverance, as it may take from 10 to 30 minutes of work.
If it worked out - cheers! I congratulate you, you can “polish” this case with Bad Crystal. And if the pixel stubbornly does not want to recover, then you can try to run the program and simultaneously massage the place for about 15 minutes, then leave the program to work for 10 hours.