Camera icon aesthetic black
10 iPhone Camera Settings Every Photographer Should Use
The iPhone’s built-in Camera app is loaded with amazing features to help you take stunning photos. In this tutorial, you’ll discover 10 iPhone camera settings that will instantly improve your photography. Read on to learn how to use these iPhone camera settings to shoot incredible photos every time you press the shutter!
Table Of Contents: How To Use iPhone Camera Settings
Click any title link below to go straight to that section of the article:
1. Set The Focus For Tack-Sharp Photos
2. Adjust Exposure To Achieve Perfect Brightness Levels
3. Switch Between iPhone Lenses To Zoom In & Out
4. Use Night Mode For Unbelievable Low Light Photos
5. Blur The Background In Your Photos With Portrait Mode
6. Use Portrait Lighting To Add Studio Light Effects To Your Photos
7. Activate Burst Mode For Jaw-Dropping Action Shots
8. Shoot Live Photos To Preserve Those Special Moments
9. Set The Timer For Hands-Free Shooting
10. Switch On The Grid In iPhone Camera Settings For Better Compositions
1. Set The Focus For Tack-Sharp Photos
The first step to shooting stunning iPhone photos is to ensure your subject is in sharp focus.
If the subject isn’t in focus, you won’t be able to capture its intricate detail.
A photo with an out-of-focus subject will look like an amateur snapshot. And it won’t have the impact you’d hoped for.
Fortunately, the iPhone Camera app makes it super-easy to set focus.
But unless you know what you’re looking for, you might not even realize the camera has a focus setting.
It’s one of those hidden iPhone camera features that most people don’t know about.
So, how do you set focus on the iPhone camera?
Simply frame your shot, then tap the screen where you want to set focus. A yellow box will appear to indicate the focus point.
When you take the photo, the area that you set focus on will appear crisp and sharp.
Setting the focus point is especially important when shooting close-up photos.
Why? Because when the camera is close to the subject, the depth of field in the photo will be shallow.
A shallow depth of field means only a small portion of the image is in focus. Anything in front of or behind the focus point will appear blurred.
Setting focus is one of the best iPhone camera tricks you can learn.
And it’s one of the easiest iPhone camera settings to use.
It only takes a second to set focus. But it will make a huge difference to the quality of your photos.
2. Adjust Exposure To Achieve Perfect Brightness Levels
Exposure refers to the brightness of an image.
If you don’t get the exposure right, your photo will either be too bright (over-exposed) or too dark (under-exposed).
If the photo is under-exposed, it will lack detail in the shadows (dark areas). And the highlights (bright areas) may appear dull.
If the photo is over-exposed, the highlights (bright areas) may appear completely white with no detail at all. And the shadows will be overly bright.
Some exposure problems can be fixed in editing (such as brightening up shadows). But you’ll never be able to bring back detail in the over-exposed whites.
So it’s important to get the exposure right in the camera.
Adjusting exposure is easy. But, like the focus feature, exposure is one of those hidden iPhone camera settings. And most people don’t even realize it exists.
So, how do you adjust exposure in the Camera app?
First, you need to tap to set focus on your subject.
Then, simply swipe up or down on the screen to adjust exposure.
Swipe up to make the image brighter. Or swipe down to make it darker.
In general, you should aim to capture as much color and detail as possible. Try to avoid over-exposed highlights and under-exposed shadows.
However, in some cases, you might want to deliberately under or over-expose your photo.
For instance, to capture a silhouette photo, you’ll need to under-expose so that your subject appears completely black.
Before you take a photo, always check whether the brightness levels look good.
If the image looks too bright or too dark, adjust the exposure before you press the shutter button.
3. Switch Between iPhone Lenses To Zoom In & Out
Do you have one of the dual-lens or triple-lens iPhones?
If so, you can zoom in and out on your scene by switching between iPhone camera lenses.
The iPhone 11 Pro and iPhone 11 Pro Max have three lenses: Ultra Wide, Wide, and Telephoto.
The iPhone 11 has two lenses: Ultra Wide and Wide.
Older dual-lens iPhones (iPhone XS, XS Max, X, 8 Plus, and 7 Plus) have the Wide and Telephoto lenses.
If you have a single-lens iPhone, you’ll just have the standard Wide lens.
So, how do you switch between lenses on the dual and triple-lens iPhones?
In the iPhone Camera app, you’ll see some numbers at the bottom of the viewfinder. These are the Zoom options that let you switch between lenses.
0.5x is the Ultra Wide lens. 1x is the Wide lens. And 2x is the Telephoto lens.
To use the Ultra Wide lens, tap 0.5x.
To switch to the Wide lens, tap 1x.
For the Telephoto lens, tap 2x.
You know how to switch between lenses. But which one should you choose for your scene?
The 1x Wide lens has a moderately wide field of view. This makes it suitable for most shooting situations.
The 0.5x Ultra Wide lens has an extremely wide angle of view. This allows you to capture super-wide photos that include much more of the scene. It’s great for shooting wide landscapes, cityscapes, and architecture.
The 2x Telephoto lens allows you to capture a closer view of distant objects. Use it to zoom in when you can’t physically get closer to your subject.
As you can see, the same scene can look very different when captured with the Wide, Ultra Wide, and Telephoto lenses.
Having the option to zoom in and out allows you to be more creative and versatile when shooting.
4. Use Night Mode For Unbelievable Low Light Photos
Do you struggle to take good photos when you shoot at night? Do your low light photos look dull and grainy?
Well, if you have the iPhone 11, iPhone 11 Pro, or iPhone 11 Pro Max, night photography will never be a problem again!
The iPhone 11 Camera app has an incredible new feature called Night mode.
Night mode uses intelligent camera software to capture more color and detail in your night photos.
So, how do you use Night mode on iPhone 11?
First, ensure you’re shooting with either the 1x Wide lens or 2x Telephoto lens. (Night mode doesn’t work with the 0. 5x Ultra Wide lens.)
Night mode will come on automatically whenever you shoot in low light.
If the light is fairly low (but not very dark), the Night mode (moon) icon will be white.
The white icon means that Night mode is available to use, but it’s not yet active. To activate it, tap the Night mode icon so it appears yellow.
If the scene is very dark, Night mode will activate automatically (the icon will appear yellow).
When Night mode is active, you’ll see a number on the yellow Night mode icon. This number indicates the exposure time, e.g., 1 second, 3 seconds, 7 seconds, etc. This is the time it will take to capture the image.
The Auto exposure time is the time recommended by the camera.
However, you can increase the exposure time if you wish. Simply drag the Exposure Time slider right to the Max setting.
If you would prefer not to use Night mode, drag the slider left to the Off setting.
When you’ve selected the Night mode exposure time, tap the shutter button to take your shot.
Hold your iPhone really still until the exposure is complete. If you move the camera, your photo might not be sharp.
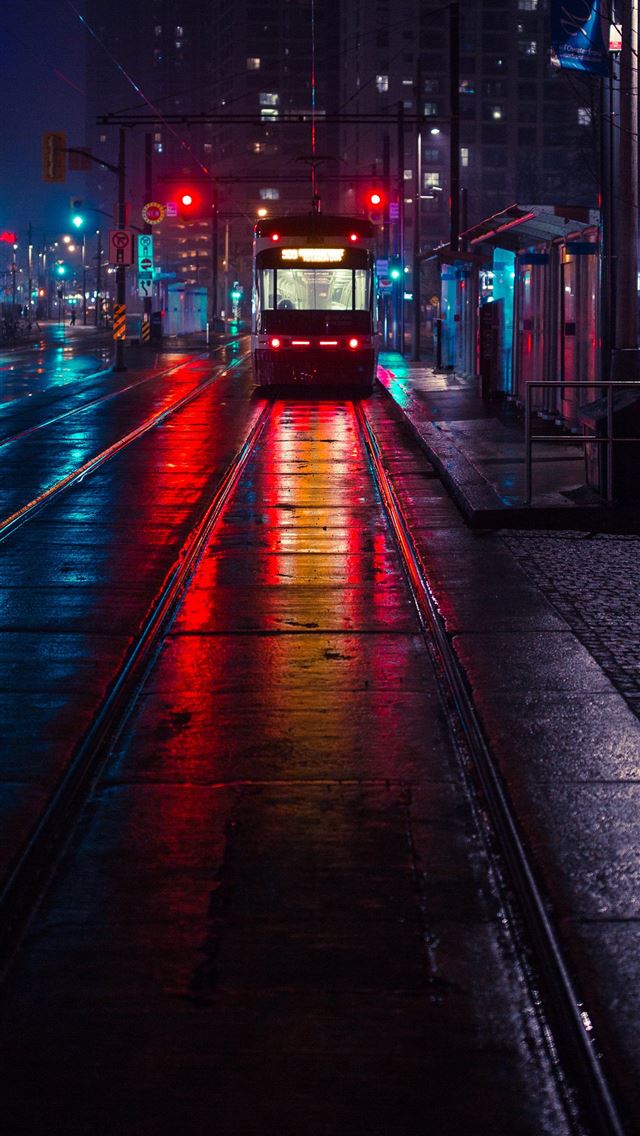
The above photo was taken using Night mode. It was taken at night with only a couple of street lamps illuminating the scene.
For comparison, below is the same building taken without Night mode.
As you can see, Night mode allows you to capture a brighter image with vibrant colors and sharp detail.
So, if you have one of the iPhone 11 models, don’t be afraid to shoot at night. You’ll be amazed at the results!
Note that if you’re shooting in medium to low light, and Night mode isn’t activated, your camera may use Deep Fusion instead. Deep Fusion is an automatic camera feature (you can’t control it) that captures more texture and detail in medium to low light scenes.
5. Blur The Background In Your Photos With Portrait Mode
Have you ever wondered how to blur the background in your portrait photos?
With the iPhone camera, it’s easy. You just need to shoot in Portrait mode.
Portrait mode is available in the built-in Camera app on the following iPhones:
iPhone 11, iPhone 11 Pro, iPhone 11 Pro Max, iPhone XS, iPhone XS Max, iPhone XR, iPhone X, iPhone 8 Plus, and iPhone 7 Plus.
Portrait mode uses depth-effect software to blur the background in your photos.
This means you can easily create professional-looking portrait photos with your iPhone.
So, how do you use Portrait mode?
First, swipe across the shooting modes at the bottom of the screen and select Portrait.
Ensure your subject is between two and eight feet away. If they’re too close or too far away, the depth-effect won’t work.
When Portrait mode is ready, you’ll see the words Natural Light in yellow.
Now, press the shutter button to take a stunning portrait with a gorgeous blurred background!
But what if you change your mind and decide the photo would look better without the blurred background?
The iPhone makes it easy to remove the depth effect after taking a photo.
To remove the blurred background, open your portrait photo in the Photos app, then tap Edit.
Tap the yellow Portrait icon at the top of the screen to remove the blur. You can re-apply the blurred background at any time by tapping the Portrait icon again.
Tap Done to save the changes.
If you have the iPhone 11, 11 Pro, 11 Pro Max, XR, XS, or XS Max, you can go even further with the Portrait mode options.
On these iPhones, you can control the strength of the background blur… after you’ve taken the shot.
First, you need to open your portrait photo in the Photos app, and tap Edit.
Next, tap the f/number icon at the top left.
The Depth slider will appear beneath your photo. Drag the slider left or right to make the background blur stronger or weaker.
Tap Done to save the changes.
Portrait mode allows you to take photos with beautiful, blurred backgrounds.
But there’s even more to Portrait mode than this!
Read on to find out how to make your portrait photos even more stunning…
6. Use Portrait Lighting To Add Studio Light Effects To Your Photos
Do you want to add professional studio light effects to your portrait photos?
You can do just that with the iPhone’s Portrait Lighting feature.
You can apply different lighting effects when shooting in Portrait mode. But it’s easier to experiment with the effects after you’ve taken the photo.
So, once you’ve taken a photo with Portrait mode, open it in the Photos app, and tap Edit.
Ensure the Portrait Lighting (hexagon) icon is selected at the top left. The Portrait Lighting icons will be displayed beneath your photo.
Swipe across the Portrait Lighting icons to see the different effects, e. g. Studio Light, Contour Light, Stage Light, etc.
Use the slider at the bottom of the screen to adjust the strength of your chosen light effect.
Tap Done to save your edits.
Portrait Lighting offers a powerful way to quickly enhance your portrait photos. And it can really make your subject stand out!
7. Activate Burst Mode For Jaw-Dropping Action Shots
Do you struggle to take good photos of moving subjects?
Do you end up pressing the shutter button too early or too late, missing the perfect moment?
It doesn’t have to be this way!
Your iPhone camera has a little-known feature called burst mode.
And once you know how to use it, you’ll be able to take perfect action shots every time!
Burst mode takes around ten photos per second. This gives you the best chance of getting at least one photo of your subject in the perfect position or pose.
So, how do you activate burst mode on your iPhone?
It’s actually really simple.
On iPhone 11, 11 Pro, or 11 Pro Max, slide the shutter button to the left. The camera will keep taking pictures until you release your finger.
On iPhone XS and older, simply hold down the shutter button (don’t slide it left).
Once you’ve shot a burst, you can choose the best images to keep and discard the rest.
To select the best photos, open the Photos app. Find your burst and tap to open it.
Tap Select at the bottom of the screen. Scroll through the photos and tap on the ones you want to keep. Then tap Done, and choose to Keep Only Favorites.
Burst mode will instantly improve your iPhone action photography. You should use it whenever there’s any movement or unpredictability in the scene.
It’s great for photographing children and animals. And it’s perfect for street photography or capturing people walking, running, jumping, or cycling.
8. Shoot Live Photos To Preserve Those Special Moments
The iPhone Live Photo feature brings your pictures to life by creating a 3-second moving image.
Rather than freezing a moment in time with a still photo, use Live Photos to capture movement and sound.
Press Play on the video below to see how this Live Photo captures the movement and sound of the beach.
Live Photos are perfect for preserving those special little moments that you couldn’t capture in an ordinary still photo.
Use it when photographing moving subjects, children, water, fun moments, or any scene that has interesting sounds.
To shoot a Live Photo, ensure the Live Photos icon at the top of the screen is set to on. (If the icon has a line through it, it’s off.)
Then simply press the shutter button to capture your Live Photo.
Remember that the camera automatically captures 1. 5 seconds of video before and after you take the shot. So keep the camera still for a few seconds before and after pressing the shutter.
To play back your Live Photo, open it in the Photos app, then hold your finger down on the screen.
In the Photos app, you can apply different effects to your Live Photo, such as Loop, Bounce, and Long Exposure.
To access these effects, open your Live Photo then swipe up.
Swipe across the effects beneath your photo, and tap the one you want to use.
Loop turns your Live Photo into a continuous video loop. Bounce makes your Live Photo play forwards and then in reverse.
Long Exposure creates a slow shutter effect, blurring any movement that was captured. This is perfect for creating a silky smooth effect on rivers and waterfalls.
If you’d prefer to convert your Live Photo to a still image, tap Edit at the top of the Live Photo.
Tap the Live icon at the bottom of the screen. Then tap the yellow Live icon at the top of the screen.
The Live Photos animation and sound are now turned off. But you can convert it back to a Live Photo at any time by tapping Live at the top of the screen.
9. Set The Timer For Hands-Free Shooting
The self-timer in the Camera app lets you set a delay between pressing the shutter button and the photo being taken.
This means you can shoot hands-free… and appear in the photo yourself.
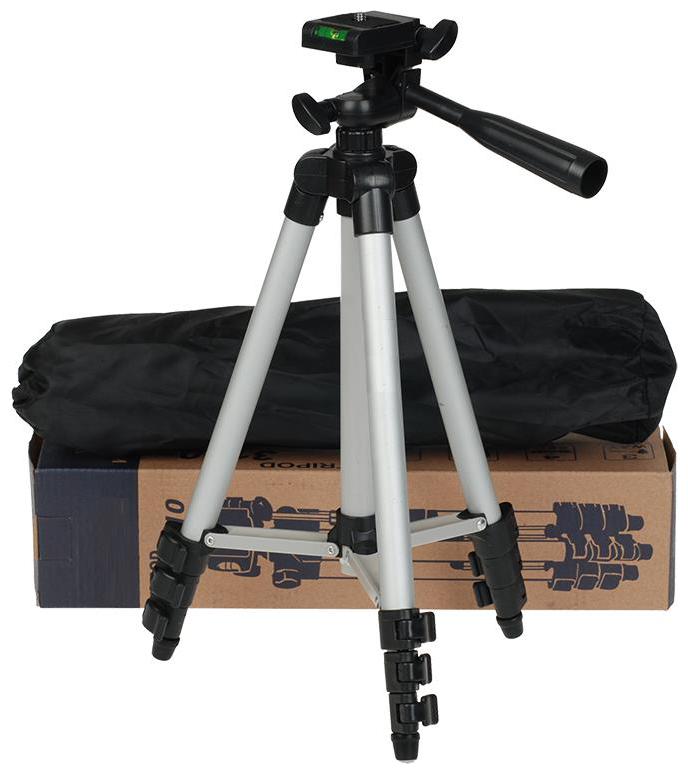
First, set your phone on an iPhone tripod (or any solid surface) and compose your shot.
In the iPhone 11 Camera app, tap the up-arrow to display more iPhone camera settings at the bottom of the screen. Then select the Timer icon.
On iPhone XS and older, you’ll find the Timer icon at the top of the screen (as shown below).
Select either a 3-second or 10-second delay.
When you press the shutter button, the camera will start counting down the seconds.
Now you can get into position in front of the camera.
When the shutter fires, the camera will take a burst of 10 shots.
You can then choose the best photos from the sequence and delete the rest (just like you do when selecting your favorite burst mode photos).
Using the timer means you never have to take a boring photo again.
You can always add interest to your photo by appearing in the scene yourself!
10. Switch On The Grid In iPhone Camera Settings For Better Compositions
Did you know you can display gridlines in the iPhone Camera app?
These gridlines will help you create stunning compositions that really catch the viewer’s eye.
You can use the camera gridlines to:
- Keep the horizon level in landscape photos
- Ensure lines are straight or level in architecture photos
- Divide the frame into three sections for a classic rule of thirds composition
- Compose a perfectly symmetrical photo
To turn on the grid, open the Settings app, then select Camera. Ensure the Grid option is switched on.
Close the iPhone camera settings, then open the Camera app. You’ll see two horizontal and two vertical lines in the viewfinder.
Use these lines to help you position the main elements in the scene for a pleasing composition.
Position your main subject on one of the vertical gridlines (or where two lines meet) to create an off-center “rule of thirds” composition.
Or align the horizon along the top or bottom gridline. This will ensure the horizon is perfectly level.
And your composition will be more pleasing than if you’d placed the horizon across the middle of the frame.
So, switch on the camera grid. And start using it to compose jaw-dropping iPhone photos!
13 Best Apps for Black and White Photos in 2022 (Updated)
The best apps for black and white photos can completely transform your B&W photos! Black and white is a classic look in photography that highlights line and light.
In this article, we went looking for the best black and white app for photography. Some apps turn your phone into a black and white camera. Others let you convert color images to monochrome. Let’s start with the apps that let you see the world in black and white.
The Best In-Camera Apps for Black and White Photos
First, we look at some apps that create black and white photos. Each of these apps creates a black and white aesthetic in camera.
1. IOS & Android Native Cameras
The native cameras on both IOS and Android phones allow you to make black and white photos. Click the filter icon. It looks like three connected circles. Depending on your phone, you will have one or more monochrome filters. The iPhone has three filters—Mono, Silvertone, and Noir. The newer iPhones have two more black and white options in the Portrait mode—Stage Light Mono and High-Key Light Mono. These options work best when taking portraits.
The native camera on your phone may not be the best black and white app, but it is available without a download. Let’s take a look at some better black and white photo apps.
2. Camera1
IOS
Camera1 is our favorite black and white photography app. With this app, your phone becomes a manual black and white camera. You can change exposure and manually adjust focus. Whenever you change exposure settings, a histogram pops up to guide your choice. Red zebra stripes appear if you are overexposing. A magnifying glass helps you focus. You can lock in the settings to take a series of black and white images.
The Camera1 sliders let you manually control exposure and focusYou can shoot in various RAW formats. These keep color information as well as monochrome JPEG. When you apply color filters to your photos, you can see the effect in real time. This shows you exactly how each filter affects the colors. The Zen mode (Z) hides all the controls to let you focus on composition.
Vistax is by the same developer as Camera1. The app includes many presets, including both color and black and white. With Vistax, select the preset, and you decide how much of the effect you want. The app goes beyond the presets. It allows you to control your camera’s exposure settings manually. The price of these apps is high in comparison to the others on this list, but you get much more with your purchase.
3. Hypocam
IOS | Android
Hypocam is a free black and white app that comes with five black and white filters and textures. You can buy more in the app. On top of the basic filters, you can add a color filter to emphasize or minimize certain colors in the scene. Once you have taken the photos, you can apply texture, grain, vignette, and fade to get the look you want.
Hypocam also works as a black and white filter app. You can apply the filters to photos in your camera roll and edit the effect in the app. This app is an easy and flexible tool. You can expand your filter collection, and the editing functions are simple yet powerful.
4. Black and White Camera
IOS | Android
Black and White Camera lets you take photos with film effects. Some filters simulate the look of damaged film with flares, discolorations, and scratches on negatives. If you are going for an old film vintage look, this is your app.
There are many filters included, and you can buy more in-app. The app works with your phone’s camera. But you can also apply the filters to images on your camera roll. The free version of this app watermarks your images and popup ads can distract from your image-making. If you like this app, you will want to upgrade to the paid version.
Black and White Camera interface showing four of the filters5. Argentum Camera
IOS
Argentum Camera simulates the look of famous black and white photographers. These include Ansel Adams and Henri Cartier-Bresson. The app is free to download and comes with the Ansel Adams filter. You can buy others in-app. Read the introductions for each of the filters. There is a lot of information about the photographer and how they achieved their specific black and white aesthetic.
There are many adjustments hidden within the app. You can adjust the exposure, shoot in Live mode, use a flash or constant light, change orientation and aspect ratio, and choose to shoot in JPEG or RAW. In a nice twist, the DBLEXP setting captures allows you to layer photos in a double exposure.
Double exposure photo created in Argentum6. BlackCam & BlackCam Pro
IOS | Android
BlackCam by developer Pierre Gougelet lets you make a black and white photo by using adjustable filters. The filters simulate classic black and white looks, including color filter effects. There are a few pro filters, but most come free in the app. Click the plus button, and you have even more control over your photos. Use sliders to change exposure, vignette, fade, and the amount of desaturation.
7. Lenka
IOS | Android
Lenka is a free black and white app that turns your phone into a black and white camera. Using sliders, you can control exposure, white balance, and contrast. You can also manually adjust focus. Flash photography is disabled, as are the phone’s many lenses. On the list of apps for black and white photos, this one is a simple, no-fuss option.
In the Lenka interface, sliders for exposure, focus, white balance, and contrast appear on the right side of the screen8. Provoke Camera
IOS
Provoke Camera is a popular film simulator app that includes about a dozen ’60s-style film effects. These are based on the styles of famous Japanese photographers like Daido Moriyama. Their names are not very descriptive. On the developer’s website, you can get the description of each simulation. This would be very helpful to include in the app. For instance, HPAN is High Contrast. h200 is High Contrast with Blur.
You can change the exposure of your photo. With a double-tap on the screen, you can change the focus point. With this app, you can make photos, and you can apply the film effects to photos already in your camera roll.
Provoke Camera app interface showing two of the filters9. Hipstamatic X & Classic — Vintage Camera
IOS X | IOS Classic
Hipstamatic X is the free version of this vintage camera app. The developers also make a TinType app and Hipstamatic Classic.
The entire app experience is retro. The graphics look come straight out of the ’60s. You can select a look or choose an analog camera simulation. You can also build your own vintage camera simulation with different lenses and film options.
After you take a photo, you can apply various filters. There are only a few free options in the app. Most options are only available to club members who pay a subscription. Hipstamatic is not only a black and white app. But if you like a vintage look to your images, Hipstamatic will help you get it.
Apps for Converting Color to Black and White
Editing apps convert images you have taken in color to black and white. With these apps, you do not have to think about composing in black and white when you take the photo. You can use a familiar camera app and decide on the monochrome style later.
10. Snapseed
IOS | Android [Free]
Snapseed is a popular photo editing app. It is one of the best choices when converting color images to black and white. The app walks you through the process of editing your photo starting with a filter, then a look.
The number of editing tools is almost overwhelming. You can change nearly any aspect of your image. Tools like Vintage, Retrolux, and Noir, and Grainy Film will give your image an old-fashioned look. You can add text, frames, and even a second image as a double exposure. There is a lot of editing power in Snapseed and the app is free.
11. Dramatic Black & White
IOS | Android
Dramatic Black & White is a powerful photo editing app by JixPix Software. Select an image from your phone to start applying filters. The purchased app comes with dozens of black and white filters, including many infrared filters.
A randomize button lets you try out different ones to see what works best. You can also customize the filters. You can change color tone, softness, brightness, and contrast. You can also add color filters and grain. What makes this app unique is the ability to add spotlights. These are extra areas of light and shadow that you can resize, tilt, and strengthen as you like. You can layer several spotlights for a more complex effect.
12. Carbon – B&W Filters & Effects
IOS
Carbon by Livintis W. L.L. is an elegant black and white app. You can edit your own photos or demo portraits. The app focuses on portraits, but you can use editing tools on any style of photograph.
Start with the included monochromatic filters. You can adjust how much of the filter shows through. The app has a full editing suite. You can adjust exposure, sharpness, vignettes and many other settings. You can even add a tilt-shift effect to your image. You can also add grain, dust, light leak, and lens flare textures and a border.
Some of the effects are free. Others are available to buy through the app. The filter packs can be pricy. But this is one of the best apps for black and white photos. You can only export your own images, but the demo portraits will help you edit like a pro.
Demo portrait edited in Carbon – B&W Filters & Effects app13. Monokrom B&W Photo Editor
IOS
In this black and white app, you move colored circles (or pucks) around the image. The pucks adjust brightness, contrast, tint, grain, and vignette. It takes a little getting used to. But once you do, editing your image becomes interactive.
Import photos from your camera roll and start moving the circles around. These increase or decrease the effect. You will immediately see changes in the preview. Editing this way removes the technical details. You will see the changes, but your brain stays on the creative elements of the image. If you like an effect, switch to the Memory tab and save the “recipe.”
Tone and Finish interface for Monokrom B&W Photo Editor. Circles control brightness, contrast, tint, grain, and vignetteConclusion
We went in search of the best black and white camera app and the best black and white photo editor. The best included many presets and let you explore your own black and white aesthetic. Our favourite black and white app was Camera1 because of its functionality. If you want a simpler filter app, then Hypocam is your best bet. Snapseed tops our black and white photo editing apps. Especially if you already use the program to edit your colour images. But Dramatic Black and White is not as overwhelming and is highly flexible.
Black and white is one way to be creative with your photographs. If you want to learn even more, read our Creative Photography Cookbook.
holding f 2, man holding black DSLR camera, png
- Image size
- 612x360px
- File size
- 283.23KB
- MIME type
- Image/png
resize PNG
width(px)
height(px)
Non-Commercial Use, DMCA Contact Us
- Camera Drawing Illustration, Old camera, pink and black DSLR camera illustration, watercolor Painting, camera Lens png 1500x1500px 534.69KB
- black Canon EOS DSLR camera, Tripod Fujifilm X-Pro1 Fujifilm X-T1 Nikon F Camera, SLR Camera Mount, camera Lens, monochrome png 800x800px 130.
 78KB
78KB - DSLR camera illustration, Camera Cartoon Drawing, Camera, watercolor Painting, camera Lens png 1200x1200px 269.46KB
- man holding dslr camera illustration, graphic device, hand, illustrator png 876x1000px 375.27KB
- People, man holding black DSLR camera, png 449x600px 129.15KB
- man holding black DSLR camera, Studio, grapher, studio, monochrome png 598x806px 125.72KB
- black DSLR 70-300MM camera lens, Camera lens, Camera Lens, angle, lens png 1276x1276px 383.9KB
- woman holding black DSLR camera, Camera Flash, Woman taking with digital camera, camera Lens, monochrome png 1500x1370px 1.86MB
- Camera Monopod, black reflex camera, lens, camera Lens png 617x428px 307.83KB
- man holding DSLR camera, grapher, grapher, microphone, monochrome png 4809x3200px 7.96MB
- Black and white Camera, Camera, text, rectangle png 2381x1987px 177.54KB
- One Direction, man holding DSLR camera, png 2005x3000px 5.69MB
- woman holding camera illustration, Drawing Illustration, Cartoon girl holding camera, cartoon Character, human png 791x3813px 3.
 71MB
71MB - DSLR camera illustration, Camera Logo, camera logo, television, symbol png 2490x2382px 576.75KB
- black and gray camera illustration, Camera Drawing, Camera, white, camera Lens png 564x564px 251.65KB
- Infinite, man using black Canon DSLR camera, png 1500x1000px 948.53KB
- Camera Cartoon Black and white, Black Camera Soda Suta, black and white DSLR camera sketch, watercolor Painting, painted png 640x640px 57.81KB
- boy with black DSLR camera illustration, Playmobil Backpacker, objects, toys png 400x536px 58.94KB
- black DSLR camera illustration, Emoji graphic film Camera, Cameras, angle, electronics png 1024x1024px 67.81KB
- Camera lens, Watercolor camera, dslr camera illustration, watercolor Painting, watercolor Leaves png 615x784px 1.86MB
- Camera logo, Digital still camera, black and orange camera illustration, angle, electronics png 800x500px 271.03KB
- man holding DSLR camera illustration, Camera operator Operator, grapher, digital, computer Wallpaper png 800x800px 45.37KB
- man holding DSLR camera, grapher Videographer, grapher, microphone, silhouette png 506x548px 48.64KB
- AESTHETIC GRUNGE, man holding DSLR camera, png 303x378px 50.2KB
- black MILC camera illustration, Camera Drawing, Vintage Camera, watercolor Painting, camera Lens png 1600x1381px 1.48MB
- DSLR camera illustration, Drawing Camera, Hand-drawn camera, template, angle png 1728x1767px 134.99KB
- DSLR camera illustration, Camera Black and white, Hand-painted vintage camera background, watercolor Painting, white png 1000x1000px 358.17KB
- multicolored DSLR camera illustration, Camera, Camera, watercolor Painting, camera Lens png 800x760px 122.6KB
- Holding hands Finger, holding hands, hand, hand png 1200x712px 594.25KB
- black DSLR camera beside red paper bag art, Flight Train Travel, world travel, world, travel png 984x984px 705.74KB
- black camera lens, Camera lens Icon, Camera Lens File, purple, lens png 1280x1024px 741.45KB
- thinking woman in black dress holding book illustration, people, public Relations png 1014x1600px 1.21MB
- camera, multicolored reflex camera, watercolor Painting, blue png 1899x2211px 1.22MB
- woman in black suit holding laptop computer, Business Woman, company png 815x1227px 1.
 48MB
48MB - vintage black and brown camera, Steampunk camera, Vintage Camera, camera Icon, camera Icon png 500x656px 323.01KB
- man holding black tablet, Two Hands Holding Blank Tablet, electronics, tablets png 693x475px 31.7KB
- white DSLR camera illustration, Camera Poster Illustration, Cartoon Camera, cartoon Character, text png 1000x1012px 873.58KB
- DSLR camera illustration, Drawing Logo, vintage camera, studio, camera Icon png 965x1008px 331.29KB
- black Canon EOS 5D camera beside, ICO Camera Icon, SLR camera, camera Lens, camera Icon png 512x512px 437.
 58KB
58KB - gray DSLR camera illustration, Stencil Camera, camera, text, decoupage png 1027x778px 87.13KB
- woman looking at camera while holding white flowers, Woman Face Skin, woman hair, hair Accessory, black Hair png 1299x1675px 2.54MB
- Modern DSLR Icon Collection, Sony_A230, Sony black SLR camera, png 512x512px 320.08KB
- man holding pencil, Pencil Writing, Hand holding pencil, hand, color Pencil png 1181x1181px 475.86KB
- Louis Tomlinson, man holding DSLR camera, png 2040x1740px 1.26MB
- gray and black security camera illustration, Surveillance video camera Icon, Realistic silver webcam, angle, electronics png 722x614px 144.6KB
- two babies holding plush toy illustration, Infant Boy Girl, cartoon baby, cartoon Character, child png 1000x1000px 184.35KB
- Cameras, black Sony DSLR cameras, png 600x600px 366.11KB
- man holding smartphone with black screen, electronics, android phones png 1162x954px 183.15KB
- black and white card, Instant camera Polaroid Corporation, Black frame, template, frame png 626x626px 73.66KB
- Sale F Type Logos, black and red F logo, png 2000x2000px 30.64KB
PREQUEL: Photo & Video Editor
on the App StoreScreenshots (iPhone)
Description
Aesthetic effects and filters for photos and videos: VHS, Stardust, Disco, Monroe. Retro, vintage or indie - find your aesthetic!
Prequel - for every story. Tell your story and add iconic effects: DISCO, BLING, MIAMI, PRISM, VHS, D3D. Create aesthetic videos with one touch and share with everyone!
FREE FEATURES
• Over 800 EFFECTS and FILTERS for every taste
• TEMPLATES for creating aesthetic videos in a couple of taps
• D3D mode for easy creation of animated 3D photos with trendy processing
• TEXT: over 30 unique fonts. Talk about yourself in style
• MUSIC: Thousands of songs to suit every mood
• STICKERS: Thousands of gifs, emojis and stickers for your photos and videos. Complete creative freedom
• GIPHY Text: an exclusive feature that allows you to create unique animated text
• CORRECTION: a complete set of editing tools for better results
• INTRO: specially created "intro" effects for videos. Just like in a real movie!
PREQUEL GOLD SUBSCRIPTION
Get unlimited access to all Prequel effects and filters and enjoy an advanced set of editing tools. No limits for creativity!
Prequel Gold is available by subscription. After the expiration date, the subscription will automatically renew, but you can always turn off auto-renewal in the settings. Payment will be debited from your card 24 hours before the end of the current subscription. To manage your subscription, please log in to Account Settings after purchase. If you purchase your subscription during a free trial period, any unused portion of the free trial period will be forfeited. Prices may vary by country of residence and may be converted to local currency.
About subscription: https://prequel.app/prequel-subscription
Privacy policy: https://prequel.app/privacy-policy
Terms of use: https://prequel.app/term-of-use
Version 2.33.0
Thank you for using Prequel! We listen to your feedback to improve even more.
In this version:
- Red-orange halo and red highlights - the vibe of film shots with the mysterious effect of HALATION
- Wes Anderson-inspired CONTEXT effect for film and contemporary art lovers
- ELDER BERRY effect unity of opposites in its cool tones and warm skin tones
- Cut out the silhouette, fill it with handwriting and choose a texture that will highlight your mood - everything this can be done with the NO ONE effect
• Bugs fixed
Ratings and reviews
Ratings: 62.9k
Excellent!
What you need! You can slap music without a hitch (finally!!!) what was so lacking .
.. It's nice to work with an application in which everything is all at once, well done!
Thank you very much for your feedback! We are happy to be of service :)
Guys, with such a price, I don’t think that many will use it.
Let's start with the fact that I understand that any work must be paid.
But if you are making an application for a large circle of people (and I think any developer wants many people to use his application), then you need to set the price accordingly.
The application is cool, but besides this there are a lot of others, for more adequate money.
400₽ per week is that match.
Probably the developers read these reviews and laugh that our people are greedy and snickering, but I can say for myself that I buy applications and music, and pay subscriptions, BUT 400₽ a week is unjustified)
I want to use the application when I want to, I’m not a blogger like many, but when you are charged 400 rubles a week, it’s a pity for the loot and it’s like you have to use it (the application).
Yes, of course you have a free version where there are many filters and so on, thanks for that)
But I'm not ready to pay 400₽ per week and I'm also not ready to mount watermarked videos, simply because it spoils the whole look.
And if they ask me, then I myself can say with pleasure the name of the program (this is the topic of the watermark).
In general, I refused to work with him, even though I really liked it.
But spend 1600₽ per month to edit 2 videos according to your mood...
Reduce the price or make a one-time purchase and you will have a lot of satisfied and grateful customers.
In the meantime, apart from the feeling of losing money, unfortunately nothing.
But I agree for guys who really shoot videos very often, or maintain a blog that brings money from these videos, the option is good.
For mere mortals, alas.
If the developers respond to my review, then there is no need to write about the free version and so on, like everyone else)
I'm ready to pay, but the price should be adequate) and the watermark in the furnace.It ruins everything
Hello! We understand the reason for your outrage. We'd love to hear more from you on how to make Prequel better. Write to us: [email protected]
The app is not supported on iPhone 6
Please make a version for iPhone 6
Hello! Thank you for your feedback and your interest. In order to ensure that Prequel works at a high level for our users, we carefully check the compatibility of the technical capabilities of the device with Prequel. Unfortunately, the iPhone 6 does not have enough power to make all Prequel features work correctly.
Developments
Subscriptions
Aesthetic Editor (Annual)
All-access filters, effects for photo & video
Trial subscription
Developer Prequel Inc. indicated that, in accordance with the application's privacy policy, data may be processed as described below. Detailed information is available in the developer's privacy policy.
Data used to track information
The following data may be used to track user information on apps and websites owned by other companies:
- Identifiers
- Usage data
Unrelated with user data
The following data may be collected, which is not related to the user's identity:
- Purchases
- Identifiers
- Usage data
- Diagnostics
Sensitive data may be used in different ways depending on your age, features involved, or other factors.