What is tilt shift
50 Beautiful Examples Of Tilt-Shift Photography — Smashing Magazine
- 3 min read
- Graphics, Photography, Techniques
- Share on Twitter, LinkedIn
About The Author
Vailancio Rodrigues is a web ninja who bakes semantic muffins. Apart from that he is also interested in Motion Graphics, Visual Effects, Photography and knows … More about Vailancio ↬
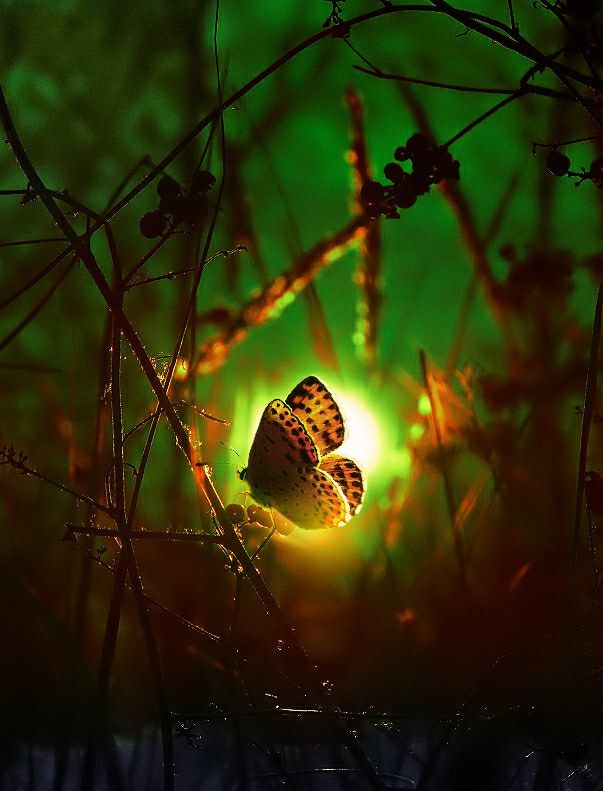
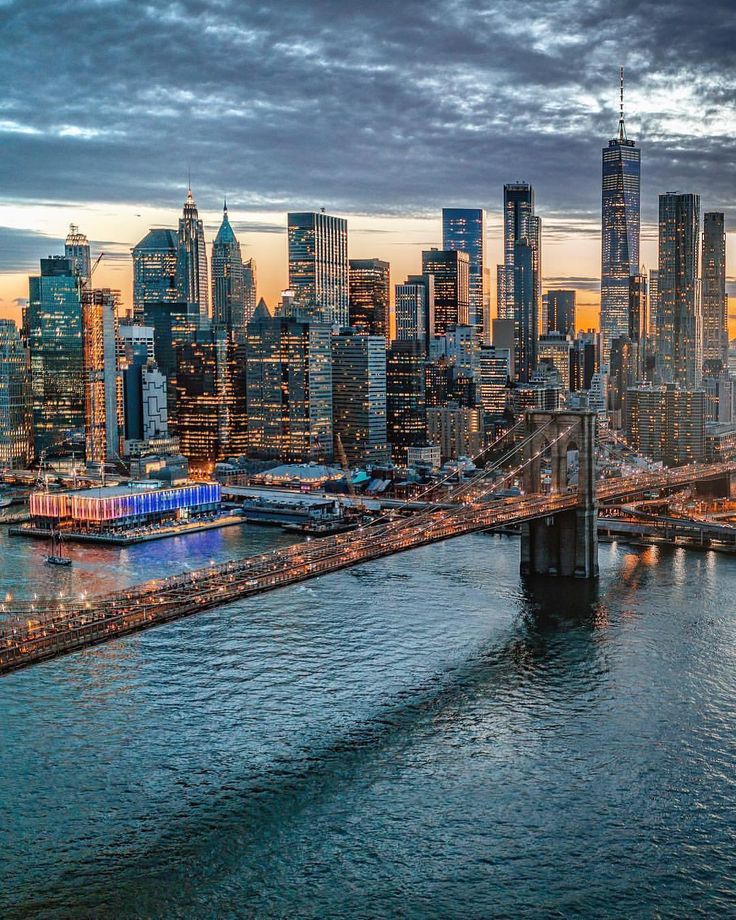
Tilt-shift photography is a creative and unique type of photography in which the camera is manipulated so that a life-sized location or subject looks like a miniature-scale model. Below, we present 50 beautiful examples of tilt-shift photography. All examples are linked to their sources. We strongly encourage you to explore other works of the photographers we’ve featured in this post.Tilt-shift photography is a creative and unique type of photography in which the camera is manipulated so that a life-sized location or subject looks like a miniature-scale model. Below we present 50 beautiful examples of tilt-shift photography. All examples are linked to their sources. We strongly encourage you to explore other works of the photographers we’ve featured in this post.
To add good miniature effect to your photographs, shoot subjects from a high angle (especially from the air). It creates the illusion of looking down at a miniature model. A camera equipped with a tilt-shift lens, which simulates a shallow depth of field, is essentially all you need to start.
Further Reading on SmashingMag:
- Beautiful Examples of Transparent Screen Trick Photos
- 50 Incredible Photography Techniques and Tutorials
- 50 Excellent Digital Photography Photoshop Tutorials
- 50 Stunning Examples Of Reflective Photography
50 Amazing Examples of Tilt-Shift Photography
Vincent Laforet
More after jump! Continue reading below ↓
Baldheretic
www.tiltshiftphotography.net
Christopher Chan Sydney Apple Store Miniature; Fake tilt shift effect applied to a 3xp HDR.
Vesuviano - Nicola De Pisapia Model of a model of reality. Vietri sul mare (SA) Italy.
Pattagon
Hanna María & Arnar
Sir Hsu
Tiltshiftphotography.net
Lachlan Sear
Automatt
B Tal
Dutchb0y
Eric Lafforgue
Tilt-Shift Photography: It’s A Small World After All
Timmy Toucan
Therealjasonruff
Hamish Grant
darktiger
roevin
Ender079
FoxyMcSlick
patrix
wumpiewoo
Marin G
tHE PypEr
Andrew James
Gérard Pétremand
Wmandra
B Tal
Angusleonard
cityshrinker.com
Jeangenie
Tarkka
Shawn S. Ide
Kurtis Perry
Vladimir.d
Envios
MCMLXXV
oseillo On the photo: Barcelona, Spain.
Toshio
Timothy Schenck
unknown
Tilt-Shift Videos
- Beached from Keith Loutit Time-Lapse video of Tamarama Beach, Sydney.
- Bathtub III from Keith Loutit Time-Lapse video of Sydney Harbor with tilt-Shift.

- Bathtub II from Keith Loutit Time-Lapse video at Sydney with tilt-Shift.
- Harrowdown Hill from Beggars
- Multnomah Falls in Miniature from Andrew Curtis
How To Make Fake Miniature Tilt-Shift Photos?
To add good miniature effect to your photographs, shoot subjects from a high angle (especially from the air). It creates the illusion of looking down at a miniature model. A camera equipped with a tilt-shift lens, which simulates a shallow depth of field, is essentially all you need to start.
Resources:
- Focusing the Tilt-Shift Lens
- Using Tilt-Shift Lenses to Control Depth of Field
- Using Tilt-Shift Lenses to Control Perspective
- Why does tiltshift photography make things look tiny?
- Tilt/Shift Photography Links
And if you don’t have specialized equipment, you can make use of Adobe Photoshop or any other image-editing software. Manipulate the focus in such a way that it gives the image the effect of having been shot with a macro lens. Secondly, increase the saturation and contrast in a way that the color looks like bright paint on a miniature model.
Resources:
- Tilt-Shift Photography Photoshop Tutorial This tutorial shows you how to make photos of real life-sized subjects look like photos of miniature models.
- Tilt-Shift Photoshop Tutorial
With a very little effort, you can take existing photographs of everyday scenes and make it look like they’re actually of miniature models.
Sources and Resources
Here you’ll find links to further articles and related Area for further articles and related resources:
- Flickr Pool: Tilt-shift miniature fakes Consists of tilt-shift photos created using Adobe Photoshop.
- Flickr Pool: Tilt-Shift HDR
What is a Tilt Shift Lens? The Tilt Shift Effect Explained
Tilt Shift LensOverview of the tilt shift lensFor visual artists, every new method or tool they find becomes an opportunity to explore creative territory. And the tilt shift lens can do some pretty amazing things. The effects provided by this lens can be subtle or extreme, invisible or visible.
Nowadays, you can simply add a filter to get the same effect of a tilt shift lens, but how is it done manually? And what kind of equipment is needed to get those incredible and unique perspective shots? Let's begin with a quick definition.
TILT SHIFT LEns DEFINITIONWhat is a tilt shift lens?A tilt shift lens is one that changes the orientation and position of the lens mechanism with respect to the image sensor. Typically, a lens and sensor are parallel to one another on the same plane. With this lens, the ability to tilt and/or shift the lens in different directions changes the entire plane of focus, something otherwise known as the Scheimpflug Principle.
By changing the angle of the plane between the lens and the camera’s sensor, one can change the scale of focus and the depth of field. Changing the scale can allow your images to appear miniature. And shifting or tilting can also minimize or maximize the blur behind your subject.
- Correcting vertical converging lines
- Panoramic shots
- Blurring select sections
- Changing scale — creating a 'miniature' effect
Before we get into the pros and cons of tilt shift lenses, take a minute to download our FREE Ebook — Camera Lenses Explained Vol. 1 — where we cover everything you need to know about the different types of camera lenses, their unique visual characteristics, and how to use them.
Free downloadable bonus
FREE Download
Camera Lenses Explained
Every type of camera lens has distinct qualities and visual characteristics that every image-maker should understand. Download our FREE e-book to get in-depth explanations on prime vs. zoom lenses, anamorphic vs. spherical lenses, wide angle, standard, telephoto and even specialty lenses that all tell a slightly different story.
It's one thing to describe the tilt shift effect but it can be hard to visualize. For a quick example of what a tilt shift lens can do, here's the opening sequence of The Late Show with Stephen Colbert employs an excellent use of tilt shift photography.
The tilt shift effect explained in The Late Show's intro
Here’s a quick overview of why you might want to try a tilt shift lens out for your next creative project. Tom Buck gives some great tricks for using this lens for photo and video. You'll see for yourself that mastering tilt shift photography is within reach.
What is a tilt shift lens? • Tilt shift photography explained
A tilt shift lens can produce images with a wide-range of effects, from subtle to extreme. In all cases, having this tool as a part of your repertoire will enhance your image capturing skills. Now that we know the basics, let's look at how to use a tilt shift lens.
A tilt shift lens serves as a perspective tool. Whether tricking the audience into seeing something smaller than it is, or managing perspective by "fixing" angled lines on buildings — this lens can do a lot.
Let's look at another video tutorial that offers some creative insights into how to use a tilt shift lens for landscape and nature photography.
The tilt shift effect in action
Shift: Perspective ControlShifting your lens up or down can eliminate the angle your camera captures. Tilt shift photography can straighten out the converging lines and is often used for architectural photos for this reason.
Tilt shift lenses can fix converging lines
Shift: Panorama
Shifting your lens from left to right makes it perfect for capturing those panoramic shots without moving the actual camera. By keeping the camera still, a series of photos can be taken by adjusting only the lens position, creating gorgeous panoramic photos.
Tilt: Maximize or Minimize Depth of Field
Because a regular lens only focuses on a singular plane, the areas of sharpness are the same distance from the camera. But being able to tilt the lens, makes the focal plane pliable.
Now, it’s possible to capture an image in focus, as well as narrow the field of blur, so there’s a soft blur in the background. This is what leads to the next point.
Tilt shift photography, see source
Tilt: Effect the Scale of FocusThis is the most common use of the tilt shift shot and it makes the image appear miniature.
Tilt shift photography, see source
The illusion of the super shallow depth of field, makes the image appear like we’re looking into a diorama. The tilt shift effect in this image is quite noticeable and warps reality in very interesting ways.
Tilt Shift Photography in Film
In David Fincher's The Social Network, the Henley Royal Regatta sequence is shot with some gorgeous tilt shift photography. Watch the scene and ask yourself what qualities or meaning the simple choice of using a tilt shift lens adds to the scene.
Tilt shift effect in The Social Network
As we've seen, using a tilt shift lens can provide a number of interesting aspects to your images. From simply "correcting" the angle of a tree or building, to creating more extreme visuals like a miniature stadium. There is no end to the creative uses of the tilt shift effect.
What are some creative ways you can use a tilt shift lens?
Free downloadable bonus
FREE Download
Camera Lenses Explained
Every type of camera lens has distinct qualities and visual characteristics that every image-maker should understand. Download our FREE e-book to get in-depth explanations on prime vs. zoom lenses, anamorphic vs. spherical lenses, wide angle, standard, telephoto and even specialty lenses that all tell a slightly different story.
Explore the different types of camera lenses, and learn how to use them with shot size, angles, and camera movement for impact.
Main Types of LensesLens Focal LengthsSpecialty LensesExplore 50+ Camera Shots & Angles
UP NEXTThe different types of lensesWe mastered the tilt shift lens and the next step is to expand your image making with different types of camera lenses. In this post, we'll cover definitions for zoom, parfocal, fisheye lenses, and more. Knowing how each of these lenses works will open up the possibilities for the types of images you can capture.
Up Next: Types of lenses →
Tilt-Shift Lens Effect / Sudo Null IT News
There is something attractive about tiny things, they are inherently fascinating. A tilt-shift photo is a great example of how large real-life objects can be turned into miniature works of art.
Tilt-shift is a type of photography where you can manipulate focus and depth of field to produce photos that mimic miniature moles by selectively focusing.
The effect can be achieved with special Tilt-shift lenses, but you can also simulate this effect in Photoshop post-processing.
If you don't want to spend $2,500 on a lens like this to get the effect you want, here are some tips to help you do it with Photoshop CC.
In addition to direct retouching and software, I will give some tips for getting the most suitable source images.
There are several ways to achieve a tilt-shift effect with Photoshop CC, but we will use a simple method that will give exactly the same result as using specialized equipment.
1. Choose the most suitable image on the model from above). Choose a photo with enough detail, with lots of elements and few "blank" spots to give your photo more of an impact.
2. Step two
In the "layers" menu, right-click on the preview, in the drop-down menu, select "convert to smart object" (convert to smart object).
3. Step three
Now in the top menu, click "filter", then point to "blur gallery", then select "tilt-shift".
4. Step four
There are 2 panels on the right side of the screen: the basic blur tools at the top with tilt-shift filter options and settings, and the "blur" panel at the bottom, with some additional "bokeh" adjustment features.
To move the area of focus, simply click in the center and drag to a new location, then release the mouse button. To change the strength of the impact, press the "button" and you can move the lines up and down to change the blur location.
5. Step five
You can decide in your own way, but I choose “Symmetric Distortion”
6. Step six
Select the “High Quality” option for the best study of details . To achieve the greatest "toy-like" effect, it might make sense to edit the colors a bit (maybe add a bit of saturation). Top menu-image-correction-hue/saturation. Another important step that should not be forgotten is the correction of the brightness curves. Top menu-image-correction-curves. And finally, the last step is adding sharpness. I recommend cropping the image a bit to remove all unnecessary surroundings to achieve a greater tilt-shift effect
When it comes to colors, curves, and sharpening, don't overdo it.
I hope these short tips will help you discover a fun new way to shoot and then add a tilt-shift effect to some of your photos.
Thanks for reading, enjoy flying with your aircraft.
ps: The tilt-shift effect works not only in photography, you can also use this technique with your video material. I'm using Final Cut Pro X, which makes it easy to add this effect to footage as well.
Tilt-Shift Lens Effect
Shooting Techniques
There is something magical about tiny things, they are inherently fascinating. A tilt-shift photo is a great example of how large real-life objects can be turned into miniature works of art.
Tilt-shift is a type of photography where you can manipulate focus and depth of field to produce photos that mimic miniature moles by selective focusing.
The effect can be achieved with special Tilt-shift lenses, but you can also simulate this effect in Photoshop post-processing.
If you don't want to spend $2,500 on a lens like this to get the effect you want, here are some tips to help you do it with Photoshop CC.
In addition to direct retouching and software, I will give some tips for getting the most suitable source images.
There are several ways to achieve a tilt-shift effect with Photoshop CC, but we will use a simple method that will give exactly the same result as using specialized equipment. 1. Choose the most suitable image on the model from above). Choose a photo with enough detail, with lots of elements and few "blank" spots to give your photo more of an impact.
2. Step two
In the "layers" menu, right-click on the preview, in the drop-down menu, select "convert to smart object" (convert to smart object).
3. Step three
Now in the top menu click "filter", point to "blur gallery", then select "tilt-shift".
4. Step four
There are 2 panels on the right side of the screen: the basic blur tools at the top with tilt-shift filter options and settings, and the "blur" panel at the bottom, with some additional "bokeh" adjustment features.
To move the area of focus, simply click in the center and drag to a new location, then release the mouse button. To change the strength of the impact, press the "button" and you can move the lines up and down to change the blur location.
5. Step five
You can decide, but I choose "symmetrical distortion". To achieve the greatest "toy-like" effect, it might make sense to edit the colors a bit (maybe add a bit of saturation). Top menu-image-correction-hue/saturation. Another important step that should not be forgotten is the correction of the brightness curves. Top menu-image-correction-curves. And finally, the last step is adding sharpness. I recommend cropping the image a bit to remove all unnecessary surroundings to achieve a greater tilt-shift effect
When it comes to colors, curves, and sharpening, don't overdo it.
I hope these short tips will help you discover a fun new way to shoot and then add a tilt-shift effect to some of your photos.