Butterfly light photography
What is Butterfly Lighting — Definition, Examples and Setups
What is butterfly lighting
First, let’s define butterfly lighting
If you want to take dynamic portraits, there are many options of lighting patterns. They all bring their own unique look and narrative value to your image — not every setup tells the same story. Let's define butterfly lighting quickly and then we'll move onto the setups and its unique properties.
Butterfly lighting DEFINITION
What is butterfly lighting?
Butterfly lighting is a lighting pattern used in portrait photography where the key light is placed above and pointing down on the subject’s face. This creates a dramatic shadow under the nose and chin that looks like a butterfly. It's also called 'Paramount lighting,' named for the Hollywood studio and how they lit their most glamorous and beautiful actresses.
What do you need to capture butterfly lighting?
- A key light
- Flashes and triggers
- Modifiers
- Reflector
Butterfly lighting is perfect for portrait photography. It is one of the most flattering lighting techniques for sculpting facial features. Here's a quick tutorial on butterfly lighting photography and how it works.
Lighting techniques • Butterfly lighting photography
History of Butterfly Lighting
Butterfly lighting dates back to some of the earliest glamour shots. Specifically, Marlene Dietrich, a German silent film actress, who became a Hollywood star in the 1930s, was presented on film in a way that gave this look its name.
Butterfly Lighting Photography • Butterfly shape just under the nose
She came to California with director Josef von Sternberg, who lit her in his films with what is known today as butterfly lighting.
He would position the key light above her, where a butterfly-shaped shadow would appear just below her nose. With this lighting, her cheekbones and facial structure became more prominent.
It soon became a Hollywood-must for lighting.
Butterfly Lighting Setup
How to capture butterfly lighting
Butterfly lighting setups are simple. In its purest form, it's a single source (key light) directly in line with the subject's face and the camera. If the shadows are a little too deep, a reflector can be placed below the subject to bounce light back up into the face.
Here's a tutorial on this setup, along with other light patterns for comparison.
What is butterfly lighting? • Quick Setup Tutorial
Like flat lighting, where the key light is directed right at the subject’s face, butterfly lighting places the light at an angle just above the subject. The light created softens the face and creates shadows under the nose and chin.
Butterfly lighting photography setup
You might use a reflector below as a fill light for the chin area. Reflectors are great ways to balance light.
During the shoot, you or a crew member can hold the reflector, or you can have the subject hold it. Mess around with it a bit. A benefit of reflectors is that you can capture beautiful catchlights in the subject’s eyes by adjusting the reflector.
What You Need for Butterfly lighting setup?
What should be in your camera bag?
Because of its simple setup, you won’t need any fancy gear or equipment to pull this off. Here's a quick list of what to include in your gear kit.
Cameras and Lenses
Obviously, you’ll need a camera with an appropriate lens for shooting portraits. No lens wider than 50mm, and you can use any mirrorless or DSLR camera. iPhone even has a fairly suitable portrait mode on its latest models.
You can also use a telephoto lens for portraits, as long as the space allows you to move back and focus.
Flash and Trigger
Ensure your camera is compatible with the flashes and triggers you buy.
You can get triggers to wirelessly set your flash off. This allows you to position your flash wherever you’d like to get the desired lighting effect.
Modifier
If you’re using a flash, you can add a modifier as well. Modifiers will help diffuse the light. Common ones are softboxes or even umbrellas.
Reflector
Reflectors will help you balance your light. Once your key light and modifier are all set, you may still experience shadows under your mode’s chin. Use the reflector under and angled towards their face, in order to soften that shadow.
Butterfly lighting is one of the most flattering lighting patterns. And probably the easiest one to pull off. If you want to explore more patterns, keep reading!
UP NEXTRembrandt lighting explainedLearning to light is the basis for great photography and cinematography. Knowing how and when to use certain lighting patterns with intention can help you level up from a beginner to an enthusiast and beyond. Let’s go deeper into another pattern, Rembrandt lighting, and how it adds more dramatic shadows and depth to your portraits.
Up Next: Rembrandt lighting →
What is Butterfly Lighting and How to Do it Well
If you’re a beginner portrait photographer, this guide to the butterfly lighting pattern is what you need to create really striking images.
In studio-portrait photography, there are different lighting setups that photographers use to create consistent results.
In this article, I’ll tell you how to set up butterfly lighting, how to recognize it and the different effects you can create with it by analysing some examples.
This lighting technique is one of the first ones studied by beginner photographers because it’s flattering for all sorts of subjects, although it’s mainly used for beauty shots. It’s also easy to learn and budget-friendly!
So, if you’re interested in improving your portraits and learn about lighting patterns, keep on reading.
Table of Contents
What is Butterfly Lighting?
Butterfly lighting is a type of portrait lighting technique used primarily in a studio setting. Its name comes from the butterfly-shaped shadow that forms under the nose because the light comes from above the camera. You may also hear it called ‘paramount lighting’ or ‘glamour lighting’.
Butterfly lighting is used for portraits. It’s a light pattern that flatters almost everybody, making it one of the most common lighting setups.
Butterfly lighting was used to photograph some of the most famous stars from classic Hollywood, and that’s why it’s also called Paramount lighting.
With it, you can highlight cheekbones and create shadows under them as well as under the neck – which makes the model look thinner.
That’s why it’s often used for beauty, boudoir and glamour photographs – even if it’s also perfect for photographing men, children or elderly models.
What features identify a photo as having butterfly lighting?A butterfly lighting pattern is a setup that consists of a main light coming from above and in front of the subject. Thanks to this position, it highlights the nose and cheekbones – making the subject look slimmer and the face longer.
The main characteristic is the shadow created under the subject’s nose that’s shaped like a butterfly. It also causes a shadow underneath the subject’s chin. Both shadows can be less evident if a reflector bounces back the light from the main source.
You can also identify when butterfly lighting is used in a portrait since you’ll be able to see the main light’s reflection on the top part of the iris in the subject’s eyes.
What Equipment do you need for Butterfly Lighting?
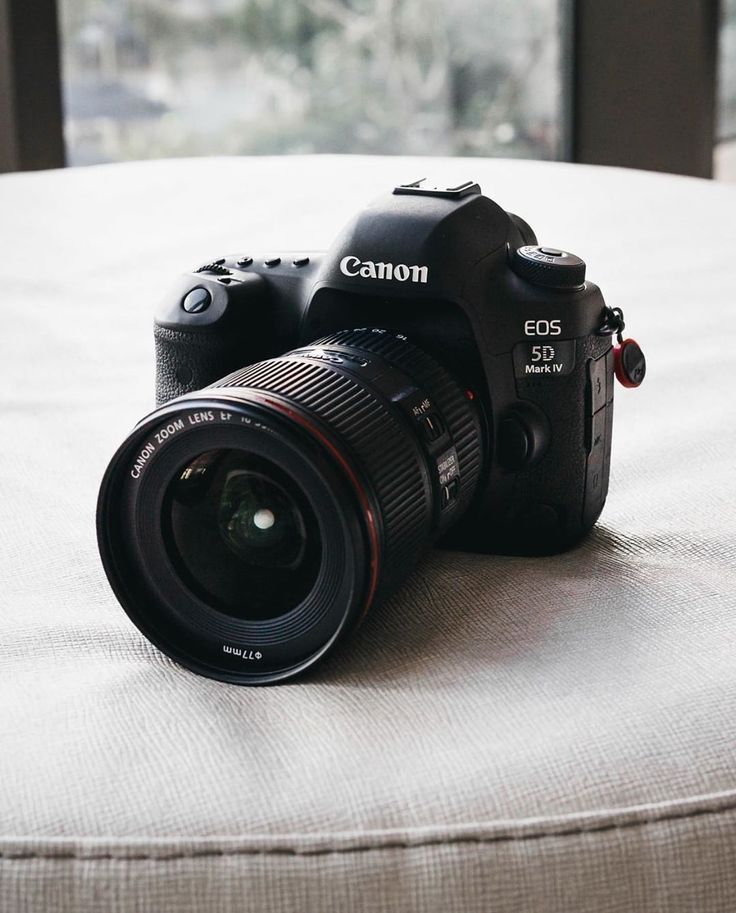
Camera gear of portrait photographer Ambe Williams.
To use butterfly lighting in portrait photography, you need a camera, a main light, and – if you want – a reflector. You don’t need expensive gear or a lot of knowledge in balancing multiple lights.
However, if you want to get serious about portrait lighting – here’s a more in-depth list of what you need.
-
Camera
While you can make portraits with any camera, one with interchangeable lenses would be the best choice. You can choose between DSLR and mirrorless according to your preference; they are both suitable for studio portraits.
What’s more important is the sensor size. If your budget allows it, a full-frame camera will give you sharper images. However, nothing is stopping you from making some spectacular butterfly photography using a crop sensor camera.
Here are some of the best cameras for portrait photography:
Canon 5D Mark IV – full-frame DSLR
Nikon Z7 – full-frame mirrorless
Nikon D3500 – entry-level DSLR
Canon EOS Rebel SL3 – entry-level DSLR
-
Lens
There are two important things to consider when choosing a lens for portrait photography: the distortion and the bokeh.
To avoid face distortion, you should work with focal lengths that resemble the human eye or longer – anything above a 50 mm lens will do.
However, to achieve a good bokeh effect, you’ll be better with longer focal lengths. A short telephoto lens is the best choice.
Here are the favourite lenses from professional portrait photographer Ambe Williams, whose gear is displayed in the photo above:
Sigma 85mm f/1.4
Sigma 50mm f/1.4
Canon 35mm f/2
Tamron 24-70mm f/2.8
Tamron 70-20mm f/2.8
-
Light
Butterfly lighting requires a key light that can be a flash unit or continuous. If continuos, it can be artificial or natural. In other words, you can use strobes, speedlights, LEDs or even the sun.
The most important is where the light is placed – but we’ll get to that later. Keep in mind that, even if it can be done with any source of light, it’s typically done with strobes.
Some of the strobes preferred by professional portrait photographers are:
Profoto B1 500 Air TTL
Digi Bee Flash Unit
Neweer Vision 4
Godox AD200
LimoStudio AGG1756V2
If you can’t afford strobes just yet, don’t worry. You can start to practice using speedlights, or you can rent an equipped studio for a day and use it to try out different lights and build a portfolio.
As an option, you can enrich the butterfly lighting setup by adding a hair light or add some extra lights for the background.
What is the best camera flash to buy? There are plenty of models to choose from, but the basic advice is to select a model without TTL if you intend to use it off-camera most of the time – this can save you some money.
-
Accessories
– Tripod. This is optional because when the light source is bright enough – as artificial studio lighting will be – you can shoot handheld. If you’re using natural light, then make sure you can use a fast enough shutter speed before ditching the tripod.
– Stand. You will need a light stand to hold the flash unit and place it in the right position. Some photographers make use of a boom arm to get a better angle.
– Light modifiers. A butterfly lighting effect refers to the setup and not to the quality of light – it can be soft or hard light depending on the effect you want.
If you want to create a soft light, you’ll need to use modifiers. A beauty dish is perfect for glamour photography as it distributes the light evenly and smooths the skin. You can also use a softbox or an umbrella.
Instead, if you want to have hard light, you can leave the light source as it is. Alternatively, you can use grid spots to direct it and create different effects – check out MagMod gels for some creative options and examples of what hard light is used for.
Remember that you can rent equipment if you are just starting. This way, you can try different modifiers and their effects to see which ones you like before investing in your own gear.
– Trigger. You need to connect your camera with the flash unit; you can do this via cable or a wireless trigger. If you are working with another fill light, make sure it’s compatible to work on slave mode – if not, you’ll have to connect another receiver to it.
– Reflector. Most photographers use a reflector as part of the butterfly lighting setup. Unless you want to create a very dramatic image, you can place a reflector under the model’s face.
How to Set up a Butterfly Lighting Pattern
First, position the model in front of the lighting stand. The light should be at a higher angle, pointing down towards the subject’s face.
Then, place the camera directly under the light using a tripod. If you plan on shooting handheld, finish the lighting setup and then come back to position yourself under the light.
Add a light modifier according to the type of light that you want on your portrait. You can place a beauty ring or a softbox on the strobe to achieve soft light. Otherwise, you can use a grid to create a more controlled hard light.
Measure the intensity of the light. Ideally, use an external meter – this will make the reading more precise. Alternatively, you can make a few trial shots and adjust the camera settings and flash intensity accordingly.
Once you have the key light set up, it’s time to fill the shadows. You can use a reflector to bounce the light back up and soften the shadow under the chin and the one from under the nose.
To do so, position the reflector under the subject’s face. Start at waist level and see how it looks. If the shadows are still strong, move it closer to the face and so on.
Experiment with different positions to achieve different effects. You can also change the colour of the reflector. A white one will give you a neutral tone, while a golden one gives a warming overcast.
Once you’re happy with your butterfly lighting, direct the model to have a striking fashion pose or whatever the desired pose or expression you’re looking for.
Just keep in mind that the subject’s face needs to be towards the light in order to have the butterfly shadow under the nose.
That’s the basic butterfly lighting setup for a studio portrait. You can add more lights if you want to create a more complex pattern.
For example, you can add a hair light to create a highlight that separates the subject from the background. You can also add lights to illuminate the background – this can be even light for a solid background or graded to create more depth.
Butterfly lighting cheat sheet1. Position the subject in between the background and the light.
2. Lift the light source above the subject’s eye level.
3. Put a reflector underneath the subject’s chin.
4. Stand under the light and start shooting – Keep the subject looking straight ahead.
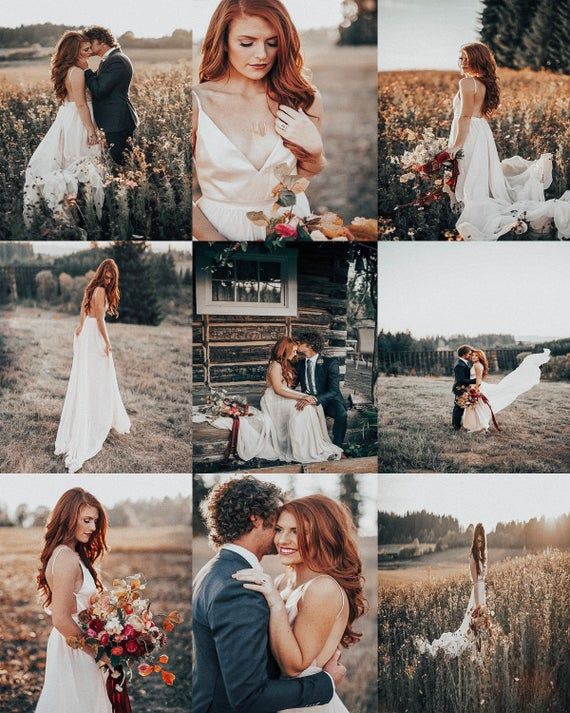
5 Examples of Photos Using Butterfly Lighting
Now that you know what is butterfly light and how to use it as a lighting pattern – here are some examples for you to see what you can create with it.
Audrey Hepburn by Bud Fraker. PDM
As I mentioned before, this type of lighting was very popular in the old classic Hollywood portraits. So, I decided to start with one of those images: a public domain picture of Audrey Hepburn from 1946 taken by Bud Fraker.
Notice how – even if it’s a little to the side – you can see the butterfly shadow under the nose. Plus, a strong shadow under the subject’s chin. The cheekbones are highlighted, creating a graded shadow towards the rest of the cheek.
Credit: Monica Silva
In this portrait of former athlete Fiona May photographed by Monica Silva, you can see the butterfly lighting pattern more clearly because of the straightforward pose.
The shadows are softer because there’s a fill light or a reflector underneath. You can see the reflections of both on the subject’s eyes.
Credit: Ziphaus
In this example, you can see how the shadow under the subject’s nose is not a perfect butterfly because the head is a little tilted. However, the butterfly effect is perfectly achieved.
You can also see the light source reflected on the iris.
Credit: Ludovic Migneaut
Butterfly lighting pattern is not only for female models. In this self-portrait by Ludovic Migneaut, he used a butterfly lighting setup complemented by a backlight coming from the right that separates him from the background and creates a pleasing halo on the hair and the shoulder.
Credit: Cristian Newman
As you can see in this photograph by Cristian Newman, using butterfly lighting for elderly portraits is also a good choice that can result in a very powerful image.
Final Words
If you’re a beginner photographer and you want to start trying some portrait lighting patterns, the butterfly lighting effect is the perfect way to start.
I hope this article showed you how much you could achieve by using just one light. Let us know in the comments section how it goes; we’d love to hear from you!
Highly Recommended
8 Tools for Photographers
Check out the 8 essential tools to help you succeed as a professional photographer.
Includes limited time discounts.
Learn more here
Light pattern "Butterfly". Manual of Photography
In studio portrait photography, there are several lighting schemes that you need to know and use them skillfully in your work. In this article, photographer Ana Mireles talks about one of the main lighting schemes called "Butterfly" and the various effects that can be created with it.
What is Butterfly lighting?
Butterfly is one of the first lighting patterns that beginner photographers learn. It is easy to learn and it is quite budgetary in terms of the cost of photographic equipment. This is a portrait lighting setup used primarily in a studio setting. The name comes from the butterfly-shaped shadow that forms under the person's nose because the light source is above the camera. This scheme is called "glamor lighting" or "Paramount lighting" because the "butterfly" was used to photograph Hollywood movie stars.
Butterfly can be used to highlight the cheekbones, create shadows under them and under the neck, which will make the model more sophisticated, which is why it is often used for beautiful and glamorous female photographs. However, this scheme is great for portraits of men, children or older models.
The Butterfly lighting scheme consists of a main light coming from above and in front of the subject. With this position, the light highlights the nose and cheekbones, and the subject becomes slimmer and the face is longer.
Its main feature is the shadow created under the object's nose in the form of a butterfly, and the shadow under the object's chin. Both shadows can be less noticeable if the reflector reflects light from the main source.
You can tell when a portrait is using butterfly lighting if you notice the reflection of the main light at the top of the subject's iris.
Butterfly Lighting Equipment
- Camera
The best choice would be a camera with interchangeable lenses. You can choose between a DSLR and a mirrorless camera according to your preference - both are suitable for studio portraits. More important is the size of the sensor. If your budget allows, a full frame camera will give you sharper images.
Excellent cameras for portrait photography:
- Canon 5D Mark IV - Full -frame SLRICK
- Nikon Z7 - Full -grade
- Nikon D3500 - ENTERY MIRRACK
- CANON EOS REOS REL3 - The initial mirror of the initial level of the initial level
There are two important things to consider when choosing a lens for portrait photography: distortion and bokeh. To avoid facial distortion, you should work with focal lengths. Anything larger than 50mm will do. However, to achieve a good bokeh effect, it is better to use longer focal lengths. A short telephoto lens is the best choice.
Ambe Williams professional portrait photographer lenses:
- Sigma 85mm f/1.4
- Sigma 50mm f/1.4
- Canon 35mm f/2
- Tamron 24-70mm f/2.8
- Tamron 70-20mm f/2.8
- Light
The Butterfly lighting scheme requires a primary light, which can be a flash or steady light. If the light is continuous, it can be artificial or natural. In other words, you can use studio all-in-ones, on-camera off-camera flashes, LED panels, or even the sun.
The most important thing is where the light source is located, but we'll get to that later. Keep in mind that while this can be done with any light source, it's usually done with flashes. Alternatively, you can enrich the butterfly lighting setup by adding light for the model's hair or using additional lights for the background.
What is the best camera flash to buy? The main advice is to choose a non-TTL model if you are going to be using it most of the time off camera - it can save you some money.
Accessories
- Camera tripod. This is optional - if the light source is bright enough, you can shoot handheld. If you're using natural light, make sure you can get a fast enough shutter speed before you ditch your tripod.
- Flash stand.
- Light modifiers . The butterfly lighting effect refers to the setting, not the quality of the light - it can be soft or hard, depending on the desired effect. If you want to create soft light, you will need modifiers. If you want a hard light, you can leave the light source as it is.
- Shutter trigger . You need to connect the camera to the flash, you can do it with a cable or a wireless trigger.
- Reflector. If you don't need a dramatic image, you can place a reflector under the model's face.
How to set up the Butterfly lighting scheme
First place the model in front of the studio stand. The light should fall at a high angle and be directed downward towards the subject's face.
Then place the camera directly under the light source using a tripod. If you plan to shoot handheld, complete your lighting setup and then return to position yourself under the light source.
Add a light modifier according to the type of light you want in your portrait.
Measure the light intensity. Take a few test shots and adjust camera settings and flash intensity accordingly.
Once you've set up your key light, it's time to fill in the shadows. You can use a light disc to bounce the light back and soften the shadow under the chin and the shadow under the nose. To do this, place a reflector under the subject's face - start at waist level and see how it looks. If the shadows are still strong, move them closer to the face and so on.
You can also change the color of the reflector. White will give a neutral hue, and gold - a warming overcast.
The model's face should be facing the light so that the shadow of the butterfly is under the nose.
This is the basic butterfly lighting setting for a studio portrait. You can add more lights if you want to create a more complex layout. For example, you can add light for the hair, create a highlight that separates the object from the background. Also add lights to light up the background - this can be a flat light for a solid background or a gradient light to create more depth.
Butterfly Light Chart Cheat Sheet
- Place the object between the background and the light.

- Raise the light source above the subject's eye level.
- Place the reflector under the subject's chin.
- Stand under a light source and start shooting. Let the subject look straight ahead.
Five Examples of Photography Using Butterfly Lighting
- As already mentioned, this type of lighting was very popular in old classic Hollywood portraits. For example, a photograph of Audrey Hepburn (by Bud Fraker). Notice here you can see a butterfly shadow under the nose, and a strong shadow under the chin. The cheekbones are highlighted, a gradient shadow is created towards the rest of the cheek.
- In this portrait of former athlete Fiona May (by Monica Silva), you can more clearly see the glowing butterfly pattern on her face. Shadows are softer because there is a fill light or reflector underneath them. You can track their presence in the reflection in the subject's eyes.
- In this example, you can see that the shadow under the object's nose is not a perfect butterfly because the person's head is slightly tilted.
 Pay attention to the reflection of the light source in the eyes.
 - The Butterfly lighting scheme is not just for female models. In this self-portrait, Ludovic Migneaut used a "butterfly" lighting setup, complemented by lighting on the right, which separates him from the background and creates a nice halo on his hair and shoulders.
- In this photo by Cristian Newman, the use of the Butterfly light scheme for portraits of the elderly demonstrates the photographer's excellent choice.
Light schemes. Butterfly. - Dmitry Bulgakov, it's me. — LiveJournal
Let's talk today, or rather, let's start talking about lighting schemes in a portrait. Many have heard such an expression as a black and white drawing. If quite simply, then this is a drawing with light, obtained in the aggregate of light and shadow on the face of the model. Depending on the location of the light source, we see a certain direction and location of the shadows on the face. So, depending on these directions and locations, these drawings have their own names. Building a certain pattern on the face of a model is the task of the photographer. The knowledge of these drawings and the ability to build on one or another model in order to emphasize the best and hide the flaws is the skill of a portrait painter.
Let's plunge into history a bit, literally by the edge. Those who often go to exhibitions, now I mean art exhibitions of the old school, which show us classics painted 100-200-300 years ago and so on, could notice that in so many paintings, namely in large portraits, there are certain black and white drawings, but they do not spoil the model at all, but on the contrary, emphasize its beauty, while maintaining naturalness. In fact, all black and white drawings were described and dismantled in art school before people could even think that there would be art that creates images other than canvas and brush. Photography is just another way of capturing an image. Mastery is worth drawing from museums, from artists who have given their lives to the study of light and how it falls on the face of the model. Helped them in this ordinary sunlight. Hard or soft, but still the light that is always present in our lives, which always creates black and white patterns on our faces. But for us they are very familiar. Firstly, many simply don’t think about them, and secondly, we perceive the video sequence and never look closely at the naturalness or unnaturalness of the shadows on the face. We are not static. But as soon as we begin to convey a static model in the image, this is where the questions begin, why, with the natural direction of the light, the portrait turns out to be not expressive, and sometimes even frightening.
Everything is very simple. In the video sequence of our interlocutor, there is a direction of the shadow for us, but there is no cut-off pattern on a static person, and we perceive the picture in an average way. When turning the head, in addition to the unnatural position of the shadows on the face, completely natural ones also very often slip through. So from the moment the artists studied light, they realized that there are directions of shadow and light that are very natural for a person, for a portrait, but there are opposite sensations. So it was at one time revealed, described and sketched, and most importantly, it was explained why some black and white drawings can make a handsome beauty out of a model, and some can only spoil the portrait. These schemes are considered classics, the basis of everything on which portrait photography is now built, on which the art school has always been built.
And so, today we will talk about the classic BUTTERFLY lighting scheme.
I'll start with the simplest. The location of the light source here is exactly in front of the model, from above. I can’t draw you at what distance from the model, at what height it is located and at what angle it shines, and then you will understand why.
Well, since we are talking about classical schemes, then let me show you examples from the classics. For example, the incomparable Marlene Dietrich.
First, let's immediately understand why Butterfly. Look at the placement of light and shadow on the model's face. An angled overhead light illuminates the model's forehead, eyes, and undereye bones. Further, on the cheeks, there are shadow dips and the illumination resumes on the cheekbones. in hard light, the nose and the shadow of the nose, as well as the lips and the shadow of the lips, create a contrast. If this contrast is taken as a basis, the body of our butterfly, then the illumination of the face becomes like wings, the upper pair of wings and the lower one. But of course I started from the end, as they say. Not always on the face there will be a contrast from the light and shadow of the nose and lips, so we perceive the light scheme starting from the illumination of the face, wings.
Now let's take a closer look at how this scheme is set up correctly. There are a few things to keep an eye on here. When building this circuit, there are 3 control points that you need to pay attention to.
1) these are the eyes and shadows from the superciliary arches. Superciliary arches cast shadows, and this shadow should end not on the upper eyelid of the model. This allows you to achieve two important points at once, firstly, the eye becomes illuminated and does not hide in the shadow, the viewer does not have to peer and look for the look of the model, and secondly, the shadow above the eye automatically creates a contrast with the eye and makes them more expressive (now it should become clear to many appointment of shadows in a women's cosmetic bag). A glare from a light source in the model's eye can also serve as a guide. A trifle but very important, the eyes are alive.
2) The shadow of the nose. It descends from the very nose to the dimple on the upper lip, but does not touch it. The ears of the nose and the tip create a triangle, and our task is to make sure that it descends exactly to the dimple on the lip, without shifting to the sides. This will create contrast in the face and most importantly, it won't distort the shape of the face in the highlighted parts.
3) Shadow from the lower lip. Makes lips plumper visually, more expressive (and this is all without plastic surgery, just with light).
Now let's take another look at the portrait, already having some knowledge.
Black and white drawing Butterfly. Very expressive, in many cases expressiveness is emphasized by increased contrast. Illuminated part of the face, forehead, eyes and undereye bones. The contrast above the eyes, created with the help of shadows from the superciliary arches, made the eyes very expressive. The dips on the cheeks visually made the face narrower (here you immediately understand why many girls need powder). The lips of the model became plump, highlighted by contrast and directly desired))) BUT. As always, there is a small but. All people are different, all are individual in their own way. There are several face types and face shapes.