Camera mount size
Camera Thread Size Vs Tripod Thread Size & Convert Nuts
You might have purchased a camera recently. It can be any type of camera. You will be looking to add more camera gears and accessories to your kit, including the tripod/monopod. It is essential to understand the different thread size for different types of camera gear. It will ensure that you buy the camera gear with the matching thread size. Otherwise, you will have to depend on converters to match the size.
Table of Contents
Is Thread size Standardized in Photography?Yes, there is a standardization for threads used in photography. It is clearly defined in the ISO 1222:2010 by the ANSI. The thread size specification is a UNC one for the coarse thread.
Standard Thread Sizes in PhotographyThere are two commonly used thread sizes for camera and camera accessories.
As per the standard, there are two thread sizes used in photography.
It is a thread size that is a quarter-inch wide, and there will be 20 threads per inch as the UNC thread size.
Most consumer cameras come in this thread size, and the mounting plate will have the matching male screw.
2. 3/8-16 UNC Thread SizeHere, the thread size will be 3/8 inch wide, and it will have 16 threads per inch as per UNC thread size specification.
Most of the tripod heads come in this tripod thread size for mounting on the tripod legs.
Different Camera & Tripod Thread ConvertersYou don’t have to worry if your camera and tripod have different thread sizes that do not match. You can always invest in the right converter to match the camera and tripod thread size.
I will share some of the converter adapter options here.
1. 1/4” to 3/8” Convert Nut (Male to Male)You can use the 1/4” to 3/8” Convert Nut to change the size 1/4” male screw to a 3/8” male screw.
3/8” to 1/4” Convert Nut transforms a bigger screw into a smaller one. When you these converter nuts, then your camera will not be fully flushed onto the tripod. There will be space around the circumference of the converter nut. It is because the use of this nut will result in an overall increase of the male nut.
3. Male to Female Converter NutIn some instances, you want to convert the male screw to a female. It can be the ¼” male screw to a 3/8” female thread or a 3/8” male screw to a ¼” female thread. Use the converter (shown above) to do the conversion. You can use the same nut (shown above) for both the conversion.
4. Female to Male Converter NutSometimes, you may have to convert the ¼” female thread to a 3/8” male screw or 3/8” female thread to a ¼” male screw. You can use these converter nuts to get the job done. You can use the same nut (shown above) for both the conversion.
So, if you have purchased a tripod for your camera and the thread size does not match between the two, you can consider buying an appropriate converter. You can easily get these converter nuts in online shops like Amazon. If you are interested to buy all the variants, then you can go for the combo kit option. It will cost you around $5 to $8 for all the nuts together.
Different Camera Gears & Their Thread/Screw SizeI will share the different camera gears and accessories where you need to look for the thread size while buying.
Camera BodyAll camera bodies come with a tripod mount option. There will be a thread at the bottom of the camera that will allow you to connect the camera to a tripod. Even small action cameras and point-and-shoot cameras come with the tripod mount option. So, check the camera thread size while buying.
Example: Sony A1 camera comes with a camera thread size of ¼” at the bottom.
You may be using an interchangeable lens camera like a DSLR/ Mirrorless/ Medium format camera. If you are using a heavy telephoto lens, you will mount the lens on the tripod instead of the camera body. This heavy telephoto lens will come with a tripod collar. The tripod mount thread will be located at the bottom of this tripod collar. You need to check the thread size on this collar to make sure that it is compatible with your tripod thread size.
Example: The Canon EF 500mm F/4 L IS II USM lens’s tripod collar comes with ¼” thread on its tripod collar.
Tripod LegsThe tripod legs will come with a screw pointing outside. The tripod screw size will be either the ¼-20 UNC size or the 3/8-16 UNC size in most consumer models. Big size tripods will be using the bigger thread screws, and some come with smaller thread size along with the convert nut.
Example: The tripod screw size for Manfrotto 190XPRO Aluminum 3-section tripod comes is 3/8”.
The provision for connecting the camera to the tripod head comes in the tripod mounting plate section. It is a detachable piece. You can connect the mounting plate directly to your camera base. Whenever you want to mount on the tripod, you need to mount the plate on top of the tripod head.
Example: The camera mount screw size of the mounting plate of the Manfrotto 498RC2 tripod head is ¼”.
Tripod HeadThe tripod head will have a screw thread in the bottom. You will be connecting the head to the tripod legs using this part. So, make sure that the thread size matches for both the part.
Example: Manfrotto 498RC2 tripod head comes with a 3/8” thread at the bottom.
Few Camera StrapsSome high-end camera straps come with the option of connecting directly to the tripod mount thread at the bottom of the camera instead of the regular strapping place located on the top of the camera body. Such straps can also be directly connected to the camera lenses for a better balance if the lens is a heavy telephoto lens.
So, if you are planning to buy such a camera strap, you must ensure that your camera’s thread size matches that of the screw in the camera strap. BlackRapid Sport Camera Strap is an excellent example of such a camera strap.
ConclusionWhenever you are selecting any camera gear, make sure that they have a thread size that is compatible with your other gears. If not, ensure that there is a thread size converter is available in the market, which does not cost you much.
Camera Lens Mounts - Everything You Need to Know About Lens Mounts
With practically all camera manufacturers having launched several different camera systems, there seems to be quite a bit of confusion among photographers in regards to camera lens mounts. This is especially true for things like “throat size” and “inner diameter”, where different measurements are used to wrongly quantify a mount’s potential. Unfortunately, there is a lot of misinformation out there regarding mounts and their exact sizes, which is why I decided to write a detailed article talking about different mounts, their differences and take more precise measurements for different systems to present accurate information.
Table of Contents
What is a Lens Mount?
Simply put, a lens mount is an opening of a specific size on an interchangeable lens camera that allows attaching lenses designed for that mount. Although in the early days of photography lenses were only mechanically attached to cameras without any communication between the two, with the rise of automatic metering and autofocus systems, it was necessary to create electronic contacts on both cameras and lenses to allow them to communicate with each other. As a result, a lens mount became more than just a physical hole, but more like an interface between lenses and cameras.
Today, practically every lens mount for photography is a bayonet mount (the name “bayonet” comes from the type of fitting soldiers used on their rifles to quickly mount bayonets), where three to four tabs are used to lock a lens tightly in place, but other lens attachment systems have been used in the past, such as screw-threaded lock and breech-lock. With a bayonet mount, one aligns a marked section of a lens (typically a colored dot) with the marked section on a camera body, then after coupling the two, twists the lens either in clockwise or counter-clockwise direction (depending on the brand/mount) until it locks into place.
The locking mechanism is mechanical, with a spring-loaded pin locking the lens in place in its proper position, requiring the pin to be retracted when a lens needs to be detached (which is done using a button next to the camera mount). The bayonet mount has a number of advantages compared to other mounts, which is why they are the most popular today. First, it makes it quick and easy to attach and detach lenses. Second, it allows for a tight and precise fit, which is especially important when shooting with modern high-resolution cameras, as any sort of wobble or play could end up negatively affecting parts of the image. And lastly, a bayonet mount also allows for easy incorporation of electronic contacts between lenses and cameras to enable two-way communication.
Due to the proprietary nature of all camera mounts, each one of them can differ in mounting direction, mount size, flange distance, number of electronic contacts and even where the electronic contacts are physically placed. Let’s take a look at each in more detail.
Mounting Direction
While most lens mounts require attaching lenses by twisting them clockwise, some brands like Nikon have a reversed way of doing it. On one hand, it does not matter which direction a lens is mounted or dismounted, but on the other hand, it might cause some confusion and might take time to get used to it, especially for those who decide to switch brands. Below is a table that summarizes the mounting direction of lenses among the popular camera brands.
Please note that the mounting direction is relative to the front view of the camera.
| Brand | Attaching Direction | Detaching Direction |
|---|---|---|
| Canon | Clockwise | Counter-Clockwise |
| Fujifilm | Clockwise | Counter-Clockwise |
| Leica | Clockwise | Counter-Clockwise |
| Nikon | Counter-Clockwise | Clockwise |
| Olympus | Clockwise | Counter-Clockwise |
| Pentax | Clockwise | Counter-Clockwise |
| Sony | Clockwise | Counter-Clockwise |
Mount Size (Throat Size, Inner and Outer Diameters)
When it comes to mount size, there are a few important measurements that need to be done correctly, especially when a lens mount is being compared to another one (as you want to compare apples to apples). There is throat size, inner diameter and outer diameter, and all of them mean different things. Let’s take a look at different measurement criteria and their differences.
Throat Size
The throat size of a lens mount is the inner diameter of a mount, minus the tabs that are used to mount lenses. Throat size gives us a more accurate representation of the potential of the mount and is important for calculating the angle of incidence, which we will discuss below.
Take a look at the below image to understand how the throat size is measured on a system:
As you can see, the distance measured is between the two tabs on the inner side of the mount.
Inner Diameter
The inner diameter of a lens mount represents the size of the lens opening ignoring the tabs on the mount. This measurement is often provided by camera manufacturers to give us an idea of the overall size of the lens mount.
Below is the image of how the inner diameter of a lens mount is measured:
Please note that the measurement is taken of the outermost inner part of the mount here. Due to the small additional recess within the inner mount in the case of Nikon F, there is an additional loss of 0.5mm to clear it. Hence, while the inner diameter is 47mm as measured above, it is technically 46.5mm between the inner parts of the mount.
Outer Diameter
The outer diameter of a lens mount is the full diameter of the bayonet mount, which in most cameras represents the end of the metal mount. The outer diameter of the mount plays an important role in determining the approximate outer diameter of the rear part of a lens, as it must be able to wrap itself over the outer diameter.
Here is the image of how the outer diameter of a lens is measured:
Again, there is another small recess that is right below the outer part of the mount, but we do not measure the outer diameter from it.
Flange Distance
Flange distance, also known as “flange focal distance”, “flange back distance” or simply “register”, is the distance between the mounting flange (which is the outer part of the lens mount when viewed from the side) and the film/sensor plane. Just like different mounts have differences in throat size, inner and outer diameters, flange distances also often vary greatly between different camera systems.
Mount Size, Flange Distance and the Angle of Incidence
Now that we have defined the mount size and the flange distance, let’s talk about the pros and cons of large vs small mount sizes, as well as the impact of the flange distance on a system.
The size of the mount is an important factor in a camera system. Generally, a larger mount size allows for larger lenses that can provide more light to the sensor. Hence, faster lenses can be designed by optical engineers. At the same time, mount diameter is not the only variable that impacts lens design – flange distance is also equally important. Shorter flange distance allows lenses to be placed closer to the sensor, which in itself allows lens manufacturers to start building simpler, smaller, lighter and less expensive short-focus lenses instead of the retro focus types.
A shorter flange distance also allows designing thinner cameras, thus making them smaller and lighter compared to cameras with longer flange distances. In addition, it allows lens designers to place a more powerful actuator on lenses for faster autofocusing and makes it possible to adapt lenses from other camera systems with longer flange distances via adapters. Lastly, the throat diameter combined with flange distance determines the maximum possible angle of incidence of the marginal rays from the lens, which is important in designing lenses – generally, the larger the angle of incidence, the easier it is to make high-performance lenses.
One downside of a larger lens mount is lens size and weight issues. The larger the throat diameter, the larger the lens has to be at its mount point, which obviously does impact its overall thickness and weight as well. Also, the shorter flange distance can lead to increased vignetting or discoloration in the corners of an image (although this can be mitigated by making the lens design longer to simulate a longer flange distance), due to sensor microlenses not being able to pass enough light at extreme ray angles.
To understand the importance of a larger mount and a shorter flange distance, please check out the below video from a Nikon engineer that explains the benefits of the Nikon Z system when compared to Nikon F:
When adapting lenses from other mounts, it is important to point out that due to the proprietary nature of autofocus systems, differences in exchange of information between camera body and lens via electronic contacts (the number of which also vary from system to system) and other issues, most adapters end up being “dumb” adapters with manual controls, manufactured by third party companies. Camera manufacturers themselves often provide adapters with the release of shorter flange distance systems to be able to mount lenses from other camera mounts that they developed in the past, but they almost never provide adapters for competing systems.
In addition, some adapters are capable of changing the physical properties of lenses by using glass elements in them, while others make it possible to insert a lens filter (such as neutral density or polarizing filter), making it possible to use filters on wide-angle lenses with oversized front elements, without involving bulky filter mounting rigs and large filters. When adapting lenses from other systems, it is important to make sure that the target lens mount has a longer flange distance in order to be able to achieve infinity focus. Furthermore, the difference in flange distance between the source and the target system has to be big enough to have enough room for an adapter to sit between the lens and the camera for a dumb adapter. Smart adapters that can establish communication between the camera and the adapted lens must have even more legroom for contacts and electronics to fit between the two.
Camera Mount Comparison
Now that we have gone through all the terms and definitions, let’s go ahead and compare different camera mounts based on their throat and inner diameters, as well as flange distance and angle of incidence:
| Description | Throat Diameter | Inner Diameter | Flange Distance | Angle of Incidence | Format |
|---|---|---|---|---|---|
| Leica M | 40. 0mm 0mm | 44.0mm | 27.8mm | 16.05° | Full Frame |
| Fujifilm X | 40.7mm | 43.5mm | 17.7mm | 35.34° | APS-C |
| Minolta SR | 42.0mm | 45.0mm | 43.5mm | 11.69° | Full Frame |
| Sony E | 43.6mm | 46.1mm | 18.0mm | 28.58° | Full Frame |
| Nikon F | 44.0mm | 47.0mm | 46.5mm | 12.14° | Full Frame |
| Pentax K | 44.0mm | 48.0mm | 45.5mm | 12.40° | Full Frame |
| Leica L | 48.8mm | 51.0mm | 19.0mm | 33.13° | Full Frame |
| Canon EF | 50.6mm | 54.0mm | 44.0mm | 16.82° | Full Frame |
| Canon RF | 50.6mm | 54.0mm | 20.0mm | 33.62° | Full Frame |
| Nikon Z | 52.0mm | 55.0mm | 16.0mm | 41.19° | Full Frame |
| Fujifilm G | 62. 1mm 1mm | 65.0mm | 26.7mm | 28.67° | Medium Format |
Note
To find the angle of incidence, I calculated the angle between the throat diameter and the top center of each system’s camera sensor. I assumed all full-frame sensors to be 24mm in height, the Fuji X camera sensor to be 15.6mm in height, and the Fuji G camera sensor to be 32.9mm in height (note that other websites sometimes do this calculation with inner mount diameter rather than the throat diameter, and they may calculate from a corner or the center of the camera sensor rather than the top center).Frequently Asked Questions
Below is a list of FAQs related to lens mounts that I put together for our readers:
What are the different camera mounts?
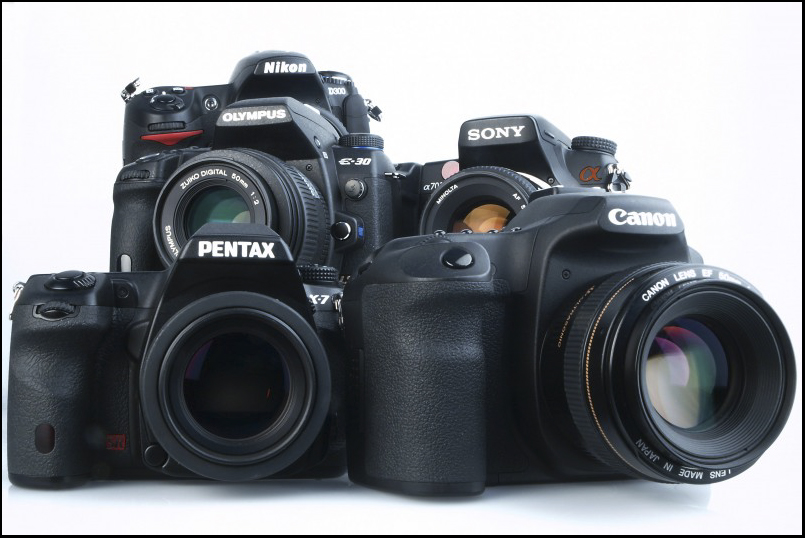
While many camera mounts have existed in the past, the most popular camera mounts today are: Canon EF, Canon RF, Fujifilm X, Fujifilm G, Leica L, Leica M, Nikon F, Nikon Z, Pentax K and Sony E. Each one differs from each other by a combination of throat diameter and flange distance.
How do I know which lens mount my camera has?
Find your camera’s brand and model, then search for its manual online. The manual should contain information relative to the mount, as well as a list of compatible lenses. Another option is to look up the lens that is mounted on your camera – its description should contain the name of the mount.
Which lens mount is the best?
While all lens mounts have their strengths and weaknesses, lens mounts with the largest throat size and shortest flange distance typically provide the most flexibility for lens design. At the moment, Nikon Z, Canon RF and Leica L mounts have the largest throat diameter and shortest flange distance among full-frame cameras.
Are all Nikon lens mounts the same?
No, they are not. Nikon has two different lens mounts: Nikon F and Nikon Z. The former is for Nikon’s DSLR cameras, while the latter is for Nikon’s newer mirrorless cameras.
Are camera lenses universal?
Unfortunately, they are not. Aside from a couple of alliances, most camera manufacturers typically create their own proprietary mounts, resulting in many different lenses for different lens mounts. However, some third-party lens manufacturers make the same lens for different camera mounts.
Can you mount a Canon lens on a Nikon camera?
It depends on the lens mount. You cannot mount a Canon EF lens on a Nikon F camera, because the Canon EF mount has a shorter flange distance. However, it is technically possible to mount a Canon RF lens on a Nikon Z camera.
What is a lens mount adapter?
A lens mount adapter is a device that allows a lens from one camera mount to be used on a camera with a different mount. While some manufacturers provide lens mount adapters with full compatibility and autofocus features, most adapters are “dumb”, and cannot transmit electronic data.
Please note that the above information is based on my research and submitted data from our readers. If you use a system that is not listed in the table and would like to help expand it with more data, please use the images in this article to properly measure the lens mount, then provide the information in the comments section below. We will do our best to update the table as soon as possible!
Everything you need to know about a tripod | Articles | Photo, video, optics
Purchasing a tripod can be a daunting task, given the huge selection of products on the market today. It would seem that a tripod is a fairly simple design, and it is only intended as a stand for the camera when we shoot at night or in HDR format. But this opinion is superficial, because in fact there are a lot of factors that are included in the description of a tripod: height, weight and dimensions in assembled and disassembled form, stability, how much weight it can withstand and, of course, cost. And these are just the basic questions you need to ask yourself. nine0003
First, let's look at the advantages and disadvantages of using a tripod for filming.
Why do we use a tripod?
First, a tripod is used in filming to enhance the sharpness and depth of field in images. This is due to the fact that the tripod keeps the camera in a static state, preventing vibrations when you shoot at slow shutter speeds.
If you shoot with a large and heavy lens, your hands will probably get tired quickly. The tripod in this case serves as a support and stabilizer. With a tripod, you can lower the ISO while still maintaining high quality. nine0003
Composition is much more convenient with a tripod, as the camera is stable and the horizon is much easier to level.
Of course, without a tripod, it is absolutely impossible to shoot panoramas and HDR photos, which require a very even hold of the camera in one position, or in a turn. Shooting on a timer or at night is just as impossible without a tripod. Similarly, its use is preferred when shooting macro, using an external flash, reflectors and other accessories, and in general, in many other cases. nine0003
What is the tripod made of?
As a rule, tripod construction is very simple and obvious, but let's look at it in detail.
Tripod legs are the simplest part, usually made of aluminium, basalt, in some cases steel and more recently carbon fiber.
Tripod Head - This part of the tripod body is where the digital camera is mounted. There are a lot of types of tripod heads and they are used in different cases. The most popular are ball and panoramic heads with rotation. nine0003
The tripod center shaft is a separate leg, or axle, that is located in the center of the tripod and is designed to allow the tripod to be raised even higher than the main legs allow.
The foot tips are in some cases interchangeable and in some cases permanent tips that allow the tripod to not travel on the surface and the photographer to shoot indoors and outdoors.
The most budget tripods usually do not allow replacement of head and tips, and some of them do not have a center shaft. On the other hand, more expensive options have almost all parts interchangeable, and the tripod head is sold separately, so one or more replacements can be purchased. nine0003
What should be considered when using a tripod?
There are things that may seem uncomfortable when you shoot on a tripod, but a real photographer usually puts up with them. However, let's look at some of them. Tripods add weight and bulk to all your photo luggage. Traveling with them is not always easy, although there are convenient options for cases and attachments to backpacks. Tripods are not easy to use if you are shooting on a busy street or city. The cost of a tripod, of course, will also affect the overall spending on photographic equipment. Setting up a tripod always takes time, and you also need to know how to use a tripod, otherwise you can damage the camera. nine0003
9 factors for a good tripod
Before you buy your first tripod, be sure to pay attention to the 9 key factors that make one tripod different from another and that will prove to be very important when you get into shooting.
-
How much weight can the tripod support -
Stand height -
Weight and construction of tripod -
Tripod legs -
Leg ends -
Central rod -
Tripod head -
Quick Release -
Stability
The first thing to consider is the weight the tripod can support. Consider not only how much the camera weighs now, but also how much weight the lens adds to it. Also, stock up on a tripod, as both the camera and lenses can get bigger over time. In addition, you can shoot with an external flash and other accessories that will also be mounted on a tripod. nine0003
It will be too expensive and inconvenient to change a tripod with each new thing, so be sure to take this figure into account.
If you choose the wrong tripod, it can simply break, damaging both the camera and the lens. Ideally, the tripod should be able to support 1.5 or 2 times the weight of your current gear. At the same time, remember that sometimes you will have to press on the camera and, accordingly, on the tripod, which also adds weight. nine0003
The minimum height of the tripod must be suitable for your height - this is the most important thing. Otherwise, you will have to bend over, which will lead to increased fatigue and may adversely affect the result of the shooting. When the camera is on a tripod, the viewfinder should be at eye height. Sometimes you will have to look through the viewfinder for a long time, waiting for the right moment to shoot. At the same time, you must also keep in mind that sometimes it is more convenient to shoot from above, especially if the camera has a display with a rotation. The legs can always be adjusted to make the tripod shorter, but it just won't get taller. nine0003
If you purchase the tripod head as a set, the height of the tripod head must be at chin height. If the tripod has an interchangeable head, then without it, its height should be at shoulder level.
Height is also important if you plan to travel with a tripod. It must fit in the car and luggage.
One of the most important parameters is the weight of the tripod. It shouldn't be too heavy as it's mostly used on location shoots, meaning you have to take it with you all the time. The lightest tripods are made from carbon fiber, they are durable and stable, but they cost a little more than others. nine0003
The second most convenient material from which tripods are made is aluminum. Most modern tripods are made just from it. These tripods weigh a little more than carbon fiber tripods, but are cheaper. There are also stainless steel tripods, which are most often used by operators to set up heavy equipment. They are not suitable for photography due to their weight.
The middle version is a basalt fiber tripod. Its weight is just between aluminum and carbon fiber. nine0003
It is most convenient when the headless tripod weighs about 2 kg.
There are two types of tripod legs - tubular and non-tubular. We are all used to tubular legs, and have seen them more than once. Carbon fiber tripods usually have tubular legs. Tubes of different sizes are inserted into each other, providing a telescopic design, and special locks secure them at the desired height. nine0003
Basalt, steel and aluminum tripods are available with different leg shapes and locks. Depending on the required tripod height, 3 or 5 sections will suit you, that is, 3 or 5 tubes located one inside the other. However, do not forget - the more sections, the higher the tripod, but the less stable it is.
We have already noted the fact that they are removable and fixed. Of course, it's better to get a tripod with detachable tips, since you can choose them depending on the conditions in which you will be shooting. For rooms, rubber or plastic tips are most often used - they do not scratch the floor and provide stability, preventing slipping. The most convenient for outdoor shooting are tips with metal spikes. They are more convenient because they allow you to firmly mount the tripod on any surface, including icing, puddles or on the ground. nine0003
Not every tripod has a central stem. It allows you to simply control the height of the tripod and, accordingly, the camera. This is quite convenient, especially when shooting landscapes.
However, the central post also has dangerous moments. In fact, it is not as stable as tripod legs and creates the effect of a monopod placed on a tripod. This is somewhat contrary to the concept. When shooting with a heavy telephoto lens, the stem can create unwanted vibrations, so a tripod without one is more suitable for this type of photography. If you choose a tripod with a rod, always look at how high it extends. nine0003
The head is the most important part of the tripod. It is she who is responsible for mounting and holding the camera, for controlling movements and turns. If you choose a tripod that does not include a tripod head, or want interchangeable features, be sure to check the weight the tripod head can support. The minimum weight should be the same as that of the legs.
Ball head only allows fastening and loosening fasteners. It is comfortable and allows you to easily rotate the camera. The gimbal head is designed for very heavy telephoto lenses (300mm+). These heads are suitable for sports shooting and are very comfortable. nine0003
Most modern cameras are equipped with a special cord that is attached to a tripod or monopod. This is not a very convenient system, therefore, for comfort and simplification, manufacturers began to place a small removable plate on the camera or lens, on which there is a tripod mount.
Budget tripods have a plastic mount, a little more expensive - reinforced, usually aluminum. nine0003
Well, here we come to the last point, which, however, is very important. A heavy tripod is not necessarily more stable or stronger. You will have to shoot in different conditions, on different surfaces and in different weather. And all this tripod must be able to withstand, while keeping the camera in a level position. You can only check this in practice, but always before shooting, try to make sure that the camera is level and that all tripod legs have a stop. nine0003
Lens parameters for video cameras. Camera lens.
Sensor and imaging dimensions The lens creates an image in the shape of a circle (image circle), and in CCTV cameras the sensor has a rectangular shape (image size), so a rectangular image is obtained inside the circle (image circle).
Correspondence between angle of view and sensor size Cameras with different sensor sizes (such as 1/4", 1/3", 1/2", 2/3" and 1") and with the same focal length have different angles of view. The ratio between sensor sizes is 1:0.69:0.5:0.38:0.25. This means that a 1/2" sensor is 50% of a 1" sensor, a 1/2" sensor is 75% of a 2/3" sensor and a 1/3" sensor is 75% of sensor format 1/2". Image Sensor Size in mm
Camera to Monitor Magnification
Focal LengthA parallel beam of light incident on the surface of a convex lens converges at a point on the optical axis. This point is called the focal point of the lens. The distance between the main point of the optical system and the focal point is called the focal length (focal length). For a single thin lens, the focal length is the distance from the center of the lens to the focal point. As the focal length increases, the visibility of fine details increases, but the viewing angle decreases.
The focal length of the lens is indicated in millimeters and, other things being equal, determines the angle of view. A wider angle is provided by a shorter focal length. And vice versa - the longer the focal length, the smaller the angle of view of the lens. Approximate focal length required to achieve a 30° horizontal angle of view
Lenses are usually divided into normal, short throw (wide-angle) and long throw (telephoto). Lenses whose focal length can be changed by more than 6 times are called ZOOM lenses (zoom lenses). This class of lenses is used when a detailed view of an object remote from the camera is required. For example, when using a 10x ZOOM lens, an object 100 m away will be seen as an object 10 m away. Minimum Object Distance = MODThe minimum subject distance indicates how close the lens can be brought to the subject when shooting. This distance is measured from the vertex of the front lens element. Flange Distance and Back Focal Length
Flange distance - the distance from the plane on which the lens is mounted to the focal plane (in air). For a C-mount adapter, this distance is 17.526 mm (0.69"), and for a CS-mount adapter, this distance is 12.526 mm (0.493"). CS-mount and C-mount threads have a diameter of 25.4 mm (1") and a pitch of 0.794 mm (1/32").
Back focal length - the distance between the vertex of the extreme lens and the sensor. Compatible with C-mount and CS-mount adapters Modern video cameras and lenses may have different types of mounts.
Angle of View and Field of View The angle of view is the shooting range that can be viewed by the lens given a specified image size.
OrificeTypically, a lens has two aperture ratios - (1:F) or aperture. Maximum value of F - minimum value of F; fully open aperture - F minimum, maximum F - aperture closed. The F value affects the output image. Small F means that the lens lets in more light, so the camera performs better in the dark. A lens with a large F is needed when there is a high level of illumination or reflection. Such a lens will prevent the camera from "dazzling" by providing a constant signal level. All auto iris lenses use a neutral density filter to increase maximum F. Aperture (F) also affects depth of field. nine0003 Depth of field Depth of field indicates how much of the field of view is in focus. Diaphragm (automatic or manual) Auto iris lenses are recommended in variable light conditions. Manual iris lenses are mainly used in indoor environments where the light level is constant. With the advent of electronic iris cameras, it became possible to use manual iris lenses in variable light conditions. However, it must be taken into account that with a fully open aperture in low light conditions, the F value becomes critical, and the depth of field is very small, which makes it difficult to achieve the necessary focus in the daytime. An auto iris lens is used to achieve the required image quality. Such a lens has a cable through which control is carried out. Using a controller with a DAC, you can programmatically change the focal length and aperture of such a lens (in the absence of power, the aperture is completely closed). With some lenses, either focus or aperture can be changed in this way. How to determine the required focal length of alensTo select a lens for a specific application, consider the following points:
Lens focal length = sensor size x working distance / field size Example: if there is a 1/3" video camera (i. 
|
 The ratio of the horizontal size of the sensor to the vertical size is called the aspect ratio and for a standard CCTV camera this ratio is 4:3. nine0003
  6 mm
6 mm  If the lens is designed to work with a large However, if the lens is designed to work with a 1/3" sensor and will be used with a 2/3" sensor, then the image on the monitor will have dark corners. nine0003
  3X
3X  2X
2X  The normal viewing angle of a TV camera is equivalent to that of a human, with the lens having a focal length proportional to the diagonal size of the video sensor.
  . The camera equipped with such a lens can be controlled remotely by the operator. nine0003
  It is usually expressed in degrees. Normally the angle of view is measured assuming a lens is focused at infinity. The angle of view can be calculated if the focal length and image size are known. If the distance of the object is finite, the angle is not used. Instead, the dimension of the range that can actually be shot, or the field of view, is used. nine0003
  A large depth of field means that more of the field of view is in focus (an infinite depth of field can be achieved when the aperture is closed). A shallow depth of field allows only a small fragment of the field of view to be observed in focus. Depth of field is affected by certain factors. For example, lenses with a wide angle of view provide, as a rule, a large depth of field. A high F value also indicates a greater depth of field. The shallowest depth of field is possible at night when the aperture is fully open (so a lens that is focused during the day may be out of focus at night). nine0003
  The camera can maintain a constant video signal level, but cannot affect the depth of field. When the aperture is fully closed, the depth of field increases, but this leads to a decrease in camera sensitivity. nine0003