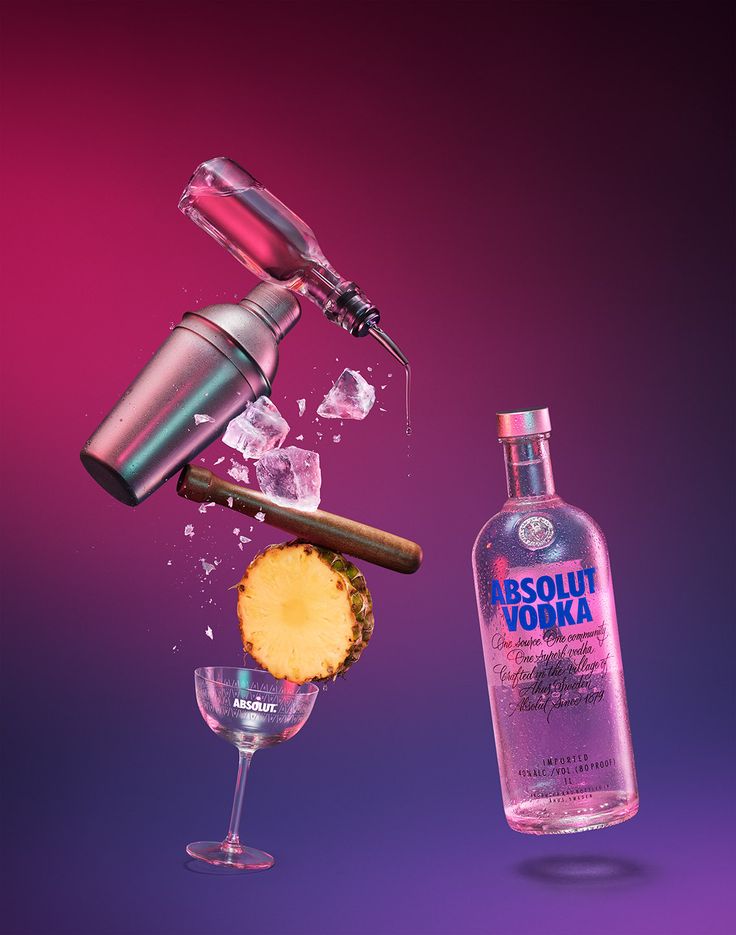
Drink product photography
32 Awesome Drink Photography Tips To Improve Your Drink Photos
This post may contain affiliate links from products and services we love and trust.
Drink photography is its own niche because it commands unique styling, lighting and photographic technique. Photographing drinks is anything but just putting liquid in a glass. Drinks have texture, they are colourful, they dance with the light and they have the power to make us lust after an icy cold one on a hot day.
But for most food photographers, drinks and cocktails are hard. Hard to style, hard to photograph.
If you feel limited by just pouring liquid into a glass, or you can’t seem to make your drink photos stand out – this tips post is for you!
Here are 32 tips to photograph beverages – let’s dive in.
Drink Photography Requires Photoshop Compositing
Photoshop compositing is a technique where multiple images are combined into one photo. With drink photography, compositing is a standard technique to help perfect lighting and reducing reflections.
With commercial or advertising beverage photography, photoshop compositing is a required technique. It’s actually really easy to learn and can take your shots to new heights. I can teach you Photoshop compositing in my retouching food photography masterclass.
View this post on Instagram
A post shared by Rachel Korinek | Food Photos (@twolovesstudio)
Strong Lighting Before Styling Drink Photos
Let’s be real, liquid can be boring to photograph. However, if lit properly, the drink can really stand out to the viewer. Focus on manipulating your light first for tonal or colour contrast, then style your scene. In the next tip, I’ll be sharing the angle of light that’s my go-to.
The strong lighting in this image really makes the drink pop.For clear liquids, try backlight to make them shine.
Shoot Backlight to Make Clear Drink Photos Interesting
Backlight is an impressive angle for drink photography. Especially for clear drinks. At the right angle, you will pick up a nice shine on top of your beverages that helps create dimension in your photos.
Drinks do have texture and backlight is a direction of light that picks up the most texture. This direction of light can not only be used to emphasise texture in your drinks subjects but also to illuminate the scene you are shooting.
Using Artificial Light Will Reduce Reflections
Most professional beverage photographers will use artificial light for a few main reasons. They can control the light in drinks and liquor bottles, and control (and reduce) reflections.
With artificial light, you can reduce reflections that would normally be picked up with ambient light in the room. If you do use artificial light, you’re likely dealing with fewer reflections than natural light and are in a good place to start reducing reflections even further.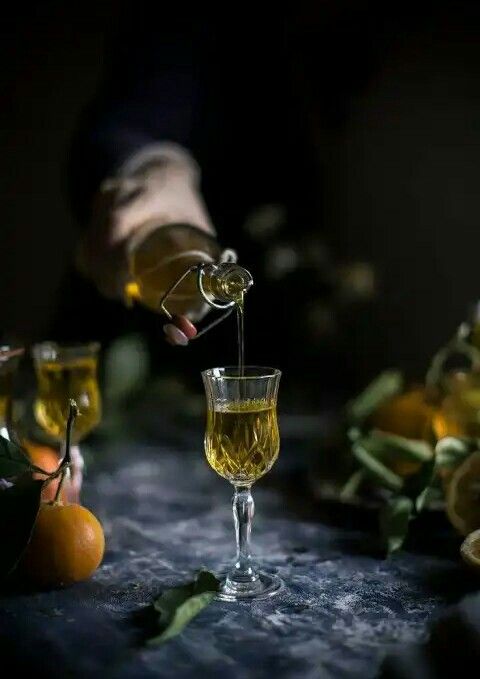
Double Diffuse to Reduce Unwanted Reflections
Depending on the type of modifier you’re using (in either natural or artificial light), you may be able to see the reflection of the modifier in your glassware. If the modifier is large enough, you’ll get a nice highlight on the glass. If it’s a small modifier, instead you’ll just see a round or square highlight that isn’t as flattering.
In this case, you can use double diffusion to create softer, more flatter highlights and reduce reflections. Double diffusion is where you use two modifiers. For example, a softbox and a large scrim/diffuser together to light your scene.
Managing exposure and highlights with beverages is done with the help of Photoshop.Combining my Profoto Strobe with a 4′ x 6′ modifier for double diffusionUse White Foam Boards to Minimise Reflections
White foam boards are typically used to bounce light back onto your subjects and the scene you are shooting. You can, however, use them to reduce reflections and add nice highlights to glassware or bottles.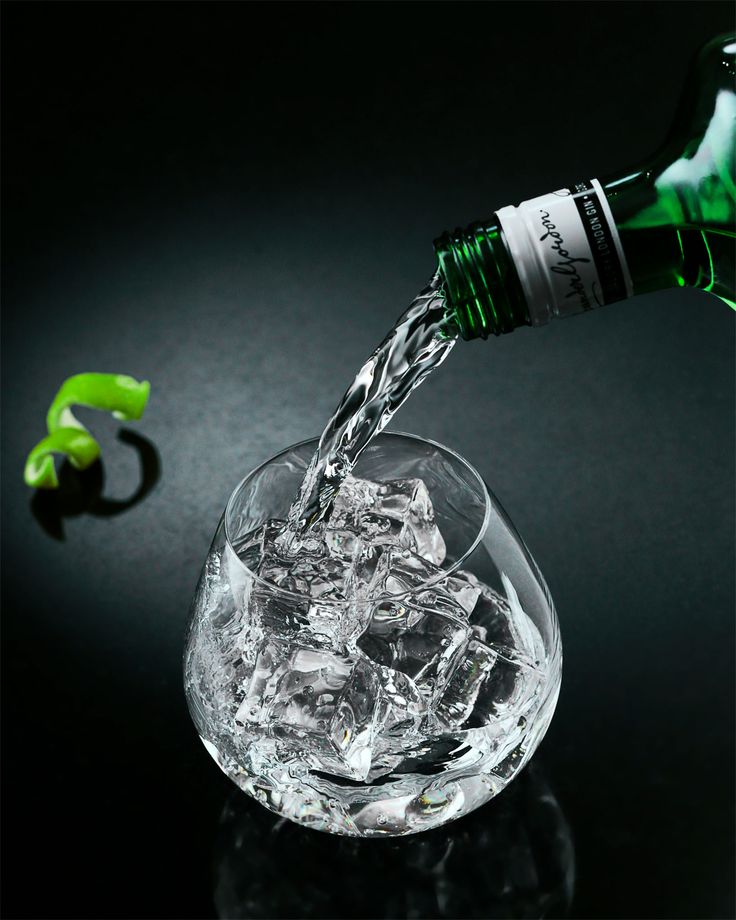
Use large white foam boards that can stand up on their own to help reduce any reflections picked up by ambient light or the flash you’re using. You can even use a white foam board to be in front of the camera (with a hole cut out of course for the lens) to reduce any reflections from the camera itself.
Photoshop Will Help you Remove Unwanted Reflections in Glassware
It’s almost impossible to remove all of the reflections you might encounter when doing drink photos. Even if you minimise all of the reflections with your lighting, unless you’re lighting one single drink on a very large background, you’ll still likely get reflections from other subjects.
Photoshop is necessary for drink photography. Using a combination of the Clone Stamp Tool and The Spot Healing Brush, you can further remove and retouch the last of the reflections in Photoshop.
I teach an online class on just how to do this in Retouching Food Photography.
All beverage photographers need a little help from Photoshop.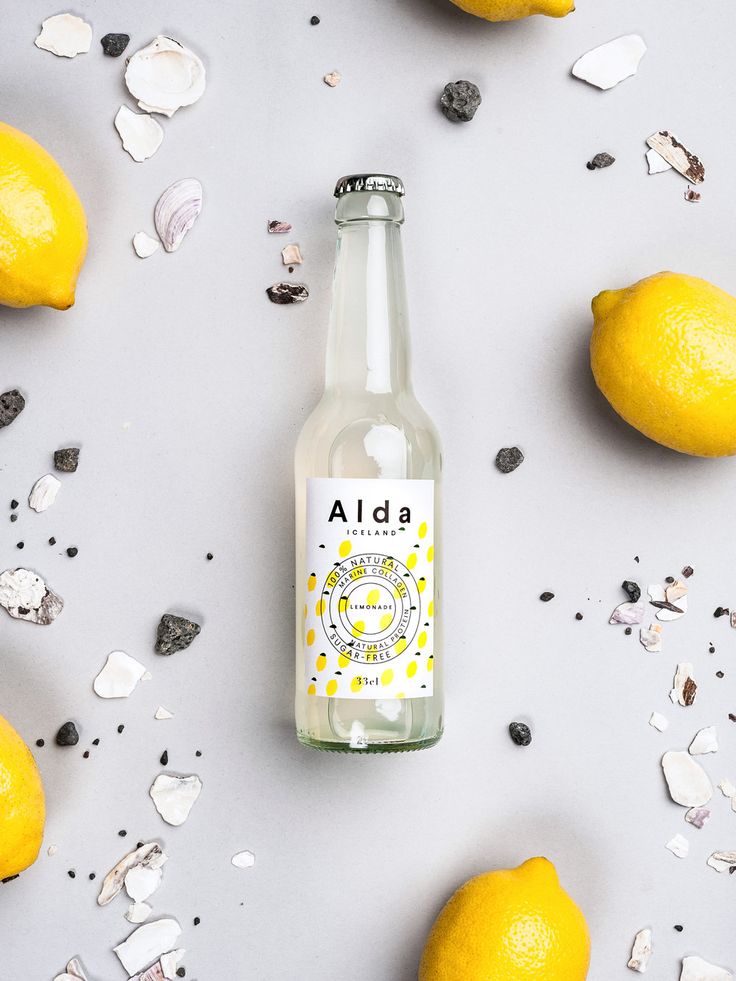 Learn how to remove reflections with me.
Clear Ice Elevates Drink Photos and Catches Light Better
Clear ice is better for drink photography for one simple reason. It has fewer imperfections and distractions in it and therefore picks up the light nicer.
I’m always distracted by the clumps of white imperfections in ice, rather than looking at the drink itself. Clear ice at home isn’t easy. I do recommend a simple and affordable clear ice maker in my drinks style guide. But you might also want to think about using quality fake ice if you get into this full time.
Use Good Quality Fake Ice
If you’re going to get into the drink photography game full time, you might want to consider some quality fake ice cubes. They are pricey and not a lot of companies make them. Saving up for a few key pieces is a good way to start.
Check out Trengove Ice Cubes for more information on fake ice.
Clear ice catches the light nicely in photosUse crushed ice to get started.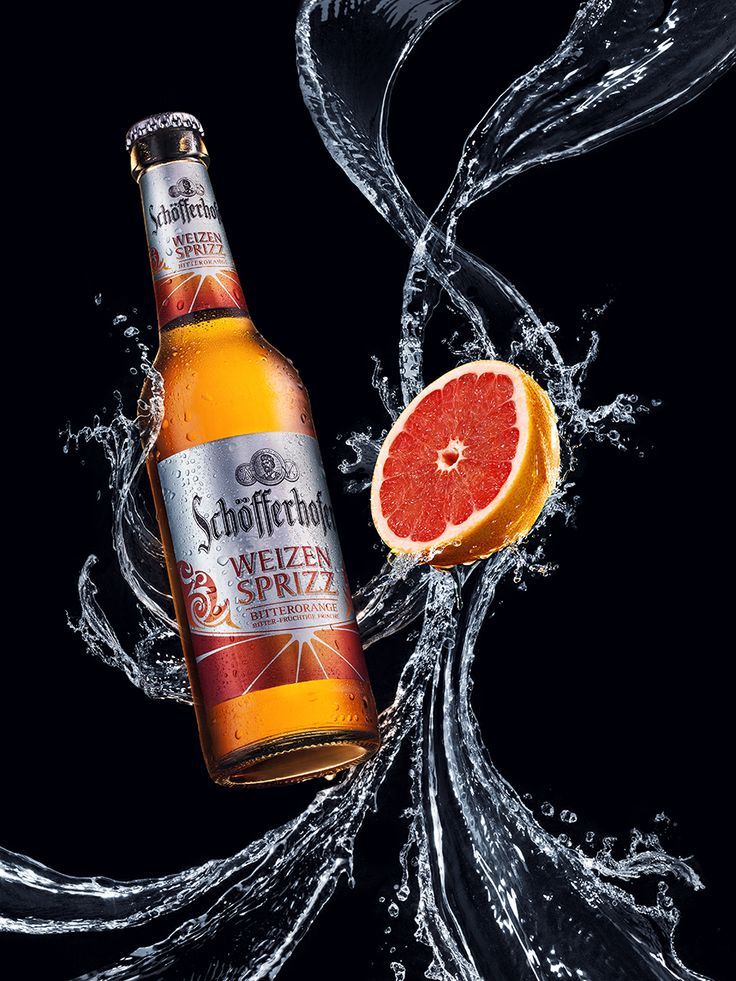 It lasts longer than you think
Crushed Ice is a Good Way to Get Started. It Lasts Longer Than You Think
I hear from a lot of photographers that they avoid shooting drink photos because they aren’t sure how to work with ice or are scared of working with ice. My advice is to then start with crushed ice. You can get more time with crushed ice than you think. Even up to an hour on a cool day. That’s plenty of time to play with a few shots.
For crushed ice, most blenders have a crushed ice setting. I simply buy a bag of ice from the grocery store and crush it using my blender.
Use Less Liquid with More Ice & Ingredients to Avoid Them Floating to the Top
It’s true, most ingredients and ice that you use in drinks are likely going to float to the top of the glass. Leaving the top crowded and the bottom vacant. This doesn’t always look at good as if the peach slices and ice cubes were sitting nicely in the glass from bottom to top.
The trick, in this case, is to get the ratio of ice, ingredients and liquids right.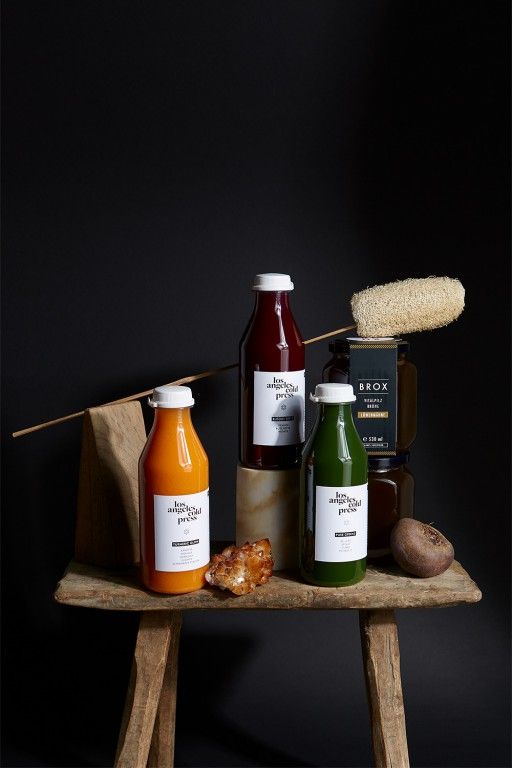 Add more ice and less liquid.
The liquid level shouldn’t be full. There will come a point where the liquid will allow the ice to float. Fill the glass with ice and ingredients, then just 3/4 full with liquid.
Cheap Plastic Decorating Cubes Are Good to Help you Practice and Light Drink Photos
You can find these at craft or DIY stores. I don’t recommend them for the final shot, but when you’re using real ice they make a good option to light your drinks for test shots so you don’t waste ice.
Cloudy Ice Works For Cloudy or Muddled Drinks
Having said that clear ice is best for drink photography, I know it’s not always possible. If you can’t make clear ice at home, then use cloudy ice in cloudy or muddle drinks as it’s less obvious.
Adding fruit or fruit juice to ice cubes can further hide the fact that the ice isn’t clear – win! The bonus is that it also looks nice in photos.
In this shot, I’ve used regular cloudy ice in an opaque drink and you can’t even notice!Buy a Glass Cleaning Cloth
A must-have item if you are shooting drink photos is a glass cleaning cloth.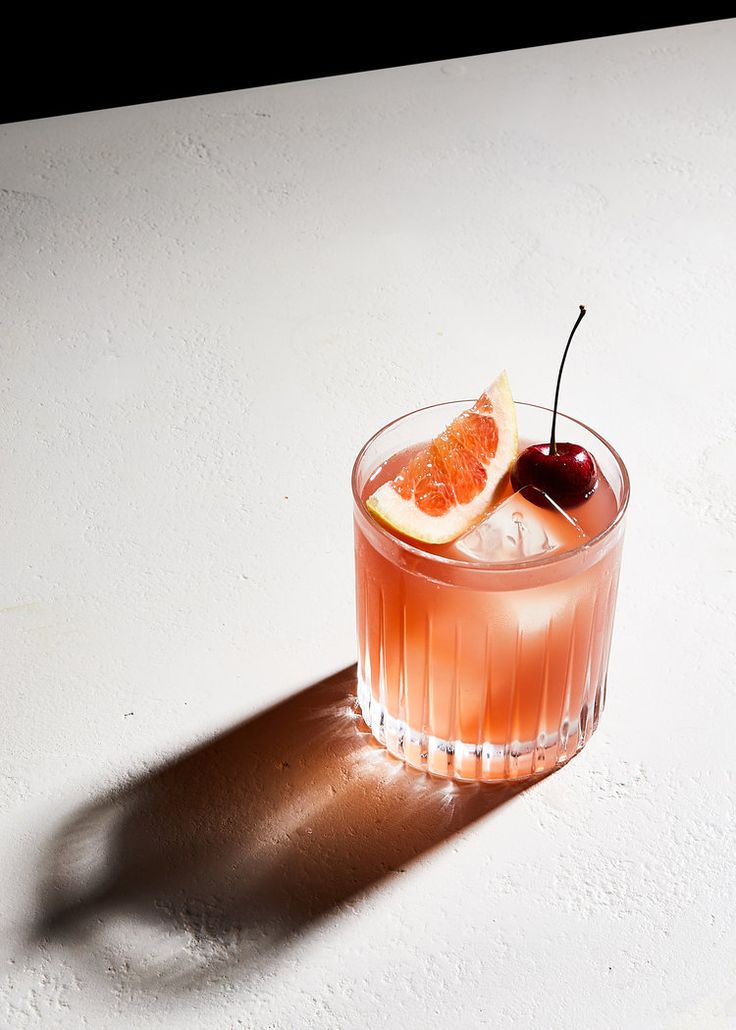 No matter how many times you try to wash a glass, there will be some marks left. A good cleaning cloth designed to clean glassware is a lifesaver. It will reduce the time that you need to remove unwanted marks in photoshop.
I found this one from Crate & Barrell and it’s awesome. I came in a three-pack and I solely use it for cleaning glassware on set.
Use a Variety of Interesting Glassware
If you’re going to get into the drink photography game, glassware will become an obsession. Not only is there a type of glass for each cocktail, but having a variety of interesting and vintage pieces will make your photos better.
In my drinks styling guide, I cover different types of glassware you’ll need for different drinks. But here are the top four types of glasses I recommend:
- Vintage coupe
- Rocks glass
- Clean lines tumbler
- Tall Tom Collins
Consider a Balance Between The Height of Your Glasses & Liquor Bottles
One thing many photographers don’t think about when they get into drink photography, is that they need a variety of tall and short glassware.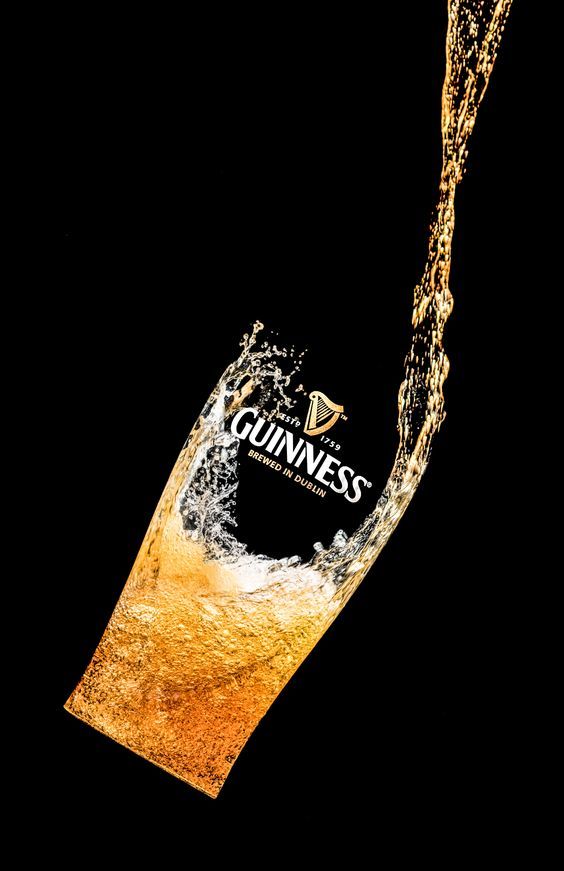 Some glasses might seem very tall and large, but when you think about it most liquor bottles are very tall.
Using a very tall bottle and a very short glass can cause an imbalance. We want to aim for harmony between the height and visual weight of any bottles, decanters and glassware that we use.
Drink Photography Hack: Use Sticky Tac to Help Glassware Stand Up Straight
Between distortion and glassware imperfections, can be hard to get glassware to stand up straight sometimes.
As I like to get them as right in-camera as possible, I will use sticky tac and place a small piece under the glass to make it stand up straight. Then I photoshop it out in less than 30 secs. I’ve found this to save the most time and give the best results.
I like to add a little sticky tac under glassware to make them stand straight then use photoshop to remove them.Perfect The Foam in Your Cocktails Using the Dry Shake Method
One of the things that got me into drink photography is the foam on cocktails.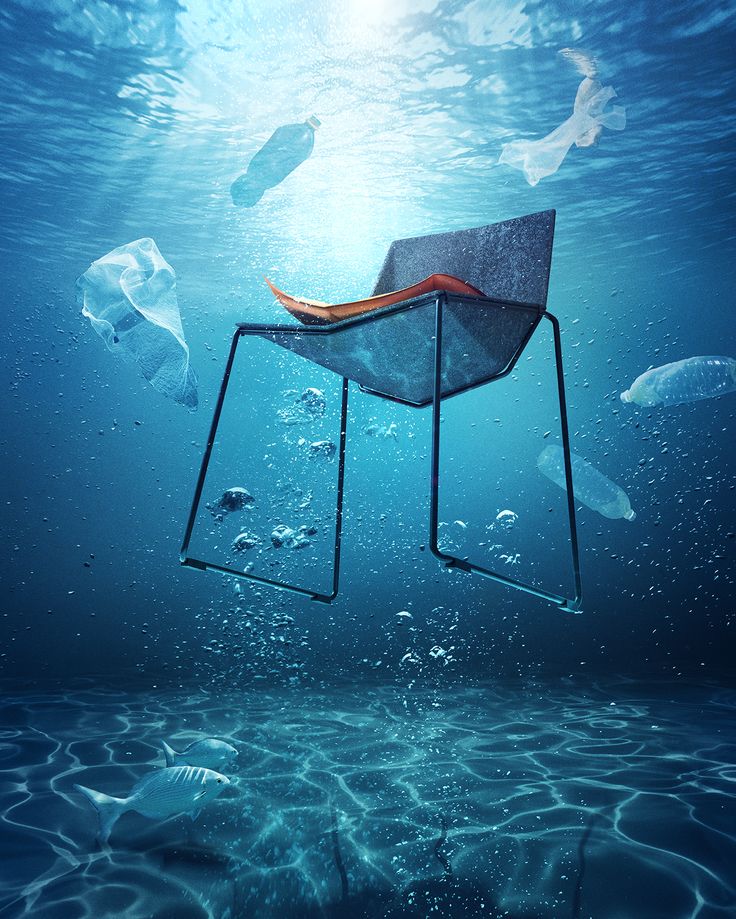 That buttery, meringue-like foam is so darn pretty and photogenic. But there is a technique to it. If you don’t have the right combination of ingredients or don’t use the right shaking method, you can end up with airy foam that looks curled.
For the perfect foam, use the Dry Shake technique. You shake the ingredients first, without ice. Then add ice for a second shake. Learn how to do the dry shake technique in this post.
View this post on Instagram
A post shared by Rachel Korinek | Food Photos (@twolovesstudio)
Replace Simply Syrup For Clear Spirits When Testing to Save Money
When you are doing a lighting test of your drink photos you may not want to waste precious spirits as they aren’t cheap. Some clients will even ask you not to use clear spirits to save money on photoshoots.
This needs to be approached with caution. Cocktails are a delicate balance of textures and liquids. You can’t simply omit the spirit and the cocktail always look the same. In this case, I’ve found using a 1:1 ratio effective. Simply substitute simple syrup for clear liquors.
Help Identify the Temperature of the Beverage With Steam or Icy Conditions
Drinks either cool us down or warm us up. There’s not much in between. In summer, our job is to want to make the viewer cool down with an ice-cold beverage. In winter, our job is to get them to cosy up with a hot drink.
Help the viewer connect to these ideas by either capturing steam or condensation.
The condensation on the glass tells us this is a chilled beverageThe subtle foam line tells us the drink has been freshly poured.Capture Freshly Poured Beverages
Freshly poured beverages are when the drink is the best to photograph. There is movement happening in the glass, there might be bubbles or foam adjusting to its new container. This gives beverages life. Think about your first shot vs the shot you take after an hour. There’s less life in the one that’s been sitting around.
Don’t be afraid to reshoot the beverage a few times to get the freshly poured look. It really does make a difference.
Be Prepared to Make Drinks 2-3 Times For the Perfect Shot
Maybe this goes without saying, but as a food photographer, we don’t have to make every recipe a couple of times to photograph in the same shoot. But with beverages that’s normal.
When prepping for ingredients, make sure you have enough to make the drink a few times. Being able to shoot the drink two to three times will help you capture the freshly poured look.
Top Up the Liquid on Set to Avoid Rim Marks
I always recommend doing test shots for composition and lighting with a test drink. Then when you’re happy with how the photo is looking, bring in a freshly poured hero cocktail. However, if that’s not possible, in order to avoid rim marks on your glass as your moving and setting things up, underfill your cocktail.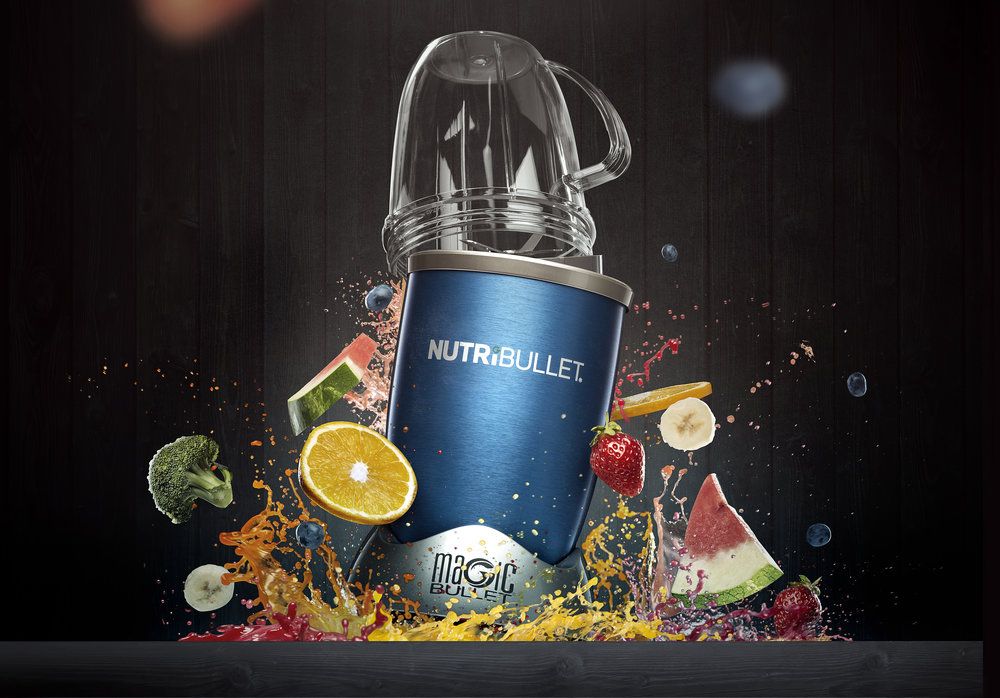
Then when you’re ready for the final shot, top up the liquid on set with a small jug or syringe.
Have Short Straws For Short Tumblers
Reuseable metal or glass straws are great options for styling drinks. You will want to avoid putting very tall or long straws into small tumblers. The proportions will look off and distract from your hero subject.
Instead, source small straws around 5″ to 6″ (12cm – 15cm) that will sit nicely in your smaller cocktail glasses.
5″ glass straws work better for short tumblersCocktail picks are a great way to affix garnishesCocktail Picks Add Interest and Class to a Drink
Probably the most essential styling prop for cocktail photography would be the cocktail pick. It’s not only the best tool to skewer and present garnishes, but it adds interest and lines to any cocktail photo.
You can find these in metal, wood, bamboo or glass. It’s a good idea to have a couple of different shapes and lengths to suit different glasses and recipes.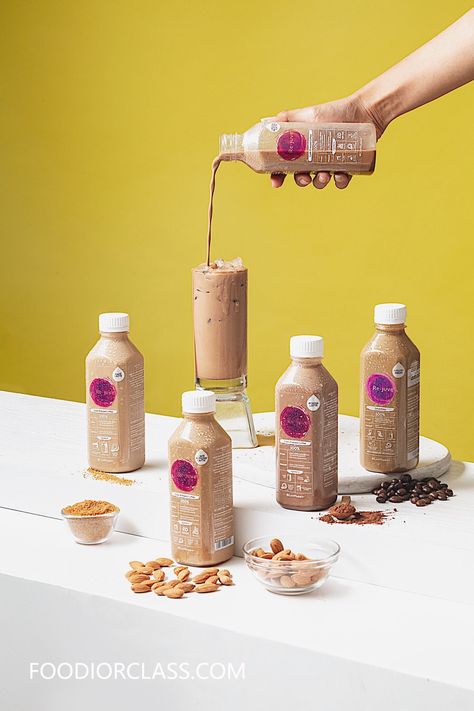
Find Interesting Garnish Ideas
Garnishes are literally the cherry on top of hero subjects. Liquids in glasses can be rather boring until we focus on a nice garnish. Create a mood board of garnish ideas for all kinds of cocktails and drinks that you can reference later.
I have a post on garnish ideas: 13 Simple Yet Stunning Cocktail Garnish Ideas For Drinks Photos.
Make pretty shapes from common ingredientsGarnishes with edible pearl dustShow Off Your Drinks Texture
Drinks have texture. They can be smooth, creamy, silky, foamy, bubbly, icy, hot, stirred, muddled, chunky, thick or thin. It’s our job to communicate what the drink might feel like when it hit our mouths.
Ways to highlight the texture in your drink include using:
- Backlight to bring out texture
- Ice or steam to communicate the temperature and hint at texture
- Size of glass
- Layers on drink like foam
- Lens choice like marco to capture textures
Shoot With a Narrow Lens to Reduce Distortion
When it comes to drink photography, we are often working with tall subjects. In order to reduce distortion, shoot with a narrow lens. For example:
- 85mm, 105mm, 70-200mm on a full-frame camera
- 60mm on a cropped sensor camera
The goal with a narrow lens is to compress the subjects so they look straighter. Therefore, you’ll need more space for the camera to be further away from your subject.
There’s less distortion with a narrow lens, like the 200mm.More distortion is experienced with a wide lens up close.Learn more about lenses: Ultimate Lens Guide for Food Photography
Don’t Shoot too Shallow of an Aperture
Viewers want to be immersed in the feeling of the subjects. They want to feel the texture of the drink and daydream about what it would be like to unwind sipping on a cocktail. They can’t do that if we shoot a shallow aperture and only capture the garnish or rim of the glass in focus.
I recommend capturing your subjects at apertures of f/5.6 to f/8 as a place to start. But always explore different depths of field too.
Use a Fast Shutter Speed to Capture Pour Shots
Action or pour shots in drink photos are fun ways to use interest. They can also help with composition when our subjects lack interest. To capture high-speed shots, use a fast shutter speed. With natural light that might be 1/500 sec or above, with artificial light your strobe’s highest sync speed.
For more on settings, read the ultimate guide to camera settings.
ISO 80, 1/200 f/5.6 shot with Profoto B10Zest from an orange slice with backlightingCapture Zest Spray of Effervescence using Backlight and Dark Backgrounds
Looking to capture that magical show that is effervescence or a zest spray from a citrus peel? It’s much easier to do on a dark background using backlight.
Make sure to take test shots to get the lighting and angle right before attempting your final shot.
Brighten Up Shadows in the Drink to Clearly See Texture
Whichever lighting you use for your shots, in the editing stage, bring out the shadows in the drink itself to make sure the viewer can see the texture of the drink.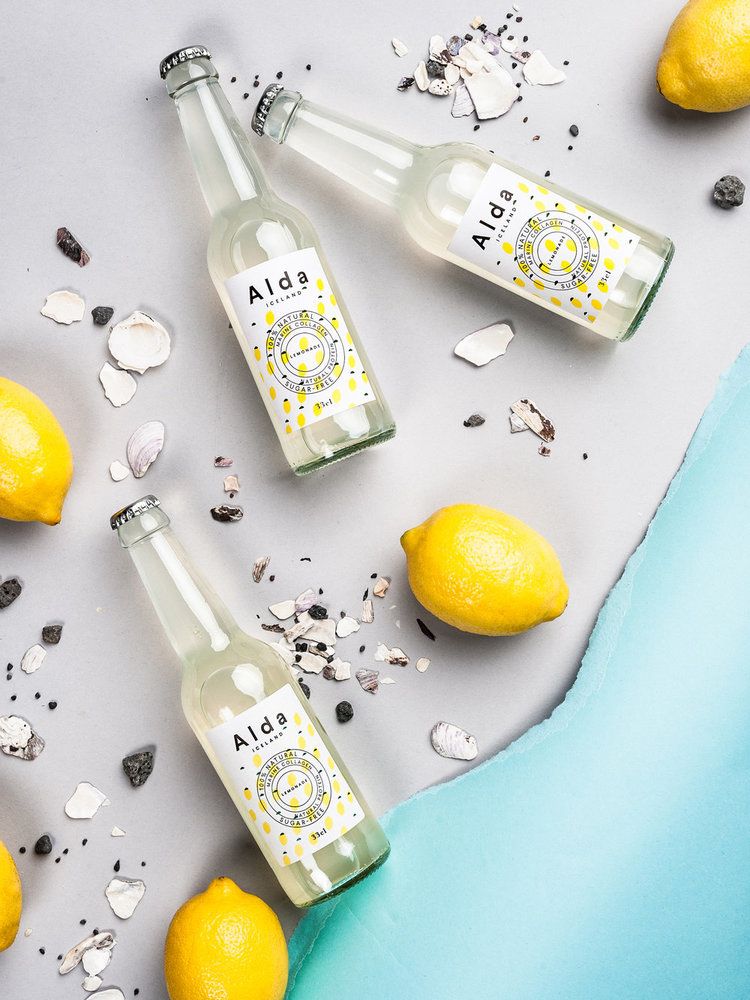 I like to use the shadows sliders in Lightroom or Capture One first, rather than adjusting all tones.
How to best light drink photos?
Strong lighting is important before styling your drink photos. First focus on manipulating your light for tonal or colour contrast, then style your scene.
Should I use fake ice for drink photography?
Yes, fake ice is a good option for full-time drink photographers. Saving up for a few key pieces of quality fake ice cubes is a good place to start.
What is the best glassware for drink photography?
Make your drink photos better and unique by having a variety of interesting pieces. Try these top four styles.
1. Vintage Coupe
2. Rocks Glass
3. Clean lines tumbler
4. Tall Tom Collins
Best Drink Photography Hack?
Use sticky tac to help glassware stand up.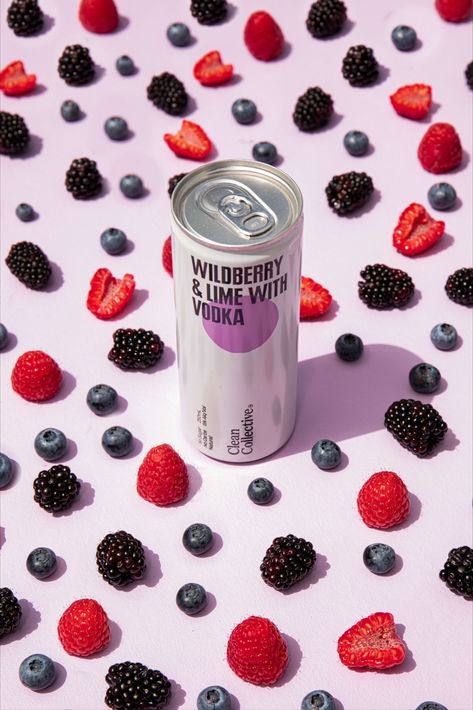
If you’ve made it this far, thanks for reading all these tips. Did you have a favourite? Which tip will you work on next? Let me know in the comments below.
Two Loves Studio was not paid to write this post, however, it may contain affiliate links. If you purchase an item from an affiliate link, we do get a commission on the sale which helps us run this site. Only affiliates for products/services we believe in appear on this site.
10 Cocktail Photography Techniques for Styling and Shooting
Shooting drinks is a vital food photography skill. It can be fun and rewarding, but it can also be very challenging. The ice always melts, and it’s tough to get rid of the ugly reflections in the glass.
Despite these challenges, you can create some great looking drink photography. All you need is a little bit of experimentation and patience.
Here are some top photography tips for styling and shooting drink photography.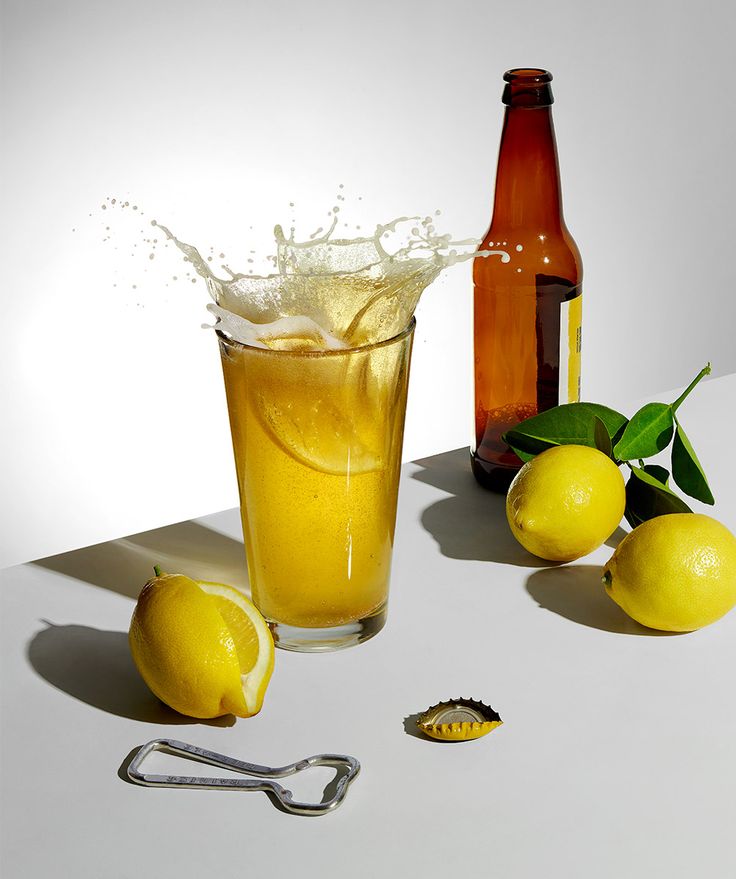
[Note: ExpertPhotography is supported by readers. Product links on ExpertPhotography are referral links. If you use one of these and buy something, we make a little bit of money. Need more info? See how it all works here.]
10. Make Your Cocktails Look Realistic
Styling cocktails is where you can get creative. There are dozens of drinks you might choose to shoot. You can make them much more attractive with garnishes, speciality ice cubes and ice shards. You can even use supplementary fresh ingredients such as lime and pomegranate seeds.
If using ice, don’t use cheap trays from the dollar store that will give you awkward, rectangular ice cubes.
Use some fun square pieces and place the cubes in the glass before filling it. Don’t overfill the glass! Leave a little breathing room.
Garnish your cocktails with whatever you see fit for your particular drink. This can be mint, maraschino cherries, berries, or orange peel. Be careful in placing them, or they can look messy.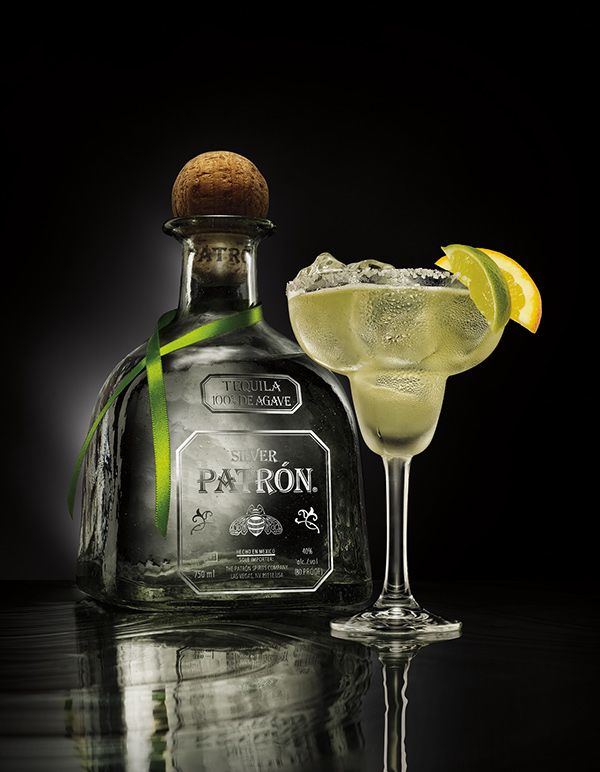
You don’t have to splash out for real alcohol much of the time when you’re shooting drink photography. Sometimes substitutes work better for the cocktail picture.
For example, red wine usually shoots too dark. Professional food stylists often opt for red food colouring mixed into water as a stand-in.
The same goes for a few drops of soy sauce or liquid seasoning mixed with water. It makes a very believable substitute for white wine.
In the shot above, I used water instead of vodka for my martini. It’s one of my best selling photos, and no one is the wiser.
In styling food and drink photography, sometimes you need to make concessions to get the best shot, keep costs down. Why pay for vodka when it doesn’t look any different than good old h3O?
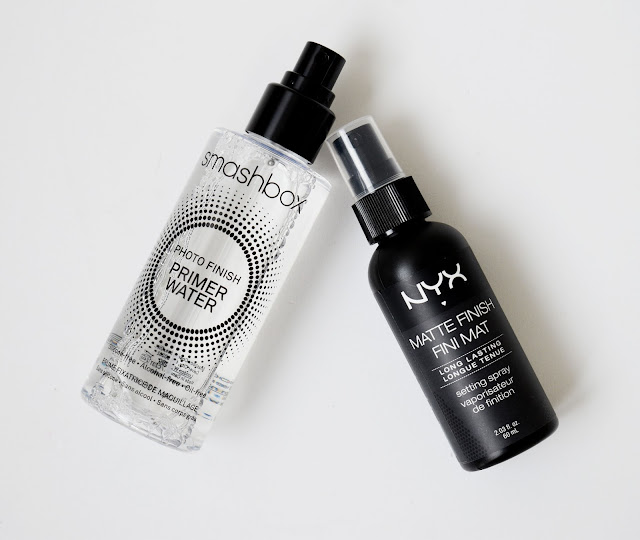
A great tip for styling cocktails is to make fake condensation on the glass. You can do this with a 50-50 solution of glycerin and water.
Glycerin is cheap, and you can buy it in the cosmetics section of the drug store.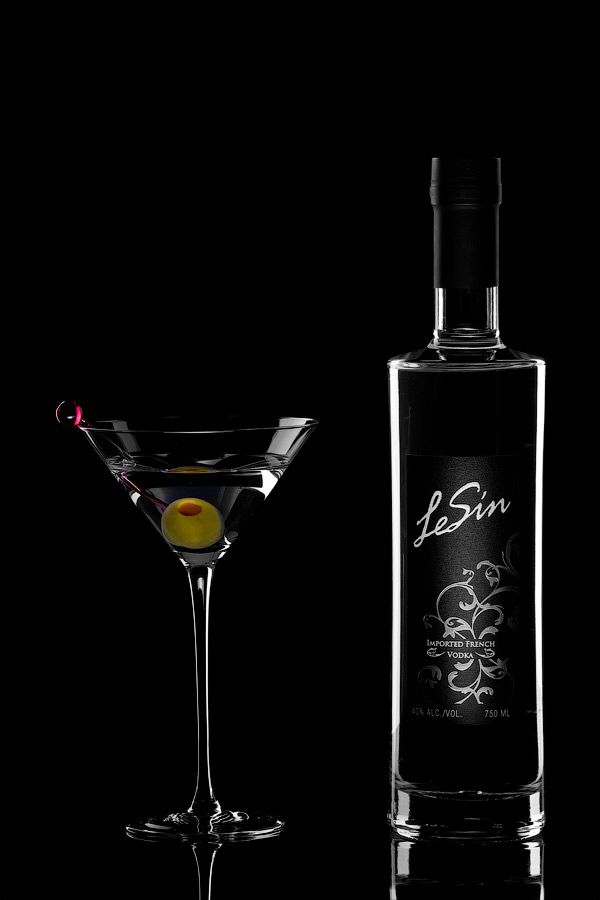 Use a spray bottle with a fine mister and apply it to the glass.
It will give you that cool, beaded look on the glass. And it will last much longer than if you were to spray it with water.
9. Shoot Coffee and Hot Drinks in a Natural Setting
Coffee and other hot drinks are very popular subjects in drink photography. There are lots of coffeehouses uploading photos of their drink menu.
The best approach to shooting coffee and tea is to photograph them in a natural way. You can add steam later in Photoshop.
If you want to try to your hand at creating steam while you shoot, check out these tips.
If you’re using milk in your coffee shots, the froth will be best produced by skim or 1 per cent milk. They are also a little whiter in colour than 2% milk.
If you don’t have a good steam machine, you can use a frothing wand or a milk frothing machine. Heat milk to just above room temperature. Use one of these tools to create the froth before spooning it onto the beverage.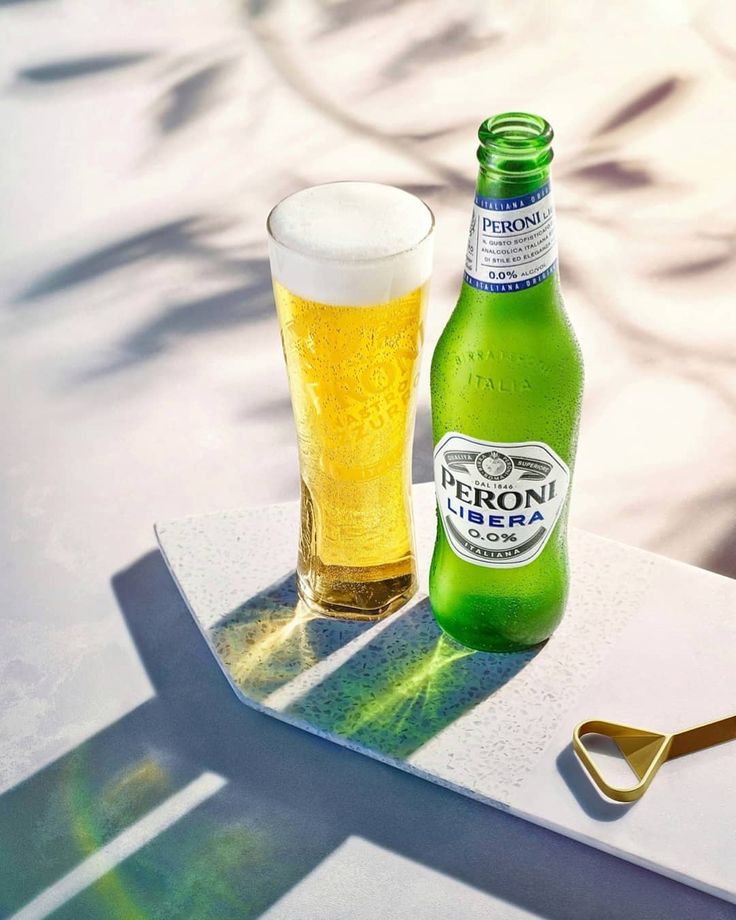
Old froth milk will not thicken again. Ensure you have some extra to froth if you don’t get the shot before the milk starts to look less than fresh.
Hot chocolate tends to separate, so it’s best stirred and poured right before shooting. Marshmallows look good when added to the beverage while it’s hot. The edges will melt and look attractive.
Whipped cream will immediately melt and look messy. Try scooping it on the hot chocolate when it has cooled.
A great substitute for tea is a product called Kitchen Bouquet. This is a liquid seasoning product that is in every food stylist’s kit.
It can stand in for coffee or tea, or even white wine or whiskey, depending on how much you use.
8. Use the Rule of Odds for a Pleasing Composition
You can take a couple of different approaches when photographing cocktails and drinks. You can focus on the details of one drink. Or you can shoot multiples for a stronger storytelling aspect. There is no right or wrong.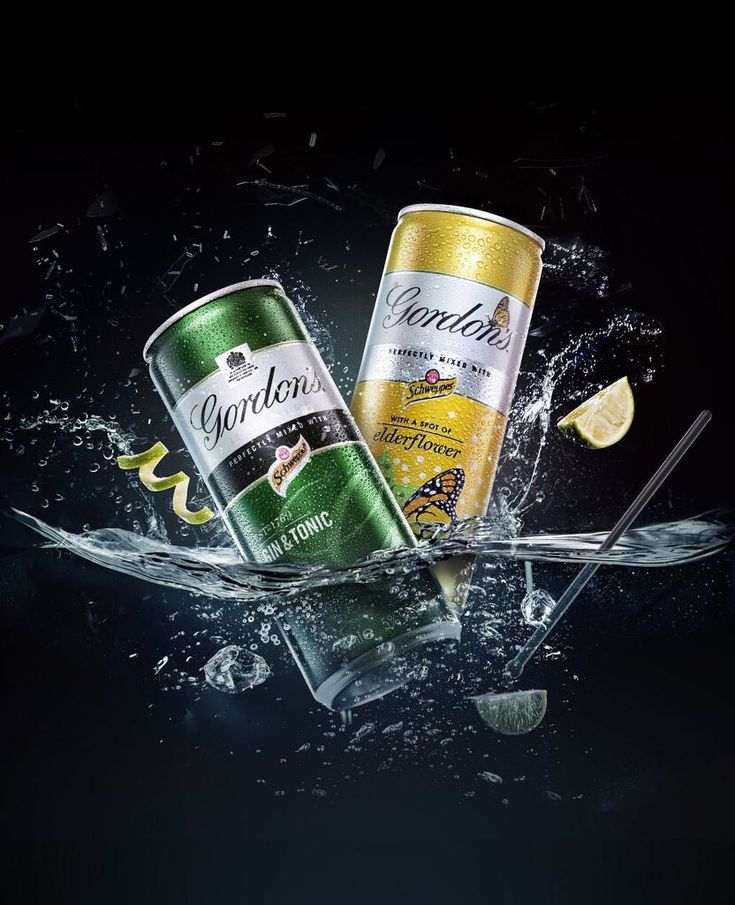 Each has its own appeal.
When shooting a single drink, get close to the beverage. You’ll want to use a macro lens so that you don’t have much negative space around it.
A tighter crop looks better when shooting a single object.
Try shooting the drink a fair distance away from the background if you can. This will blur out a distracting horizon line and will give depth to the look.
When shooting several drinks together, aim to use the “rule-of-odds“. This composition principle states that odd numbers of objects in photos are more pleasing to the eye than an even number of objects.
Odd numbers create a sense of balance and harmony. They also provide a resting point for the eyes. Even numbers of objects can divide our attention and compete with one other.
Quick tip: Position three glasses to form a triangle. It will give the image symmetry and balance. This is also a lot more pleasing to the eye than two or four glasses might be.
7. Backlight Your Subject to Make It Stand Out
Backlighting is the go-to lighting direction for beverage photography. It’s great for bringing out the beauty of liquids.
This is when you place your main light (key light) behind your subject-set. If you imagine the face of a clock with your camera placed at 6:00, this would be at 12:00. Use this lighting style with artificial or natural light.
The problem with backlighting is that it can sometimes be hard to get your exposure right. The back tends to be too bright, without enough light hitting the front.
If you find this to be a problem play with the distance of your light to the set. Make sure that you’re bouncing the light back onto the scene from the front with a reflector or piece of white foam core. Keep it opposite of your light source.
You can also place your light source at around 10:00 or 11:00. This is side-backlighting and is a go-to lighting style for many food and drink photographers. It gives you the best qualities of both back and side lighting without the exposure problems.
Quick Tip: Using two lights will give you directional light.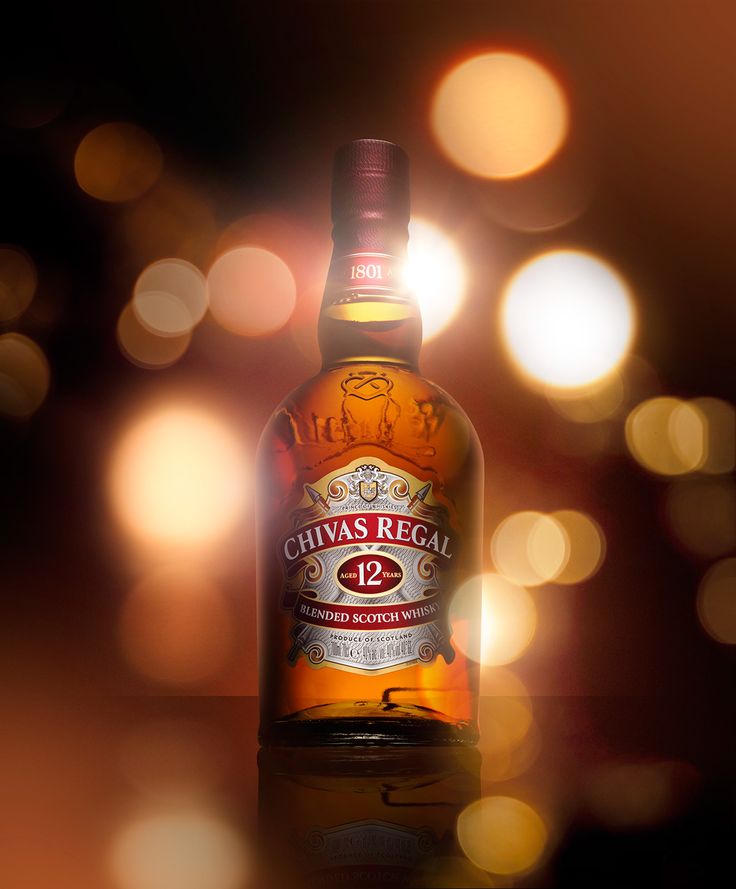 Make sure that your second light is not as strong as your key light or you’ll get double shadows.
6. Use Double Diffusion To Manage Reflections
Cocktail photography is one of the most difficult ones to create. The reason is that they are often shot in glassware. The reflections can be tough to manage, and this kind of shoot can take much longer than a food shoot.
When you’re shooting glasses or glass bottles, everything in the room can end up reflected in the glass. This can make your beverage photography ugly.
You do need a bit of reflection, or they can look fake. It’s up to you to use your judgement of what looks good.
An important trick is to use double diffusion to make sure your shadows are super soft and to manage the reflections.
I shot this image of milk and brownies in a very small space. I was having difficulty getting the bottle of milk to look soft until I placed two diffusers parallel to each other on the edge of my set.
Quick tip: You can bounce light from the front of your scene.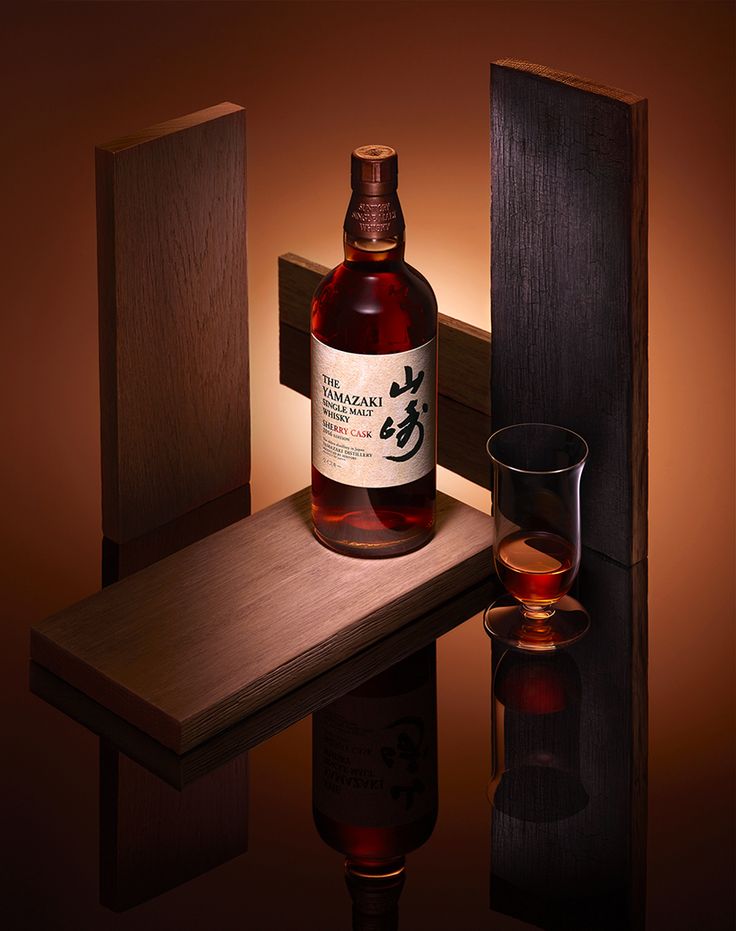 Cut a hole in the middle of a piece of white foam core and putting your lens through it. This will allow you to bounce light from the front onto your scene without your camera in the way.
5. Try Hard Light for Eye-Catching Reflections
Hard light is very popular right now. This is direct lighting with very hard and sharp shadows.
It’s not the best for food photography, but it can be great for drink photos. The reflection created by the highlighting can look interesting and attractive. It works very well for strong drinks such as whiskey or rum.
You can achieve hard, direct light with either natural or artificial lighting. Using natural light is the easiest approach. Make sure it’s very bright out, and the sun is not playing peek-a-boo behind the clouds.
You need to shoot out in the sun or next to a window with direct sunlight. You can use pieces of black foam core to block sections of light if you wish.
For artificial light, you’ll need to light your set with an unmodified light like a bare bulb strobe.
A softbox will not give you the desired results as the shadows will be too soft.
4. Use Fake Ice to Avoid Messy Melting Scenarios
Nothing elevates beverage photos like great-looking ice. It can be difficult to work with as it melts so quickly.
You might only have seconds to get the shot. This is not ideal when you’re also trying to manage your reflections.
If you are doing professional drink photography, you will need to get some fake ice. Use both cubes and shards.
Trengrove Studios in the U.S. is a great source for high-quality fake ice.
These realistic ice cubes are very expensive, but once you invest in some, you’ll have them forever.
Commercial drink photographers spend a lot of money on their fake ice cubes.
If you shoot for your blog or do social media photography, there are some good looking fake ice cubes on Amazon that will do. Be sure to read the reviews so you can find the best ones.
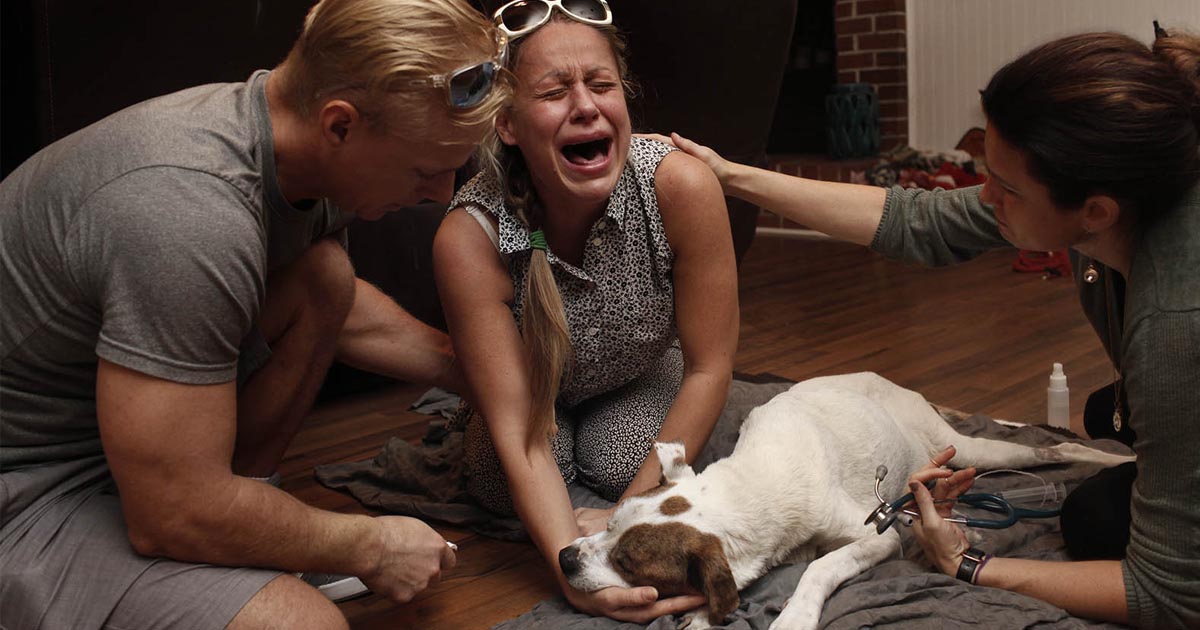
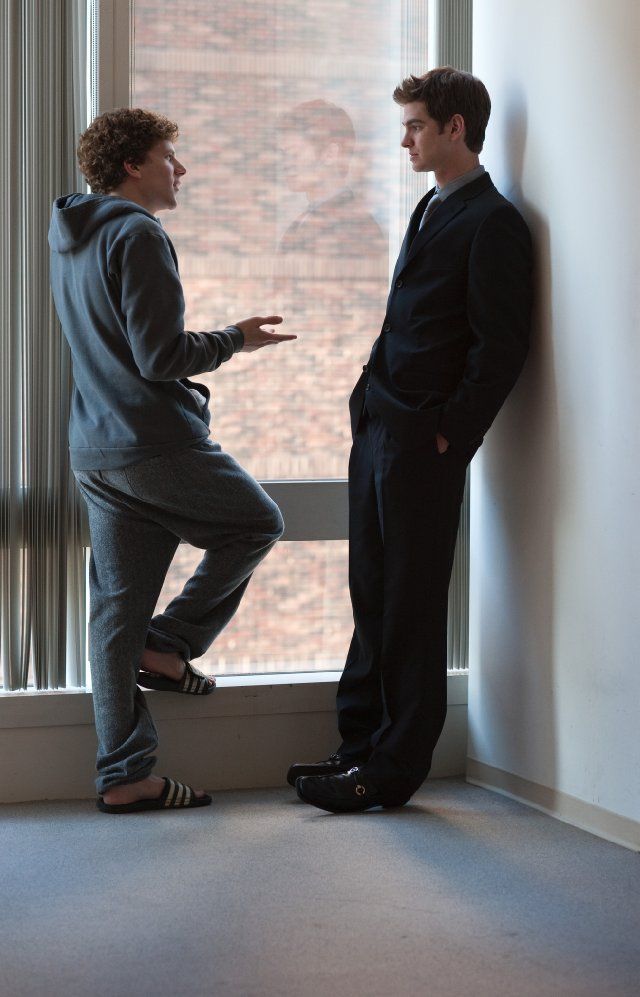
3. Add Human Elements
You can create more authentic drink photography by adding human elements to your photos.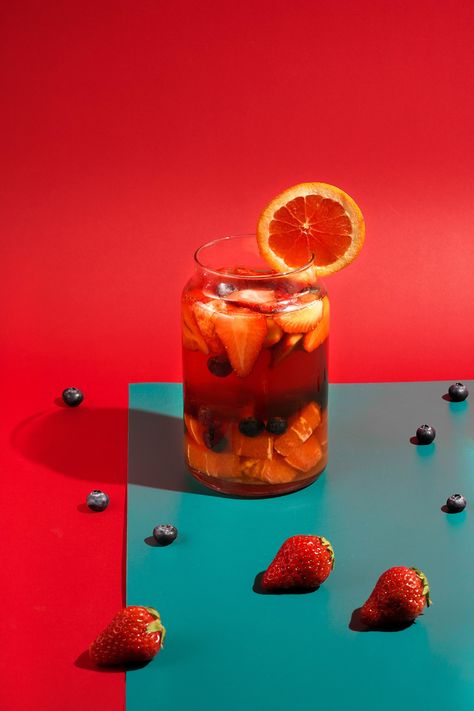 People relate better to pictures that involve humans.
You can do this by using a model or only body parts of a person. For example, a person reaching out for a cocktail.
If you photograph drinks for a specific brand, they might look for the model. If not, be sure to use a model who fits the brand image of the company.
It is also a good idea to find a model who matches the personality of the drink. A picture of a cocktail in a fancy glass would be a good fit for a model who has a playful charisma. While whiskey suits someone who shows seriousness and determination.
2. Use Props to Tell a Story
Like in food styling, you should be using suitable props when shooting drinks. First, ensure to find a background that fits your subject.
In cocktail photography, you often have to work with complicated drinks that have lots of decorations. Choose a simple backdrop so your drink photography won’t look chaotic.
Use simple yet relevant props when you are shooting drinks. A spoon to stir the cappuccino or some fresh fruit and spices for cocktail photography.
Props are also perfect for creating an atmosphere when shooting holiday drinks. A cup of steamy hot chocolate with a melted marshmallow on top looks a lot better if you add a cosy blanket, a book and some Christmas lights in the background.
Always consider the drinks’ personality and the concept when choosing props. A cup of tea would look weird with bartending tools around it.
1. Capture Splashing Drinks
Splashes add dynamics to your drink photos. It doesn’t matter if you photograph milk or beer. Splashes always enhance your pictures.
You can create splashes with the beverages or some extra objects. Sugar cubes, olives or ice cubes can look great when being dropped into a drink.
To be able to freeze the motion, you need to use fast shutter speed. Set your camera in continuous shooting mode so that you won’t miss any action.
Splashes might create a mess.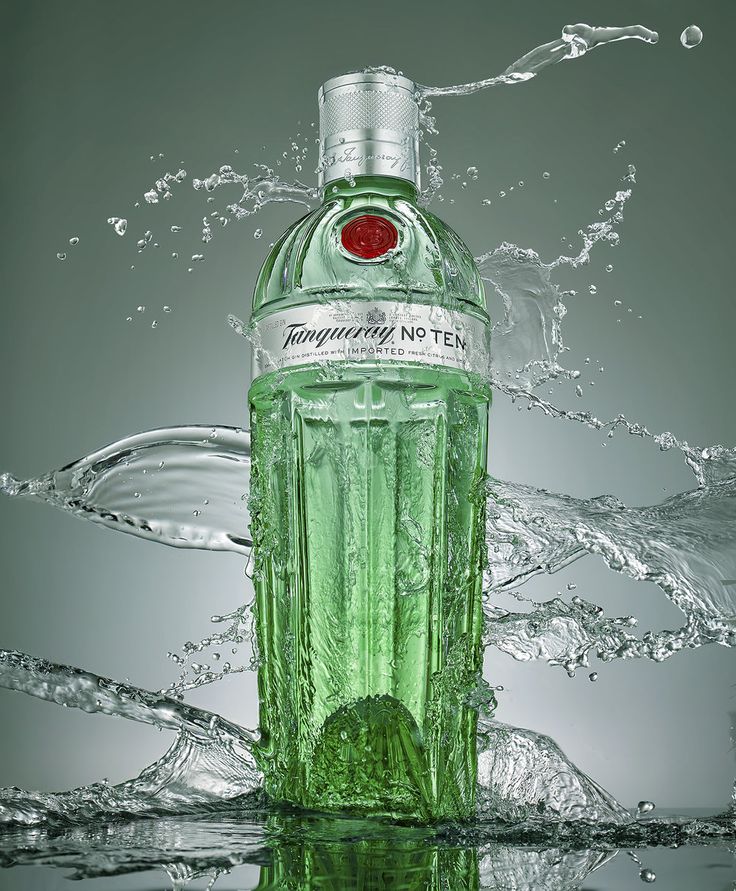 Ensure to have some towels close to you and protect your gear as well.
Conclusion
Drink photography can be a bit frustrating. But it’s also fun and creative.
The great thing is that you don’t need a lot to get started. Some juices, water, a cup of coffee or tea can give you endless inspiration.
So grab a drink and start playing!
Want to learn the best food photography tips? Read our eBook – Edible Images!
6 commercial beverage photography tips
Shooting drinks is a separate topic in the world of food photography. When building shots with drinks and cocktails, there are many points to consider. In this article, professional food photographer and stylist Elena Otvodenko has put together some important tips to help you master a new photography niche.
Start with an idea
You should have a clear idea of what kind of drink you will shoot, how people usually drink it and what it consists of, what mood you want to create in the frame.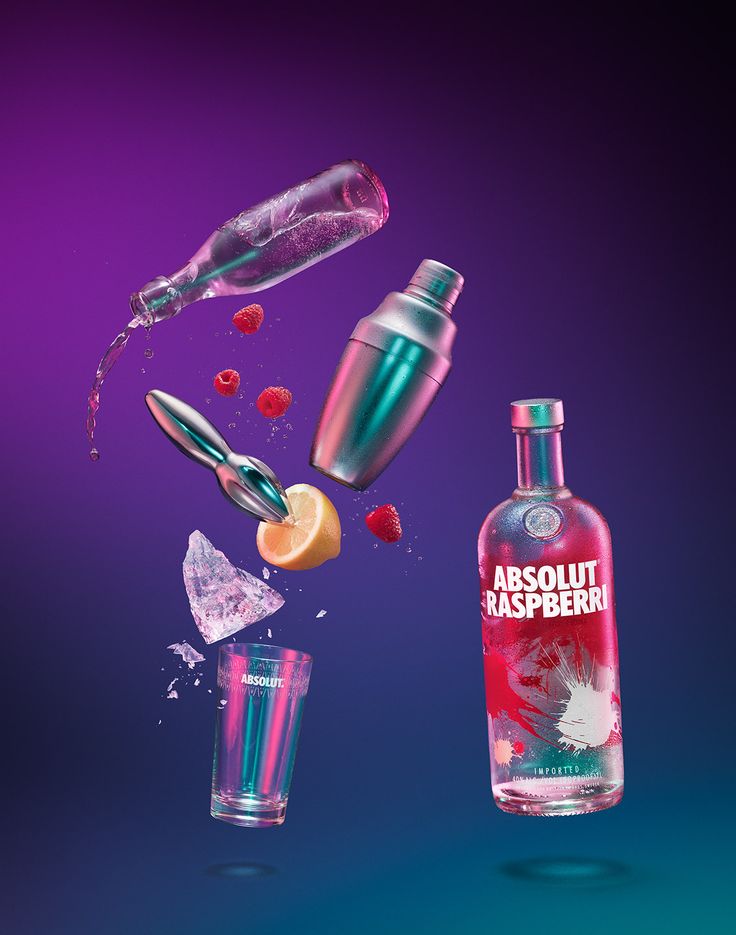 This will help you choose the right props and lighting for your photo. For example, if you're shooting an autumn drink, use soft lighting and props to help create a cozy atmosphere in the frame. And bright sunlight or hard light is perfect for summer cocktails.
Photographer Elena Otvodenko
Choose the right lighting
Lighting is crucial when shooting drinks. It is advisable to use artificial light, so you can better control glare and reflections on glass surfaces.
If you are shooting a transparent drink, use backlight when the source is behind the subject. Light will pass through the liquid and emphasize the color and composition of the drink. Use large diffusers or reflectors, they will give beautiful soft reflections on the glass.
Photographer Elena Otvodenko
Use the right ingredients
Greens, fruits and berries in photographs should be as fresh and beautiful as possible, without stains or damage. Before shooting, you can put greens in water and refrigerate, so they become more photogenic and stay fresh longer.
Some drinks may have unnecessary bubbles, so replace plain water with distilled water to make them. This will allow the drink to become more transparent.
Photographer Elena Otvodenko
Use beautiful transparent ice
If there is ice in the drink, I recommend using artificial ice. First, it won't melt or condense, and you won't have to rush to take pictures. Secondly, artificial ice, unlike the real one, gives beautiful highlights and gaps. If you still decide to work with natural ice, you need to buy bar or sculptural ice. Such ice is transparent and melts more slowly than regular ice. When shooting, use a waterproof background to avoid wasting time drying it.
Photographer Elena Otvodenko
Carefully inspect the glasses before shooting
Dust and fluff may appear on the glasses and glasses during the construction of shots.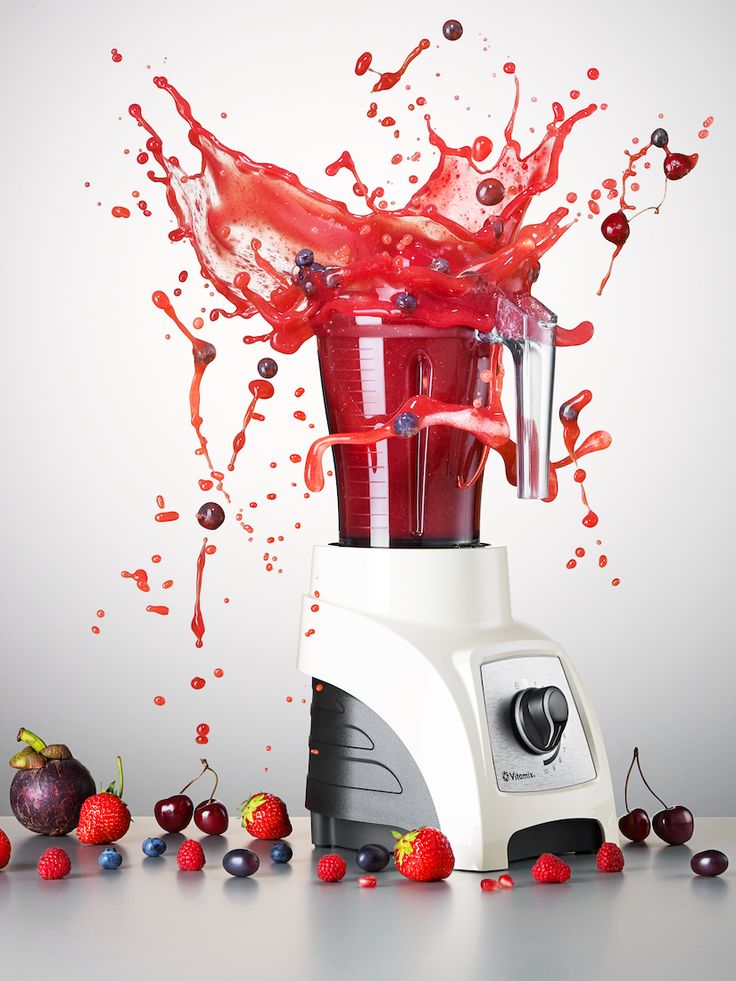 Be sure to keep the dishes clean and carefully polish the glass. To clean glasses or glasses, you can use liquid for washing windows and mirrors. Remember to use gloves to avoid fingerprints. This will reduce the time that will have to be spent on retouching frames.
Photographer Elena Otvodenko
Place the drink in the frame in order
Start with ice and the ingredients that are placed inside the drink, such as berries or lime slices. Then add 2/3 liquid and decorations - mint leaves, tubules, etc. Lastly, carefully add the remaining liquid. I recommend doing the last step directly on the table where the shooting will be done. Otherwise, carrying the drink in your hands, you risk getting dirty marks on the glasses, and you have to redo the drink again or spend a lot of time editing the photo.
Tags: still life, food photography
10 Beverage Photography Tools
Beverage photography is a challenging and fascinating niche in photography that is often captured by food photographers.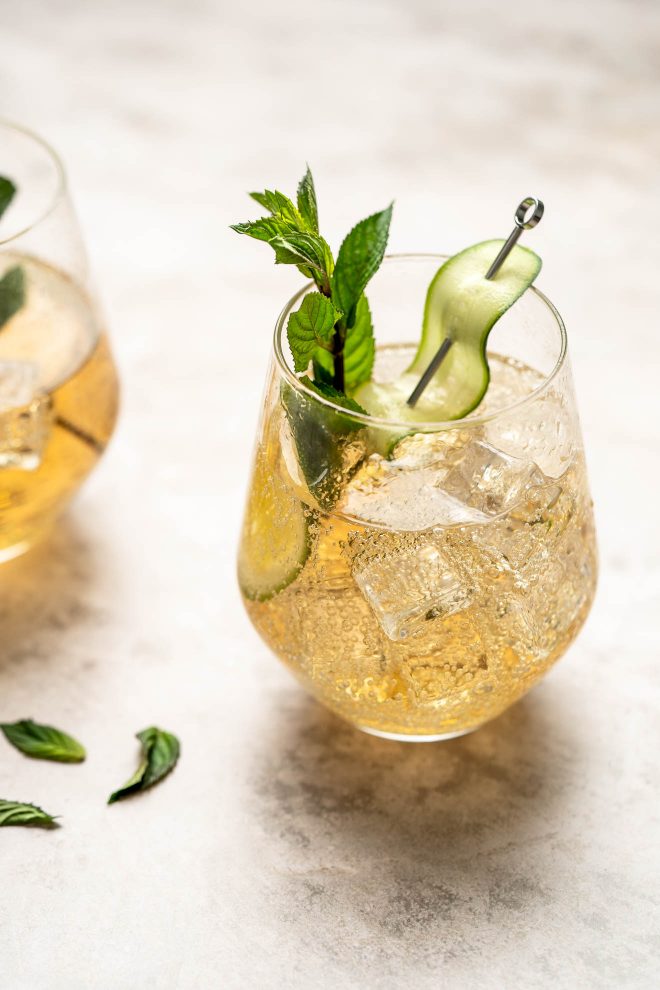 A shaker, a stirrer and brushes are just some of the items you need to capture drinks.
So, here are the top ten tools for commercial drink photography.
1. Razor blades
Commercial beverage photography involves shooting a large number of liquor bottles. This means that you must remove the back label as it will cast a large black shadow and ruin the image accordingly. You will need a good razor blade to remove the labels. Gently peel the label off the bottle using a razor blade, moving the label down to remove it. If that doesn't work, you'll need to soak the label by putting the bottle in a saucepan with a little warm water to keep the front label from getting wet. The label should be easier to remove after five or ten minutes of soaking. Keep a pair of razor blades in your kit and keep them clean.
2. Sticker remover
After removing the label, there may be glue left on the bottle. You must remove all traces of glue and make sure the bottle is as clean as possible. Any marks will show up on the image and can be a retouching nightmare.
3. Glassware
The most important item you can have in your beverage photography kit is good quality and beautiful glassware. If you are going to take a lot of photos with drinks, this is a worthy place to invest. The quality of glassware is easily apparent when removed, especially from stemmed glassware. If you carefully rotate the glass, you'll find that the cheap material won't line up perfectly. This will show how the liquid "sits" in the glass. In a drink photography, the cocktail or drink is the focus of the shot, so it needs to look heroic. The ideal is to have many different glasses for different types of drinks.
4. Fake ice cubes and shards
Another important thing for commercial beverage photography is fake ice cubes and shards. Real ice looks more organic and works well for editorial photography. However, in high-end commercial photography, where consistency is often required, artificial ice is needed. Fake ice must be of high quality and very expensive. Be sure to purchase artificial acrylic or plexiglass ice. Cheap fake ice can be useful as an ice filler, perhaps blurred in the background or in another glass that isn't the main subject.
5. Ice powder and crystals
Ice powder and crystals are most often used on the outside of beer bottles and glasses to give a cool and frosty look. They are used less for cocktails, but they are great for making drinks such as Margarita. Crystal ice and powder allow you to shoot all day.
6. Glycerin
Glycerin is an inexpensive product that you can get in pharmacies. It is widely used in food and drink photography. Mixed with water, you can spray it on foods to create a misted look with evaporation. In the drink photo, he also adds condensation to the glass.
7. Atomizers
Buy several different sized spray bottles. This will be for your glycerin and water blends. Different bottles will have different amounts of water drops, so it's good to have a variety of drinks to choose from.