Example of shutter speed
What is shutter speed in photography? A Useful Illustrated Guide.
The shutter speed (the amount of time the camera’s shutter remains open when taking a photo) controls the amount of time that we capture light for and allows us to freeze or blur motion.
What is shutter speed in photography?
When we take a picture, the camera’s shutter opens to allow light to reach the recording medium, thereby allowing an image to be created. By controlling how long the shutter stays open, we can control what the resulting image looks like.
Also known as exposure time, shutter speed is measured in fractions of a second (seconds or tenths or hundredths of a second). For example, a slow shutter speed of 1/2 means the shutter remains open for half a second, while a faster speed of 1/2000 means it only remains open for one-two-thousandth of a second. Many DSLR cameras can go as fast as 1/8000 and as slow as 30” (if shooting in Bulb mode, the shutter remains open for as long as the shutter release is held).
Shutter speed: 18 minutes | Aperture: f8
Interested in night photography? Click here.
Slow shutter speed
When using a slow shutter speed, the shutter remains open for a greater length of time. This not only allows more light to be recorded, it also means any moving objects will appear blurred. Slow shutter speeds are commonly used when photographing in low light conditions or when we want to capture motion blur. To avoid any unwanted, extra motion from camera movement, make sure to use a tripod. This helps to prevent camera movement also being captured in the image.
Slow shutter speeds can be used to achieve creative techniques such as panning, or combined with flash to capture both frozen and blurred movement. But remember, you generally shouldn’t use a shutter speed slower than your focal length (for example, if shooting with a 50mm lens, don’t go lower then 1/50, if shooting with a 200mm lens, don’t go lower than 1/200). If you do, it might be necessary to use a tripod.
Shutter speed: 4 sec | Aperture: f22
Shutter speed: 13 sec | Aperture: f13
Fast shutter speed
Faster shutter speeds mean the shutter remains open for a shorter period of time, resulting in light having less time on the sensor. Faster shutter speeds will also freeze movement and are often used when photographing fast moving subjects like sport or wildlife.
Shutter speed: 1/1000 | Aperture: f5.6
Interested in action photography? Click here.
How to change shutter speed
If you’re shooting in Auto, the shutter speed (along with the aperture) is automatically determined by your camera. You can control the shutter speed manually when photographing in Manual or Shutter Priority (shown as TV or S) — this will allow you a much greater degree of creativity. Shutter priority is a great option for those wanting to get out of Auto, but without having to worry about the aperture (though it is also often used by professionals shooting in conditions where the light changes quickly and often).
- Manual mode: Set both shutter speed and aperture yourself.
- Shutter Priority mode: Set only shutter speed. The camera estimates the aperture.
You can see the shutter speed on the top LCD panel of DSLR cameras, on the back screen and through the viewfinder. Changing the shutter speed varies from camera to camera and some even allow you to set which control wheel does this.
Setting your shutter speed will depend on what and where you’re photographing. If you’re looking to freeze motion when photographing fast moving objects, a fast shutter speed will be the best option. However, this will limit the amount of light reaching the sensor so you may need to compensate by using a wider aperture.
From the example of the bicycle shown in the video, we can see a shutter speed of 1/30th results in a good amount of motion blur. However, at f16 the picture is too dark. To correct this, I needed to open the aperture to allow more light in. A one stop change, from f16 to f11, meant I was able to keep the same level of motion blur while lightening the image and therefore achieving the correct exposure. This is why an understanding of f-stop changes and the relationship between shutter speed and aperture is important.
All content © Copyright Karl Taylor Education.
Introduction to Shutter Speed: Easy explanation and examples
Setting the shutter speed on your camera is really simple, and it will teach you how to capture crystal clear photos even when there is fast action in the scene. Knowing how to use the shutter speed properly also helps photographers to make creative long exposure shots.
Simply put, the shutter speed is the length of time that the camera is recording a picture. A long shutter speed makes a brighter picture, but if something moves while the image was being recorded, it causes blur. On the other hand, short shutter speeds freeze motion better but produce a darker picture.
In this post, I'll teach you everything you need to know about the shutter speed to confidently set it every time. However, there is more to learning a camera. After reading this, check out my photo basics series where I teach you everything you need to know about using your camera in a series of free articles.
How the Shutter Works
The part of your digital camera that records the picture is called the imaging sensor. In front of the sensor, there is a “blinder”–that's the shutter. The shutter's job is to cover up the sensor until a picture is being recorded. It quickly uncovers the sensor for a moment for the picture to be recorded, and then covers it up again.
When you set the shutter on your camera, you are setting the length of time that the shutter reveals the imaging sensor so it can record the light coming through the lens. The longer the light is being recorded, the brighter the picture will be.
The shutter speed is expressed in fractions of a second. If you see a camera setting of 1/100, it means that your photo is only being recorded for one one-hundredth of a second. A shutter speed of 1/2 means your photo is being recorded for half a second.
Download My Free Shutter Speed Chart
If you are understanding this tutorial but you're afraid you may forget how to set the camera settings when you're out shooting, go download my free camera settings chart. You can keep it in your camera bag and glance at it anytime you need to get an idea for general camera settings for a particular situation.
Shutter Speed Examples
Here are a few common shooting situations and the shutter speed that I would recommend as a general idea:
- 1/4000 – Taking pictures of a friend at the beach on a sunny day. You will likely need 1/4000 shutter speed to block out most of the light since it's so bright outside or else the picture will be overexposed.

- 1/1000 or faster – Fast action sports photography such as basketball or football. This shutter speed is usually sufficient for shooting sports, but you may find that you can't go quite that fast if it's in a dark indoor gym. More on camera settings for indoor sports here.
- 1/400 – Taking a portrait of someone in a park on a rainy day at noon.
- 1/200 – Photographing someone indoors when using a flash to light up the scene.
- 1/50 – Photographing a family member indoors. Even with the lights on in a room, you usually need to drop the shutter speed and increase the ISO to get a properly exposed picture indoors (unless you're right next to a window).
- 1/20 – Photographing a waterfall while the camera is on a tripod to capture silky movement in the water.
- 1/10 – Photographing sunset color in the sky after the sun has gone down. For landscape photos like this, the aperture will typically be at f/16 or another high number, so you'll need a long exposure to capture the light.
 More on camera settings for photographing a sunset here.
 - 15 seconds – Photographing the Milky Way at night while the camera is on a tripod. More on camera settings for photographing the Milky Way here.
- 30 seconds – Photographing a city scene at night and getting light trails of the car headlights and tail lights driving past. You would obviously need a tripod to shoot with this long of a shutter speed.
- 2 hours – Photographing star trails (though this is more commonly done by shooting a series of shorter pictures and combining them later in Photoshop). Note that most cameras can't go past a 30 second shutter speed unless you get a cable release. More on star trail photography here.
Using Long Shutter Speeds for Creative Effects
As a photographer begins to learn how to use a camera, the shutter speed is usually just set fast to freeze the action; however, as a photographer becomes more advanced, the shutter speed is often used as a creative tool to allow for creative blur in a photo as a way to express motion.
The most common example of a creative long exposure is photographing waterfalls. If you take a picture of a waterfall with a fast shutter speed, the photo almost always looks amateurish. Professional photographers almost always use a longer shutter speed at waterfalls to show a sense of movement and beauty.
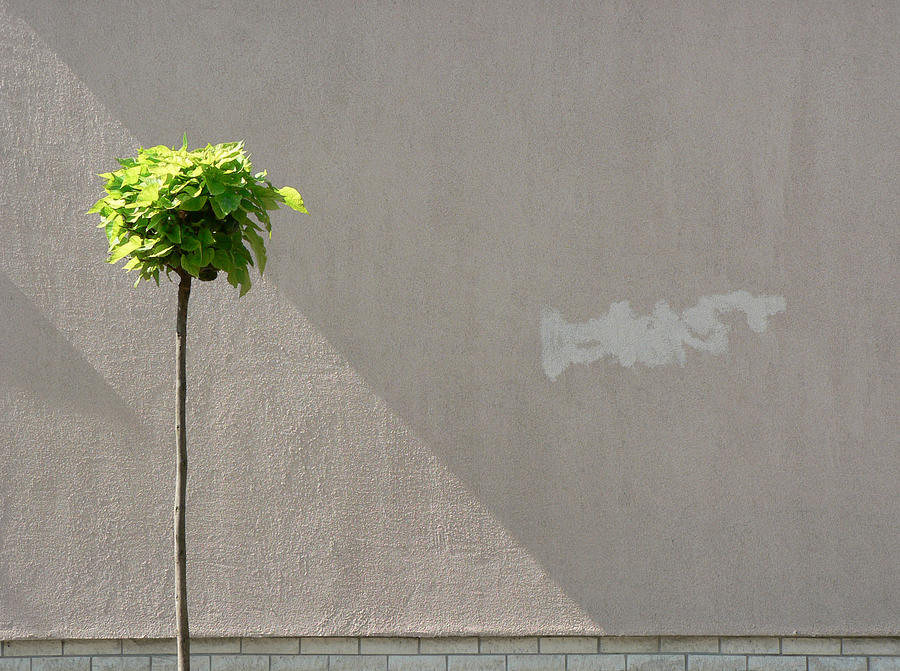
What's the shutter speed on this photo? It's actually a trick question. It doesn't really matter! Nothing is moving in this scene and there was no wind to blow the leaves, so it wouldn't really matter if this were shot at 1/500 or 2 seconds as long as I set the aperture and ISO to balance the exposure. I shot this at 1″ on a tripod.The 1/Focal Length Rule
Your hands have a natural tremble to them. Also, when you press the shutter button on the camera, the camera moves just slightly. While this may seem minimal, remember that you are recording something that is a slight distance away, and that distance magnifies the tremble in your hands. Camera shake is only an issue when you are hand-holding the camera. There is no significant camera shake when your camera is locked onto a tripod.
An example of camera shake is holding a laser light. If you point it at the table a few inches away from you, it appears to hold perfectly steady. However, when you shine the light across a room at the wall, you can see the laser light dancing everywhere. It's impossible to hold it perfectly steady. That's exactly why even a little camera shake can produce a blurry photo.
The easiest way to stop camera shake is to simply use a fast shutter speed. For example, shooting at 1/4000 of a second is so fast that your hand simply doesn't have enough time to tremble much before the photo is done being recorded. However, that's impractical because many shooting situations would require a slower shutter speed to gather enough light.
The camera shake is magnified by distance, so the more zoomed in you are (longer focal length), the faster your shutter speed needs to be to freeze the motion of your shake. This is why some photographers teach the 1/focal length rule. The 1/focal length rule says, to prevent camera shake, your focal length in mm should be equal or greater than the shutter speed (the denominator in the shutter speed fraction). For example, if you are zoomed in to 100mm (you'll get this number by looking at the scale on your lens), you would need to shoot at a shutter speed of 1/100. If you were using a wide angle lens at 20mm, you could cheat down your shutter speed to no slower than 1/20 (meaning you shouldn't go to 1/10, but you can go faster to 1/40 or 1/60 without any problem).
This rule is good to keep in mind as a benchmark for setting your shutter speed, but it is by no means perfect. Today's technology is changing the rule and allowing photographers to use slightly slower shutter speeds while maintaining sharpness due to newer image stabilized lenses and sensors.
Conclusion
Setting the shutter speed is actually one of the easiest settings to get right on the camera. You simply determine how much blur is acceptable and set the shutter speed accordingly. However, remember that shutter speed also impacts the brightness of the image, so you sometimes need to compromise between the ideal shutter speed, and a practical shutter speed for capturing enough light in the photo.
Link Disclosures
About exposure for beginners / Beginner photography / Photography lessons
NIKON D850 / 70-300 mm f/4.5-5.6 SETTINGS: ISO 64, F7.1, 1/50 s, 70.0 mm equiv.
The shutter speed, or exposure time, is the amount of time the camera takes to take a picture. At first, everything here seems simple, but the deeper you dive into the topic, the more complex and interesting it becomes.
Exposure on a SLR camera. The mirror rises, the shutter opens for the exposure time, then closes.
In modern cameras, the exposure time works out the shutter. Prior to shooting, the matrix is closed by its opaque shutters (lamellae), and only opens for a short time to take a picture. Shutter - the most accurate mechanism that can open for the duration of a given shutter speed with an accuracy of thousandths of a second. We have already prepared a separate lesson on shutter operation in more detail.
Shutter speed is measured in seconds and, more commonly, in fractions of a second. Even the most affordable models of modern DSLRs and mirrorless cameras work out shutter speeds from 1/4000 to 30 seconds.
Camera information display: shutter speed set to 1/60 s.
Camera information display: shutter speed set to 6 s.
The current shutter speed is always displayed on the screen and in the camera's viewfinder, even if you are shooting in auto mode.
Most often, shutter speed is indicated by a fraction. The larger the denominator, the faster the shutter speed. For example, 1/100 s (one hundredth of a second) is longer than 1/1000 s (one thousandth of a second).
Shutter speed 1/60 s displayed on camera display Nikon Z 7
Keep in mind that on some devices, the numerator of the fraction is discarded when designating the shutter speed, and, for example, the same 1/100 is displayed simply as 100 on the screen. This still means a hundredth of a second. That is how, without a numerator, the shutter speed is indicated in the optical viewfinder of a SLR camera and on the upper information display of advanced cameras.
A shutter speed of 6s is displayed on the top information display of the Nikon D850 camera.
When shutter speeds slow down and count by whole seconds, this is indicated by “. For example, 2 is 1/2s and 2” is two seconds.
What does shutter speed affect
Amount of light hitting the sensor . The longer the camera shutter is open, the more light will hit the matrix and the brighter the frame will turn out. If we shoot on a clear day outside, enough light for a good shot will hit the sensor in a short time. And in low light, the same amount of light will have to be gained for a long time - the shutter speed needs to be lengthened. But at the same time, blurry shots when shooting in a city at night, in low light conditions, are just a consequence of shooting at too slow a shutter speed.
Shooting at night requires a slow shutter speed to allow the camera to capture the right amount of light.
Good daylight: A fast shutter speed is enough to get just the right amount of light for a bright shot.
Capturing moving objects in photos . The faster an object moves in the frame, the shorter the shutter speed is needed to “freeze” its movement in the photo. We are not specifically talking about specific excerpts yet - it is important to understand the principle itself. Sometimes, for artistic purposes, moving objects should be blurred in order to separate static and dynamic models in a still picture. A classic example is the blurring of water or the sky in landscape shots.
Long exposure blurs moving cars. Still objects remained clear.
Fast shutter speed: moving subject remains sharp.
In auto modes, scene programs, P and A modes, shutter speed is adjusted by the camera's auto. In this case, the device is guided by its internal algorithms. Sometimes the machine works better than the user who just picked up the camera. But in complex plots, it can also work unsatisfactorily.
Risk factors include shooting fast action and working in low light (and for a photographer, this can be considered any, except for a sunny summer afternoon). A simple example: in the "Sports" scene program, automatic shutter speed is shorter than usual in order to achieve a clear transmission of movement. But the machine does not know all the features of our shooting. After all, it is necessary to take into account the type of sport, and the level of training of athletes, and many other specific factors. As a result, automation may not guess with shutter speed, blurry photos will turn out.
NIKON D810 / 18.0-35.0 mm f/3.5-4.5 SETTINGS: ISO 50, F16, 1/4 s, 18.0 mm equiv.
Exposure is also a creative tool. On its various values, you can get completely different shots. This is easy to verify when shooting, for example, the surf. Put your camera on a tripod and try to shoot the oncoming waves at shutter speeds from 1/1000 to 30 seconds. All frames will be different!
Photographer's skill is the ability to adjust exposure according to shooting conditions and creative tasks.
Shooting mode dial on Nikon Z 50
Modes in which shutter speed is adjusted
Mode S - Shutter Priority . In this mode, the photographer controls the shutter speed, and the automatic selects the appropriate aperture value. A convenient mode when there is no time to monitor all exposure parameters, but you need to control the shutter speed. Most often this is required when shooting motion. This mode can also be used when working in low light: by fixing the shutter speed at the desired value, we will not let the automation unnecessarily lengthen it and thereby avoid the appearance of movement (more on that below).
On cameras with two setting wheels in S and M modes, the default shutter speed is set to the rear.
A classic beginner's mistake: shooting in S mode results in dark shots. This means that the shutter speed is set too fast and the automatics that control the aperture in this mode cannot gain the required amount of light in such a short time, even by opening the aperture to the limit. In this case, the aperture value will flash on the display and in the viewfinder. Don't miss this moment! To make the shots bright in such a situation, it is worth increasing the ISO sensitivity or even giving this parameter under the control of automation (Auto-ISO) and still slightly lengthen the shutter speed, if the plot allows.
NIKON Z 7 / 70.0-300.0 mm f/4.5-5.6 SETTINGS: ISO 200, F5, 1/500 s, 140.0 mm equiv.
M mode - manual mode . Here the photographer himself controls the three exposure parameters. Having set a certain shutter speed, it is necessary to choose the appropriate aperture and ISO values. In many cases, you will have to tightly control all three parameters. Landscape, interiors, architecture, shooting in a studio with pulsed light - these are examples of areas where manual mode is indispensable. M mode requires experience and skill and is not suitable for dynamic work - the lighting can change constantly, which means that you will constantly have to adjust the exposure parameters. To adapt the M mode for dynamic sequential shooting, it is enough to activate Auto-ISO. On modern Nikon devices, Auto-ISO is a real salvation when you need to control both shutter speed and aperture, and at the same time shoot quickly. A simple example is a portrait photo walk: the model will not wait while you fiddle with the camera. In such a plot, you also need a shutter speed fast enough so as not to get blurry, and an open aperture to blur the background. And the automation will select the brightness of the frame itself, flexibly and accurately adjusting the photosensitivity.
NIKON D810 SETTINGS: ISO 450, F3, 1/400 s, 90.0 mm equiv.
Error in setting the shutter speed: shake
So, the shutter speed is responsible for the transfer of motion. The faster the movement, the shorter the shutter speed is needed to make it clear. But it happens that when shooting an absolutely motionless scene, the frame is still blurred. The reason for this is our own movement: the camera in our hands always moves a little, trembles. This must be taken into account. Blur due to camera shake is called shake in photographers' slang. Shaking is bad because it cannot be eliminated during processing. Occasionally, image blur can be perceived as an artistic effect, but more often it is just a technical flaw.
How to shoot without moving. If you have a camera with a kit lens, just do not set the shutter speed longer than 1/60 s. And if a slower shutter speed is set by automatic (in auto mode, mode P or A), activate the built-in flash, improve lighting conditions or raise the ISO.
If you have a large zoom lens in your arsenal, you may have noticed that the larger the zoom, the more the picture in the viewfinder shakes. Therefore, with long lenses, the advice not to use shutter speeds faster than 1/60 s does not work. It turns out that the safe shutter speed for handheld shooting also depends on the angle of view of the lens, its focal length. To find out the safe shutter speed for a particular focal length, photographers, based on their experience, derived the formula:
Max. shutter speed = 1 / focal length x2
That is, with a focal length of 50 mm, the maximum safe shutter speed will be 1/100 s. And with a focal length of 200 mm - already 1/400 s. Note that some photographers substitute the x3 factor in the x3 formula instead of the x2 factor. This is necessary when working with cameras that have more than 30 megapixels. After all, the higher the detail of the images, the more noticeable all the flaws.
Tip: don't move the camera. A beginner's mistake is the inability to press the shutter button correctly. If you reflexively jerk the camera at the time of shooting, the shake will follow you even at very fast shutter speeds, such as 1/250 and even 1/1000 s. Learn to smoothly, calmly press the shutter button, control yourself at the moment of pressing, develop a stable position for photographing. Conduct appropriate training to be fully equipped at the time of responsible shooting.
Thanks to optical stabilization and the presence of some skill, the Nikon Z 6 and Nikon Z 7 can shoot even at shutter speeds in the region of 1 / 2s!
NIKON Z 7 / 14.0-24.0 mm f/2.8 SETTINGS: ISO 220, F2. 8, 1/2 s, 20.0 mm equiv.
Optical stabilization - anti-shake protection
Optical stabilization is designed to compensate for camera shake in the hands of the photographer and protect the picture from blur.
The stabilization system can be located in the lens or directly on the camera's sensor. The Nikon Z 6 and Nikon Z 7 cameras use sensor stabilization. It works with any lens mounted on the camera. Even lenses that do not have stabilization get it on these devices.
Nikon Z 6 and Nikon Z 7 IS performance is rated at 5 exposure stops. This means that if without stabilization you get sharp shots at a shutter speed of 1/60 when shooting handheld, then with it you can shoot even at ⅕! You should not abuse stabilization, because it only compensates for camera shake in the hands, but not for the movement of subjects. Therefore, when setting the shutter speed, it is necessary to proceed from the dynamics of movement in the frame, and not from the stabilization capabilities of the device. Still, stabilization is a real lifesaver. On the Nikon Z 7, the number of frames with motion became practically zero, in addition, new opportunities in shooting opened up.
The greenhouse is a great place to shoot in winter. But even there, the winter sun gives very poor lighting. If I shot with a device without stabilization on an 85 mm lens, I would set the shutter speed in the region of 1/500 to ensure that blur is not allowed. And if so, then the ISO would have to be increased to approximately 3200 units! Digital noise at such a high ISO is unacceptable for me - it will significantly reduce the quality of the pictures. Without exaggeration, in-camera stabilization saved this shoot! I was able to consistently get sharp portrait shots at 1/160s and keep the ISO at an adequate level. At ISO 1000, the Nikon Z7 produces very little noise.
NIKON Z 7 / 85.0 mm f/1.4 SETTINGS: ISO 1000, F1.4, 1/160 s, 85.0 mm equiv.
The new, affordable Nikon Z 50 does not have sensor stabilization. However, there is effective stabilization in the Nikon NIKKOR Z DX 16-50mm f/3.5-6.3 VR kit lens and the Nikon NIKKOR Z DX 50-250mm f/4.5-6.3 VR compact telephoto lens. This made the camera lighter and more affordable without limiting the user.
Nikon Z50 with NIKKOR Z DX 16–50mm f/3.5–6.3 VR 9 kit lens0003
How to shoot at slow shutter speeds. Tripod
Let's see why in general the shutter speeds are longer than 1/60 s in the camera, if they always get a stir when shooting handheld. The fact is that in order to work with such shutter speeds, the camera must be placed on a support. Of course, a table, a curb or a stack of books can serve as a support, but there is also a special device - a tripod. It is necessary to guarantee a clear frame at slow shutter speeds. In addition, a tripod will ensure the constancy of the shooting point, which, for example, is important when shooting catalogs (all products will be taken from the same angle), panoramic shooting. You can also use super telephoto lenses, which bring the picture very close, only with a tripod - otherwise you won’t even be able to compose the frame due to image shaking in the viewfinder. A tripod is the easiest and most reliable option for stabilizing the camera when recording video. It's easier to say where a tripod is not used - in reportage and wedding photography, when it is important to move quickly with the camera.
Car headlights, long exposure. Shooting from a tripod.
NIKON D850 / 70-300 mm f/4.5-5.6 SETTINGS: ISO 64, F8, 120 sec, 135.0 mm equiv.
How to set the shutter speed correctly
Cooking recipes often end with the phrase “add salt to taste”, which always baffles a person without cooking experience. Unfortunately, working with exposure is the same “salt to taste”; universal advice and accurate, always working figures will not be here. The best way to learn how to adjust shutter speed is to gain experience while shooting. Nevertheless, we will try to give advice on setting the shutter speed in different shooting situations. It is clear that these are far from the only options for action, but this is the base from which a novice photographer can build.
In order to achieve fast shutter speeds in low light, you have to raise the ISO a lot. Modern cameras have a low level of digital noise even at high ISO values, however, there is still noise. Therefore, for shooting at short shutter speeds, it is better to choose good lighting conditions - this will greatly facilitate your shooting task.
NIKON D810 / 70.0-200.0 mm f/4.0 SETTINGS: ISO 3200, F4, 1/500 s, 180.0 mm equiv.
NIKON D850 SETTINGS: ISO 250, F1.6, 1/1000 s, 105.0 mm equiv.
The most important thing is to learn how to adjust the shutter speed when shooting moving subjects. Recall that without the use of a tripod, all objects will be moving relative to the camera due to the inevitable shaking in the hands.
Let's give a brief cheat sheet on specific types of moving objects. The values given here are not an axiom, but a starting point for setting up the camera.
- Person standing still - 1/60 s or shorter.

- Walking, talking person - 1/125 s or shorter.
- Jogger, actively gesturing person, small children in the sports section, pets on a walk - 1/500 or less.
- Athletics, wrestling, figure skating, football, hockey, birds in flight, frolicking animals - 1/1000 and shorter.
If you are using a long lens (large zoom), calculate your shutter speed using the formula in the article.
The image is blurred due to the shutter speed being too long for the scene.
This is clearly seen when zooming in on a fragment of the image.
Rather short shutter speed: the hero of the picture is sharp.
NIKON D850 / 85.0 mm f/1.8 SETTINGS: ISO 320, F3.2, 1/500 s, 85.0 mm equiv.
In order to get high-quality shots at an important event (a performance of a child at a matinee or competitions), it is necessary to take a series of test shots before shooting, carefully examine the resulting images for blurring in full scale and understand what shutter speed is suitable for our case. It is not necessary to set an excessively fast shutter speed - this will lead to dark frames, shooting at high ISO values \u200b\u200band lower image quality. Therefore, the most important thing in setting the shutter speed is to find the golden mean.
Shooting with a telephoto lens on a tripod.
NIKON D850 / 70-300 mm f/4.5-5.6 SETTINGS: ISO 200, F6.3, 1/160 s, 300.0 mm equiv.
Knowing how to set your shutter speed is one of the most important steps in mastering the camera. And this can only be learned through practice. To get started, look at how the automatic shutter speed adjusts, but then start acting on your own - this is the only way you will learn how to take clear and expressive pictures in any conditions!
What should be the shutter speed? - Photography Lessons
Home » Basic concepts of photography
Now let's talk about the second basic concept in photography theory - about exposure time . What is it, what are the shutter speeds and what depends on the shutter speed set? Let's figure it out.
To understand the essence of exposure in photography, I will explain in simple terms what it is. Exposure is the length of time during which the shutter of the camera remains open. That is, during this time, the light passes through the lens and hits the camera's matrix, drawing the image. Thus, the shutter speed directly affects the amount of light that passes through the lens. That is why shutter speed, as well as aperture, is a basic concept in photography.
The dwell time is indicated as a fraction and represents fractions of a second. Slow shutter speeds longer than 1 second are expressed as integers. For example, let's give an example of the shutter speed scale used in modern digital photography. Some intermediate shutter speeds are omitted.
1/1000 (1/1000 s)
1/500 (1/500 s)
1/250 (1/250 s)
1/125 (1/125 s)
1/60 ( 1/60 s)
…
1/30 (1/30 s)
…
1/15 (1/15 s)
1/13 (1/13 s)
1/10 (1/10 s)
1/8 (1/8 s)
1/6 (1/6 s)
1/5 (1/5 s)
1/4 (1/4 s)
1/2 (1 /2 s)
1'' s
2'' s etc.
Remember the pattern: subject to unchanged shooting parameters, the longer the shutter speed, the lighter the photo will turn out; If you reduce the shutter speed, the photo will turn out darker. Therefore, in dark rooms you have to set long exposure, and on a bright sunny day - short. Examples of photographs with different shutter speeds and a change in the brightness of the photographs are illustrated in the picture below.
What else depends on the exposure time when shooting? By changing the shutter speed, you can show movement in the frame - either freeze the moving objects in the frame ("stop" the movement), or vice versa make the moving objects a little blurry. If moving objects enter the frame, then while the camera shutter is open, they have time to move from one point to another.
The faster the shutter speed, the more static the photograph will be. If you set slow shutter speed , then the moving object will be smeared in the frame in the direction of its movement. This happens because during the exposure time, the moving object has time to be exposed or “appear” at different points in the frame. Therefore, slow (long) shutter speeds are often used for creative photography. Read more about this in the following articles on studyfoto.ru.
See photos below for examples of shooting with different shutter speeds. This is a classic example of filming moving water.
Long and short exposures.
You often hear terms like "long exposure" and "short exposure" . What shutter speed is considered long, and what is short? Everything is relative. For example, 1 second. It seems to you that it is very fast, but for a photographer 1 second is a long time. Such an exposure is considered long.
Under normal shooting conditions for static subjects, the normal operating speeds for shutter speeds are 1/80 - 1/320. You can freeze fast motion (splashes of water, a running person) at shutter speeds from 1/500 to ultra-fast shutter speeds of 1/1000-1/8000, for example.