How to photograph t shirts flat
How to photograph a T-shirt flat lay
In this tutorial, we’ll show you how to style and photograph a T-shirt on a tabletop in two different styles
Equipment used: StyleShoots Horizontal. Click here to learn more.
Shooting a T-shirt flat lay is relatively quick and simple. In this product photography tutorial, we will show you two different methods - stuffed and un-stuffed - for styling and photographing a T-shirt for eCommerce, or your lookbooks and catalogues.
We’ve compiled a few useful techniques to give the tee a pro-quality look. For example, you may choose to style your by adding a bit of stuffing for depth and body. Or, to add a more informal look you can play with creases and texture.
To learn how to photograph and style a T-shirt, read on. But first, let’s run through the essential tools you’ll need:
Here’s the equipment you'll need
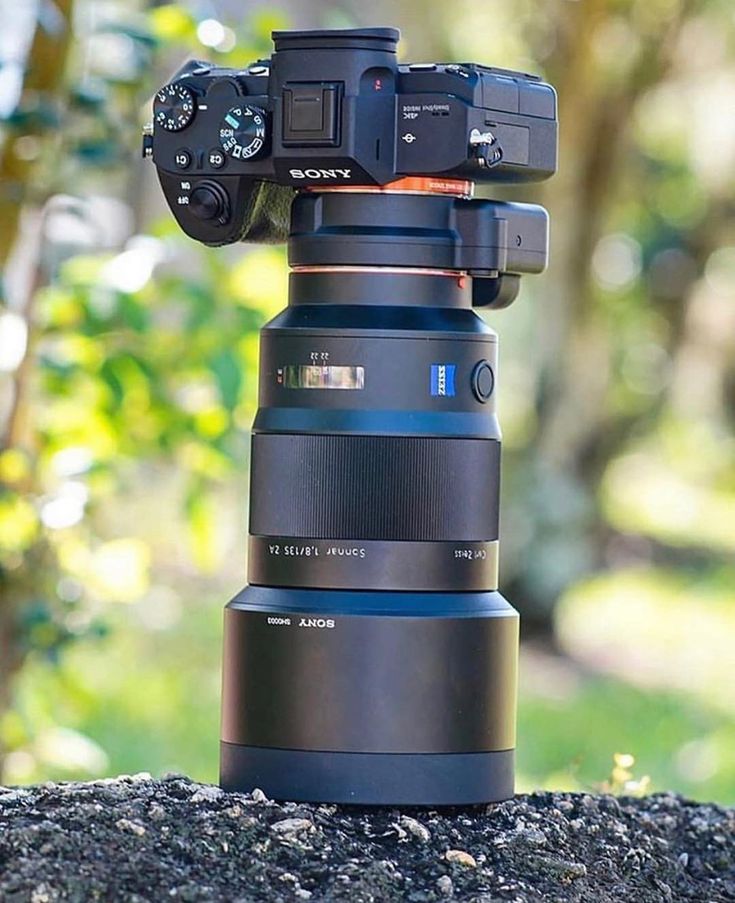
Camera - Any camera will suffice but a Canon EOS 5D Mk III is recommended as a standard for professional product photography
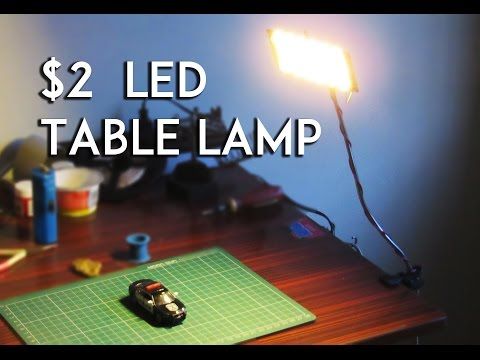
Studio lighting - Continuous cool LED lamps are recommended to ensure exposure, shadows and contrast are kept consistent
Your T-shirt
Tissue paper - Stuffing a t-shirt with tissue adds depth
Styling the tee without stuffing
1.
Spread the T-shirt out evenly in the center of your surface.
The neckline and shoulders of the shirt should be level.
2. Tuck in the sides
Next, to give the shirt the most natural shape, make a small fold along each side seam and tuck it under.
Tip: For a women’s T-shirt, you may want to taper the shape in a little more.
3. Style the sleeves
Ever so slightly, slide the armpits of the sleeves in under the body of the T-shirt.
4. Conceal the rear hem
For a neater finish, tuck the rear hem of the T-shirt underneath so that only the front hem is showing.
And shoot...
Styling the tee with stuffing
1.
 Add tissue paper to the shirt
If you would like to add a bit more volume to the shirt, place a
few sheets of tissue paper in the body.
This will raise it slightly and give it some depth.
2. Style the t-shirt
Once you have added the tissue paper, go ahead and style the shirt as above.
Make sure everything is even and symmetrical, tuck in the side seams, adjust sleeves and conceal the rear hem.
3. Adjust texture with your fingers
By gently pressing down on the tissue paper with your fingers, you can vary the texture and add an impression of movement to the fabric.
4. Position your light source
Move the light around to see what position best highlights the texture, adding or taking away drama.
And shoot.
 ..
.. What we'd really appreciate is...
Thanks for reading our tutorial on using a styling t-shirt flat lay for fashion eCommerce — part of our ongoing series of tutorials on product photography, styling and lighting. If you found it useful, why don’t you head on over to our YouTube channel and subscribe?
Better yet, follow us on Instagram, Twitter and LinkedIn to get the latest updates, tips and tricks on product photography so you can drive conversion and sell more clothes online.
More product photography tutorials
How to photograph books and magazines for e-commerce
How to create different lighting effects in your model shoot
How to shoot a watch and style your set for e-commerce and editorials
5 tips: How to elevate your food photography to the next level
[Top 7 FAQs] How to produce product images that convert for your Facebook and Instagram Shop
How to create animated flat lays in 5 steps
How to photograph beauty products using props from IKEA
How to photograph beauty product sets
Flat Lay PhotographyStephen Warr
0 Likes5 Things to Consider When You Photograph a T-Shirt
5 Things to Consider When You Photograph a T-shirt
August 08, 2021 - Hannah Shallah
It may seem simple to photograph a t-shirt to sell online but sometimes it is the simple things that need more attention. The preparation of the garment, the way you shoot and your camera settings can play a key role in capturing great product photos.
You don’t have to have a pro setup or spend lots of money. Just consider these five things when you photograph your products.
1. Choose a mannequin, model, or hangerWhen it comes to presenting your t-shirts online, you will need to choose between a mannequin, model or hanger. Not only will you need to choose how to photograph a t-shirt, but also think about how you would like the end product presented on your eCommerce store for your visitors and potential customers.
When you photograph a t-shirt you want to keep in mind some key points.
Using a model is the most natural looking and organic choice. This allows the customer to visualize it as if they were wearing it. I also suggest listing the model’s exact measurements in your clothing description. The same t-shirt can sit differently on someone who has wide shoulders over someone who is narrower but still takes the same size around the chest.
A mannequin is a great way to keep your photos consistent as the measurements will always stay the same no matter when you do a photoshoot. Mannequins, however, are not always the most realistic representation of real-life. Don’t we all want to be tall and slender?
A hanger is a very cheap way of presenting an item, however, it will only show the item as a flat lay. This method will give a consistent look to all of your t-shirts but it is not the best choice because your potential customer will not see how the item looks when worn.
To understand the difference between using a model vs a hanger when you photograph a t-shirt, look at these examples showing how the t-shirt lays in different forms.
Source: The IconicSource: Nike AUSource: Net-a-Porter2. Iron out those wrinkles!The next thing you want to consider is removing those wrinkles. Ironing or steaming your t-shirts before shooting is one of the most important steps to perform but is a step commonly forgotten.
This five-minute task will instantly take your photos from unprofessional and sloppy to professional and clean. Most importantly, make sure to iron out the sleeves of the t-shirt, neckline, the tag, and front to back to ensure there won’t be any wrinkles visible in your product photos.
It seems like it would be easier to edit them out later but trust me, it’s usually easier to prep the t-shirt properly before photographing it.
3. Achieving the perfect lightingWhen you photograph a t-shirt, achieving the perfect lighting in a DIY studio can be simple with the correct lighting equipment or natural light from a window.
To achieve consistent lighting throughout your product photos, investing in professional studio lights is a must. To get started with a studio lighting kit you will need two strobe lights and a transmitter to set the lights off when you hit the shutter button. You will also need two white umbrellas to bounce the light back. Done correctly, this will avoid unnecessary shadows and help to accentuate the natural colors of your t-shirt.
A plain white wall as a background or a fabric/paper backdrop is needed as well to ensure all photos have a consistent background that is clean and even.
4. Get your camera settings rightThere are some key steps to take your photos to the next level.
To get your camera settings right, I suggest to always shoot in manual mode. This will help you to control every aspect of your camera’s settings.
When choosing between shooting in jpeg or shooting in raw file format always go with raw if you have the option. Shooting your photos in raw format will help bring back highlights and reduce shadows easier than it would if you were to shoot your photos as a jpeg.
Shoot at a high f/stop. For clothing photography, stay between f/8 and f/11 to ensure every part of your t-shirt will be perfectly in focus.
For shutter speed (the amount of time your shutter is open) stay at around 1/125 when you photograph a t-shirt.
Keep your ISO between 400-800 depending on if you are using natural light or artificial light. When using artificial light I keep my ISO between 600-800. This will be best to reduce ‘noise’ for clothing photography.
If you would like to learn more details about camera settings, read our blog post specifically on aperture, ISO and shutter speed.
5. Close-up details of the t-shirtOnce you have prepped the garment and your camera is set up, you want to consider the photograph itself. Of course, you will take a photo of the front and the back of the t-shirt, but you will also want to capture all the details so your customer knows exactly what they are purchasing.
The photos on the product pages should give the potential customer a close-up feel of what the t-shirt looks like. Think about including photos of product and washing labels, any print designs, the stitching and the details of the fabric.
Source: Nike AURemember the more details the better. Why? Because it means less customer service questions for you and hopefully less returns because the photos will be a true representation of the product and what the customer expects.
Your camera must be perfectly in focus and the t-shirt wrinkle and lint free when shooting these types of photos because it’s all in the details!
Share on social:
How to photograph clothes without a mannequin?
To engage your audience, you need quality, eye-catching, and captivating product photos. There are two main methods for photographing clothing, one is Flat Lay and the other is Mannequin Photography.
It discusses the flat photography process and how you can improve the quality of your photos with a ghost mannequin editing service. Let's start.
For e-commerce or clothing business owners, product photography is vital. This allows them to attract target buyers through a quality image and increase sales. A brand can spend all they want on product photography, but for someone trying to start a business, there is a big problem. He has to photograph clothes to sell online on a limited budget and cannot afford to spend as much as a brand. nine0003
In order to reduce photography costs and save money, he has no hesitation in choosing a photo without mannequins or models with poses to sell clothes. This style is commonly known as flat or tabletop photography.
Flat photo
Flat lay photography is preferred due to its simplicity. Most brands and retailers do their photo shoots using this photographic approach. Because it provides the flexibility of style, the ease of setting up a photo studio, and the ability to capture more photos in a short amount of time. nine0003
If you don't have a photo studio, you can use a variety of hangers to create your own unique corporate identity while saving money. By photographing flat lay, you can create more stylish outfits than with a mannequin.
During photography, every brand and retailer is looking for ideas for stylish clothing, simple photo studio setup, and high volume photography. Flat-clothes photography is the best solution to meet the demand as it requires a simple studio set-up and produces large volumetric images quickly. nine0003
Conventional flat process
A common setup for flat/tabletop photography is done with the camera facing the clothing. And the headlights, lenses and delicate boxes are on the same side as the camera. When installing equipment, clothes are hung on a stick or hanger.
Lay the item on the table and place all the accessories (sticks, tape and clasps) to form the outline of the item. Wrap around underarms and use tissue paper to achieve natural depth. nine0003
“Flat Lay is a simple process for product photography; products can be removed anywhere.
How to do a photo shoot in Flat Lay Photography
Flat lay photography is a simple process of exceptionally creative photography of garments. Use your smartphone or DSLR to start photographing clothing for e-commerce.
- Keep the lines of the garment straight, consider the symmetry of the edges, and keep the same amount of white space on each side. nine0032
- Center the garment and align your shoulders perfectly.

- If you're not sure, stick to the rule of thirds and place your clothes on the 3×3 frame grid. The
- Canon EOS 5D Mk III is suitable for any professional product photography. For photography, lay the fabric right in the middle of the table, make it as straight as possible.
- When the fabric is placed on the table, make sure the neckline and shoulders are aligned so that it looks even and straight.
- When photographing men's and women's clothing, try to capture as much naturalness as possible. For women's clothing, try to give it the perfect shape, and for men's - as straight as possible. nine0032
- For a more natural look, use some tissue paper under the fabric. This will provide an excellent and crisp finish.
- After all preparations are done, you can take a photo of your clothes.
Quick tips
- Play with light. Move the light source back and forth to see which lighting conditions look best.
- You can use tape (preferably double-sided) to stick the arms and shoulders to make the product more attractive.
 nine0032
 - When it is bright and wrinkles are not visible - click to shoot.
Which products can be removed
Flat lay photography is suitable for items such as shirts, jumpers, shoes, scarves, hats, towels, baby clothes, jeans, blazers, coats, socks, swimwear, sunglasses, watches and more you can find.
Based on the above discussion, four points can describe flat photography.
step by step flat photography nine0065
- Prepare clothes
- Mount camera, light, lens facing clothing
- Take a picture with the perfect lighting setup
- Take photos from all angles
Why do you need post-processing after flat photography?
The success of an online store is limited by what viewers view in the online store. Owners must ensure that images look as enhanced and attractive as possible so that viewers click the "Order Now" button. nine0003
Before post-processing images for online stores, make sure the clothes look like they came straight from the factory. Since flat lay is a manual approach, there are many chances that the photos will require post-processing. There is no other better option for creating web-ready images other than getting a product image editing service.
Flat screen photography can be done in many locations without complicated studio setup. Images can sometimes have color and lighting issues, and flat screen photography lacks depth. nine0003
To add depth to clothing photos, you need to add a natural shadow under the garment. In such a case, the shadowing service is the only solution.
Color and lighting can be a real problem with flat photography. Color grading is required to create vibrant apparel photos after product photography. When editing designers in production, through a hand-drawn clipping path, Photoshop designers extract the object from the background for smooth editing. nine0003
When installing a flat photo, there are some problems with the angle and image quality. Viewers always want to see images from the same angle. The ghost mannequin editing service can provide images of clothing from the same angle.
Even if you take sufficient precautions, it is difficult to balance the color of your clothes. To correct color balance before uploading images to an online store, photo editing in Photoshop may solve your problem. nine0003
Wrinkles and stains on clothes distract attention and degrade the quality of photographs. Only a flat photograph cannot reduce these scratches; photo post-processing can solve any problem with photography. This way your clothing images get a fully optimized, perfectly styled and eye-catching look as you want to engage your audience.
Photo editing services ghost mannequin
There is another distinctive way to photograph clothes for online stores using a mannequin. This is also a simple process. However, initially buying a mannequin for men, women and children can be costly. But you can shoot 3D images in a short amount of time, and post-processing takes less time than flat-layout editing. nine0003
Whatever method you choose to photograph clothes, whether with or without a mannequin, you will need professional photo editing services to get more attractive images of clothes.
How to get natural images of clothes?
After all, flat photography is not the best solution for product photos. How wrinkles, picture angle, color, texture, photo size, etc. appear in pictures and make product pictures look unattractive and unprofessional. nine0003
With photo editing, you can quickly increase/change/enhance color or recolor, adjust color contrast, lighting. As a result, you will get professional photos of products that attract the attention of buyers.
If you don't have time to edit product photos yourself and demand quality clothing photos, place an order for Color Clipping's photo editing service.
Written by
Color Clipping
Photo only makes my heart beat. I like traveling, training, football and more. Although these are the most important.
How to photograph clothes and shoes correctly | Articles
- home
- Articles
- How to photograph clothes and shoes nine0047
- The basis of the picture. In our case, this is a swimsuit, beach hat, sandals;
- Fillers. Their task is to create the right mood and fill the free zones in the frame.
In glossy magazines, shop windows, advertising posters, we often see wonderful colorful photos of fashionable clothes, stylish shoes and related accessories. Moreover, in the absence of human models: just things as a self-sufficient object of shooting. And, you see, it often looks very convincing. The high style, grace and special aesthetics of these photographs magically attract the eye. How do the authors do it? What secrets do they possess to attract our attention in such a way? nine0003
In recent years, photographing things has become a separate genre of photographic art, as self-sufficient as portrait, landscape or animal photography. Many outstanding masters of this genre have appeared, and already from their experience the canons and features of the approach to this type of photography are formed. Many global brands and stylish glossy magazines can no longer imagine their pages on social networks without photos in the flat lay style (a composition of fashion items on a flat surface). Moodboards are also popular among users - photos of sets of clothes hung on the wardrobe door. I picked up an interesting composition, hung it on a closet - photographed it. And in the morning I put it on - and to work. Saving time on fees! Well, seriously, the moodboard is not just beautiful clothes. nine0003
With your approach to the selection of things, their combination into a common composition, you can show your individuality, your character, style. Tell the viewer a little story about yourself. And for sure you will gather a lot of well-wishers on Instagram and other networks. And for yourself, if there are enough frames, a photo book can be made to order or a photo album created with your own hands.
So, you have firmly decided to start photographing things. What do you need to know to avoid obvious mistakes? Let's figure it out together. nine0003
An important component of success is the background
The background in this genre is the foundation. Did not "hit" the background - all subsequent efforts are in vain. The simplest things suitable for the background will surely be at hand, right in the house. It can be bed linen or a pastel-colored blanket. Colored pastel paper is also acceptable and is easy to find at any art supply or hobby store.
More solid background accessories - marble and granite boards. These are quite expensive materials and are more suitable for professional studios. But it is easy to replace them with cheaper ones by buying a self-adhesive film with a similar pattern. nine0003
Soft background materials (fabric, paper) will give the picture a homely warmth and comfort. It is better to place items of clothing slightly carelessly, asymmetrically, with wrinkles and folds. A hard background is more versatile. It is great for neatly folded things, and for laying out with a touch of negligence.
Natural light is your advantage
Natural daylight is the best choice for photography. Therefore, try to choose a place for shooting near the window, where the illumination is maximum. Artificial light introduces too much distortion into the color gamut that filters cannot correct. If the lighting is insufficient, you can use the Cortex Camera application, or similar. These programs are designed for just such a case and when shooting with the front camera in low light, they improve the quality and increase the size of the pictures. nine0003
Look for meaning in every composition
Flat lay is a short story made up of things instead of words and sentences. Construct an atmosphere that matches the event, and further develop the semantic series by adding objects that are close in association. By the way, the creation of a fly lay is very close in spirit to the game of associations. Let's say you decide to demonstrate a new beach set. Those. the main subject of the shooting is known, the background has also been decided. We develop the story further: we add sunglasses to the composition, a glossy magazine with palm trees and a beach on the cover. Let your imagination run wild. nine0003
You can use a camera and even a passport as accessories. You feel how the story of the upcoming trip that you are looking forward to is looming. All items involved in the composition are divided into two categories:
Try to enliven the images of clothes and shoes with perfume and cosmetics inserts, bright postcards, magazine covers, bijouterie, and other cute things that are present in many in every home. nine0003
Build your composition according to the rules
There are two axioms in photography that are always relevant: the rule of thirds and the golden ratio. For those who have forgotten, we recall that according to the “golden rule”, an object is most organically perceived by the eye if it is virtually divided into two unequal parts: ideally 62/38, and roughly two thirds and one third. The 3x3 grid and the rule of thirds only confirm the conclusions of the "golden section" and are its instrumental embodiment. The grid divides the frame by vertical and horizontal lines into 9parts: three cells in any direction. This option is available in most modern cameras, it is also in the iPhone, just enable it in the camera settings. This is a wonderful frame building tool. Strive to place objects along horizontal and vertical lines. The places where they intersect are considered the strongest points of the frame, here you can place the main objects.
Another way to arrange the composition is diagonal.

