Diy photo shoot
Photo Shoots the D.I.Y Way
Whether friends asked you to snap some quick engagement photos or you want to capture digital memories of a family member or pet, executing a DIY photoshoot has never been easier or more budget-friendly. To learn how to do a photoshoot on your own, all you need is a usable space, a few pieces of equipment, and an introduction to DIY photo shoot basics.
Below, you’ll find a beginner’s guide to how to do a photoshoot by yourself, from essential gear to creative ideas for your first shoot.
Step 1: Collect the Gear You Need for a DIY PhotoshootCamerasWith their large pixels and super-high-quality images, full frame digital cameras are the medium of choice for many top professional studio photographers, but they’re not cheap (typically over $3,000). If you’re simply learning how to do a photoshoot by yourself, you can do very well with today’s large-sensor DSLR and mirrorless cameras. Popular (and capable) models include the Nikon D5600, Canon 6D Mark II, and the Sony a6500, which cover a range from about $600 to $1600. Once you have your DSLR camera in hand, take the time to learn its capabilities, so you can produce the best photos possible.
There are two main types of camera lenses: zoom and prime. Zoom lenses offer versatility through a range of focal lengths, but fixed-focal-length prime lenses deliver the image detail you’ll need for portrait photography. Prime lenses tend to be more expensive, and you’ll need more than one to cover a full range of shooting needs and situations. An arsenal of three prime lenses covers the bases for many portrait photographers: 50mm, 85mm, and 135mm. Keep in mind that focal length is also affected by your camera’s body and sensor size, so figure out what lenses will likely suit your needs (and camera!) before you invest in a particular model or size.
Learn How to Take the Perfect Portrait
Fundamentals of Portrait Photography: Using Natural Light to Create Drama With Justin Bridges
Take the Class
LightsThere are three basic types of lights for photography: continuous lighting (lights typically mounted on stands that stay on throughout a photo shoot), flash (small, lightweight, battery-powered lights that can be mounted on your camera’s hot shoe), and strobe lighting (larger, more powerful AC-powered flash lighting on stands, often triggered through wireless remote). For a DIY photoshoot, continuous lighting is the best place to start. In most cases, flashes are not flexible enough for studio use. Strobes are useful in a studio, but have more advanced applications.
Fortunately, you won’t need to spend a lot of money on DIY photoshoot lighting. Highly functional studio light kits are available for as little as $50, and often include lights, stands, and umbrella reflectors. A three-light setup gives you all the flexibility you need to experiment and learn how to do a photoshoot by yourself.
Step 2: Set Up the DIY PhotoshootOnce you have your DIY photoshoot gear, you’ll need to do a little additional setup to produce great photos.
Light ModificationsLearning to control and modify your lighting may be the single most important part of your DIY photoshoot. Light modifiers are essential to getting the look you want for your portraits and are a key to creative freedom in your work. Here are some of the most popular tools for DIY photoshoot lighting:
- Umbrellas: Umbrellas are inexpensive and provide lots of soft light, which makes them an ideal place to start when setting up your DIY photo shoot.
 White shoot-through umbrellas diffuse light and spread it evenly, while reflective umbrellas typically point away from your subject, reflecting light back in a controllable way.
 - Softboxes: These closed chambers go directly in front of your light source to soften and diffuse the light. Softboxes are extremely popular not only for the warm glow they give portraits, but also because they are lightweight, inexpensive, and portable, and they come in every imaginable size.
- Beauty Dishes: Used mostly for beauty and glamour photos, beauty dishes diffuse light while enhancing contrast and image detail. They are often placed high and pointed down to accentuate and define models’ cheekbones and bodybuilders’ muscles.
- Color Gels: These transparent color shoots placed in front of lights add depth and dimension to your photos. They come in an endless array of hues and can be used to whiten your light or provide a splash of color.

If you prefer to learn how to do a photoshoot outside, you may need some different lighting options. You’ll find the natural light is best either one to two hours after sunrise or a few hours before sunset. Alternately, a gloomy day can provide the perfect soft light that’s ideal for a DIY photoshoot.
Backgrounds and BackdropsThe right photoshoot background is crucial to setting the mood for your pictures. Many studio photographers use a backdrop support system paired with photography backdrops available in an endless variety of materials, textures, colors, and sizes. A traditional support system typically consists of a three-section crossbar combined with two light stands. These systems typically accommodate up to 10.5-ft-by-12-ft. backdrops, but tend to work best in larger spaces. An X-Drop kit sets up easily and quickly and handles 5-ft.-by-7-ft. backdrops. The X-Drop’s small footprint renders it ideal for smaller studio spaces or anytime flexibility and portability are required. For ultimate flexibility, try a chroma key or green screen background (used widely in the movies), which allows you to drop in whatever background you like later on using your computer.
However, for a more inexpensive option, use removable wall hooks to provide an anchor for your backdrops.
The right background or backdrop can help you achieve the right look and feel for your DIY photoshoot.As far as backdrop materials, muslin is a popular option for its light weight and versatility, whether hung taught or draped over objects. Canvas backdrops are heavier but very durable. Polyester and stretch-knit fabrics are virtually wrinkle-free. Velour can look great in portraits, and black varieties may reflect no light at all for those in need of a deep black background. Less portable but very useful are seamless paper rolls, which are also inexpensive enough to let you keep a wide range of colors on hand.
Keep in mind that cheap photography backgrounds can be created from scratch with a bit of imagination and know-how. Try hanging a colorful bed sheet (wrinkle it for texture), lace curtains, or Christmas lights for some vibrant and unexpected contrast. Be sure to experiment—using unique backgrounds may help you develop a signature portrait style.
Or, if you’re learning how to do a photoshoot outside, you can skip the backdrops altogether. Instead, look for locations that are full of natural light and offer a unique background, like flowers, foliage, or lush trees.
Step 3: Edit Your PhotosBoth Macs and PCs arrive with basic photo editing apps on board. But if you’re interested in taking your DIY photoshoot to the next level, it’s worth becoming familiar with the increased power and flexibility of advanced photo retouching and editing software. Adobe Photoshop ($9.99 per month) remains the top photo editor for professionals. But other options including Adobe’s Lightroom ($9.99 per month) and Photoshop Elements ($99.99), and Cyberlink PhotoDirector ($99.99) add workflow and photo organization tools that many photographers at all levels find essential.
Once you have these basics down, you can tackle nearly any type of DIY photoshoot. It’s always wise to follow your interests, but not to the point of exclusion—you may be surprised at the kinds of photography work you enjoy or discover an underserved market segment in your area. Here are a few of the most popular types of photoshoots for budding DIY photographers, along with some tips on how to approach each theme.
During an engagement or couple photoshoot, give the couple a fun prompt (like “Tell me how you met”) to produce candid, natural photos. Couple PhotoshootsThe best advice for any DIY photoshoot is to bring a relaxed, creative vibe to the event and set an example for your subjects. Help couples show their authentic emotional attachment to one another by asking them to tell the story of how they met or imagine their future lives together.
Maternity PhotoshootsArtistically framed belly shots are always a hit, but be sure to suggest including the entire family (don’t forget siblings!) in the shoot as well. Keep some high-quality sample maternity photo prints on hand to give you ideas for the shoot while reminding any self-conscious models that growing families are beautiful.
Babies can’t follow instructions, so be sure to bring your patience and spontaneity to this type of DIY photo shoot. Be prepared to shoot an active or sleeping baby, and ask the parents to bring props such as a Moses basket, pillow, or blanket.
Graduation PhotoshootsAsking your subject to don a cap and gown is a given, but also explore ways to go deeper and reveal your subject’s true personality. Consider asking your subjects to bring props from their lives, along with clothing that will make them feel comfortable and open in front of the camera.
Self PortraitsTo practice your photography skills and get a better handle on your overall DIY photoshoot setup, don’t be afraid to experiment with self portraits. A camera remote or self timer can be helpful for this, as well as a few tips on how to do your own makeup for a photoshoot.
Whatever your DIY photoshoot adventures, remember to keep trying new techniques and equipment to evolve your skills and know-how. Shoot as often as you can and challenge yourself with projects that require creativity. You’ll be shooting beautiful, professional-looking photos in no time!
Learn How to Take the Perfect Portrait
Fundamentals of Portrait Photography: Using Natural Light to Create Drama With Justin Bridges
Take the Class
20 At-Home Photoshoot Ideas to Try
By Chelsea Candelario
Published May 9, 2020
Tired of scrolling through Instagram wishing you could get creative outside? Well, lucky for you, there are plenty of ways to capture easy snapshots without leaving your house. From backdrops to looks, here are 20 at-home photoshoot ideas to sprinkle some fun into your feed.
Backdrops1.
 Backyard
Forget about heading to the park or daydreaming about your next tropical adventure, when you have a plant-filled paradise in the backyard. Whether you choose to stand in front of your largest (and proudest) plant or lay in a bed of roses, your outdoor oasis can be a lush backdrop that also shows off what a great plant parent you are.
2. Print Clippings
Remember covering your walls with the latest movie or crush of the month (hello, Zac Efron). How about bringing back some nostalgic memories and dusting off those old teen magazines you have stored in the attic? Just cover a blank wall with any clippings you can find and now your background is literally screaming with interesting stories.
3. Fun Wallpaper
If home décor is your forte, highlight your fave wallpaper in the house and let it do all the talking. No need to invest in photoshop work when you can take photos in front of the whimsical wall you already have.
4. Bedsheets
Possibly the easiest DIY backdrop ever? The options are endless, so grab any sheet (though we prefer white, black or grey) and prepare to look like you’re in a photography studio. Tape or pin it to a wall, lay it on the ground or even hang it over some furniture.
5. Milk Bath
While sharing your spa day in the bath is a nice flex for lazy Sundays, upgrade your next bath with bath bombs, fake florals and maybe...milk? When Ariana Grande shot “God Is a Woman” in a unicorn-colored bath, we knew we had to try to recreate it ever since. Just fill up your tub with equal parts milk and warm water to create the translucent look (and yes, milk is OK to dip in, and thanks to its ingredients, it does super well for the skin) or try a water and bath bomb combo instead. Then, add some floating objects (like fake flowers or confetti), set your camera timer and sink into your design.
Props
6. Your New-found Hobby
What daily activity do you enjoy and want to share with the world? Is it running, embroidery or even attempting to recreate Bob Ross paintings? Whatever you’re interested in, capture the moment in action, while you’re preparing or even the end result.
7. Mirrors
What started as the “outdoor mirror challenge” on TikTok has bloomed into an easy (but weird) idea to try at home. All you need is, well, a mirror (doesn’t matter the size as long as you can carry it), the subject (aka you) and a great open space to capture your reflection.
8. Food
Let’s face it: Food pics are always in. Many of us have found solace in cooking and baking, so what better way to show off your new skills than with a snapshot of your creation? Just grab your concoction, lay it down (or hold it in your hand) and let your food be the model. Bonus if you have a little furry friend make an appearance in the pic to “admire” your work.
9. Books
Spotlight your current, favorite or prettiest book—play coy by covering your face with the book, pretend to read a chapter or just place it on its own in a well-lit location.
10. Your Favorite Products
Give your go-to products the editorial look with a nice flat lay. Choose beauty, fashion or any products that are currently sparking joy during social distancing. Take a simple background (we recommend a magazine, printed paper or even your bright countertop), round up your items and start positioning them any way you like. Take the photo overhead (this is essential for the flay lay vibe) to get all the products in one shot.
Lighting
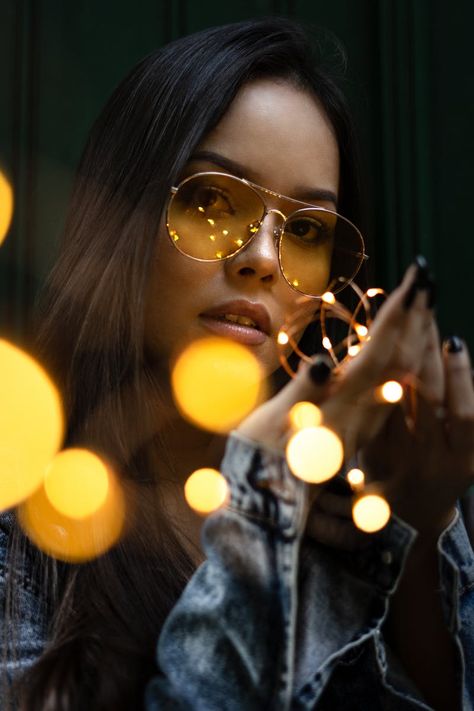
11. Snow Globe lighting
You don’t need state-of-the-art lighting to play with lighting patterns into your images. Surprisingly, all you need is a knitted blanket. (No, we’re not kidding.) Bring back your winter bedding, head under the covers and watch the sun pierce gently through the small holes for an added snow globe effect.
12. Golden Hour
Hey Alexa, play “Golden Hour” by Kacey Musgraves. In photography, the term means to capture an image shortly before or after a sunset. The popular lighting idea is all about timing with no disruption from any shadows. The “magical hour” can last 20 to 30 minutes, so grab your camera (and check the time) to capture the moment.
13. Shadow Play
Impress your friends by controlling the shadows (no lighting equipment or phone app needed). In photography, the term means to capture an image shortly before or after a sunset so there are no shadows. How to create this abstract look? All you’ll need is an empty toilet paper roll (yes, seriously), tape and your phone. Just tape the roll over your phone's back camera for a DIY micro lens. (Bonus: Tape a transparent colored gel over the roll for an enhance look.)
Looks
14. Pillow Challenge
Another odd but interesting challenge to hit the internet is the #PillowChallenge. It went viral in April, and celebs like Tracee Ellis Ross, Halle Berry and Anne Hathaway have joined the craze. Grab your most festive pillow, wrap a belt around your waist and flaunt at the camera because this is what we’re doing now.
15. Outrageous Makeup
Take a risk and have fun with an out-of-the-box makeup look. Give your bright lid, bold lip or bomb highlight the spotlight in a close-up portrait.
16. Pop Culture References
Many events were canceled this year, but that didn’t stop people from recreating some popular Met Gala looks. Let Halloween come early and replicate your fave pop culture moment. Is it an album cover, meme or even the time Beyoncé broke the internet with her pregnancy news? The options are endless, and the only requirement is finding items already around the house to replicate the moment.
17. Wfh #ootd
Loungewear, but make it chic. Share your comfy look with a daily #ootd. The location, pose and outfit are entirely up to you. You’re the model and your home is the runway. Brownie points if your look is professional on top and party on the bottom.
Mixed Media
18. Facetime
We’ve been screenshotting our Zoom meetings this whole time, so why not turn it into a virtual photo shoot. Celebs like Demi Lovato and Cindy Crawford have jumped on board with the new photo idea and the results look like a ‘90s VHS filter. Just have a friend use their camera or phone and take a snapshot of their computer screen as you pose.
19. Recreating Childhood Photos
What better way to brighten up your family’s day than by recreating a few childhood photos? Find an old image you love, grab similar clothes (bonus if can find the same ones from the pic) and mimic the poses. The best part of the process is pairing both photos side by side and seeing the similarities immediately. Throwback Thursday, here we come.
20. Projector
A projector isn’t only good for a nice at-home movie night. Set up your projector, let it play on a blank wall and let your imagination run wild. Become part of a flick, artwork or any moveable visual you can find online.
More Stories You'll Love
home
by Rachel Gulmi
Take a (Virtual) Step Inside This Influencer’s Eclectic Condo and Shop Her Fashionable Finds
home
by Sarah Stiefvater
The 15 Best Mattresses in a Box, According to People Who Have Slept on Them
home
by Sydney Meister
10 Laundry Room Organization Ideas That’ll Make Folding Socks Your Favorite Part of the Day
home
by Arricca Elin SanSone
Is Snow Bad for Plants? What You Need to Know About Your Snow-Covered Garden
home
by Sydney Meister
10 Cozy Home Decor Items That Are Equally Comfy *and* Chic, According to a Design Editor
Take It From #CleanTok: Microban 24 Will Help Rid Your Bathroom of the Grossest Messes
Make-up for a photo session: do it yourself step by step
Since the camera "eats" up to 30% of the color intensity, make-up for photography should be created a little brighter than usual, and the emphasis should be on both the eyes and lips. Follow the instructions from the make-up artist
Make-up for a photo shoot has its own characteristics. It must be made, firstly, brighter than usual (it will not be so noticeable in the photo), and secondly, do not be afraid to accent both eyes and lips with it. How to prepare for shooting yourself? Do-it-yourself step-by-step makeup for a photo shoot will answer all your questions! nine0003
Makeup preparation
© Makeup.ru
1
To remove impurities and cleanse the skin, wipe it with micellar water. Apply a non-greasy moisturizer, such as a milk or lotion, to your entire face.
© Makeup.ru
2
Lightly massage the face starting from the center of the forehead, chin, nose and moving towards the contours. This will help speed up the process of blood circulation: the face, like the body, needs to be “charged”.
Gently massage before applying make-up (ideally, this "treatment" should take five minutes). Distribute the cream along the massage lines without stretching the skin. nine0003
3
When doing makeup for a photo session, make sure that the skin is not too shiny. Apply a pea-sized amount of mattifying primer to those areas of the face where oily sheen first appears (T-zone, center of the chin). So you do not have to constantly powder it and make your skin heavier with extra layers of cosmetics. Distribute the makeup base in the same way as the moisturizer.
Before the photo session, in the process of preparing for makeup, do not apply serum to the face and do not use masks, especially with a greasy texture (otherwise the makeup may “float”). nine0003
© Makeup.ru
4
Apply an illuminating primer locally on the skin - on those areas where the maximum reflection of light occurs (cheekbones, sides of the face, "back" of the nose and chin). Your task is to give the skin a delicate glow.
© Makeup.ru
5
To prep your lips, apply a lip balm. This is especially true for those with dry or chapped lips.
Foundation
6
Apply foundation all over face with fingers, paying special attention to areas along the hairline. This way you will not create a mask effect. nine0003
- Use Giorgio Armani Lasting Silk foundation. It perfectly covers imperfections, gives the skin a pleasant shine and does not dry the skin during the day.
© Makeup.ru
© Makeup.ru
7
Cover redness, breakouts and other visible imperfections with the concealer. Do not forget to apply it on the "wings" of the nose and nasolabial folds. Work the area under the eyes well with concealer.
© Makeup.ru
Eye Makeup
8
To keep eye shadow from rolling during a long photo session, apply a primer to your eyelids, such as Urban Decay's Primer Potion. Spread it quickly over the skin: the product instantly “seizes”.
© Makeup.ru
© Makeup.ru
9
Walk along the eyelash contour with a brown pencil. And on the entire moving eyelid and in the crease, apply liquid shadows with a shimmer: they will add shine to the skin, “open” the eyes, and in addition, if necessary, help create the effect of wet eyelids. Shades choose nude, neutral and apply with a fluffy eyeshadow brush. nine0003
© Makeup.ru
© Makeup.ru
© Makeup.ru
© Makeup.ru
1 Silk0
Silk0
Darken the space along the eyelash contour in Eyercil Pencil5 again with a pencil (Armani Pencil5) . Blend the contour of the eyeliner with your fingers to make it fuzzy.
- Tip: If your eyeshadows start to flake off (this can happen with those that are not creamy, but powdery), apply concealer under your eyes. Blink, and then with a clean fluffy brush, go under the eyes and remove its excess, as if removing pigment from the folds: this way you will definitely avoid the effect of dark circles under the eyes. nine0048
© Makeup.ru
© Makeup.ru
© Makeup. ru
ru
11
Apply translucent powder to set the concealer under the eyes. This is also necessary so that dry shadows are further distributed evenly: they fit better on a dry texture than on a cream one.
© Makeup.ru
12
To add extra sparkle to the eyes, add light shadows with a shimmer to the inner corners of the eyes.
© Makeup.ru
13
Apply mascara to lashes and comb through with a clean brush to remove excess. On the last third of the ciliary contour, starting from the outer corner of the eye, stick bunches of false eyelashes.
© Makeup.ru
© Makeup.ru
Eyebrow makeup
14
Comb your eyebrows (choose an eyebrow makeup product with a brush) and give them a natural, not too geometric shape, coloring in with a pencil in the direction of hair growth.
© Makeup.ru
Sculpting
15
Lightly sweep the peach blush across the cheekbones and apples of the cheeks. Lines should not be clear, make-up needs freshness and naturalness. You can apply the pigment a little more intensively, because it is “eaten up” by the camera.
© Makeup.ru
16
Walk along the upper line of the cheekbones with a highlighter. Highlight the sub-zygomatic area, make light contouring - so the facial contours in the photographs will be clearer. nine0003
© Makeup.ru
Lip makeup
17
Fill the lips inside the contour with a peach-colored pencil - this way the lipstick will stick better. Pencil can dry out your skin, so add a matching lipstick to it (if you want matte lips, stop at the pencil stage).
The matte effect of the pencil can visually reduce the lips, while the lipstick will make them more voluminous. Keep this in mind when creating makeup.
© Makeup.ru 9Makeup fixing
© Makeup.ru
Did you manage to repeat the make-up for the photo shoot with your own hands? Write a comment.
How to make a photo session yourself - Emotions Workshop
Photoshoot nine0166 Anton Bakin
May 23, 2019 Views: 2106
Any planned photo shoot can turn into a failure if you do not take into account the basic rules of photography.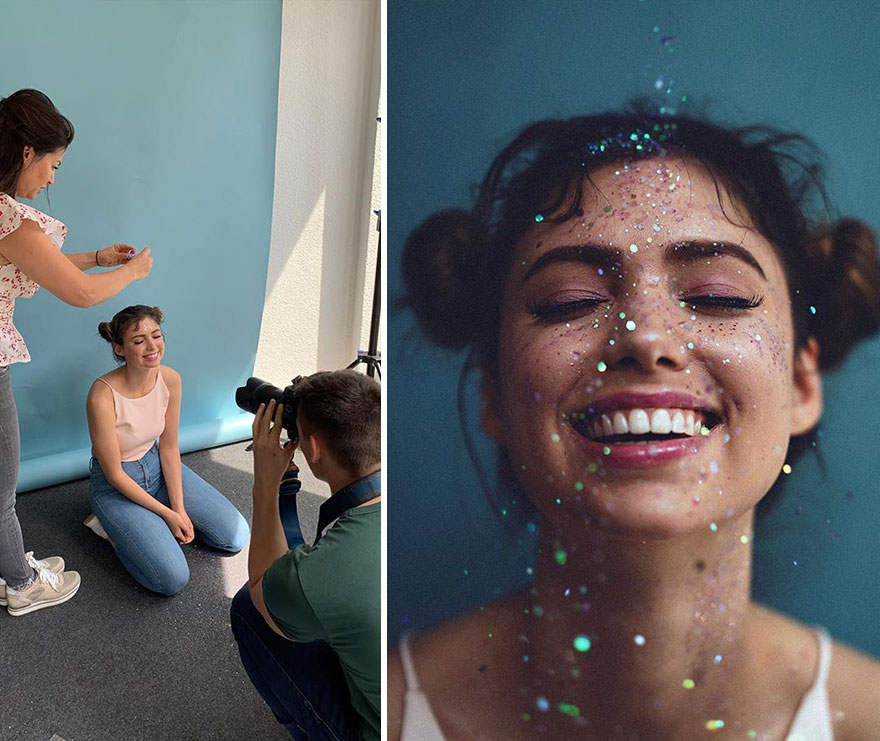 Anyone who has no or little experience in this matter will definitely need our advice on how to make a photo shoot yourself without extra effort and investment. nine0003
Do-it-yourself photo shoot steps
- — Decide on the theme of the photo shoot, then choose the right entourage, outfit and accessories.
- Decide what genre you want to take photos. It can be interior, street photography, art photography, body painting, etc.
- - Create images. In one case, the mood of the picture will be better conveyed by the play of light and shadow, in the other, high-speed shooting.
- - Choose a location for a photo shoot. You can arrange shooting at home, outdoors, rent a studio or a small house in the forest. Keep in mind that sometimes even banal city places will help you open up from a completely new side. nine0048
In what style do you want to arrange a photo session?
There are several basic styles of taking photographs:
- - Portrait photo session.
 Fully reveals your sensual image through the camera.
 - - Lifestyle - shooting in the natural environment of your life, requiring little preparation.
- - Love story - photo shoot for two. It conveys passion, tenderness and sensuality of partners. nine0048
- - Shooting in retro style. Increasingly, young women of fashion and fashionistas pay tribute to the past time and try on outfits, hairstyles, and jewelry of the 19th-20th centuries.
- - Glamor. Shows your sexuality, individuality, beauty. In this case, makeup, clothes, interior and, of course, high-quality photo processing play an important role.
- - Military. Strong poses, military paraphernalia, equipment - all this will be a reflection of your bold and independent character.
Choosing a location for a photo session
If you want to capture yourself against the backdrop of sailing ships or arrange a home shoot - go for it! No one limits you in choosing a place, but consider a few nuances. For example, if you are going to take photos in your favorite cafe or other public place, discuss this with the owner in advance. This way you don't have to deal with visitors who might be interrupted by camera flashes.
Tip: take pictures in the morning or afternoon, but never between 12 and 2 pm. Otherwise, all photos will be illuminated by the sun, which is at its zenith at this time. nine0230
What clothes to wear for a photo session?
Clothes are selected depending on the surroundings and place. If you are using a solid white background, wear a rich dress or a bright suit. For a photo shoot in nature, in a cafe or at home, give preference to plain clothes. So you will not merge with the landscape and become the main character of all the photos. In any case, pick up things that will not hamper your movements.
Conducting a photo session
For successful shooting, not only the beauty of the model and the use of high-quality equipment are important, but also the following factors:
- — Composition — matching the content and emphasis in the photo to the idea that you put into the photo session.

- - Proper lighting. With the help of natural and artificial light, you can set the right accents and set the mood for your photos.
- - Makeup. It will help to eliminate minor imperfections of the face, highlight the advantages and change its contour. nine0048
- - Accessories. Too many background objects can absorb attention from the main character of the shooting.
Once all requirements are met, you can set up your camera and start. If you plan to shoot yourself without an assistant, always keep your hand with the camera without tilting your hand. Otherwise, you will fill up the horizon, and the shoulders will look larger than they really are. Another tip is to hold the camera slightly to the side, not straight ahead.
Pros and cons of organizing a photo shoot yourself
Among the advantages of doing a photo shoot yourself is saving money on a professional photographer. In addition, you can arrange this event at any time and you will not need to rely on anyone. Another plus is that you do not have to wait for processed photos - they are already in your hands! And of course, if you like to try something new, a photo session with your own hands will be an interesting experience. nine0003
However, in order to get beautiful photos for all 100 points, you will have to spend a lot of time. Even professional models take 300-500 shots to do well for a magazine cover. In addition, self-organization of photography has several disadvantages:
- — There is no guarantee that you will be able to make standing shots. Amateur shooting is easy to identify even with the naked eye.
- - To create an image and entourage, you will have to spend savings. Conducting a high-quality photo shoot on your own can cost even more than contacting a studio. nine0048
- - No equipment. If you do not have a professional camera, you will have to look for it from friends or rent it.
Who can help with photography?
If you want to be sure of the result, contact the professionals.