How to make a lightbox for photography
DIY Light Box: Improve Your Product Photography
How can you help customers feel confident that they’re buying the right item? Sure, there are reviews, testimonials, and product descriptions. But good product photos are probably the most important part of your online store.
Below, we’ve put together some of the basic techniques that will improve your online store product photography, as well as step-by-step tips to create your own DIY light box and DIY product photos.
Start selling your products online with Jimdo.
The basic setup for your product photography
One easy way to make your products look more professional and more desirable is to photograph them inside of a light box.
What is a light box? A photo lightbox (also known as a white box or light tent) is an empty box with translucent white sides and a smooth, white backdrop. Put your product in it, take a picture, and you get a professional product photo with good lighting, no shadows, and a plain background. DIY light boxes are easy to make yourself with a few simple tools.
You could spend anywhere between $20 and $4,000 to purchase a pre-made light box, or you can make one yourself at home for (almost) free! Best of all, you don’t need an expensive digital camera. A light box can improve your product photos even if you’re just using the camera on your mobile phone.
Start selling your products online with Jimdo.
This DIY light box cost $3.70 and took 10 minutes to build. The tools you will need are:
- a cardboard box
- packing tape
- a box cutter
- white tissue paper
- white poster board
Step 1: Cut out your cardboard light box
Step 2: Trim the white tissue paper to the same dimensions and tape it to the box.
Step 3: Snip the poster board to the same dimensions and drape for a white background.
Learn how to start your own website today!
Just follow these steps to make your own photo light box:
Step 1: Cut out your light boxUse the box cutter to cut the top flaps off of the box. Next, cut out three sides of the box, leaving about a 1-inch border on each side. You don’t have to worry about making this perfect—as you can see, mine is free-handed and a bit messy.
Step 1: Cut out your light boxStep 2: Trim and tape the tissue paperCut the tissue paper to the approximate size of the sides of the box (leaving edges that can be taped down). Then tape the tissue paper to the outside of the box, covering each hole. The tissue paper will act as a light diffuser, softening the incoming light and removing harsh shadows.
Step 2: Trim and tape the tissue paper to the box.Step 3: Drape the poster board for a white backgroundCut the poster board to the width of the box. Make sure the poster board is long enough so that it extends out of the box. Tape the top of the poster board to the top of the back of the box, then let it drape down and out of the box to create an “infinity” white background without corners. You can tape the bottom of the poster board to the bottom of the box so it doesn’t curl upwards.
You light box is done!
Now you can place your products inside the light box and take some photos. Put the light box in a naturally well-lit area, like near a bright window. Or place a desk lamp above the light box if you don’t have enough natural light. For this example, we found a corner of our office with lots of natural light, so we didn’t use any additional lighting.
Making your own light box for product photography takes just a few minutes.How to take product photos with a DIY lightbox
- Natural light is always preferable to artificial light. Unless you want to add dramatic shadows, in which case you can simply angle a lamp to shine towards the left or right side of your light box.

- Make sure that you turn off your camera’s flash.
- Get close. Using a light box and a close-up photo is a great way to showcase the details of your product without any distracting backgrounds.
- Photograph your product from different angles so your customers know exactly what they’re getting.
More product photo set up tips for online stores
Here are more ideas for taking your own product pictures and getting the right set up.
Lighting:
The top priority is a product that’s easy to see, and that’s why the photo lightbox is such a great tool. But that doesn’t mean that you have to illuminate your product in a boring and sterile way. But you can also play with light and shadow—especially if more dynamic lighting goes well with your product.
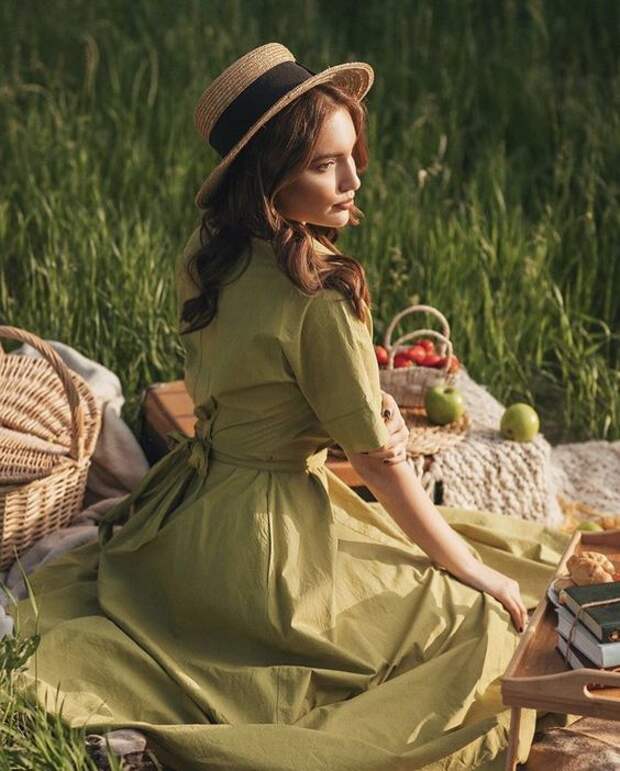
Some products photos look great with more dramatic shadows, like this example from Candice de Rijcke JewelryWhite balance:
Our eyes naturally adjust the white balance when we look at something—white appears white, not blue or orange. But cameras have more trouble. If you take a picture of a product, the color might look “off”, just like snow in a photo sometimes looks blue or an object by candlelight looks orange. By adjusting the white balance on your camera, you can fix this and make your product photos look more true-to-life.
Depth of field:
When you see a photo with a sharp foreground and a blurred background, you’re seeing an image with a “shallow” depth of field. When a larger area of a photo is in focus, that’s a “longer” depth of field. A shallow depth of field puts the focus on the close-up details of your product, while the background fades out. This makes the product details stand out.
A shallow depth of field put the focus on the details and lets the background fade away, like in this example from Glasstudio Schmidsfelden.Getting creative with product photo backgrounds:
The photo lightbox is a great tool for improving your product photography, but it doesn’t have to be the only kind of product photo you take.
Customers also like seeing a product in its natural environment. This gives them a feel for how they can use the item in their own home, making them more likely to purchase it. So make sure to throw in a photo of the product nestled into an attractive background.
You can also use backgrounds and compositions to show a certain mood or atmosphere for your product.
Make sure to include a photo of the product in a real-life background, too.Photograph from multiple perspectives:
Take pictures from different perspectives in order to depict your product as comprehensively as possible. Think about what could be important for your customers: Are there important details that your viewers should absolutely see? Then treat them to a close-up. Can you show a person using the product in action? Does scale matter? Then place your product next to an everyday object so that your customers can better judge how big it is.
These details are also something to mention when you write better product descriptions.
Choose a high resolution for your product pictures:
When it comes to resolution for product photos, we recommend shooting at the highest quality you can. It’s always possible to reduce the resolution of an image after the fact. But increasing the resolution never works, and the results will be pixelated and grainy. Here’s more on optimizing your website images.
Can you take good product pictures with a smartphone?
Yes, taking professional product photos with your smartphone is absolutely possible. Many smartphone cameras are so good these days that they can easily compete with more expensive digital SLR cameras, especially if you are a beginner. Keep in mind the following tips:
- Color temperature and white balance: On a smartphone, you can adjust the color temperature after the fact in a free photo editing program or use a third-party camera app. Some smartphones offer a kind of “Pro mode” that let you adjust certain settings manually, or choose from various specifications like “daylight” or “artificial light.
 ”
” - Depth of field: Creating a shallow depth of field is harder on a smartphone, but possible. You can try using an external lens, or use a photo app that can create the effect of a blurred background.
- Resolution: If you take photos with your smartphone, you should always take photos with the aspect ratio that offers you the highest resolution. That way enlarging, cropping and other photo effects will still be possible afterwards.
Learn how to start your own website today!
Product photography FAQ
What do you need for product photography?
Nowadays, you don’t need professional equipment in order to take great product photos. All you need is a camera or a smartphone with a decent camera. For lighting, just use natural light (e.g. from a window), or use photo lamps in combination with a soft box. You can often rent these quite cheaply. Use a seamless backdrop for a neutral background.
What should you watch out for in product photography?
Always make sure your product is clearly visible. It should be central in the photo, well lit, and sharply in focus. Of course, you can still be creative with your photos and play around with light and depth of field, but your product should always be the centre of attention.
Which lighting is best for product photography?
In most cases, natural light works best. If you have a big window, for example, position your product so that the daylight falls on it from one side. This gives you soft lighting. Photo lamps combined with a soft box also work well. Whatever you do, don’t put your flash on. That never looks good.
What’s a product image?
A product image is a photo in which your product is the centre of attention. It doesn’t matter whether only the product itself is shown or whether it’s shown in action alongside other objects or people. What’s important is that the product is always presented well, and that it impresses your customers. They should instantly know what the purpose of your product is, whether it appeals to them visually, and whether they’d consider purchasing it.
How does a light box work?
A light box evenly distributes light so that your product photography has soft lighting. A seamless backdrop made of white poster board creates a neutral background, while the light falls through the white tissue paper or fabric sides. If you photograph the object from the front (without flash!), you’ll get a neutrally lit product image.
What do I need for a photo box?
To set up your own photo or light box, all you need is: an old cardboard box, sellotape, a box cutter, white tissue paper, and a large white poster board. First, use the box cutter to cut out three sides of the cardboard box, and cover the openings with tissue paper. Then insert the white poster board as a seamless backdrop. That’s it!
How to Make a DIY Light Box (Three Different Easy Methods)
Ever wondered how people shoot those great product shots you see in catalogs or online stores?
Professional photographers usually use a light box to create an even illumination on the products.
The best options on the market can cost hundreds to even thousands of dollars. So how do you make a DIY light box for photography if you don’t have enough budget?
It’s quite easy. In this tutorial, we’ll show you three different ways to build a DIY light box using re-purposed materials.
Calpalmy 8x10
Create professional-quality photos with this light box, perfect for product photography and macro shots.
Buy from Amazon
×
Calpalmy 8×10″ Plexiglass Panels
Amazon
$7. 99
99
Buy Now!
[ExpertPhotography is supported by readers. Product links on ExpertPhotography are referral links. If you use one of these and buy something, we make a little bit of money. Need more info? See how it all works here.]
How to Make a DIY Light Box with Available Light
This DIY light box will take about 15 minutes of your time. And you only need a few materials you probably already have around the house.
You will need:
- 1 Medium card box
- 2 Sheets of baking or wax paper
- 2 Sheets of aluminum foil
- 1 White sheet of paper
- Ruler, x-acto knife, glue
Step 1
Start with your cardboard box. It doesn’t matter if you have a square or a rectangular box as long as your products would fit inside it.
Now, see which side would work the best as the front of your light box.
If your box is square, then it wouldn’t matter which part you choose. But since mine is rectangular, I chose the longest sides because they’d let in more light.
Step 2
Now, cut that sides of the box in the middle with an x-acto knife. It will help if you use a ruler and a marker to draw out which parts you’d like to remove.
Make sure the cuts are precise and clean. That way, your box would produce even light from both sides. Not to mention, a clean box always looks more appealing.
Step 3
Leave two open flaps that will work as barn doors on the front side of the light box. You can use them to control the light that reaches the inside of the box.
In a professional environment, you can find barn doors in front of camera lenses or lighting equipment. Each flap moves independently to help direct the light beams.
Step 4
Measure the sides of the box. Then cut wax paper to match their size. Leave about an inch or two so you have space to tape or glue the wax paper onto the box.
Wax paper can be delicate, so be careful not to tear it while taping it onto the box. Even minor tears can potentially affect the quality of your lighting box photography.
Step 5
Cut rectangular holes on the sides of the box, leaving one flap to the back of the box. Then glue the wax paper to the edges of the openings.
Step 6
Measure the flaps on the back of the box and cut aluminum foil to match their size. These will act as reflectors to help direct the light into the box.
Feel free to add white paper or aluminum foil to your front barn doors as well. These flaps will be especially useful if your location has plenty of uneven lighting.
Step 7
Place a white sheet of paper inside the box, which you’ll use as the background. Compose your product and position the flaps of the box to reflect most of the natural light you might have in the room.
Now your light box is ready, and you’re prepared to shoot.
It would be best to place your box right next to a light source. For even lighting, you can also consider shooting outside in direct sunlight. Just make sure that the sun is not directly shining in front of the product.
Instead, let your light box filter the light and adjust the barn doors to create even illumination.
I shot this image at f/22, half a second shutter speed, and 400 ISO.
See the even lighting and color temperature? Not bad at all for a homemade light box, right?
How to Make a Compact LED DIY Light Box
The box we made earlier is perfect for shooting in natural light. But you can’t always wait for the sun to shine when it comes to lightbox photography.
What if you need to shoot at night? Don’t worry, because our next project involves a light box with LED lights!
This method requires more time and energy, but it will be worth it. Especially since using LED lighting creates controllable exposure and color temperature.
You will need:
- 1 3mm Perspex sheet
- 1 5V LED bar
- 2 Small Velcro strips
- X-acto knife
Step 1
Cut this shape on a white 3mm Perspex sheet. The dotted lines are folding marks and not cuts. The size of your DIY light box will be as big as the scale of your template.
As a reference, you can use the center square to calculate the size of one of the sides of the light box.
You could also use white cardboard instead of Perspex. But it won’t be as durable or resistant to the elements.
Step 2
Now fold your box, overlapping the triangle-shaped flaps. Keep them in place with adhesive tape or Velcro strips. With the latter, you’ll be able to collapse it for transportation and reassemble again easily.
Next, glue the 5V LED strip to the small flap on the top front of the box. If you have more of those lights to spare, consider adding more to cover all sides. Doing so guarantees that you have even illumination.
These lights are pretty inexpensive. They even come with a micro USB connection that you can plug to a portable power bank. You can do this with a simple cable, making this the ultimate “on the go” DIY light box.
Step 3
Now, just use a white sheet of paper as a background. Prepare your product, and you are ready to shoot your image.
I shot this image at f/22, 1/4 of second shutter speed, and 400 ISO.
Straight out of the camera, it has good overall exposure. On a comparative note, however, the light is not as natural looking as in the previous image.
The color temperature is probably a little off, too, due to the blueish color cast of the LED. But you can easily correct that with a more precise in-camera white balance or in post-production.
But if you want to get everything perfectly in one go, consider buying daylight-balanced LED strips. They’re a bit more expensive, but at least they produce more natural results.
How to Make a White Box Flash Diffuser
If the LED light box seems too complicated, there is still one last project you can try. It’s effortless. You won’t even need to have DIY skills.
Sure, this project involves materials you get from home. But the overall process, which you’ll see in a second, is mostly the standard among many product photographers.
So how do you make a large light box? You don’t have to at all, and I’ll show you in a second.
You will need:
- 1 Plastic translucent white storage box
- 1 Sheet of white paper
- 2 Speedlights
- 1 Speedlight transmitter
Step 1
Set your storage box on its side with the opening facing to the front. Place a white sheet of paper inside as your background.
Now arrange your product. Test your speedlights‘ exposure and positioning to the subject.
Step 2
Synchronize the transmitter with the speedlights and the camera.
Now you are ready to shoot.
I photographed this image at f/22, 1/60 of a second shutter speed, and 200 ISO.
Looking at the result, I think it’s a pretty fantastic image straight out of the camera. The overall light is well diffused and placed on the right spots. The background appears lit and shadowless. And that is a huge plus if you need to isolate images in post. It saves you hours of work, creating cut-outs in post-production.
The white balance seems to be spot on as well. I used the flash preset in the camera color temperature options.
The metal reflections are also great without glare or specular light hot spots. This type of lighting is sometimes hard to accomplish with this type of material.
Instead of a storage box, most photographers use a real light box. But most of them set up their flashes exactly the way you would with this homemade setup. The main reason is that strobes produce powerful and consistent light, which you need when shooting hundreds of images.
It’s worth noting that some photographers also tend to add an overhead light for even illumination. But for the most part, two strobes placed on the sides of the box work perfectly well.
Conclusion
There are all sorts of uses of the lightbox in photography. Apart from shooting products, it’s also an excellent tool for taking still life photos.
So consider building a light box if you want professional-looking results on a budget. Remember that the most important thing is the image, not the tools you used to get it.
With a little ingenuity, you can go far. Even if you have all the money in the world or you normally stay away from DIY photography solutions, you may decide to create your tools to get the results you want.
Want to learn more about useful techniques that will help you take your photography to the next level? Why not check out our course Wow Factor Photography next!
Do-it-yourself Lightcube (Photobox, Lightbox) for 300r How to be? You need a lightcube! About how I made my inexpensive but durable lightcube, examples of photos and much more - under the cut.
What is it?
Lightcube
is a construction of plastic/metal frames in the form of a cube, on the sides of which a translucent diffusing fabric is stretched. The bottom and back wall of such a cube are a "subject" table. It looks something like this:
Why?
The reasons can be very different:
• I like photos on a white background
• I would like to have my own "mini-studio"
• Interested in subject/macro photography
• Conditions in the apartment do not allow to take high-quality photos
• I like to work with my hands
I decided to make a lightbox because I wanted to get high-quality photos, but my apartment has completely unsuitable conditions for this - it is “dark”, the sun practically does not get into it. In room lighting, photos rarely turned out good. Lightbox solved all these problems. nine0003
Why like this?
There are many articles on the net about how you can make your own lightcube out of a cardboard box. And I had such a cube.
At first I liked everything about it, but gradually the cons began to appear: the speed of production negatively affects the life expectancy, the size of the lightbox is sometimes not enough (my last “cube” had dimensions of 35 * 35 * 40 cm), the cardboard skeleton is easily damaged when replacing "scatterers" and a subject table (they are torn and dirty over time). nine0003
So I decided to replace the "cube" skeleton with a more durable one, and make it the size I need, and not start from what size cardboard boxes I have.
Construction
The idea to make a skeleton out of a wire box came spontaneously while visiting a hardware store - for my "cube" I took 3 sticks of 2 meters in length.
To create a lightbox you will need
• Whatman
• Wire box
• Corrugated paper
• Double-sided tape
• Small carnations
Box ~160r, Whatman paper ~20r, Corrugated paper ~50r, Adhesive tape ~40r, carnations ~30r. Total 300r.
Light
In the photo at the beginning of the last section, you can see 2 lamps and 2 lamps. Before that, I had a table lamp and a clothespin lamp, but they had different bases. I decided to buy a second “clothespin” of the same kind and take two energy-saving lamps - 23W (corresponds to 160W for an incandescent lamp), 4200K (bright white light). nine0003 Such 2 lamps and 2 lamps will cost 800-900 rubles.
Assembly
I’ll make a reservation right away - I don’t pretend to be the optimal design, because I decided how to connect the faces of the “cube” to each other “on the go”. But what happened in the end, I liked it, and I decided to tell about it.
The boxes were cut as follows: 4 pieces of 50cm and 8 pieces of 35cm (these dimensions of the lightbox seemed to me optimal for use/storage):
In order to connect the "sticks" to each other, I used the feature of the boxes - a hollow structure:
And then I fixed the joints with small nails:
First I made the sides:
boxes for the construction of the base:
After some time, the skeleton was ready:
When I fastened all the sticks together and got a box, I decided to add two extensions to the back wall to increase strength and stability. Stretching made from the remaining parts. I also added one "rail" to the bottom so that the future cardboard bottom does not sag down. nine0003
After I attached the bottom and pasted the drawing paper (to get a “subject table”):
At the end I glued corrugated paper on the sides and top of the lightbox:
Everything, the lightbox is ready. With its large size, the lightbox turned out to be durable - it does not stagger or bend. For the sake of the experiment, I "accidentally" dropped the structure from the table a couple of times - the skeleton remained intact, even the paper on the sides did not have to be changed. And since with such dimensions the lightbox turned out to be quite durable, then if it were smaller, say 20x20x20cm, then it would be even stronger. And such a photo box is easy to make the size you want. nine0003
Result
The "working" state of the lightbox:
The purchased light bulbs noticeably "get out" of the lamp body, so I made a "continuation" of the body out of paper to better focus the light on the lightbox, and also to prevent direct rays from entering the eyes.
Sample photos taken
For a couple of years now, my camera has been Nikon Coolpix L110 (budget hyperzoom). All photos were taken with it.
It turned out to be an inexpensive, but durable lightbox, the price of which is only 300 rubles. I hope this article is useful to someone.
Good luck with your experiments!
How to make a DIY lightbox in 20 minutes [instruction]
0003
🔸 How to receive payments from foreign buyers using Boosty
🔸 This is how Etsy search and keyword research works
Lightbox, LightBox or light cube is a device for subject video and photography. Outwardly, it resembles a box, which is filled with light even over the entire surface. Such a box can be purchased in specialized stores, or you can make it yourself.
There are a lot of master classes on the net. I want to tell you about my simple version. nine0003
Ready-made light cube in stores costs decent money. But if you do it yourself, you can save indecently.
We will need:
- Box - 1 pc
In my case it is a box from IKEA worth about $1 - A4 white paper — 5 pcs
Suitable for regular weight printer/copier. - Adhesive tape
- Stapler
- Utility knife
- Scissors
- Piece of Whatman paper
For the above box, whatman paper should measure 31.5x62cm. I received this piece by cutting it off from A2 paper. nine0170 - Table lamp — 2 pcs
Step 1 - Cut off all unnecessary
First you need to cut off the cover and part of the front wall, leaving a small piece of the crossbar.
The crossbar is needed so that the side walls have a stop.
If it interferes with work later, cut it off. But then try to strengthen the "sidewalls" in a different way.
Step 2 - Line the inside of the box with paper
After the frame of the box is prepared, it is necessary to strengthen the crossbar, which remained from the front wall - rewind it with adhesive tape.
Line the inside of the box with white sheets of paper.
Attach the paper to the walls of the box with a stapler and/or adhesive tape. The paper is attached to the back wall in such a way that the angle between the bottom and the wall, created by the paper, becomes not sharp (like a box), but rounded.
This is necessary so that the large piece of paper (step 3) takes the same streamlined position. nine0003
After the sides of the box have been prepared, place the fifth piece of paper on the bottom of the box. Try to arrange sheets of paper so that there are as few dark gaps as possible from the box itself (as in the photo in the left corner of the box). Whatman paper itself is dense, and should not be translucent, but it is better to play it safe 🙂
Step 3 — Position paper paper
than the inner length of the box. And the length of the paper (vertical part) should be 8-12 cm more than the sum of the height and width of the box. nine0003
In my case, the inner length of the box is ~32cm, and the sum of the height and width of the box is ~50cm.
Step 4 - Create Lighting
The final step is to position the table lamps so that the inside of the box is well lit, without shadows. It is also worth considering that both lamps must have the same light temperature and be combined with the main lighting in the room.
For example, if the additional light source is natural light from a window and it is cold, then the temperature of the lamps should be the same. nine0003
It will not be superfluous to set the “white balance” mode on the camera / phone.
The more lamps, the more light in the box. Ideally, place one lamp on top, and the second opposite the box.
If you have an external flash (removable), it can solve the problem of missing table lamps.
An example of how I use a light cube without using additional lighting (other than a flash).
This photo was taken with camera flash:
And this photo was taken using one lamp:
Step 5 — Processing the photo
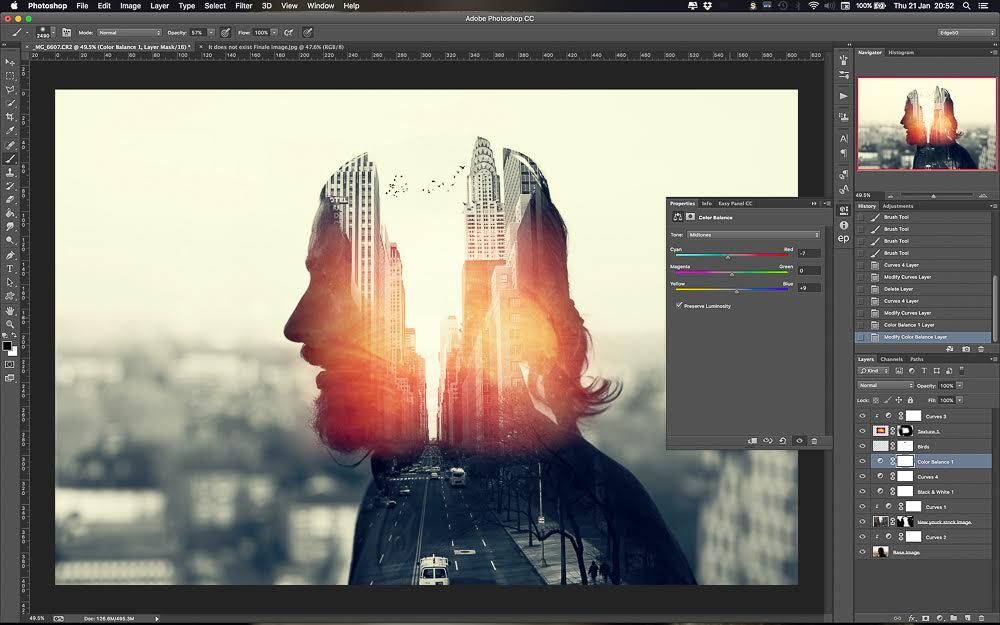
I wrote about the helper programs here. In this case, I used Lightroom and Photoshop. In lightroom, I set the basic settings. And Photoshop helps to achieve a more or less uniform background.
Despite the good lighting, I always edit my photos before listing them. It takes time, but what can you do 🙂
Conclusion
It is not always necessary to turn to professional photographers to take good quality photos of your products. Sometimes for this you need to allocate a couple of hours of free time to learn how to take high-quality photos yourself.
If you make a lightbox based on this master class, tell us about the results. Maybe you can improve it and change it for yourself.
Well, if you liked the article and found it useful, tell your friends about it, maybe our recommendations will come in handy for them too.
Learn more