Modeling photography tips
5 tips on posing your model during a photo shoot
Get better at directing models for your fashion e-commerce photography
With a growing stream of new products that need to be put online and content to be created for them, on model photography for your online store can be very demanding.
So when on set, knowing how to work with and pose your models means you will get the right shot easier - and then be able to move onto the next style or outfit faster.
In this photography tutorial, we'll be showing you some tips o directing your models to show off your products better.
1. Have reference shots at hand
If you want to achieve a specific look, have some images nearby that you can show to your model.
A style guide can also act as a reference manual if you already have one.
2. Use focal points to direct the model’s stare
If you want your model to look in a certain direction there are lots of tricks you can use.
For example, you can use your hand - or even direct them to focus their attention on objects in the studio.
You can use this technique to direct a model's stare and expression a lot easier than using vocal commands.
3. Arm placement is key when showing off handbags and jewellery
When showing outfits combined with accessories like handbags, the way the arms
Make sure to show it in full view and keep an eye on how the hands look.
It also helps to have some shots from a 3/4 angle, back and from the side.
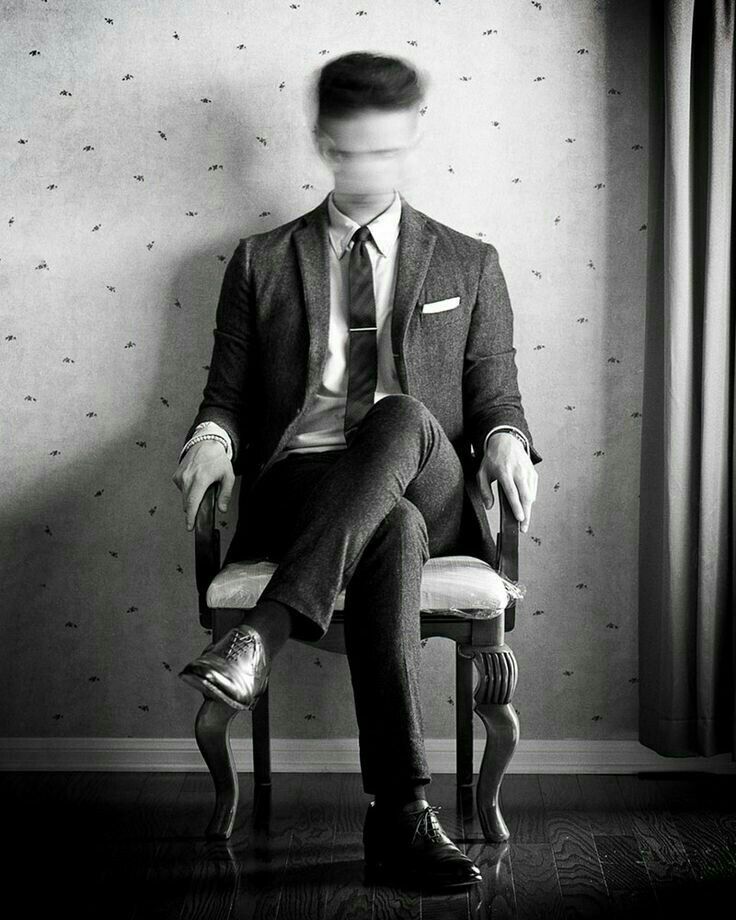
4. Hands and feet emphasize movement
A model's pose can be static or dynamic - conveying movement or appearing still.
This is shown mostly through the placement of the hands and feet.
Positioning them outward and one in front of another gives a feeling of walking toward the camera.
To keep a more static pose, keep the feet at shoulder width and the hands by the side.
5. Match the pose to the product
Your model’s pose needs to show the product off in the best light. If you’re shooting a top with a detailed print, it makes sense that your model’s hands shouldn’t cover the torso - otherwise shoppers might not be able to get the full picture.
Another example is when showing footwear; positioning each foot at a different angle also allows you to show off more of the shoe.
You can also try crossing the legs at the heel to give an appealing look.
More model photography tips, videos and articles
How to photograph books and magazines for e-commerce
How to create different lighting effects in your model shoot
How to shoot a watch and style your set for e-commerce and editorials
5 tips: How to elevate your food photography to the next level
[Top 7 FAQs] How to produce product images that convert for your Facebook and Instagram Shop
How to create animated flat lays in 5 steps
How to photograph beauty products using props from IKEA
How to photograph beauty product sets
Live Model TutorialsStephen Warr
0 Likes23 Tips for best model poses - NYC Headshots
Model Poses For Any Situation
One of the most common things that people say after their studio sessions are “I have no clue how models do this all day!” I could not agree more, that’s why I stay behind the camera..jpg) However, photographing thousands of people each year, you learn what works and what poses are best.
However, photographing thousands of people each year, you learn what works and what poses are best.
Translating the dynamics of a person into the flat surface of a photograph is one of the most important parts of model photography. Model posing is challenging to learn, so this is definitely a place where many images are lacking. Not only is the lighting important, the way the photographer poses models also comes into play, which is something that only gets better with work.
Researching various poses on Google, YouTube, and Pinterest is an excellent place to start. Putting together a collection of images you wish to emulate and then practicing various poses and looks while looking in a full-length mirror will help the process along nicely and help you prepare for a photoshoot.
Once shoot day arrives, expect to chat with your photographer a bit before getting to work. It’s nice to get to know each other a little bit and build a level of mutual comfort. The photographer is the person running the shoot, so it is essential to communicate to them that you are open and willing to try things. They are there to help you look your best, the goal at the end of the shoot is for everyone to be pleased and this may include a little give and take. In my experience, the best images come from working together. This means that you should follow the photographers’ direction, but if you have an idea, don’t hesitate to throw it out there. You are both artists working together to create the best photographs possible.
It’s usually best to start the shoot with simple poses, sitting and standing, get some decent poses and photos in the bag, and then move on. As the shoot progresses, you can incorporate things that are a little more creative, more candid shots, looking off-camera, folding your arms, moving around a bit. Some of the best photos have no eye contact with the camera, but the subject is still showing all of their emotion and letting you see into their personality. Working together, the photographer and model can have a smooth, painless shoot!
5 Tips for Model Poses During a Photo Shoot
- Use the profile and 3/4 angles to create a bit of extra depth.
 With sharp lighting, a more angled look will really jump out and show the correct shape of you and the outfit you are being photographed in.
 - When changing the direction of your head, don’t lock your eyes to the camera, instead let them move with your head to keep a bit of candidness in the look. If you are looking towards the camera, look past the camera. In some cases, this makes for a bit more thoughtful of a look. Some looks will definitely have you looking intensely into the camera, but be fluid and change it up. Your photographer should be directing you, so if you go too far, they can help balance things out.
- Movement. Keep your poses fluid, unless you know precisely what look you are going for, keep a little bit of fluidity in yourself and move around slightly every few seconds to change things up. Try to avoid drastic movements, but turning your head, raising/lowering your chin, moving your arms slightly. This will help keep things fresh.
- Keep your arms and legs angled a bit.
 Think triangles. Making triangles with your body will keep things creative and allow for nicer compositions. There are some cases when keeping everything straight is necessary, but most times, a little bit of a bend here and there will help tie things together.
 - With that said, keep your hands closed, pleasant and straightforward. No balled up fists or spreading things out, try to keep your fingers close to one another.
13 Different Model Poses for Photoshoots
Standing poses
Standing will work with just about every female pose and has the most versatility as anywhere you go, you can stand up and have a bit of flexibility.
Facing the Camera
One of the most essential things a model will do is face toward a camera. Whether it’s for NYC headshots or advertisement, you should know the best way to position your head and shoulders, a squared up straight on shot tends to be boring, try letting your weight fall to one side or the other to give your shoulders and head a little lean and tilt.
Posing Your Face
Do you have a mirror? Bring it into a well-lit space and practice posing your lips and face. Not every shot will be a smile or smug look, work on finding all of the in-betweens and figure out what works best for you.
Find a Wall or Chair to Lean On
A simple lean on a wall or chair becomes very dynamic in the camera if done correctly. Take an extra step away and let the lean be a bit more dramatic than usual, give your legs and arms a slight bend as well to build in some shape and watch the magic happen.
Slight Leans
Even if you do not have something to lean on, let one foothold more weight than the other and let your body drift in that direction. Also a slight lean can be pleasing on the eyes and give some additional definition to the image.
Bring A Hand Toward Your Face
Be careful when you bring your hands into the image that you do not put them in front of you, if your hands are closer to the camera than anything else, they will seem very large. That said, bringing a hand up, wether to rest your head on or simply rest on your shoulder like the above imager, will add an extra element to the image. The image above is significant because the arms and hands build leading lines that draw you to the models’ face.
Show Your Profile
With excellent, sharp lighting, profiles look incredible. Once you’ve gone through a bit of the shoot, ask the photographer if you can do some tapered profile shots being lit from the side you are facing. The light falls off, and contrast makes for incredibly striking images. For male poses a sharp profile is always a strong look.
Full-Length Pose
There is a pretty good chance that at some point in your modeling career, you will need to show off your shoes and have a full-length shot done. Full body dynamic is a must for this, a half step here or there, and a side step while standing in the epic light will help a full length shot look great!
Sitting Poses
Whether on an apple box in the studio or a bench outside, knowing how to correctly set for a photo is essential.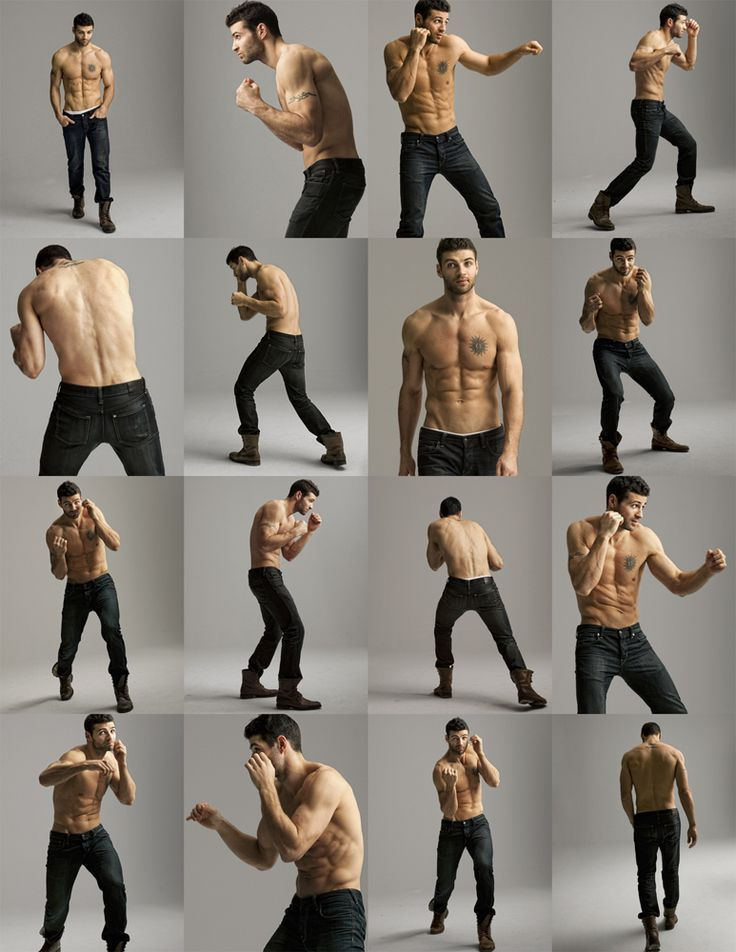 How you sit for a shot will depend on the look you are going for, and the final outcome needed should drive this decision.
Sitting On An Angle
Just like when you are standing, angles absolutely add to the dynamic of the look and the photograph. Sitting square to the camera will make you look quite broad, turn a bit to the side where the light is coming from to build up the dynamic and slim down your torso in the shot.
Sitting While Leaning
While sitting, you can either choose to lean forward or lean back for two distinct looks. Leaning a little bit forward keeps you looking proper and attentive. This is best achieved by sitting closer to the front edge of a chair, so your feet are firmly placed on the ground. Leaning back is best used when you are trying to set a more sexy or playful mood, often done with a bit more directed and intense lighting, when this look is pulled off correctly it is a killer.
Head Tilts
Head tilt can make a world of difference in an image. Many people say that ahead tilted down a little and in the direction of the lower shoulder is more powerful compared to a head tilted back and towards the higher shoulder, which can seem more playful.
Look Back Over Your Shoulder
The ultimate playful way to end your shoot and get a fun photo. Looking back over the shoulder is a classic look that has been used time and time again and definitely something to throw in the mix to cap off a busy day!
There are a handful of different categories to differentiate model poses for both men and women. Most people have a specific market to target, so figure out what works best for you and position yourself in a way where you can create some great work.
5 Key Model Posing Categories
1. Fitness
A fitness model will often be dressed in athletic gear and have more ‘action’ shots. Whether it’s doing lunges, pushups, lifting weights, planks, running, or jumping, you need to be in excellent shape and know how to properly do a lot of exercises and yoga poses.
2. Commercial
Commercial models have the most versatility. They are found and used EVERYWHERE. You need to look natural like an everyday person as you will be depicting an average person for advertising, commercial and editorial uses. This is the biggest market, but also the most competitive.
3. Corporate
For corporate models, looking the part is 90% of the work. You need to look like you belong in a bank, law firm, or big agency. A very professional look is key to blending in, whether it’s for a recruitment brochure or other use, you should have the look of someone who would actually work at the firm you will be representing.
4. High Fashion
I think the dream for most people who aspire to be models is to end up as a high fashion model. These are the images we see in magazines like Vogue and Elle. This is also where you would work with high-end fashion brands such as Gucci, Balenciaga, and Versace. Posing for this type of shot relies on the model being proper, accentuating their features, and lifting their head a bit higher. High fashion is one of the more difficult places to end up but is where fame is found.
5. Glamour
Glamor models are often used to look seductive. Looking fierce will undoubtedly help you make your mark here. Often working with a makeup artist for a sharp look around the eyes, glamour models often pose for high end makeup brands, fierce magazine covers, and commonly for commercial uses in lingerie or swimsuit advertising.
In The End
Modeling is a tough job. It may seem simple for someone to simply pose in front of a camera all day, but there are a lot of nuances that need to be learned and strict regimens to be kept in order to have a very consistent look. We offer model test shoots and help build look books if you’re interested in shooting with us, please get in touch!
For more reading on model posing, our friends at Pixpa.com have written an excellent guide on Male Model poses.
This guide will give you lot of new pose ideas for men.
How to pose for a clothing catalog.
 12 Fashion Photography Tips
 Professional freelance photographer Chad Verzosa shares his tips for creating harmonious fashion poses.
- Prepare a list of reference poses in advance
When planning your photo session, decide on the reference poses to start with. Then you will not need to waste time on unnecessary explanations, especially if the subject is not a professional. In this case, visualization is the fastest way to show how to "pretend to be a model" correctly. But even if you are working with a professional, references can save you time. nine0003
- Break the ice between you and the model to avoid awkward positions
Make sure the model feels comfortable. Do not immediately start shooting "from the door", especially if you are not familiar with the model, spend at least a few minutes talking. This way, she won't feel like you're some stranger who decides to take her picture. Of course, it is not necessary to start a conversation about something personal: the model just needs to relax in your presence. So by the time you pick up the camera, your model will no longer look like a deer in the headlights due to nerves. Establishing a connection is an important step in getting the most out of your shooting. nine0003
Photographer: Judeus Samson (Unsplash)
- Start with simple portrait poses. Even when she shows great potential, give her time to warm up. Forget about your to-do list within the first few minutes of shooting. Use simple poses first. The first shots may seem boring, but take your time, let the model get used to the camera. Be patient and you will get the desired result. nine0003
Wesley Tingay on Unsplash
- Take random photos of the model
Don't try difficult poses if you're working with an inexperienced model, otherwise the photos will come out awkward. Create the feeling that there is no camera in front of her. But since we all know that naturalness is quite difficult to achieve, just keep your camera with you and capture these honest moments in time.
 Shoot the model while she is just sitting, standing or walking during her break. Perhaps even better shots than staged ones will turn out. nine0003
 Of course, this method does not always work - editorial or high fashion photography requires a lot of skill. But in most cases, being relaxed is good (especially when your model still needs to work on its shape).
Photographer: Alex Iby (Unsplash)
- The model must play a certain role
Sometimes simple instructions are not enough to help the subject understand you. In such a case, you can ask him to play a specific role. When the model is in a certain character, it will be easier for her to imagine what you mean and what message the viewer needs. For example, you can ask her to become a princess or even an action movie heroine - feel free to select characters. It's okay if the model turns out to be a bad actress. Sometimes in motion it seems more natural than in a motionless pose. nine0003
Photographer: Jacob Nizierski (Unsplash)
- Natural posing
Body shape is a decisive element when it comes to posing.
 So pay attention to how your model stands. Confidence is conveyed by posture. If a person slouches, it will look awkward, no matter what position the arms and legs take. It helps if you ask your model to tilt their body towards the camera, the pose will look more refined. nine0003
 If the model looks too stiff, ask her to lean on her leg behind her. This will make the position more relaxed.
- Bend your limbs for a more attractive pose
Most beginner models often don't know what to do with their arms and legs while posing. Just ask them to bend their limbs (no need to bend them all the way; just until you see triangles between the pelvis and legs).
For a full length pose, ask your model to slightly bend one knee while standing. As for the hands, she can put her hands on her waist as a starting point. If the arms are in the air, at least one of the elbows should be slightly bent. nine0003
People are attracted to triangles.
 So include this figure in a pose. It also makes the position of the model more balanced and removes visual rigidity in posing.
 - Try the three-quarter position
Once you start shooting portraits and fashion photography, you'll hear a lot about "posing." What does it mean? The term involves placing the model at a 45-degree angle from the camera, so only three-quarters of the body is visible. nine0003
This pose adds depth and dimension to your subject. So if your photo looks a bit flat, tilt your subject slightly to make the angle more interesting.
Photographer: Úrsula Madariaga (Pexels)
- Avoid clenched fists - they convey anger and tension
Now that you know what to do with the subject's limbs, it's time to focus on the fingers. They may seem unimportant, but in the end the fingers can make or break the whole pose. Always pay attention to them. No matter what your model does, she must not make a fist.
 Instead, ask her to slightly bend her fingers. You need to open your hands in a natural position. You can also hide your fingers in the side pockets - you will also get a more natural and elegant pose. nine0003
 - Keep the chin straight
When it comes to posing, the subject's chin is very important. To emphasize the natural curves of the face and neck, always ask to keep the chin straight. Your subject should not crane their neck while posing, just lift their chin a little. This technique works regardless of the direction of head movement. Therefore, feel free to remind the models if they forget about it when changing positions. nine0003
Photographer: Eben Odonkor (Pexels)
- Where should the model look?
There are times when looking straight into the lens can produce great results. But in most cases, instead, it turns out again something awkward.
To avoid a sinister look, ask the model to look at a specific object behind the camera.
 This will make the eyes look more alive. If you need a contemplative gaze, ask to choose a point of interest in the distance. For more intimate - ask to take a closer look at something. nine0003
 Photographs often do not look attractive when the whites of the eyes are shown too much. Make sure that the pupil of the model does not go into the corner of the eye. The gaze should follow where the nose is pointing.
Photographer: Lucas Queiroz (Pexels)
- Add movement for dynamics
Model poses should not be static. Movement will make the photos more dynamic and also make the pose less intrusive. The jump pose is one of the most exciting. It may take a few tries to get the shot, but it will definitely be worth it if you do it right. nine0003
Before you begin, be sure to remind her to keep her face calm. Believe it or not, not wincing in action can be quite difficult. Expect to spend a few more shots on this as well. If jump shots look too energetic for your liking, shoot natural movement instead of poses.
 Ask your subject to cross the street, spin, dance, or jump. These movements achieve the same effect without looking too frantic. nine0003
 Photographer: Jeys Tubianosa (Pexels)
Conclusion
For the most part, models are responsible for posing for the shoot. But, in the end, the choice of which poses will be effective lies with the photographer. Practice seeing which poses work best and which don't. In addition to constantly taking pictures, read magazines and visit fashion websites regularly. Familiarize yourself with different poses and memorize them. Establishing a solid visual foundation when it comes to modeling the best poses will help you better orient your subject as well. nine0003
Five rules for 3D modeling | App2top
Getting started with the model
The initial stages of creating an image are the hardest, says Hernandez. Here are his tips for this stage.
Gather references
Hernandez advises drawing on real-world examples—or the work of other artists.
 Even if you do not want to use them as references, they can still be a source of inspiration and determine the shape of the object and additional details. nine0003
 Never start with detail
The artist quotes the words of his art teacher: "go from the general to the particular." You need to start with large shapes and the silhouette of the picture. Hernandez advises to pay as much attention to proportions as possible. In order not to start detailing the image ahead of time, he suggests working with the model at low resolution at first.
Get rid of what you don't like
Image elements that are out of place or simply ugly will distract attention and interfere with further work.
Add "worn"
Sometimes you don't want to model cracks on a character's new armor or stain it with dirt. But if you add “worn out” to the picture, it will become more realistic. The main thing is not to overdo it.
Name the models
Whether you're creating a character, an environment, or a weapon.
 Give it a cool name, Hernandez advises. And come up with a short story. Hernandez names models early in the process because it sparks the imagination. nine0003
 Sculpting
Hernandez says his favorite sculpting software is Zbrush. It allows you to quickly create the desired forms. “Some people think that Zbrush is only for “organic” images, but it is also convenient to make models of rigid shapes in it,” comments Hernandez.
He adds that other modeling programs, such as Maya and 3DS Max, don't allow you to work with the form so freely. However, they also have their own areas of application. They are, for example, good when you need to create a polygonal model. nine0003
Textures and materials
If Hernandez is working on a concept, he uses KeyShot to create the render. He processes the resulting renders in Photoshop - adds, for example, scratches.
If the model is intended for a game engine and is meant to be visible from different angles, Erandez suggests using UV sets.
 They allow you to apply texture to each part of the model. He recommends the programs Quixel Ddo and Substance Painter: they automatically generate, for example, scuffs on the edges of the model. This saves time. nine0003
 Hernandez advises trying different material colors and color combinations. So you can choose the most advantageous color scheme. As for the details, the main thing here is not to overdo it. The artist recommends adding details only where they would be present in reality. For example, abrasions often appear on the outer edges of the mechanism, but dust accumulates in the recesses and cavities.
Lighting
If properly lit, the model will look pretty even without textures. And if you already have a good image, then lighting will only decorate it. Lighting settings change depending on what you want to highlight or what mood you want. But if you are interested in realism, then try to at least use Image-Based Lighting.
 This is easy to achieve with renderers such as Keyshot and Marmoset Toolbag. Simply select an ambient background image and the render will use it to light up your model from all angles. Reflections on materials will be added automatically - based on the same background image. nine0003
 Details
Details are always important, Hernandez believes. They will add realism to your character and help complete the look. The artist advises not to overdo it: if you cover the entire character with an even layer of details, then the eye will have nothing to catch on.
The difference between organics and hard-surface objects
The difference is that organics are easier to draw with sculpting, while hard-surface objects are easier to create with polygonal modeling, says Hernandez. Most 3D modeling software allows you to create both. Hernandez prefers to work with hard surfaces. But this, he admits, is a tribute to the love of drawing mechanisms, and not because it is easier to model.

Learn more