Softbox for product photography
7 Best Softbox for Product Photography in 2022
When you purchase through links on our site, we may earn an affiliate commission. Learn More
The best softbox for product photography can level up your photos right away. This is why having the best softbox lighting kit is crucial. A softbox can provide you with a lesser and smooth shadow on your product images. Below we are sorting out the best softbox lighting kits which are best for product photography.
Yet, your product photos would be a lot better with the softbox lighting compared to a photography umbrella lighting kit. You get better control of your light and get to create a creative lighting setup. Even a softbox allows you to diffuse the lighting with a clothing diffuser. Let’s take a sneak peek into the best product photography softbox lighting units.
Neewer Parabolic Softbox
Check Price
JS JULIUS Softbox 800W
Check Price
LINCO Light Kit
Check Price
What Is Softbox in Photography
A softbox is a light modifier that lets you diffuse, soften, and control the lighting. The tool has a central light bulb in the middle and an enclosure around it. When considering softbox vs. umbrella, the softbox gives you more control over lighting.
Nowadays, softboxes are still a vital tool to consider in photography, because it lets you get the correct depth of lighting with little effort. The softer lighting makes the subject appear extra clear and balanced on images.
The best part, softbox lets you reduce the harsh shadow and make it blend softer. It benefits you as a photographer to create even lighting in the image. Meanwhile, the lighting of the softbox looks a lot more natural, like it’s coming from a window.
Softboxes can come in many forms, including round, rectangle, and others. We will talk about which one is best right below.
7 Best Softbox For Product Photography
We have evaluated tons of units and sorted out the 7 best softboxes for product photography. These softbox kits offer all the equipment to capture studio-like photos. Each unit has an in-depth review below its titles. Have a check right now.
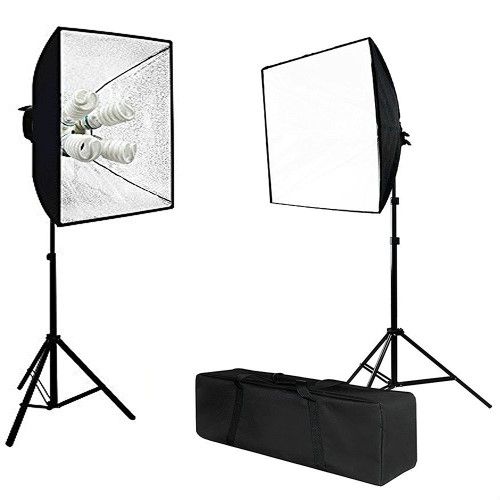
EMART Softbox Lighting Kit
Check Today's Price
The EMART Softbox Lighting Kit is a robust solution for your professional product photography lighting. In the following kit, you get two rectangular softbox kits with CFL lights. Each of the lights creates a sweet ambiance on your images.
In case you need to defuse the softbox lighting, the unit has a velcro removable nylon diffuser. It would help you out to set up the best lighting for product photography.
The flexibility of the softbox makes it an all-rounder product photography kit. For example, the knob of the softbox supports up to 210-degree adjustment. Moreover, the stands can swap between 29″ to 78″ heights.
Moreover, using the EMART Softbox Lighting Kit, you get the wrong way longer because the CFL bulbs do not warp up at all. As a plus point, the lights are energy-saving, avoiding your vast bills.
The whole lighting packs are completely portable, letting you create a product photography studio anywhere. You get top-notch product carrying bags for each tool. It’s a great feature that enables you to shoot both indoor and outdoor super easily.
It’s better to mention, the light bulbs are decent, but you could buy additional ones to get higher quality lighting.
Neewer 700W Professional Softbox Lighting Kit
Check Today's Price
If you are concerned about the heat during product photography projects, the following kit is for you. It’s the Neewer 700W softbox lighting package with low-temperature bulbs. The rectangle softbox contains E27 sockets, which are suitable for a wide range of light bulbs. The socket lets you add lights like a fluorescent lamp and others into the softbox.
With two softboxes and light bulbs, you get to create even lighting at both sides of your product images. Thus, making brighter product images is faster using the following softbox kit. As it diffuses the lighting, you get softer and subtle.
Let’s talk about the build of the softbox. The light stand has an Aluminum alloy that is sturdy and lightweight at the same time. It makes the softbox a portable unit as you get to carry the whole unit with carrying bags.
Softbox flexible height adjustment lets you create the best light for product photography with ease. The single-action locks make it seamless with one tap. In addition, you could adjust the softbox angles to get total comfort with the photoshoot.
The kit runs only on real-time electric supply, and it won’t run on battery units at all. Still, it’s all good for your product photography projects.
YICOE Softbox Lighting Kit
Check Today's Price
The YICOE Softbox lighting kit comes with two remote control units. It lets you control the lighting parameters and others without gaping near the softbox lighting. Plus, you get to change the light color as well. These colors are warm, calm, and pure white.
With 2 LED lights, this provides you 80% energy savings compared to indicated lighting. The unit is the best softbox for product photography with low eclectic costs. In addition, the light makes sure brighter and clearer lighting on your product image shoots.
In the unit, you get a stable tripod and an adjustable stand. The stands can extend from 26 to 78 inches without any hassle. Even though it doesn’t feature a one-tap lock, the stands are solid and stay in their positions.
To create unique product photo lighting angles, both of the softboxes offer you custom angles. Only tilt the rectangular softbox enclosure to the angles you like. It’s that simple to get perfect.
Although you get two softbox units, they won’t feature different color profiles at once. You have to work with the same colors with both of the soft lights. It lets you avoid image errors, but you can’t experiment with mixing different types of lights.
No doubt, it’s a must-have softbox lighting kit for any product photographer to have.
Neewer Deep Parabolic Softbox
Check Today's Price
The following Neewer Deep Parabolic Softbox provides up to 3 layers of diffusion. It lets you control the shadow and exposure to the finest point. You get both external and internal diffusers in the unit for the perfect shadow on your product image.
The front diffuser and inner baffle of the soft light kit are removable for better customization. The Eggcrate grid at the front diffuser softens the lights with sheer perfection. Overall it lets you get the best lighting for product photography faster.
Are you planning on a lengthy photoshoot? The softbox has the strength to stand in place for long hours. As a result, you don’t have to think twice about the durability of the kit.
The best part about softbox lighting is it’s far smoother to assemble. Even if you don’t have experience with a softbox, the setup would be a breeze. Users can assemble the kit within 3 minutes.
Working on other projects with the following softbox lighting kit is a huge advantage. For example, you could use it in the studio, indoors, and live to stream as well. It’s also known as the best softbox for videos.
JS JULIUS STUDIO Photography Softbox
Check Today's Price
To spice up your product photography, the JS JULIUS STUDIO Softbox set would be the best. The set comes with three individual softboxes with fluorescent bulbs.
As a plus point, within the sets, you get a boom arm stand. It would be great to place lighting at the top of your image subject.
The following softbox is enough to get a pro effect on your product image photographs. The whole kit would work fine even if you are shooting in a big space studio. The lighting is intense; perhaps you could diffuse it using an additional diffuser.
However, the softbox kit doesn’t feature a one-tap height adjustment. Instead, you get a screw to lock the height. It’s a bit time-consuming and still does a decent job. You could adjust the height from 28.5 inches to 78 inches.
There’s no doubt you would get a soft drop shadow beneath your product using the softbox lighting. Meanwhile, the kit would be great for eCommerce store product photography as well. It would be a huge success.
At last, you get a carrying bag to move with all of your softbox setups. It’s a complete portable kit. Let’s have a check.
Andoer Softbox Photography Lighting Kit
Check Today's Price
If you are a fan of customizing softbox lighting on your images, the following kit is a masterpiece. It’s the Andoer softbox photography lighting kit with 3 Softbox with LED Beads lighting bulbs. The light adjustment capabilities of these bulbs range from 1% to 100%.
The softbox enclosure is rectangle in size and has 70 cm x 50 cm dimensions. The softbox has a shiner surface inside and a rough black surface on the outside. Similar to other softbox kits, the softbox lets you rotate the enclosure to up to 210 degrees.
Apart from basic features, you get three separate remote control units to alter the lighting. It’s better to note, and you could add the additional cloth diffuser to get deeper lights.
The stands of the softbox are robust and suitable for professional projects. Stands are adjustable between 26 inches to 78 inches. Meanwhile, the 3-leg tripod design at the bottom would ensure proper stability.
The following softbox kit lets you get a pleasant lighter better than photography umbrella lighting kits. Because right on the package, you get three white cloth diffusers, a boom arm, and mount. It’s a complete package to have on your set.
The portability is still possible as you get a carrying bag as a plus.
Linco Lincostore Photo Video Studio Light Kit
Check Today's Price
At last, comes the best kit to let you create a full-fledged product photography studio. The following kit is a Linco Lincostore photo video studio light kit. On the next pack, you get 2 squares and two umbrella-style softboxes.
Thus, the following kit would help you create lighting like a product photography umbrella lighting Kit.
Each softbox has a silver reflective layer inside and black nylon cloth outside. These softboxes are foldable and let you store them anywhere like a charm. Plus, the frame of both the softbox and umbrella reflector features metal linings which makes it durable.
Plus, you get three color backdrops within the pack. These are green, white, and black muslin backdrops. On the following pack, you would get a 6.7 ft background stand kit as well.
It’s a great soft light lighting kit to capture a product image with pleasant lighting. You could also create a product video as it’s the best softbox for video production. Your studios would be the same.
At the same time, the whole softbox lighting and backdrop kit is compact and takes less space to set up. It’s portable as well and has a bag to let you store equipment with ease.
How To Choose the Best Softbox for You?
We all have to accept that softboxes come in different sizes and shapes. Evaluating a few aspects would let you get the best softbox in no time. The following elements would let you get the best soft light for yourself. It would make your softbox lighting buying process a lot smoother.
Softbox Shape & SizingsWhile checking out the softbox lighting, consider its size first. It’s well popular among photographers, and larger softbox lights give you the sweetest shadows. The large size of the softbox lets you diffuse light in a suitable manner. Thus, consider taking larger ones while doing portrait photographs.
In the meantime, if you are working with smaller-scale products like Jewelry items, smaller softboxes would be fine.
On the other hand, the shape of the softbox modifies the lighting as well. Most of the time, the round shape lets you get more spread out illumination. The round lighting is hard to cap off with an additional diffuser cloth.
The additional duffers are a must while working with softbox lighting. The diffusing must have a white surface that spreads the light better. It would let you soften the shadow and create a smooth transition between light and shadow.
Most often, you won’t get a variation on the additional diffuser. The one exception would be the grid pattern diffuser. It’s a diffuser that has a black grid on top of a white sheet. Kits like the Neewer Parabolic Softbox have the fabric grid on the removable diffuser.
One-Tap LocksHeight adjustment can be a crucial aspect to create the best light for product photography. The one-tap lock makes the height adjustment fast and smooth. You only have to top it, and the stand will lock into position.
Softbox lighting kits that have a one-tap lock let you get quick height adjustment. Aside from one-tap waves, screw locks are the most reliable. Though it takes time and energy to tighten the softbox stand screws.
Either way, make sure to check out the screw types of your softbox stand beforehand.
LED Light BulbsCFL light bulbs are popular within softbox lightings. Still, if you want the most reliable ones, LED lights are the answer. It takes 75% less energy and is environmentally friendly as well. Plus, you won’t have a fear of breaking the light up.
If you are into long hours of product photography, the light should be at a low temperature. Both CFL and LED light bulbs are great at low temperatures. So, choosing one of them would let you shoot for long hours without burning the subject.
In addition, make sure your softbox has E26, E27 standard lightbulb sockets for better compatibility.
PortabilityIf you want to get a softbox for outdoor photography, make sure the kit has portability. Having a carrying bag is even if you’re going to shoot inside. Not only does it make carrying equipment easier but storage as well.
Most of the softbox framing should be foldable like an umbrella. It would let you get compact storage as it would take less space.
How Do Softboxes Work
In simple words, a softbox is an enclosure around a lightbulb or lamp, you call it. When you turn the lamp on, the light gets scattered around the shiny inner layer. In most cases, softbox kits feature glossy and rough coating to diffuse the lighting.
As a result, you get even and softer lights on your product image photographs. The light diffusion depends on the types of softboxes and their shape.
Thus, in most kits, you would get at least two softbox lighting units. It’s recommended to place a softbox on either side of the composition. In a few cases, you could also use an additional softbox at the top of your product.
Softboxes let you control and diffuse the light with a removable external diffuser. It would allow you to soften the light and get subtle shadows.
New-age softboxes provide you with a customizable lightbulb as well. You could change the light color temperature brightness using remote control units. This softbox lightbulb might cost a bit, yet you get seamless light customization.
Softboxes give you more control than a photography umbrella lighting kit. The best part, you get to create even lighting, which is customizable with an extra diffuser.
Softbox vs. Umbrella: Which Is Best and Why?
Both softbox and umbrella are wide and popular among the product photography industry. Each one has its benefits while taking photos. Let’s have a look at a straight softbox vs. umbrella comparison. It would let you get a firm idea of both and consider which one is the best.
Best Use Case Scenario for Softbox
You have a few use case scenarios when softbox would perform better. Below are some examples.
- While you are shooting product photos, a softbox would be great to go.

- In case you want more directed lighting.
- If you want to work in a professional photography studio,
- To create more natural window-like lighting.
Best Use Case Scenario for Umbrella
On the other hand, photography umbrella lighting kits are light modifiers that are best in a few cases. Let’s get to know these points one after one.
- Umbrella lighting lets you get finer outdoor composition.
- Wedding photographers use umbrella lighting on their projects.
- When you need more spread-out lighting, an umbrella lighting kit works best.
Which One Is The Best & Why?
In terms of product photography, softboxes would be the best option to go. Because, with softboxes, you could defuse and control lights to the perfect point. Meanwhile, you could light up your product in the proper manner. We have mentioned a comprehensive list that would let you get the best softbox of all time. On the other hand, umbrella lighting is best at big space studios or outdoor lighting.
Advantages Of Using a Softbox
The softboxes have a lot of advantages to talk about. This makes it the perfect equipment to create the best light for product photography with minimum effort. Below we are mentioning some of the advantages that make a softbox ideal equipment to use. Let’s get into it.
- Light Direction: You could direct and control lighting with softboxes. The additional diffuser is available to make the light a bit softer.
- Indoor Setup: Softboxes are great for creating a studio lighting setup. To be specific, it would help you a lot with in-studio product photography.
- Natural Looking: If you are shooting indoors, softbox lets you create natural-looking lighting.
- Choices: Within softboxes, you get to choose different shapes. For example, you could find a rectangle, square, octagonal, and other shapes of softboxes.

- Smooth Shadow: With a proper softbox, you get the smoothest and minimal shadow. It looks excellent in product photography close-up shots.
Disadvantages Of Using a Softbox
Let’s get to know the disadvantages of softboxes real quick. Getting yourself used to the disadvantages of softbox would let you get workarounds as well. Below are some of the common drawbacks of a standard softbox lighting kit.
- Confined Lighting: The softbox lighting gives you specific direction lighting. It falls short of creating broad and spread-out lighting effects.
- Less effective outdoors: While softbox creates natural-looking light, it’s not best for outdoor lighting. If you shoot outdoors, umbrella lighting might help you out.
- Bit hard to fold in: Unlike an umbrella, you need a little bit of preparation to fold in the softbox. It takes a little bit of time to fold and unfold the softbox housing.
- Additional diffuser: Sometimes, you might have to add additional diffuser clothes for softer lighting.
 It would help if you were a little bit cautious while adding the extra diffuser clothes.
Beauty Dish Vs. Softbox
Both beatify dishes and softboxes have considerable differences in between. The beauty dish is a parabolic dish that reflects light. Plus, it’s widely popular among the beauty and fashion industry. You get a shiny enclosure surface in a softbox, and it’s famous for general pornography usages.
The beauty dash is excellent at creating dramatic lighting. The softbox is great at even and diffused lighting. The beauty dash, as its name stands, only works in close-up beauty photographs. On the other hand, the softbox is famous for taking a wide range of photography projects.
In short, a beauty dish is best for face close-up photos with complete contrast. Softboxes create a softer light that is great at both close-up and portrait photography. Both light modifiers have their ups and downs, yet the softbox has a more generalist approach.
Unless you are a beauty photographer, going for a softbox would be the optimal way.
Ring Light Vs. Softbox
The ring light and softbox have a lot of differences from start to end. At first, the right light consists of a circular ring light source. It’s most of the valuable time for smartphone cameras. Thus, it only works great on close-up images. Therefore, you won’t be able to control lighting like a softbox lighting unit.
It’s obvious, and proper lights are only popular among small-scale photo and video productions. Unlike softboxes, the right lights are rarely used in professional setups. You won’t get to diffuse the lighting out of the right lights. On softboxes, you could use external diffusing clothes to tone down the light.
Plus, while taking close-up shots, your model eyes would catch up with an “O” shaped light. Thus, you won’t find such issues with softbox close-up images. You get to have both closer and broader photoshoots without getting any light on your mode’s eyeball.
What Size Are Softboxes Best for Tabletop Product Photography?
Want to know what size softbox for product photography tabletop studio works best? In general, square and smaller softboxes are best for tabletop product photography. Kits like EMART softbox lighting come with 20"x28," and it's close to a fair shape. It would let you create the best lighting for product photography on the tabletop.
Smaller softboxes let you control the lighting that would make your tabletop image great. Most of the time, square and smaller softboxes allow you to avoid over-exposure on the tabletop images. So, keep these in mind while choosing softboxes for tabletop photos.
Why Do Photographers Use Softboxes for Product Photography?
Softbox lighting kits are popular among product photographers. Because softboxes let you customize and diffuse your lighting a lot. It’s beneficial to minimize the shadow and create a smoother transition.
Moreover, you get to create even lighting on your product images. Plus, the softbox lets you create a bright and vivid composition. Thus, the product looks clear and attractive. That’s why product photographers use softboxes all the time.
Where Should Softbox Lights Be Placed?
The softbox lighting position depends on your product itself. You could use two softboxes on the upper left and right sides for product photography on the tabletop. However, If you shoot more oversized products, you could use 3 point lighting to get a lower shadow on images.
In 3-point lighting, you place your softboxes on two sides of your subject and one at the top. It would give you the most bright image possible. Nonetheless, in portrait photographs, you could place two bigger softboxes on both sides of your model.
Final Verdict
Finding the best softbox for product photography takes time.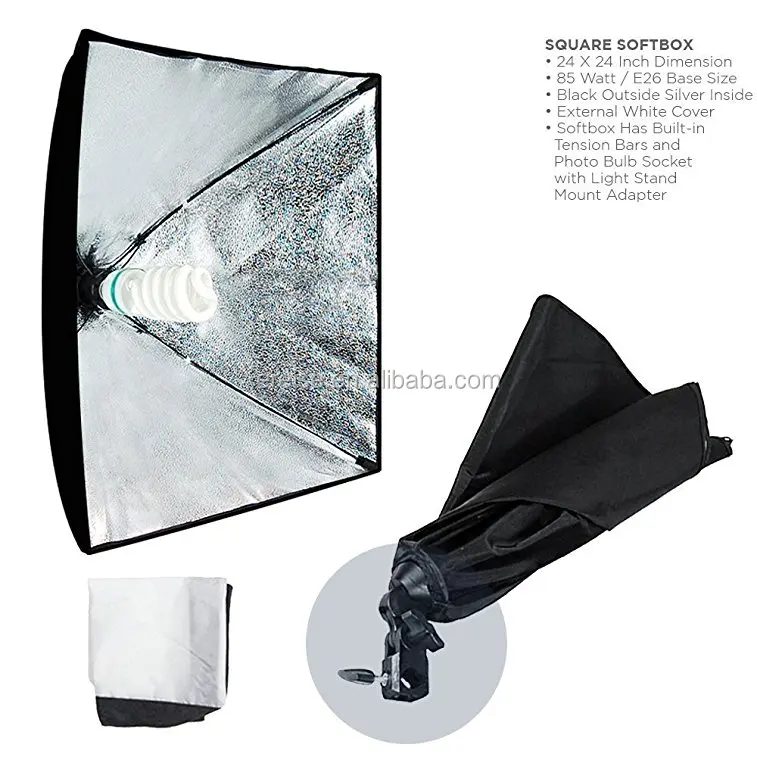 So, review each of the listed softboxes and find out the ones that suit your photoshoot the best. Thus, comparing the softbox vs. umbrella, the softboxes are a significant light modifier for perfect lighting. You could achieve smooth and minimal shadows fast.
Best softboxes can transform your product images into professional quality. Thus, having the fitting kit would smooth out the whole process. With the help of a buying guide, you could reach the best softbox for your product photography. So, don’t hesitate and jump yourself into the softbox kit and start having pro-level photos.
Bordie Capron
Author
“Bordie Capron is a Sr. Content Maker who is working in The Clipping Path Service an US-based image and video post-production company for over 7+ years. She completed her degree in graphic designing and worked as a graphic designing expert for several years. She always loved writing”
What You Need to Know.
LightingThis post may contain affiliate links from products and services we love and trust.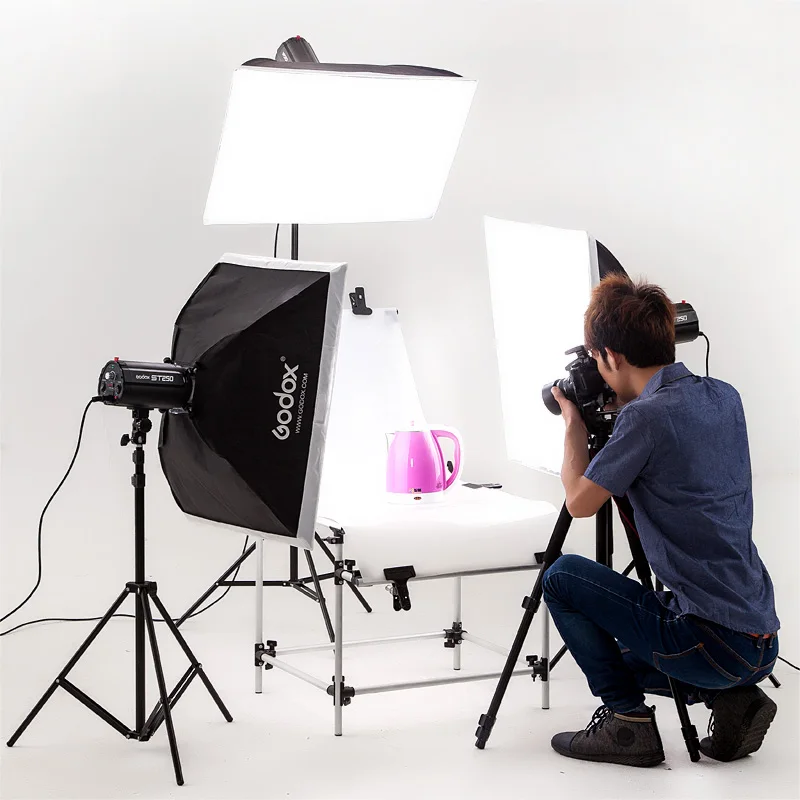
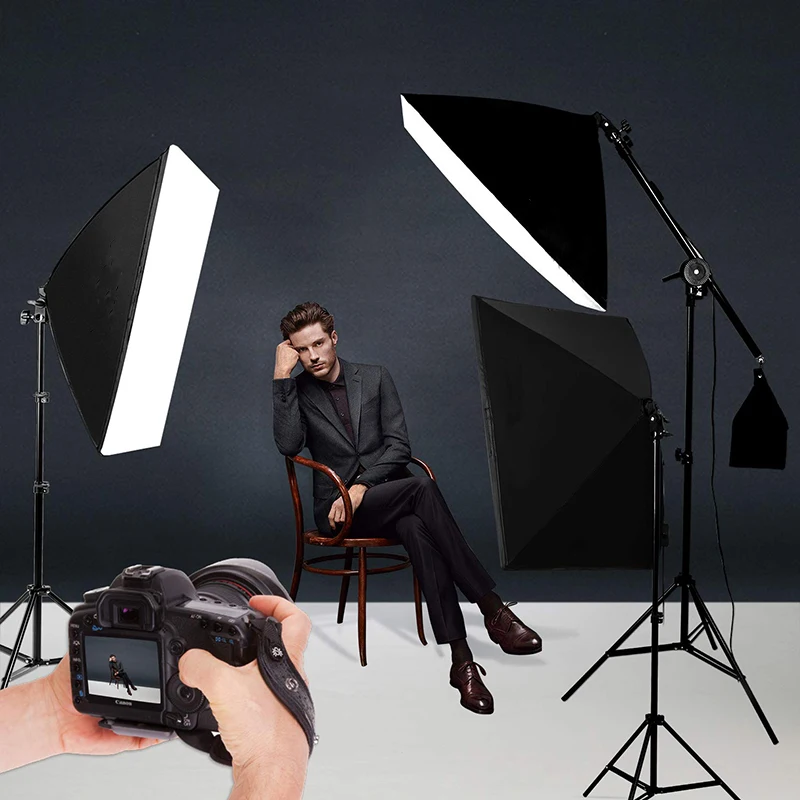
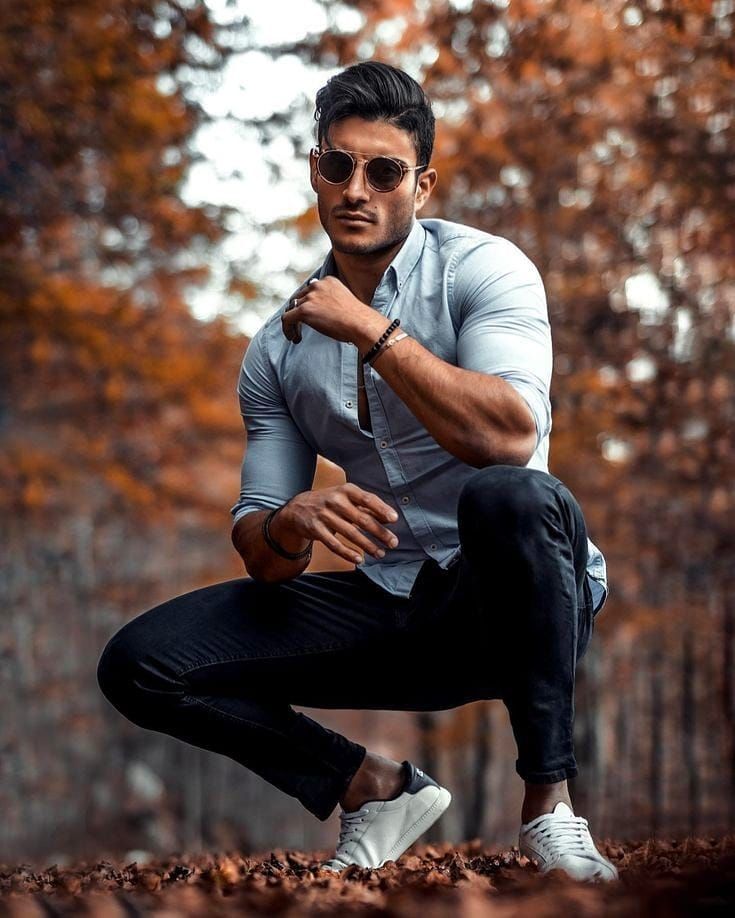
It’s true, photographers can achieve a lot with natural light! I do think, however, that artificial light is something every photographer should have a base level understanding of.
In this post, I’m going to show you the simple softbox set up for product photography that I use.
The key to mastering artificial light is simply having a better understanding of various lighting conditions so you can have the confidence to get the shot in any condition.
Softboxes are suitable for all types of photography, including product photography, and they can be a game-changer for your workflow!
Why I Love Softboxes for Product Photography:
Natural light can be tricky. It can change by the second and can make the consistency of images a challenge of their own. In the winter months in New York, where I am from, the sunset can set as early as 4 pm. This makes it crucial to have this skill set in your toolkit.
The first thing I grab, when soft window light isn’t available or I need to shoot a series of images is my softbox setup.
The best part of mastering artificial light is that it unlocks the ability to get the shot you want anytime you’re available to pick up your camera!
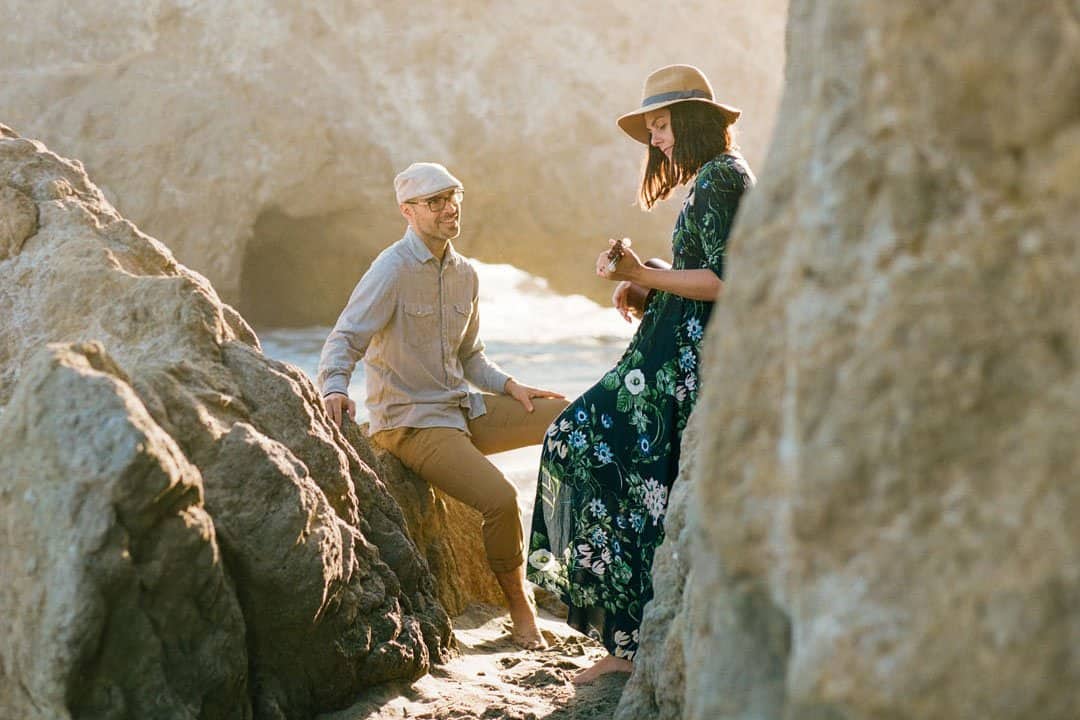
Using double diffusion to create soft even light for product.The final shot from using a softbox and double diffusion.The Perks of Using a Softbox for Product Photography:
For my work, the bigger the softbox better. Below are my favourite reasons for using a softbox for product photography:
- Softboxes are an incredibly versatile tool to create artifical light in photoshoots as key or fill light.
- Most softboxes come with two layers of diffusion which reduces harsh shadows.
- Softboxes come in all sizes. My advice is you should choose the biggest one you can comfortably work within your space.
Softbox for Photography Gear List
This is a studio setup that requires a few lights (and some space!). Here are the key lighting pieces I used in this set up.
- Multiple Broncolor Siros 800 S lights for both key lights and fill lights.
- Broncolor Softbox 120 x 180 cm for the main key light.
- LEE Filters White Diffusion to create soft light
- Red Gel on the back Broncolor Siros 800 S
- Plexiglass used at the back of the shot for the ‘warm’ glow
Would love to hear about your experiences using artificial light and softboxes in the comments below!
Further reading: if you’re interested in reading more about Lighting tips –
Simple One Light Photography Setup: Moody Black Forest Cupcake
Create Dappled Light Using a Speedlite: How to Guide.
Photography Flags: Add Stunning Dimension & Contrast to Your Food Photos.
Natural Lighting Food Photo Tips You Need To Know For Chiaroscuro Effect.
How Learning Low Key Product Photography Improved My Creativity
This post was written by Justin Sisson. Thank you Justin for sharing your insights on lighting.
Justin Sisson
Commercial Photographer – Justin Sisson
Justin Sisson is a New-York based photographer specializing in food, beverage and portraiture. Justin draws inspiration from minimalism, quiet scenes, & everyday French living. His fine art and commercial work are often interlaced as he explores beauty in simple moments. Check out my website or come say hi on Instagram.
Two Loves Studio was not paid to write this post, however, it may contain affiliate links. If you purchase an item from an affiliate link, we do get a commission on the sale which helps us run this site. Only affiliates for products/services we believe in appear on this site.
Reader Interactions
Photo box for subject shooting in the category "Engineering and electronics"
Portable Photo box with LED illumination for subject shooting lightbox Shiny 20x20 cm Macro photography Lightbox ORG
In stock in Kyiv
Delivery across Ukraine
604 hryvnia
474 hryvniaBuy
Online store ORANGE
Portable photo box with LED lighting for subject shooting lightbox Shiny 20x20 cm Macro photography Lightbox PRP
In stock in Kyiv 9Ol000 UAH
3 446. 52 UAH
Buy
ShopOnline
Lightcube (photobox) for subject shooting Travor F60 60x60x60 cm + 5 backgrounds (95572) gl
Delivery in Ukraine
4.UAH3 443.13 UAH
Buy
Greenlemon
Portable photobox with LED lighting for objective shooting Lightbox Shiny 20x20 cm Lightbox Macro
UHP
462 GRN 9000 9000 9000 2 Photobox for subject shooting - Lightbox 24*23*22 + Case
Delivery from Polonnoe
300 — 550 UAH
from 2 sellers
550 UAH
300 UAH
Buy
Economy
Portable photobox with LED lighting Andoer LB-01 | Lightbox for subject shooting, 55cm
in warehouse
Delivery in Ukraine
3 421 - 3 697 UAH
from 3 sellers
3 724 UAH
3 421 UAHGadget -Shop - online store of gadgets and accessories
Lightcube (photobox) for product photography Shunyi 70 cm + 3 Backgrounds
Delivery across Ukraine
4 273 UAH
3 790 UAH
Buy
NVStudio
Lights (photobox) for subject shooting Shunyi 50 cm. + 3 flaps
Delivery from Pavlograd
9000 2 990 UAH2 59000 2 59000 2 59000 2 59000 2 59000 2 59000 2 59000 2 59000 2 59000 2 59000 2 59000 2 59000
Buy
NVStudio
Laitkub (photobox) for subject shooting shunyi 60 cm.+ 3 flaps
Delivery in Ukraine
3 890 UAH
9000 3 390 UAHNVSTUDIO
Laitkub (photobox) for item) Shooting Shunyi 60cm + 5 backgrounds
Delivery in Ukraine
4 068 UAH
3 468 UAHBuy
NVStudio
Lights (Photo Box) for subject shooting Shunyi 40 cm. + 5 Falls
Delivery
2 550 GRN
2 2 2 150 UAH
Buy
NVStudio
Light Lights (Photo Box) with LED backlight for the objective shooting PULUZ PU5022 24*22 cm + Bag os
Delivery in Ukraine
603 UAH
464.31 GRN
Buy
Shoponline
Light Lights (Photo Box) with LED backlighting for the subject shooting PULUZ PU5030 31x31x32 cm + Bag os
Delivery
UAH
860. 86 GRN
Ends
Delivery across Ukraine
Ol000 for subject shooting Puluz PU5023 - 24*23*22 cm + Case | Ring
In stock
Delivery across Ukraine
409 — 411.55 UAH
from 3 sellers
509 UAH
409 UAH
Buy
NIA MART
Lightcube photobox with LED backlight for product photography PULUZ PU5030 31х31х32 cm + Cover | Ring
in warehouse
Delivery in Ukraine
688 - 692.28 UAH
from 3 sellers
856 UAH
688 UAH
Nia Mart 9000 -Books with LED Subtings Puuluz Puuluz PULURG Case | Ring
In stock
Delivery across Ukraine
1 033 UAH
919 UAH
Buy
NIA MART
Lightcube photobox with LED lighting for subject shooting Puluz | Ring
in warehouse
Delivery in Ukraine
1 099 - 1 105. 17 UAH
from 3 sellers
1 233 UAH
1 099 UAH
Buy
Nia Mart
Light Lights (Photo Box) for product shooting PULUZ PU5022 24*23*22 cm + bag gl 9Ol000
857.86 uah
Buy
GreenLemon
Photobox for subject shooting size 60x60x60 Light Photocube Folding lightcube
Delivery from Odessa
3 485 UAH
2 935 UAH
Buy
Unit Store - online store for the whole family
Light photobox 60x60 cm Lightbox for substitution shooting Lightbox photo cube
Delivery from Odessa
7 528 UAH 9000
3 764 uah
Buy
Online store Chip
Photo box, lightcube, LIGHT ROOM with LED for object shooting. Original
In stock in Odessa
Delivery in Ukraine
350 UAH
Buy
trendmarket.
Laitkub (photobox) PULUZ PU5210 200 x 120 x 80 cm for object shooting BSS Black (PU521000)
In a warehouse in Novograd-Volynsky
703 UAH
. 40 UAH
Buy Buy
Aukro.Online
Photobox for subject shooting Light Photocube Folding lightcube dimensions 60x60x60
Delivery from Odessa
3 190 UAH
2 945 UAH
Buy
Prime Choice - Best choice
Lights (photobox) for subject shooting PULUZ PU5040 40x40x40cm (black)
Delivery
2 09000 2 0
Buy
Innovativ. - Internet shop
Photobox for subject photography (lightcube) Easy Studio ES1023K - 23cm art. 10193
In stock in Kyiv
Delivery across Ukraine
536.25 UAH
Buy
UBrand - Trusted Online Store
Equipment Recommendations for Effective Studio Product Photography
In this article, I'm going to talk about the equipment you need to take good product photography. I created a scheme to provide excellent multi-faceted lighting, speed and the ability to carve a subject in post-processing quickly and accurately. Such a scheme can be used for still life, food photography, fine art photography, as well as some macro work.
When I first started doing product photography, I was hired by a company to reshoot 3,200 inventory items. Needless to say, it was a HUGE amount of work and speed and efficiency were paramount. I had never shot more than a few dozen titles for a client before, so I wasn't prepared to take on a job of that magnitude. I was going to think about a lot of things and knew that I would need additional equipment. I was not going to give up and wanted to take on the challenge and also get a new experience. Many of the things that I introduced for this specific job I still use today for product photography. The tips in this article can be a good starting point if you aspire to be a product photographer.
Lighting Requirements for Shooting Subjects
These are, in my opinion, the most important things to think about in order to do this job well.
1. Speed - the ability to quickly change the angles of one product and quickly adapt to the next product.
2. Multi-faceted lighting - lighting that can remain the same for a similar group of subjects, but be flexible enough to set a suitable exposure.
3. Ease of cropping - the ability to quickly cut out an object from the background in post-processing and place it on a pure white background without having to open the image in Photoshop.
This list will lead you straight to the stage. There really is no other way. The subject table is great for this type of shooting.
1. Speed
The platform is needed to quickly change products in front of your camera. Why not use a platform specially designed for such purposes? A seamless stage background means less hassle of intersecting lines that are common with background photography, and you don't have to waste time placing your subject within the scene. Even this will speed up the shooting process.
2. Multifaceted illumination
You can bounce the light off the white stage, but it's better to illuminate it from below, creating a glow. Another advantage of the stage is that it is white. This is a great way to control the shadows of a subject. If that were the case, I would wrap the subject in white light or reflectors, then use black cards for final control to create shadows to give the subject shape and dimension. Unfortunately, this won't happen, but the white stage will serve as a great start.
Table with bottom lighting.
Table with light from above.
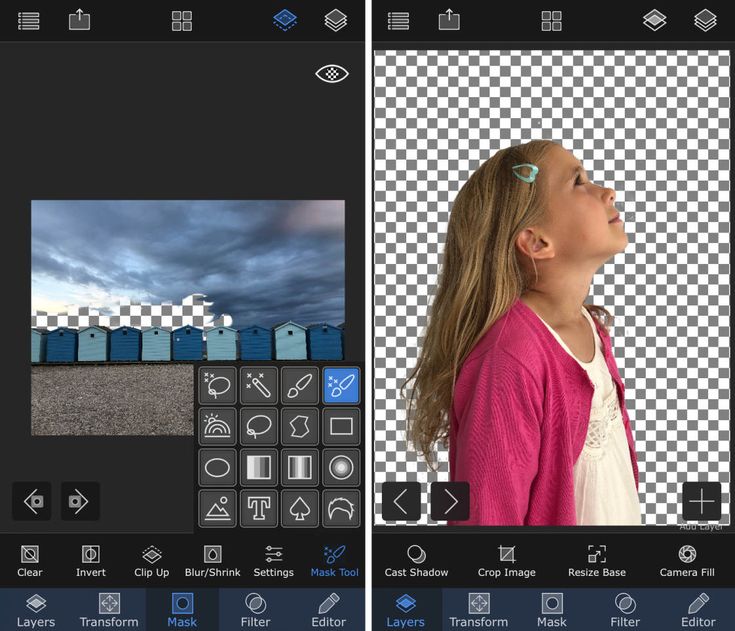
3. Quick background removal in post-processing
No one wants to tinker with Photoshop's Quick Selection tool, perfecting the edges and seeing how badly the selection is made, and eventually using the more efficient Pen Tool to hide the background. It's much easier to do it while still in the camera, or at least do most of the work. You will notice very quickly how much time you have saved with this method, and the result will look more natural.
Object Table Table
The Object Table should be your first investment. Their choice is huge, but after a long search, I chose Foba DIMIU, which is the perfect solution for me, but it is not cheap, you can buy a cheaper Chinese equivalent.
This is a large shooting area, long curved Plexiglas seamless surface that allows you to illuminate it from above or below, the table body is equipped with 4 - æ inch studs in each corner, which can be used for various mountings, as a hand or bracket for cards, products or lights.
The table is very light and easy to move around in the studio and set up. I increased the height of my table with 6x4 blocks and some supports.
It's priced at $1,544 and I understand it's not for everyone. But don't worry, you can find more affordable options, like Manfrotto large still life table for $811 or even cheaper Chinese counterparts on e-bay, their price is several times lower, the quality is good. If you only plan to shoot small items, the $480 Manfrotto mini table is just as good. Remember, if in the future you have to photograph products of large sizes, then it is better to spend money and buy a large table.
Lighting
Lighting is the next issue to consider. The type of system you choose will make a difference in product photography. In the end, you will be choosing between two basic types of light; constant light source and studio flash system.
Using constant light sources will make your job easier if you are just getting started with product photography. Its study will be much easier. It is difficult to overestimate the advantage of "You get what you see. " I'm going to make a bold statement and say that if you're reading this article to help with your product photography, then you probably don't have enough experience to use studio flashes as a light source in your work.
Even if you have experience with flash, until you have two or three years of experience with flash in the field of still photography, do yourself a big favor and use constant light. You will be surprised at how much and how quickly you learn using constant light. Plus there are a few other benefits:
- No restrictive hardware. You don't need to control the light with radio transmitters by switching the source to optical slave mode, or a cable, as is the case with studio flashes. They will always be on and ready to take a photo.
- You can use them as video lights if you want to get movement in your product shots.
- Constant sources are much better for studying light, even for advanced photographers.
 In my opinion, this reason alone is worth choosing a constant light.
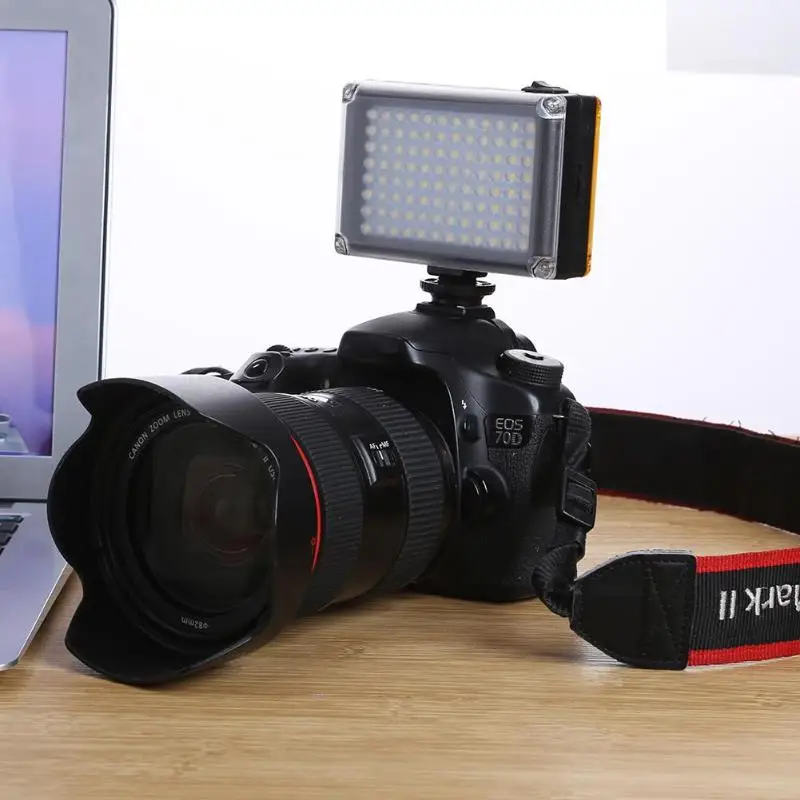
So, suppose you take my advice and use a constant light source. I recommend the Westcott Spiderlite TD6 for the following reasons:
- They are bright.
- Fluorescent lights stay cool. Great if you work in a windowless studio.
- Recessed lamps are daylight balanced and can be combined with natural light.
- Possibility to use halogen lamps (not sure for what, because such lamps get very hot).
- Westcott has many light modifiers to change its shape.
- Power is controlled by three switches in 33% increments.
- Sturdy body with metal heads and quality light modifiers.
When I bought this Westcott system, it came with a Spiderlite TD6 head, six 50w fluorescents, a tilt arm and a 36x48 softbox. I paid $700 for the lights and bought two of these for $1400.
But there is some good news. At the time of this writing, a Westcott promo kit is available, which includes only two - two heads, two brackets, two sets of lamps and two softboxes, one 36x48 and the other 12x36. The kit costs $799. Fantastic price for such a lighting system.
If that's still expensive for you, then there are other lighting options. The Impact has a kit containing heads, stands, lamps and modifiers for $265. But as my grandfather used to say, you can't afford to buy the same thing twice. If you are serious about product photography, then it is better to pay for a quality Westcott. It will serve you day after day.
I'm using my TD6 as a main and fill light. And I still need to be able to highlight the stage. To do this, I resorted to several reflectors.
I chose two 40 cm reflectors from Flashpoint for $70 each, you can get Chinese counterparts on E-bay, they are several times cheaper, the quality is good. They are located under my raised table and illuminate the surface of the table.
Stands
Now it's time to talk about the feet. Supports for your lighting equipment should be carefully considered and don't skimp. I have a story that illustrates this point of view. While doing product photography for a client, I moved around the studio and darted past the lighting fixtures towards the camera. Before I could look back and look at the stage, I heard a crack. My light tipped over, hit the table and unbalanced the product, which fell to the floor and shattered. It was a bottle of wine. I ended up with a big mess that needed to be fixed, a broken bottle that needed to be replaced, and a bill from a customer for a non-returned product. It could have been worse, but not by much. Invest in racks. Buy good ones and weight them down with sandbags.
You will need one of the C-pillars. Whether it's a "turtle base" (removable center column legs), a "rocky mountain" (stance with one foot that moves up/down the center column) or a "super" C-stand (super heavy), invest in a C-stand.