Taking 360 photo
How to Take a 360 Photo with a Smartphone (Ultimate guide)
While regular, two-dimensional photos remain the standard on the web, more and more smartphone users are adopting 360° photos. Sharing and embedding 360° panoramas used to be quite tricky, but today you can do both in a matter of minutes and at no cost. Now’s the time to harness the power of 360° technology.
If you are serious about 360° photography, we advise getting a specialized 360° camera as these are growing more affordable. But if you’re not ready to spend the money, you can share or embed a beautiful panorama with your smartphone. All you need is the right app.
To get you started with 360° photos, we prepared this guide on how to shoot panoramic images with your smartphone.
Step 1
Shooting 360-degree photos with a smartphone is easy. If you own an Android or an iOS device, download the Google Street View app from Google Play or the AppStore, respectively. The process is almost identical in both operating systems.
Step 2
Install the app and pick an exciting spot to photograph. After a few screens with tips and welcome messages, you’ll arrive at the homepage of the app. To start, click on the “Camera” icon on the bottom-right corner of the screen. A contextual menu will appear. Choose the third option, “Camera.”
Tap the “Camera” button in Street ViewStep 3
When you select “Camera,” Street View will bring you to the camera screen. The app will then guide you through the capture process. Essentially, you must stand still, hold the device in the correct position, point the camera at the dot, and hit all the orange circles that appear on the screen.
This procedure is illustrated below :
As you move your camera to hit the orange circles, the app automatically snaps pictures; you don’t need to hit the shutter button. Remember to pan in every direction (360°). After you hit all the circles and reach the final dot, press the white button in the middle of the screen. The app will take you back to the home screen.
At this point, the app has already begun stitching the images to create a 360-degree panorama. An orange loading bar at the bottom of the screen indicates the progress. As soon as the process is complete, the app will notify you that your 360 photo is “ready to publish.”
Step 4
The separate photos are now stitched together into one 360 image. While you can preview the raw version of the panorama on both Android and iOS devices, how to access the photo will depend on the smartphone system.
Android users can find the panorama in “Images” in the Explorer app (or in “Gallery” for newer versions of Android). iOS users will need to press the “private share” tab and choose the “save to device” option.
Step 5
Now that you’ve accessed the raw 360 image on your smartphone, what next?
By uploading your image on Panoraven, you can share your 360 photo from your smartphone:
- Via WhatsApp, Twitter, and Facebook.

- By email
- By SMS
You can also embed your 360 image in a website, but that is easier done from a computer.
Tips and Tricks
Making a good 360 photo with Street View requires some skill. At first, you will move too much when pointing at the circles. But be patient! After two or three attempts, you will come up with a quality 360° image.
Shoot your first 360 panoramas in open areas. Although Street View can perform indoors, the more distant the photographed objects, the more accurate the photo stitching.
For indoor use, we recommend investing in one of these dedicated 360 devices for 2021.
Below is an example of a 360° photo taken with the Street View app :
Wrapping Up
Three-sixty photos are increasing in popularity. Thanks to cutting-edge technology, they provide new opportunities in the world of photography. Whether you employ these photos as a commercial tool or as a cute souvenir, you should harness the power of 360 photography now!
Now you know how to take a 360 photo with a smartphone. Shooting panoramas has never been simpler!
Our flash tutorial
Time needed: 5 minutes.
How to take a 360 photo with a smartphone
- Download the Google Street View app
Download the app from Google Play or the AppStore, depending on your device.
- Take your 360° photo
While remaining stationary, point your smartphone in all directions. Make sure to hit every orange circle. When you are finished, tap the white dot at the center of the screen.
- Save the photo onto your smartphone
When the stitching process is complete, hit “ready to publish.” Android users will find the 360° photo in “Images” in the Explorer app (or in “Gallery” for newer Android versions). iOS users will need to tap the “private share” button and select the “save to device” option.
- Share your 360 photo
Now that you have the raw version of your 360 photo, you can upload it to Panoraven to share it for free.

How to Take Amazing 360 Degree Photos
Editor’s Note: The author is General Manager of the THETA Business Division for the RICOH Company. The above image is by @tetsu_photo2.
Scrolling through Instagram or Facebook, you may occasionally come across a unique image with the distinct features of 360-degree panoramic photography. With the ability to transform the mundane into compelling content, these images may seem difficult to produce – that’s not always the case.
Though every 360 camera is different, many of them grant even the most novice photographers the opportunity to capture beautiful imagery. There are three important aspects to unlocking your inner 360 photographer – understanding the framing process, placing yourself properly, and knowing the best (and easiest) editing practices.
Know Where Your Camera Is
While 360 cameras indeed capture your surroundings from every angle, a common misconception is that you can just turn any photograph into a work of spherical art. Shot placement is still essential if you want a photo worthy of boasting online and knowing the elements in each direction will allow you to position your camera in just the right spot.
For instance, if you’d like to snap a flowery photo, placing your camera as close as possible to the subject (the flowers) will make it pop throughout the image.
Another common situation to consider is landscape photos, both in natural and urban settings. Elevating your camera, preferably with a selfie stick or monopod, will give your shots a greater emphasis on the broader surroundings while keeping eye-level distractions out of focus, such as other people, cars, street signs, and more.
The key to a successful monopod photo is to keep your camera vertically aligned with it, which can give your image a “floating camera” effect as it becomes invisible in the image. Beyond these common examples, generally being aware of both your surroundings and your camera’s positioning will help you hit the ground running to create quality photography.
The below 360-degree image is by Shawna Rogers. It’s interactive and you can scroll around the scene by click-and-grabbing it with your mouse. To see more 360 image examples, click on the THETA 360 Photo Gallery box on the right below the photo.
Post from RICOH THETA. – Spherical Image – RICOH THETA
How to Fit in (or Out) of Your Photos
A benefit of many handheld 360 cameras is the ability to simply press the shutter button for instant results and the ultimate on-the-go photography capabilities. But forget double chins and side profiles, due to the nature of 360-degree photographs, your hands will likely be the biggest pain point in your handheld 360 photography ventures.
Holding your camera correctly and knowing what you’ll look like once the shutter clicks will minimize their presence in your shots and can save you from plenty of self-conscious grief. So how do you hold your camera correctly?
The best way to avoid in-frame fingers in your imagery is to use a selfie stick or monopod. These will distance your hand from the bottom of the frame, and many cameras will automatically filter over the bottom of their photos (remember the “floating camera” phenomenon?), helping to keep your monopod and hands from becoming the unintended stars of the show.
Don’t have a monopod? There’s still an easy way to hold your 360 camera without your hand taking up unwanted space: pinch the bottom of the camera with two fingers and hold it up at a 90-degree angle before snapping a photo.
Another pair of tools to improve your positioning in 360° imagery are tripods and remote shooting buttons. These give you much more freedom in choosing where to be in your photo, if you even want to be in them at all.
If you want a pure landscape photograph without photobombing the scenery, grab a remote shooting tool and hide out of sight for the perfect shot.
The below 360-degree image is by Shawna Rogers. It’s interactive and you can scroll around the scene by click-and-grabbing it with your mouse. To see more 360 image examples, click on the THETA 360 Photo Gallery box on the right below the photo.
Post from RICOH THETA. – Spherical Image – RICOH THETA
Easy Editing Techniques
Now that you have your 360 images taken and ready to share, there’s one final (and optional) step that can bring your content to the next level: editing. You’ve probably seen the “tiny planet” edits of 360 photos that are highly popular thanks to their iconic look, and that’s just one of many that are easily achievable, which both open up new creative avenues and make your images compatible for social networks and websites that don’t host 360 imagery.
Even an ordinary scene or object can become exciting when its proportions are distorted, making its features stand out in new ways. For someone with an existing suite of photography software, apps like Photoshop and Lightroom can be your go-to, but even apps like Ricoh Theta’s THETA+ app allow for both freeform and preset editing of 36o-degree images directly on your smartphone.
Is capturing 360 photos really this simple? Yes.
By following these three guidelines, anyone can capture stunning 360-degree content. The magic doesn’t stop here, though. If the basics of 360 photography grabbed your attention, I highly encourage you to take a deeper dive and learn more about all the possibilities you can uncover with a 360 camera and an open, explorative mind.
Creation of rotating 3D photographs of goods, 3D photography of an object
How to take a photo of a 360 object or a 3D photograph of an object? This question is especially relevant for owners of online stores. Selling a product is much easier when the buyer has a complete understanding of it. Photo 360 gives you the opportunity to twist the subject and see it from all sides. As if the object is in the hands of the client. This is very convenient for the buyer and arouses his interest and confidence in the product.
Creating a 3D photo of 360 products
Product photography in 360 format for online stores
Order a 3D photo 360
Next, we will look at the process of photographing 360 products and make a step-by-step instruction. There is nothing difficult in creating a 3D photograph of an object at 360 degrees, the whole process can be divided into two stages:
- Photographing an object in a circle;
- Combining the received photos into a 3D photo 360.
Contents of the article
The first step is to take 360 degree photos of the subject. How to take a photo of an object from all sides? There are two options:
- move the camera around the object
- rotate the object 360 in front of a stationary camera
The first option is suitable for 3D shooting of large stationary objects. If you need to take a 3D photo of a house, a monument or something like that, then the camera will have to be moved around. There are large platforms on which even a car or a boat can be rotated. But this luxury is not available to everyone.
If you want to shoot 360 products or 3d people, then the object must rotate around its axis, and the camera is stationary.
Photographing 360 products can be divided into two types:
- Single row - when the object is photographed in a circle in only one plane.
- Multi-row - several rows of frames are photographed at different angles. After shooting each complete rotation, the camera moves to a certain angle using a special bracket.
For 3D photography of an object, special equipment is needed that simplifies the process of creating a 360 photo and greatly improves the quality of the result.
Equipment for 3d photography
Now let's look at all the necessary equipment for photographing objects in 360 degrees.
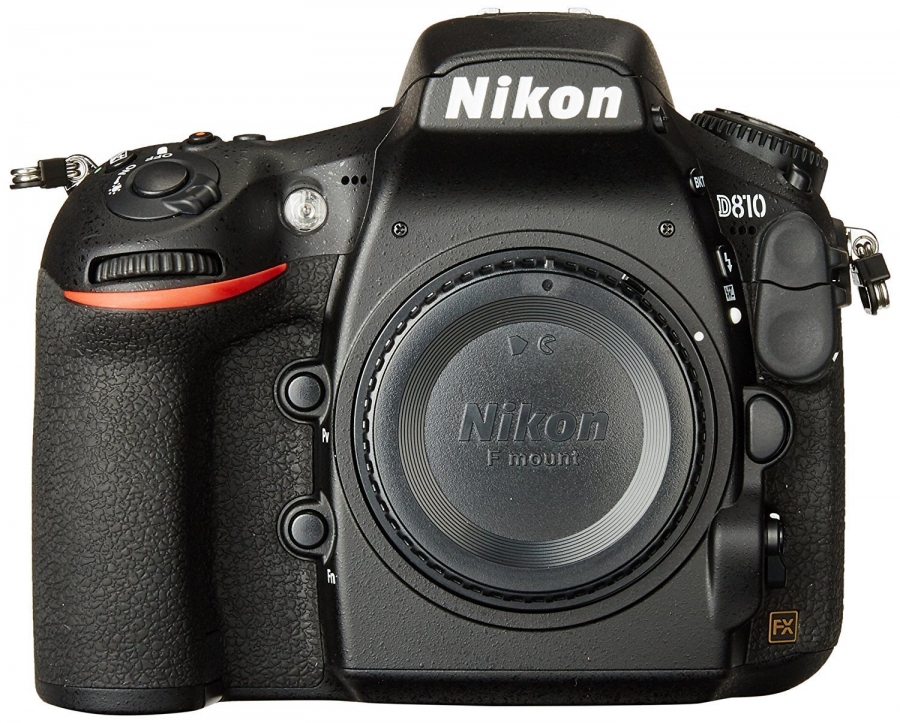
Camera or video camera
First of all, you need a camera. It is best to use a SLR camera with interchangeable lenses. But this is optional. Any camera with the ability to shoot in manual mode will do. Below we will review all the camera settings required for 3D product photography.
A camcorder can be used for 3D 360 subject photography. A series of frames in JPG format is obtained from a video using special programs (for example, Free Video to JPG Converter). But this option is less preferable, the quality of the photos will be much lower. It will not be possible to flexibly process the frames received from the video.
Where to buy: Ya.Market • Citylink
Tripod
The tripod is necessary for a fixed installation of the camera in front of the object. The tripod should be as stable as possible. It is very important 3D shooting goods. Any vibration will give the subject movement in the frame, which will be noticeable when rotating.
It will be better if the ball head is mounted on a tripod. It will allow you to accurately set the horizon level during shooting.
Where to buy: Ya.Market • Citylink
Rotating table 360
The rotating platform is needed to scroll the object 360 degrees. Rotating tables can be different:
- Automatic platforms 360 - table with automatic rotation. The required number of frames is set in the platform settings. The control unit of the table is connected to the socket of the camera control panel. After shooting starts, the platform rotates to the set angle (depending on the number of shots) and stops. At this point, the camera takes a picture. Then the table rotates again by the same angle, and so on, until a complete rotation of the object by 360 degrees occurs.
- Mechanical turntable - This turntable does not have its own drive to rotate. Turning the table and shooting are done in manual mode.
Mechanical turntables are much cheaper and suitable for beginner photographers. You can make a mechanical table with your own hands or buy something similar in a store. For example, a rotating kitchen tray.
Where to buy: Ya.Market • Aliexpress • Aliexpress
Background for object 3D shooting
The most commonly used background is white. It can be fabric or paper. The background color must match the color of the turntable surface. To protect the surface of the platform, you can use replaceable circles cut out of paper or thin sheet plastic.
Instead of a background, you can use a light cube for subject photography.
Lightbox Background for subject photographyWhere to buy: Ya.Market • Aliexpress • Aliexpress
Lighting
The use of lighting is highly desirable. Without light sources, it will not be possible to obtain high-quality subject 3D photos. It is best to choose constant light sources without flicker. For example, LED lighting, this is used in video shooting. It is better not to use pulsed light sources (flashes).
Three light sources are most commonly used. One for the sides of the subject and one for the backlight.
Where to buy: Ya.Market • Aliexpress • Aliexpress
Remote control
The remote control is useful when using a mechanical turntable. It is necessary in order to avoid shaking the camera when you press the shutter button. In automatic rotary tables, the remote control replaces the contact wire.
Where to buy: Ya.Market • Aliexpress
Preparing equipment for still photography 360
Place the turntable 360 on the table and fix the background behind it. Then we will arrange the light sources. We will put two lamps on the sides of the table, and we will direct the third to the background. Depending on the size of the product being photographed, the front light sources move back and forth to achieve the best result.
Installation of equipment for 3D shooting 360 Mount the camera on a tripod, place the object on the turntable. It is very important that the desired axis of rotation of the object coincides with the center of the platform. Otherwise, during rotation, the product will move in the frame from side to side. This is especially noticeable on cylindrical objects.
Centering the item on the turntable 360
There is a fairly simple way to set the item straight:
- Turn on the camera's preview mode and display the centering grid.
- Move the tripod so that the center of the frame is directed exactly to the axis of rotation of the turntable.
- We place the object in the center of the table “by eye”.
- Rotate the table 90 degrees and center the object. In this case, we move the object only to the left and to the right.
- Then rotate the table another 90 degrees and adjust the object again if necessary.
You can use the laser beam attached to the camera or the table itself to center the object. But not all turntable models have lasers.
Now we check the horizon level so that the object is located in the frame without obstruction. Next, we build the frame on the subject so that it completely falls into the picture. Leave some space before the edge of the frame. Now you need to set up the camera and turntable.
Camera setup
- Set the ISO value. ISO - camera sensor sensitivity. The higher its value, the more noise will be in the frame. ISO is set depending on the level of illumination. It is best to use an ISO value of 100-200.
- Choose RAW image quality. Let's focus on the RAW format. This will allow us to flexibly process images without losing quality in the future. Note that some camera models cannot cope with a large amount of data during continuous shooting. In this case, you will need to increase the stop time of the turntable or reduce the image resolution in the settings.
- Adjust white balance manually. It is necessary to set the white balance value at which the color is white. With automatic white balance, colors may vary from frame to frame.
- Activate manual shooting mode "M". This is to ensure that all frames have the same brightness (exposure).
 In manual mode, you must set the aperture value and shutter speed.
 - Set aperture value and shutter speed. Both parameters must be adjusted depending on the illumination. Therefore, all lights are turned on during setup. The aperture of the lens should be closed down to about f / 8 - f / 11. The smaller the aperture, the higher the depth of field of the photo. But do not overdo it, because closing the aperture entails darkening the frame. When setting the shutter speed, it is necessary to achieve the most even illumination of the entire surface of the object without overexposure and darkening. In this case, the background should be the brightest.
- Disable image stabilization. Minor micro-vibration occurs during shooting. When stabilization is on, the camera will straighten the image. The result is a series of frames with a shifted position of the object.
Turntable setting
The following parameters are set in the automatic turntable:
- Number of frames per full turn.
 Some models simply indicate the number of camera moves per full turn. Or the angle is set, when turning to which the picture is taken. Most often, the number of frames is selected as a multiple of 12 (12, 24, 36, 72). The more frames in a 3D photograph of an object, the smoother it will rotate. If you need to shoot 36 frames, the angle is set to 10 degrees. For twelve frames - 30 degrees and so on.
 - Clockwise rotation of platform. Clockwise rotation is an established standard that should be followed.
- Platform delay time when surveying. This is the time that the turntable stops while a picture is being taken. The delay is set depending on the shutter speed of the camera and must be greater than its value. The camera must finish shooting before the platform starts to rotate.
Everyone chooses the number of frames in a 360 photo for himself. It all depends on how detailed you need to show the product.
The more frames in a 360 product photo, the larger the file size and the slower the download speed.

For comparison, here are some examples of 360 photos with different number of frames:
Click on the photo to view
When using a mechanical turntable, there are no special settings. It is only necessary to mark the angles of rotation on the end of the platform.
3D product photography process
Almost everything is ready for 3D product photography. It remains only to focus on the object in such a way that most of its surface is sharp (in focus). Then turn off autofocus.
Before shooting, once again check the connection of all wires and turn off the preview mode on the camera screen (it greatly slows down the shooting process).
Now press the "Start" button and wait for the table to make a full turn, and the camera to shoot the required number of frames.
When using a mechanical turntable, the steps are quite simple:
- Take the first picture using the remote control.
- Manually rotate the platform to a given angle.

- Taking the next picture.
- And so on until the object is completely rotated.
To begin with, it's worth taking a test shot of one subject and checking the pictures on a computer. If the quality of the 360 photo is completely satisfactory, we continue 3D photography of the rest of the goods with the selected settings. We only change the composition of the frame and the focus of the lens depending on the size of the object.
It is better to write down all the set parameters of the equipment for further use in the same conditions.
Rules for successful 3D object shooting 360
- Keep the object and turntable surface clean. Any dust in the frame greatly spoils the impression of the product.
 If the garbage still got into the frame, it can be removed during retouching. But you have to spend extra time editing each frame. It is better to take care of cleanliness during shooting.
 - Control the focus of each subject. The subject should be as sharp as possible. When replacing the product, an error is possible, then it will be fuzzy in the picture. It is better to double-check the sharpness before starting shooting.
- Center your subject as precisely as possible so that it does not move in the frame when rotated.
- Take the first picture of the front of the product. So you don't get confused during shooting and don't make unnecessary shots.
- Select a multiple of twelve shots. The rotation angles must be exactly the same.
- Check the image quality of the first subject on the computer to make sure all settings are correct.
Processing frames for photo 360 of the subject
After shooting, we get a set of photos that are frames of the future photo 360.
Now we have to process the photos. It is best to use graphic editors with batch processing capability. Most settings will apply to all frames.
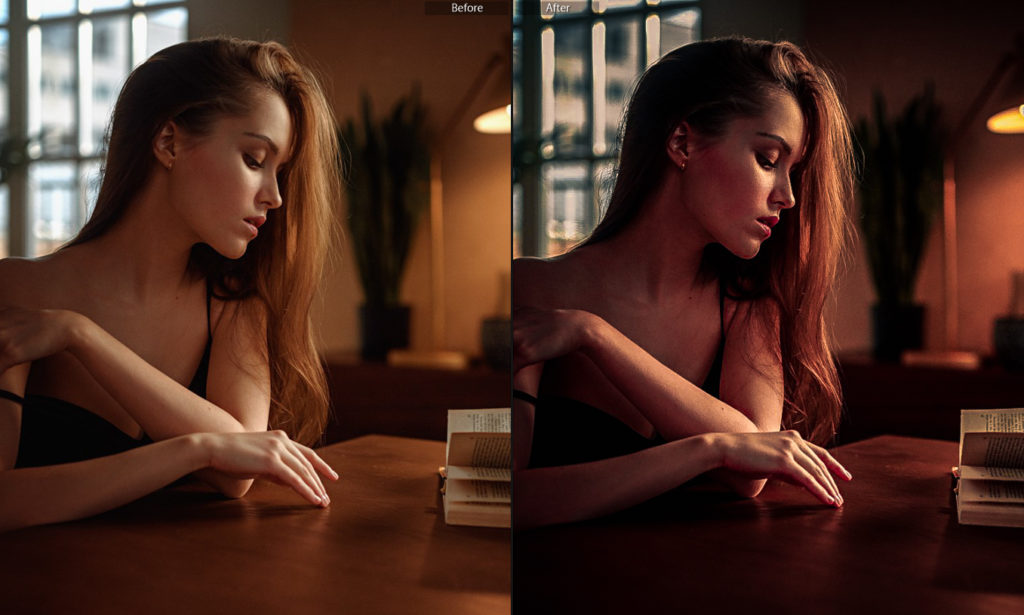
Photo editing example:
before processingafter processingPrograms for processing 3D photo 360:
- Adobe Lightroom
- Adobe Camera RAW
- Blender
Actions in all programs are similar, so you should choose the editor that is most convenient for you.
Editing 3D 360 photos in Adobe Camera RAW
The first step is to transfer all the original images into the program. Next, open one photo and start editing:
An example of processing a 3D photo 360 in Adobe Camera RAW- Crop the image with the Crop tool.
 We remove excess empty space and align the horizon, if necessary. We crop the photo in such a way that in all the photos the object falls into the field of view, and none of its parts are cut off. The rotation axis of the object must be in the center of the photo.
 - We correct the white balance with the pipette automatically or with the adjustment slider in manual mode.
- Using curves and adjusting the white colors, lighten the background to pure white. At the same time, we pay attention not to lose details on the surface of the object.
- There are still areas of gray around the edges of the image. They also need to be completely white. For this we use gradient filters. In the filter settings we dodge "Highlights" and "Exposure". Now apply gradient filters around the perimeter of the frame, starting outside the frame. We try not to stand too hard on the object so that the filter does not affect its surface. Apply enough filters so that all the edges of the image become white.

- We make additional color correction, add contrast, saturation, etc.
- Now we need to apply the processed image settings to all frames. We check that all photos look normal. If necessary, we make changes on a specific frame. Don't forget to apply the changed settings to all images.
- Here, in the editor, you can remove extra particles that have fallen into the frame. To do this, use a stamp or a brush. Such adjustments are made frame by frame, without applying them to the rest of the photographs. But it's more convenient to do it in Photoshop separately.
- Export edited images.
If there are extra particles or scratches in the frame, they can be removed in Photoshop. The program has the ability to work with sequences. Thanks to this, in Photoshop you can easily remove dust and scratches frame by frame:
Creating a 3D photo of a 360 object
We have come to the final stage of creating a 3D photo of a 360 object. We have to choose software. There are several programs for viewing 360 photos.
- Since we have 72 frames, we indicate the number of columns - 72.
- Number of rows - 1, if you take a multi-row photo of 360, the required value is indicated.
- Using the tool "States" (state) you can place in one photo 360 several objects or several variants of one object (for example, different colors). In this case, we have a regular single-row photo, so we leave the “States” value at 1.
Click the refresh button, the number of frames will change to the specified value of the columns. Next, click "Add Images" and select 72 photos. Or just transfer the files from the folder to the box in the first column.
Go to the "Projection settings" button "Change".
Here we can:
- Rotate the photo 360 and select the initial position of the object when opening.
- Select the type of object rotation.
- Set cyclic rotation.
- Set reverse rotation.

Select Type - "Grabber/Scroller" and check the box - "Horizontal Wrap".
Project Information contains general information about the photo, date of shooting, author, copyright.
In Object2VR, you can also create "Active Zones" - these are interactive points, when you hover over them, an information window appears with a text description or photo. They can be in the form of a dot or a whole selected area.
Export photo 360 to Object2VR
Now everything is ready to create a photo 360. Select the format for export - "Student" and click add. A window with export settings will open:
- Set the image settings depending on the required quality and resolution.
- Specify the width and height of the displayed image.
- Auto spin at start: spin type, speed, delay.
- Scalable.
- Select one of the standard control menu design templates. You can modify the template or create your own using the built-in editor.

On the "Advanced" tab, control and active zones settings are configured.
After entering all the settings, click "Ok". The program immediately offer to create, we agree. The processing will start. After a few seconds, the finished 3D photo 360 will open in the browser:
Online services for creating 3D 360 photos of the subject
There are specialized sites for creating 3D 360 photos from your photos.
- Sirv.com
- Imajize.com
- Arqspin.com
You need to follow a few simple steps:
- Register on the site.
- Create a new image and add the original photos.
- The service automatically creates a rotating photo.
As a result, you will receive a link to view the 3D image, which must be inserted into the online store.
This method is suitable for both beginners and professionals. All photos are stored in the cloud storage.
Such services are paid (monthly payment).
Some are free to use with some restrictions.
Creating a 3D photo of an object using Java scripts
There are Java scripts designed to display 360 photos on the site. The script is added to the site page code and demonstrates a rotating photo, loading frames from the specified folder.
Free use
Programming skills are required to post on the site.
Conclusions
So we sorted out the question - how to take a photo 360. There is nothing complicated in 3D subject photography. You can create rotating product photos yourself. If you follow simple rules, you will get excellent results.
The resulting 3D photos of items can be used to sell goods in your own online store or on the Wildberries and Ozon marketplaces.
Panoramic 360 photo shooting on an Android and iPhone smartphone
How to shoot a spherical 3D panorama using your phone? It's not difficult at all. You can take a 360 panoramic photo using any smartphone. Next, we'll walk you through all the steps involved in capturing high-quality 360-degree panoramic photography on your Android or iPhone. But first, a little theory.
Creation of turnkey virtual 3D tours
Placement of 3D panoramas in Yandex, Google and other platforms on the Internet.A 3D spherical panorama is a 360-degree photograph, both horizontally and vertically. In such a picture, we can see the whole space around.
Spherical 3D panorama in equidistant projectionWith the help of applications, a 360 photo can be scrolled in any direction and see what is there. Spherical panoramas are used to create virtual tours:
Virtual tour of the restaurant (click to view)Such panoramic shooting can be done on an Android or iPhone phone. We will consider several options - from the simplest to the more complex, close to professional shooting.
What you need for panoramic shooting on your phone
First of all, you need a smartphone.
A phone with an Android or iOS operating system is suitable.
From the app store, we will install a free program - Google Street View. It allows you to take 360 panoramic photos and share them with the world by uploading photos to Google Maps.
Download Google Street View for AndroidDownload Google Street View for iOSFor a simple shooting option, this will be enough. But for better shooting, you need any tripod and phone mount.
Shooting a 3D panorama on the phone
Open the Google Street View application and go to the "Create" section. Here we are offered several options:
Panoramic shooting with Google Street View
- 3D panoramas — create a circular panorama using a smartphone.
- Import panoramas - suitable for uploading ready-made 360 photos.
- Connect a spherical camera - if you have a 360 camera, you can take pictures on it and upload it to your phone via wi-fi.
Select the first option. Next, the application will ask for permission to shoot and access to location data - confirm.

Panorama shooting in progress
- Camera image and a yellow circle appear on the screen.
- Pointing the phone at the circle. The circle will fill with white and the first frame will be taken. At this point, try to keep your phone still.
- Next, move the smartphone to the edge of the first photo, where the next yellow circle will appear. We take a picture and rotate the camera further.
- It is best to shoot the first row horizontally and then move to the next.
- And so on until all the space around is filled with photographs.
- A progress bar is located at the bottom of the screen. When completed, it will turn green. We click on it. If you need to cancel one frame, press the "back" button.
Incorrect panorama shooting on the phoneCorrect panorama shooting on the phonePay attention that the phone rotates around the point where the camera is located. This is how you get the best result after stitching photos.
After shooting, the process of processing and combining photos into a spherical panorama will start.
User profile in the Google Street View applicationThe finished 360 photo can be seen in the "Profile" section. All 3D panoramas of the user are stored here.
To open a photo in 360 mode, simply click on it. Now the panorama can be rotated in any direction. Here (three dots in the upper right corner) you can specify the shooting location on the map, hide the faces of passers-by or delete the photo.
Examples of panoramas taken with the phone
Here are examples of finished panoramas with the correct shooting and when the phone is removed from the axis of rotation: In the first panorama, the joints between the photographs are noticeable. They are more visible on nearby objects. They can be avoided if you rotate the phone correctly while shooting.
If we are completely satisfied with the result, click "Upload to Google Maps". After a while, your 3D panorama will be available for viewing in Google Maps.
To save a photo to the phone's memory, you need to click on the "share" icon, select a file manager from the list and specify a folder for storage.
Further, the resulting spherical panoramas can be used to create a virtual 3D tour. For example, in the programs Pano2VR or KRpano.
Or publish a panorama in one of the social networks. By the way, Facebook supports viewing 3D panoramas in a spherical view.
Shooting a spherical panorama with a smartphone from a tripod
During handheld shooting, it is difficult to rotate the phone around one point. Due to the offset, so-called serifs appear on the panorama - joints between adjacent frames.
Panorama notches due to incorrect shootingTo avoid these defects, you can use a tripod while shooting. To fix the smartphone on a tripod, you need a special mount, like on selfie sticks. Or a professional mount for panoramic shooting - a panoramic head.
Ask for price
Call for price
Call for price
The camera is fixed at the desired point using a tripod and mount.