Tips for photographing sunsets
11 Sunset Photography Tips for Beautiful Results
If you’re looking to do gorgeous sunset photography, then you’ve come to the right place.
Because in this article, I’m going to share 11 simple tips that will instantly improve your sunset photos.
Specifically, I’m going to explain:
- How to capture beautiful sunset tones consistently
- How to create balanced, pro-level sunset compositions
- The best type of weather for sunset photos
- Much more!
Ready to become a sunset photography master?
Let’s dive right in.
1. For the best shots, plan ahead
While you can sometimes capture beautiful sunset shots without any forethought…
…the best shots usually come from real planning.
So scope out places that might be good for sunsets the day or two before your shoot. Look for interesting locations – locations where you can photograph the sun all the way down to the horizon, and where there will be opportunities for shots that include foreground elements and silhouettes.
Sunsets only take a few minutes, which is why you want to think about these elements before the sunset begins. Otherwise, you might miss the best shots.
Find out when the sun will set, then arrive at least half an hour beforehand. It’s often in the lead up to a sunset that the real magic happens.
And keep an eye on the weather. There are a variety of different types of sunsets that produce a range of different types of lights and patterns in the sky. Don’t just head out on clear days, because while these can produce some wonderful colors, it’s usually the days with (partial) clouds when the real action happens.
(Also, dust and smoke in the air can produce amazing results, too.)
Consider the equipment you might need. Take a tripod, lenses with a range of focal lengths, and extra batteries.
That way, when the sky turns beautiful, you’ll be ready!
2. Shoot at a variety of focal lengths
Most sunsets are photographed with wide-angle lenses, and these focal lengths can make for beautiful images. A lens in the 10-30mm range will give you sweeping shots of your sunset scene.
However, if you want the sun itself to be a main feature of the shot, you’ll need to zoom right in. The sun is just half a degree across, so when you shoot with a wide-angle lens, the sun will be tiny in the frame. If you want to highlight the sun, you’ll need to zoom in with a 200mm lens or longer.
(This, in turn, will increase your need for a tripod!)
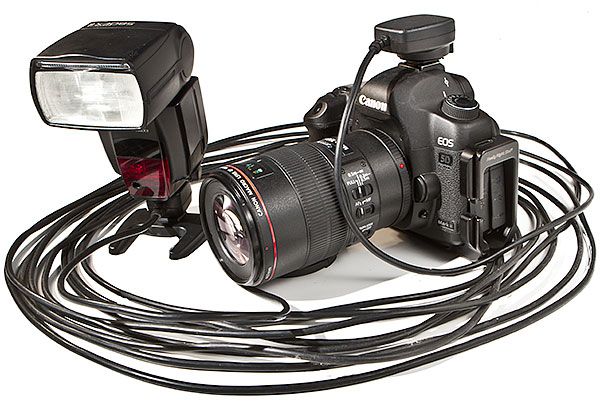
Also, be hyper-aware of eye-safety concerns: looking at the sun is always dangerous. And it’s even more dangerous when you look at it through a telephoto lens. So if you do include the sun in your composition, never look through your camera’s optical viewfinder. Instead, use Live View to check your composition and exposure on the rear LCD.
(If you use a mirrorless camera, this won’t be an issue. You can safely look at the sun through the electronic viewfinder.)
3. Use the rule of thirds to improve your sunset photography compositions
The rule of thirds states that you should position key elements of your scene a third of the way into the frame.
So instead of putting the horizon in the center of the composition, put it toward the top or the bottom, like this:
Do you see how the horizon is a third of the way up from the bottom? That’s what the rule of thirds suggests.
And it’s not just about horizons. You can also use the rule of thirds to position the sun, foreground elements, background elements, you name it.
Of course, the rule of thirds isn’t a requirement. And you can break the rule of thirds for stunning results in certain situations.
But in general, the rule of thirds is a great starting point – so unless you have a good reason to do otherwise, I highly recommend you follow it!
4. Experiment with different exposures (to achieve a magical result)
First things first:
When doing sunset photography, you should always shoot with a semi-automatic or Manual mode. Don’t let your camera dictate your settings for you (in other words: get off Auto mode immediately!).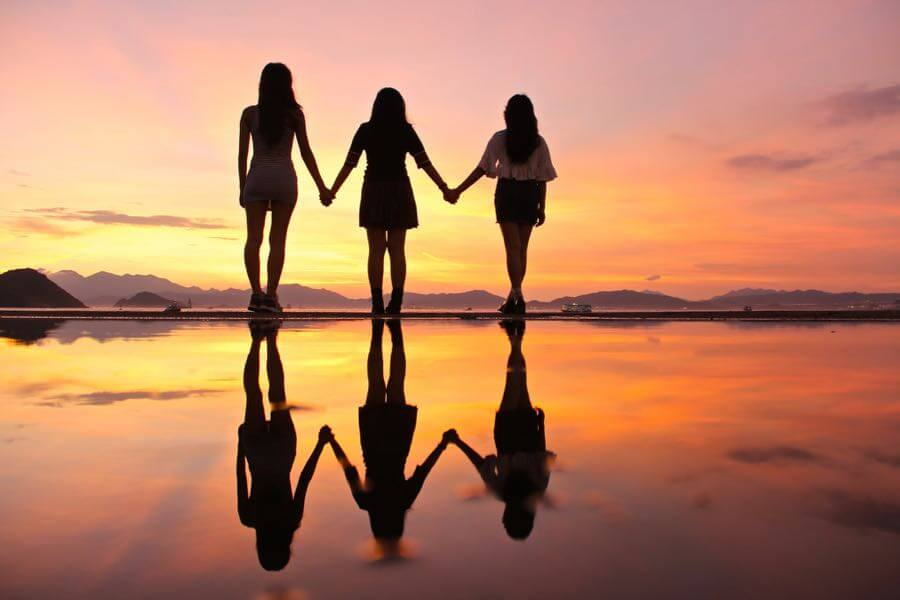
So before starting a sunset shoot, switch your camera over to Aperture Priority mode, Shutter Priority mode, or Manual mode.
And don’t just take one shot at one exposure. Instead, take a variety of shots at different exposures.
So while you can try a “standard” exposure based on your camera’s recommendation…
…don’t be afraid to underexpose by raising your shutter speed or narrowing your aperture. And don’t be afraid to overexpose by doing the opposite.
The great thing about sunsets is that there is no one “right” exposure. You can get stunning results with underexposure and overexposure; the key is to experiment.
(Personally, I tend to start with a relatively quick shutter speed, then slowly work down to slower shutter speeds for brighter, more luminous shots.)
5. Bracket often
In the previous tip, I talked about experimenting with different exposures.
But did you know that there’s a technique, called bracketing, that guides you in your exposure experimentation?
Here’s how it works:
First, take a photo using your camera’s suggested settings.
Then adjust the settings (either manually or via exposure compensation) to slightly underexpose the photo and then to slightly overexpose the photo.
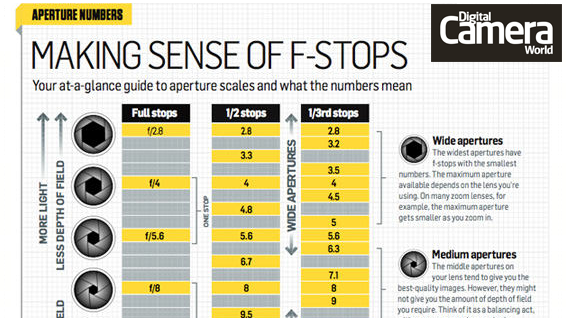
So if your camera says to shoot at f/8, you would take your first shot at f/8, as recommended. But your second shot would be at f/5.6, and your third shot would be at f/11.
That way, you’d end up with a “standard” shot, a darker shot, and a brighter shot, all of which will give you different colors and effects.
It’s a good way to guide your experimentation, and it’s also a good way to create “insurance” photos – so that, if you overexpose the standard shot on accident, you still have a darker file on your memory card.
Make sense?
6. Auto Exposure Lock is your friend
Bracketing can be a lot of fun, but it also takes time – and it’s not the most precise way to create a well-exposed image.
That’s where Auto Exposure Lock (AEL) comes in handy.
Using AEL is simple.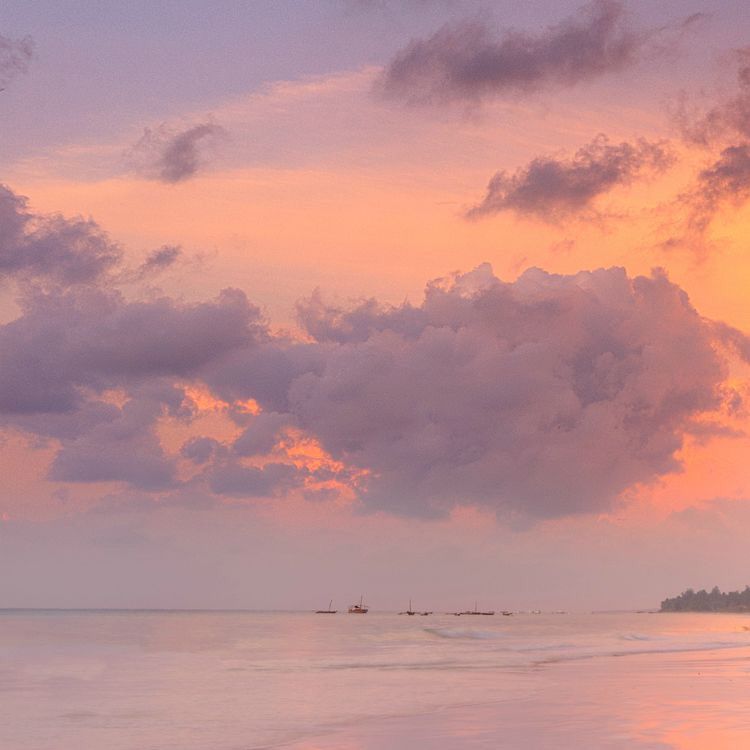 First, you point your camera at the area of the scene you want perfectly exposed, such as a beautiful foreground feature.
Then lock the exposure.
Finally, reframe the picture (while maintaining the exposure lock).
Basically, it lets you determine the exposure without interference from the ultra-bright sunset, which can wreak havoc on a camera’s meter.
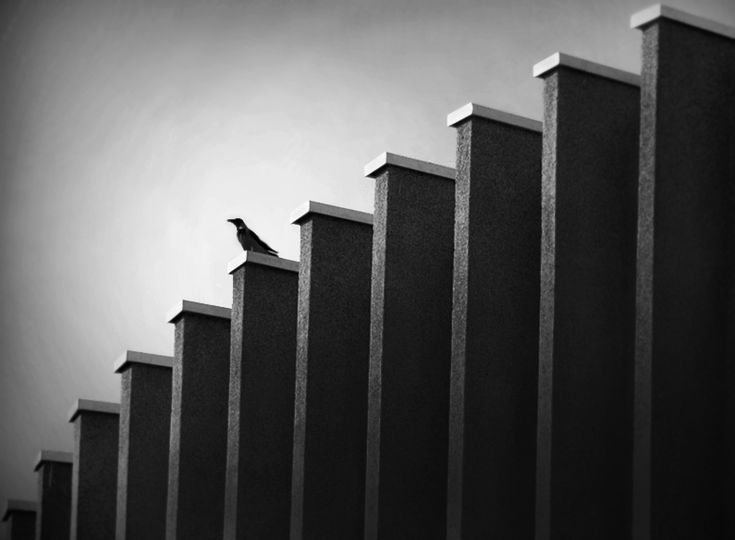
Also note that you can use Auto Exposure Lock to create beautiful silhouettes; just point your camera at the brightest part of the sky, lock the exposure, and then reframe with a foreground subject. The result will look like this:
Cool, right?
7. For the best colors, get off Auto White Balance
Your white balance setting adjusts the temperature of the colors in your scene.
So depending on the white balance, you’ll end up with a cooler (bluer) photo or a warmer (redder) photo.
When the white balance is set to Auto, your camera will automatically deal with the color temperature. And while this can sometimes work, it often gives subpar results – where you lose the warm golden tones of your sunset.
So instead of using Auto White Balance, switch your camera to the Cloudy or Shade presets, which will warm things up a little.
Alternatively, if you’re shooting a sunset and you do want a cooler, moody shot, you can experiment with other white balance settings, such as Incandescent.
One more thing:
If you shoot in RAW, it’s true that you can always tweak the white balance during post-processing. However, this is often pretty inconvenient; after all, how much time do you want to spend adjusting the white balance in front of your computer?
Which is why it’s worth getting the white balance right in-camera.
8. Always bring a tripod for the sharpest results
If you’re shooting at longer shutter speeds, such as 1/60s and beyond, then a tripod makes a huge difference.
It’ll keep your camera stable – so that your files remain tack sharp.
When you’re out doing sunset photography, you don’t need to start the shoot with a tripod, because the minutes leading up to a sunset bring plenty of light.
But as the sun sinks on the horizon, a tripod will become more and more necessary. (And by the time the sun is gone, a tripod will be absolutely essential.)
Note that you might want to use a tripod for your whole photoshoot, especially if you plan to capture long exposures that feature moving water, like this one:
What if you don’t have a tripod? Or you forget to bring one?
In such cases, I recommend you stabilize your camera against an object. You can put it on the hood of a car, or you can just set it on the ground; whatever allows you to minimize movement as much as possible.
9. Don’t be afraid to focus manually
We all love autofocus – but sometimes, when shooting in extreme lighting conditions, autofocus just won’t get the job done. Your lens will hunt all around, and the shot will end up out of focus.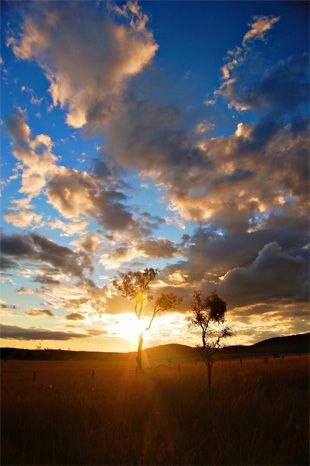
That’s where manual focus comes in handy.
Now, not all lenses support manual focus. Some only allow for autofocusing, in which case you’re out of luck.
But many lenses do let you focus manually (and you can generally activate manual focus by pushing the AF/MF switch on the lens barrel to MF).
So when your lens starts to hunt, don’t fret; just swap over to manual focus and keep shooting!
10. Shoot more than just the sunset
Here’s one of the many wonderful things about sunsets:
They don’t just create wonderful colors in the sky; they also cast a beautiful golden light that is great for other types of photography!
So as the sunset progresses, keep an eye on other photographic opportunities around you. For instance, you can capture portrait, landscape, or macro shots. In the light of the setting sun, it’ll all turn out amazing!
11. Keep shooting (even after the sun is gone)
A sunset constantly changes over time – which means that every additional minute is an opportunity for a different shot.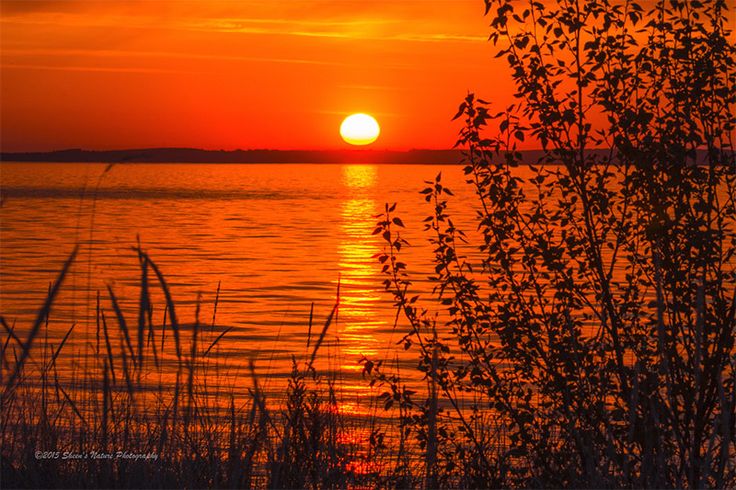
So don’t take a few shots and call it an evening. Instead, stick around and photograph the sun as it goes down. You can continue to capture the same composition, or you can test out different compositions; the key is to keep your camera out and your finger on the shutter button.
Also make sure to capture different exposures (bracket!) and consider working with different focal lengths, as I’ve discussed above.
And finally:
Don’t pack up once the sun is gone. The period after the sun has disappeared – called the blue hour – can be great for photography, too, thanks to its beautiful colors and ethereal light. So if you still have the energy, keep finding compositions until the colors have vanished completely from the horizon.
Sunset photography tips: conclusion
Now that you know these tips, you’re well on your way to capturing some stunning sunset photography of your own.
So the next time the sun starts to get low in the sky…
…grab your camera and head outside!
Amazing images await.
Now over to you:
Which of these sunset photography tips is your favorite? Are you going to use any of them the next time you photograph a sunset? Share your thoughts (and sunset photos) in the comments below!
Sunset Photography: 8 Proven Tips for Great Images
There’s no big secret that sunset photography is popular. What’s not to love about a beautifully pink or dramatically red sky?
It takes something special to have your golden hour images stand out from the crowd as there’s an abundance of images with nice colorful skies. However, far fewer can be considered impactful.
So what does it take to create professional-looking images of sunsets? How can you tell a story beyond the colorful sky?
The good news is that there isn’t all that much extra that needs to be done. It’s often enough to make just a few simple changes in your approach. Let’s find out what.
#1 Arrive Early and Stay Late
Patience is a key ingredient in becoming a better photographer. You can’t expect to simply show up, fire off a couple of shots, and leave with great images. Those situations are rare.
Instead, you need to arrive at the location early and stay late. This will drastically increase the likelihood of returning home with great images.
Exactly how early you should arrive depends on the location. If it’s one that you’ve never visited before, you want to arrive extra early so you have enough time to explore the area and find the best compositions. If it’s your local go-to, you might not need as much time. In that case, you just need to be all set up before the best light arrives (though it’s not a bad idea to shoot through the different phases of a setting sun either)
I also recommend staying for a while after the light starts fading. It’s not over before it’s over. Sometimes the best light comes unexpectedly late or closer to blue hour. There’s no worse feeling than being in the car on your way home when the light suddenly becomes amazing!
Trust me, I speak from experience.
#2 Know the Sun’s Position
There certainly is a fair bit of luck involved in sunset photography but there are some factors you should pay attention to in order to increase the chances of capturing impactful images. The sun’s position is one of them.
Know the sun’s positioning for sunrise or sunset. Shutter Speed: 15 seconds, Aperture f/11, ISO100Knowing where the sun will be during sunrise or sunset is important in order to get an idea of what the light will do. It means you know whether your main subject will be bathed in light or left in the shadow. Knowing how the light affects the landscape will better prepare you for what’s to come.
It also gives you an idea of how the sky takes on color. Of course, there are more factors involved in colorful clouds but the sun is definitely one of them.
A common misconception about sunset photography is that the sun needs to be in a particular direction. This is not true! Good light comes in many variations. It doesn’t matter if you get backlight, sidelight or if you shoot directly into the sun. What matters is that you adapt to the light you’re given.
#3 Watch Out for Lens Flare
Lens flares are one of a sunset photographer’s worst enemies. They can be hard to avoid, especially when photographing towards the sun, and they instantly remove the ‘wow’ factor an image could’ve had.
There are two basic methods to avoid unwanted lens flares:
- Use a lens hood (though this doesn’t work when using filters)
- Adjust your perspective until the sun is out of the frame
These methods work ok in most scenarios but they aren’t ideal. The first option doesn’t work when using filters and the second means you’re altering the composition.
The third option is to capture two or more images that are to be blended together in post-processing. This is a slightly more advanced alternative but it works wonders.
Start by placing the camera on a tripod.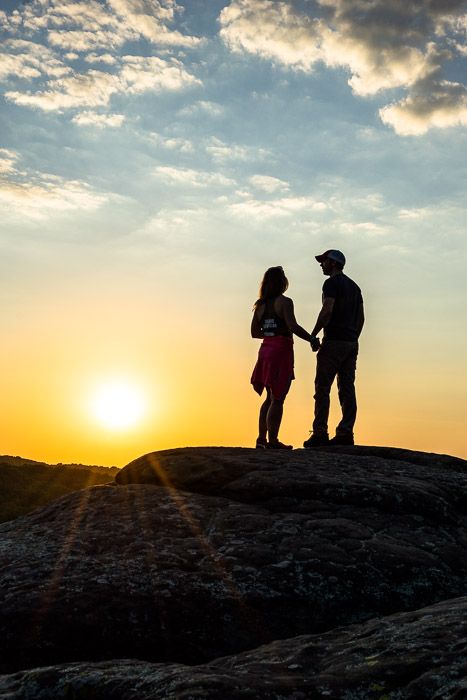 Set up your composition and take the shot. Now, place a couple of fingers in front of the lens and cover up the sun, such as in the example below. Then take a shot. Make sure that there are no more flares in the landscape.
The next step is to blend the two images together in post-processing using a software such as Adobe Photoshop or Luminar 4. This is done by opening both images as layers (where the covered image is placed on top), then using a black brush on a white layer mask to paint back the sky.
Recommended Reading: Understanding Layers and Masks in Photoshop
There are going to be some of you who want to comment and say that lens flares can add an extra dimension to a photo. You are, of course, right. What we’re talking about here are unintentional lens flares. Those, you want to avoid.
#4 Avoid Silhouetted Landscapes
Just as with lens flares, there are scenarios where a silhouetted landscape can do wonders for a photograph.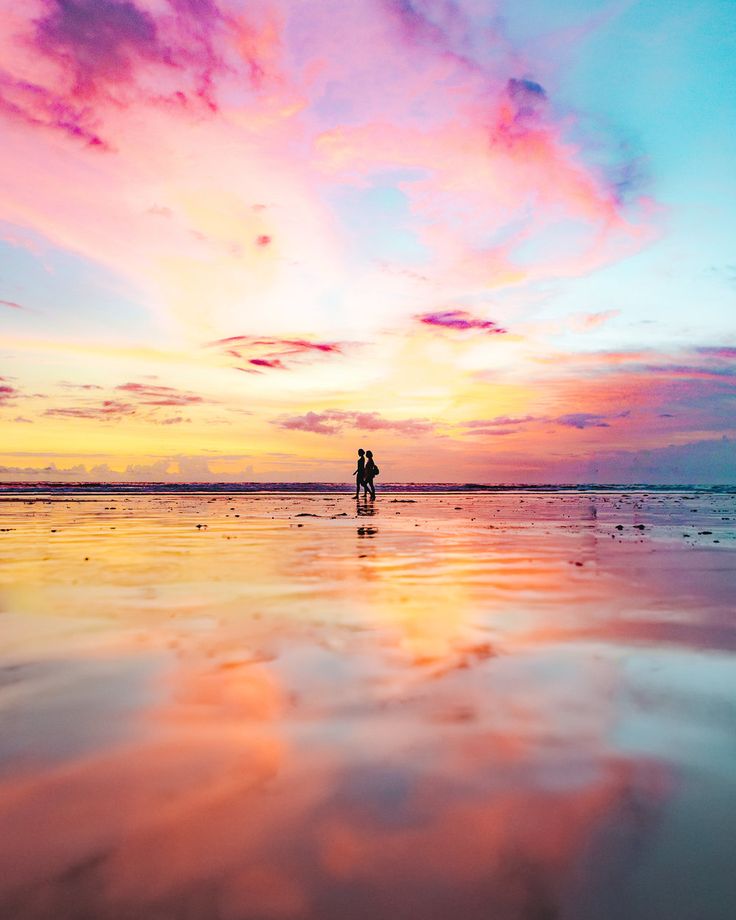 But, again, that’s only when they’re intentional.
Generally speaking, unintentional silhouettes are distracting and an indicator that the photographer is new to the craft. Focusing primarily on the sky while leaving the lower portion of the image pure black makes the storytelling much harder.
Silhouetted landscapes are, unfortunately, very common when photographing sunsets. The high dynamic range of the scene, i.e. bright sky and dark landscape, make it difficult to correctly expose the photo. There are two main methods you can apply to avoid this:
- Expose for the landscape. This means using a longer shutter speed to introduce details into the foreground. In some cases, it might lead to overexposing the sky.
- Use a Graduated Neutral Density filter to darken the sky. This is a great way to balance the exposure and brighten the foreground without overexposing the sky.
Modern cameras have drastically improved their dynamic range performance and you are able to recover details in a bright sky and bring them out from dark shadows. So, combining one of the two options with some basic raw adjustments in your photo editor will help your sunset photography a lot.
#5 Bracket Images
Exposing for the landscape or using a Graduated Neutral Density filter isn’t always the best solution. Sometimes the dynamic range is too big, other times there’s a mountain or object projecting from the horizon. Whatever the reason might be, those basic solutions won’t always work.
That’s when you need to bracket the images and do some magic in post-processing. It’s a technique very similar to what we looked at when avoiding lens flare. The main difference is that instead of placing your fingers in front of the sun, you capture multiple images with different exposures. For example, you can capture one image exposed for the sky and one for the landscape.
This gives you two files that then need to be blended together in post-processing. You can put the darker exposure on top and paint back the landscape, or vice versa.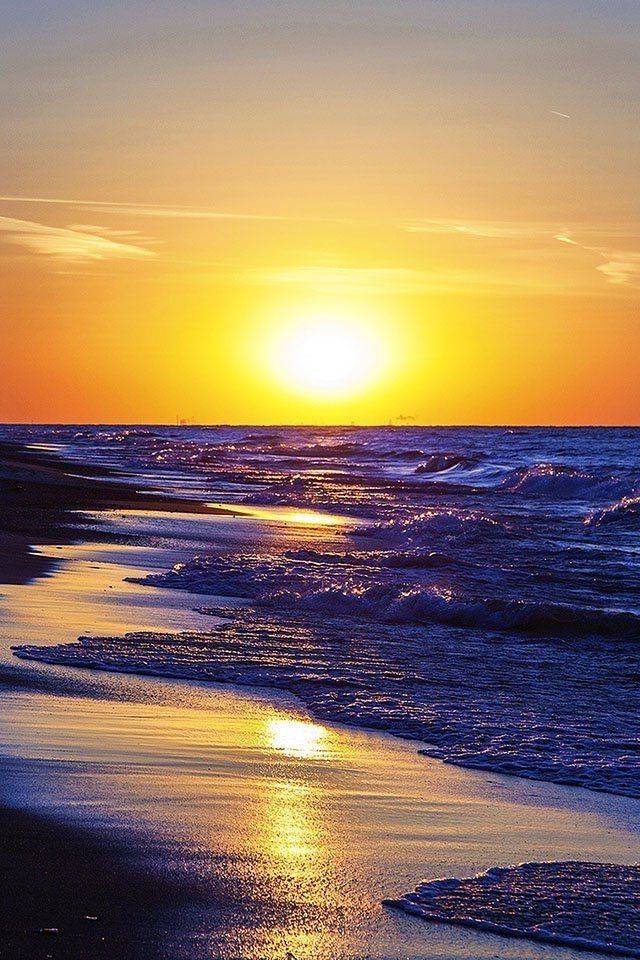 The result is an image that is correctly exposed in both the sky and foreground.
Now, this is a more advanced technique that requires a certain understanding of post-processing. Most importantly, it requires practice. When it’s done right, this technique is brilliant. When it’s done wrong, however, it looks bad.
Recommended Reading: Capture the Full Dynamic Range by Taking Multiple Exposures
I recommend capturing a few images with different exposures and using these to practice your blending in Photoshop. When you get comfortable with the basic methods, you can use Luminosity Masks to get even better results.
#6 Experiment with Shutter Speeds
The shutter speed is arguably the most important camera setting when it comes to the creative aspect of photography. Even slight adjustments can make a significant difference.
There’s no blueprint of what works best. It often comes down to personal preferences. Personally, I’m a fan of what water looks like when using a slow shutter speed. It makes less of a difference when there are no moving elements in the frame.
This tip is best explained with some visuals so let’s take a look at the same image shot with at different shutter speeds:
- Image 1 has a shutter speed of 1/25th second
- Image 2 has a shutter speed of 20 seconds
As you can see, the difference is significant. Personally, I find the image with a slower shutter speed much more interesting. It adds a new dimension and steps away from reality. The first photo is ok but feels a little more ordinary.
Experimenting with shutter speeds is still a big part of my workflow. While I have an idea of what an image will look like with a quick or slow shutter speed, I still set aside time to try different settings. Having Neutral Density filters is crucial for this.
#7 Use Different Focal Lengths
It’s not only the shutter speed you should experiment with; the focal length is just as important. I’ve written extensively about the importance of focal lengths before and have gone in-depth about this in my eBook ‘A Comprehensive Introduction to Landscape Photography‘ but it’s worth repeating.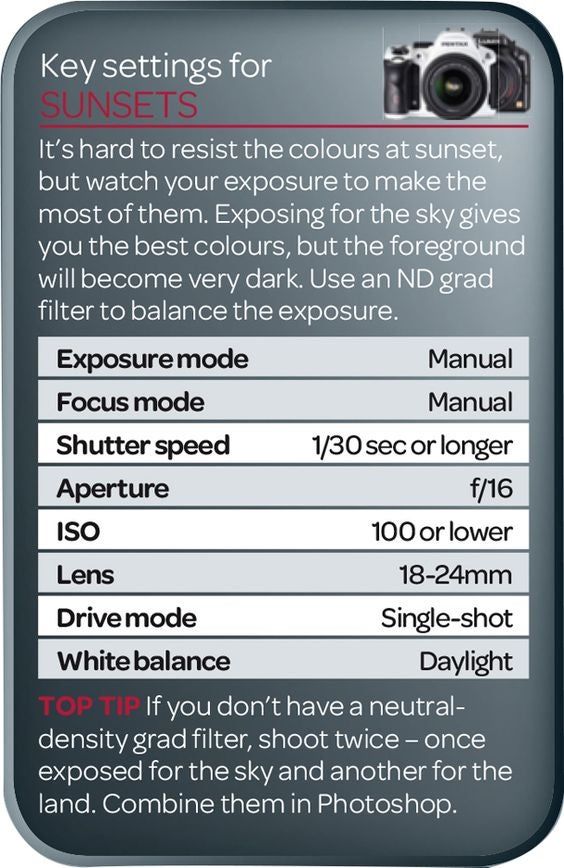
An image captured at 14mm will have a completely different meaning than one captured at 200mm, an image shot at 200mm will be different than one shot at 400mm.
Again, there’s no right or wrong. This is another aspect that comes down to personal preferences but it also depends on the scenery you’re photographing. Some situations benefit from a long focal length while others look better when shot at an ultra-wide angle.
Photographing a sunset at 200mm. Shutter Speed: 1/500, Aperture f/10, ISO125Having at least two lenses with different focal lengths is going to be a huge advantage in your development as a photographer. Not only will you be able to photograph a large variety of scenes but you’ll also learn to better observe your surroundings.
It wasn’t until I started photographing with a telezoom that I learned to look beyond the grand landscape and appreciate the smaller details it consists of.
#8 Focus on the Composition
All the tips shared above are important parts of improving your sunset photography but they make little difference unless the image has a good composition. This is the fundament of a good photo.
I know that it’s easy to get carried away when the sky is exploding in colors. In those moments, you forget about everything else. But it’s also in those moments you need to take a deep breath and put a little extra effort into your image. At least if you’re aiming to become a better photographer.
Incorporate the sky into a composition. Shutter Speed: 1 second, Aperture f/10, ISO80The most important part when setting up your composition for sunset photography is to incorporate the sky into the composition. Yes, that often means you include less of the sky. Less sky means more foreground, so it’s essential that you find a foreground and composition that guides the viewer through the frame.
A sky is there to complement the rest. It’s the icing on the cake!
Conclusion
Sunset photography is without a doubt popular amongst landscape photographers. The golden light and colorful skies look great in a photo. It’s also the perfect time to be outside and simply observe.
Capturing a great sunset photo doesn’t come without challenges. Dealing with the dynamic range, light, lens flare, and even the sun’s positioning can be frustrating. A few simple mistakes are enough to make an image less appealing.
Luckily, it doesn’t take that much extra effort to create a beautiful image. Implement the tips above and you’ll quickly see a difference. Are you ready to get back out there?
DID YOU ENJOY THE ARTICLE? THEN DON’T FORGET TO SHARE IT!
- More
- More
practical tips / Beginner photography / Photography lessons
Sunset and sunrise are magical times! It’s nice and easy to observe these phenomena, and even more so to take a beautiful picture.
For a photographer, sunset and dawn are “modes”, the period of the most interesting lighting. Photographers love and appreciate the feeling of a turning point, awakening or, conversely, “falling asleep” of nature, which can be shown in the pictures.
Shooting a sunset or sunrise is not an easy task, especially if the goal is to capture a truly beautiful and high-quality shot. In this article, we will give some tips that will be useful to any photographer who hunts for sunsets and sunrises.
NIKON D850 / 18.0-35.0 mm f/3.5-4.5 SETTINGS: ISO 100, F11, 1 s, 18.0 mm equiv.
Learn to work with dynamic range
There is a lack of dynamic range when, for example, we want to shoot a beautiful sunset over a forest edge, and the result is either a juicy sky and a completely black forest, or detailed details of a dark forest and a whitish, overexposed sky.
Dynamic range refers to the range of brightness tones displayed in a photo. The wider it is, the better the details in the dark and light areas of the frame will be worked out. The camera has a limited dynamic range and can only capture a strictly defined range of brightness in a photo. Therefore, when shooting sunset or dawn, no matter how we adjust the exposure settings, there will inevitably remain either too dark areas of the frame, devoid of detail, or white spots in place of the brightest areas. But in order for a sunrise or sunset landscape to turn out to be of high quality, expressive, we need details in both bright areas and dark areas. Different camera models are capable of perceiving a different range of brightness.
Nikon Z 7 with NIKKOR Z 14-30mm f/4 S
The Nikon D610 is one of the most affordable full-frame cameras on the market.
Nikon DSLRs and mirrorless cameras in the Nikon Z family are renowned for their wide dynamic range. RAW files obtained from cameras from this manufacturer make it possible to brighten shadowed areas with minimal loss and even “pull out” some details from overexposed areas. Perhaps the 45-megapixel full-frame cameras Nikon D850 and Nikon Z 7 have the widest dynamic range. But, to the credit of the manufacturer, some more affordable cameras are almost not far behind the flagships in this matter. For example, the Nikon D610 full-frame model, due to its large sensor, is able to provide excellent image sharpness and a wide dynamic range. And even the most affordable DSLR in the current line of cameras, the Nikon D3500, has a very good dynamic range. It also allows you to take great shots with the dawn or sunset sky, for which it is important to learn how to get the most out of your creative tool.
Prophotos.ru published articles detailing the dynamic range and methods for expanding it. Here we mention the most important thing: to get frames with the widest possible dynamic range, you should use the RAW format.
Shoot in RAW
The RAW format offers more processing flexibility. You can almost without loss in quality to adjust the brightness of the image (brighten dark areas in the photo) and white balance. It is the RAW format that will allow you to get the maximum dynamic range for your camera in the pictures. Master it!
Properly expose your shots
How the exposure is worked out will determine not only the brightness of the frame, but also the quality of detail in its light and dark areas. In the field, it is difficult to set the exposure perfectly: stress, rush, weather can interfere ... To play it safe, you can use exposure bracketing. This function is available in all Nikon devices, except for the 3xxx series. Its essence is that the camera takes frames in a row with different exposures - the user pre-adjusts their number and the exposure step between them. As a result, we get several shots with different brightness. At home, in a calm environment, you can choose from them the frame with the most successful exposure, where the maximum details are worked out. Or combine all these frames into one HDR image.
Use minimum ISO
Minimum ISO means not only the absence of digital noise in your photos, but also the widest dynamic range, which allows you to capture shots with detailed details in both bright and dark areas. The minimum ISO value for different camera models may vary - 64, 100, 200 ...
Perhaps the only reason to raise the ISO is the desire to get a faster shutter speed, which is necessary, for example, when shooting in strong wind. In order for the swaying branches and grass to remain clear, it is better to use shutter speeds no longer than 1/125 s, for which you will still have to raise the ISO during morning and evening shooting.
Use a tripod
Shooting at minimum ISO in low light, morning or evening, working with exposure bracketing - all this requires a secure camera fixation. If you try to take a picture in the evening at the minimum ISO, you will see that the shutter speed has become too long for handheld shooting (if it is longer than 1/60 of a second, you can already get blurry frames). That is, to get a high-quality photo, you have to put the camera on a tripod. If we talk about shooting with bracketing, then it is also more convenient to do it from a tripod, regardless of the shutter speed, so that all frames are taken from the same camera position.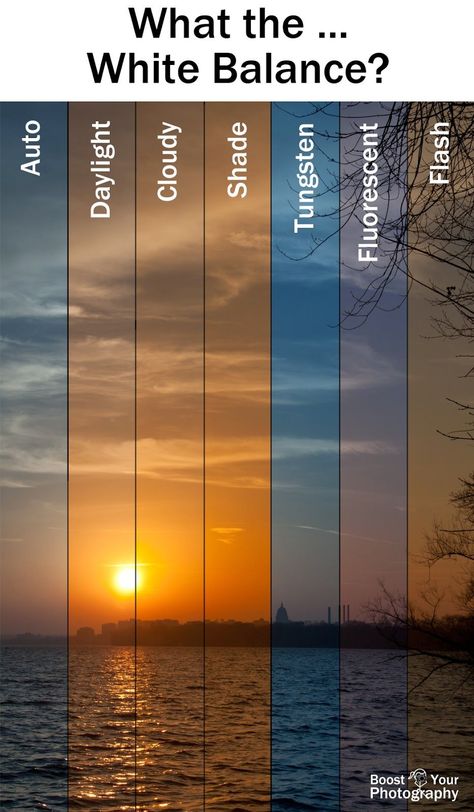 This is very useful if you decide to create a merged HDR image from a bracketed series - handheld shots may simply not come together. A tripod is a landscape and architecture photographer's best friend!
Use quality optics
No one likes to get "soapy" shots with low detail, especially when it comes to landscapes. In principle, modern "whale" lenses from the camera kit are quite suitable for shooting sunset or dawn shots. They are quite sharp, often providing a suitable viewing angle. But which lens to choose if the "whale" one no longer meets your needs?
In addition to sharpness, a lens for shooting sunrises and sunsets must also have reliable protection from bright oncoming light. Glare protection is a weak point of inexpensive optics and lenses of past generations, of which there are many on the secondary market. Therefore, if you are already going to change the “whale” lens for something else, then it is better to look at high-quality modern “native” optics.
Since sunsets and sunrises are most often shot at short focal lengths with a wide angle of view, a wide-angle lens is most suitable. It will allow you to take spectacular landscape shots with the sun in the frame. Most of the photos in this article were taken with the Nikon AF-S 18-35mm f/3.5-4.5G ED Nikkor lens. This is a compact, lightweight, relatively affordable and very sharp lens.
The Nikon AF-S 18-35mm f/3.5-4.5G ED Nikkor is a wide-angle zoom lens for full-frame cameras. 9The 0003
NIKKOR Z 14-30mm f/4 S is the latest wide-angle zoom lens for Nikon Z mirrorless cameras. Despite the widest angle of view, at 14mm the lens accepts standard threaded filters, which is important in landscape photography.
Get rid of unnecessary glare - wipe the lens, remove unnecessary filters
And a little more about glare. Of course, if you're shooting portraits or flowers in a flower bed, a beautiful lens flare can be a welcome special effect in your subject.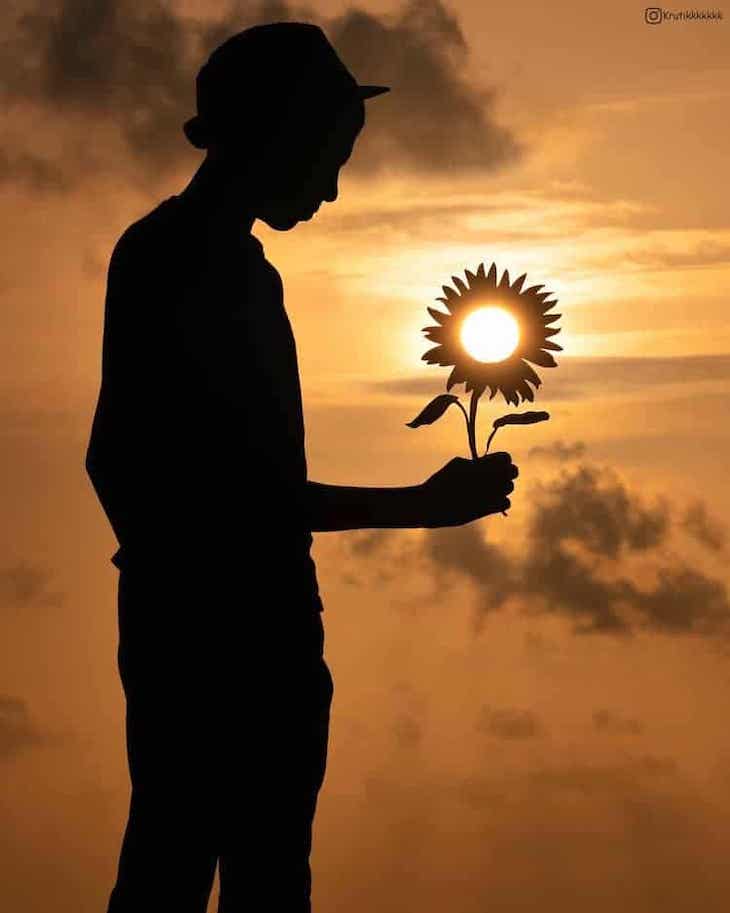 You can always add highlights if you want, but during shooting it should be possible to get a technically high-quality picture without them.
NIKON D850 / 18.0-35.0 mm f/3.5-4.5 SETTINGS: ISO 31, F16, 1/60s, 18.0mm equiv.
It is important to understand that if the sun is in the frame, then the lens hood will not help us in any way to get rid of glare. Keep in mind that extra glare will be created by all, even the highest quality, filters. Therefore, if there is a sun in the frame, it is better to remove all filters from the lens, including the protective one. Especially willing to catch "sunbeams" are inexpensive noname filters made in China. It is better not to use them at all - they will not give anything but problems with sharpness, color reproduction and the same glare.
Flare can also be caused by dirt on the front of the lens. Therefore, before shooting, make sure that it is absolutely clean.
NIKON D850 / 18.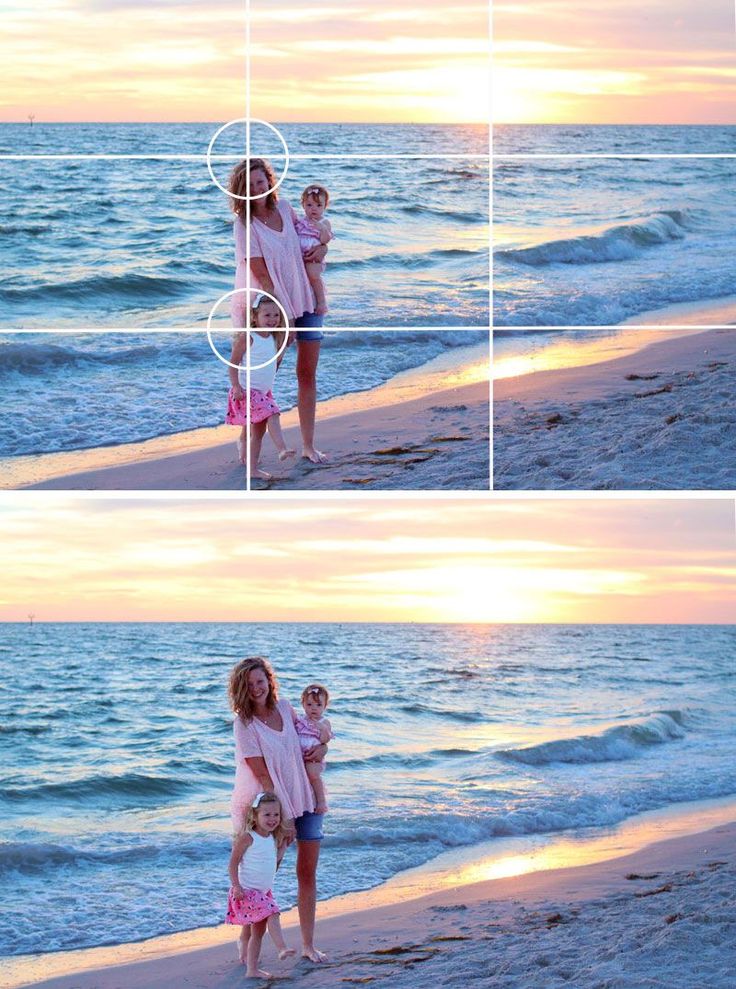 0-35.0 mm f/3.5-4.5 SETTINGS: ISO 100, F16, 1/250 s, 21.0 mm equiv.
There is one radical method of dealing with glare from the sun. Having installed the device on a tripod, we make a frame with a flare. Without changing the settings, we cover the sun in the frame with our own finger in front of the lens so that the photo shows a picture with your finger instead of the sun. It is necessary to find such a position of the finger that it covers only the sun, but not the landscape. So we get a second frame without glare, but with a finger. It remains only to combine these two frames into one in Adobe Photoshop. Note, however, that a photographer using high-quality optics with good glare protection is unlikely to have to resort to this method often.
Plan your shoot, find out exactly where the sunrise or sunset will be
Luck is the result of good preparation. To bring more good shots from the shooting, it is better to plan it in advance. Think over your route, and even better - mark it on the map. It is important to know in advance where, in fact, the sunrise or sunset will be. The trajectory of the Sun changes throughout the year - the place of sunset and dawn will alternate depending on the season. Modern technology helps in planning shootings. There are services that will show where the sun will be at one time or another. The most famous of them is The Photographer's Ephemeris. In addition, browsing the Internet for photos from your chosen location will be of great help. See how other photographers are shooting at this point. Get inspired and think about how to avoid banal shots.
NIKON D850 / 18.0-35.0 mm f/3.5-4.5 SETTINGS: ISO 64, F8, 1/2000 s, 35.0 mm equiv.
Use the weather forecast
In order not to literally sit in a puddle, check the weather forecast. After all, spectacular sunsets or sunrises do not happen every day. This event can be prevented by cloudy weather, rain. Keep in mind that a relatively accurate forecast can be obtained no more than 3-5 days in advance. The best option for sunrise or sunset photography is partly cloudy. In such weather, there will be beautiful clouds in the sky, which at the right time will be filled with sunset colors. Clear weather is also suitable for such shooting, but the sky may turn out to be “empty”, uninteresting.
If cloudy weather caught you on a trip, don't give up! In my practice, there were many cases when, even in the most hopeless situation, the sun still peeped through the clouds, giving an interesting light. To obtain the most objective data, it is better to use several sources of forecasts at once.
Scout the area. Look not only for views, but also foregrounds
Reconnaissance is an important part of shooting. It’s better to arrive early so that you have time to go around the shooting locations you have planned at a calm pace, even without filming anything. Look live at the planned shooting points. Perhaps, during the inspection, there will be more advantageous positions.
It is important to shoot not so much the sunset sky as the scenes against its background. The sky is just a backdrop for everything else. Show your author's vision, show the viewer something new, unusual, impressive.
For this, it is important to find not only beautiful views, but also spectacular foregrounds. This will help, firstly, to better convey the plot, atmosphere, mood in your frame. Secondly, a beautiful foreground is an opportunity to combine small details of the landscape (flowers, stones, textures) and, in fact, beautiful views in one frame. A tip that applies to any type of photography: first imagine your shot, and only then pick up the camera.
Shoot wide open for great depth of field and 'sun stars'
When it comes to landscape photography on a full-frame or DX-format camera, it's almost always better to shoot at apertures as wide as F8-14. At these values, the lens reaches the maximum level of detail both in the center and at the edges of the frame. And the depth of field increases, which, with proper focusing, will make both the background and foreground sharp.
In addition, at closed apertures, most lenses draw beautiful rays around the sun - "sun stars" (sunstars). These rays will definitely decorate your frame! Perhaps the only time you don't need to close your aperture is when you want to blur the foreground or background, because shooting with a shallow depth of field requires an open aperture.
NIKON D810 / 105.0 mm f/2.8 SETTINGS: ISO 64, F5, 1/8000 s, 105.0 mm equiv.
Look around! Often the most interesting things can happen on the side or behind your back.
When the daylight is close to the horizon, photographers often stop looking around altogether, taking only shots of the sun. But taking a high-quality picture with the sun in the frame is a technically difficult task. For many, instead of a beautiful sun, a large, irregularly shaped white spot is obtained. In order to avoid overexposure, again, you need to learn how to work with exposure and dynamic range.
Red glare on the mountain from the rising sun
And most importantly, at the moment of sunset or dawn, beauty is everywhere! Show attention to nature, and it will reward you with unusual pictures. So, on the other side of the sun, there may be beautifully illuminated clouds or mountains. And with side lighting, all the textures and volumes of the objects being shot will stand out perfectly.
Do not leave the shooting ahead of time
"Law of Meanness" — as soon as you leave the shooting location, the most spectacular moment of sunset or dawn will surely come. Therefore, even in the case of hopelessly cloudy weather, stay at the shooting location for some time. In the case of a successful light, leaving ahead of time is all the more not worth it. When shooting at sunset, after sunset, you are waiting for the “blue hour” and twilight. At this time, beautifully illuminated clouds will remain in the sky, and the overall tone of the lighting will shift towards cold shades. In these moments, you can take great pictures! And if you have a town or village in your shot with a couple of street lights, artificial lighting from them can be a great addition. When you shoot a cityscape, it is after sunset, when all the city lights turn on, that you will take the best shots. Patience is one of the most important qualities of a photographer. In the fight for beautiful photos, the most patient win.
How to photograph sunsets: tips from the pros
Summer is the perfect time to capture sunsets. And although sunsets are not taken only by the lazy, truly magical shots are obtained from a few. What tricks will make your shots brighter, right now in our material.
Photo by Yan L
#1. Choose a location in advance. To understand where the sun will set (over the sea or over the mountains), you need to come to the place the day before the shooting. But if this is an auto tour, and you are going to places you have never been before, you can use the sunsurveyor.com program, which shows how the sun moves around the globe and at each specific point on the earth. Arrive at the location a couple of hours before the shoot to pick a good shooting point and set up your tripod before the sun goes down.
#2. Check out the weather forecast. The setting sun gives amazing light and color. It is better that there is no “softbox” of clouds in the sky. Here it will be redundant. Choose either a little overcast or clear skies.
#3. Clean up your tech. Wipe down the lens and check that there are no drops or dust particles left on it, which can turn the post-processing process into a nightmare, or even nullify all efforts to create a masterpiece.
Setting tips
#4. Cover your diaphragm. Using the widest aperture (eg f/22 or f/32) will give a crisp ray and star effect. There will be exactly as many rays as there are petals in the aperture of your lens.
Photo by Chip Phillips
#5. Underexpose the frame. Darken the frame will make the colors more saturated and deep. You can darken the frame in different ways: set negative exposure values, or reduce the shutter speed, or increase the aperture value - this can be done in priorities or in manual mode.
#6. Switch modes. When the sun is still in the sky, shoot with aperture priority to compensate for exposure. And when the sun goes down, switch to manual mode, as the built-in exposure meter does not always work correctly in low light conditions.
#7. Adjust the white balance. Select the Shadow mode and you'll get warm golden tones even if the sunset is dull and unremarkable.
#8. Shoot HDR. Shooting several frames with different exposures and then gluing these frames together in Photoshop helps to achieve extraordinary brilliance of the sunset. When there is a lot of contrast in nature (bright sunset sky and dull earth), the camera does not understand how to properly display the image. By exposing first the sky, and then the ground or water, and then gluing these frames together, you can get a rich landscape with equally well-developed sections of the frame.
Photo by Paul Emmings Photography
#9.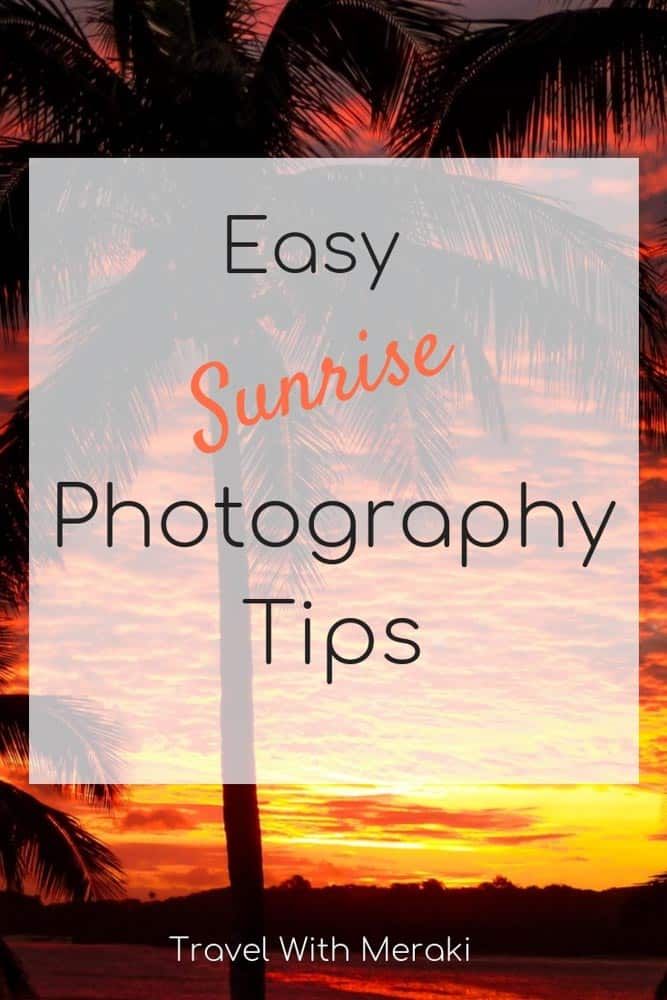 Use the RAW format. Unlike JPEG, RAW forgives you for minor errors that can still be corrected during processing. True, it will take time to correct them. But if you're shooting in JPEG, you won't have a chance to pull out the colors and remove the noise.
#10. Don't bump up the ISO. At sunset, the light becomes less than at noon, but this is not a reason to increase the ISO above 800. Otherwise, digital noise will appear in the photo, which will be difficult to correct in the editor if you shot not in RAW. However, this does not apply to professional cameras with full-format sensors, which cope well with noise even at ISO 3200.
Photo by Aleksandr Pietrosian
#11. Use a histogram. Different light conditions must be taken into account. When the sun is shining brightly, the image on the camera screen may appear darker than it actually is. But when the sun has set below the horizon, the picture may appear brighter than it really is. Therefore, it is better not to trust the screen, but to use the histogram.
#12. Change your shooting style. If you still shoot in JPEG format, you must use picture style (Canon) or picture control (Nikon) landscape mode. It will allow you to get brighter, more contrasting and saturated pictures.
Photography Tips
#13. Use a tripod. If you want to use a slower shutter speed to capture the movement of the water or let more light into the camera's sensor, you'll need a tripod. Sunset landscapes are best shot with a tripod.
#14. Level the horizon. A photo of a sunset usually conveys calmness and tranquility, there is no place for a littered horizon. Therefore, use a special tripod bubble level and use the bubble as a guide when setting up the tripod on the ground.
Photo by Haakon Nygaard
#15.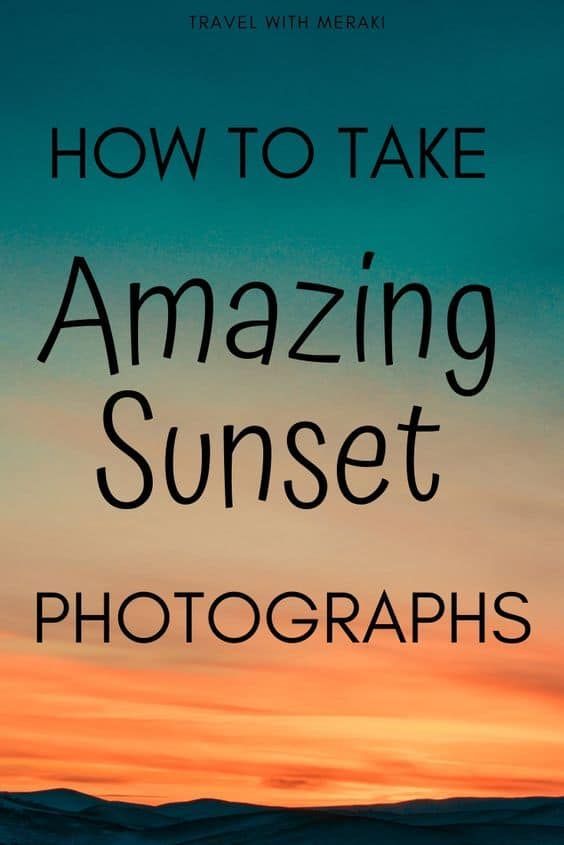 Don't use filters. A polarizing filter will not saturate sunset colors. Remove even UV filters, because an additional flat, even ultra-thin piece of glass, reduces saturation. When photographing a sunset, this is unacceptable.
#16. Take off your glasses. Even if you have poor eyesight and wear tinted spectacles. Otherwise, you will feel that the pictures are getting darker and darker, you will not be able to clearly set the exposure.
#17. Grab a reflector. To take a portrait against a sunset, you need to light up your face. This can be done as a reflector so that the face does not fall into the shadow.
#18. Use an on-camera flash with a synchronizer. You should not use the built-in flash, so as not to kill the volume in the frame. Therefore, when shooting a portrait at sunset, it is best to remove the flash from the camera and insert a synchronizer into the hot shoe.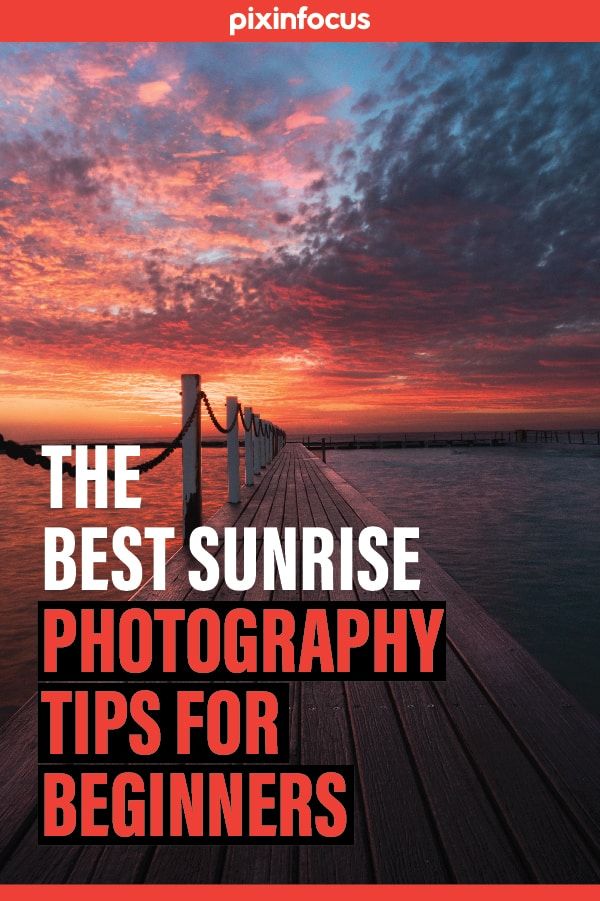 Then you can use the flash as a side light, which will draw volumes and help you make a beautiful portrait in the rays of the setting sun.
#19. Take a portable light. An additional constant light source will help illuminate the model when the sun sets below the horizon. This is not a must-have at sunset, but you will find it in cloudy weather.
#20. Use different lenses. If you want the sun and everything in its rays to be large, use a telephoto lens. If you want to convey scale and take all the space into the frame, take a wide-angle lens.
Composition tips
#21. Do not place the horizon line in the middle of the frame. If the sunset is especially beautiful, give the sky two thirds of the frame, and if there are not enough colors, then place the horizon in the upper third, devoting more attention to the ground.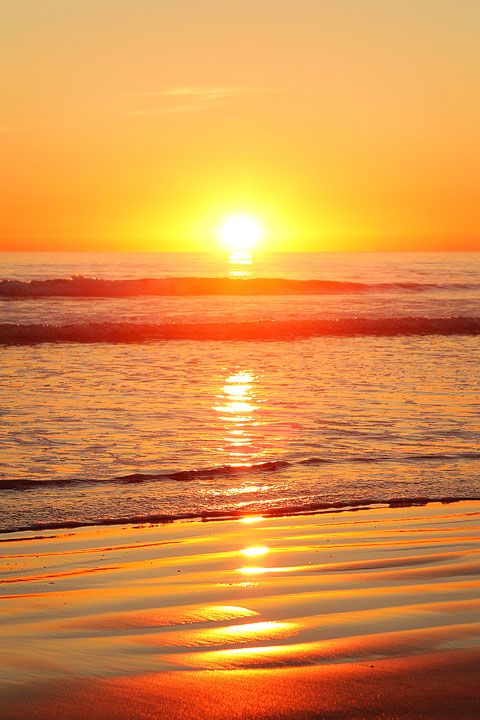
#22. Don't cut off your head. When photographing people against a sunset, make sure that the horizon line is located in the area of the chest or abdomen, but does not pass along the person's neck.
#23. Don't focus on the sun. Don't just focus on the sun, there's so much going on at sunset! Look for cars, houses, shop windows, people, animals that can become the heroes of your sunset photos.
#24. Create volume at the expense of the foreground. Just find something interesting and include the subject in the composition. Spikelets, flowers or leaves in the foreground will add depth to the frame.
Photo by Salim Waguila
#25. Create silhouettes in the foreground. A good silhouette will be obtained if the elements of the plot have a recognizable shape. Just make sure that the black silhouette does not take up too much of the frame.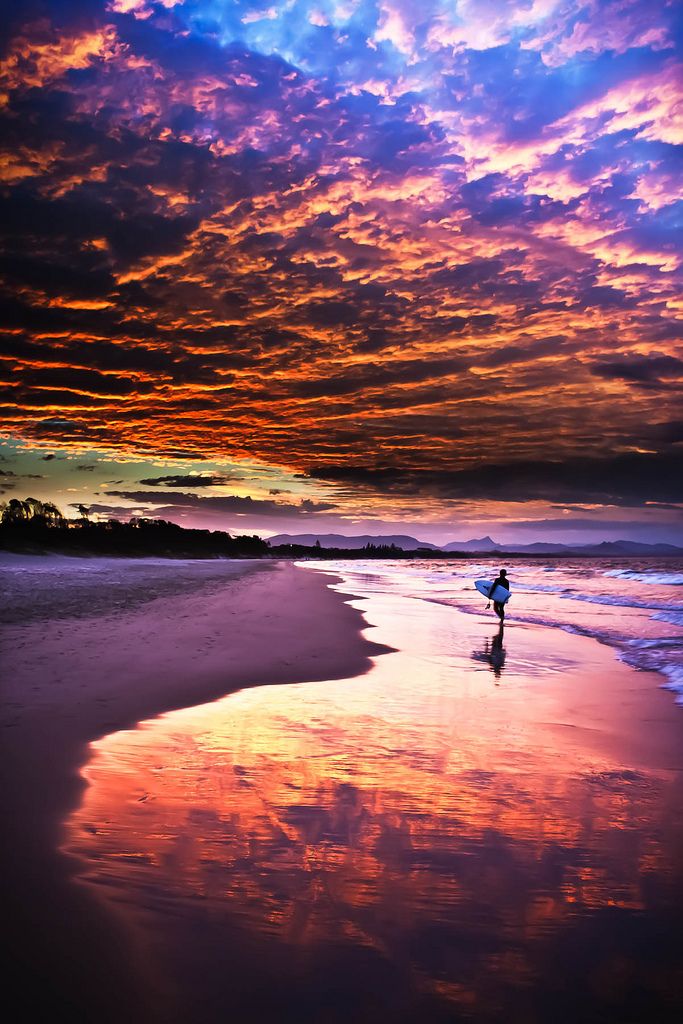
Photo by Dominik Astrodi
#26. Wait for the right clouds. The ideal conditions for sunset photography are partly cloudy. The clouds in the sky will be illuminated by the rays of the setting sun and will serve as a great addition to the plot.
Photo by Elia Locardi
#27. Keep focus at one third of the bottom of the frame. Don't get carried away focusing on the clouds.
#28. Look around! Sometimes the scenery behind you can be better than the sunset itself. But it's easy to miss because photographers are usually too busy with the sunset. The sunset is good because it colors the everyday scenes of life in a warm, light and amazingly beautiful light.
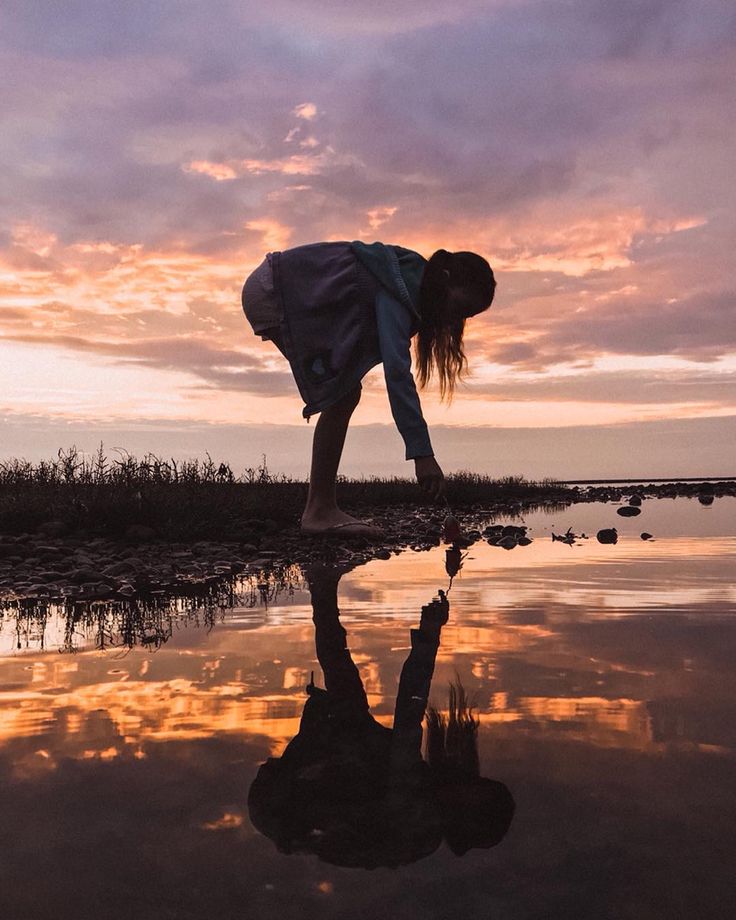
#29. Look for reflections. Glass showcases, car windows, puddles - all this can give wonderful reflections.