Bad quality pictures
Fix Low Quality Pictures in Efficient Ways [2022]
Fix low quality picture
Check the solutions to fix low quality picture with clicks.
Try It Free
Try It Free
Capturing photos holds a distinctive beauty on its own. Images can hold great significance in our everyday lives. Thus, it is surely a bummer when your pictures do not come out as expected. Images that retain low quality come off as unappealing and unpleasant. Therefore, it is essential to maintain the quality of pictures taken to procure impressive results.
Here, we will provide you with all the rudimentary information related to image quality and how to get the most out of it. You will also know"how to fix low quality photos"using simple tips and techniques. So without further ado, let's get started.
In this article
01 How to Fix Picture Quality?
02 What is Image Quality?
03 What Factors may Cause Low Quality Pictures?
04 Tips to Avoid Low Quality Photos
Part 1: How to Fix Picture Quality
The process to"fix low quality images"is a relatively simple task if you are aware of the right methods. Here, we have compiled the best ways to let you know"how to fix a bad quality picture"easily.
Method 1: Use Photoshop
Photoshop is a tool that effectively improves almost all aspects of your image, including the picture quality. It has several options and utilities that let you"fix image quality"quite effectively. To know"how to fix bad-quality pictures in Photoshop, follow the steps given below.
1. Launch Photoshop and open the image.
2. Select the option "Filter and Blur."
3. Choose the option 'Gaussian Blur' and slide to obtain a suitable range.
4. Click on OK.
5. Then, go to the 'Filter and Sharpen' option.
6. Select 'Unsharp."
7. Slide until your required results are produced, and click on OK.
8. Now go to 'File' and save the image.
If this method doesn't work, you can try another way to fix the quality of an image. Here is how.
1. Launch Photoshop on your device.
2. Go to 'File' and click on 'Open' to open your file.
3. Right-click on the image.
4. From the drop-down menu that appears, choose "Layer" to create a new layer.
5. Locate "Blending Options" from the menu on top and select the option "Soft Light."
6. Go to "Filter and Noise."
7. Select 'Despeckle' and choose a suitable level.
8. Next, find a preferable level of brightness and contrast.
9. Lastly, save the image.
Method 2: Fix low quality Photos by Using Repairit Photo Repair Tool
You can quickly fix your pixelated, corrupted, or otherwise damaged images using the Wondershare Repairit. It helps you get rid of several issues in your file, including repairing files. The program has a high repair rate and is also compatible with both Windows and Mac. The following are its main features:
Wondershare Repairit
Try It Free Try It Free
5,481,435 people have downloaded it.
-
Repair damaged photos with all levels of corruption, such as grainy photos, dark photos, pixelated photos, faded photos, etc.
-
Repair images of diverse formats, such as JPG, JPEG, PNG, CR3, CR2, NEF, NRW, etc.
-
Repair critically damaged or corrupted photos available on SD cards, phones, cameras, USB flash drives, and more, as well as incomplete photo parts.
-
Compatible with Windows PC, Mac OS, and supports PC to mobile transferring/sharing.
Here is how you can use the tool:
Step 1: Target the Corrupted File
After launching the program, you need to add your desired file by clicking on the 'Add File' button.
Step 2: Begin Repairing
Click on 'Repair' to let the program start the recovery process. Repaired images can also be previewed.
Step 3: Save the Image
The final step is to save the image to your desired location on your device. You can do so by clicking on the 'Save Repaired File' button.
Method 3: Try Paint.net
Another alternative to fixing the image quality is paint.net. To adjust the quality of your image using this free tool, proceed as below.
1. Open the image in paint.net.
2. Go to the 'Effects' tab.
3. Go to the 'Blur' option.
4. Choose Gaussian blur and slide to reduce pixelation.
5. From the Effects tab, go to "Photo" and then choose "Sharpen."
6. Use the slider to get a suitable level.
7. Save the image, and you are all done.
Part 2: What is Image Quality?
Image quality is a measure of the excellence of an image. It signifies how fine and sharp an image appears to be. Generally, there are two methods in which image quality can be assessed: objectively and subjectively.
Subjective techniques signify a viewer evaluating the quality and superiority of an image. Whereas objective methods define set standards by which images can be assessed. Resolution of an image is a term commonly used for defining the quality of an image.
Resolution symbolizes the number of pixels that are viewed on a set area of the screen or on paper. Generally, image resolution is measured in PPI (pixels per inch). A higher resolution signifies the higher quality of the image produced. It is addressed in the format Width x Height.
Bonus: Are you ready for photo shooting, editing, managing or sharing? Do you have a question about what makes your photo corrupted? If the answer is yes, let's check your intimate guard to photos with any corruption scenarios - Photo Corrupted? Let's Rescue Them Right Now!
Part 3: What Factors may Cause low quality Pictures?
Before knowing"how to fix a low quality picture, it is necessary to register its causes. Several reasons can produce a low quality image. A few of them are listed below.
-
Resizing the Image
One of the most common reasons that cause pixelation of images is resizing. When you try to resize a photo without proper work, it might be rendered low on quality. Particularly when smaller images are enlarged, they can get blurry and of low quality.
-
Unfocused Shots
In often cases, when images are taken, the lens is not properly focused on the subject. Hence, images get out of focus, blurry, and pixelated. All of this can significantly reduce the quality of the image.
-
Camera Errors
The device or lens you are using to take a picture on may be damaged. Due to this, image quality can be significantly lowered. To"fix the quality of the photo,"you will need to fix your device first. By the way, we have an article tell you the most common digital camera errors and how to fix them.
A possible reason for your images being low in quality might be that the file format is not supported by the application that is being used to view the file. Hence, file quality is reduced, and you encounter pixelation or blurriness.
-
Shaky Camera
Shaky camerawork often produces results that are blurred and pixelated. Images of low quality are produced when a camera is not stable. If you wish to"fix the quality of a picture,"you can start by stabilizing your device.
Part 4: Tips to Avoid low quality Photos
There are specific ways by which you can avoid low quality images. Following these will certainly help you in improving your photo quality to a great extent.
-
Adjust ISO
A high ISO can cause grainy and pixelated images. Keep your ISO to a minimum to take better quality pictures.
Lighting matters a lot when perfecting an image. You should adjust the lighting to maximize the quality of your image.
Using a tripod or monopod to stabilize your camera can significantly help to"fix image quality.
-
Capture in RAW
The good idea is to capture your images in RAW formats, which can reduce damage due to compression and editing, avoiding bad quality.
After taking the picture, it is essential to edit and fix various aspects such as sharpness and exposure, to bring out the best in your photo.
Conclusion
Image quality is of prime importance when your work's value is in question. With the help of the above-mentioned tips and techniques, you now hopefully know"how to fix picture quality" quickly. Try these methods the next time you need to"fix picture quality"and produce discernable results in record time.
Try It Free
Try It Free
How to Fix Bad-quality Photo? [Full Guide]
home_iconCreated with Sketch.Home > Repair Files > How to Fix Bad-quality Photo?
Heather Marston
May 27, 2022 (Updated: July 29, 2022)
1 min read
0 Count
Fixing bad-quality photos is important to focus on if you want your picture looks better. Low-quality images are unpleasant to look at, and they can detract from the value of this experience, especially if we are talking about memories.
It brings the question, is it possible to fix bad-quality pictures? The answer is definitely yes, and we are here to guide you through the process of how you can do it here. Let's move on now!
- Part 1: What Causes Bad Quality Photos?
- Part 2: How to Fix Bad Quality Photos? [2 Solutions]
- 2.1. Repair Bad Quality Photos with Professional Repair Tool
- 2.2. Fix Bad Quality Photos in Photoshop
- Bonus Tips: How to Avoid Bad Quality Photos?
Part 1: What Causes Bad Quality Photos?
Before we move to get the fixing solutions, we must know what causes bad quality photos. There are many different reasons. One of the most common reasons is you resized the image, and when you do that without any adequate work, it might end up of low quality. Another reason will be unfocused shots, as well as camera errors. Some cameras can end up with errors where the software is not working as expected.
Part 2: How to Fix Bad Quality Photos [2 Solutions]?
01 Repair Bad Quality Photos with Professional Repair Tool
If you want to ensure everything is working the way you want, a great idea is to take your time is find a proper repair tool. iMyFone UltraRepair is a professional tool to help you fix any bad-quality pictures! In addition, it can help you repair any corrupted documents, videos, or pictures, and it does that in just a couple of steps! What efficient it is!
Try It Free Try It Free
Follow the three steps below to fix the bad quality photos:Step 1. Download and install UltraRepair on your PC and choose Photo Repair option from the panel situated on the left. Add the desired photo on the screen.
Step 2.Click on the Repair button until the process is finished. You will be notified when everything is completed.
Step 3.Then you can save the repaired photos anywhere you want on your device.
Try It Free Try It Free
02 Fix Bad Quality Photos in Photoshop
If you want to fix bad-quality pictures, Photoshop can be a great option! It’s a paid tool that makes it easy to enhance images and make them easier to work on, among many others. With its help, you will be able to fix the image quality efficiently!
See how to fix bad quality picture with Photoshop:Step 1.Launching Photoshop and open the image you want to repair. Then select the Filter and Blur option.
Step 2.Choose the option Gaussian Blur, and then slide to get the right range. Press OK.
Step 3.Go to the Filter and Sharpen option, and select the Unsharp tool then slide until you have the desired results.
Step 4.Lastly, go to the File menu and save your image.
Bonus Tips: How to Avoid Bad Quality Photos?
1 Reduce ISO
Generally, when the ISO value is very high, you will end up with problems, and the quality can get lowered quite a bit. So lower the ISO levels as much as you can.
2 Right Exposure
Experimenting with the exposure levels is another great thing you can do, it helps save time, plus you will find it easier to prevent bad quality images from appearing.
3 Shoot Stably
We can use a monopod or a tripod for stability, since you will have a much better stability if you do it right.
4Edit Properly
You can edit various things like exposure and sharpness. These will help you remove any issues. Use that as an advantage, and you will be much happier with the results in the end.
Conclusion
We recommend using these tips and tricks above if you want to fix a bad-quality picture. If you want to save more time, just try UltraRepair, it can help you fix it automatically, you can click the free trial version below to have a try now!
Try It Free Try It Free
(Click to rate this post)
Generally rated 5 (256 participated)
Rated successfully!
You have already rated this article, please do not repeat scoring!
Please enable JavaScript to view the comments powered by Disqus.
How to improve photo quality | Movavi Photo Enhancer
Do you want to improve the quality of an old photo or make the colors in your photo more saturated? Or maybe you need to sharpen your scanned image? In all these cases, Picverse Photo Editor will help you out, which is great for complex photo enhancement. With it, you can easily change various image settings (brightness, contrast, sharpness, etc.), as well as improve your photo with just one click.
Move the slider to see how image enhancement works in Picverse Photo Editor
Below you can read how to achieve this effect yourself, as well as read the answers to frequently asked questions. Click on the link to go to the relevant section.
- How to improve photo quality with Picverse Photo Editor
- FAQ
How to improve photo quality with Picverse Photo Editor
Thanks to a simple and clear interface in Russian, even an inexperienced user can improve any photo in a matter of minutes. The program works with all popular image formats (JPG, PNG, TIFF, BMP, etc.), as well as high resolution photos. All you need is to download the installation file and follow the instructions below, which is suitable for both Windows and Mac versions of Photo Editor.
Free download
Free download
Step 1.
 Install the program
 Open the downloaded file and follow the instructions on the computer screen. After the installation is complete, launch Picverse Photo Editor by double-clicking on the program icon.
Step 2. Load the image into Photo Editor
Click Open Photo and select the image you want to edit, or simply drag and drop the file into the Photo Editor window.
Step 3: Enhance the Image
Auto Correction
Using the tools on the Correction tab, you can correct the contrast and brightness of colors in a photo, as well as adjust individual parameters manually. But you can let the program improve the image on its own, to do this, click the button Automatically . Thus, you will make the picture more juicy and saturated in one click.
Noise Removal
Getting rid of pixel noise is sometimes enough to improve image quality. The photo editor will quickly identify defective areas and replace them with pixels that match in color.
Go to tab Correction , select option Manual . Then click on Denoise and set the desired value using the slider . When you get the correct result, click Apply .
White balance
If the white balance setting is incorrect, the color reproduction of photos is distorted: extra yellow, blue or green tints appear. Picverse Photo Editor makes it easy to restore the natural colors of a photo by automatically adjusting the white balance. Open tab Adjustment and use the Eyedropper tool to select white or the area closest to white in the photo. The picture will immediately acquire a natural color gamut.
Manual correction
To fine-tune individual image parameters, move the sliders in the Correction tab to the left or right, or set the desired values in the input fields to the right of each scale. For example, using parameter Temperature you can give the image a warm or cold tint. Increasing Contrast will increase the difference between the lightest and darkest pixels in the photo, while increasing Sharpness will help sharpen blurry lines and outlines. Parameter Details will add sharpness to small details in the image.
Exposure will allow you to adjust the light intensity in the photo. Play with the settings to increase or decrease the amount of light in the image. Using this option, you can try to "save" the picture if the original photo turned out to be overexposed or, conversely, too dark.
Step 4. Save the enhanced photo
Click Save in the upper right corner of the program window and select Save from the drop-down list. Select a folder and format (JPEG is recommended to save hard disk space), and then save the edited image.
Excellent! You no longer have to put up with poor image quality, because now you know how to improve a photo in Picverse Photo Editor in minutes!
Picverse Photo Editor
Quality photo editing is easy!
*The free version of Movavi Picverse Photo Editor has the following restrictions: saving up to 10 images, a watermark on saved photos, and prohibiting taking screenshots while working in the program. More
More
Frequently Asked Questions
How to adjust photo quality on your phone?
Modern smartphones have a built-in photo editing function, so if the picture is not very good, you can try to fix it. Go to your gallery and open the desired photo, then press the image edit button: on Android devices, this can be an icon with with a magic wand or with a pencil , and on the iPhone with a button Edit . Here you can crop the excess, adjust the tilt of the photo, its brightness and contrast, change the white balance and much more.
How to compress photos with Paint?
The Paint editor can reduce the size of a photo, and therefore its “weight” – this can be useful, for example, when sending by e-mail. Open image in editor, press button Resize and Skew and enter a new photo resolution that is smaller than the previous one. Then press OK and save the result.
Photo quality will deteriorate after being compressed in Paint. If this does not suit you, try editing the image in Picverse Photo Editor. The functionality of this program will allow you to minimize the loss of quality during compression. You can read the relevant instructions at the link below.
How to compress a photo
Other useful instructions
Still have questions?
If you cannot find the answer to your question, please contact our support team.
Watch video instructions
We also recommend
Screen Recorder
Reliable and efficient HD screen recording software. Capture videos from programs, live streams and even Skype conversations and save clips in any popular format.
Video Editor Plus
Handy and powerful video editing software that provides everything you need to create cool videos with special effects, music, titles and transitions.
Subscribe to the newsletter about discounts and promotions
Your email
Your email address is incorrect.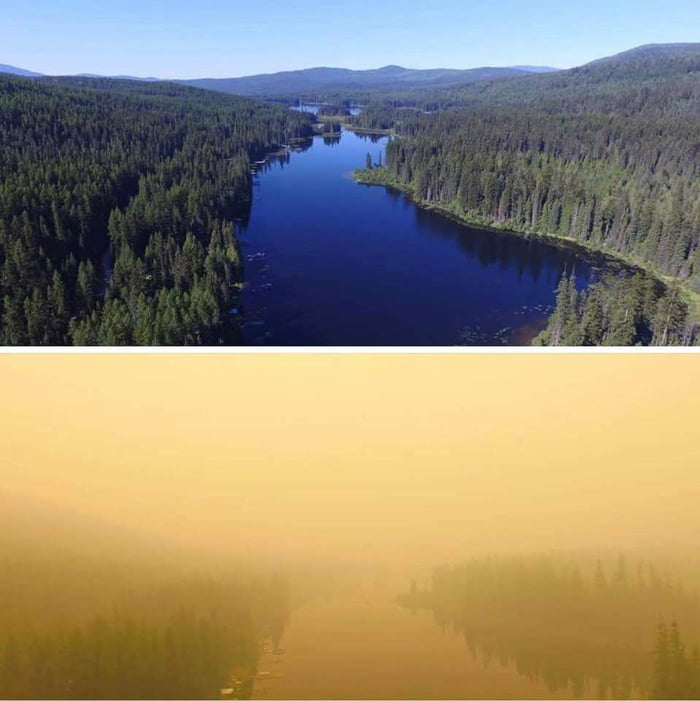 Please check your email address and try again.
Subscribe
By subscribing to the newsletter, you agree to receive promotional information from us by email and to the processing of personal data in accordance with the Movavi Privacy Policy. You further acknowledge that you are free to express such consent. Read the Privacy Policy.
Please confirm your consent to the processing of data in order to subscribe.
The email address entered is incorrect. Please check your email address and try again.
Your e-mail address has been successfully added. Thank you for your interest!
Subscribe
ten services — Services on vc.ru
ee0ac1a42b1a","title":"5 \u0448\u0430\u0433\u043e\u0432 \u2014 \u0438 \u0432\u044b \u0443\u0436\u0435 \u043f\u0440\u043e\u0434\u041\u045\ u043d\u0430 \u00ab\u042f\u043d\u0434\u0435\u043a\u0441 \u041c\u0430\u0440\u043a\u0435\u0442\u0435\u00bb","buttonText":"\u0423\u437\u043d\ \u044c","imageUuid":"5ba79695-2be9-5bb9-b913-6f12da0c8995","isPaidAndBannersEnabled":false}
views
Zyro AI Image Upscaler
Zyro's completely free service allows you to process photos using deep convolutional neural networks. The site does not allow you to choose the image enhancement settings yourself and automatically doubles the quality.
Zyro AI Image Upscaler
Waifu2x
Free online service to improve the quality of not only photos, but also drawings. Software based on deep convolutional neural networks allows you to remove noise and double the size of images without losing quality. When processing a picture, you are prompted to select its type: drawing or photograph.
Waifu2x
Let's Enhance
The online service improves the quality of photos up to 16 times using artificial intelligence technologies. When processing images, Let's Enhance corrects their color and tone, and also removes noise. You can upload several images to the site at once and start processing them simultaneously.
The developers claim that Let's Enhance is based on deep convolutional neural networks. In the free version, users can improve the quality of five photos up to four times. Subscription for unlimited processing of 100 images costs $9per month, for processing 300 photos you will have to pay $24, and for 500 - $34.
Let's Enhance
AI Image Enlarger
The site provides users with six AI-based online tools:
- to improve quality up to eight times;
- sharpening;
- noise removal;
- color and contrast enhancements;
- face retouching;
- background removal.
The free version of AI Image Enlarger allows you to process up to eight images per month. The premium subscription costs $9, the corporate package is $19.
AI Image Enlarger
Deep Image
An online service that can process several images at once. In the free version, the site allows you to improve the quality of five shots up to four times.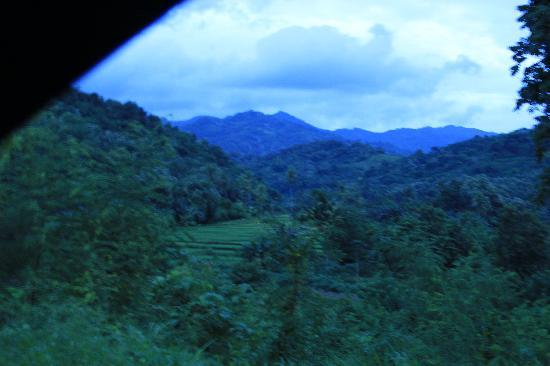 A monthly subscription to process 100 images will cost the user $9, for 500 and 1000 - at $39 and $69 respectively.
Post-processed images are available in 6250 x 4000 px, 12020 x 2080 px and 5000 x 5000 px resolutions.
Deep Image
Vance AI Image Enlarger
The developers claim that Image Enlarger can improve image quality with AI up to eight times without quality loss. All photos uploaded to the site are deleted 24 hours after processing.
In the service you can improve the quality of three photos for free. Subscription costs $9.9 for 200 images and $19.9 for 500 images.
Vance AI Image Enlarger
icons8 AI Image Upscaler
The site enlarges photos by two to four times and provides access to its API for $250 per month. The service can be used for free to process three images, then you will have to pay $0.2 per image. For $9 you can process 100 images per month, for $99 you can process an unlimited number of photos.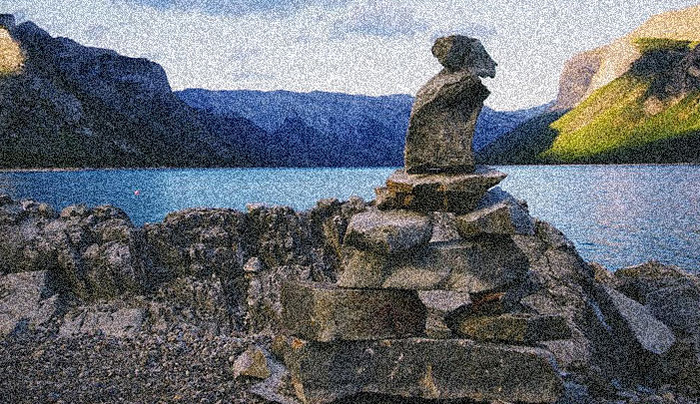
icons8 AI allows you to enlarge photos up to 3000x3000 px resolution.
icons8 AI Image Upscaler
Crea8tiveAI Photo Refiner
The online service offers to improve the quality of images up to 16 times by increasing the pixels vertically and horizontally by four times using AI. Photo Refiner also removes noise from photos. The service takes 10 seconds to process the images.
Single photo enhancements in Photo Refiner cost $4.99. The service has several subscription options:
- 200 shots per month for $48;
- 500 shots per month for $98;
- 3,000 shots per month for $297;
- 5,000 shots per month for $450;
- 10 thousand pictures per month for $8000.
By subscribing, the user will have access to other image processing tools from Crea8tiveAI.
Crea8tive AI
Upscale Pics
This online service allows you to enlarge images up to eight times, remove noise from photos, and compress images for free.