Fast action photography
How To Shoot Fast Action Shots – SLR Photography Guide
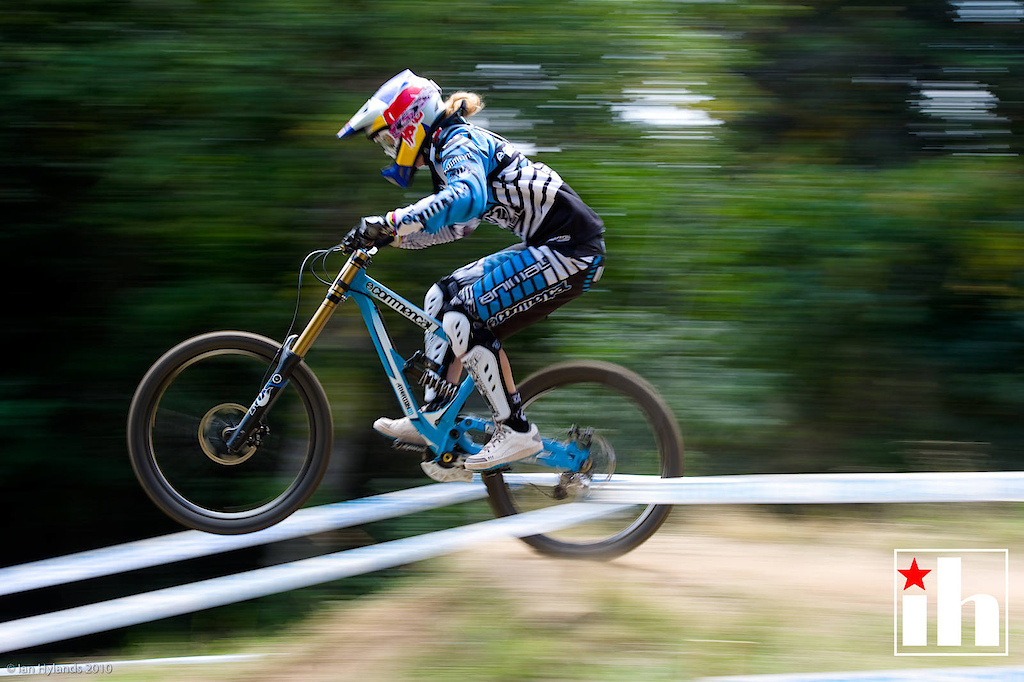
Here are my best tips to shoot fast action shots, like the image of a go-cart racer shown below. Don’t let this photo fool you, this kid was flying!
To capture images like this that seem frozen in a split second, you need to understand the basics of shutter speed, aperture and ISO. Manipulating any or all three settings, will allow you to shoot fast action perfectly.
Beginners are always surprised when I say three sports photographers could all stand next to each other capturing this shot and each would most likely choose different camera modes! That is the advantage of using a DSLR camera. There are literally several techniques for capturing any shot you’ve ever taken.
For example, to shoot faster you need to lower your aperture f-number, increase your ISO number, or adjust both settings. This in turn will allow for a faster shutter speed. It is possible to achieve this in any of the manual modes, whether it be aperture or shutter speed priority, mode P (Programmed Auto) or fully manual.
How to shoot fast action in aperture mode
To shoot fast action in aperture mode, firstly choose the lowest aperture f-number your lens will allow. The lower the aperture f-number, the faster your camera will shoot.
Take a few test shots. If you find your camera is still shooting slower than your subject is moving, increase your ISO number 100 at a time until you find the perfect speed. For those who are unfamiliar with aperture mode, we recommend reading this article: What is aperture mode.
How to shoot fast action in shutter priority
Shutter priority allows you to choose the speed, then the camera automatically adjusts your aperture to suit. The faster you set your shutter speed, the lower your camera will set the aperture. However, there is a minimum aperture each lens can go. When it’s hit the lowest f-number you then need to adjust the ISO setting or you may end up with an image that is too dark.
Some camera models adjust the ISO number automatically to suit the shutter speed, others don’t.
If for example, you have your camera set to shutter priority and you’ve chosen a fast 1/800th of a second speed and you find the image is too dark, now is the time to increase the ISO number 100 at a time until you are seeing a nice exposure.
Note, if you have no idea what shutter priority is, I recommend reading: How to use shutter priority.
How to shoot fast action in mode P (Programmed Auto)
Mode P on your digital camera allows you to set the ISO number and the camera sets both the aperture and shutter speed automatically to suit. Hence all you need to worry about is setting a fast ISO. The higher the ISO number, the faster your camera will shoot.
Note also the higher you set your ISO the more chances of seeing grain / noise in your image. It’s important to experiment with ISO settings to know how high you are willing to go, yet still be happy with the image quality.
You can read more about ISO and program mode at: What is ISO on your digital camera.
How to shoot fast action in manual mode
Manual mode allows you as the photographer to choose all three settings yourself. The camera doesn’t make any adjustments for you. I presume in this post that you already understand manual mode. If not, I recommend reading: Manual mode camera settings.
Obviously in manual mode, your first priority for actions shots will be shutter speed. Unfortunately no one can tell you what shutter speed to set because everyone will be shooting different subjects. I usually set a shutter speed of 1/400th of a second to start with which is fast enough for most subjects. If you are photographing a car or motorbike racing, then I suggest starting with a speed of 1/1300 sec.
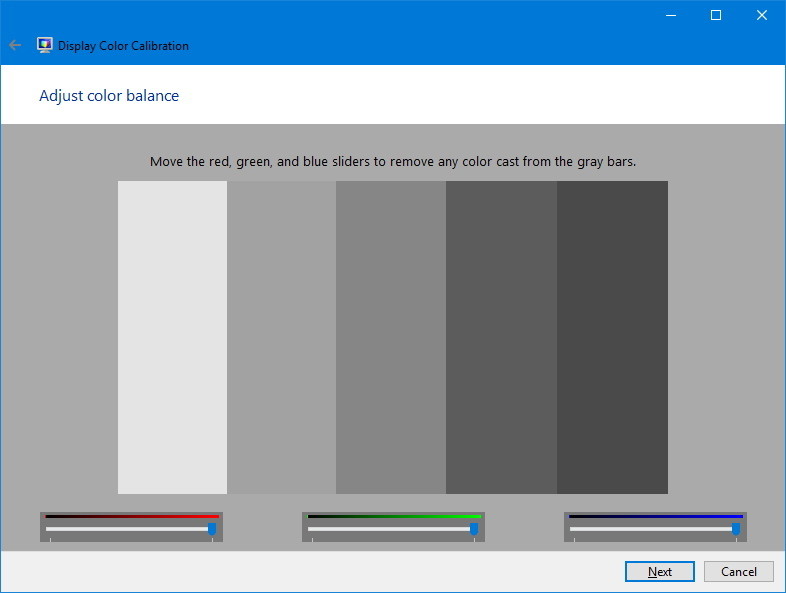
Once you have set a shutter speed, you need to choose which setting is more important ISO or aperture. Personally I always look at my aperture setting first and set a low f-number. Look through your rear vision, pressing the shutter button half way down to focus near your subject and look along the exposure line. The next step is to adjust your ISO setting until the exposure line has zeroed like the image shown below.
Now you are ready to shoot fast action shots in manual mode.
Other quick tips and camera settings to consider
Keep the switch on the side of your lens to AF (auto focus). There is no use making focusing any harder than it should be.
Consider using continuous shooting (also called burst mode) so you can take several shots per second, for as long as your finger is holding down the shutter button. In Continuous or Servo modes, autofocus will keep tracking moving targets.
If your camera brand and model offers ‘Dynamic Area AF’ mode (check your manual) then I recommended trying it. Dynamic Area AF allows you to choose one AF point, but the camera will also use nearby focal points if it detects the subject has moved. Dynamic Area AF is especially useful for subjects that move erratically.
Sign-up for our online photography course and learn how to master your digital camera in easy to understand “at your own pace” lessons.
Click here for more information and sign-up details!
6 Fast Action Photography Tips for Shooting in Low Light
By Anabel DfluxA- A+
Download as PDF
Subscribe Below to Download the Article Immediately
You can also select your interests for free access to our premium training:
Business Basics
Cheat Sheets
Child Photography
Colorful Cityscapes
Composition
Creative Photography
Creative Portrait Concepts
Digital Photo Collages
Fairytale Portrait Photography
Food Photography
Interior Photography
Landscape Editing
Landscape Photography
Lightroom Processing
Lightroom Presets
Long Exposure
Macro Photography
Milky Way Photography
My Camera and Photography
Organic Marketing
Pets
Product Photography
Sky Photography
Social Media
Still Life
Time-Lapse Photography
Travel Photography
Urban Photography
Wildlife Photography
Your privacy is safe. I will never share your information.
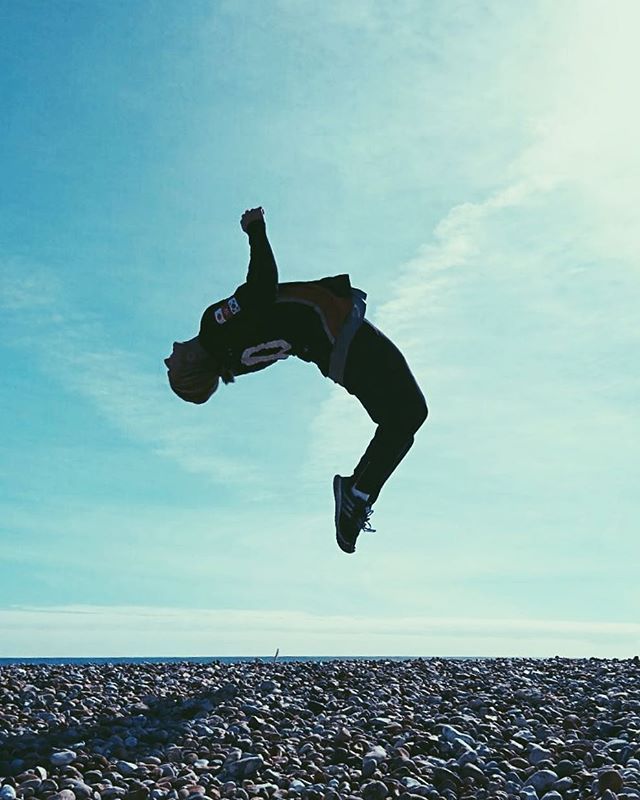
 Low light has always been considered the bane of a photographer’s existence. Partner the need to photograph action when there is less than ideal available light to work with and it sounds like a recipe for disaster! Fear not my friends, our article will give you all the info you need to conquer fast action photography in bad light.
You’ll definitely impress your clients and friends with the final result!
[ExpertPhotography is supported by readers. Product links on ExpertPhotography are referral links. If you use one of these and buy something we make a little bit of money. Need more info? See how it all works here.]
The Problem with Low Light and Action PhotographyPhotographing action and low light photography simultaneously sounds completely counterintuitive. This is because the settings necessary for these shooting scenarios tend to clash with one another.
For example, if you set up your camera solely to photograph action, the result will be badly lit photos. If you set up your camera to solely account for the light, you’ll probably get lots of motion blur.
To photograph action, you need to set your shutter speed quite high to account for the movement. Most of us tend to want completely frozen action photographs as they are quite eye-catching.
But there’s a catch. The higher you set your shutter speed, the darker the image will be. If you try to remedy this, you’ll likely add lots of noise to your image. The ideal scenario for action photography is lots of light.
To photograph in the dark, you’ll want to open up your aperture very wide to let in all of the available light and slow your shutter speed down. The slower the shutter speed, the lighter the image. This doesn’t work well for action because you’ll get a lot of motion blur.
All of this being said, you can certainly find a happy medium. It all depends on the camera equipment you use, knowing the settings that can work well with both, and the technique you apply.
Although good photography is about the photographer and not the equipment, in this case gear matters. It can either increase or decrease your chances of capturing that great fast action low light photo.
Using the right lenses and camera bodies will make it significantly easier to photograph action in darker conditions.
Keeping in mind that the goal is to let in as much light as possible, let’s start with the lenses.
You’re most definitely going to want to use a fast lens, and one that has a rather wide aperture. A lens with an f-stop of 2.8 is going to be the maximum aperture you should be looking at. Lenses with an even wider opening (such as f/1.8) are even better.
Remember, the wider the aperture (the lower the number), the lighter the lens lets in. These are called fast lenses, and this is because a lens with a larger maximum aperture can achieve the same exposure with a faster shutter speed.
As well as this, you will also prefer a lens with a fast autofocus. Using manual focus can be incredibly difficult for fast-paced action photography.
It’s already difficult enough seeing in lower light, you want a lens that can figure out what you want in focus quickly.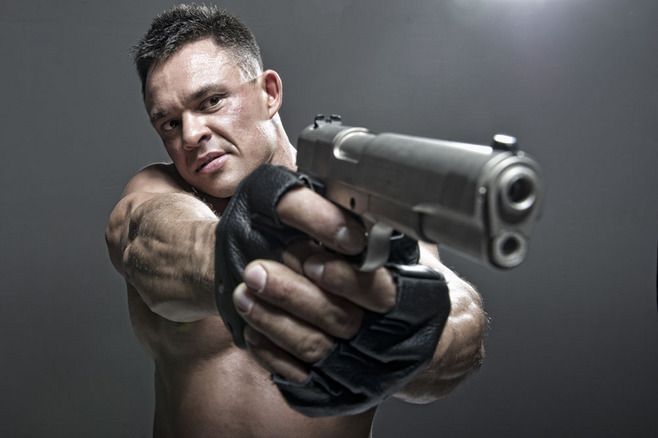 Canon’s 70-200mm lenses and their L line are all considered to have very fast auto focus.
The camera body is important for light sensitivity, which comes out in the form of noise. The ideal camera body will have the lowest amount of noise at high ISO numbers because you will be pushing those ISO settings quite high.
A good idea is to look at comparison shots online of different camera bodies at the same high ISO level and see which looks better. For example, the Canon 5D Mark IV produces better low light photographs than the Canon 5D Mark II.
Full frame cameras tend to perform better in low light than crop sensors.
As well as this, since we are also photographing action, you need a lens with many fast frames per second. Look at how many frames-per-second the model you want can take. Sometimes, there is firmware available to download to your camera that increases the frames-per-second, keep that in mind!
Finally, look for a camera that has a powerful focusing system. Canon’s new dual pixel auto-focus system makes low light photography much easier because the camera can more accurately lock focus. Other camera brands have similar new auto-focusing systems.
6. Aperture, ISO, and Shutter Speed Settings
It all starts with your settings. For low light, keep your aperture as open as possible- I recommend staying at the absolute minimum number that your lens allows you. Unless you’re shooting with something like a 50mm f/1.2, 1.2 may be too soft for your picture style and you can bump that up to 1.8 or 2.0.
Now that your aperture is wide, it is time to set your shutter speed. For high speed action, you generally want it higher than 1/2000. But you can get away with shooting action as low as 1/400 if you follow Tip 2 below.
Since the higher you set your shutter speed, the darker the frame, the wide open aperture should help compensate for how dark your frame can get.
Finally, set your ISO. Don’t be afraid to bump it up if you need to! If you see your frame is too dark with the higher shutter speeds, push your ISO higher. Or you can try slightly lowering your shutter speed.
All three of these settings work together. It’s just a matter of figuring out the proper formula for your shooting situation.
I’ve found that switching the camera to burst mode and continuous focus works best for low light action photography. The burst setting is a must-have when the fast paced action begins.
Continuous focus has different names depending on the camera brand (AI Servo for Canon users or AF-C for Nikon users). It allows your camera to lock onto your subject and follow it around as it moves.
On the Canon 5D Mark IV, you can tell the camera how your subject moves and what obstacles may be present. You can adjust the various levels of sporadic movement, obstacle interference, and more.
There is no one-size-fits-all formula to low light action photography. You have to test your settings to see what works best for the scenario you are in.
Before the bulk of the action starts, take a few test shots and look to see if they work well for you. This way you can work out most of the kinks before you’re on the spot to shoot.
Chimping is generally frowned upon in the photography community, but I disagree. It’s okay to chimp while shooting. Chimping is an informal term in photography that means checking your LCD screen after taking the photograph.
Photographing fast paced action in low light will actually require you to chimp to make sure that your settings and focus are properly capturing what you need them to.
Don’t be afraid to check your screen. Better safe than sorry!
There are three types of shooting techniques that come in handy when photographing action. And they work well in low light too. You can use either panning, pre-focusing, or bursting.
Panning is moving your camera horizontally with the subject’s movement. You synchronize your camera movement with that of the subject moving parallel to you.
The benefit of panning is that you can reduce motion blur and maintain good focus if you follow your subject around!
Pre-focusing is setting the camera to focus on where the action is about to take place. So long as you are fast at clicking your shutter button, this allows you to be ready for where the peak action is going to happen and not have to worry about losing focus.
This is best when you know exactly where the action will take place.
Bursting is when you set your camera to burst mode and hold the shutter down to take advantage of the number of frames per second. This guarantees that at least one of your shots will be crisp because your camera will be so fast at taking them!
Sometimes the best advice is to accept that there are certain factors that you have no control over. Instead of feeling dismayed, take it as inspiration to do something new and creative!
If it is too dark for frozen action, maybe motion blur would actually work in your favour and create a beautifully unique image!
It’s okay to lean on photo editing for help, especially in difficult lighting situations. You can reduce noise in post processing, lighten the image, or sharpen the subject. You can keep this in mind when shooting and adjust your settings accordingly.
Hopefully these low light photography tips have inspired confidence in you. So go practise your fast action photography in bad light!
Skyflow - Time Lapse
on the App StoreDescription
Skyflow is a convenient and functional tool for photographers who strive for the best quality time-lapse shooting!
Skyflow has many options such as resolution and format selection, blur and light trail effects, HDR, panning and more.
After shooting, your time lapse must be exported as a video file or image sequence.
And the coolest thing about Skyflow is that you can change the playback speed of your timelapse even after you've finished filming, right before exporting the final video!
Highlights:
• Capture and export up to 4K resolution
• Capture and export RAW (for iPhone 6S and above)
• Manual control of focus, ISO, shutter speed and white balance
• NR noise reduction function for cleaner shots
• LLB light-up function for shooting at night
• Long exposure modes: light trail and motion blur with preview function
• Exposure bracketing for later HDR export
• Horizon stabilization function for shooting on the move or from a vehicle
• Zoom and lens distortion functions for interesting effects
• Panning function for dynamic and dramatic effect
• Support for DJI OSMO Mobile and DJI OSMO Mobile 2 stabilizers
Warning: DJI OSMO Mobile 3 is not supported (due to reasons beyond our control)!
Other features:
• Telephoto lens support (on dual camera devices)
• System time, memory and battery indicators (pressing the memory indicator changes the display mode)
• Setting the start time, interval and duration of shooting
• Possibility to change some parameters right during the shooting
• Despite the fact that the shooting interval is fixed, the editor will allow you to change the playback speed of the time-lapse project before exporting!
• Rule of thirds grid with 1:1 (square) and 2. 39:1 (cinematic) aspect ratios
• GPS metadata in photos
Also:
• Quick view of your temporary projects right on the main screen, just swipe
• Rich editor: ability to cut time, add music, or continue timing
• Flexible HDR settings with real-time preview in editor
• Convenient and clear export options with choice of resolution, format, frame rate and video quality
• Received the video can be saved to your photo library, sent to iTunes, or sent to another application
Important!
In the free version, you can shoot time lapse without worrying about any restrictions,
but the export will be limited to 540p, 30 fps and the video will contain a watermark.
Restrictions are unlocked with one-time purchases.
Please note that if your device has an 8 megapixel camera, then it has 15% lower resolution than real 4K, and therefore there is a slight loss of quality during video export.
Version v1.3.2.3
Changes:
• iOS 13 Dark Theme Fire
• iPhone 11/Pro ultra-wide lens fire
Fixes:
• Fixed crash on launch on iOS 10
• Screen flickering fixes when using manual ISO or shutter speed settings in some lighting conditions
• Improved quality of light trail effect
Ratings and reviews
ratings: 331
Typo
Correct the typo in the description of "FIRE"
OK! =)
Good application.
Design, usability. It's a pity there is no way to control OSMO Mobile 3, I would like to see the function of smoothly changing the position of the camera according to selected points, as in DJI Mimo.
Is it possible to add a function to automatically change focus when creating a timelapse? It would be great to change the shooting plan from close to far or vice versa. For example, specify that from frame 0 to 120 focus (A), from frame 120 to 360, a smooth change from (A) to (B), from 360 to the end of shooting focus (B). It would be cool.
Update: there is a nuance in use ... if you fix the exposure and white balance, and then click on the screen to focus on the object, then all the fixed parameters go astray ((you have to take this feature into account when setting up the camera.
Great app
Perhaps the best application of its kind. Everything is intuitive, convenient settings and quite diverse. Plus Russian language. I really liked it. Thanks to the developers.
In-App Purchases
Full version
Full version includes all export options
279. 00 RUB
HD export
Unlocks export up to 1080p
179.00 RUB
Developer Andrey Kovalyov did not inform Apple about his privacy policy and the data processing methods he uses. Detailed information is available in the developer's privacy policy.
N/A
Developer will be required to provide privacy information when submitting the next app update.
Information
- Provider
- Andrey Kovalyov
- Size
- 92.8 MB
- Category
- Photo and video
- Age
- 4+
- Copyright
- © 2014-2019 KageDev
- Price
- Free
- App Support
- Privacy Policy
Supported
You may like
Fast photography - frwiki.
 wiki
wiki Speed photography (also known as the English name high speed photography and its French equivalent "High speed shooting") is a technical approach to solving two problems: a period of as short exposure as possible and a specific trigger in time to synchronize it with the phenomenon to be captured. The goal is to capture phenomena that are too fast to be seen with the naked eye.
Summary
- 1 Holding time
- 2 Actuation accuracy
- 3 History
- 4 books
- 5 Notes and references
- 6 External links
contact time
The faster the subject of the photo moves, the more the motion blur worsens the sharpness of the image, the more the magnification increases.
Consumer devices show a minimum exposure time of 1/2000 to 1/8000 of a second (0.5 to 0.12 milliseconds), which is too long, for example, to hold a bullet from a firearm.
The sound of the shot is so powerful that the air is locally highly compressed. This denser air causes the light rays to bend. The black arcuate line is the "sound barrier". A bullet traveling at 800 meters per second is faster than sound at 340 meters per second. Thus, the bullet precedes the shock wave: it is supersonic.
To freeze a fast-moving subject, use the electronic flash connected to the camera. When set to minimum power, it will flash at a rate of 1/40,000 second (0.025 millisecond). Ambient light should be negligible compared to this flash. The photo will only be taken when the subject is illuminated, i.e. during the flash, even if the exposure time, depending on the mechanical limitations of the shutter, is much longer (the rest of the time the device does not take anything).
Actuation accuracy
A nuclear explosion photographed less than a millisecond after the explosion using Harold Edgerton's Rapatronic camera. The fireball has a diameter of about 20 m.
When triggered, a series of automatic actions are performed: light measurement, focusing, mirror up and shutter opening. The delay between the pulse given to the shutter button and the shutter fully opening makes the timing of the photo and the phenomenon that the photographer wants to capture random. The open flash technique overcomes this technical limitation: the shutter of a camera placed in a dark room remains open for several seconds. It remains only to trigger a flash when receiving a stimulus (sound, light, contact, etc.) corresponding to the phenomenon being recorded. Because the response time of an electronic circuit is thousands of times faster than a mechanical system, a photograph can be taken with a delay of only one microsecond (0.001 milliseconds) for the best solutions on the market.
Historic
Quick photographs by pioneers Muybridge and Etienne-Jules Marey at the end of 19th - centuries; the lack of a mechanical shutter then encouraged the use of lighting to determine exposure times. The American engineer Harold Eugene Edgerton democratized stroboscopic flash between the 1940s and 1970s, making this photography technique more widely available.