Lighting secrets for the professional photographer
Lighting Secrets for the Professional Photographer by Alan
Etsy is no longer supporting older versions of your web browser in order to ensure that user data remains secure. Please update to the latest version.
Take full advantage of our site features by enabling JavaScript.
Click to zoom
1,285 sales |
€10. 30
Loading
Only 1 available
VAT included (where applicable), plus shipping
Rare find — this item is hard to come by.
Explore more related searches
Listed on Sep 10, 2022
3 favorites
Report this item to Etsy
Choose a reason…There’s a problem with my orderIt uses my intellectual property without permissionI don’t think it meets Etsy’s policiesChoose a reason…
The first thing you should do is contact the seller directly.
If you’ve already done that, your item hasn’t arrived, or it’s not as described, you can report that to Etsy by opening a case.
Report a problem with an order
We take intellectual property concerns very seriously, but many of these problems can be resolved directly by the parties involved.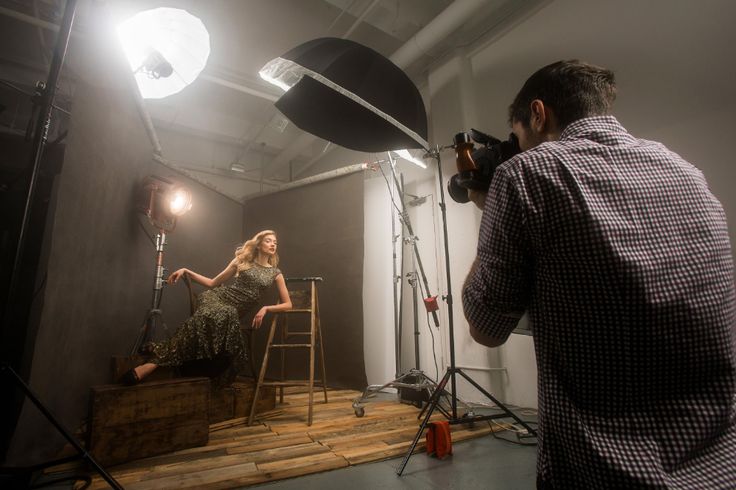 We suggest contacting the seller directly to respectfully share your concerns.
If you’d like to file an allegation of infringement, you’ll need to follow the process described in our Copyright and Intellectual Property Policy.
Review how we define handmade, vintage and supplies
See a list of prohibited items and materials
Read our mature content policy
The item for sale is…not handmade
not vintage (20+ years)
not craft supplies
prohibited or that use prohibited materials
not properly labeled as mature content
Please choose a reason
Tell us more about how this item violates our policies.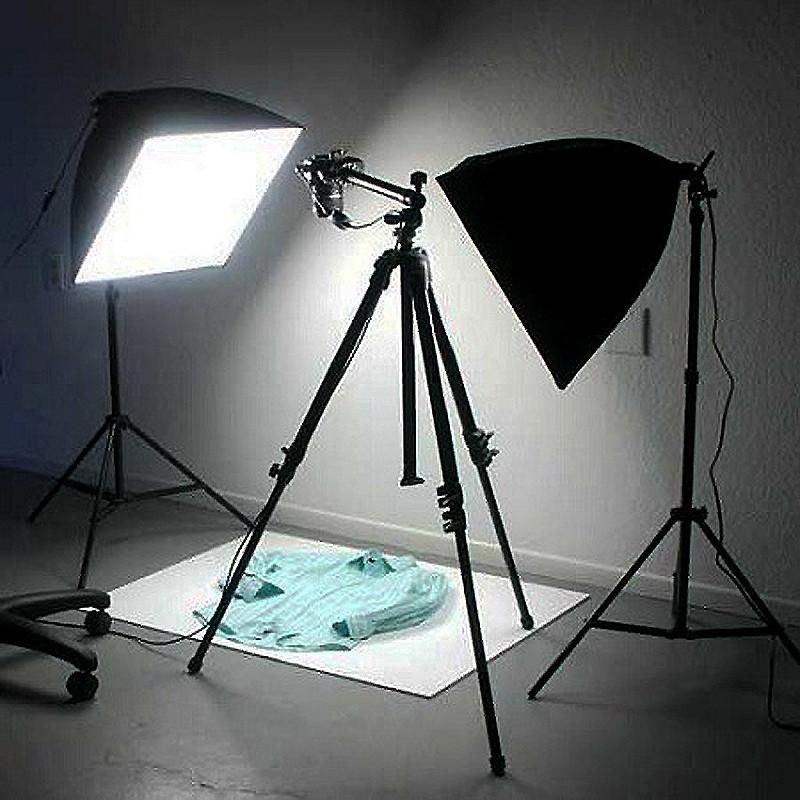 Tell us more about how this item violates our policies.
5 Lighting SECRETS that Will Help You Capture the PERFECT Portrait
All photos © Roberto Valenzuela
(Editor's Note: Exploring Light is a monthly Shutterbug column featuring tips, tricks, and photo advice from professional photographers in Canon's Explorers of Light education program. This month's column is by Roberto Valenzuela who shares his lighting secrets for portraits.)
When I was invited to create five lighting tips for this Exploring Light column, my initial thought was to avoid common lighting tips you’re familiar with and likely using now. Instead, I wanted to offer a few tips and techniques that have benefited me throughout my career while shooting portraits.
My goal with these lighting tips for portrait photography was to challenge you and give you some tools to become an expert at understanding light and how to find the highest caliber natural light available to you wherever you go and use it to your advantage.
Tip 1: Have a lighting benchmark
When shooting with natural light, I strongly believe you need to begin with a benchmark in mind regarding the quality of light. Your goal should be to begin with a level of quality light that is quantifiable.
For example, not all-natural light falls the same way within your surroundings. The quantity (and to some extent quality) of light could literally double just a few feet from where you may be standing.
In my book, “Picture Perfect Lighting,” I shared the benchmark I use when photographing people. Here it is:
Outdoor Sunny Day Lighting Benchmark:
Shutter: 1/500
Aperture: f/4
ISO: 100
Cloudy Day or Large Open Shade Benchmark:
Shutter: 1/500
Aperture: f/4
ISO: 400
Indoors Benchmark:
Shutter: 1/500
Aperture: f/4
ISO: 800
These benchmarks, when used in conjunction with their specific lighting conditions (sunny / open shade / indoors), will get you very close to the quality of light that would provide a good exposure on your subject’s face.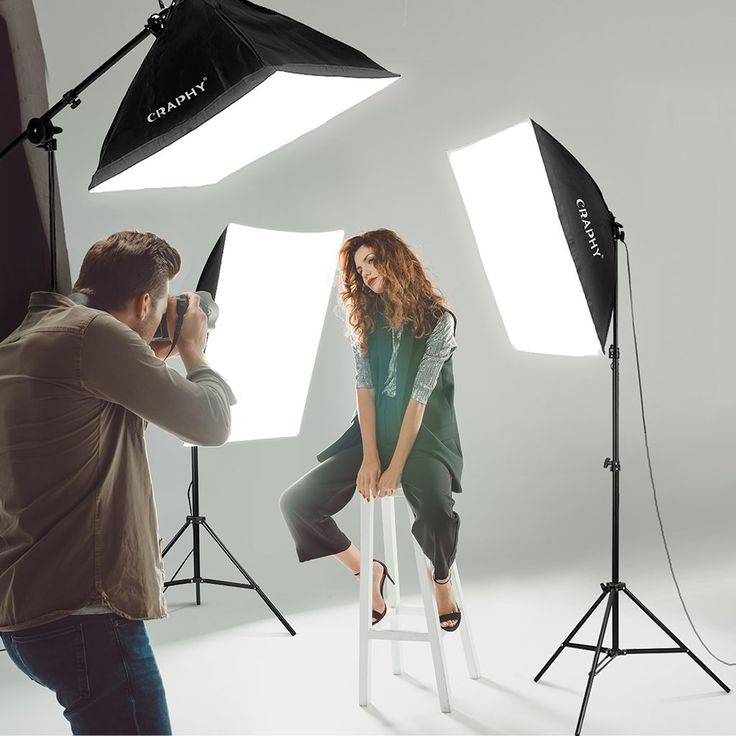 You may need to make slight adjustments to your settings to suit the specific light you have, or for personal preference. The point is, it is better to find the light to match these benchmark settings rather than changing camera settings to fit the light.
I always give myself some flexibility equal to a one-f/stop from my initial benchmark settings. For example, if I’m shooting a client outdoors on a sunny day, and I can’t find the light quality needed to reach the outdoor sunny day benchmark, I’m ok dropping the benchmark to one-stop under. This means my shutter speed would be 1/250 instead of 1/500. I consider one-stop under the benchmark totally ok. Two-stops under would not be good.
Why do I have lighting benchmarks? This “system” has been responsible for my largest growth as a photographer when photographing people in natural light. It gives me an easy to follow “Good, Better, Best”’ scenario when working with just the sun.
Without it, you are essentially “shooting blind. ” If the light is bad, you could simply increase the ISO to whatever level needed to make that poor quality of light work. But as photographers, we should want more than settling for low-quality light. We should be masters at finding the most amazing quality of light everywhere we go, cloudy or sunny.
You can accomplish this if you train your eye to recognize the quality of light at these benchmark settings. Even if you don’t use these benchmark settings with paying clients, you could (and should) use them for training purposes. Training your eye to quickly recognize superior pockets of light will never serve you wrong. Try them!
It’s not easy to find pockets of light that will allow you to have a good exposure on your subject’s face at these benchmark settings, but if you keep trying, keep looking, and keep pushing, you will begin to discover these amazing little gifts of light with higher frequency.
Tip 2: Not all light modifiers come from camera stores
Become an avid observer of the objects and structures around you as they all reflect or absorb light in different ways. As you read this, look around you? What objects do you see? What are their shapes, texture, and color?
Photographers can’t carry every piece of equipment out there to every location. We only have two hands. But if you want to create flattering light on your subjects using only a flash or the sun, what do you do? One of the most important skills we have as photographers is the ability to predict how the sun-light or the light from our flashes would react when it strikes any surface (or subject).
For example, imagine you are doing a photoshoot in your neighborhood, and you are walking around with your client. Suddenly, there is a big white building to your right directly illuminated by the sun. Well, that building is actually acting like a huge light modifier creating the softest and most flattering light imaginable. At this point, you would stand close to the building with your back to the building and let that large flattering light source illuminate your subjects.
A traditional white box truck is a perfect light modifier! I have taken several photos of clients during paid shoots using the amazing light of a white box truck.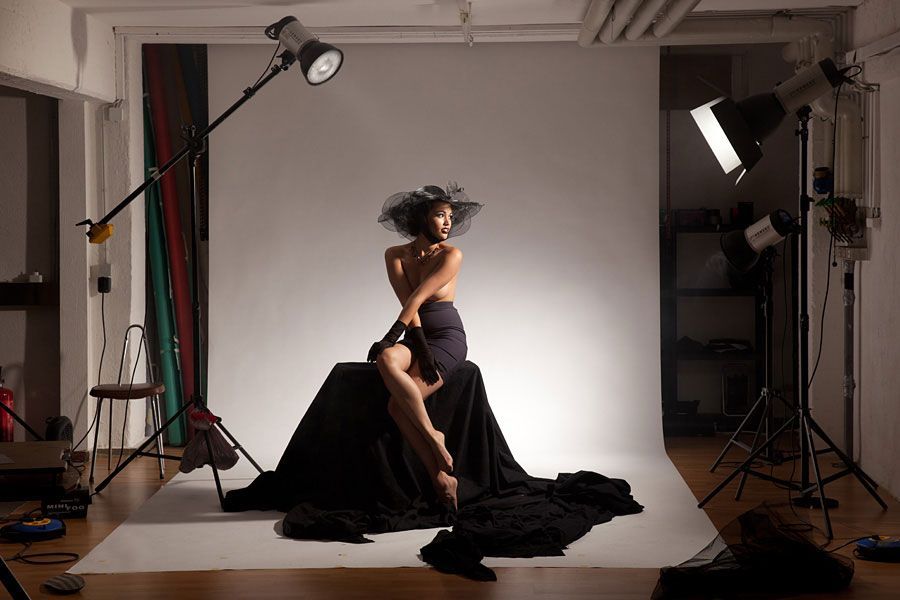 Any white metal surface directly hit by the sun provides a strong light source. Hard light such as this can be a showstopper if used properly on your subjects.
The same goes for a mirror. A small mirror or any side view mirror from a car can provide this kind of uber strong light source. There are also objects such as thin materials, cloths, fabrics, frosted windows, etc. that allow the light to pass through in different ways. These are opportunities!
Last but not least, look for interesting shadow graphics on the wall from the sun. As the sun hits tree branches, window frames, buildings, etc. it will consequently create some very interesting graphics on walls. These graphics are great gifts because it would be incredibly difficult to replicate these designs artificially. Be smart with the naturally occurring light modifiers around you. Think of it as a fun scavenger hunt in search of great light.
Tip 3: Darken the Ambient – Light-Up the Subject – Highlight Something
This technique or approach has served me very well during my career.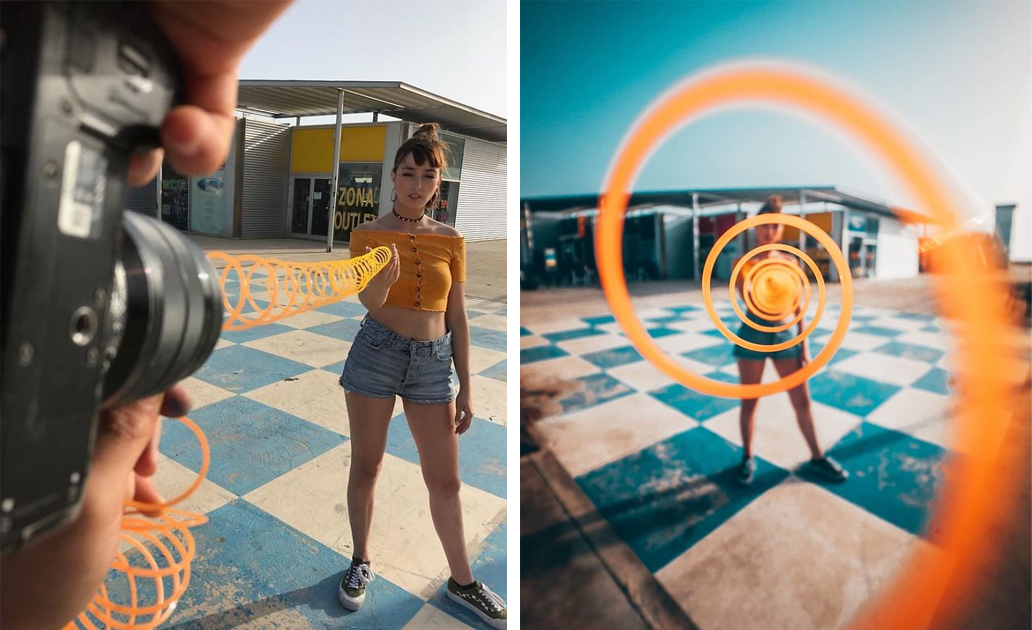 Here is how it works. While on a portrait shoot, follow these three steps:
Step 1: Turn down the ambient. Obtain the right exposure on the background and then dial it down a bit so it becomes ½ stop or even ¾ of a stop darker.
Step 2: Use a modified flash or a reflector to direct soft light towards your subject. The balance of light between the subject and the background is up to you and what you like. I prefer my contrast to be subtle but still noticeable.
Step 3: Use a flash with a snoot or a very small light modifier to highlight something of your choosing on their face, clothes, or accessories. This adds a little kiss of light to draw the viewers’ attention exactly where you want it. It’s a fantastic technique to attempt. Definitely more advanced, but not overwhelming by any means. You simply need two flashes, one equipped with a soft box or beauty dish, and the other with a snoot. The results of this technique are a very painterly and elegant look.
Tip 4: The collapsible diffuser – The most versatile light modifier in the world
Hands down, there isn’t a more versatile light modifier than a simple collapsible diffuser.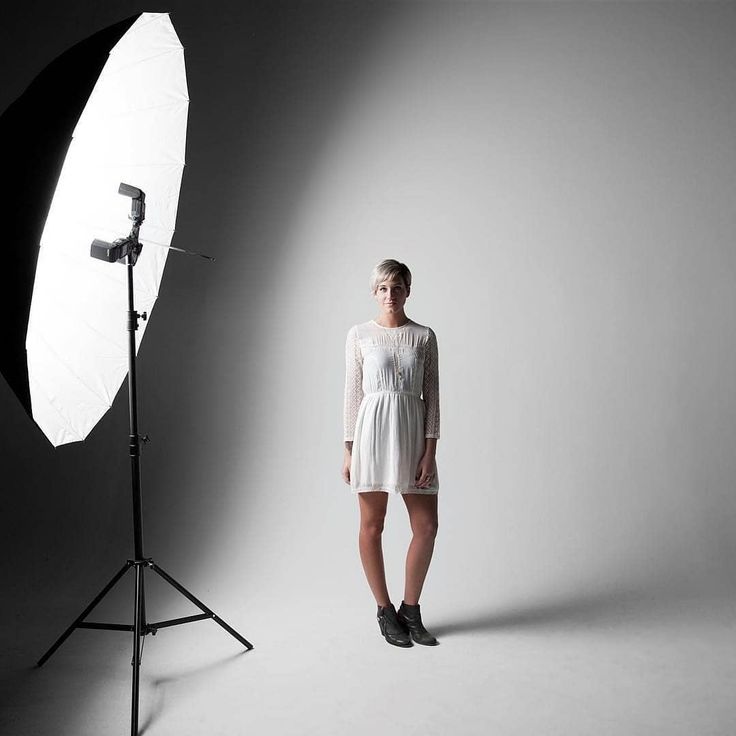 When paired with a flash, you can achieve the look of many light modifiers with only one. Unlike many modifiers built to be used with a flash where the distance between the flash and the diffuser is fixed, a collapsible diffuser allows you to change the distance between the flash and the diffuser as much as you want. A person simply holds the diffuser with their left hand, and a flash with their right hand.
By changing the distance between the flash and the diffuser, you are effectively creating different light-size sources. Hold the flash very close to the diffuser and you have a very small light source. Hold the flash as far as you can from the diffuser, and you now have a very large light source providing you with beautiful soft light. When done, simply collapse the diffuser and put it away inside your camera bag. It’s light, compact carrying size keeps your portable gear to a minimum but offers the greatest flexibility to manipulate light.
Tip 5: Make sure to use light to COMMUNICATE, not just to illuminate
During any of my lighting workshops and seminars, one element that I strongly emphasize to my students is the notion of using light to communicate something to the viewer, not just to illuminate the subject. Light, when well placed, will draw the viewer’s attention to where you chose! You are the photographer, it’s your message.
As you light your subject, don’t just be satisfied with a proper exposure. Instead, ask yourself “what do I want to say here” or “what aspect of the image do I want to feature”? Use light to communicate with your audience.
Think of it as a language. If you begin to try this approach during your shoots, you will notice your lighting will exponentially become more interesting to the people viewing your photographs. Now you are truly painting with light.
Roberto Valenzuela Bio
Roberto Valenzuela is a photographer, author, and educator based in Beverly Hills, CA and is a member of the prestigious Canon Explorers of Light program.
Roberto uses the same disciplined approach he has as a classical concerto guitarist to develop his skills as a professional photographer. His belief that “deliberate practice” is at the very core of “skill and achievement,” is also emphasized in his workshops and his collection of best-selling photography books.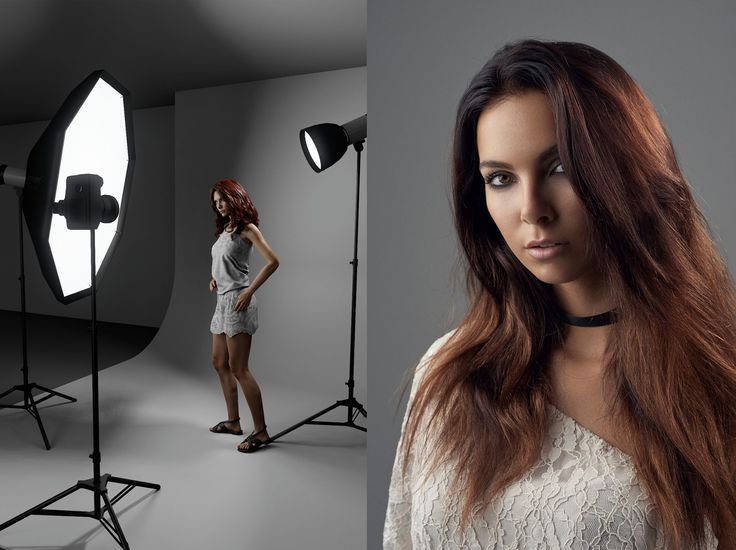
He is an avid educator who has shared his skills and experience at large conventions and conferences around the world. He conducts private workshops on lighting, posing, and wedding photography and continues to write photographic business and technique books. Roberto has been nominated by his peers as one of the ten most influential photographers and educators in the world.
He has photographed major campaigns for Canon USA including the 5D Mark IV and most recently a global campaign for Canon’s EOS R5 and EOS R6 mirrorless cameras.
When he is not shooting or teaching, Roberto can be found in the kitchen creating a colossal mess while attempting to replicate the dishes he sees on The Food Network. As a dedicated student of the culinary arts, the only people to be served his gastronomic masterpieces to date are his wife Kim, and his son Lucas.
Roberto’s most recent book, titled The Successful Professional Photographer gives photographers the tools and knowledge on how to stand-out, get hired, and make real money as a portrait and wedding photographer.
Roberto also has a unique lighting conference with a heavy emphasis on a hands-on experience photographing agency models at a dude ranch in Tucson AZ. The Photo Creators Lighting Conference May 3rd to 6th 2021 will be taught by renowned photographers and educations such as Joel Grimes, Pratik Naik, Jennifer Rozenbaum, and Roberto Valenzuela.
See more of Robert's work at the links below:
https://www.robertovalenzuela.com/
https://www.thephotocreators.com/
https://www.facebook.com/Roberto-Valenzuela-Weddings-51136535100/
https://www.instagram.com/roberto_photo/?hl=en
https://www.youtube.com/user/robertophotography
https://rockynook.com/shop/photography/the-successful-professional-photographer/
how to develop creativity, compositional thinking and artistic taste / Shooting for beginners / Photography lessons
How to take beautiful photos? After all, sometimes even technically flawless shots do not evoke emotions. Why do some photographers have the author's vision, while others do not?.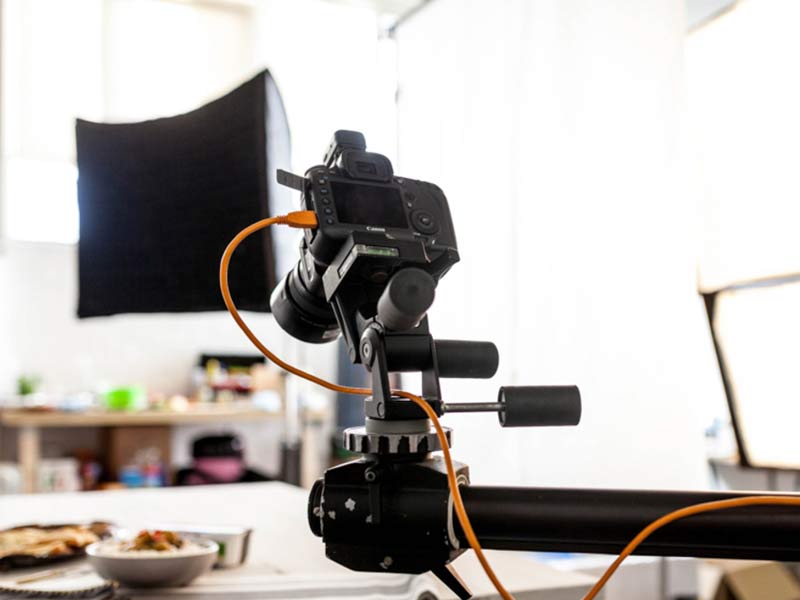 . It is important to develop creative skills and creativity for anyone who wants to take pictures that catch the viewer. Based on photography experience and many years of teaching practice, I have prepared 10 tips on how to "practice" as a photographer to create impressive shots.
Follow other photographers
Photography is a visual language of self-expression.
When children learn to speak, they first repeat simple words after adults, then put them into phrases... The language is based on the repetition of constructions, symbols. Creativity also works through repetition. Just as it is impossible to speak the language of Pushkin overnight, it is also impossible to create a masterpiece with zero knowledge. It is important to repeatedly repeat and feel what has been done before us. That's how scientific progress works, that's how evolution works.
By the way, not in all cultures creativity means the creation of something new. In Japan, for example, art is excellence in one area or another.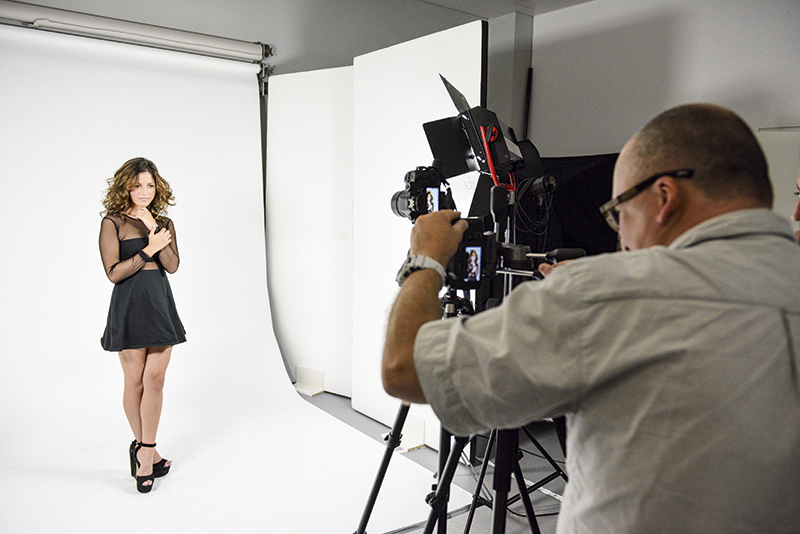
Still life on the theme of Vanitas - the subject of Dutch painting of the XVI-XVII centuries. Inspired by the paintings, I decided to embody such a plot in the photo.
Some people think that "everything has already been filmed before me, so I won't even take it." This is a disastrous approach. We are forced to believe that art is always about something unique. But sometimes the recognition is received by the one who arranged the known elements in the best proportions. Don't be afraid to copy the subjects, ideas, compositions, and approach of the photographers who inspire you.
Creativity is when a person uses his analytical and emotional abilities, interprets what he saw, realized, experienced before. At the stage of learning photography, one way or another, you will have to copy a lot, your own approaches will be developed over time.
Observation and cultural experience are what distinguishes a real photographer
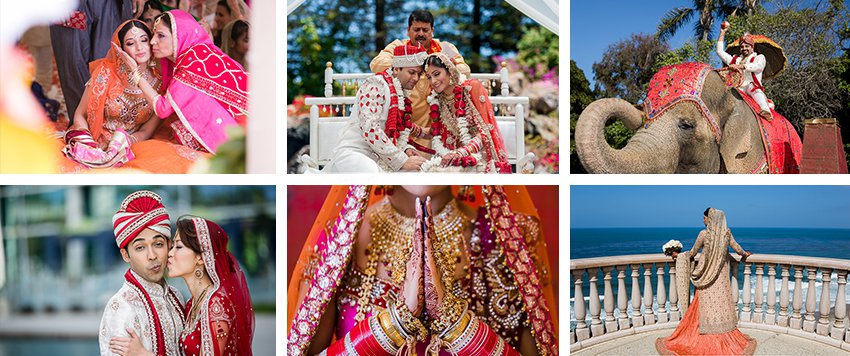
So, creativity is what our brain has seen before, comprehended and repeated in its interpretation. And in order to have a guideline, you need to consciously form observation. If your cultural horizons are limited to workdays, TV shows and memes from social networks, you are unlikely to become a good photographer (even if you thoroughly master the technique of shooting). Have you ever seen a photo with a bride in her palm or a girl “holding” the setting sun in her hands? Banality? And for some people without cultural baggage and with minimal vision, this is a real creative revelation.
We are very lucky, because through the Internet we have access to all the knowledge of the world. You should not waste this opportunity on watching low-grade jokes and fake news. Visit gallery websites, view the work of artists and recognized masters of photography, get acquainted with the peculiarities of the style and approaches to shooting. Visit (and preferably more than once) the Tretyakov Gallery, the Hermitage, the Pushkin Museum, the Louvre, or, for example, the Old Masters Gallery in Dresden.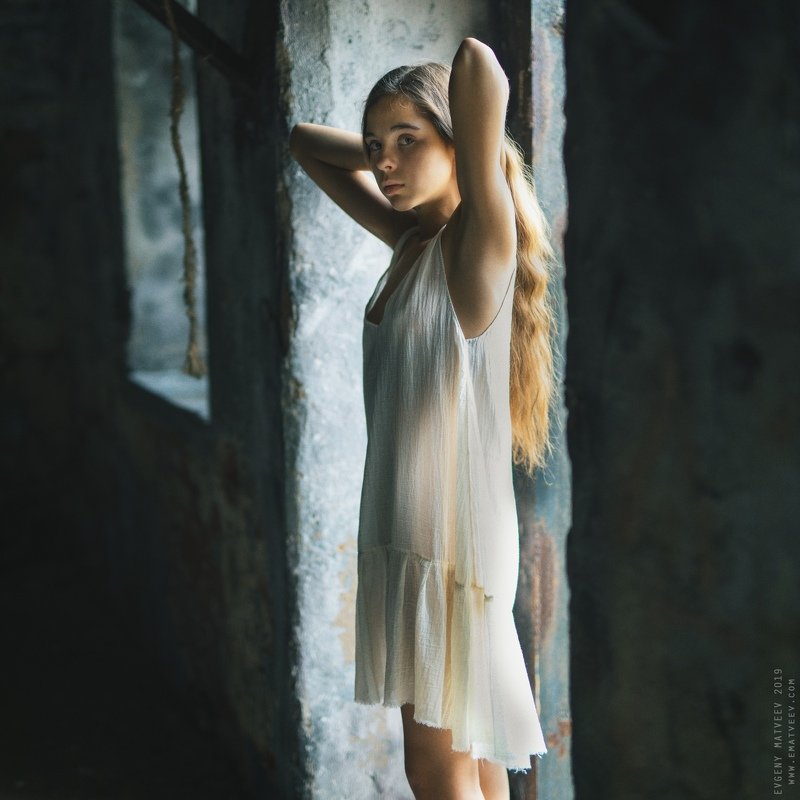 In the works of the old masters, it is especially evident that they masterfully combined the methods of work known to them with the plot, composition and material. And the novelty was obtained, as it were, by itself, in an evolutionary way.
Don't forget about movies. There are tons of incredible movies and even series that a photographer needs to watch. The so-called "cinema is not for everyone." The authors put a little more into these films than the layman can understand.
When building up cultural experience, it is not necessary to divide works into “likes/dislikes”. Many, for example, do not like K. Malevich's "Black Square", but it is necessary to know about the painting and about what happened to the fine arts at the beginning of the 20th century. How you feel about this or that work, it is better to decide after getting acquainted with it. The “I didn’t read, but I condemn” technique does not work.
Try to evaluate films not only through the prism of the plot. Pay attention to working with composition, lighting, colors, stage setting, how the author sets the mood. Often filmmakers pay more attention to this than to the story itself, which may not be if it is not needed.
A good place to “build up” your vision is NikonPro.ru. Here are the works of brand ambassadors. All of them are world-class professionals. The photos are accompanied by author's stories about the shooting, which is no less useful.
Compile photos for inspiration
Save images you like, study them, see how they were made, get inspired. Compiling collections with shots you're targeting is a great approach. If the photographer grows, the gallery will grow, and something may disappear from it (and this is also part of the journey).
Another trick is to create a mood board for a particular shoot. Let's say you need to conduct a creative photo shoot with a model. It is not enough to discuss the image and location with her. Most likely, you will have a different idea of \u200b\u200bwhat should turn out.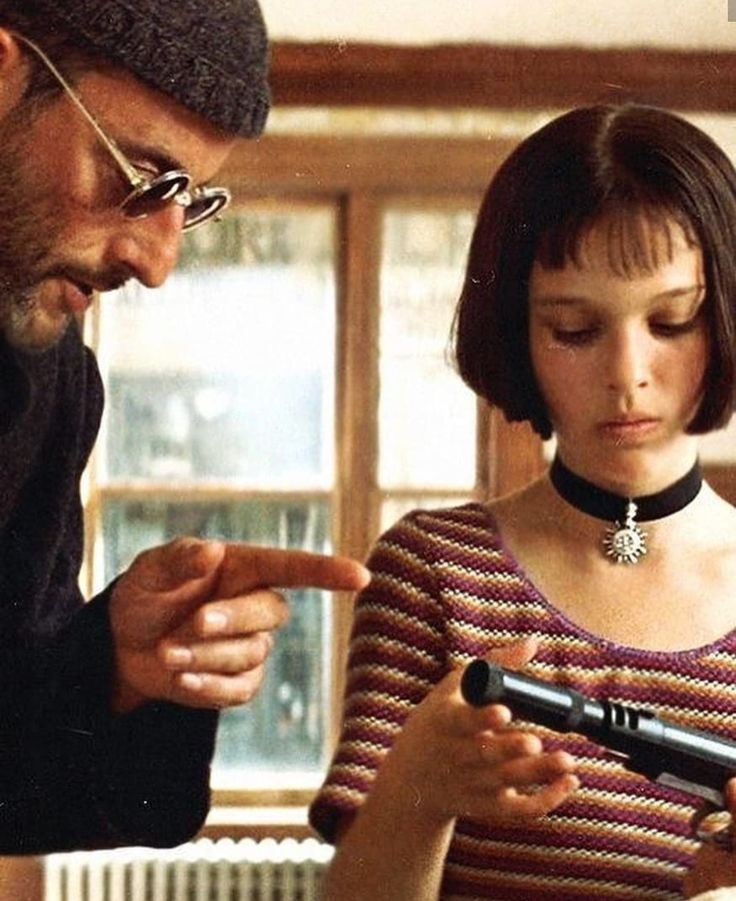 It is very useful to make a selection of photographs that are close to your idea in terms of mood, plot, composition, poses and image of the model, color schemes. This approach will allow you to have a deeper understanding of the result you are working on, and synchronize this understanding with all participants in the shooting. Experienced models are often asked to send references, that is, to show examples of what the photographer wants to get. The presence of references becomes for the model a certain guarantee of the success of the shooting.
Pinterest page with my selections of places of interest for a landscape photographer.
Travel photographers, urbanists, landscape painters will find it useful to make collections with locations. Perhaps even your hometown is rich in places where you can get great shots. I also keep a table where I add locations for filming and their main parameters (examples of photos, routes) so as not to lose anything.
Install the Pinterest browser extension with the Pin button (highlighted in yellow). By clicking it, you can save your favorite photo from any site to the collection. Copyright is not violated, because you do not save the image, but a link to it.
Today, any social network allows you to create collections of pictures. But there is also a more convenient service. Pinterest is a kind of social network for working with saved images. There you can create your own galleries, think over their structure and be inspired. Make it a rule to save at least one picture every day, and soon the collection will become a real encyclopedia of your visual interests.
Travel, visit new places
Good shots will not fly into the window, they will not be brought by a courier ... You will have to go for them yourself. And for inspiration, the brain needs fresh information. Watching movies provides a cultural experience, but not an incentive to create. The stimulus occurs in the presence of a shake. So deviate from the usual routes, explore the surroundings of the house, travel! There is always a way to see something new.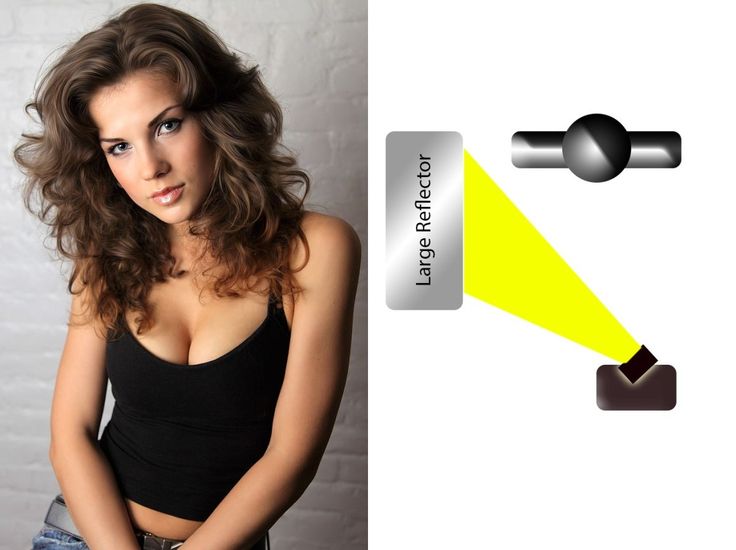
This is important even for studio photographers. Take a walk in a new place, come to the studio and you will see that the shooting is easier, ideas appear. I have a photographer friend who shoots commercials in a studio. And at the first opportunity, he breaks into travel, and quite extreme ones, in order to recharge his emotions for new masterpieces.
Consciously shape your social media feed
It is important to put your brain on a diet of good photos, paintings, movies. Therefore, it would be nice to unsubscribe from all the acquaintances who post their everyday pictures on the social network like “me and my children” and “my cat is sleeping”. We do the same with small-town photographers and publics like “the best photographers of the N-region”. After watching such content, you yourself will begin to shoot in a similar way. Sometimes a photographer forms an information bubble in social networks with mediocre reference points and authorities and therefore does not develop as a professional. He simply does not see outstanding photographs.
However, it's not worth unsubscribing from all relatives. Social networks shape the news feed according to our preferences, so just follow what you view and like: shape your information environment to grow. Let these be truly talented photographers, public pages about classical photography and cinema, pages of interesting people who create beautiful content.
Do not approach the creation of a frame technically
Photography, like any other art, cannot be measured technically. And yet, many try to assemble the frame as if according to the instructions, like a constructor. Having studied the rules of composition, they try to strictly observe them. But a good shot is not one that is perfectly exposed, nor is it one that is neatly composed according to the rule of thirds. And the portrait is not good when the sharpness fell strictly on the eyes. The main thing is creativity.
There is no absolute in photography. The language of photography changes like the language we speak. And even in different countries it is different. That is, any rule can be broken. Have you heard the idea that “to break the rules, you have to learn them”? It is not always so. Just because you don't know how the golden triangle rule works doesn't change anything. So it is not necessary to strictly adhere to the rules, they can and should be broken. And the already mentioned observation and visual experience will help to do this harmoniously.
There are laws of perception based on anthropology. They always work. So it’s worth, for example, to get acquainted with the theory of color (the foundations of which were laid by Goethe, and formulated in its modern form by Itten), with such elements as rhythm, balance, with how objects with different geometries are perceived in the frame.
Many rules describe only the geometric construction of the frame (Fibonacci spiral, golden triangles rule). But they do not take into account the main thing: the features of the plot, texture, lighting. So these are not rules, but just cheat sheets. Such recommendations always begin with the phrase: “To make the frame look better, place the subject in such and such a fragment!”. They were invented in photography schools to explain to a beginner in an accessible way where to place the object. This does not mean that using, for example, the rule of thirds is bad. But this is not a law, but a cheat sheet to simplify the work with the composition.
How many framing rules did the world famous photographer Henri Cartier-Bresson break in this picture? The central layout, the littered horizon, the cropped legs… In a modern photography school, he would have received a deuce for composition! But the photographer acted intuitively, based on his experience. Therefore, this frame is a world-famous masterpiece.
Personal experience, vision and cultural background will allow you to compose shots without using compositional rules. A simple answer to the question of what story you want to tell in the frame will help you compose the shot according to your story.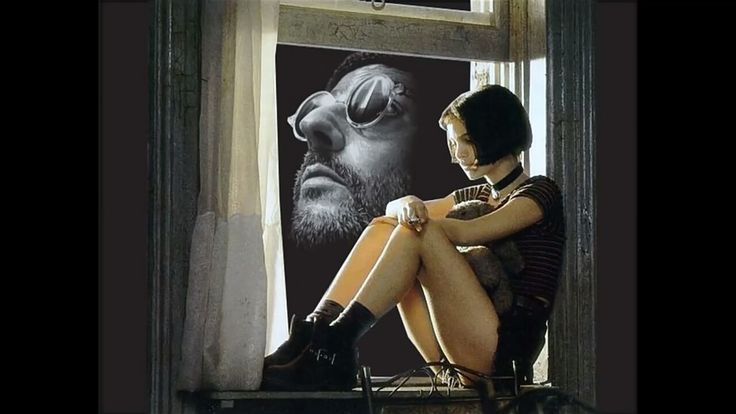 This is what is often lacking in the work of novice photographers.
You are the best critic of your work
It is almost impossible to get adequate criticism in the modern world. On the Internet, you will be praised by your loved ones and scolded by “haters” who are simply looking for an excuse to throw out their own negativity. Those who could parse your footage and give good recommendations will never do it for free in the comments, because their time is valuable. There are paid courses, private tuition… But this is not available to everyone and not always. How to be?
Develop the habit of being critical of your work. If you are absolutely satisfied with the results of the shooting, this is a wake-up call. In psychology, the Dunning-Kruger effect is distinguished: a phenomenon when a person has just begun to understand a particular area, but already considers himself an expert. No truly successful photographer is 100% satisfied with their photos! He knows where his work is weak and how to do better next time.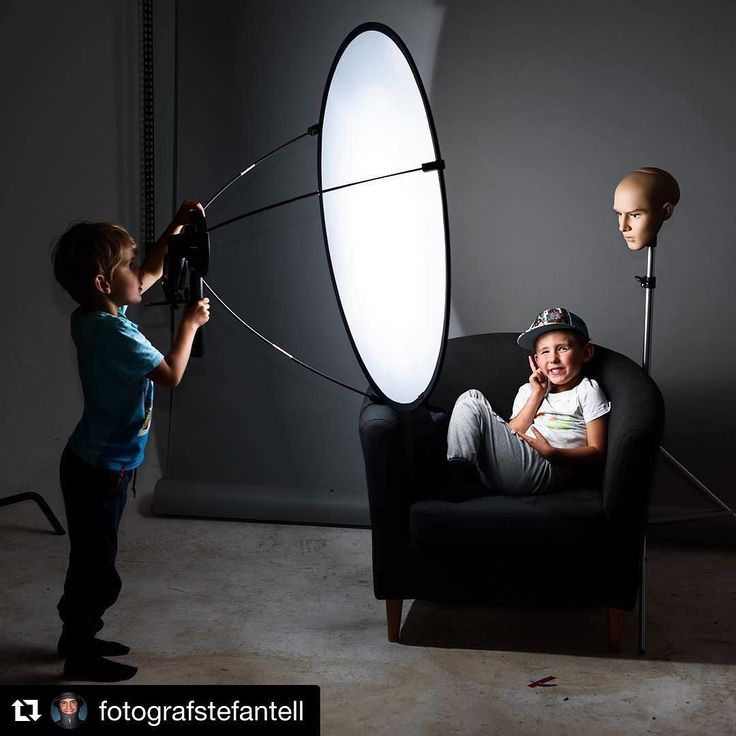 Try to find flaws in your shots in time to take them into account in further shootings.
Participate in photo contests
To show yourself off and look at others, take part in a photo contest. This is a way to create specific goals and objectives, which is important in creative photography, a reason to analyze and choose strong shots. Do not be offended by the results that are not in your favor. In any case, this is a good creative and emotional experience. Start with regular photo contests on Prophotos.ru, the annual 35Awards. The peculiarity of the latter is that you can see the rating of your work in real time and compare the pictures of the participants. If you subscribe to NikonRussia, NikonPlaza and NikonSchool_ru accounts, you won't miss Nikon's activities (and there are many of them!). There is also an international competition from Nikon, held from 1969 years - Nikon Photo Contest. Current competitions are easy to find on the Internet. And if you join the photographic party, announcements will constantly flash in the news feed.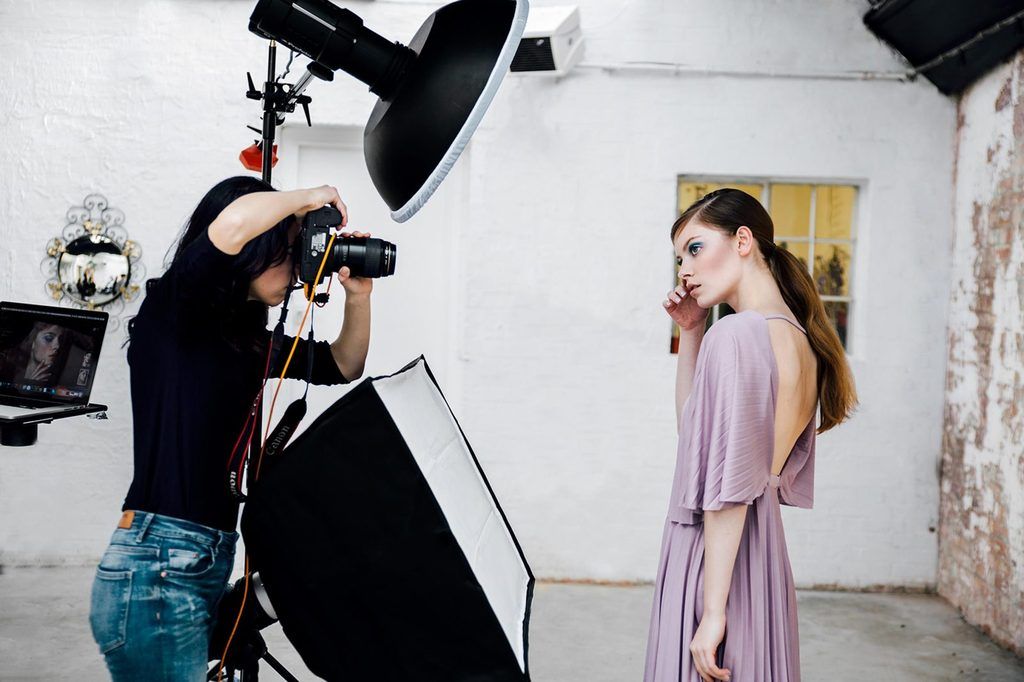
Focus on your direction of photography
I work near a photography store and I know that beginners are most often interested in the most versatile "shoot everything" technique. But advanced photographers know exactly what interests them.
Spraying on everything is permissible only at the beginning of the creative path. If you shoot a portrait, and a landscape, and a reportage, and macro, and stars, and something else, you are unlikely to reach serious heights in any genre. Try to concentrate on the minimum number of shooting directions. Preferably one. So you can delve into the topic, develop, without being distracted by the secondary.
Choose the best set of equipment
There is nothing wrong with collecting photographic equipment, it is also a hobby. But if our goal is beautiful shots, an excessive set of equipment will not help, but hinder. It turns out that an artistic portrait on the street can be taken without pulsed light, and a dozen lenses will not come in handy on a trip (while you are juggling them, the plots will scatter, you won’t even notice them).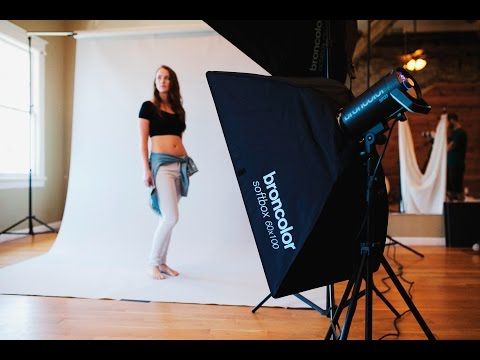
The Nikon Z Mirrorless System lets you build the perfect kit for any shoot. Such cameras are compact and technologically advanced, with them you can think less about technology and do more creativity.
To optimize a set of equipment, you need to decide on the tasks (more on that below). Work with minimal resources. For example, to shoot a landscape, you need a tripod and filters. Track what equipment you use most often, and leave the rest at home.
Be interested in the world
How to choose your direction in photography? Shoot what makes your eyes burn! I often see this spark in students, and this is a sign that they are doing the right thing. Are you interested in extreme sports? This is an occasion to try yourself in such a report. Do you like to travel? Then step up your travel photography skills. Do you love communication? Become a portrait photographer. Love beautiful clothes, unusual images? Take a look at fashion photography. Finding a subject that interests you is the key to not giving up on photography.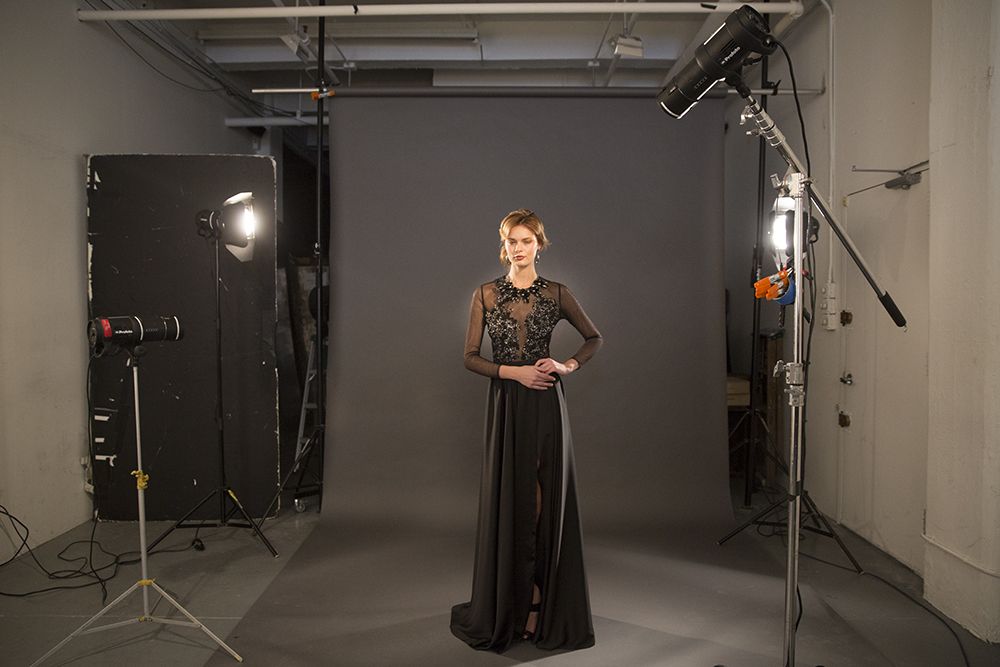
Try to see more of the selected subject than others. Beauty is truly in the eye of the beholder. Everywhere has its own aesthetics, depth. The main thing is to feel it, this is the work of the photographer.
Development is a process
While reading the article, did you think that all this is boring, because you already have impeccable taste? A sure sign that the tips will be useful for your photography. The development of a photographer is a route without a finishing point. It is important for each of us to improve in some way. I'm not an exception. :) We can always learn, see, feel something that will improve our creativity.
📚 Tips for a Beginning Photographer: 43 Tips for a Photographer
Taking the first steps in a new activity, whether it's a job or a hobby, every person will certainly face difficulties. It seems that you are doing everything as it should, but the result is still not the one you expect. And at such moments one often wants to quit everything and become very, very sad.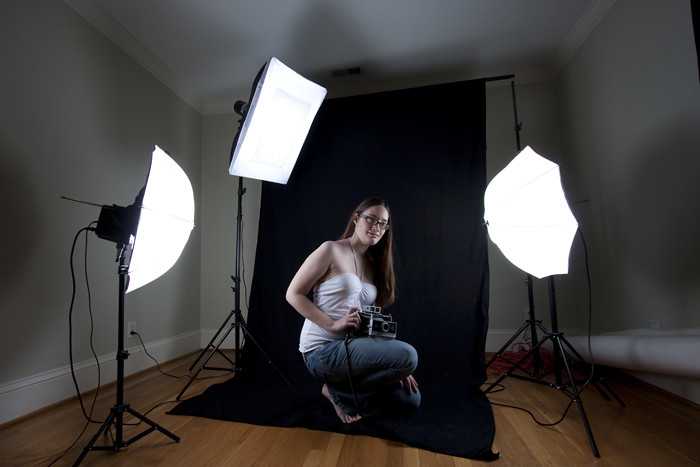 ..
..
The main problem for a beginner in anything is the lack of knowledge or necessary information. And then everyone decides for himself what to do: learn from his own mistakes or take the advice of those who have been “in business” for a long time - they have already filled their bumps and know how to act in certain situations.
When I first started taking photographs, I naturally did not know everything that I know now. I made mistakes (many mistakes, very many...), and looking back, I understand how they could have been avoided. But this is what helped me become a professional in my field.
In the photograph, I lament that ten years ago, when I was just learning to photograph, there were no such valuable tips 😊and wrote me a short guide on how to avoid mistakes as a beginner in shooting, communicating with customers and in many other situations ...
But today I can already tell myself about what a beginner photographer should and should not do.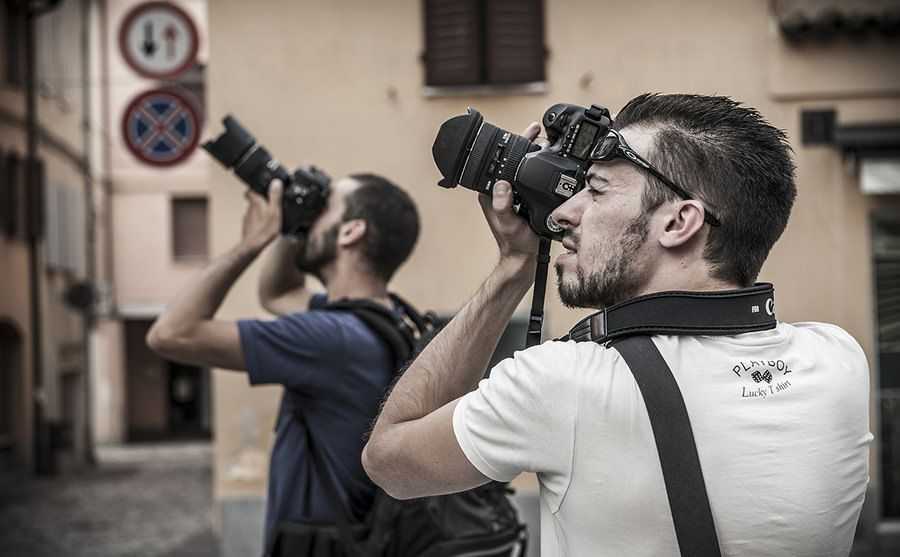 I based these recommendations solely on personal experience: on the mistakes that I made, and on those situations that often baffled me as a beginner. In this article, you will find 43 tips for a beginner photographer to help you get started.
By the way, I also have a photography school where there are a lot of theoretical and practical lessons for beginners and professional photographers, and also where I hold online workshops every month, where you will see live how shooting takes place, what camera settings are, how cool photos and where else I answer all the questions! And all this for the price of two cups of cappuccino😊
General
Always take your camera with you
It is with this banal but very valuable advice that I want to start this article. Yes, today everyone has mobile phones, but today the phone models are not yet as perfect as even the cheapest cameras with decent optics.
Compact and small mirrorless cameras are taking over the world today.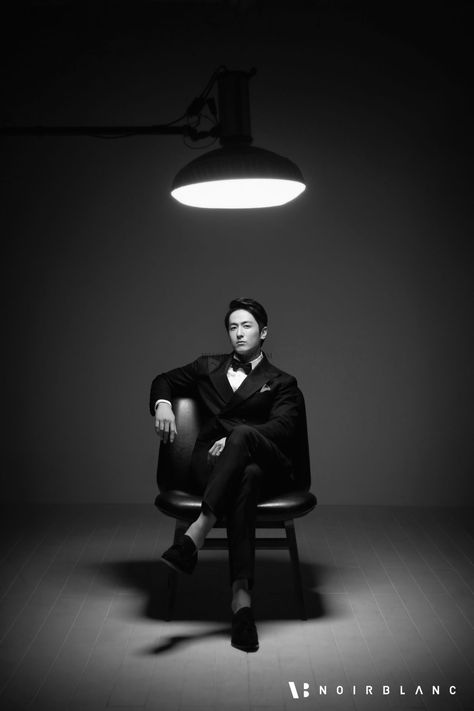 According to statistics, more than 80% of professional photographers in Japan and more than 25% in England have switched to mirrorless cameras. They are so small and light that you can carry them with you just for a walk.
 And at the same time, mirrorless cameras, like my Fujifilm X-T2, fit easily in the hand and even in a small women's backpack.
What if something interesting happens and you don't have anything to film it with? Or you saw a location of stunning beauty, but in the absence of a camera, you will have to capture it only in the depths of memory ...
So again: always take your camera with you.
Read instructions
The camera requires the same treatment as any other technique. Therefore, the first thing after purchasing a camera is to inquire about its functions. The instructions were created for them to be read and learned about all the intricacies of using the equipment and about its functionality.
You can't even imagine how much useful information you can get from your camera manual.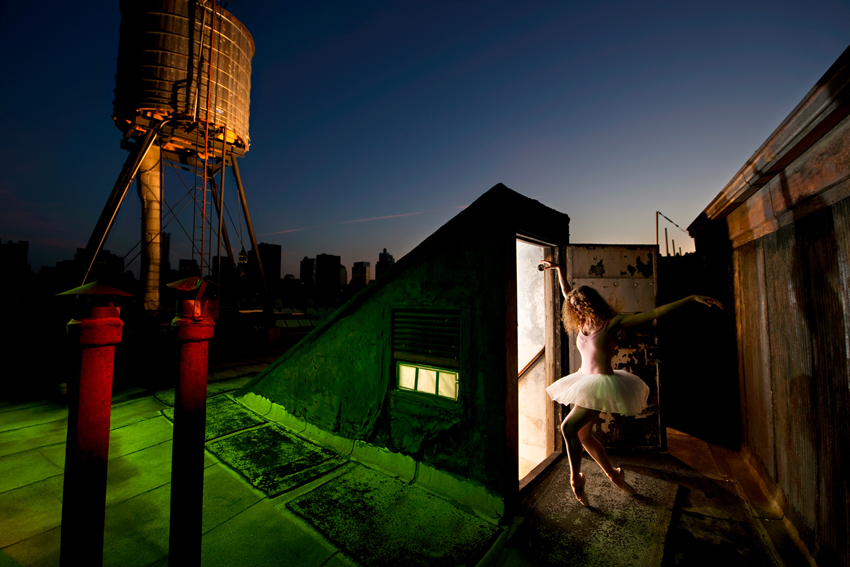
And don't take this point lightly. In any manual for the camera there are basics that are given out as copyright information in any local scale photography school.
If you threw away your manual in a fever, or if it's in a language you can't read, don't worry. Your way is to go to the manufacturer's website and literally in three or four steps you will be the happy owner of the instructions for your camera.
Shoot in RAW format
Think of a JPG as a printed image from the era of film cameras. The maximum that you can do with it is barbarically draw mustaches on happy faces with a marker.
RAW is the negative. It allows you to adjust the color, contrast, brightness, shadows without losing image quality. With this format, you can save even a completely hopeless shot.
The only nuance, and you will soon get used to the fact that there is not a step without nuances in photography, is that the RAW format is very heavy. Approximately one megapixel in your camera is equal to one megabyte in a raw format file.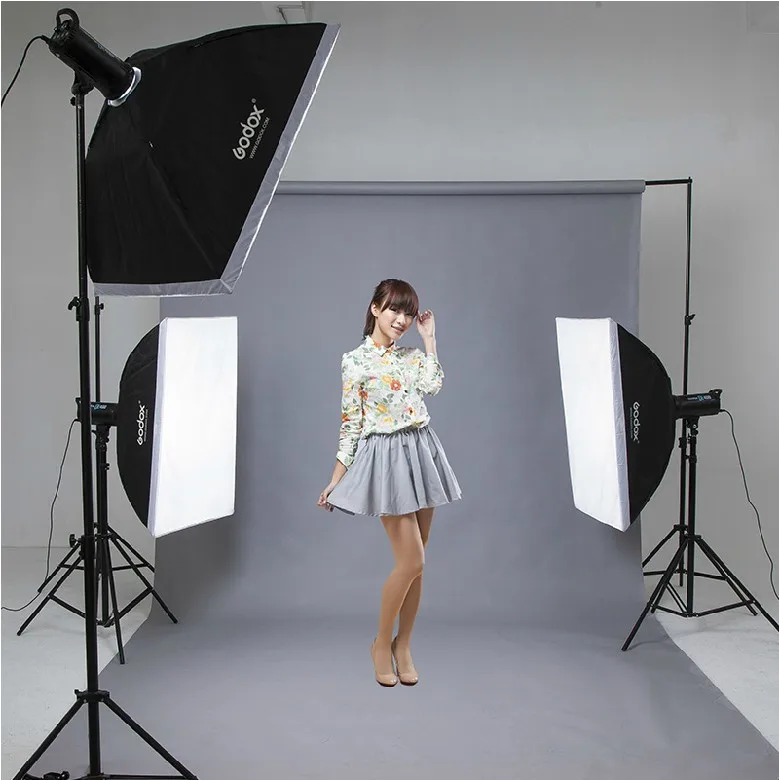
Accordingly, if your camera has the ability to set the raw + jpg option, use it. Jpg for photo selection, raw for processing.
Buy a tripod wisely
Do you need a tripod? You can understand this only when you understand what style of photography you will dedicate your time to. A tripod is essential for nature, night scenes and still life photography.
In the photo, I'm engrossed in the process of making a video. This is one of those cases where it's impossible without a tripodBut in portrait or travel photography, he will be a burden. I only use a tripod when shooting food or videos. And when I walk the streets of Rome or Barcelona, my tripod stays at home. I do not need such a heavy burden in my walks.
Therefore, once you start your journey in photography, don't rush to buy a tripod. Better get a friend who has one. And don't forget, there are tripod legs and heads for every type of photography.
Disable camera effects.
 No, turn
 Remember that if you are only shooting in jpg, the effects must be turned off. You will not be able to correct them later during processing. At the same time, if you photograph in raw + jpg, you can turn on any filter, be it sepia or black and white film from the era of Helmut Newton.
In Adobe Photoshop and Lightroom, in one second you can return your raw color to its original color or change the effect to a completely different one. And add a preset. For example, VSCO or any other.
Choose a camera with manual settings for all parameters
In my photography school, I make it mandatory for students to switch to manual mode. Most often, it is marked with the letter M. This approach allows you to better understand the exposure and shoot creative photos without trusting the camera's processor.
Yes, you will not always want it, yes, it will not always be convenient. But if you really want to be a pro, learn to shoot in manual mode. And only then, if necessary, switch to semi-professional modes, for example, when shooting children or a reportage.
Lens selection
Lenses can be divided into wide angle, portrait and telephoto lenses. Each of them serves its own tasks. Do you remember that without nuances in photography you can’t go anywhere?
Choosing a lens is a process. For example, before I found the perfect portrait lens that I liked the design of, I changed about 15 models. No, I didn't buy them all. Some I rented, some I borrowed from friends.Choose a lens based on what or whom you are going to shoot. Wide-angle lenses are used when shooting nature and interiors, portrait lenses are used for shooting people. Therefore, first decide on the subject of shooting, and then with the equipment you need.
And remember, you don't have to buy the entire line of lenses first. A standard 18-55 basic lens will suffice (almost all manufacturers have it, it is cheap and usually included in the starter kit) and a creative fixed lens 50mm with aperture 1.4. It is on the latter that you can make beautiful portraits with a blurred background.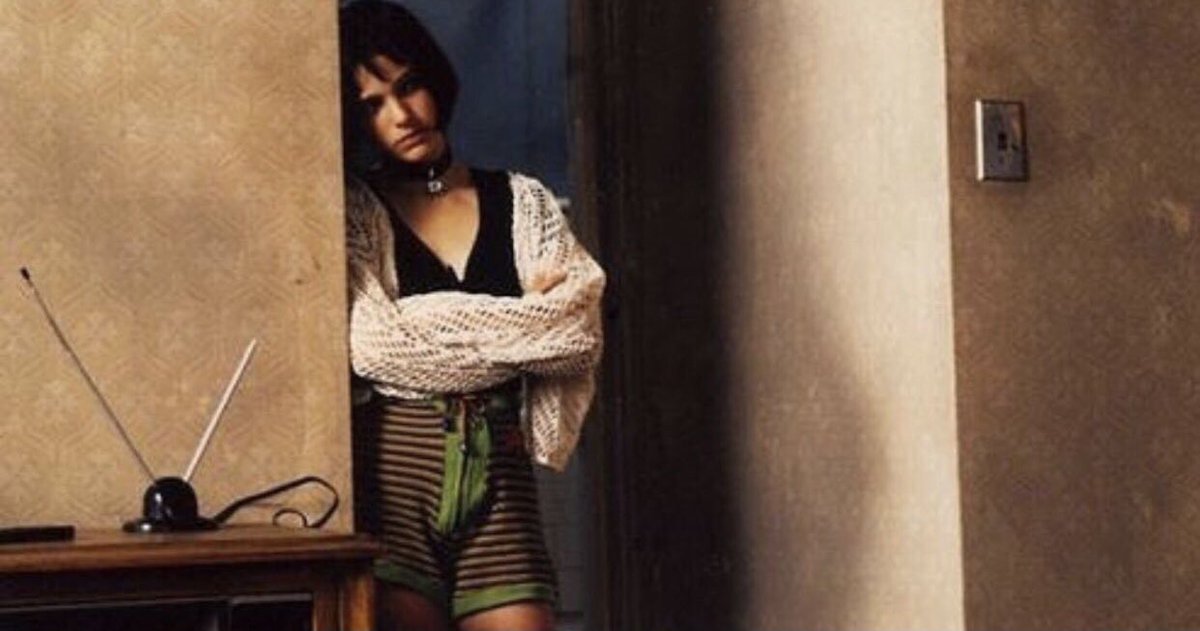
And only then, after a while, you will independently understand what kind of lens you need to shoot your preferences. And, I repeat, find yourself a friend who is unfortunate enough to read this article and who has the entire line of lenses, and from whom you can borrow wide or telephoto from time to time.
Learn the functions of the lens
Stabilization, macro photography, etc... Knowing what you can do with a particular lens will make it much easier for you to take beautiful pictures.
Lenses are available for various tasks, from shooting molecules to photographing exploding galaxies and black holes.
By the way, would you like to know how a food photographer lives? In this short video, I talk about my profession and shooting around the world:
Exposure
Shoot wide open
Remember this abbreviation: DOF. It's not a virus, it's Depth of Sharply Rendered Space. It can be from one millimeter to infinity. Roughly speaking, it is the depth of field that is responsible for the beautiful blurry background. Rather, when the background is blurred, this is called shallow depth of field or small depth of field.
There are four factors that govern depth. And one of them is an open aperture. The wider the aperture, the shallower the depth of field. And secretly, lenses with open apertures are quite expensive. But they also give a beautiful picture. Use
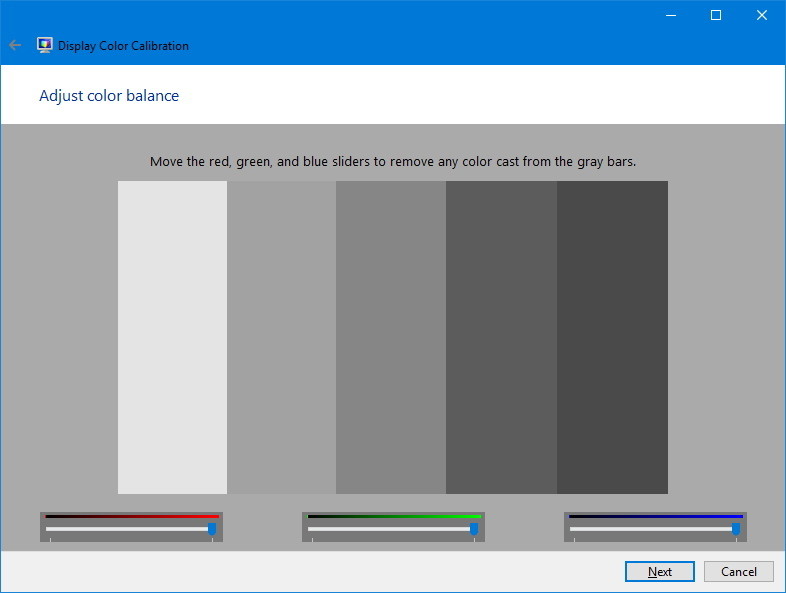
Set the correct white balance
To avoid taking pictures that are excessively yellow or blue, you need to set the white balance correctly, depending on where and how you shoot.
This photograph illustrates how the mood and meaning of a photograph changes with changes in white balance temperature.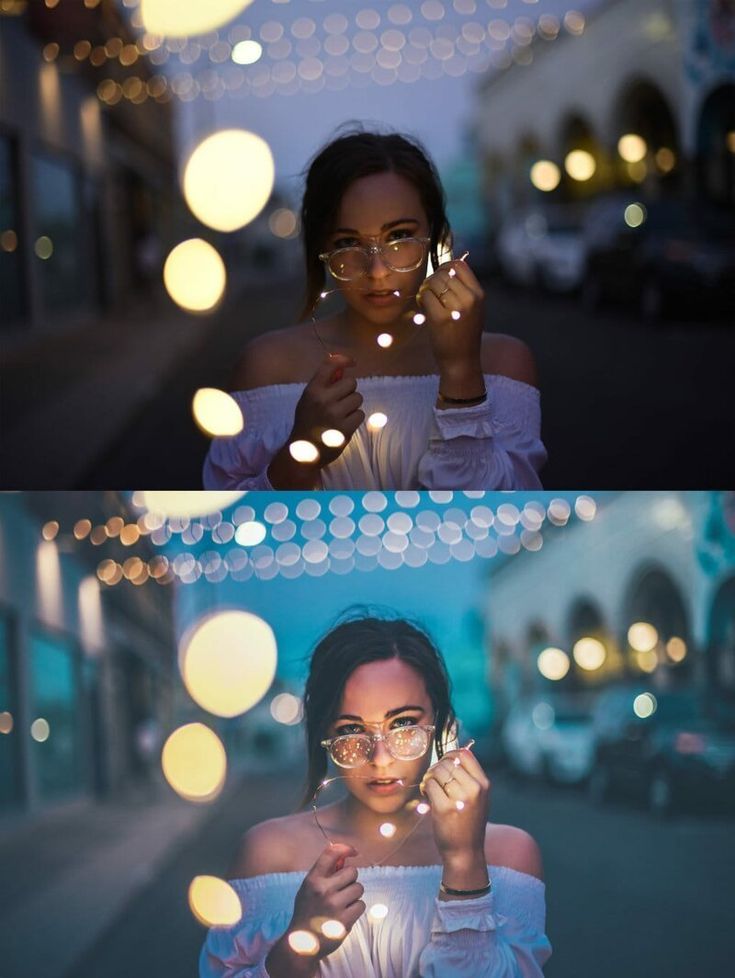 In this case, the most correct temperature is 6500K. P.S. I hope my wife doesn't kill me for using her pictures so brazenly 😊
Most white balance can be left to the camera's automatics, and it does a great job in a wide range of different situations. Difficulties can arise only in a few cases: there is no white, black and gray colors in the frame, you are shooting at values up to 3000 or above 7000 Kelvin.
This is the flame of a burning candle and dawn and sunset in the early stages on one side and fog on the other. But don't worry, if you shoot in raw, then you can fix the white balance in a few seconds in Photoshop and Lightroom.
Light
Avoid bad lighting
Good lighting is vital to getting perfect shots. therefore, poorly lit rooms or ugly artificial light are not your story.
Learning the art of controlling light is the main task of any photographer. It is light that creates the pattern, and light is part of the composition. If you like the photo, it means that most likely the photographer set the light correctly.
In my photography course for beginners, I devote two large sections to light, and in many other sections I talk about how light can affect color and composition and the subject and meaning of a shot. And below I will look at the most common mistakes of novice photographers and how to avoid them.
Direct lighting kills volume
Built-in camera flashes often do this. Cover them with blue duct tape and never turn them on. Flat, not voluminous and ugly. This is how you can describe direct light from a built-in flash or a flash put on the camera and aimed at the subject.
In all of these photos, I created a separate side light. Agree, thanks to such a light-shadow pattern, volume is better felt. Use side light and side-to-back light of the photographer. But do not forget, light creates shadows, and if you don’t need deep shadows according to the shooting plot, they can be softened either with a built-in flash or a reflector.
By the way, direct lighting from a large window is good. Soft, enveloping and almost shadowless light is loved by many photographers. Try to position your model so that you are between the large window and the subject. And enjoy the beautiful black and white pattern.
Use the mode light
The mode time is half an hour before and after sunrise and one hour before and after sunset: it is divided into “blue” and “gold”. Half an hour before dawn and an hour after sunset, the light is soft and bluish.
This shot was taken 15 minutes before sunset. Although the regime light is the most beautiful, you need to hurry with it. You have very little time to take good shots. Therefore, plan. But more on that below.After sunrise and an hour before sunset, golden time comes - the sun gives a soft golden color. This is good for atmospheric and portrait shots, as well as for landscapes.
This is the favorite time of any photographer. After all, at other times of the day it is difficult to get such beautiful photos. Try to position your model so that the sun shines from behind the subject's back and enjoy the cool result.
Use a detachable flash
Many photographers do not like the camera's built-in flash. And in professional models there is simply no built-in flash. Therefore, they use a removable one. On-camera or ring flash...
On-camera flash is worn on top of the camera and is often used in reportage photography. Shooting events, weddings, birthdays - that's what it is for. If you don't plan to shoot such events, you probably don't need to buy a camera flash.
Ring flash is worn on the lens and encircles it. It is used for macro photography. For small objects, the ring flash acts as a large window from the previous section, creating a beautiful and soft light and shadow pattern.
Use studio lighting
Studying light is best done with controlled sources. Agree, you can’t control the sun, but studio light is easy. To do this, you just need to take a loved one or friend as a model and rent a photo studio.
Often in many large studios there is a special person who knows the magic of proper lighting 😊
Don't shoot indoors with mixed light
We've already talked about white balance in photography. So, each light source has its own color temperature. It is measured in Kelvin.
An incandescent bulb has a temperature of 3200 Kelvin, the sun at its zenith is 5200 K, an overcast sky is about 7000 K. The higher the number, the colder the color. Therefore, when shooting indoors, you may encounter mixed light.
An incandescent lamp (3200K) is on in one corner, an LED strip (4500K) is on in the other corner, and the light from the window has a temperature of about 6500K. Accordingly, when shooting, you will encounter the fact that one part of your model's face will be yellow, the other blue.
How to avoid this? In the photography course for beginners, I talk about the method used in filmmaking and complex staged photography. These are conversion filters that change the color temperature of a light source.
But for a beginner photographer, this method is difficult. So just turn off all the lights and move closer to the window - shoot with natural light from the window. Unless, of course, the shooting takes place during the day.
In the video below I show and tell you how to work with light from a window
Composition
Composition, along with light management, is one of the most important pillars in photography. There are over hundreds of different rules, laws, principles and properties of composition.
But, the composition is first of all not the rules, it is the ability to observe and see. We photographers call this vision. You have two ways to learn composition. The first is to learn the rules and follow them. The second is to watch. Paintings, other photographs, art objects, architecture, natural masterpieces.
Naturally, you need to combine both. And also understand psychology. After all, the main task of the composition is to create a plot, to convey meaning. And this is psychology.
In photography school, I devote more than 60% of my time to composition, because there is such a rule in photography: you will learn how to work with exposure in three months, learn how to set the light in half a year, and you will study composition all your life.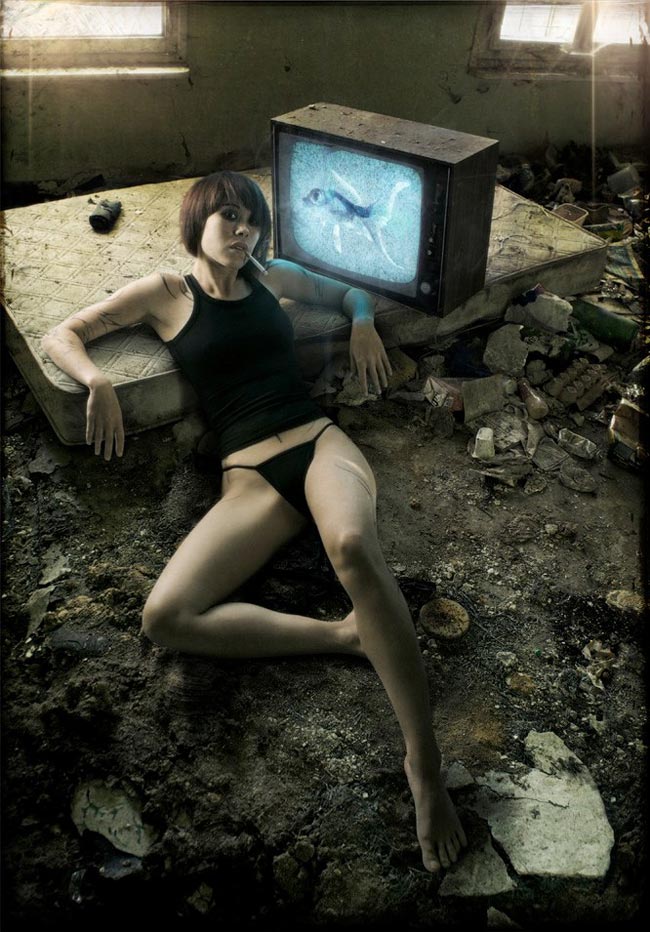
Each photo has a subject center
Each photo must have a subject center. And this center should be one. This is an axiom of photography that all professional photographers follow.
The human brain is designed in such a way that we grasp all the details in the image and combine them into one whole. And if you use several scenes of the same importance in your frame, then there is a chance that the viewer's attention will be defocused and he will become irritated.
Please note that in the left frame the subject center is a girl. On the right is the process of brewing coffee.The story center is the main part of the image that focuses the viewer's attention. Properly built composition helps to see the subject and present the story embedded in the picture.
But once you start to understand the psychology of the composition, you can add a few sub-plots, complicating the meaning of the shot and giving you something to think about.
Rule of the golden section
Rule of the golden section - the basic geometric rule for the arrangement of objects in the frame.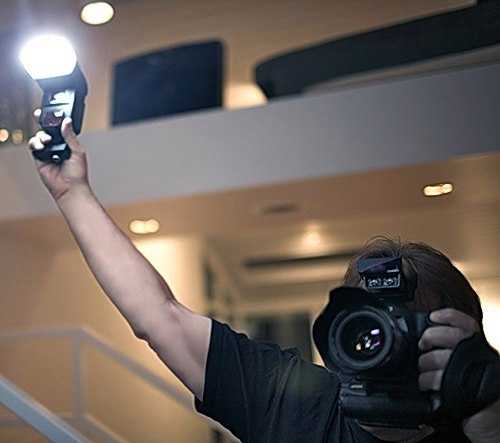 It is used to achieve harmony in the frame. It is considered ideal for perception by the human eye.
Whether you are shooting nature, interiors or architecture, the golden ratio will be your basis for composition. The basis, but not the only rule.
Although I rarely work with the golden ratio, this frame is a great illustration of this rule. The main focus is our silly faces with my wife. And I placed them at the intersection of linesHow does it work? In photography, we need to divide the frame into three parts, equal in aspect ratio as 3/8, 2/8 and ⅜. Horizontal lines place horizontal objects, vertical lines - vertical objects. Intersection points are points of semantic objects, where we place the most important thing in the picture: faces, eyes, plot centers.
PASS THE MARATHON AND WIN A PATRIOTIC T-SHIRT
Learn in 14 days to create photos that will take first place in your portfolio. Get feedback. And win a patriotic T-shirt from the Ukrainian creative brand Benya&Zubrik.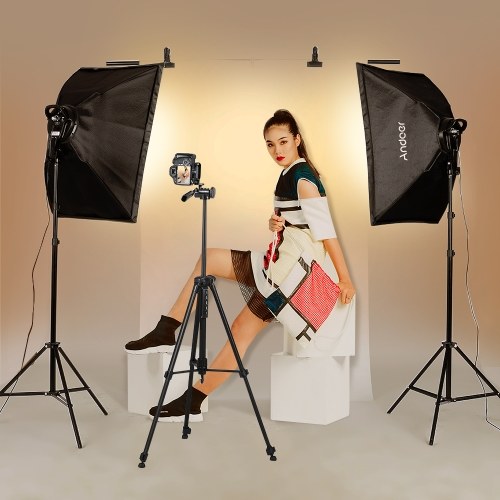
P.S. We hold a drawing every 2 weeks
Start for free
When shooting a moving object, leave a place in front of it in the frame
When shooting a runner, leave a place in the frame in the direction of movement, so you will make the photo more voluminous and logical. A picture in which a person is moving “to nowhere” will cause dissonance in the viewer.
This rule is rather from the psychology of perception, but you remember that psychology is a composition. If you asked your model to look to the side, or is it a moving car, a runner, or something else, leave room in front, so our brain harmonizes the process.
My flight was delayed and I filmed the planes landing to keep myself busy. This one is the best shot. And look, leaving a place in front of the plane, I thereby created calmness. “Ladies and gentlemen, we landed at Milan airport. Stay where you are and don't unfasten your seat belts…” But if you want to create dissonance, stop attention, cause irritation - do the opposite.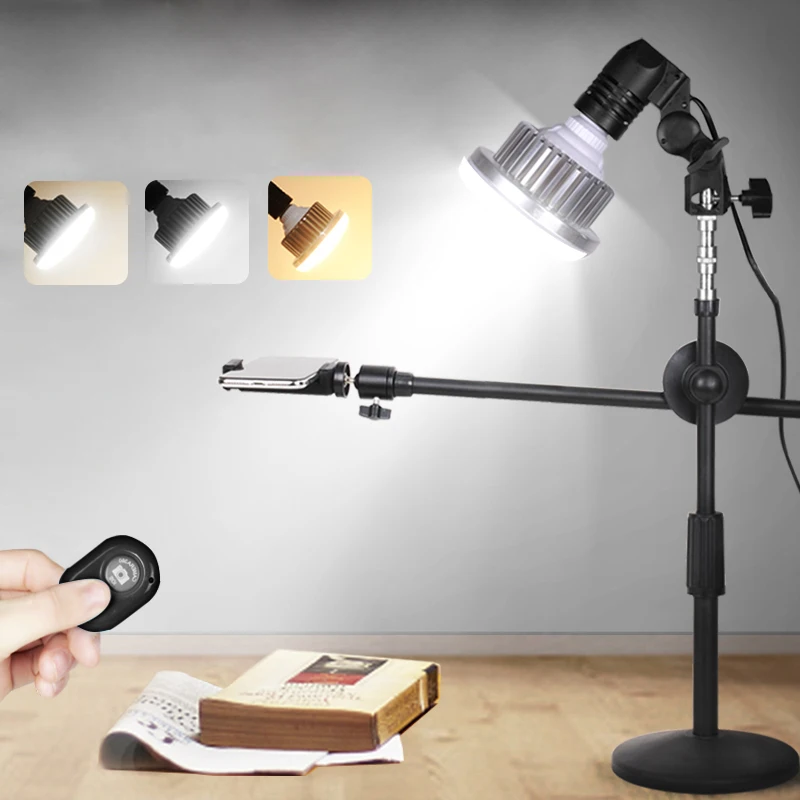 For example, a moving car, in front of which there is no space, creates a feeling of braking, anxiety.
The best way to explain this rule is to imagine a ball against a clear blue sky. There is nothing in the frame. Only the sky and the ball.
If the ball is in the center of the frame, it appears to be hovering. If there is more room above the ball, it appears to be flying upwards. If there is more space under the ball, it seems that it falls down. You can see that there are many nuances in photography.
Keep your eyes in focus
When we look at a person, the first thing we find is the eyes. The eyes are the most expressive part of the face. We see “eyes” even in the cracks in the pavement and in the shadows.
No matter how big I shoot, I try to focus on the eye closest to me.So again, psychologically, it's best to always focus on them when shooting portraits. On the eyes.
Practice
Shoot regularly
Without constant practice, any knowledge is forgotten.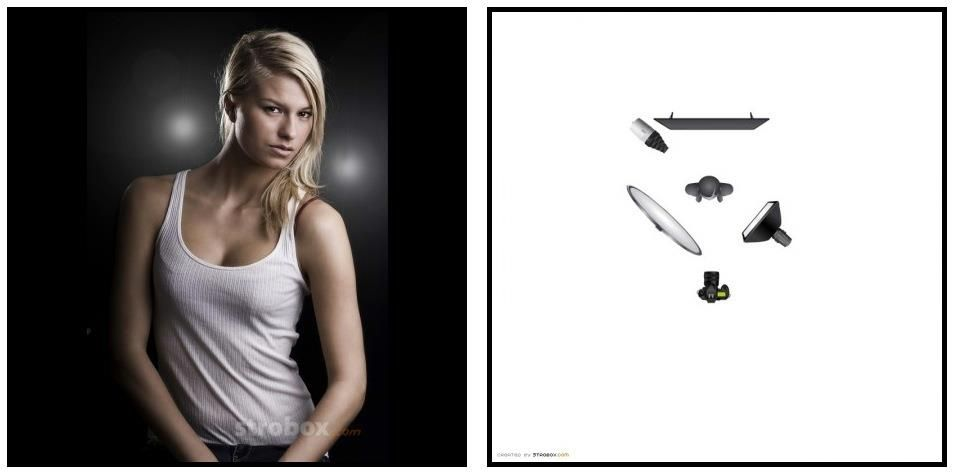 If you learned English a year ago, and then did not practice it, your knowledge could obviously deteriorate. It's the same with photography...
The ability to take a beautiful picture depends on constant practice. So shoot regularly.
It would seem that this is such an obvious rule, it is written in all motivational books and articles, that I didn’t even need to talk about it. But I don't just want to give you some advice and breathe easy, that's not my way.
I would like to invite you to try my hand at photography for beginners. Namely, to receive homework, as my students do.
You will receive your homework twice a week. It will include several interesting stories that you can complete at your level of knowledge, a selection of photos for this story and a set of tips on how to shoot these stories. And many more useful photography tips that will increase your level of photography by several orders of magnitude.
When photographing someone, imagine yourself in the place of the client
What kind of pictures would you like to get after the photo session? Of course, successful and super-beautiful. Such that they are not ashamed to post on social networks. Those that will collect a lot of likes from friends.
Each client has his own ideas, needs and wishes. Each client has their own tasks. The task of the photographer is to figure out these tasks and complete them with the help of a photo session.
Here's an example. A girl approached me with the aim of doing an erotic photo shoot. I invited her to a preliminary meeting and talked to her for several hours.
We chatted about various topics, looking at inspirational nude photos on Pinterest, discussing locations and details. In the end, when she began to trust me a little, she admitted that with the help of this photo shoot she wants to return her boyfriend. With a message: look what beauty you have lost...
It was an obsession that I had to gradually move to another topic. I offered her to be her boyfriend for a second, who saw her naked photos on social networks. Would he want her back after that?
Unfortunately, I can't show you a photo from that photo session. Therefore, just a cute cat being squeezed by a girl 😊Of course not. And we did a completely different photo shoot, where Masha, that was the name of the girl, appeared in a completely opposite image. Not accessible, but mysterious. Not naked, but stylishly dressed. Still sexy, just as desirable, but not at all in the way she wanted to appear in front of her ex-boyfriend.
Make a list of the shots you would like to shoot
This can be done in a number of ways. It’s convenient for someone to just save a photo on their phone, for someone to write it down in a notebook by hand .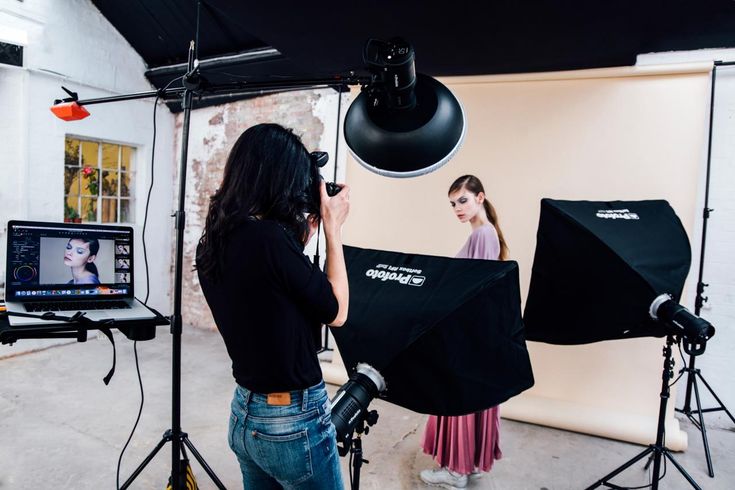 .. This is a matter of habit.
I personally find it convenient to plan frames on Pinterest - this is an aggregator site for all kinds of ideas for photos (and not only). Its convenience is also in the fact that there you can create separate boards for each topic. You can also make them private so that only you can see what's saved there.
By the way, I also show my clients boards on Pinterest to find inspiration and develop the plot of the frame.
Think over the idea and props in advance
In general, planning is a very good habit. By carefully thinking through the idea and deciding what is needed to bring it to perfection, you can make a successful shoot.
Don't expose yourself and your client - get ready to shoot in advance.
Don't review every photo you take
Of course, not every shot will turn out perfect. Therefore, it is pointless to review each photo immediately after you have taken it. This will only take your time and the client's time, and it will also get on their nerves.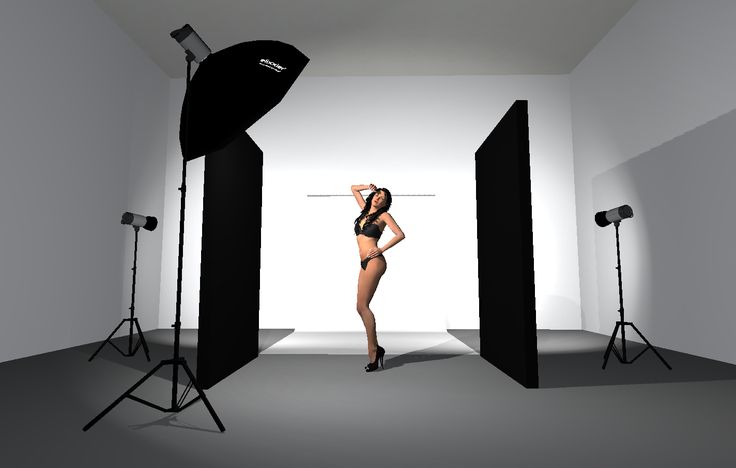
It is best to shoot each frame several times in a row, in case you accidentally get into focus or the client closes his eyes and then, already at home, upload all the photos to Adobe Lightroom and make a selection already right there.
Go shooting in a good mood
Good mood is the key to successful shooting. No, of course, one mood is not enough, but it plays a huge role in the filming process. A cheerful photographer will not only win over the model, but also charge her with a good mood, which will contribute to excellent shots.
Be cheerful and charge your models with your optimism. But do not overdo it, not everyone will understand the jester photographerBut if your goal is dull shots from a dull photo shoot, then forget what I just told you.
Show only your best work
Why would someone see your bad shots? Leave them for a personal archive, or better yet, delete them altogether. Especially if you're in the habit of giving away all your footage to the client.
After all, who will give a guarantee that he or she will not post the entire photo session, even with the most terrible shots, on social networks and will not sign the album in large letters - VASYA PUPKIN PHOTOGRAPHED ME (Substitute your name)
I had such a case in practice: I forgot to remove bad takes and gave the shoot to the client. He also chose the worst and ugliest photographs, posted them on Facebook and signed: this is how one of the best photographers shoots, blah blah blah ...
What motivated him, I don’t know. But now you know that such people exist on this planet.
Interaction with clients
Interaction with clients
When I photographed people, I almost never scheduled a photo session without first meeting with the client. First, you need to get to know the person, find out “what he breathes”, and win him over.
Secondly, after discussing all aspects of the shooting, you will know exactly what the customer needs.
And thirdly, with the help of a preliminary meeting, you will put your client to yourself and it will be easier for her (or him) already at the photo session itself.
Prepare for the weather
If you plan to shoot outdoors, be sure to consider the weather. Yes, the weather can change very quickly, so you should always be prepared for force majeure situations.
In 2011, when this backstage was made, I didn't have any experience with the weather. Looking at these photos, do you think I started doing this later?You obviously don't want your equipment to be flooded with rain, and the list of desires of a model does not include ruining makeup and hair in a downpour or wind.
Time it right
Always leave yourself some time in reserve. So that later you do not rush and do not panic in case of force majeure.
Do not schedule multiple shoots on the same day
A photo session is a creative process. When working with a model, you seem to connect with it in one impulse and it is quite difficult to switch back.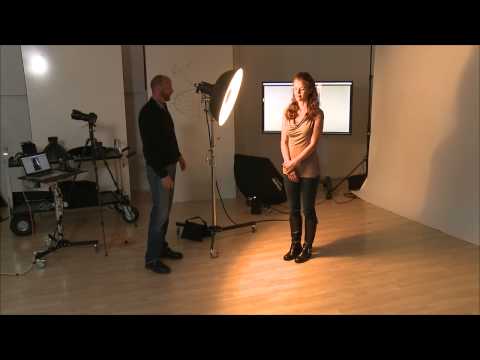
Therefore, by scheduling several photo shoots a day, you run the risk of not creating such a “connection” with your other model. And, of course, your second client may not get such successful shots.
Create a mood board
Also known as an inspiration board. You can make it both yourself, based on the wishes of the client, and together with the customer. Of course, the second option is better - because then both of you will be one hundred percent sure that the result will satisfy both parties.
Moodboards are practical to create using the Pinterest service, which we talked about earlier.
Don't be intrusive (when shooting at events, etc.)
Nobody likes intrusive people. And obsessive people with a camera are disliked even more. Therefore, if a person at an event does not want to get into the frame, pose for you ... do not force him.
Otherwise, the photos will be unsuccessful. After all, a person will be constrained or annoyed. No one wants to receive such photos.
Pay attention to details
Always pay attention to the background - to those objects that are located behind the person and near. And then you can get a picture where everything is perfect for a person - hairstyle, facial expressions, posture, but lying far away, for example, a garbage bag will make you put an end to the picture.
Alas, I don't have shots with protruding trees and poles in the model's head, so here are some beautiful pines for you. This looks extremely ridiculous and suggests that the photographer either does not know how to shoot or simply does not respect his model.Correct shooting height
Shoot children and adults differently. If your model is shorter than you, shoot at her level so as not to spoil the proportions of a person. By the way, many often take pictures of children from above - and this is not always good. So make an effort and sit down - squats are useful!:)
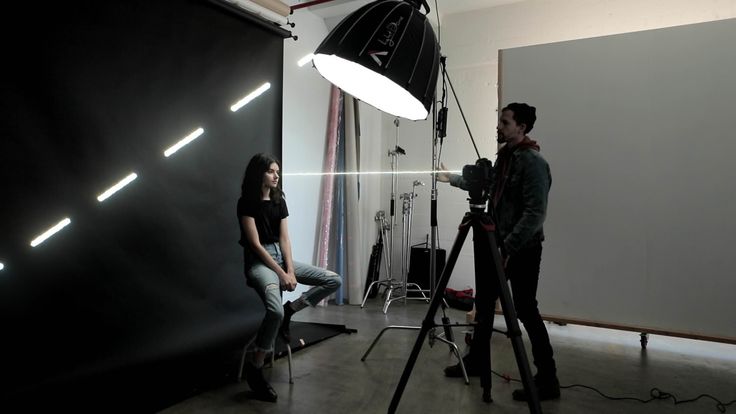
This is my friend Anton photographing a portrait of a stranger in Nice from chest level. Be like Anton. Shoot right.
 A universal tip: if you are shooting a portrait, take it from the model's chest level. If you shoot ¾, shoot from the waist level, if you shoot at full height, lie down on the floor.
Wear comfortable clothes
During photography, you will have to wallow on the floor, hang from trees, kneel in puddles and sprinkle ashes on your head. And don't forget, the photographer is always on his feet during the photo session. For several hours in a row.
Therefore, do not wear high heels and a tight miniskirt. Loose-fitting clothing and comfortable flats are best.
My record is 35 kilometers in Singapore in one day. In second and third place are Rome and Berlin. There I went out for 26 km. I, like no one else, know the price of the right shoesP.S. Just do not be surprised that I am in the frame without a camera. They take me on it.
And this advice does not apply to reportage photographers. After all, if you are filming an event where the dress code is “Black Tie” or “Festival attire”, you should at least know what it is, and at the very least, dress accordingly.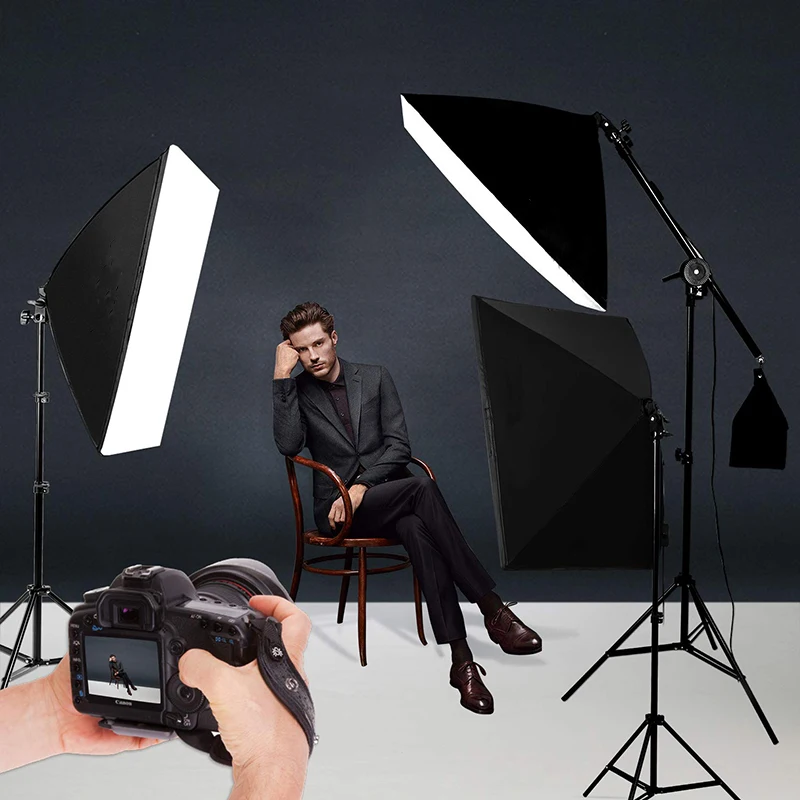 No one will take seriously a photographer in a sweaty T-shirt among tuxedos and evening dresses.
By the way, another important factor is the bag for the photographer. Watch a short video on how to choose the right bag for you:
Plan the key subjects
Decide on the number and locations of the main subjects of your photo session. This will make it easier for you and your models to act during the shooting process.
And don't forget to set the timing. What time does it start, how much time is needed to prepare and what time is it to move to a new location.
Proper timing will eliminate the fuss, show you as a professional and also allow you to estimate the amount of time needed for a photo shoot and correctly set the price.
Build relationships not with the camera, but with the subject
Anton is in the frame. I filmed it in Hong Kong in 2014 by order of a modeling agency. We built friendships during the photo shoot and are friends to this day.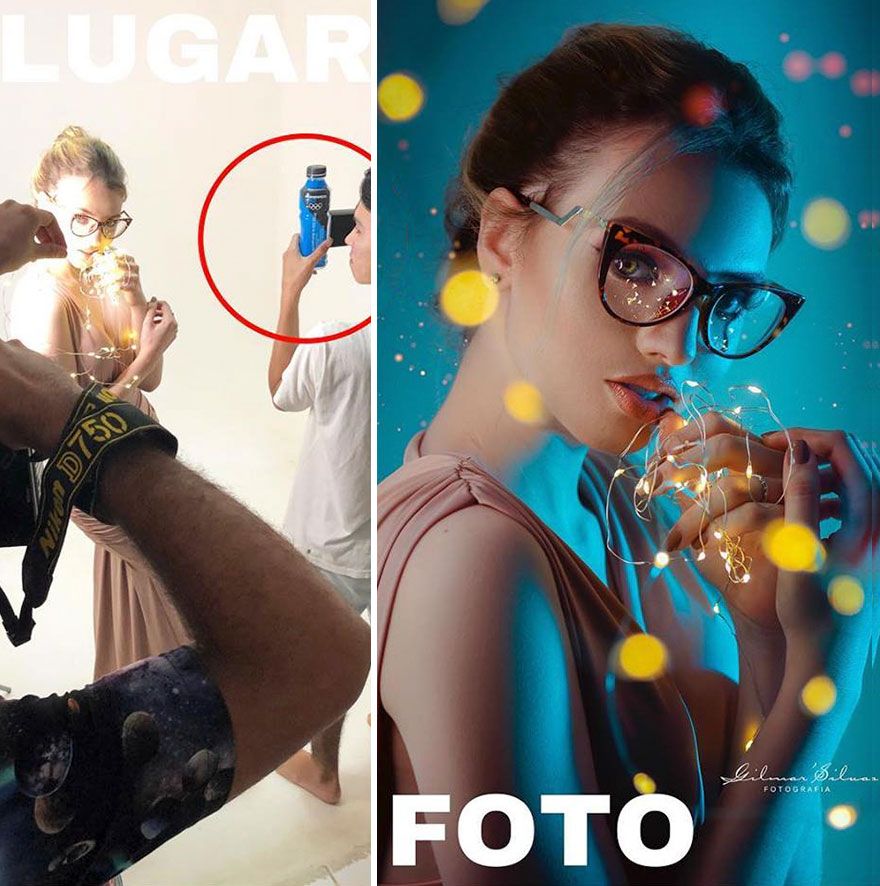
Become a friend of your client during the photo session. Talk to him, make him laugh, do everything possible to make him feel free in front of the camera - this is the key to an excellent result.
Get better
Get inspired by other people's work
Remember that being inspired and copying are two different things. Copies are forgivable at first, but then you have to find your own style.
You can have as many sources of inspiration as you like. Now it is not difficult to find an interesting idea for photography. Sign up on Pinterest - this is an aggregator site for ideas on any topic. And as I mentioned above, it is also convenient to make mood boards on it and select the shots that you want to embody.
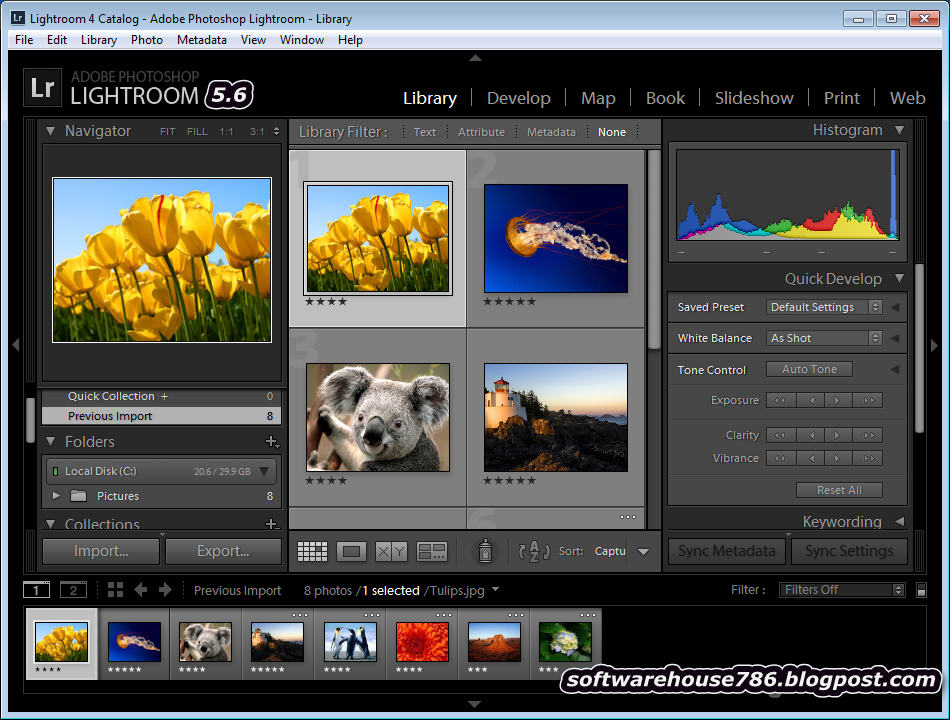
Learn to edit photos
Adobe Photoshop costs only $10 per month. And it gives you a huge number of possibilities. Practice processing. Learn new things. Get inspired by how other photographers edit their shots. Look for what's right for you.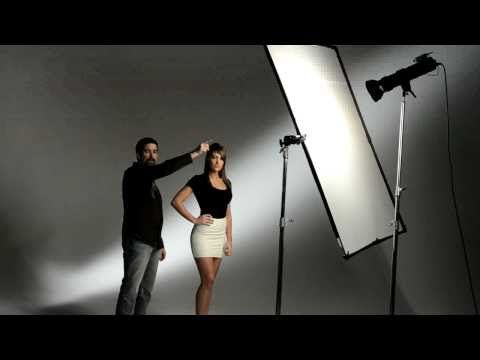
And with Lightroom, which is included in one package with Photoshop for $10, you can edit photos even from your phone. It's incredibly convenient.
Always delete ugly photos
No, you don't need them. No, you won't fix them by processing. And no, they will not set a bad example for you in the future. Although, here you need to make an amendment: they will serve, but you still have to remove them.
Don't clutter your memory with bad shots. Delete them without the slightest regret.
If the photo is uninteresting, there is no point in making it black and white.
Yes, black and white pictures really look spectacular and in certain cases even outperform photos in color. However, this is only possible when the frame is initially successful.
A boring photo “about nothing” will not become a masterpiece if it is made in black and white. So such pictures should also be disposed of without regret.
You will spend much less time shooting something new than fixing a bad old one.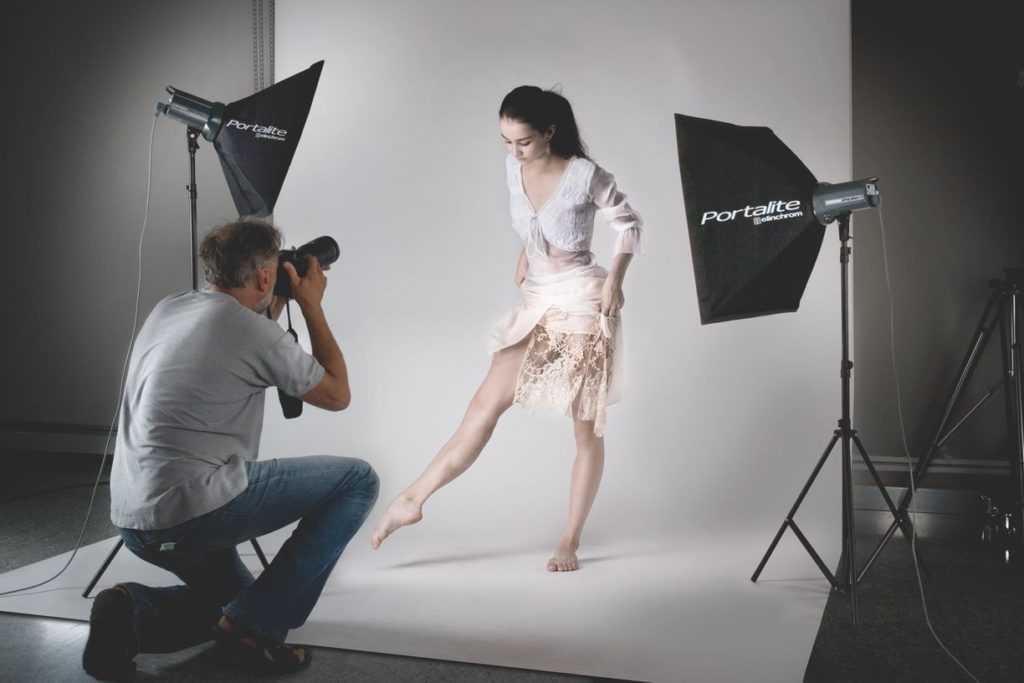
Keep learning
You get better with every new shoot. Your skills develop when you pay attention to them. Invest your time and money in education.
These are photographs that I took in the early days of my career as a photographer. At that time I knew little, understood little. I'm ashamed to show them, honestly. But without them, you will not appreciate my progress in the future.Learn from other photographers. Choose the most convenient learning format for you. You must like what you are doing, otherwise there will be no positive result.
And these photographs are from subsequent years. I studied a lot, read books, attended courses and workshops, webinars and took private lessons. Compare these photos with the previous ones. Be like me, keep learning.And finally:
1. If you liked the article, rate it below
2. If you have any questions, write them in the comments below, I will be happy to answer them!
3.