How to turn a picture into an outline
Picture to Line Drawing (Coloring Page) | Free&Simple Online Tools - DataChef
Select your image and press "CONVERT".
Processing
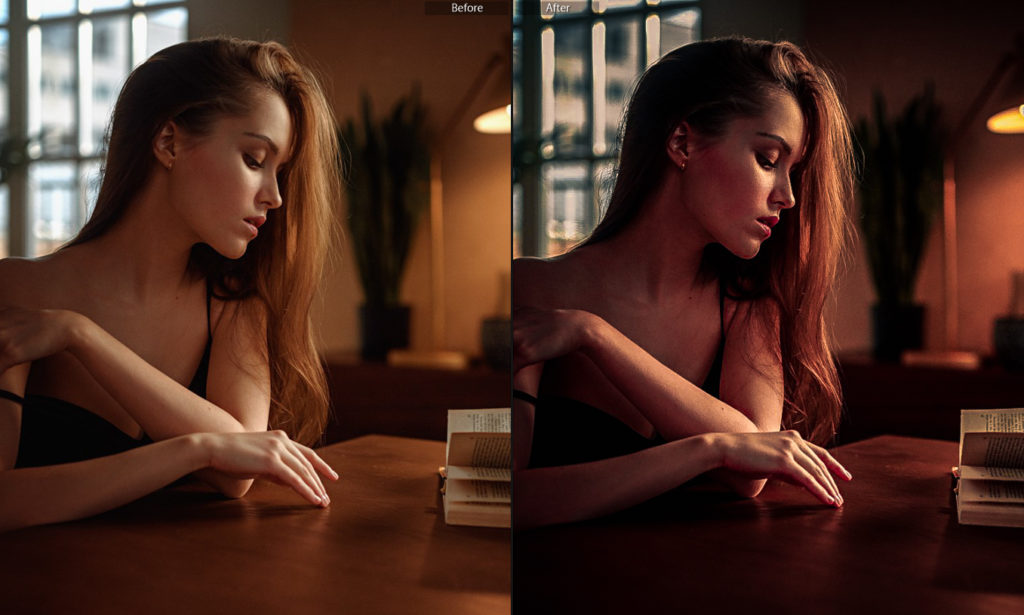
Before
After
ERROR:Upload file size must be under 10MG. ERROR:No file selected.
Browse Files
or
Drag & Drop files here
Converting...
Converting...
Download
Convert
Sample Before
Sample After
"Fine Pen" Style
"Smooth Pen" Style
"Pencil" Style
"Colored Pencil" Style
About This Feature
On this page, you can convert your photos or illustrations into line drawings or coloring pages.
(This feature can detect the contours of objects in your uploaded image. )
The conversion can be fully automatic, but you can also set details such as line type (drawing tools to simulate), pen pressure and background(white or transparent).
Supported file formats are JPEG, PNG, GIF, WebP and Heic extensions.
About Line Types
"Fine Pen" Style Example
"Smooth Pen" Style Example
"Pencil" Style Example
"Colored Pencil" Style Example
- Fine Pen(Recommended)
It's like a mapping pen (fine dipping pen) for drawing illustrations.
This can extract lines accurately and is suitable for fine touch drawing.
Because of its wide range of usages and short processing time, it is recommended to choose this option basically. - Smooth Pen
It's like a G-pen (thick dipping pen) for drawing illustrations.
Like a fountain pen, the lines are pressure sensitive.
Since the lines are clear, anti-aliased and have no shading, the output is close to coloring page, and it's especially suitable for printing.
This option is suitable for converting images with clear outlines, such as manga and anime, or flat color illustrations.
On the other hand, it's not good for converting illustrations which requires delicate touch, noisy photos, low resolution images, and portrait photographs.
It's recommended that the original image is 1280px or larger and is not too compressed. - Smooth Pen(vector graphics)
"Smooth Pen" style can be output in vector format (SVG file).
It looks almost the same as the regular "Smooth Pen".
The difference in this vector format is that the output is not blocky(pixelated) no matter how much you zoom in.
So it is recommended for larger image or printing.
However, the vector format cannot be saved on iPhone or iPad.
Not all printers are supported, so this is a setting for advanced users. - Pencil
It looks like rough pencil sketch. Since the position of the lines are clear, it's suitable for tracing lines by yourself over the output image.
This option is recommended for technical drawing such as drafting of buildings or machinery.
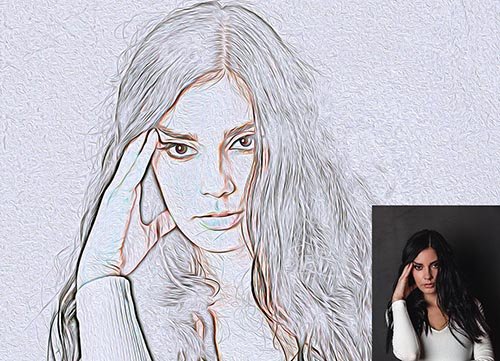
Also, if you convert with "Fine Pen" and the lines are whited out or blacked out, try again with "Pencil" and it may work. - Colored Pencil
The colors used in the original image will be extracted as outlines.
If you want to make the contour lines less noticeable when applying color, this mode is the best.
It's good for painting watercolor with a soft touch, and it's suitable for converting face photos without losing their original atmosphere, or converting food photos without losing their delicious look.
This option is also useful to use as a coloring book with hints on where to paint in what color if you want to repaint with the same color as the original image.
About Background
If you are to color in analog, it is recommended to use a white background.
If you are to color it digitally, a transparent background is more useful.
If you set the background to transparent, you can add a layer under the output image and color the lower layer, so that the extracted lines will not be hidden in the fill.
About Noise
It's better to use an image with less noise to get better output.
If the original image is a JPEG, it's better to be uncompressed, and the resolution shoudn't be too low.
"Line Type" with the least noise is "Fine Pen" mode.
If the original image is as clean that you can't find noise even when you zoom in to twice the size, there will be few noticable noise in the output image.
If the noise is bothering you after conversion, move the "Noise Reduction" slider in the settings.
How to Turn a Picture into a Line Drawing in Photoshop – Path
Illustrations can enhance the style and appeal of your ecommerce site. However, creating illustrations (or hiring skilled illustrators) can be costly and time-consuming.
Thankfully, you can learn how to turn a picture into a line drawing in Photoshop CC 2019 following the steps below. Images of objects isolated on a white background work best for this technique, making this a great option for modifying or enhancing product photos.
Scroll down below the video for the written tutorial.
Before you begin: How to outline an image in Photoshop
If you want to turn a photo into a pencil sketch in Photoshop, but you don't want it to look like you did it in Photoshop, you'll need to pay attention to detail and prepare your image properly before you apply any filters.
In the following tutorial, we'll go over one method that shows you how to convert your image into a pencil sketch flawlessly, and then we'll discuss specific tools you can explore to achieve other image outlining effects in Photoshop.
Not all photos are the same, so you'll need to use your judgement as you adjust filters, blurs and layer opacities each time you use Photoshop to convert a photo into a line drawing using the steps below.
How to turn a picture into a line drawing in Photoshop
- Adjust the contrast of your photo
- Set up your layers
- Convert the image to grayscale using an adjustment layer
- Convert your photo to a line drawing
- Set your Background and Foreground colors
- Add Pencil Shading to your image
- Add a cross-hatching effect to your image
- Make your final tweaks
Step 1: Adjust the contrast of your photo
In the example photograph, the image of the shoes and sunglasses contrast significantly against the white background. The image of the change purse and perfume tube, however, are so light they almost blend into the background.
We'll adjust the contrast of the entire photograph so the purse and tube stand out more.
Go to your Layers panel and make sure the layer that contains your image is selected. If you're working in a flattened image (such as a JPG), this layer will be the locked Background layer.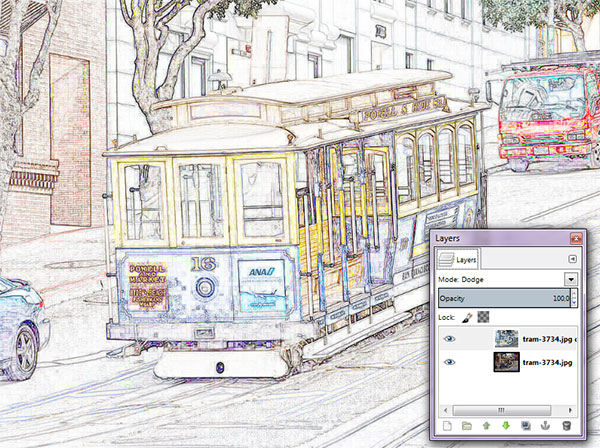
Choose Image > Adjustments > Curves from the dropdown menu at the top of Photoshop's application window.
The Curves dialog box will appear. Make sure Preview is checked.
In the graph on the left side of the dialog box, click on the middle of the line running diagonally through the graph and drag downward, creating a curved line in the graph. You'll notice that the dark areas of the image will get darker, while the lighter areas will remain light.
Note: If you're working in a CMYK image, you'd pull up on the middle of the line instead of down.
Once you're satisfied with the increased contrast of the image, click OK.
Step 2: Set up your layers
In your Layers panel, duplicate the layer containing your image three times, so that you have four identical layers.
To duplicate a layer, select the layer in the Layers panel, click on the Layers panel menu in the upper right hand corner of the panel, and choose Duplicate Layer.
Step 3: Convert the image to grayscale using an adjustment layer
Select the duplicated layer at the top of the Layers panel.
Select the Adjustment Layer icon at the bottom of the Layers panel (the icon looks like a half black, half white circle). Choose Hue/Saturation from the dropdown menu.
You've just created an adjustment layer for Hue/Saturation, which means all layers that appear beneath the adjustment layer will retain the Hue/Saturation properties you set for that adjustment layer.
With your adjustment layer still selected, go to your Properties panel, located to the right of your image by default. If you don't see your Properties panel, you can choose Window > Properties from the dropdown menu at the top of the Photoshop application window.
You'll see three sliders in the Properties panel: Hue, Saturation and Lightness. Drag the slider for Saturation as far as it will go to the left, so that the value listed for Saturation is now -100.
Your image now appears grayscale.
How to convert an image to grayscale: an additional method
Having the Hue/Saturation adjustment layer makes your image appear grayscale, but if you want to eliminate all color completely from your image as you work, you can convert your image to grayscale by choosing Image > Mode > Grayscale from the dropdown menu at the top of the application window.
If you have an adjustment layer in place when you convert to grayscale, the adjustment layer will be deleted.
Step 4: Convert your photo to a line drawing
In this step, you'll learn how to outline, or trace, the picture in Photoshop using a series of layer effects. If your goal is to create just an outline of your photograph, you may decide your picture is complete after this step.
Make your top two duplicated layers invisible by clicking on the eye icons next to the layers in the Layers panel. Then select the visible layer that is second from the bottom of the Layers panel.
Click on the dropdown menu at the top of the Layers panel next to Normal. Select Color Dodge.
With the same layer still selected, invert the image by typing CTRL+I (COMMAND+I on a Mac). You can also invert the image by choosing Image > Adjustments > Invert from the dropdown menu at the top of Photoshop's application window.
Next, choose Filter > Blur > Gaussian Blur from the dropdown menu at the top of the application window.
In the Gaussian Blur dialog box that appears, adjust the slider until your image looks like a line drawing.
Moving the slider the left will result in thinner lines; moving the slider to the right and increasing the blur will thicken and darken the lines, and add some shading to the image.
Make sure that Preview is checked in the dialog box so that you can see how the image changes as you move the slider to the right or to the left.
How to make the strokes of your line drawing thicker in Photoshop
If you want to thicken the strokes of your line drawing, duplicate your original layer one more time and move the new layer above the layer you just adjusted (layer with Color Dodge blend mode).
Choose Filter > Filter Gallery... from the dropdown menu at the top of the application window.
Choose Glowing Edges under Stylize. Here, you can adjust the Edge Width on the right-hand side of the window. Reducing Edge Brightness will result in a cleaner edge.
Click OK.
Back in your layer, click CTRL+I (COMMAND+I on a Mac) to invert the layer, and change the layer blend mode to Multiply.
The outlines of your image will now be thicker and darker.
Step 5: Set your Background and Foreground Colors
In your Toolbar, set your Background Color to white by double-clicking on the Background Color icon.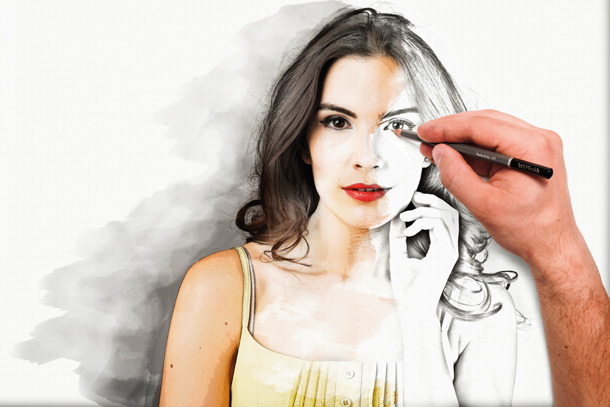 In the Color Picker (Background Color) dialog box, click on the upper left-hand corner of the large color box.
Next set your Foreground Color to a medium gray. Double click on the Foreground Color square in the Toolbar. In the Color Picker (Foreground Color) dialog box, click midway down the left side of the large color box.
Other colors in the large color box (such as the blues and reds visible in the Color Picker panel image below) are irrelevant since you're keeping the cursor all the way to the left side of the large color box.
Related: 9 alternatives to white background product photography
Learn more
Step 6: Add Pencil Shading to your image
In the Layers panel, select the layer above the layer you just worked with. Click on the eye icon to make the layer visible again. Your image will now look like a black-and-white photograph again.
Choose Filter > Filter Gallery. .. from the dropdown menu at the top of the application window.
In the Filter window, click on the folder marked Sketch and choose Charcoal.
Adjust the Charcoal Thickness, Detail, and Light/Dark Balance sliders until the image in the preview window has the appropriate amount of detail. Remember, you already have a line drawing of the photo in a lower layer, so you only need to create shading in this step.
Click OK.
In the Layers panel, click on the dropdown menu next Normal and adjust the Layer Blend Mode of the charcoal layer to Multiply.
Step 7: Add a cross-hatching effect to your image
In the Layers panel, click the eye icon on the top layer to make the layer visible. All layers should now be visible in your image.
With the last layer selected, choose Filter > Filter Gallery. .. once more from the dropdown menu at the top of the application window. If you see the Filter Gallery option more than once in the dropdown, make sure you select the lower option.
In the Filter window, click on the option marked Sketch and choose Torn Edges. Adjust the toggles on the right-hand side of the window until you can see the details of your image.
Once you're happy with the appearance of the Torn Edges filter, click on the New icon located at the lower right-hand side of the Filter window. (This icon looks like a piece of paper with a folded corner, just like the New Layer icon in the Layers panel.)
You'll see Torn Edges appear twice in the right-hand side of the Filter window. While the top instance of Torn Edges is still selected, click on the Graphic Pen filter and change the Stroke Diagonal to Left Diagonal.
You can also adjust the sliders for the Graphic Pen filter until you're satisfied with the image in the preview window. As with the previous layer, you're only creating shading at this stage.
Click OK.
Change the Layer Blend Mode from Normal to Multiply as you did with the previous layer.
Finally, because the graphic pen filter is crisper than the charcoal filter we applied to the lower layer, we'll add a slight motion blur.
With the same layer still selected, choose Filter > Blur > Motion Blur from the dropdown menu at the top of the application window.
In the Motion Blur dialog box, set the angle to -45° and move the Distance slider to the left to create a very slight blur. Make sure Preview is checked so you can see the blur before you apply it.
Click OK.
Step 8: Make your final tweaks
You're not done yet! Playing with the opacity of your layers and cleaning up any dark spots that you see in your image will put the final touch on your new pencil sketch.
Adjust opacity of layers
You can adjust the opacity of the top two layers to reduce the intensity of the pencil shading.
In the image below, the top layer's opacity is reduced to 60% and the next layer down has an opacity of 70%.
You should not adjust the opacity of the bottom two layers as doing so could undermine the line drawing effect you have created.
Clean up any artifacts
In the example image, there are several places where the white background looks as if it has smudges, or dark spots.
In order to remove dark spots such as these, stamp the layers by selecting all layers, including the Hue/Saturation adjustment layer, within the Layers panel. Type CTRL+A+E (COMMAND+OPTION+E on a Mac) to create a stamped layer, which will appear at the top of your Layers panel.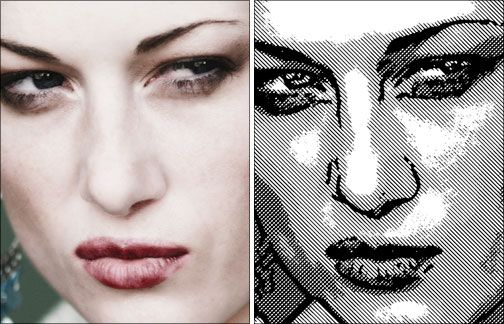
Set your foreground color to white in the Toolbar and choose the Brush tool from the Toolbar. Within the new stamped layer, carefully paint over any smudges using the brush tool.
Are you aware of all of the tools available in Photoshop CC 2018?
Learn more
Your finished image will now look like a pencil sketch.
Now that you know how to turn a picture into a line drawing in Photoshop, be sure to check out our other Photoshop tutorials to master your skills.
Browse Photoshop tutorials and fine tune your image-editing skills
Learn more
Creating a pattern from a picture in Pattern Maker
Pattern Maker was created not only to be able to see or print any cross stitch pattern. In fact, it has a lot more functionality. In our articles, we will try to reveal most of the useful features.
You can download the Russified version from Dropbox or YandexDisk , as well as from of our site .
In this material, let's look at the possibility of creating your own embroidery scheme from literally any picture or photograph.
The first thing to do is to import the picture you have chosen into the program. To do this, take the following steps:
1. After launching Pattern Maker, in the upper left corner under the "File" menu, you need to find the "Import Image" button (in the figure below it is under the number 1).
2. After clicking on "Import Image" the "Image Importing Wizard" menu will open, offering several ways to load your image. Most often, the picture is already on a laptop or PC, so we indicate the first option “Take existing” (in the figure below it is under the number 2) and click on “Browse” with which we indicate the path to the file.
As you can see, there are alternative methods: scanning and pasting from the clipboard.
If everything is correct, then a thumbnail of your image should appear in the window on the right. It's time to move on to the next step by clicking "Next" (marked with number 3 on our diagram).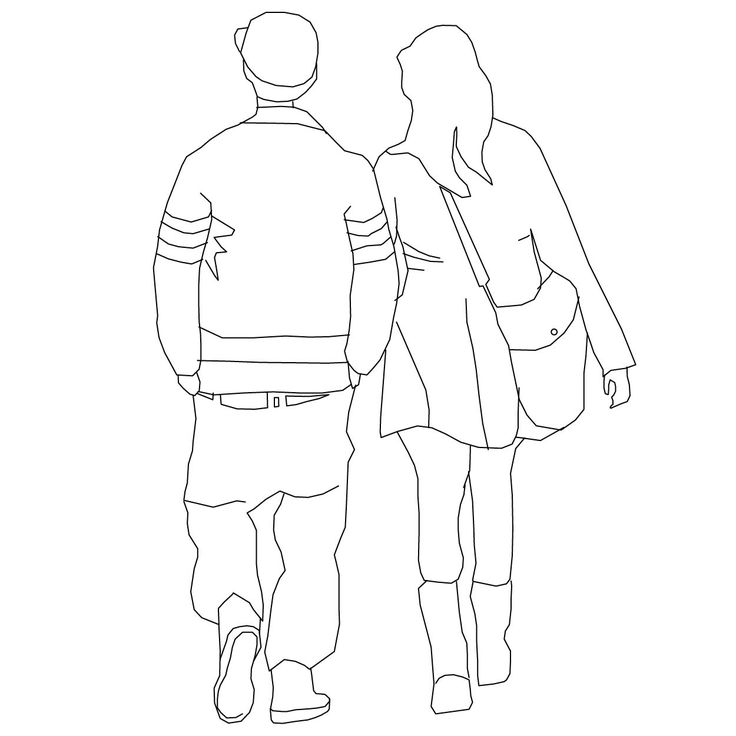
(All images can be enlarged by clicking on them. You can exit the magnification with the ESC button or by clicking on the dark background outside the picture)
In the second step, we are asked to choose the method that will be used to convert the selected image. There are two in total:
Convert - Convert image to full cross stitch - creates a pattern by converting all colors to cross stitch. Only full stitches are used.
Make image background for stroke — creates an image as a watermark, this option allows you to make an image a watermark, very useful when retyping. It can also be enabled to create your own schema. After finishing work, the substrate can be easily removed.
(In addition, the program allows you to select two options at the same time)
Having decided on the method, click "Next".
In the next window, you can "correct" the image to your liking. Easy adjustment of hue, brightness, contrast, saturation is available, you can also crop the image.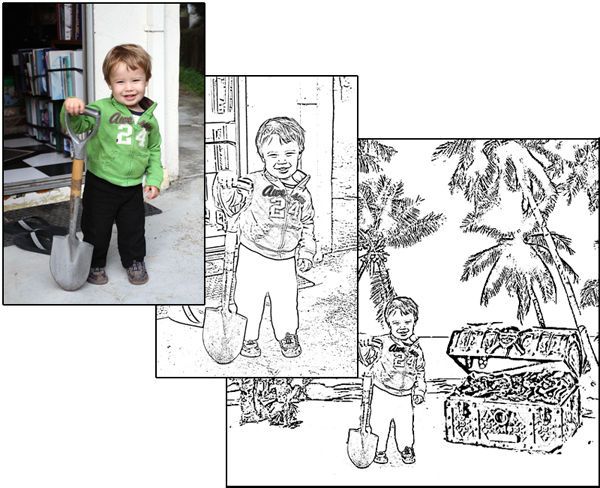
After all the manipulations, or if they are not needed, click "Next".
Here we see the "Grid" tool, but we'll talk about it when retyping schemes. Therefore, we skip this step by clicking "Next".
Now the next step is "Background" - select the areas that you want to transfer to the diagram. In this case, the background will not be converted to stitches, but will remain empty. To mark areas of the image as background select the background tool (labeled as 1).
Place the tool on the area of the image that is part of the background.
Press and release the left mouse button. The selected area and all adjacent areas of the same color will be marked with strokes.
To select additional areas, press and hold the Shift key while repeating the previous steps.
To undo the last background selection, click Undo Last.
Use the sliders in the Sensitivity window to adjust the sensitivity tool.
After you have cleared the background, you need to manually correct the edges, removing all unnecessary.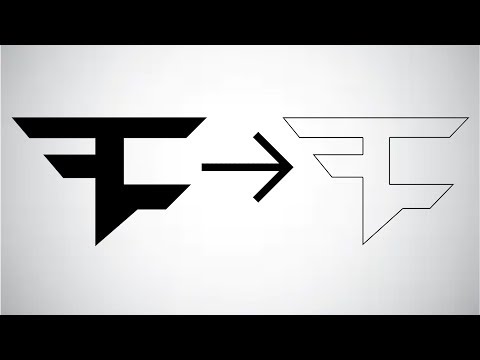
Click "Next".
Foreground tool - here you need to select the areas that you think are most important in the foreground of the image, which will make it possible to more accurately determine the color for these areas.
To select areas in the foreground, select the Foreground tool, move the mouse over the image, click and hold the left mouse button and drag the area around the desired area.
To select additional areas, press and hold the Shift button, repeat the steps described in the previous paragraph. To undo the last selection, click Undo Last.
Use the slider to define the percentage of the palette that will be used for the selection. For example, 50% means that 50 percent of the colors in the palette will be used for this area and 50% for all others.
Having made your choice, click "Next".
The next step in creating an embroidery pattern is “Size”. This window sets the size for the finished job. The top part of the window is called "Select new project size" and contains size settings in inches and millimeters. When choosing this option, we indicate the size of the finished work in millimeters or inches, and the program itself selects the required number of stitches for the pattern.
You can also set the size of the work in stitches. When choosing this option, specify the size of the finished work in stitches. The program itself will calculate the size of the work in millimeters or inches.
There is one more option - "Size according to the selected area". Select an area in the "Image" window (to the right of the menu) and specify the size for it. Here, as in the previous versions, Pattern Maker will automatically calculate the final size of the finished work, keeping its proportions (if there is a check mark next to the "Keep proportions" function).
At the bottom is the area “Stitch size - specify the canvas number. The "Square Stitch" option is the same in height and width, if the checkbox is checked. The option "Machine stitch size" - allows you to specify the size for the machine stitch and calculate the size of the finished work in millimeters.
Information about the size of the finished work in stitches, inches and mm will appear at the very bottom of the window.
Click "Next".
Now we need to choose the colors for the future scheme. In the drop-down menu, select the floss palette - “Use. thread color of the next type. Or specify a file with an already created palette below. This feature is useful if you want to limit your color choices (handy for creating monochrome embroidery).
The third option "Use. colors already applied in the palette” is relevant when importing an image into an existing scheme with the corresponding palette. For the new image, only those shades of the palette that are already in this scheme will be used. Use the slider to specify the number of shades for the future scheme.
The "Keep all colors applied in palette" feature is self-explanatory and useful when you import an image with a palette already defined. This will give you the opportunity to remove colors that will not be used in your scheme.
And the last one is the "Advanced" function - the smoothing method. Since the program does not mix threads, that is, it does not add a "blend", there are additional functions for replacing threads that the program could not find in the palette:
"None" - anti-aliasing is not used.
"Floyd-Steinberg" - minimal anti-aliasing is used.
"Stucki" - medium amount.
"Burkes" - the maximum amount of smoothing.
The "Auto Select" function is also available.
The best option is the average amount. If you select the None function, then the colors on the diagram will stand out sharply - in spots. Although, such a scheme is easier to process in the future, since without smoothing, the scheme has a minimum number of single crosses.
In the next window you will see an inscription that "Everything is ready for import ...", as well as some more instructions. At the bottom, the “Import” button awaits, after clicking which the result of the work done will be visible (in the window on the right).
If you need to redo something, you can go back and change the scheme at any stage of the work. After the scheme is ready, click "Close" and save the scheme.
The first part of the work is done, we get the image run. This is not yet a high-quality scheme, it is difficult to embroider due to the large number of single crosses, details can be blurry, and not all colors are needed in the scheme and can spoil the overall impression of the picture. To do this, you still need to work on the scheme and the more attention you pay to the work, the more positive the result will be.
Don't start with huge schemes with lots of small details and shades, try something small. You do not need to set a large size and the maximum number of shades. All small details can be drawn by hand, and the transitions between colors can be made softer.
How to make an embroidery scheme from a photo online for free
Brief description and links to editor sites where you can make an embroidery scheme from a photo online for free. Attached is a video with an overview of some online services. Useful for needlewomen involved in embroidery, beading, weaving, as well as those who are fond of dot painting, mosaic.
content
- 1 How to convert a photo to a cross stitch pattern for free online
- 2 How to make an embroidery from a photo online for free on pic2pat
- 3 Convert a photo to a cross stitch pattern on the Fanreal service
- 4 scheme for embroidery with beads online for free
- 5 How to make a scheme for cross stitch from a photo on the site xfloss.ru
- 6 Conclusion
- 7 Recording of webinars on the topic of converting photos into schemes for embroidery and beading, as well as for knitting patterns
- 8 Recording of the WEBINAR:
- 9 Recording of the second webinar:
- 9.1 More information on the topic:
These are my personal preferences, they may be different for you, read them all and choose the one that suits you.
How to make embroidery from a photo online for free at pic2pat
Follow the link https://www.pic2pat.com/
Upload your image (file size should be no more than 4 megabytes) and click Next.
Select the desired parameters (thread type, number of stitches per centimeter and size of the pattern in centimeters) and click "Next".
From the generated schemes, choose the one that best suits you in terms of the number of shades, quality, etc. To see all the schemes, use the scroller (scroll down and up). At the very end of the page, a diagram with fewer shades.
Click on the selected picture - a window for saving the file in * PDF will automatically open.
Open the saved file on your computer - in addition to the color scheme, it will also contain a black and white picture with color numbers and a list of all shades that are used in this scheme.
The service generated 17 schemes for me with a different number of shades. Compare the two diagrams below, this is the first and last picture. The difference is significant, isn't it.
Advantages of this editor: generation of a large number of schemes without additional actions on your part.
Translating a photo into a cross stitch pattern on the Fanreal service
Follow the link http://x.fanreal.ru/ and upload the picture. Please note that there are restrictions on the "weight" of the image - no more than 3 MB.
In the next window, select the desired options. Unlike the previous service, here you can add an inscription to the picture. Click the "send" button after filling in the lines you need.
And if the previously obtained image suits you, then click on "Embroidery scheme".
A pop-up window will open with the first fragment of the generated circuit. To download this fragment, right-click on it and select the "Save As" command to save it as a web page. This is not the best option, alas.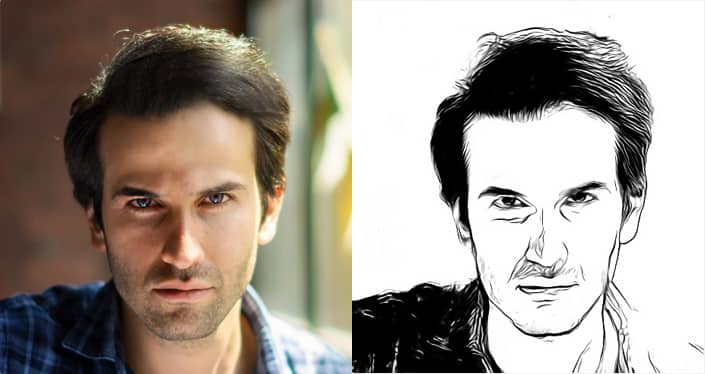 But, nevertheless, you can print a page with a diagram (with a fragment) right away - there is a “Print page” command at the bottom.
To go to the next fragment, click on “Page 2” at the bottom of the window, etc.
How to convert a photo into a scheme for beading online for free
For craftswomen working with beads, the Schemedelkino online service is at your service. Link http://makeschema.ru
Pleasant, modern design and the ability to "decompose" by color not only for embroidery, but also for beading, weaving.
Choose which needlework you need a pattern for (embroidery or beading, weaving), upload a picture and start creating. Everything is intuitive.
As a result, you will get a diagram divided into fragments (if the picture is large), as well as a palette of shades used.
Schematic map helps to quickly orientate among the generated fragments.
To save the diagram to your computer, use the right mouse button and the Save As command.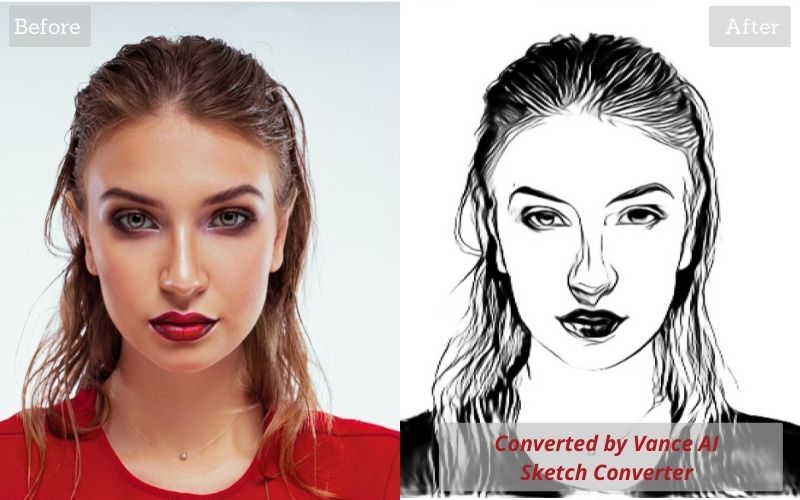 From the saved file, print already. Not very convenient, but this is the only, albeit significant, drawback, in my opinion, of this service.
How to make a pattern for cross stitch from a photo on xfloss.ru
Another free service for creating embroidery from an image https://xfloss.ru/. On the first page (follow the link) you need to upload a picture, click on the "Create" button and, if everything suits you first, then on the "Scheme" button.
A new window - a scheme of used colors and fragments of your entire generated embroidery scheme from a photo. You can immediately print the result or save the entire web page to your computer.
Conclusion
In this article, you got acquainted with only a few free services that will allow you to convert a photo or any picture into a cross-stitch or beading pattern for free and online. That is, you do not need to install additional programs on your computer, which is good.
However, there are other ways to convert a picture into a diagram.