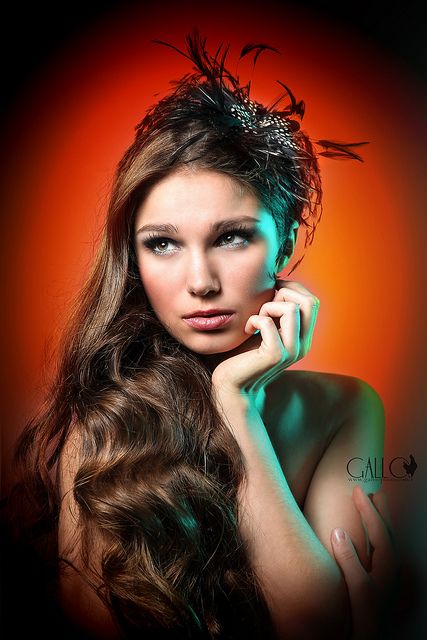
Makeup tips with pictures
10 Makeup Tricks That Make You Look Spectacular in Photos (Wedding or Otherwise!)
Bachelorette party, shower, rehearsal dinner, the actual wedding--you engaged ladies have just a few minor photo opps in your near future. So I had to share these 10 very smart tricks from celebrity makeup guru Nick Barose, the man who made Gretchen Mol look porcelain-doll perfect at Monday's Fall 2013 DKNY show.
1. Always start with primer. It fills in fine lines and fades imperfections that the (cruel, cruel) camera lens can often magnify. "Invest in a good one, it'll really make a difference," says Nick, who swears by Koh Gen Do Makeup Color Base in Lavender Pink for rosy-toned skin like Gretchen's.
2. Mind your neck. If you stop your foundation at your jawline, your face/neck color difference could be noticeable in photos (even if the contrast isn't noticeable in your mirror).
3. Avoid reverse raccoon eyes. Mix under-eye concealer with a bit of foundation before applying. This helps prevent skin-brightening concealer from popping out and looking too white when a flash hits. "We've all seen photos of stars with those white under-eye mishaps," Nick says.
4. Frame your face. Dust a sheer bronzer (like Bobbi Brown Bronzing Powder) just around the perimeter to flatteringly shape your face and take the focus off your forehead.
5. Get some power powder. If you always have major T-zone shine and regular powder doesn't cut it, try a blotting powder, like MAC Blot Powder--this stuff is your new best friend.
6. Reinforce your brows. Brows bring out your bone structure in photos, so subtly sketch them in with a bit of pencil. "They tend to disappear in photos, especially the tails," Nick notes.
7. Upgrade to liquid liner. Even if you usually use pencil, liquid will define your eyes more for photos and can still look natural; just trace a thin line extra-close to your lashes. "I like the NARS liquid liner," Nick says. "It's like a thin Sharpie and is so easy to use even a cat could probably apply it with its paws."
8. Brighten your blush. Don't be scared to go a bit brighter, just be sure to blend around the edges, and choose blush that has gleam but not noticeable sparkles. "It'll make you look radiant when the flash hits your face," says Nick, who used the Lancome Blush Subtil palette on Gretchen; he used the different shades to help sculpt her cheekbones.
9. Dabble in lip liner. Even if you hate the stuff, try using it just on your upper V and outer corners. "I learned this trick from Kim Cattrall--it gives her lips definition but never looks harsh or severe," Nick says.
10. Relax and feel pretty! "Remember that a smile will brighten your face and is always better than any lipstick or mascara!" And when you do see inevitable bad photos, blame the angle or flash and move on, because you looked perfect.
What's YOUR favorite makeup trick that helps you look extra-pretty in photos? A certain lipstick or blush shade, perhaps? A mascara tactic? Share below!
Photos: Getty Images, Nick Barose
9 Brilliant Makeup Tricks for Looking Great in Photos
Because the world still hasn't figured out how to make real-time Facetune a thing (not that you need it, you gorgeous devil, you), we've gathered the secrets to looking flawless in every picture, no matter the time of day.
By Chloe Metzger
Photos: Getty Images, Condé Nast Digital Archive (2), Courtesy of Laura Mercier, Condé Nast Digital Archive (2), Courtesy of M.A.C., Condé Nast Digital Archive, Courtesy of BH Cosmetics
© Condé Nast
Go Matte in the Middle.A glow-y complexion looks awesome in person, but on camera, it can reflect like an oil slick.
 "The trick is to leave the dewiness on your cheeks, but keep the middle of your face matte," says Black, who suggests dusting translucent powder on your T-zone as your final step before heading out. Then find the powder compact you stashed in your clutch and throw it across the room. "People tend to overpowder themselves when they do touch-ups," says Black. "It's safer to stash a few blotting papers in your purse instead and tap down your T-zone right before pictures."
2015 Getty Images
Bump Up the Contrast.Headed to a party in a dark bar, shadowy club, or pitch-black cave? (Hey, you do you.) Channel your inner Kim K. and go (relatively) crazy with the contouring. "Taking a flash photo in a dark room overexposes your face to the point where it can look washed out and wide," says makeup artist Robin Black. "Even if you think your makeup looks striking at home, err on the side of heavy-handed when you know you'll be in photos." If you're worried you'll end up looking like a clown, Black suggests turning off all the lights and taking a selfie with the flash on before you leave, so you can test how your makeup will appear in photos and adjust accordingly.

© Condé Nast
Stipple, Don't Spackle.If your M.O. is to pile a bazillion layers of concealer over a zit in hopes of hiding it from the camera, you're doing it wrong. "Unless the color matches your skin perfectly, you could wind up with a nickel-size ring of color around the blemish that looks really obvious in natural light," says Black. "Instead, dip a tiny lip brush into a matte concealer that matches your skin tone and gently stipple over just the middle of the blemish without blending it outward, then very lightly tap it a few times with your ring finger."
- Check the Clock.
As the wise band Smashmouth once said, "All that glitters is gold." Unless, of course, you're at your sister's garden wedding in the 11 a.m. sunlight and your sparkly eye shadow and highlighter are blinding the photographer. Then hello, bad decisions. "The best time for shimmery products is during sunset, when the light gets warm and hazy, and a little shimmer makes your skin glow in photos," says Black.
 Makeup artist Kate Lee suggests using Laura Mercier Foundation Primer Radiance as a highlighter—but only on your cheekbones and jawline. "Don't make the mistake of putting illuminating creams all over; that'll make you look like a disco ball," she says.
© Condé Nast
Get Bright-Eyed.There's a reason why every photo-editing app has an eye-whitening tool: "The clearer your eyes are, the brighter the rest of your face appears," says makeup artist Fulvia Farolfi, who keeps a bottle of redness-reducing eye drops (like Rohto or Visine) in her makeup kit at all times. Before you leave the house (or before your at-home selfie sesh), squeeze a few drops in each eye.
© Condé Nast
Plump Up Lips.If your lips pull a disappearing act in photos, plump them up before you go out with some subtle contouring, says makeup artist Patrick Ta. Trace the edges of your lips with a pencil that's one shade darker than your lipstick, soften the edges a bit with your finger, then apply your lip color.
 Next, make a kissy face and fill in the middle circle of your lips with a liner one shade lighter than the lipstick, so it looks like a mini spotlight on the center of your lips. Blend it in with your finger to blur the edges.
© Condé Nast
Rethink Black Eyeliner."Black can look really harsh in daytime photos, so if you're a black-eyeliner lover, try dark brown instead," says Black. Line your lash lines with brown, smudge it out to soften the color, and then go back with your black liner and draw a thin line close to your top lashes, so it softly defines your eyes without looking garish on camera. "Then, to warm up your eyes overall, blend a bit of powder bronzer into your creases to match the rest of your skin," says Black.
- Choose the Right Powder.
Let's all take a moment of silence for Angelina Jolie's ghost-white makeup malfunction, i.e., the flashback effect. Now make sure the same thing never happens to you.
 "Avoid any facial powders that say HD or mineral when you know you'll be photographed with flash," says Black. "These formulas are generally loaded with zinc and talc, ingredients that reflect the light and ruin your picture." Instead, try a finely milled translucent powder that stays flat in the flash, like M.A.C. Blot Powder.
Most Popular
- Color Correct Dark Circles.
Instead of layering on the brightening concealer, which can look obvious on film, get crafty and pull out a color wheel. "If your dark circles are blue, tap on a concealer with peach or orange undertones, and if they're purple, try a yellow concealer," says Black. "If you have green circles, which is common for those with olive skin tones, you'll want straight-up red." We like BH Cosmetics Color Concealer & Corrector Palette, which comes in light, medium, and dark with an array of shades, so virtually every skin tone can find a match.

"I'm a makeup-loving magazine editor with an unhealthy adoration for bread and misattributed quotes.” —T.S. Eliot
Keywordshow tobeauty advicebeauty tipsbeauty tricksbeauty hacks
Read MoreMakeup tutorial for beginners: step by step with 34 photos
Basic makeup rules, step by step tutorials for beginners and useful tricks look in this article
Contents:
- Makeup basics
- How to do eye makeup quickly?
- How to create simple lip makeup?
- Everyday face makeup instructions
- Day makeup
- Evening makeup
- Easy Makeup for Beginners Step by Step Photo Tutorial
In this article we will tell you about all the tricks and rules of makeup for beginners and offer several options for simple but effective looks. If you are just starting to use cosmetics, but do not know where to start and what products to use, read our article.
For dry skin, mattifying or radiant? Answer a few simple questions to find your perfect remedy.
Take the test
Makeup basics: 3 rules
© Makeup.ru A properly selected product will hide skin imperfections, even out the tone and prepare the face for the next steps. Foundation can be powder, cream or a light fluid. When choosing it, rely on your skin tone and its type (our test will help determine it). For oily skin, powders are suitable, for normal and mixed tonal fluids, and for dry skin, a nourishing creamy texture is needed. nine0003
2
Minimum funds
If you are new to makeup, use as few products as possible, gradually add new items from the world of cosmetics to your arsenal. For starters, this set is enough: foundation, mascara, light shadows and blush. Such a minimal set will hide skin imperfections and give it a healthy look, while mascara and radiant shadows will instantly make the look more open. We recommend choosing cosmetics using the online makeup service from YSL Beauty. The best way to choose the right tone, color, shade. nine0003
© lorealmakeup
3
Proper make-up removal
If you have started to actively use cosmetics, it means that one more step must be added to the standard care routine - make-up removal. In addition to the usual gel for washing, you will need a make-up remover. It can be a two-phase product with the addition of oils, micellar water or hydrophilic oil. Choose what suits you best and does not irritate your skin. High-quality facial cleansing is the key to beautiful and healthy skin. nine0003
How to do eye makeup for beginners?
Fancy eye makeup doesn't have to be complicated. Follow our tutorial to create a trendy red eye makeup.
1
Prepare the eyelid for applying eye shadow, apply a thin layer of concealer or primer. Powder light shadows on top.
© Makeup. ru
ru
2
Add a purple shade to the crease of the eyelid and blend into a light haze.
© Makeup.ru
3
Apply a dark shade with glitter to the entire mobile eyelid. At the outer corner, gently blend, connecting with purple shadows.
© Makeup.ru
4
Underline the lower eyelid with darker purple shadows, a small dense brush is suitable for this.
© Makeup.ru
5
Line the mucous membrane of the eye with a soft black pencil.
© Makeup.ru
6
Apply mascara to lashes. Eye makeup is ready! nine0003
© Makeup.ru
If you don't know which eye makeup to choose, take our express test: it will show you the right way.
Take the test
How to quickly create lip makeup?
If you have chosen a bright lipstick for your makeup, follow our tips for applying it.
© lorealmakeup
1
Moisturize your lips with a nourishing balm and wipe off the residue with a tissue after a couple of minutes. Using a pencil suitable for your lipstick, start drawing the outline, starting with the upper lip. Draw a line from the top corner of the lip to the middle. nine0003
© Makeup.ru
2
Repeat the same action with the second corner, creating a "cross" in the center of the lips.
© Makeup.ru
3
Mark the central part of the contour of the lower lip.
© Makeup.ru
4
Place small dots between the already drawn lines and corners of the lips. With their help, you can easily draw the outline.
© Makeup.ru
5
Connect all parts of the contour.
© Makeup.ru
6
Fill in lips with pencil and then with lipstick. So the coating will turn out uniform and resistant. In this way, you can create both glossy lip makeup and matte.
© Makeup.ru
We advise you to read:
- How to make daytime makeup? Photo manual
- Quick make-up: how to make up in a couple of minutes?
- How to make lip makeup with glitter? Photo instruction
Beginner Everyday Face Makeup
1
Skin Prep
Cleanse skin and apply moisturizer. After a few minutes, you can use foundation. Choose according to your skin type. Work the area under the eyes with a concealer, and hide imperfections with a corrector. Blend all products properly so that no borders and non-uniform texture are visible.
© Makeup.ru
2
Eye and brow make-up
- Fill in the brows with a pencil and set with gel.
-
For eye make-up, use cream shadows with a satin texture. Firstly, they are easy to apply, secondly, they last a long time, and thirdly, one shade is enough to create a beautiful smoky make-up.
 Apply eye shadow, such as Maybelline's Color Tattoo 24h or Giorgio Armani's Eye Tint, to the entire lid and blend with fingertips. Choose calm shades: golden, bronze or light brown. nine0003
© Makeup.ru
3
Lip makeup
Apply a light lipstick or gloss to your lips. For everyday makeup, it is better to use moisturizing lipsticks with a creamy texture. They take care of the lips, they are easy to touch up during the day.
© Makeup.ru
4
Setting makeup
Use a fluffy brush with loose powder to set makeup. Apply blush to the apples of your cheeks and, if desired, also highlighter. nine0003
© Makeup.ru
Look for another version of make-up "for every day" in our video.
Day Makeup
Daytime make-up is done in delicate shades, and the technique of its creation is as simple as possible. Follow our guide to freshen up your look in five minutes.
1
For a daytime make-up, a light foundation in the form of a cushion or fluid will suffice. Apply it in a thin layer with a sponge.
© Makeup.ru
2
Use concealer to lighten the area under the eyes, so you will remove bruises and refresh your eyes. Apply concealer locally with a brush and blend with your finger. From the warmth of the hands, the product will warm up and be distributed in an even layer.
© Makeup.ru
3
Apply a refreshing blush to your cheeks. For daytime makeup, the stick blush is perfect, they are easy to apply and blend.
© Makeup.ru
4
For eyebrows, use a pencil or tint gel: these tools will highlight the eyebrows, but not make them too graphic. nine0003
5
Apply soft pink shadows with tiny gold particles all over the eyelid, they will instantly add shine to the eyes. Fill your upper lashes with voluminous mascara.
© Makeup.ru
6
For lips, use peach gloss, it will add volume and moisturize lips. Makeup is ready!
© Makeup.ru
Evening makeup
1
Evening makeup requires extra durability, so choose a foundation that will last all evening on your face. Apply it with a brush, so you will achieve a denser coverage. Hide all imperfections and bruises under the eyes with a corrector. nine0003
© Makeup.ru
2
Apply primer to the eyelids. To create makeup, you will need three shades of shadows from the same brown-bronze range: light, medium and dark. Apply the lightest to the corner of the eye, add light bronze shadows to the center of the eyelid, and darken the outer corner with the deepest shade. Erase the borders between the shadows by slightly feathering them.
© Makeup.ru
3
Draw a light arrow with a dark brown or bronze pencil. This trick will visually make the eyelashes thicker. Curl your lashes with a curler and apply two coats of mascara. nine0003
© Makeup.ru
© Makeup.ru
Easy makeup for beginners: step by step photo tutorial
© Makeup.ru
Julia Sizykh Independent make-up artist, eyebrow master, teacher, photographer, founder of his own studio and make-up school, model
1
Start your makeup by preparing your skin. Cleanse your face with cotton pads soaked in toner. Apply a moisturizing day cream and lip balm, wait a couple of minutes. Then carefully spread the foundation with a sponge, brush or fingers. Check if there are any borders on the lower arch of the jaw, slightly smudge foundation on the neck to avoid the effect of a mask. nine0003
© Makeup. ru
ru
2
Apply a light corrector under the eyes, on the center of the forehead, on the back of the nose, on the “tick” above the upper lip and on the dimple above the chin. With a dark corrector, highlight the cheekbones and hollows of the temples. Blend the correctors with a tone brush, sponge or fingers, starting with the light areas and gradually moving to the dark ones. Make sure that there are no clear correction lines left, for this, evaluate your reflection from all angles.
© Makeup.ru
3
Apply beige matte shadows in dry or liquid texture to the eyelids and blend with a brush along the orbital line. In the corner and in the crease of the eyelid, add a more saturated shade. In the inner corner of the eye, add a highlighter shadow that is lighter than the color of the skin. Eyebrows paint over with a pencil and comb with eyebrow gel. Line your lashes with your favorite mascara. nine0003
© Makeup. ru
ru
4
Line your lips with a pencil in the color of your natural shade - trace the outline, then fill the entire surface. Duplicate with a gloss of a similar color.
© Makeup.ru
5
Use a large fluffy brush to apply translucent loose powder all over the face to set makeup. Add highlighter to the top of the cheekbones, blend the blush to match the lip gloss from the apples of the cheeks to the cheekbones.
© Makeup.ru
Makeup is ready! nine0003
© Makeup.ru
© Makeup.ru
For more makeup ideas that are easy to repeat even for beginners, look below.
© lorealmakeup
© lorealmakeup
© lorealmakeup
© lorealmakeup
© lorealmakeup
© lorealmakeup
© lorealmakeup
© lorealmakeup
© lorealmakeup
© lorealmakeup
© lorealmakeup
© lancomeofficial
© lancomeofficial
© lancomeofficial
© lancomeofficial
© lorealmakeup
32 beginner pics and video tutorials
Eyeshadow tips, different application techniques and step-by-step eye makeup instructions 9004 for all occasions
- 9 eye makeup rules
- Beautiful eye makeup step by step
- Color-Based Eye Makeup: Application Techniques nine0009 How to make eye makeup that matches hair color?
- Interesting Eye Makeup Ideas: Photo Gallery
If you already know how a concealer differs from a corrector and why you need a highlighter, learned how to sculpt your face and apply blush correctly, and also figured out all the intricacies of the perfect face tone, it's time to move on to the next chapter - eye makeup. In this article, we will tell beginners about the basic principles of eye makeup.
Smoky eyes, colored eyelashes and eyelashes, sparkles, pastel shades, graphic patterns… Beauty trends keep changing, but which eye makeup is right for you?
Take the test
9 rules for eye makeup
Basic tips for those who don't know where to start. Makeup.ru Green eyes will help to become more expressive red, copper or purple shadows; peach, brown and golden shades are suitable for blue-eyed girls; brown-eyed, you can choose any color, but the most advantageous will be shades of green or blue - for example, emerald or ultramarine. nine0003
2
Remember the basic terms that are used to describe the various eye makeup techniques. Our scheme will help you: 1 - inner corner of the eye, 3 - outer, 2 - brow space.
© Makeup.ru
3
The choice of technique for applying shadows or the shape of the arrow depends on the structure of your eyelid. For example, if you have round eyes, accentuate the outer part of the eyelid, and if the eyes are not very large, it is better to do the shading diagonally (we wrote about this in more detail here). nine0003
© Makeup.ru
4
At the initial stage, when you are not too confident with the liner or brush, you can resort to the help of improvised means. Ordinary masking tape, any plastic card or a regular napkin will come in handy. They can be used in the process of applying shadows, based on the diagram below.
© Makeup.ru
5
Keep a basic set of brushes handy. For the first time, you will need only two: a small, dense, rounded brush with soft bristles for applying shadows, as well as an elongated and looser brush for blending them. You can read more about the different types of makeup brushes here. nine0003
6
When choosing shadows of a certain texture, consider its features.
- Cream shadows are suitable for creating solid makeup, they can also be used as a base for dry shadows (by the way, cream shadows are the easiest to use for beginners, they can be applied directly with your fingers).
- Dry loose eyeshadow helps achieve the most intense and vibrant color, but requires some skill to apply. nine0009 But dry pressed shadows, on the contrary, are perfectly applied and shaded. Makeup In extreme cases, you can replace the special makeup base with foundation: apply it on your eyelids with a thin layer.
- For optimal results, you can add a medium tint and use it along the contour of the lower lashes, bringing a small arrow out of the eye.
- Almost any shades are suitable for you, but do not forget about the important rule: light tones increase the eyes, while dark ones, on the contrary, can visually reduce them. nine0010
- Do not neglect metallic shades, they will look very impressive.
- Don't be afraid to use colored ink - purple or blue.
 It suits you perfectly!
 - Enhance your eye color with warm pigmented shades such as caramel, peach, coffee.
- Blue or blue shadows are also acceptable, but their color does not have to exactly match the color of your eyes, so choose options one or two shades lighter or darker. nine0010
- Feel free to use all shades of purple (from lavender to gray) and do not neglect bright eyeliners that will add the necessary zest to your look.
- The same rule applies to you as for girls with blue eyes: the most advantageous will be funds from a warm range.
- Plum, eggplant and other shades of purple will perfectly emphasize the beauty of your eyes. The secret is simple: purple is located on the color wheel opposite green, so it creates an expressive contrast with it. nine0010
- Shades of red (like brick or terracotta) are also suitable for you, but be careful: red pigment on the eyelids will accentuate any redness on the skin of the face, so make sure that the tone is perfect.

- If nature gave you gray eyes, avoid dull shades - beige and inexpressive pink shades will make your face tired.
- Choose eye makeup in cool colors: blue, turquoise, purple. By the way, the latter are perfectly combined with fair skin. nine0010
- To "turn" gray eyes into blue, use blue tones.
- Blondes tend to have fair skin, where the slightest "errors" are noticeable. Therefore, before proceeding with eye makeup, be sure to apply a tone and mask all imperfections with a concealer and corrector. Otherwise, you will not get an impeccable make-up. nine0010
- Remember that makeup looks brighter on girls with blond hair than on brunettes.

8
If you are using an eyeshadow palette, keep in mind that each shade has its own area of application. So, the lightest shade, as a rule, is intended for the brow zone, use the darkest shade in the outer corner of the eye, and apply the middle one in the crease. nine0003
© Makeup.ru
9
Do not forget: thorough shading is the key to beautiful eye makeup. Watch the video tutorial below to learn how to properly blend shadows.
Beautiful eye makeup step by step
Four photo tutorials to create spectacular eye makeup for different occasions.
© lorealmakeup
Daily Eye Makeup
The skill of creating a simple everyday eye make-up is useful even for those who are not frequenters of cosmetics stores. A discreet make-up, which only slightly emphasizes the eyes and makes them more expressive, can be “try on” both for an important interview and for a date. Follow the steps below. nine0003
© maybelline
1
Apply eye primer or a thin layer of foundation to the eyelids. Then blend with a fluffy brush made of natural bristle beige shadows over the entire surface of the eyelid.
© Makeup.ru
2
Darken the outer corner of the eye with matte shadows of a shade slightly darker than the skin, and walk along the orbital line with them.
© Makeup.ru
3
Fill the entire eyelid with light matte or shimmer shadows. Highlight the inner corner of the eye and the brow area with a highlighter. nine0003
© Makeup.ru
4
Fill in the "gaps" between the lashes on the upper eyelid with a black pencil, and then apply mascara.
© Makeup.ru
If you want to add an interesting and unusual detail to your daytime look, but you still can't do complex makeup schemes, follow the make-up video tutorial for beginners.
Evening eye make-up
Having mastered the principles of basic make-up, you can also handle evening make-up for an important event. If you want to create a festive look, we recommend that you pay attention to shiny shadows with a shimmer. How to use them in evening make-up? nine0003
1
First of all, carefully prepare your eyelids for makeup. Spread the primer, apply beige shadows on top. Then pick up shadows with a matte texture, a couple of tones darker than the skin, and widely emphasize the orbital line and contour of the lower lashes with them.
© Makeup.ru
2
Deepen the crease of the upper eyelid with a darker shade of matte shadows, darken the corners of the eyes. Also go dark color on the lower eyelid, but only closer to the outer corner. nine0003
© Makeup.ru
3
Cover the remaining free mobile eyelid with shining shadows of a bright shade. Highlight the inner corner of the eye and the brow space: a highlighter or light shadows with a shimmer are suitable for this.
© Makeup.ru
4
Underline the slimy contour of the eyes with a black pencil, paint the eyelashes with mascara. Ready!
© Makeup.ru
Eyeshadows with a delicate shimmer look are discreet, while bright glitter will provide a more extravagant result. Watch the video tutorial on how to create an evening makeup with blue glitter. nine0003
Wedding eye make-up
Wedding make-up, as a rule, is a variant of the evening make-up, but traditionally created in lighter and more delicate colors. However, according to the latest trends, wedding makeup can be absolutely anything - even with bright glitter.
© nyxcosmetics
© lorealmakeup
But in our step-by-step photo tutorial, we're going to take a look at a classic bridal makeup look in soft, shimmering tones.
© Makeup.ru
1
Apply eye shadow
Light bronze eye shadow with a soft creamy texture, apply to the skin at the inner corners of the eyes and blend to the center of the eyelid. Add darker shadows from the same range closer to the outer corners of the eyes. Then use the feathering brush to blend the borders of the different colors.
© Makeup. ru
ru
2
Use eyeliner
Fill in between the lashes with a brown eyeliner with a shimmer effect. This will make your lashes look thicker.
© Makeup.ru
3
Apply mascara
Apply mascara in a zigzag or curl motion for fuller and beautiful lashes.
© Makeup.ru
Another version of the gentle wedding make-up is in the video tutorial created by beauty blogger Alina Fly Cloud. nine0003
Natural eye make-up
To make your eyes look as if they have no makeup on, ditch winged lines, bright eyeliners and mascara that promises "dramatic" effect, and opt for light-colored products (peach, light brown or light -gray). Shadows should be pastel and matte, without shining particles in the composition. By the way, you can not use shadows at all and only slightly bring the upper eyelid with a pencil. Follow the instructions for beginners. nine0003
1
Treat the area around the eyes with concealer to hide dark circles, spider veins and other annoying imperfections that can spoil the impression of a make-up. Apply a little on the eyelids themselves to even out the tone.
© Makeup.ru
2
Apply eyelid base. Even if you use light shades, the shadows may start to roll after a while: a primer will help prevent this. In extreme cases, just lightly powder the eyelid. nine0003
© Makeup.ru
3
Use a curler to curl your lashes. They should be “pressed” in three places - at the very base, in the middle and at the tips. So you get a nice smooth curve.
© Makeup.ru
4
Fill in the space between the eyelashes on the upper eyelid with a permanent black pencil. If we are talking about natural makeup, then at this stage you can stop: the look will already “freshen”, and the eyelashes will appear visually thicker.
© Makeup.ru
5
Apply mascara to upper lashes in a zigzag motion.
© Makeup.ru
6
While the mascara is still wet, carefully separate the lashes with a clean brush.
© Makeup.ru
7
Remove excess mascara, if noticeable, with a special brush - done!
© Makeup.ru
© Makeup.ru
A simple nude makeup option that can become your basic make-up for every day is in the tutorial video. nine0003
Eye makeup based on their color: application techniques
A little higher, we drew your attention to the fact that you should choose the option of eye makeup, taking into account their color. Let's take a closer look at this topic: below we have compiled detailed video tutorials on makeup for brown, blue, green and gray eyes.
© nyxcosmetics
Makeup for brown eyes
Brown-eyed girls can experiment even with a bright pink shade of shadows.
Blue Eye Makeup
Makeup for green eyes
Makeup for gray eyes
How to choose eye makeup that matches your hair color?
If we have more or less figured out the shade of the eyes, then how to choose a makeup that goes well with hair color remains to be seen. Watch our video tutorials!