Interior photography tips and techniques tutorial
12 Easy Ways to Create Magazine-Worthy Interior Photography
The gorgeous interior photography shots you see in magazines may seem impossible to achieve as a photographer, but they’re not!
Let’s dive in and walk through these twelve tips. You’ll start creating magazine-worthy interior photography in no time!
Raleno Softbox Lighting Kit
Transform your interior photography with this professional-grade lighting kit, perfect for capturing stunning images.
Buy from Amazon
×
Raleno Softbox Lighting Kit
Amazon
$85.99
Buy Now!
[ExpertPhotography is supported by readers. Product links on ExpertPhotography are referral links. If you use one of these and buy something, we make a little bit of money. Need more info? See how it all works here.]
12. Focus on the Details
Have you ever photographed for real estate listings? Then you may have gotten a taste of what interior shooting photography is like. But architectural or interior photography is different than real estate photography.
You need to put more time and energy into each part of the process, including post-production. The expectations are also higher when working with interior designers or builders.
Interior photography shoots are very collaborative and detail-oriented. You need to spend enough time with meeting the client, styling and with editing too. This great attention to detail allows it to demand higher rates.
The end goal is always to produce eye-catching interior photographs. These have to look great in magazines as well as on Instagram.
11. Turn off the Lights
Lighting can depend on personal preference. But there is a general consensus for high-end interior photography. Keep the lights turned off for all photos of the interior of a house. This helps to create a natural feel and an even light temperature, meaning better photos.
Having interior lights on also creates all sorts of shadows. These will appear on walls, floors, and furniture. It’s distracting and takes away from the actual interior design elements.
Is there a lighting feature that you want to show in photos, such as recessed lighting? That’s the only time that you’ll want to consider having lights on for interior design photography. In this case, make sure you bracket at least a second exposure that’s a bit darker. Like that, you can soften the brightness of the light and keep the lighting looking even.
Also, you might choose to have some lights on for any design features. Be sure to fine-tune white balance in editing.
A great additional tool to use for this is the local adjustment brush or gradient filter in Lightroom. This will help you counterbalance the light temperature from the fixture. This is one of the essential interior photography tips we can offer.
10. Work With Layers
You’ll want to do several bracketed shots at varying exposures. This way, you can layer them for a subtle natural-feeling HDR final image when photo editing.
You’ll want to bracket 3-4 exposures for any shots that include windows. This gives you darker frames that you can use for showing the view outside the windows. And middle exposures that help to balance out the bright highlights.
I also like to get a shot that is over-exposed enough to have lively shadows. Then I use this frame to help brighten shadow areas that feel too dark.
Use large soft brushes when blending layers to maintain the natural feel. Interior photographs need your full attention throughout the entire process. You’ll want to avoid too much automation so that you can maintain quality control for your clients.
The editing process is often a bit tedious. There’s no automation, and it involves great attention to detail.
If you see enough growth, consider outsourcing the editing of your interior shots. Then you can focus on client relations and improving your photography skills with actual interior shoots.
For many, though, the editing remains in-house, and we handle it ourselves.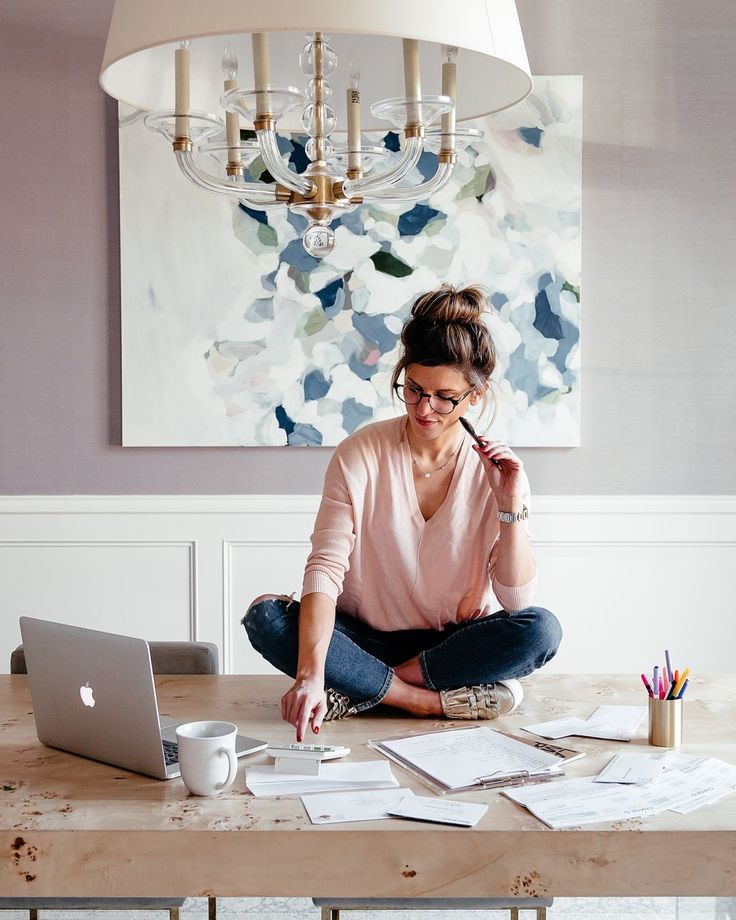 There are lots of options for automating HDR. But the automated methods are often sub-par for interior design photography. Automated processes for HDR often don’t result in a natural and high-end look. And this is what architectural photography clients expect for their investment.
When doing the manual layering, you’ll most likely be working in Photoshop. But there are other options out there such as Capture One.
Familiarise yourself with working with various layers and masking in Photoshop. This will help you create natural-looking interior photos.
9. Don’t Shoot Too Wide
It’s easy to think that wide-angle lens shots rule. Especially if you begin photographing interiors for real estate clients. But if you flip through an interior design magazine, you’ll realize that this isn’t the case.
In real estate, you want to emphasize how large the space is by showing dramatic wide shots. But in interior design photography, it’s all about the design.
All the various beautiful visual moments in the space should stand out. This means that interior photographs show tighter compositions. Add to these with plenty of vignettes and details.
In real estate photography, you’re often shooting wide shots at about 16mm (or 10mm if you’re on a cropped sensor). For interior photography, you won’t want to go wider than 24mm. This, of course, varies. It depends on the space, so don’t be afraid to go in with a tighter lens as needed.
If you have enough room, distance yourself further from the composition and use a tighter lens such as a 50mm or 70mm. This minimizes any possible lens distortion as well.
8. Let Composition Guide Your Shot
In learning how to photograph interiors, the composition is what guides most shots. This means that you need to brush up on the basics, from balance, colour, leading lines, depth, to white space.
Focusing on composition will elevate an image. It presents that photo as a work of art, rather than a photo that documents something. Artful interior design photography composition also makes the design elements stand out. And these are what your client is looking to show off!
Not sure where to begin with learning about composition? Start with the rule of thirds as one of the most useful interior photography tips. Use the rule of thirds to guide composition in your work for several weeks. Then move on to another principle, such as leading lines.
Keep adding to your arsenal of composition tools. You’ll soon create stunning photography compositions instinctively!
7. Create Depth With the Styling Objects
Creating depth with styling items and furniture placement is crucial. It will add interest and a luxurious feel to the place.
Start when setting up a shot. Ask yourself if there are items that take your eye from foreground to middle ground. Or to the background.
You also want to make sure that your eye lands on the area that you want to highlight. For example, if there’s something sneaking into the frame in the foreground, is it too distracting? This can happen if the colour is too bright, if the item is too in-focus, or if there’s too much of it seen in the shot.
Make sure that your f-stop is consistent with what you want to have sharp (and what you don’t!) in the photo. Interior photos have f-stops that are in the f/8 to f/16 range. But you can always go to a lower f-stop if it contributes to creating the depth that you want.
6. Get Rid of Any Clutter
It may seem obvious, but clearing the clutter is an absolute must. We want to see that gorgeous counter-top marble. Or see how the light hits the custom alcove with only one stunning sculpture in it.
As an interior photographer, it’s part of your job to tell your client how to prepare the space for photos. Relay the value of a clean space before the photoshoot.
Also, take a look around the space when you arrive. Give your client any recommendations on surfaces that you want them to clear up.
Clients made a higher investment for your services. They’re looking to you to be the expert and to guide them through the process.
5. Use Your Styling Skills for Interior Photography
While less is more, don’t be afraid to add some small styling touches! When working with interior designers, your role is to give a professional opinion about the setup. And then to adjust decor as needed.
Consider whether the scene looks better with a specific item. Does the decorative piece add something to the vignette? Do the colour and texture work well? Does it feel cluttered or too empty? Does it feel natural? Is the decorative piece high-end and beautiful?
Take a few moments to ask yourself these questions. Then help your client with styling.
4. Keep the Look Natural, Even if You Use a Strobe or Flash
Your aim is to make the space look and feel natural. You should try to use natural light as much as possible. But you’ll still most likely need the aid of strobes or flashes to fill in shadows.
When using any artificial light, you want to make sure to bounce or diffuse it. And to adjust the strength of the lights so that it maintains a natural look.
Bouncing the light can be a simple matter of pointing it towards a wall behind you or the ceiling. You can also diffuse the light with various types of softboxes and umbrellas.
If the walls are colourful, be sure to keep that in mind. The colour of the wall will affect the colour tint of the light.
3. Show the Property’s Personality Through Vignettes and Details
In real estate, most of the shot list consists of wide photos to show ample space. In an interior photograph, show vignettes and details. This is as important as taking wider shots.
Vignettes and details help to create the narrative of a space. They tell a story by showing personality.
The decor and cosy nooks of an interior can tell the viewer about the lifestyle of its inhabitants. It creates a strong marketing message that’s perfect for interior designers, architects, and builders.
2. Use Tethering to Involve Your Client
Part of the client experience is to make the photoshoot very collaborative. This means taking your time to set up each shot and making sure that your client is participating in each setup.
One way to do this is to tether your camera to a laptop or tablet. Tethering allows your laptop or tablet to display the photos. It does so as they’re shot in real-time. You may also be able to put your laptop or tablet in “Live View” mode. It depends on what system you’re using.
Live View mode allows the client to help style the space for each shot before you take any photos. This also helps to minimize how many photos you have to sift through during editing! Your client plays an active role in making sure that each shot looks exactly how they want it. This gives them a more valuable experience for their investment.
CamRanger is a great tethering system to use. It’s an industry favourite and very reliable system that allows for wireless tethering.
There are less expensive options on the market too. Do a bit of research to find the best fit for you. If you’re okay not being wireless, you can use an inexpensive cable to connect to a laptop and be ready to go!
1. Plan Ahead for a Professional Result
Another big part of creating a valuable client experience is to plan ahead as much as possible. There should be open communication with your client. This way you’ll be clear on what spaces to photograph. Also, what specific interior photographs they want for each room. And how many photos they’re looking to walk away with at the end.
You should also make a site visit before the shoot date. A site visit helps you to get an idea of what areas will look best for photos. You’ll also see what sort of details or vignettes you may get, and how the light comes in at certain times of the day.
Knowing the orientation of the building is especially important. It will help you to minimize strong sunshine overexposing the room. Or know where to use the low light look as the sun sets or rises.
A site visit also helps you get clear on what gear you’ll use throughout the interior photography shoot. And it will bring up any issues with access to the site or equipment you may need to rent.
As with any shoot, you should prepare the night before. Charge your batteries and pack all your gear.
During the interior photography session, make sure to shoot at an appropriate height. This is approximately 5′ or so for interiors. And keep the camera as straight as possible to avoid added distortion.
While editing your interior photographs, you want to make sure to correct for the lens that you used. Here you can straighten any verticals (and horizontals for the straight-on shots).
Keep consistency in mind when deciding whether to turn on interior lights or not. And bear in mind that you’ll want to colour correct for any lights you keep on.
Conclusion
Creating those flashy interior photographs for magazines may seem out of reach. But keeping these tips in mind will get you on your way!
Begin with basics and continue to add layers of depth and precision. Interior design photography clients are looking for a final product that speaks of luxury and warmth. They’ll want to be involved in the process with you.
Creating collaborative photoshoots can not only make your clients happy. It also produces beautiful interior photography. And it creates working relationships that will keep your business running for years.
Keep improving with our tips for editing interior photography in Lightroom or making money with interior photography! We have an interesting post on avoiding common mistakes in real estate photography too!
To add consistency to your final shots, use our Preset Collection!
My 10 simple tips for photographing interiors for Instagram
One of the things I often get asked is how to take beautiful, bright photos inside the home. In this blog post I’m going to be sharing all my tips for photographing interiors and creating harmonious, balanced compositions.
But first a little caveat: I don’t actually know a huge amount about photography. I’m certainly no expert. I’ve learnt everything I know with the help of a good eye and a bit of trial and error. I have a vague notion of how shutter speed and aperture works, but I don’t really know what all the settings on my camera actually mean. I didn’t read the manual or watch a tutorial. I’ve just taken my time to have a play around with my camera and get creative, seeing what works and what doesn’t, until I can shoot in manual and adjust the settings intuitively.
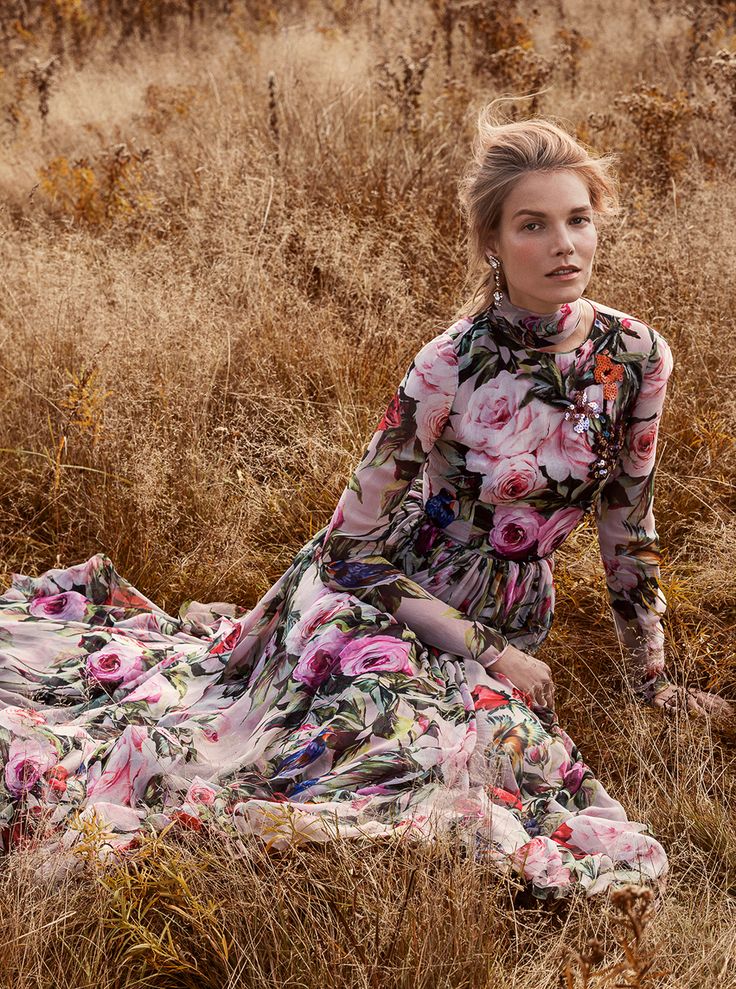
So these tips are less about how to use a camera, and more to do with setting up a beautiful composition and creating images that are naturally pleasing to the eye. Learn how to shoot in natural light, how to apply the Golden ratio and why you don’t need to edit your photos as much as you think you do.
Always shoot in bright natural light
First things first when it comes to photographing interiors, turn off any ceiling lights and lamps – they can give a yellow glow to a space and cast harsh shadows over furniture and objects. You want to capture a space in its best light and make sure the tones are true to life – natural light is far more flattering and closer to how you would see the space in reality (during the day). The light from a lamp might appear beautiful in real life, but capture it through the camera and it suddenly looks like it’s casting an ugly glare. Natural light will make for a far cleaner shot, without any funny shadows that can distract from the focus of the image.
If you’re struggling with daylight, move blinds and curtains to one side and open the windows to let in as much light as you can. If you’re shooting a still life or a small vignette, move it to the lightest spot in the room, ideally next to a window, to make the most of the best light. You can also learn how to shoot on manual, so that you can adjust the ISO (the camera’s sensitivity to light) and aperture (the opening inside the lens) and create much brighter images even in dingy light conditions.
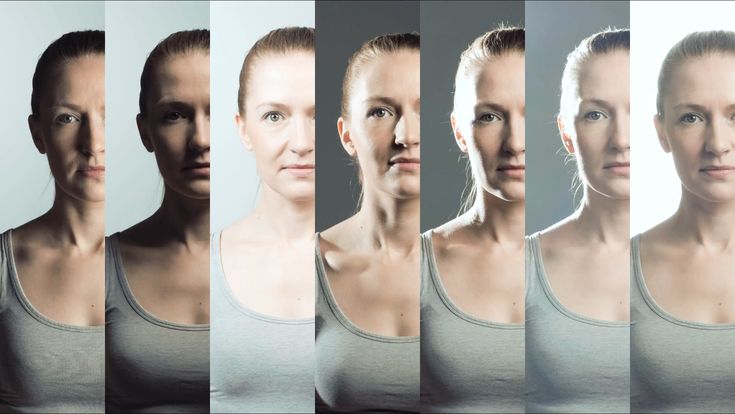
Shoot in natural light to create bright photos with soft shadowsThe weather needs to be just so…
But still, trying to find the right lighting conditions is a little bit like Goldilocks finding the perfect bowl of porridge. You want a little bit of sun, but not too much, and a few clouds but not completely overcast. Funnily enough, a wedding photographer dreams of a slightly cloudy day, so people aren’t squinting and shadows aren’t cast across people’s faces. Similarly with photographing interiors, a camera can struggle to capture bright sunshine indoors – certain areas of the image might appear like they’re blown out and some shadows might become very dark. Shapes might start to look blurry and colours might not be true to form. A cloudy day helps diffuse the bright sunshine so shadows appear softer and more even.
‘Shoot from the hip’
If you’re shooting a whole room or a wider angle, lower your camera so that the viewfinder is at waist height (the belly button is a good marker). It may seem like the camera is positioned too low, but it creates a much more natural composition that mimics what you would see at eye level. It creates a sense that you could step right into that image, rather than feeling like the camera was a bit drunk – either at the top of the ceiling looking down at a funny angle or on the floor looking up. You might have to kneel on the floor or crouch down to get the same effect, so that you can still see into the viewfinder and know what it is you’re shooting. I always find myself getting into funny angles to take photos and always wonder why my back aches afterwards!
Straighten up your lines
Imagine there’s a grid over your picture – whether you’re shooting a corner of a room at an angle or a piece of furniture straight on, you want to make sure everything is lined up neatly. That means shelves appear level, walls appear straight and artworks on the wall appear secure not wonky. Otherwise your subject can start to become distorted and items can appear a little off to the eye, giving an almost vertigo feeling for the viewer. Some cameras will have handy guide lines in the viewfinder or on the view screen. My camera (an Olympus pen) has two little bars which flash green when the camera is at a straight angle – it’s such a helpful tool to make sure I’m shooting straight.
You don’t have to spend a fortune on kit (although it does sometime help)
If you’re photographing interiors for your blog or Instagram, you don’t necessarily need a super duper professional camera. Camera phones are so good now that you can take beautiful pictures and not be able to tell what it was shot on.
On Instagram I use a mix of iPhone shots and those taken with my Olympus Pen E-PL7. Sometimes the iPhone is better at capturing bright rays of light, sharp details from far away or quick, candid moments.
That said, you don’t get the same depth of field with a phone. If you’re really into your photography and want to take photographing interiors seriously, it’s best to invest in a decent camera. The Olympus Pen cameras are great because they’re light and compact (easy to travel with) but still have the capabilities of an SLR. You can change the lenses depending on what you’re shooting, whether it’s a wider angle or a close-up. I tend to use the 25mm lens for full room shots and the 45mm lens for details.
Use a tripod
If you don’t trust yourself to get a straight, steady shot, spend a little money on a decent tripod. They don’t cost much but they make the world of difference to help balance the camera and frame your shot. Photos will appear sharper and clearer as there’s less movement from the hands. It also makes styling easier as you can have your shot all set up and then go in and make tweaks without worrying where you were standing or if you’ll be able to get the same shot. You can also use a tripod for self portraits – rather than roping in my husband and getting frustrated with one another, I can connect my camera to my phone and use it as a remote control, hiding it behind my back when the shutter clicks.
Make sure each object is clearly defined
You can set up one scene and it will appear completely different from different angles. If you’re shooting the same scene from various directions, each shot will require some tweaking when it comes to styling. You want to make sure that each object is seen and easily defined. You don’t want some items hiding behind things or becoming obscured – it creates a confusing shot because the viewer doesn’t know what they’re supposed to be looking at. You want a vase to look like a vase, a book to look like a book.
I usually take one tester photo then use it as a reference on screen while I’m tweaking and moving things around until everything looks right and natural to the eye. Sometimes it can take a bit of trial and error! I like to make sure objects are either overlapping slightly or there’s a comfortable space between them, rather than just touching. The negative space helps to more clearly define the objects’ shape.
Make sure objects are clearly visible – allow space between them or overlap objects of different sizes to create a more dynamic compositionFind your focal point
A photo needs to tell a story and have a purpose. What are you attempting to show? What are you trying to draw the viewer’s attention to? Make sure that whatever you’re trying to capture is the centre of the show. I learnt that in America’s Top Model would you believe! If you’re selling a watch, you want to see that watch clearly on the wrist, not hidden behind your leg… When photographing interiors, that might mean taking away any distracting objects in the background to give a clean backdrop, tidying up any unsightly wires and moving the washing out the way – you want to inspire and show the best version of that space. I still like to make sure that a scene looks slightly lived in – as if someone just walked out of the shot. That means ‘undoing’ the styling a little, ruffling up a blanket, fluffing up a cushion or opening a magazine – I like to create the feeling that the viewer could just step into that scene and enjoy that moment.
Use the Golden ratio as a guide
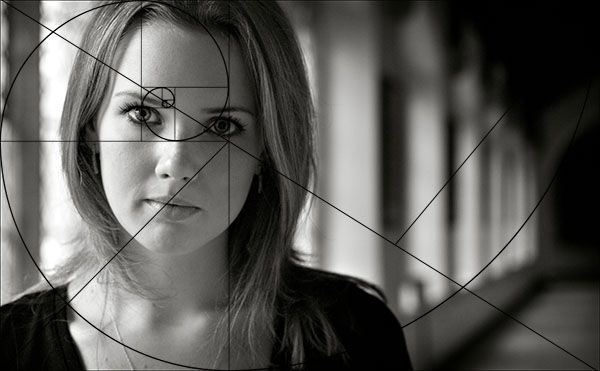
The proportions of the Golden ratio have long been used by artists, architects and photographers, from Da Vinci to Le Corbusier, to create balanced compositions. It is based on a ratio of 1 to 1.618; a ratio that can be found in some patterns in nature, such as the spirals of seashells and leaf formations. In photography, the thinking is that it creates a more natural, harmonious shot that appeals to the human eye.
Using the Golden ratio can first appear a little complicated and it takes some getting used to – it helps to have a picture of the Golden spiral to hand for reference (see below). Position your focal point in the tight curl of the Golden spiral and fit the rest of the composition to follow the curve. You can also use a more simplified version by dividing your composition into thirds and positioning most of the detail within a third of the area of the composition.
Having a central focal point bang in the middle of the shot would be a bit obvious to the eye, rather you want to excite the viewer with something that feels a little more dynamic and intriguing. It helps to have some negative space, whether it’s blank wall space above a sofa or a section of tablecloth next to a flaylay, as it helps draw attention to the main point of interest.
Use the Golden Ratio to create a harmonious composition that feels natural and pleasing to the eye – position your focal point in the tight curl of the Golden spiral and fit the rest of the composition to follow the curveJust a little bit of post-processing
Once you’ve got all these points down and start to feel more comfortable photographing interiors, your images really won’t need much editing because you’ll have already done all the hard work. I don’t like to over edit my images – they tend to only need a few adjustments. If I’m shooting for Instagram, I’ll use Snapseed to adjust the brightness, desaturate slightly and use the sharpen tool to make things look crisp and clear. If I’m editing photos for the blog, I’ll use Photoshop to do a similar job, occasionally touching up scuff marks on walls or using the clone tool to edit out wires. Long gone are the days of filters… I believe simple and natural is best – you don’t want things to look too forced or contrived.
Most of all have fun with it and find out what works best for you. Experiment until it feels natural. I love days when I’m shooting, when I can get absorbed into a composition and all the little details; it becomes such a mindful moment where thoughts and worries can’t intrude.
Do you enjoy photographing interiors? Have you got any tips of your own?
10 interior photography tips | Articles | Photo, video, optics
Many aspire to make a career out of photography, and one of the most profitable areas of commercial photography is interior photography. Photos of interiors are used on websites, magazines and portals, so this type of photography has a lot of potential.
Of course, it's not difficult to take a couple of dozen photos of an apartment or a house, but in real estate and the press, the quality of the photo is fundamentally important, because it is the first look at the product. And it's harder to take a good photo. But nothing is impossible, so we suggest you familiarize yourself with ten tips that will help you take really beautiful interior photos. nine0003
-
Use tripod
We usually recommend a tripod to avoid camera shake. However, in the case of indoor photography, where the main subject of photography will be the interior, it is most important to maintain an even horizon and perspective. This is where a tripod will help you.
Also important is the fact that indoor lighting tends to be less than outside, so you'll need to set a high ISO for a good shot. With this, the problem of additional noise will appear, which will be solved with the help of a tripod. nine0003
You can set a slower shutter speed, which will allow you to get high quality photos in low light.
It is important in interior photography to keep the horizon line and perspective, in order not to make a mistake, it is also best to use a tripod.
A tripod will allow you to correctly frame the frame and calmly move away from the camera to remove an extra object from the field of view of the camera lens.
Benro IT15 tripod is made of special aluminum alloy. Because of this, it is light in weight and is great for shooting interiors. The maximum working height of the tripod is 152, which allows you to comfortably shoot rooms with ceilings up to 3m. nine0003
The Benro IT15 has a weight capacity of up to 4kg, so it can handle most cameras with a wide angle lens.
-
Use live view mode
LiveView may not be the favorite feature of professional photographers, but it's incredibly handy when shooting interiors. It will allow you to see and evaluate the frame before shooting, make sure the composition and that all objects are in their place, as well as evaluate the color scheme. nine0003
All this is very important, because color plays a huge role in the interior.
For interior shooting, it is preferable that the screen be rotated - so you can see what you are shooting with great convenience and for this you do not have to lean to the height of a tripod (we will talk about it later). In a word, do not forget to take this point into account when choosing a suitable camera.
-
Shoot with a wide-angle lens…
... and be careful. A wide angle can visually enlarge a room, and this is very important for shooting interiors. However, it is equally important to observe the correct proportions of the furniture and the room. One of the most common options for interior photography is 16-24mm. Such a lens is more than enough to capture a part of the space that will allow you to judge the room as a whole.
What you shouldn't do is try to fit the whole room and all the elements in one frame, because sometimes one detail says a lot. nine0003
-
Two kinds of perspectives
In the interior of a standard room, as a rule, it is possible to photograph from two perspectives. The first is one perspective. With this shooting, the photo was taken parallel to the wall. In fact, you capture two walls in the frame - a straight line and a perpendicular one, building a frame.
The second, or two-perspective, is shooting into a corner, in which the walls diverge from the corner into two beams.
When shooting the same room, it's best to try both perspectives and then choose which one best captures the atmosphere and style of the interior. nine0003
-
Shoot from medium height
So we have returned to the height from which it is most convenient to rent a room. If you are not shooting a huge hall, with four-meter ceilings, then the most advantageous height for the camera is about the middle of the floor-to-ceiling height. This height most accurately conveys the scale and allows you to get smooth lines of perspective. Of course, they can be corrected in post-processing, but it is better to avoid such a need. nine0003
Again, this is where a tripod comes to the rescue - it is with its help that you will be able to correctly set the height and maintain it, regardless of moving around the building.
-
Use level
Some cameras, but not all, are equipped with an electronic level. However, even the built-in level often shows only the horizon line. Some tripods also come with a bubble level, but if none of your devices have a level, it's definitely worth getting one. nine0003
A bubble level that fits into the camera's hot shoe is great for shooting interiors. It allows you to level the horizon in the process of filming, and is quite inexpensive.
A handy option is the Matin 1 Bubble level. It is made of durable plastic, does not take up much space and performs two functions at once - leveling the horizon and a plug for the camera shoe, which does not allow the contacts to get dirty.
Level Matin 1 Bubble will easily let you know that the camera is not level. nine0003
-
Take advantage of the
range
When shooting interiors, we do not always come across a uniformly lit room. On the contrary, such cases are extremely rare. If you look at any room, you will notice that the areas near the window and around the lamps are more lit. The rest of the room may be completely without lighting. To avoid overexposed areas in the photo, it is best to take several frames. One is normally exposed, one is underexposed by 2 stops, and one is overexposed by the same amount. After that, you can combine frames in the HDR photo stitching app. nine0003
In this way we will get a frame on which both dark and illuminated areas will be displayed evenly.
-
Don't Forget the Flash
Another way to evenly light a room is to use a flash. For this, the built-in flash of the camera will not be enough, since we will need to reflect it so that the light fills the space. If you fire your flash at a wall or ceiling (the latter is best because walls are often dark or bright), the light will scatter around the room. nine0003
This can also be done by removing the flash from the camera and aiming it at the ceiling. The flash can also be used with an external remote control, in which case you can simply put it where you need it.
The Godox Thinklite TT600 is a versatile flash for any aspiring interior photographer. It is compatible with most cameras from leading manufacturers. Fans of studio shooting will appreciate the wide synchronization capabilities of this flash, but for interior photographers its power will be ideal. nine0003
-
Shoot vertically
When shooting interiors, it is always useful to consider what format is best for shooting a particular shot. For example, a living room with a sofa and a coffee table is best shot horizontally, but a staircase, on the contrary, often looks best on a vertical frame. Practice shooting this way and that. This is especially useful if you plan to shoot for magazines or interior applications. nine0003
In the same situation, you will need to learn how to build vertical shots in those interiors where you would otherwise have to choose a horizontal composition.
The most common technique is to capture part of the scene in the frame, for example, the corner of a closet and the corner of a sofa.
-
Edit photos after shooting
Processing is quite an important and almost integral part of interior photography. Of course, in some frames you will need to stretch the exposure, reconsider shadows and lights, and so on. If you still decide to do without a tripod, or are still just mastering the composition, cropping the resulting photos is also acceptable. nine0003
For interior photography, it is not forbidden to make the colors a little brighter. The main indicator in this genre is presentability, so the task of the photographer is to do everything to make the shot a success.
The last thing to say about interior photography is that it's not that hard to master. Perhaps the easiest way to get started is to be inspired by the work of others. Stock up on design magazines, visit a couple of websites, and start practicing. For rehearsal shots, friends' houses and apartments, exhibition houses, and, of course, interior exhibitions are quite suitable. nine0003
Armed with the experience of professionals, a camera and enthusiasm, you will soon be able to collect a large portfolio.
Good luck!
9 tips for interior photography
[adrotate banner="2"]
Dina Aleksandrova is an interior photographer whose work is regularly published in the most famous print media, and a talented teacher - in this article she concentrated the most important tips on interior photography.
1. Preparing for shooting
- Pack your backpack in the evening, charge all the batteries, take two memory cards. I recommend using cameras with two memory card slots for backing up information.
 So you protect yourself from data loss. Also, I always have a spare camera on the set in case of an unforeseen situation.
 - Before you start shooting, ask your interior designer what kind of shooting he needs. The specifics of shooting can be of three types: publication in a magazine, shooting for a portfolio or website, selling an apartment / house. I will talk about the specifics of angles for these three types a little later. nine0012
- After agreeing on the type of shooting, you need to walk around the entire object in order to assess the amount of work. I recommend that you always start with the living room or bedroom - these are the two most important rooms, and they require maximum concentration. At about the third hour of shooting, even a professional blurs his eyes, so start shooting from more difficult premises. When shooting a country house, take your time to shoot the first floor, go around all the floors and start from the last one, so it will be easier to lower the equipment when you are already tired in the middle of shooting.
 nine0012
2. The system of angles and plans in interior photography
I prefer to call angles for magazines classic interior photography. These are the frontal direct views that are used most often. They can be more general, they can be detailed (for example, shooting a console).
Angular views are taken strictly at 45 degrees, very carefully, only where the volumes of the apartment, ceilings will be shown. Such angles will never make the cover of a magazine, but they are acceptable in a magazine shoot. Try to shoot 80 percent of the frontal angles. Be sure to use Live view through the monitor screen and architectural grid. nine0003
We can also talk about angles in the context of plans. I have developed my own system of plans that are easily understood by customers. This system intersects with the cinematic one.
Plans in photography is the distance of objects from our view.
So, you can apply the cinematic layout system of shots: first shot (nearest shot), first middle shot, second middle shot and far shot.
- When shooting for a portfolio or website, camera angles are also classically set. However, it will be great if you make more beautiful close-ups of details and decor. This is necessary for customers to maintain Instagram or Facebook. nine0012
- Real estate photography is all about space, angles and wide angles are encouraged, close-ups are usually not useful, but second medium shots may be appropriate.
3. Optics
Recommended lens system for interior photography:
- 16–35 mm f/4
- 24–70 mm f/2.8
- 50 mm f/1.4
- 85 mm f/1.8 or f/1.4
- 24 mm Tilt-Shift
- 45 mm Tilt-Shift
For large-scale shooting, it is recommended to take a complete set of this optics. The main work will be based on 16–35 mm f/4 and 24–70 mm f/2.8. No need to be skeptical about zooms, with a good camera this is a great combination and will give you the opportunity to pay more attention to the frame, decoration and composition. So you will not move the tripod and look for the shooting point by centimeters, you can take several zoom shots of different plans without changing the position of the tripod. nine0003
When working with zooms, try to move further away from the object being photographed and do not take the focal length in classic interior photography less than 24 mm. Ideally from 35–60 mm.
However, Tilt-Shift 24 mm and 45 mm are suitable for shooting living rooms, kitchens, bathrooms, dining groups. Tilt-shift optics are expensive, but worth it, besides, it is completely manual, you will set the focus point manually, so it is recommended to use an angle viewfinder with zoom or focus by zoom in Live view through the camera monitor. nine0003
Tilt-Shift allows you to shift the vertical and horizontal point of view. This way the saucers on the table will not appear stretched, and reflections in the mirrors when shooting the console can be avoided due to the Tilt-Shift-optics. Be careful not to use full axis offset to avoid vignetting and chromatic aberration.
4. Cameras for interior photography
For interior photography it is recommended to use full-frame cameras of Nikon, Canon, Sony systems. nine0003
The following settings are suitable for interior photography:
- ISO 50–400
- Shutter speed 1/10 - 25 sec.
- Aperture 2-32, average 11-18.
Be careful with slow shutter speeds, noise may appear. The exception is the top-end cameras Canon EOS 5DS and Nikon D850 and Sony A7RIII.
5. Working with light and HDR
In the modern method of shooting interiors, pulsed and constant light are prohibited by the editors of magazines, such shootings simply will not pass through the editorial board. It will also be a big mistake to use the included overhead light (lamps, chandeliers). Used sconces or floor lamps, illuminated signs that act as an art object. nine0003
In my experience, I don't use the camera's built-in HDR features. When working on mirror systems, taking a view of the window, you can make an exposure bracket.
6. Tricks with reflections
As I said above, camera reflections in mirrors can be removed by shifting the axis using Tilt-Shift optics, but what if reflections form in mirror surfaces when shooting a frontal angle?
The best way to remove the reflection is to use a dark gray or black fabric, which can be purchased at any fabric store for a penny. A few meters will suffice. With a slow shutter speed, you should keep the fabric behind the camera and rotate it (drive from side to side). Especially such tricks can come in handy when shooting kitchens where there are glossy facades. nine0003
In the example below, the left door of the antique bookcase reflects the light from the balcony, spoiling the whole frame. It was with the help of the fabric that I managed to remove these reflections.
Sometimes a dark fabric is used to cover part of the window when shooting beds in a bedroom when the angle is from the window to even out the exposure.
Of course, you will ask about the polarizing filter. You definitely need to have it, but it does not remove reflections as well as fabric.
7. Stylization of the interior and composition
The decor on the shooting can change the interior beyond recognition. Empty, yet non-residential premises can look cozy, filled with history, if they are properly decorated.
In essence, interior photography is shooting a finished composition created by a designer and stylist, but not everything is so simple. Achieving movement in the frame, making the finished composition lively and interesting is the joint task of the photographer and stylist.
If you are a designer or decorator and decide to have a photo session of the finished object, this information is for you. nine0003
Now I will show you the universal schemes for building a frame in interior photography.
Circular or mixed composition
- The main principle to remember if you don't have a lot of experience and need decor in the frame is that the smallest objects always come to the fore.

- With the smallest object in the foreground, two or three larger objects must not be equal in height or width. If they are equal, then the fourth “player” should be included in the composition. nine0012
- Larger objects, as a rule, are the main decor, therefore, in order not to focus attention on them, they fade into the background, and discreet objects are placed in the foreground.
Diagonal composition
- When building a diagonal composition, it is necessary to take into account the choice of frame aspect ratio, the best aspect ratio is 2:3 or 4:3. A square orientation is fine too, but won't have the same visual impact as rectangular orientations. When building, try to place objects diagonally from one corner to another, at 45 degrees. The latest cameras have architectural grids with perpendiculars and diagonals. It is very comfortable. nine0012
- Speaking about the meaning of objects, you need to take into account the principles of circular composition, they will also work here.
 Distant objects are larger than objects of the foreground. For a change, you can break the rule and go by breaking down items: smaller - average - smaller - larger.
 - Since the diagonal composition is the most difficult one, it is necessary not to overdo it. Careful and precise alignment of objects along the line can lead to deliberateness, to give out the presence of a decorator. The latest trends in interior photography encourage clutter and sloppiness, so when using the diagonal method, consider the edges of the frame. Objects that have gone beyond the frame of the frame, especially on one of the unused diagonals, will increase the attraction of the eye to the main subject. Moreover, the frame will not lose the depth of space. nine0012
Central composition
- In the classical central composition, the main object is placed in the center, secondary objects of greater height - on the sides. In the corners of the frame or in the center at the top, it is desirable to place minor details.

- Any orientation of the frame is suitable for the central composition. Its indisputable advantage will be the fact that for interior photography, the central composition is most applicable to frontal angles. nine0012
- Vision in the central composition follows objects, starting from the center horizontally or vertically, moving between them.
- The central composition in all examples is more complex than shown in the diagram; it should be borne in mind that in order to achieve an interesting shot, the combination of the central composition with other views will always be favorable.
8. Vertical and horizontal orientation. Frame aspect ratio
In interior photography, vertical orientation of the frame is encouraged. Firstly, this orientation enhances the dynamics that are absent in static interior shooting. Secondly, the vertical orientation most fully reveals the space. A piece of the ceiling and floor must necessarily fall into the frame. nine0003
As for proportions, my favorite proportion is 3:4 or 4:3, it's purely a matter of taste. Since I have been shooting both medium format 1:1 and reportage mechanics 2:3 for a long time, I chose an intermediate format. I also pay tribute to the 70s when magazines printed square frames, this is not done today, but the 3:4 aspect ratio is my compromise.
9. Post-production. Photo processing
As a rule, the approval of personnel occurs at the will of the customer. In my case, I am open and show the frames during the shooting, and also throw off the original drafts for selection. After the frame numbers sent for retouching, the actual processing of the material begins. I shoot in two formats: Jpeg and Raw, this allows you to immediately see the result in different programs and easily select it. nine0003
Raw format should be opened with Adobe Lightroom or Camera Raw. I always use the second option. The options that are used when processing the material are adding sharpness, contrast, working with brightness, with lights in a low key, as well as damping reflections.