Create 3d models from photos
How to convert photos into a 3D model? (2022 Update)
3D Learning Hub
See all categories
Contents:
- Introduction
- How can you turn one picture into a 3D model
- From one 2D image to 3D model: The best tools
- How can you convert a few pictures into a 3D model
- How can you generate a 3D model from multiple images
- Selection of approved photogrammetry software to create your 3D file
- Other ways to turn an object into a 3D model
- Once you have a 3D file, what should you do?
Introduction
How can you turn one picture into a 3D model?
First, the results of your model depend on the number and quality of the photos you take; the more photos and the higher the resolution the more detailed your 3D model will be. You don’t need to be a professional 3D artist or 3D designer, but with an ounce of 3D skill and enough time, everyone can achieve a good 3D character or object and print it.
You’ll see that 3D printers can give life to your best images. You can create any avatar or model that you want with the 3D printing technology, you can also create a CAD model with images from video games. Everything is possible. We split the solutions on the number of images that you have already taken to generate your 3D file.
Did you know that you can create a 3D model even with a single picture?
Don’t get too excited – creating a 3D model from photos is possible, but you should keep in mind that the possibilities and the details allowed would be more limited. For example, you cannot expect to create a perfect 360° file of your pet or your home based on one picture. To obtain the desired shape with a printing process, it is better to have a lot of pictures to get a detailed model and an impressive result. Maybe it will be possible to print a perfect CAD model thanks to only one picture in the future of 3D printing, but it’s not possible yet.
But still, if you only have this option you can create an interesting 3D printed object with the additive manufacturing technology that we know today.
From one 2D image to 3D model: The best tools
- Use the Extrude tool
A picture is a 2D file, meaning that you will only be able to play with two axes to use it in your 3D model. The extrude tool will help you to create a third axis to create new geometry from a selected component. This tool will help you to give volume to your 2D model based on a specific algorithm (most common is converting your image in levels of grey and calculates the height based on the intensity of grey). It’s a pretty common tool that you can find on CAD software. If you don’t own a graphic software you can have a look at one of these free amazing 3D software: SketchUp, Blender or Meshmixer.
- Smoothie 3D
To convert your 2D photo Smoothie 3D might be the easiest solution. This free online software is a game-changer in the creation of a 3D model based on a single picture. With only one picture it helps you to create a simple digital model online that looks closer to the kind of result that you get with a scan or photogrammetry. What’s the trick? Well, if your 2D images can be symmetrically replicated you can get a surprisingly lookalike 3D model. However, if you need to create an asymmetrical model with a lot of details you will probably need to use another software with more pictures.
smoothie-3D.com
- Artificial Intelligence
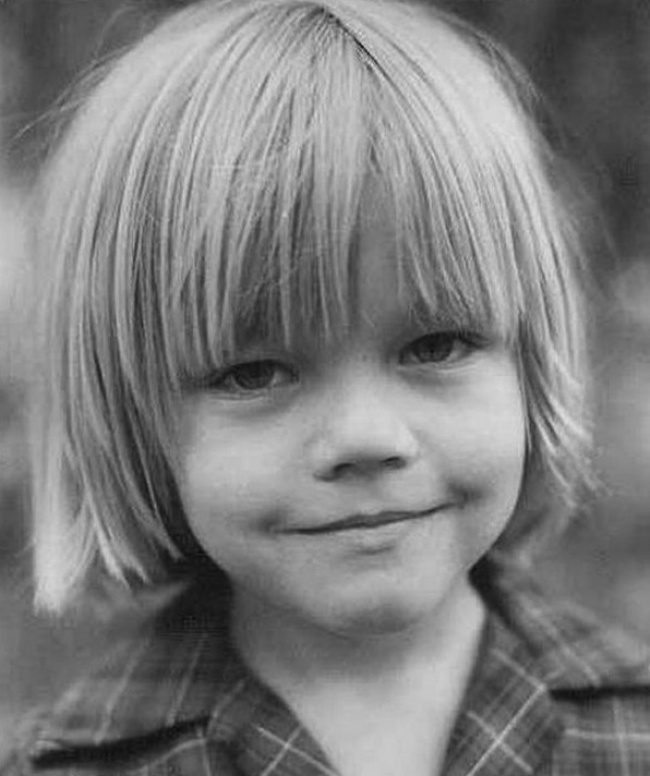
This AI powered tool, developed by researchers, is able to convert one single photo into a 3D model. This 3D Face Reconstruction online app explores a face, using one picture and generate a model that you can totally use for 3D printing.
- Lithophane
First, what is a lithophane? A lithophane is a way to 3D print a photo using the thickness of the print to show different shades of grey, some will be dark when others will be brighter when illuminated from behind. To generate a 3D model, there are options available: Cura, or Image to Lithophane.
Once your model is generated, you will have to slice your model. In order to slice the model, you will have to choose a slicing software, to create layer and guide your 3D printer. To get a good 3D printed lithophane, it is not recommended to use an FDM printer, the layer height might not be good enough.
https://www.indiamart.com
How can you convert a few pictures into a 3D model?
Many times people are contacting us for a solution based on 10 or 20 pictures. For example, when you’re looking to create an avatar of – let’s say – your grandpa, you start asking around to get pictures, try to find a good portrait of him, another picture of him sitting in the garden, the third one playing with your kids, etc.
When you think you have grabbed enough material, you’re looking for an automatic solution to build a 3D model based on these various pictures that have been taken at different time, with different devices etc. Unfortunately, there is none. Because a very special secret-sauce is needed in this case and its imagination. You have to mentally organize the pictures and sculpt your model based on the measure and details that you can grab from the pictures.
It takes a lot of time to create a model from photos like this. So the only way to get to an optimal result is to convert a lot of pictures to make a very precise digital design. Then, you’ll be able to print an interesting model and get a good print quality.
To summarize, you have 3 solutions to go from 2D to 3D with few pictures:
- you can still use the solutions described for one photo
- you can launch yourself in 3D modeling software (such as Zbrush or Sculptris)
- you can ask a 3D designer to help you modeling your 3D file.
Indeed, with more perspective thanks to the different pictures, you would be able to create a more detailed and accurate 3D model. If you need more information to find a 3D designer for this process, please feel free to contact us.
How can you generate a 3D model from multiple images?
Even if 3D printing enables you to create 3D objects with complex shapes you first have to create a detailed model to get an optimized result. In this part, we are giving you few tips to optimize your pictures in order to create the best 3D model. To do so, the best way for you is to use photogrammetry.
This technique implies a process of collecting a series of points in space from a series of photographs. First, you snap a series of photos of the object from every angle that you can, once you have those photos you upload them into a photogrammetry software and you can generate a file to 3D print it.
To get the best 3D model for photos, you first have to get good photos. Here are our best tips.
- Choose the right material for the best result
- A digital camera: of course your old camera won’t make the trick, as you need to have digital files to upload on your computer.
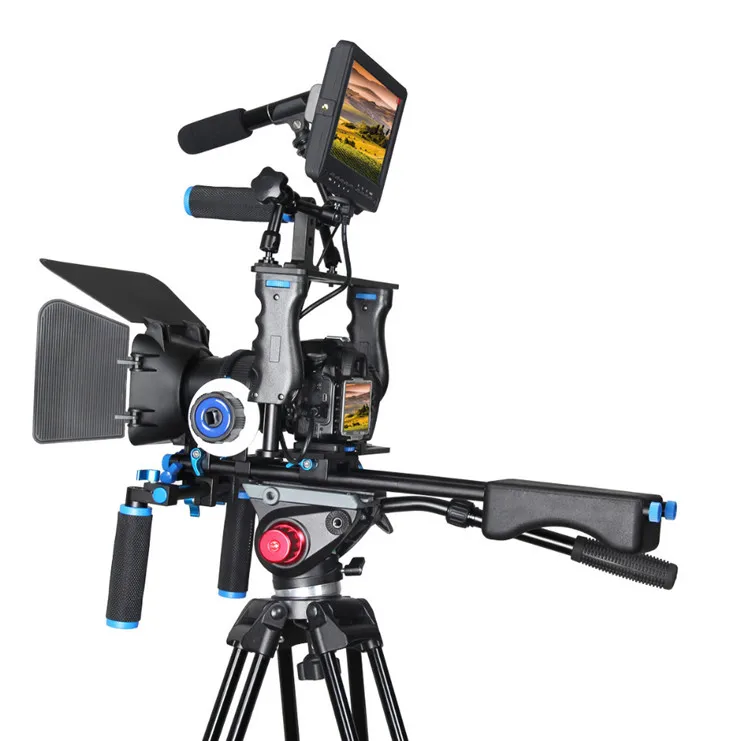
 Your smartphone’s camera can be a good start but you’ll obviously get a more detailed result with a digital single-lens reflex camera as the pixel’s resolution will be three times better and the setting more customizable. We strongly recommend using this type of camera since you need to to make the most of the light and the outline of your subject. The best settings are a low ISO to diminish the most noise as possible. The main advantage of it is that it will help you to get a small aperture with a reduced depth of field. This would allow you to increase the sharpness of the subject outline, making it less confusing for the software. If you are considering taking a subject in movement, be aware that the setup could be far more complicated. You will need many digital cameras as above in the picture (between 50 and 100) with a simultaneous triggering mechanism.
 - A lighting device: Even if you can settle your camera settings to improve the light sensitivity, an additional lighting will be key to improving your shooting.
 Adding a light will help you to earn at the same time a good light sensitivity and lower the noise. Indeed, your ISO could be lower and you will gain in speed and reduce the grain. Whether you use natural or artificial light, what is key is to avoid as much as possible shadows that would blur the outline of the subject
 - A Tripod: or any support allowing you to stabilize the subject and your camera. The pictures will be less blurred and more consistent. It will provide more high-detailed and flat pictures.
- Follow these ten commandments of an optimal shooting to create your 3D file
- Try to place your object in a way it is raised and you can easily turn around to take pictures from all the angles.
- Shoot various loops and change your angle every time to be sure to cover the surface of your object from the top to the bottom and from the left to the right.
- Take at least 30-40 photos to get a detailed model.
- In order to make the process on your software easier put some newspaper or sticky notes on the surface in contact with your object, it will help to distinguish it from your object.
- Limit the variation of light, moves and focus between your pictures
- Make sure that the exposition will be enough to get the precise shape of your object.
- To make the most of your camera’s pixel you can try to do your shooting in RAW image format to get the sharpest pictures possible.
- Use a lens with a low deformation between 30-60 mm
- Have a small aperture between 8 and 16
- The smallest ISO possible between 100 – 200
Selection of approved photogrammetry software to create your 3D file
Once you have this series of pictures you can upload them on specialized photogrammetry software such as the following ones:
Autodesk 123D Catch
123D catch is an Autodesk software which allows you easily to create a 3D model from your pictures with your smartphone or your computer. The application is free. The YouTube channel of 123D catch is full of tutorials that will help you to master easily the software from your first try and will give you precise tips to improve your set of pictures. Check also our 123D Catch tutorial.
Agisoft Photoscan
Photoscan is a computer software that is also a good alternative. It offers a free license for individuals or a professional license costing $179. There are some technical requirements on your computer to make it work properly (for example RAM more than 256 GB). But the results can be impressive when you choose to upload a lot of data. For example, this software was used to create an impressive 3D model of a whole university campus based on 5000 pictures. It is less accessible than Autodesk’s software and will be more targeted for experimented users.
Context Capture (previously Acute 3D)
In the same way that Photoscan, Contact Capture is a more complex and professional oriented photogrammetry software. Acquired by Bentley system, this software is at the edge of the technology and offers astonishing results.
Reality Capture
Reality Capture is a pure photogrammetry software, it doesn’t include any laser scan feature.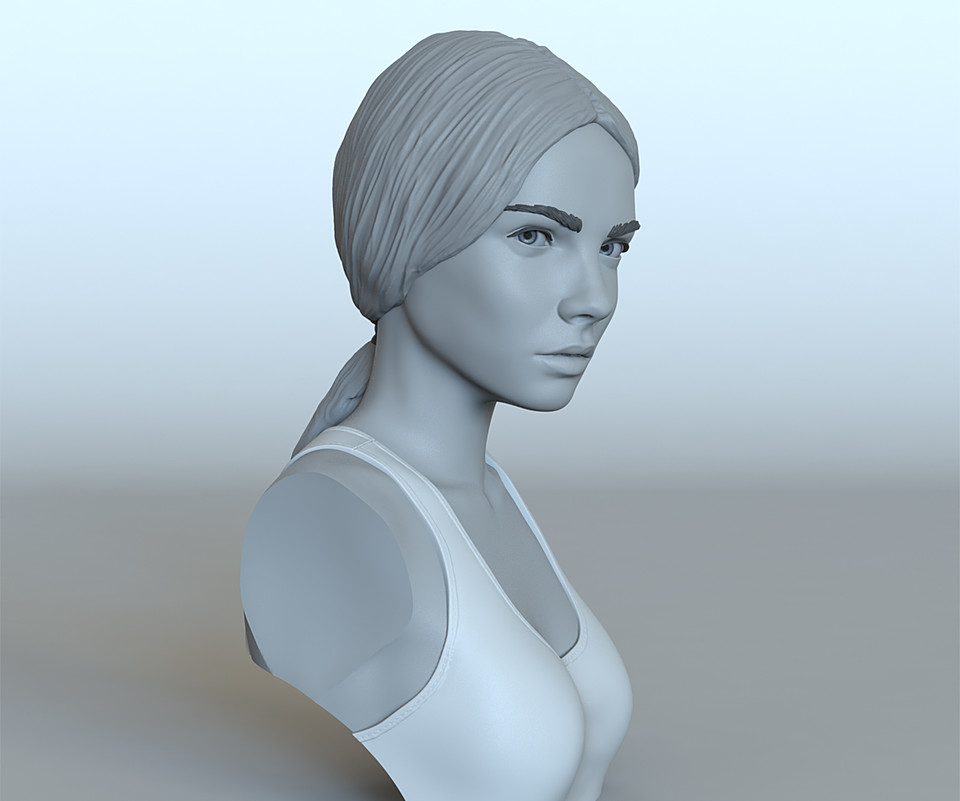 This photogrammetry solution is easy to use and has quite a friendly interface. Speed and quality are the main advantages of this Autodesk program. You will be able to work on different file format, and even small objects using this complete software.
Other ways to turn an object into a 3D model
The best method to turn an object into a 3D model is 3D scanning, to capture the shape of your item. We are pretty sure that you don’t have a 3D scanner at home, but did you know that you could create a 3D scan only using a smartphone? 3D scanning is an easy method to turn an object into a CAD model.
Thanks to CT scanning, you could also create a 3D model of your own brain, and you could also 3D print it!
Once you have a 3D file, what should you do?
Here are the last steps, and then you will be done with 3D printing your photos. First, you need to finish and optimize your 3D file in another software than the ones described above. It happens often that your 3D file can be non-printable since it’s very difficult to create a solid mesh based on a set of pictures (i.e. textures). Some 3D software are offering efficient tools for creating proper files such as MeshLab. You’ll be able to work on the resolution and size of your file, by creating a high or low poly mesh.
Then, you have to pick a format for your file. 3DS, OBJ, C4D, DAE, STL. STL files are the most common for 3D printing.
The last, and the easiest part: you just have to 3D print it by uploading your 3D image on our online 3D printing service! There are a lot of possibilities to 3D print models because various 3D printing materials are available. You have to choose the 3D printing material that you want for your CAD model, it will determine the additive process.
Usually, we recommend using the full color sandstone material in order to get a colorful and likely result. As you can see, with the 3D printing technology that we have now, it is not that difficult to turn photos into 3D models. You can do it on your own or with a little help, and the good news is that you don’t need to have a 3D scanner or 3D printers at home!
Even if additive manufacturing is very useful and efficient for rapid prototyping, or even to work on industrial designs thanks to impressive technologies allowing to create a large variety of projects from medical devices to kitchen equipment, office equipment or architectural exteriors. Witch technologies such as Digital light processing (CLIP), Multi Jet Fusion, or Selective Laser Sintering, you can work on anything, or just experiment these printing processes.
Thanks to this little guide you’ll be able to create a 3D character without using 3D scanning. We’ll be delighted if you share with us your project. We are always excited to see what you can achieve with 3D printing technologies. It’s the occasion to show us how you can get impressive results by turning your photos into 3D models!
Don’t forget to subscribe to our newsletter to get all tips you need to use additive manufacturing!
Picture credit: A 3D portrait. Toolfarm.com
How do I make a 3D model from a photo?
Can you 3D print from a photo?
How do I convert a picture to Lithophane?
Related Topics
- Return to Top
Get the latest 3D printing news delivered right to your inbox
Subscribe to our weekly newsletter to hear about the latest 3D printing technologies, applications, materials, and software.
How to Create a 3D Model from Photos (Step by Step)
By ExpertPhotographyA- A+
Download as PDF
Subscribe Below to Download the Article Immediately
You can also select your interests for free access to our premium training:
Business Basics
Cheat Sheets
Child Photography
Colorful Cityscapes
Composition
Creative Photography
Creative Portrait Concepts
Digital Photo Collages
Fairytale Portrait Photography
Food Photography
Interior Photography
Landscape Editing
Landscape Photography
Lightroom Processing
Lightroom Presets
Long Exposure
Macro Photography
Milky Way Photography
My Camera and Photography
Organic Marketing
Pets
Product Photography
Sky Photography
Social Media
Still Life
Time-Lapse Photography
Travel Photography
Urban Photography
Wildlife Photography
Your privacy is safe. I will never share your information.
 This article shows you how to approach, photograph, and create a 3D model from photos… Since the beginning of time, artists have tried replicating the world around us. These days, 3D modeling and printing may be the closest way to do this.
A 3D model is exactly that. It’s a model with three dimensions. When you create a 3D model, you allow viewers to see height, width, and depth. The process of turning a series of images into a 3D model is called photogrammetry. First, let’s see what you need to make it.
[Note: ExpertPhotography is supported by readers. Product links on ExpertPhotography are referral links. If you use one of these and buy something, we make a little bit of money. Need more info? See how it all works here.]
What You Need to Make a 3D Model From Photos
To make 3D models from photos, you need a camera, software, and a 3D printer.
Camera
A DSLR camera such as a Canon or Nikon gives you the settings you need. A mirrorless camera from Sony or Fujifilm may work, too. They should let you photograph RAW images and provide high-quality images. So it should be a high-megapixel camera.
It’s best to have a wide-angle lens without huge amounts of distortion. For example, a 24-70mm lens would be perfect. You also need a sturdy tripod. A good tripod allows you to shoot from head height when fully extended.
3D Modelling Software
You have to use software to create a 3D model from photos. For 3D modeling in this article, we will use Agisoft Metashape. Here are two other alternatives you can use:
- Regard3D: This is a structure-from-motion program. It creates a 3D model from a series of photographs.
- VisualSfM: This is another GUI (graphical user interface) application. It makes 3D reconstructions using a series of images.
For creating meshes and cleaning your 3D image, there are other options. AutoDesk Maya is a great alternative, and so is Mesh Mixer (now a part of Fusion 360).
3D Printer (Optional)
Once you have your 3D model, you want to bring it to life through 3D printing. If you do not own a 3D printer, there are websites for 3D printing. One such site is i.materialise. These sites allow you to upload your 3D model. And you can choose its size and the material!
How to Create a 3D Model from Photos (Step by Step)
Let’s go through five steps to create your 3D model. Then I go through some troubleshooting points at the very end.
Step 1: Choose Your Subject
Choose your subject carefully. Photographing a huge building or monument in 3D can cause many issues.
By choosing something too big, you risk not fitting the entire subject in your frame. You may also find you can’t move around it easily. Large structures also need many more images to create 3D models.
My advice is to location scout first. Go out with your camera. And consider leaving your tripod behind. Find a subject and take some reference shots.
I tried to capture Budapest’s Harry Hill Bandholtz statue for this article. It was small enough to capture by taking less than 100 images. And I could move around it 360 degrees.
Google Maps aerial image of landmarks in BudapestStep 2: Adjust Your Camera Settings
For the camera settings, I recommend using Manual mode. This lets you change any values you want without them affecting other settings.
Use the lowest ISO possible. It provides the best quality image. Next, set the aperture. The depth of field has to be, at the minimum, mid-level. A shallow depth of field only places a small area of your subject in focus. These two settings give you the shutter speed value.
Here are the settings that I used for my example picture.
ISO (100), aperture (f/5.6), and shutter speed (1/80 s)Step 3: Take Your Images
To make a 3D model from photos, you need to think about panorama imaging.
Panoramas are created by photographing a scene from many camera perspectives without moving. You take a picture, move the camera along the same axis, and photograph again. You repeat this process until you capture the entire scene. It can cover a 360-degree field of view.
When you stitch these images together, you get one image showing the entire scene. You need an overlap of around 80%. Each new image you shoot needs to show 20% more of the scene than the last image. It allows the 3D software to match the images correctly.
This is why you should shoot in portrait orientation. This allows you to get the height of the subject in its entirety.
For each subject, you need to take a mini-panorama. This gives you the length of the subject. It also ensures the overlap you need to create a 3D model. You have to move the camera, take three images and move the camera again.
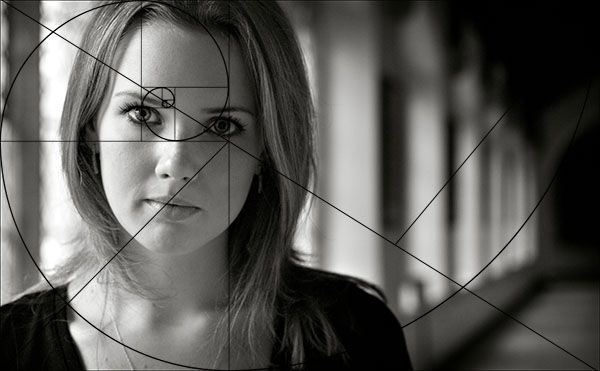
The three images follow a simple process. The first image has the subject in the middle. The subject rests on the left rule of thirds intersection in the second image. And in the third, the subject rests on the right intersection.
Use the rule-of-thirds grid on the camera’s Live View. That way, you can line everything up. Then you can use an on-camera spirit level to ensure the shots are level.
Change your location by taking two medium steps from the last location. Repeat the three steps above the entire way around your subject. In each position, take three images.
Below is a drawing of my process. It shows how many images I took and from what angle. I took a total of 132 images from 44 different positions. It covered the full 360-degree view of the statue.
Step 4: Install the 3D Modelling Software
Go to the Agisoft Metashare website and download, install, and run its 3D software.
Step 5: Add and Align Your Images
Click on Workflow > Add Photos. Locate the folder where your JPEGs are stored. Next, select every image in the left-hand browser window. You can do this with Ctrl+A (Command+A).
Go back to Workflow > Align Photos. Set the accuracy to Highest and Generic Preselection to Disabled. Under Advanced, set the Key point limit to 100,000 and the Tie point limit to 40,000.
Then press OK. This process might take over an hour, depending on computer speed and the number of images.
Troubleshooting Tips
I had a problem with the camera allocation that Agisoft Metahsare uses as a default. When I first looked at the model, I was disappointed that the statue was not as sharp and”full” as I had hoped. The trees and surrounding objects appeared in the shot.
This was partly because of the 3D software. It read the wrong placement of between six and eight camera angles. I tried to move these independently. But I instead chose to rename the files to something more coherent. The file names had the original names given by the camera.
I changed the file names and recreated the 3D model. And the program placed the cameras correctly. You can see the difference in the image below.
Another way is to try aligning the photos again. Add the photos. And then, go to Workflow > Align Photos.
In the dialogue box under Pair Preselection, change it from Disabled to Generic. Then the 3D software spends more time considering camera placements and image overlap.
Conclusion
There are many reasons to use 3D modeling. You can create special memories of your travels. Or you can create a 3D object from a photographed subject. Professionally, it’s beneficial for architectural photographers or architects. And many other professions can benefit from creating perfect 3D renditions of objects.
That said, creating a 3D model from photos is a time-consuming process. You need to have the correct camera setup, tripod, subject, and 3D software to achieve your goal.
3D modeling is also a way to create art. If you are looking for a creative gift, you might consider creating a 3D model. They make great presents for the 3D photographer in your life.
Creation of a 3D model of an object from photographs Industrial design studio KLONA, Moscow
Creation of a 3D model of an object from photographs belongs to the discipline of photogrammetry. There are two big directions in photogrammetry:
-
phototopography, which helps to map and plan the area;
-
applied photogrammetry, which is needed in construction, architecture and forensics.
nine0013 -
Take a photo in focus. It is most convenient to fulfill this condition if the object is placed on a rotating platform. The camera must be placed close and placed on a tripod. So the object will always be in the center, and it will be possible to catch all the necessary angles. It is important that the method is only suitable for small objects.
-
A large object may not be able to rotate. If it is still possible to find a platform for a car, then it will not work to rotate a residential building, unless you are the Hulk, of course. Therefore, you will have to rotate around the object, always keeping the same distance, from whichever side you are shooting.
 If all this causes difficulties, then you can call a KLONA photographer, and he will take pictures for you. Also, if you can’t photograph at all, you can take measurements from the product. nine0003
 -
The camera must be positioned vertically and horizontally , so the tripod must be level.
-
The result will be better if you place the object on a plain background.
-
Marked background is a calibrated stand, it will help you get a more accurate 3D model.
-
Images need to be converted or saved in .
 JPG format.
 -
The height and width of all images must not differ.
-
It is important to number all the images, placing them sequentially. nine0003
-
In order to get a 3D model, you need high quality images and a correctly exposed frame. If this is not an option, consider other options. nine0003
-
In any case, editing the resulting 3D model will be required, and for complex models, this process may be delayed.
-
If there are details inside the model or something that needs to be reflected, then you will have to model manually.

-
3D models obtained after photo modeling may differ significantly in size from the original item.
-
Allows you to create a 3D model of a large object.
-
Gives you the ability to model existing objects without encountering them live.
-
Allows you not to measure the object.
-
You can make a 3D model from a photo without drawings.
-
Allows you to ignore the internal structure of the object. nine0003
-
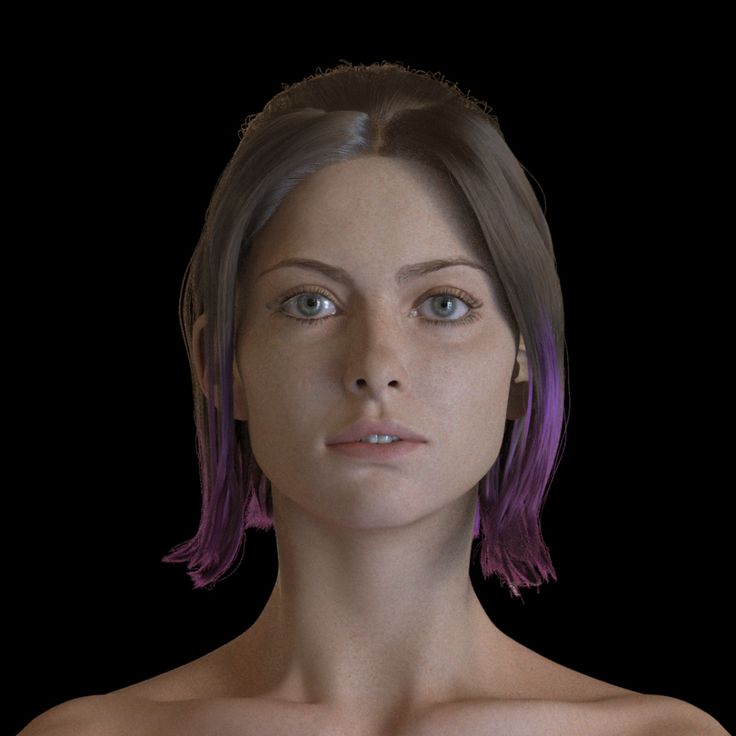
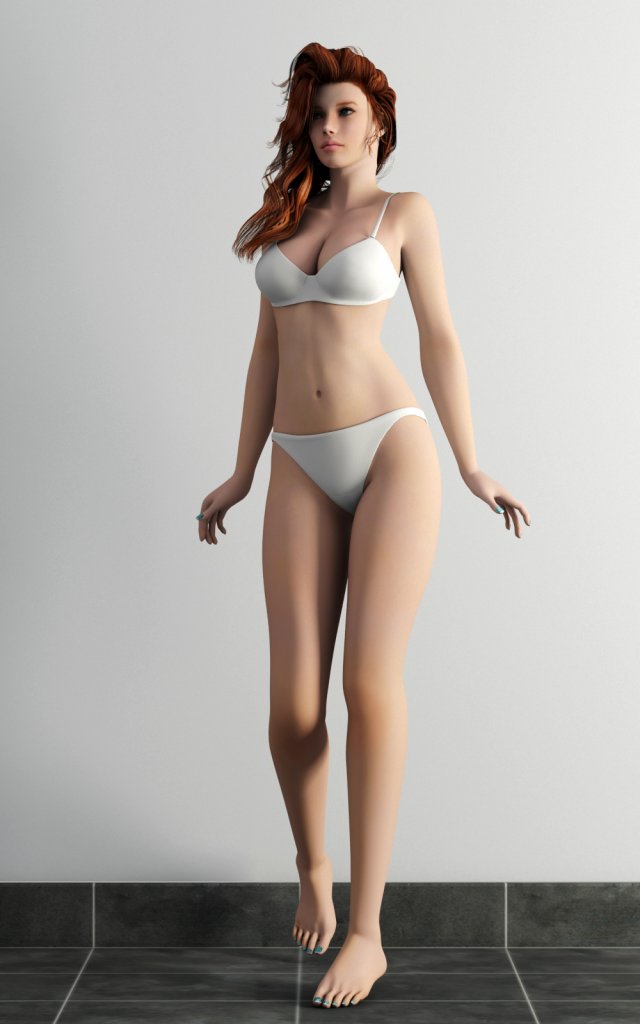
Suitable for 3D face modeling and is used in the development of low-budget games and animations.
-
It is also used to create virtual tours of salons, hotels and shopping malls, to demonstrate goods in online stores.

-
This is a good way if you need to print a 3D model of an object once and the very fact of its presence is important, and not the quality.
nine0008 - Part 1: What is a 3D model
- Part 2: How to create 3D models with Blender
- Part 3: Recommendation: Best 3D Movie Maker
- Part 4: Frequently Asked Questions
3D modeling from photographs is also used for production. Using a set of photos, you can produce an accurate 3D model and create a copy of the object.
Photogrammetry was originally used only for landscape reconstruction and mapping. Today it works better, as powerful digital cameras allow you to get a high-quality image of the object, which simplifies the 3D modeling process.
3D object from photographs - figurine from a photo
3D Modeling from a Photo: Techniques
The main reason for using this method is that there are no blueprints or the object itself next to the 3D modeler. This technology is useful in that it allows you to model large objects without taking measurements. It is also suitable for areas or objects where it is unsafe for a person to be.
3D modeling from photographs is also used by archaeologists to present the results of excavations.
Read also: Promdesign: 7 new products that make life easier
3D model from photo
Make 3D model from photo: film and games application
Entertainment is another area where 3D model from photo is used. In the case of movies, modeling is needed for special effects and combinations of shots. Games and cartoons need human prototypes.
Based on their photographs, characters are drawn, this adds realism to them and harmonizes the character. So, Robin Williams became the prototype of the genie from Aladdin, and the characteristic appearance of the evil Queen from Snow White is the merit of Joan Crawford, the star of the first magnitude of the era of Golden Hollywood. nine0003
In the past, it took an artist to come up with the characteristics of a living person for a cartoon or game character. Today, special programs will help with this, we will talk about them below. And if you need a completely new character, contact KLONA: we have a division of animators.
Production of a 3D model from a photo: Disney example
Development of a 3D model from a photo: prototyping services by them. It is important that if the detail is complex, then you need a lot of photos from different angles. Of course, if it is possible to provide the 3D modeler with the product itself, and not a photo, it is better to do so. nine0003
3D model from a photo: industrial design
Creating a 3D model from a photo will help you quickly orient yourself and estimate the time needed to develop a real model. For an estimate before the main modeling, this is a good option. However, this is not suitable for complex products with a lot of bumps, corners or for designer items.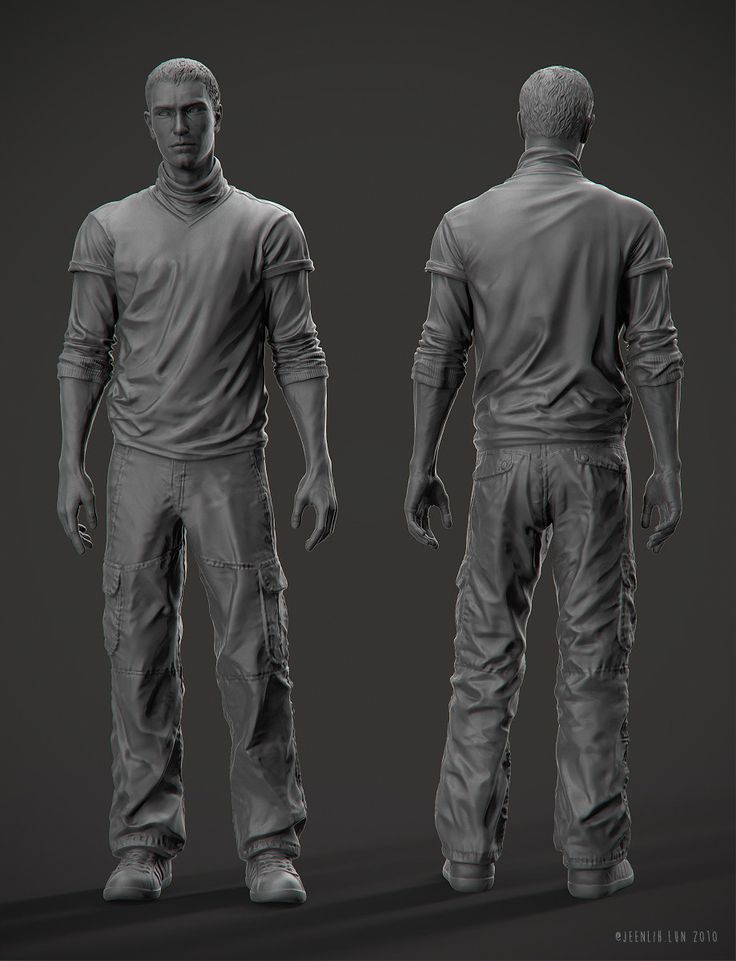 In such cases, it will be easier to create a 3D model from scratch.
How to build a 3D model from a photo: the rules
To get a high-quality and accurate 3D model, you need to follow certain rules. nine0003
At least 3 photographs of the item are required: side, front and top views are required. Optional, but desirable, is a half-profile photo.
See also: 7 customer misconceptions about industrial design
Building a 3D model from a photo: additional recommendations
Create a 3D Model from a Photo: Software Overview
In this section, we will talk about programs that will help you turn a set of photos into a 3D model, but it is important to remember that they are amateur and are used for low-budget projects. And if you need a high-quality 3D model with which you need to make a batch of products, contact the CLON studio. With us, you will get the desired result faster.
CrazyTalk is a program for creating facial animation. 3D Head Creation technology is built into it, which increases the accuracy of the resulting models. It also allows you to simulate the movement of the lips, which increases realism. nine0003
3D modeling and facial animation from photos
FaceGen is a program for modeling faces in game animation. Among the useful features is a slider that allows you to modify the resulting image. You have dealt with this if you have ever created a character in the Sims game.
Headshop is a program for modeling faces from portrait photographs. In addition to uploading photos, you will need to mark reference points on them, and only then proceed to modeling. nine0003
Strata Foto 3D is a program that turns photos into 3D models. Its main advantage is the ability to import and export images in Photoshop. Unlike the previous examples, Starta is mainly used for online stores and applications.
3D object from photos: Starta
360.3D is a more functional program that requires 4 to 8 product photos. The software provides 3 levels of work depending on the skills of the modeler. It is suitable for professional developers and for beginners, you just need to choose your level of training. 360.3D is best for creating virtual tours. Features include the ability to customize the background, set the lights, and add animation effects. nine0003
123B is the easiest program to use, since not only photos from a professional camera, but also images taken with a television camera or tablet are suitable for working with it. It is popular among beginners and those who use the Autodesk 3D editor, since 123B was released by its creators.
3D Modeling from a Photo: Highlights
3D modeling from a photo: advantages
A 3D model from a photo is a quick and relatively easy way to create a model, as the software allows you to partially automate the process. If your requirements match one of the items on the list, you should order 3D modeling from a photo in KLONA. Tell us about your task, and managers will help you.
Contact information:
+7 (499) 112 08 50
+7 (910) 479 24 20
Like this article? nine0043 Leave your vote :)
How easy it is to create a 3D model from photos
Isn't it exciting if you can make your 2D images look real? A breathtaking scenery that you want to constantly look at in your photo frame? A figure of yourself that you would like to use as a model and evaluation of your appearance? Don't look away because in this article we will show you how to create 3d model from photo to make realistic parts from images on your phone or memory card. Let's move on to the tutorial on creating 3D models from your photos. nine0003
Create a 3D model from photos
Part 1: What is a 3D model
Before we start creating a 3D model, what are 3D models?
Over the years we have progressed and with the help of modern technology we have made people's lives better. One of the seeds of progress is the use of (3D) 3D models in our daily lives. 3D models play an important role in today's construction and engineering projects as they increase productivity, which means maximum efficiency for the industry. 3D modeling is the creation of a three-dimensional demonstration of an object with a specific functionality. With it, you can determine the size, shape and texture of what you are producing. nine0003
You can also copy existing elements to a 3D model version or an exact copy. For example, you can create a simple whistle using 3D modeling. It is an experiential process and development aimed at making our lives better.
In fact, its creation is a kind of skill that needs to be learned. Since this is useful for professionals, it will also require a professional to create a 3D model. Fortunately, we will teach you how to create 3D models. The following parts of the article will be a tutorial for 3D modelers. Please continue reading this blog until the end to see our recommendation. nine0003
Part 2: How to create 3D models with Blender
Blender is one of the most famous and well-established 3D models in creating 3D models. It is not only a video editor, but also a standalone 3D modeling software available for Windows and Mac. It is an incredible program for rendering high quality path tracers for your design and offers a wide range of 3D modeling possibilities.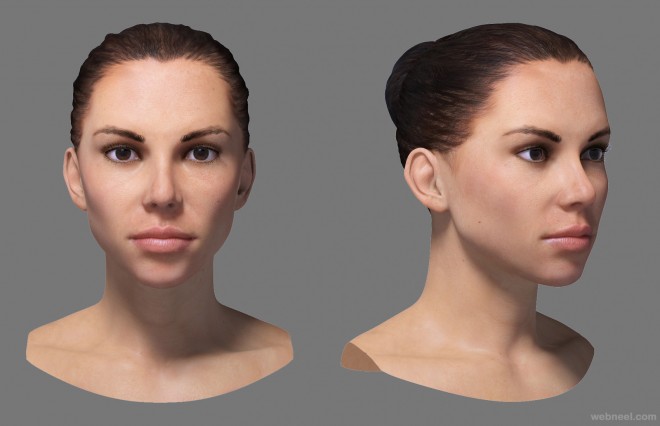 You can add animation, create 3D stories, and add visual effects (VFX) to enhance the visual quality. This is the best 3D modeling software. Plus, it's offline and free! So what are you waiting for? Let's use this program to learn how to create 3D printable models from your photos. nine0003
1 Blender presentation when starting interface. You will see a cube. Do nothing on this cube. Open your File Explorer, then find the 2D image you will be using. Select a photo, drag it and place it in the Blender program.
2This part of the step will be technical. Please press Alt+G at the same time to decrease the movement, then press Alt+R to rotate the image. Next, you want to press the number 7 on the numeric keypad. As you can see, the image is now aligned with the cube. nine0003
3To get to the vertex 3D object, you must press A to select all objects. Then press Alt+M, and then select Center on Go Settings. Press G to grab vertices or points. Click on the vertices, then press E to move the object.
4Select all vertices by holding Shift, clicking on all vertices, and pressing F to fill. Once filled, press E on it, drag your 3D object to add depth to it, and there it is; this is how you create a 3D model from photos. nine0003
In essence, you are just more clever and technical in describing the shape of your object. But at the same time, being frankly accessible.
This is a complex procedure carried out in a complex software tool, but with our simple steps we were able to make it more accessible to you. We hope we have won your trust and will continue to use it by recommending new software that will give you a 3D experience right in your home. Buckle up because we're in 3D fun!
For more 3D photo editing software, you can find them in this post.
Part 3: Recommendation: The best 3D movie maker
Now that you have the knowledge of how to convert your 2D images into 3D models, we'll show you the software to turn your boring old 2D movies into exciting ones. and realistic 3D movies! Please continue reading below to find out what this software is. nine0003
AnyMP4 Video Converter Ultimate is the most exciting software that allows you to turn your 2D movies into IMAX 3D movies. With this 3D builder under its Toolbox feature, you can choose whether you want to turn your videos into Anaglyph 3D or Split Screen 3D, which are the two most common 3D settings. You can adjust the Depth Intensity of these effects by simply dragging and dropping the settings.
This versatile software supports MP4, MKV, MOV, AVI, FLV, WEBM, WMV, VOB and over 500 formats. You can also rip DVD with this software tool. Create and edit music videos and create collages! It doesn't stop there. As mentioned earlier, many additional features have been added to the program. Tool box, such as Video Compressor, Watermark Remover, Video Enhancer and more! nine0003
As promised, we bring you a tutorial on how to turn your 2D videos into 3D movies.
1Download AnyMP4 Video Converter Ultimate from the website.
After installation, run it. In the initial interface, select Toolbox. It's the last option on the menu at the top, then select 3D Designer.
2Click Add Video to 3D Maker. Select the video you want to convert; You can move on to the editing part.
3To make your video 3D, click the Anaglyph 3D or Split Screen 3D setting icon to set the 3D effect for your video. Adjust Depth to set the intensity of the effect for your movie. nine0003
4If you are satisfied with the video, export the video by clicking Create 3D. Then you can go.
3D video is so easy! At first you won't even believe it, but now it's in front of you. Download AnyMP4 Video Converter Ultimate to make video conversion much more convenient!
Part 4. Frequently asked questions about 3D modeling
1. Is there an application for creating 3D models?
Yes, there is. 3DC is an app available on Android and iOS. This is a 3D modeling application with basic features. Great for hobbyists to gain basic knowledge and experience.Female-models-Emotional-animation-6.jpg)