Posing 3 people
3 People Posing - Bilder und Stockfotos
178.776Bilder
- Bilder
- Fotos
- Grafiken
- Vektoren
- Videos
Durchstöbern Sie 178.776
3 people posing Stock-Fotografie und Bilder. Oder starten Sie eine neue Suche, um noch mehr Stock-Fotografie und Bilder zu entdecken.Sortieren nach:
Am beliebtesten
geschäftsleute sprechen im büro-lobby - 3 people posing stock-fotos und bilderGeschäftsleute sprechen im Büro-lobby
kind mädchen süße blonde haare baby zu hause kleinkind schaut auf kamera porträt 3 jahre alt kind familie lebensstil - 3 people posing stock-fotos und bilderKind Mädchen süße blonde Haare Baby zu Hause Kleinkind schaut...
Kind Mädchen süße blonde Haare Baby zu Hause Kleinkind Blick auf Kamera Porträt 3 Jahre alt Kind Familie Lebensstil
der familienbauernhof - 3 people posing stock-fotos und bilderDer Familienbauernhof
lustiges kindermädchen, das im freien spielt, überraschtes emotionales kind in sonnenbrille 3 jahre altes baby erhobene hände familienurlaub - 3 people posing stock-fotos und bilderLustiges Kindermädchen, das im Freien spielt, überraschtes. ..
Lustiges Kind, das im Freien spielt, überrascht emotionales Kind mit Sonnenbrille 3 Jahre alt Baby hebt Hände Familienurlaub
aufnahme verschiedener frauen in voller länge, die in ihren natürlichen körpern posieren - 3 people posing stock-fotos und bilderAufnahme verschiedener Frauen in voller Länge, die in ihren natürl
umarmung von afro-menschen gelber hintergrund - 3 people posing stock-fotos und bilderUmarmung von Afro-Menschen gelber Hintergrund
junge freunde, radfahren in der stadt - 3 people posing stock-fotos und bilderJunge Freunde, Radfahren in der Stadt
junge, vielfältige menschen, die gemeinsam spaß haben, bunte saure zuckergummi-wurmbonbons essen, isoliert über grauem hintergrund stehen - 3 people posing stock-fotos und bilderJunge, vielfältige Menschen, die gemeinsam Spaß haben, bunte...
Junge, vielfältige Menschen, die zusammen Spaß haben, bunte saure Zuckergummi-Wurmbonbons essen, isoliert über grauem Hintergrund stehen. Spaß, Jugendkonzept. Horizontale Aufnahme
Porträt eines lächelnden kleinen braunhaarigen Jungen, der in...
Porträt eines lächelnden kleinen braunhaarigen Jungen, der in die Kamera schaut. Glückliches Kind mit guten gesunden Zähnen für Zahnmedizin auf blauem Hintergrund
portrait of group of creative business people - 3 people posing stock-fotos und bilderPortrait of group of creative business people
modelle von polygonalen menschen in verschiedenen posen. wandelnder mann. männer springen mit den händen hinter dem rücken. mann, der sich auf einem boden zusammenrollt. vektor für broschüre, flyer, präsentation, logo oder banner. - 3 people posing stock-grafiken, -clipart, -cartoons und -symboleModelle von polygonalen Menschen in verschiedenen Posen. ...
...
Lächelnde Frauen posieren zusammen
hand zählen-drei finger. - 3 people posing stock-fotos und bilderHand zählen-drei Finger.
familie lächeln - 3 people posing stock-fotos und bilderFamilie Lächeln
kleinkind spielt mit mutter - 3 people posing stock-fotos und bilderKleinkind spielt mit Mutter
multiethnische junge freunde genießen gemeinsam - 3 people posing stock-fotos und bilderMultiethnische junge Freunde genießen gemeinsam
fröhliche dreiköpfige familie aus dem nahen osten, die sich zusammen über gelbem hintergrund agelöst - 3 people posing stock-fotos und bilderFröhliche dreiköpfige Familie aus dem Nahen Osten, die sich...
Fröhliche dreiköpfige Familie aus dem Nahen Osten, die zusammen Spaß über gelben Hintergrund hat, glückliche junge arabische Eltern und ihre kleine Tochter, die lachen und lächeln in die Kamera, Aufnahme in voller Länge, Kopierraum
junge hübsche frau zeigt nummer drei, symbol des zählens, konzept der mathematik, selbstbewusst und fröhlich - 3 people posing stock-fotos und bilderJunge hübsche Frau zeigt Nummer drei, Symbol des Zählens,.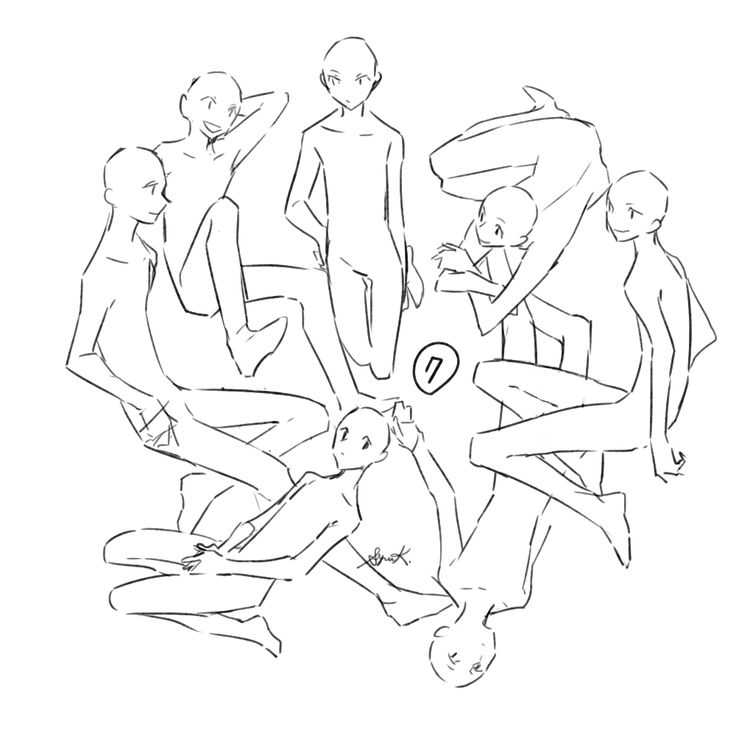 ..
..
Positiv zu sein ermöglicht es Ihnen, die Chancen voll auszuschöpfe
Porträt eines Geschäftsmannes mit seinem Team hinter ihm
jungen, die spaß am grauen studio-hintergrund - 3 people posing stock-fotos und bilderJungen, die Spaß am grauen Studio-Hintergrund
verschiedene klassenkameraden zeigen mit den fingern auf sich selbst und posieren vor der kamera - 3 people posing stock-fotos und bilderVerschiedene Klassenkameraden zeigen mit den Fingern auf sich...
Diverse Klassenkameraden, die mit dem Finger auf sich selbst zeigen und über einem orangefarbenen Studiohintergrund vor der Kamera posieren
süßes kleines mädchen lächelnd und schielend im sonnenlicht. glückliches kleinkind mit spaß. porträt des verspielten vorschulalters. lifestyle-fotografie. - 3 people posing stock-fotos und bilderSüßes kleines Mädchen lächelnd und schielend im Sonnenlicht. Glück
Glück
Frauen reden beim Schwimmen im Meer bei Sonnenuntergang
Freundinnen, die Badekappen tragen, während sie sich im Meer unterhalten. Frauen genießen den Urlaub während des Sonnenuntergangs. Schwimmer sind am Strand gegen den Himmel.
arbeitnehmer gehen in ölraffinerie - 3 people posing stock-fotos und bilderArbeitnehmer gehen in Ölraffinerie
headshot-porträt von drei glücklichen verschiedenen geschäftsleuten, die in die kamera schauen. - 3 people posing stock-fotos und bilderHeadshot-Porträt von drei glücklichen verschiedenen Geschäftsleute
Nahaufnahme des Headshot-Porträts von drei glücklichen, vielfältigen Geschäftsleuten, die in die Kamera schauen. Verschiedene lächelnde Mitarbeiter, die hinter weiblichen und männlichen Unternehmensmentoren stehen. Leiter des multiethnischen Teamkonzepts.
Selbstbewusste Umweltschützer zeigen Daumen hoch
porträt von drei jungen erwachsenen freundinnen auf der straße - 3 people posing stock-fotos und bilderPorträt von drei jungen erwachsenen Freundinnen auf der Straße
dies ist unsere zeit. - 3 people posing stock-fotos und bilderDies ist unsere Zeit.
drei junge tänzer tanzen street-dance - 3 people posing stock-fotos und bilderDrei junge Tänzer tanzen Street-Dance
Aufnahme von drei jungen Tänzern, die Streetdance tanzen, isoliert auf weißem Hintergrund
lässige junge erwachsene-isoliert - 3 people posing stock-fotos und bilderLässige junge Erwachsene-isoliert
porträt des glücklichen kleinen kaukasischen jungen vor dem gelben hintergrund zeige finger - kindheit erwachsen und erfolgskonzept - frontansicht taille bis kopierraum - 3 people posing stock-fotos und bilderPorträt des glücklichen kleinen kaukasischen Jungen vor dem. ..
..
Ich habe die besten Eltern auf der Welt.
porträt der familie mit jungen sohn spaß auf sommerurlaub spritzen im freibad - 3 people posing stock-fotos und bilderPorträt der Familie mit jungen Sohn Spaß auf Sommerurlaub...
multiracial gruppe von freunden bei einem kaffee zusammen - 3 people posing stock-fotos und bilderMultiracial Gruppe von Freunden bei einem Kaffee zusammen
Multirassische Gruppe von Freunden, die zusammen einen Kaffee trinken. Zwei Frauen und ein Mann im Café, reden, lachen und genießen ihre Zeit. Lifestyle- und Freundschaftskonzepte mit echten Menschenmodellen.
glücklich lachende kleiner junge auf seilrutsche bei strahlendem sonnenschein - 3 people posing stock-fotos und bilderglücklich lachende kleiner Junge auf Seilrutsche bei strahlendem...
The Ultimate Family Portrait Poses Guide
Yep, we’re talking family photo posing ideas! And amazing pictures your clients will cherish for years to come!
This guide will give you the best family portrait poses, tips and compositional guidelines. So join us today to find out everything you need to capture beautiful family portraits, with engaging compositions.
Do you feel like you have mastered the basics of photography? Are you ready to take the next step and become a great lifestyle family photographer?
If you wish to take your photos to the next level, we recommend that you pay close attention to posing details and capturing the best moments. Now, let’s take your family photos to a more professional level!
1. Standing
When we pose family members standing, they tend to all turn toward the lens with arms at their side.
Stiff much?
Why not better connect them in interesting ways. It could be leaning on one another with arms around their waists, heads on shoulders or heads in laps. Small children can wrap their arms around mum or dad’s legs.
For naturally looking family portrait poses, not everyone needs to be facing the camera – mix it up by asking the little ones to turn and hug mum or dad’s belly, or leg.
Having them leaning against something is a really easy way to get them all to relax. It’s also great for mixing up the poses.
Sarah Croker, Advanced Graduate
2. Seated
It can be tricky working out how to seat a large family without positioning them side by side (boring!).
So how to pose them then?
By using shape and lines! In this shot below, mum and her two girls form a triangle. Those diagonal lines create a visually strong image.
Merissa Wakefield, Advanced Graduate
3. Diagonal Lines
Similarly, check out all the diagonal lines formed by the varied positions in this shot below. It’s sooo much more interesting than if they were seated side by side on the grass. And, it’s also going a long way to convey connection and love.
You can get a load of family portrait poses variety from this one position:
- Stand up and shoot down over the top of them. Focus on them all, or on separate individuals.

- Get down low and zoom in close to individual faces.
- Capture details such as hands holding hands.
Merissa Wakefield, Click Love Grow Graduate
4. Side by Side
Sometimes you can’t avoid positioning subjects side by side, eg. in this shot below where they were seated on a fence. But you can easily elevate your portrait session by getting them in close together and prompting them to put their arms around one another.
Dig deep and find your inner child. Be silly and engage them to draw out natural smiles and laughter.
Related: 10 Ways to Get Real Smiles From Kids
Amy Philp, Advanced Graduate
5. Perspective
For the best portrait poses, throw the family in a pile (not literally, please!). Ask them to play, tickle, and do whatever they would normally when they’re trying to get their children to laugh. Then stand above them and shoot down.
Merissa Wakefield, CLG Instructor
Claire Eastman, Advanced Grad
Whilst you’ve got them there, move all around them to capture close ups of details, wide shots, head shots, hands holding… everything! Then step back and get a wide shot for a beautifully candid and unposed family photo.
Claire Eastman, Advanced Grad
This way, you can get tonnes of variety in your compositions without needing to move them, and it’s another interesting way to pose.
Heidi Talic, Advanced Graduate
Heidi Talic, Advanced Graduate
6. Turn Around
When shooting family portrait poses, you’ll convey connection far better when subjects are encouraged to turn their bodies toward one another rather than your lens.
Unless you’re trying this beautiful pose! It’s important to note dad’s head resting on his wife’s head may seem a small thing. But this makes all the difference between a more formal pose and one with lots of love and connection.
Related: 20 Poses for Natural Photos of Kids, Families & Couples
7. Interact
Avoid awkward, lifeless family photos and capture natural connections instead by prompting interactions. Ask your subjects to turn toward one another and suggest kisses, tickles and games. Singing and playing can draw out playfulness.
Bring children up to the height of their parents by asking them to pick them up and snuggle them close.
8. Play
A great way to add some variety to your family portrait poses gallery is to take a break from posing and photograph kids and parents playing. Make sure you have a fast shutter speed to capture all of the best moments.
The bonus of doing this is breaking up the session with some fun stuff which makes it much easier to keep the kids invested and happy!
Related: How to Take Action Shots
9. Bring Them Together
Avoid poses where adults are standing and small children appear much lower in the frame. That difference in heights makes it much harder for families to connect. As a result, there will be no emotion for you to capture. It also forces you to shoot much wider to get everyone in.
Instead, ask adults to get down to their children’s level. You’ll be amazed at what a difference it makes to their interactions.
Pam Bradford, Click Love Grow Instructor
…or bring them up to their parent’s height!
Pam Bradford, Click Love Grow Instructor
That being said, don’t completely rule out everyone standing at the same height… because you can take shots like this. Note how dad’s arms and hands acting to beautifully framing her face.
Or this gorgeous family portrait pose shot, which cleverly conveys the love and protection for this little girl. And all the expressivity, without even showing her family’s faces.
Jasmin Tarczon, Graduate
Or this one which captures the cheeky playfulness of these boys, and the unique dynamic of their family.
Heidi Talic, Advanced Graduate
10. Avoid Empty Spaces
Avoid big gaps between your subjects, whilst at the same time ensuring they don’t look too squashed together… unless you’re shooting a group hug, in which case all bets are off! Squish them up!
11.
 Head Heights
When shooting family portraits, avoid creating straight lines with head heights (eg. shortest to tallest or vice versa), at all costs. You’ll create a much stronger image by mixing up head heights, and thereby adding levels.
Pam Bradford, Click Love Grow Instructor
12. Sunset Silhouette
For something really stunning, the kind of wall-worthy family photography that makes everyone say “wow!!”, try a sunset silhouette.
You’ll need to use the natural light that comes around sunset or sunrise. Also, there are some key technical and compositional aspects you’ll need to consider to nail it. Luckily, we have a silhouette tutorial we prepared earlier, which includes settings you need and what to focus on.
Related Post: How to Shoot a Sunset Silhouette
13. Shape, Connection & Meaning
I touched on shape and lines earlier in relation to seated subjects. But it goes deeper than that.
For me, posing has three important functions – composition, connection and meaning.
Using shapes in our family photo poses is an easy way to create strong compositions that convey connections.
We can easily create connections between our subjects (both environmental and emotional) by bringing them together physically. But try to also incorporate shapes in how you pose your groups together.
Use strong shapes to enhance composition of family portraits.
Ok so now that you have some fabulous family portrait poses ideas to try, let’s look at other considerations that will make the difference between snapshots and professional portraits.
14. Light
We always talk about the huge difference light makes to an image. When looking for how to shoot family portraits outdoors, it’s best to look for soft light. This type of light creates the most flattering photos.
You can recognize soft light by the absence of strong harsh shadows.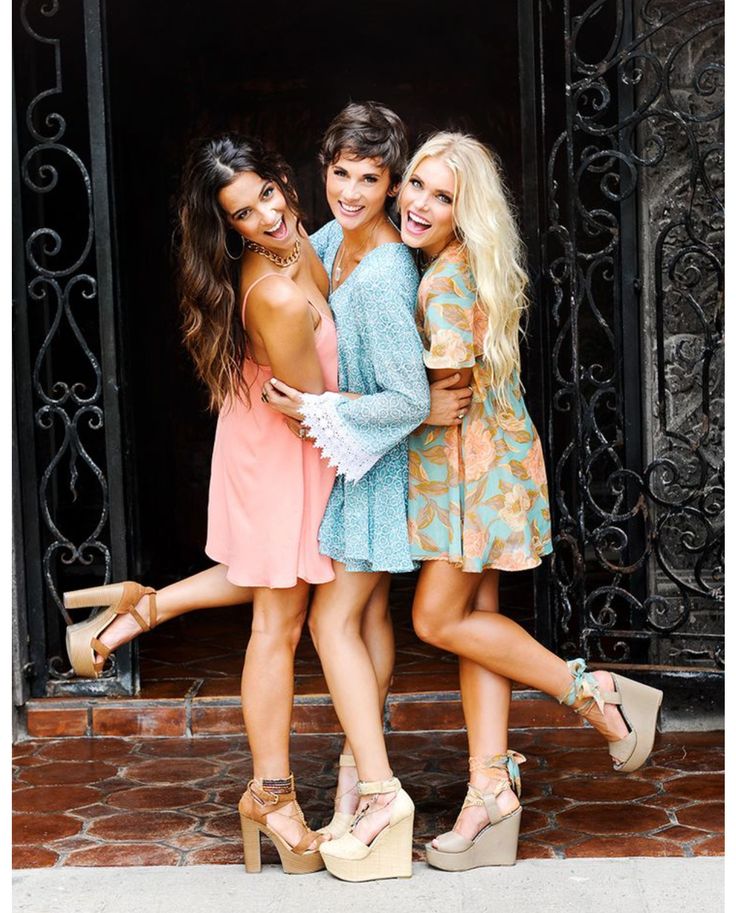 Have a look outside at different times throughout the day. Watch how the shadows change from early morning to middle of the day, when the bright sun is at its highest.
- Soft light – you’ll see a gentle graduation between the light and shadows
- Hard light – you’ll see a sharply defined line between the light and shadows
Soft light is the most flattering for family portrait photography, and it’s easy to find! Head outside very early or late in the day, when the sun is low in the sky. Or simply find some shade!
It can be open shaded areas such as doorways, porches, or garage doors. It can also be the shade of a tree (but make sure you don’t get any dappled light on your subjects faces). All these locations are perfect for taking portraits and will make a huge difference to your shots!
I love shooting in my shaded patio entrance to my front door.
15. Location
When considering your location, firstly choose it with light in mind. Remember all of the above, right?
Secondly consider comfort. I don’t just mean physical comfort although that’s very important too. But if your subjects are physically uncomfortable, they’ll also look uncomfortable in their photos. It will be harder to engage them, and you’ll probably lose the kids pretty quickly!
I’m talking about a relaxed location which will make for a relaxed family. That always shows in photos too! So think of places where they would normally chill out or have fun.
Best Location Photo IdeasSome places I love to shoot families include:
- Mum or dad’s bed
- Kids jumping on the bed
- An uncluttered spot on their porch
- Under the shade of a large tree
- Sitting on the front porch steps of their home
- Standing or sitting in the doorway of the family home with the door open
- Beaches
- Under piers
- Parks and gardens
- City laneways
Related: Behind the Scenes Portrait Locations at Home
Alana Prosper, Click Love Grow Graduate
Alana Prosper, Click Love Grow Graduate
Merissa Wakefield, Click Love Grow Graduate
Heidi Talic, Click Love Grow Graduate
16.
 Isolate Your SubjectClear the Clutter
Remember that any clutter in the background of your shot will detract from the main subject, and turn your portrait into a snapshot.
Clutter means anything that doesn’t need to be in the frame. When shooting family portrait poses outdoors, look for parked cars, poles, rubbish bins or people in the distance, behind your subject. Also, watch out for the dappled light that can be caused by trees. If you can’t move the item, move your subject. You can also reposition yourself so that you can frame it out or blur it into insignificance.
When your location is indoors, clutter might come in the form of stray toys, a basket of laundry, or a pile of newspapers.
Related: Clear the Clutter
Heidi Talic, Click Love Grow Graduate
Backdrop
Once you’ve chosen your location for family photography, take a moment to look around for any items that need to be moved in the area, and move them. Or adjust your subjects accordingly.
A plain wall can be great and totally free of clutter. But finding a place with a little more interest will provide a more natural and interesting image!
I love local parks and gardens for natural and beautiful portraits that are vastly clutter-free!
Related: Blurry Background Photos Even with Your Kit Lens
17. Styling & Colour
My motto is to keep it simple. I try to keep colours neutral and my styling simple by removing clutter and any elements that don’t need to be in the shot.
For example when shooting on beds, a busy, brightly coloured bed covered with multiple cushions can be busy and distracting. It may work wonderfully if you’re looking for a busy crazy, fun and exuberant image, or if it suits the family’s personality.
But otherwise, a white or neutral coloured bedding helps ensure the subject is the main focus.
Kailey Nagymarosi, Click Love Grow Advanced Graduate
When shooting outdoors in nature locations such as parks, gardens and beaches, look for spots where the background is simple.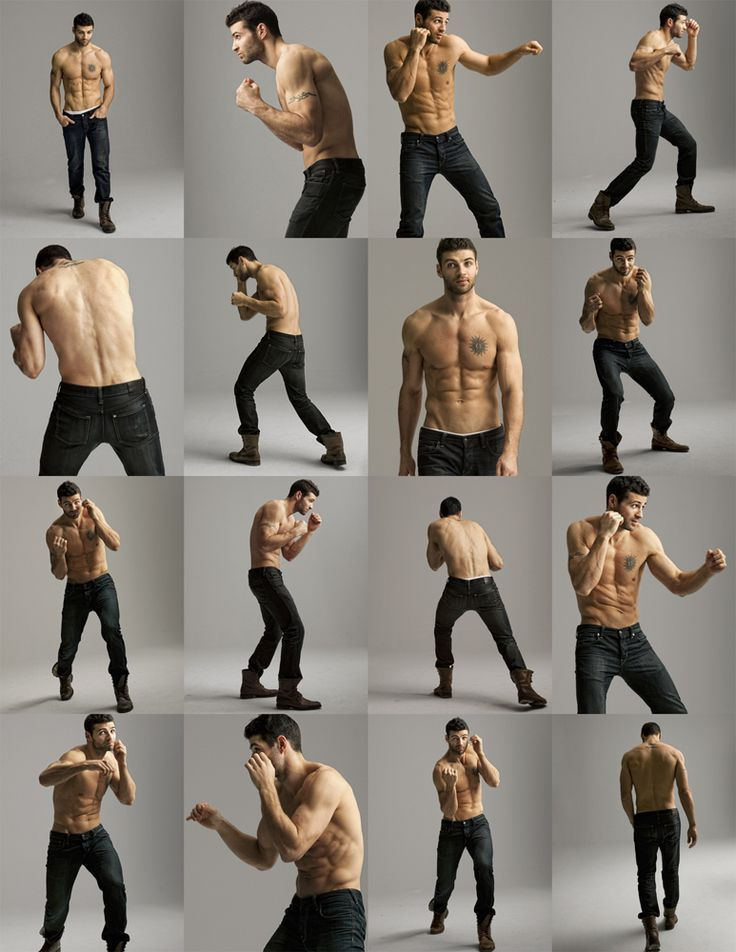
Or fill the frame with foliage and get terrific bokeh!
Related: How to Take Bokeh Photos
When shooting family portrait poses on a beach, open shade is rare. So, you’ll either be wanting an overcast day when the sun is filtered through clouds, or you’ll need to shoot during the golden hours of the day. That’s the 1-2 hours before sunset or after sunrise.
Related: Shooting in the Golden Hour
Dana Whitley, Click Love Grow Graduate
18. Clothing
Too many patterns and colors on the subjects’ clothing can distract and is a form of clutter in photos.
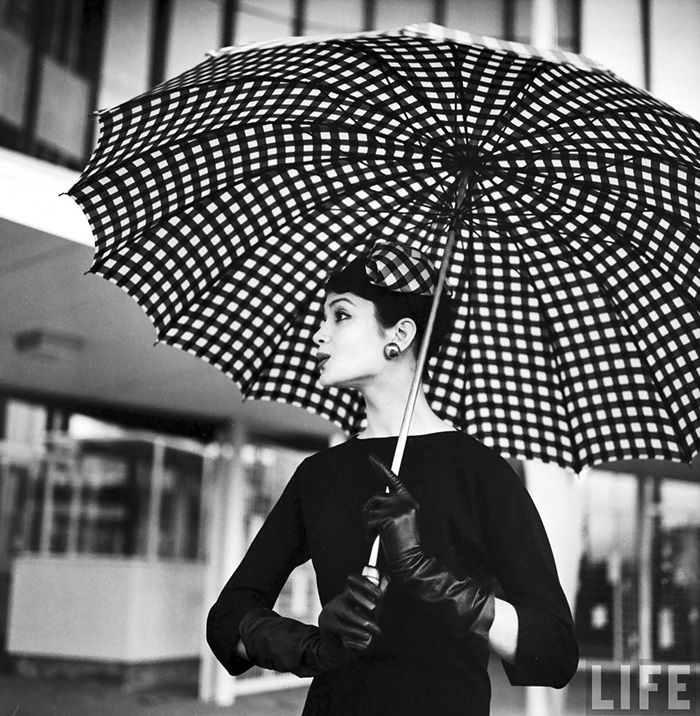
Aim to keep outfits simple with classic patterns such as stripes, spots and checks. You can also do that by ensuring a good mix of solids and patterns (more solids than patterns). Look for outfits that compliment one another in varying tones within a color family, without being matchy-matchy in a cheesy way.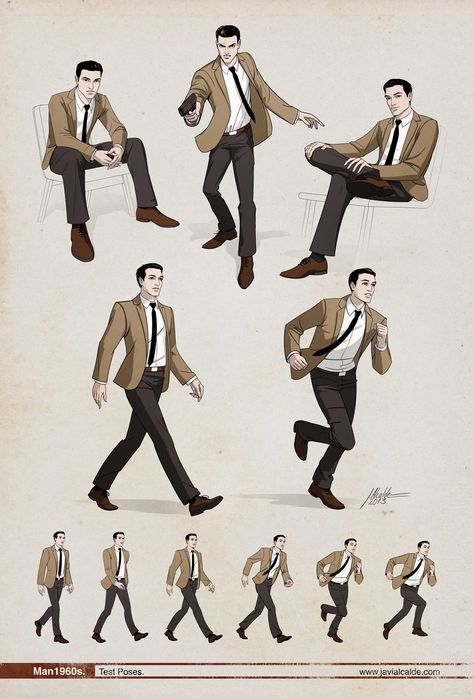
Pam Bradford, Click Love Grow Instructor
19. Framing
Framing our subjects using the environment or the architecture is a great way to draw your viewers eye directly to the subject. It will also create an impactful composition.
Bronwyn Pickering, CLG Instructor
20. Lenses
Consider your lenses if you have more than one to choose from. Wide angle lenses will elongate limbs and flatten faces, leading to a cartoonish look when photographed up close.
Whereas longer focal lengths compress the background, enhance the bokeh effect and will help your subjects pop beautifully from the background.
Related: How Lenses Affect Portraits
If shooting photography outside, make the most of this effect by selecting your longest focal length and ensuring a good distance between your subject and the background. For best effect, open up your aperture.
As an ex, this image was taken with my favourite lens, a Canon 135mm f/2.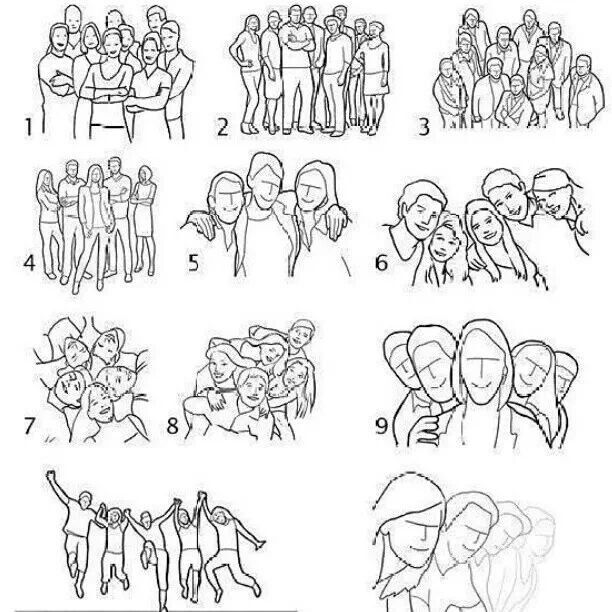
And a final word now. Being a professional photographer is more than a business. It’s an insight into your clients’ life and stories, and an opportunity to experience their special moments.
Treat every one of these opportunities with care, and create moments for them they will never forget!
Join my new workshop and learn How to Shoot Pro-Quality Photos With Your DSLR… and it’s totally FREE to join! Register here…
Spread the love
people who pose for the artist are called - 13 recommendations on Babyblog.ru
How to reveal an artist in a child without leaving home?
As soon as the child finds his fingers and knows how to sit well, mothers run to the store for finger paints, paper, and the whole arsenal of educational aids. They dream of raising a genius who can later show off to their friends by posting pictures on social networks and forums. Then we are happy to count likes and read rave reviews about it. I do not argue, she herself was like that and bought finger paints for her eldest daughter. So, let's talk about painting and its place in a child's life. We are talking with Alexander Mikhailovich Tsvelik, an art therapist from Samara, a teacher of painting and a Waldorf teacher.
At what age should a child be introduced to painting and how to do it?
Up to a certain age, the mother herself gives everything to the children, love, milk, but then it seems to her that this is not enough and she begins to teach the baby everything else. The main pedagogical law "If you want your child to have good habits, work on yours." In other words, children repeat everything after us, and up to a certain age, mother is their main idol. If you want the soul to be formed, set high goals for yourself, each time ahead of the child. But you can't give what you don't have. No need to buy paints and shove them into a child. Buy them for yourself and sit down to draw yourself.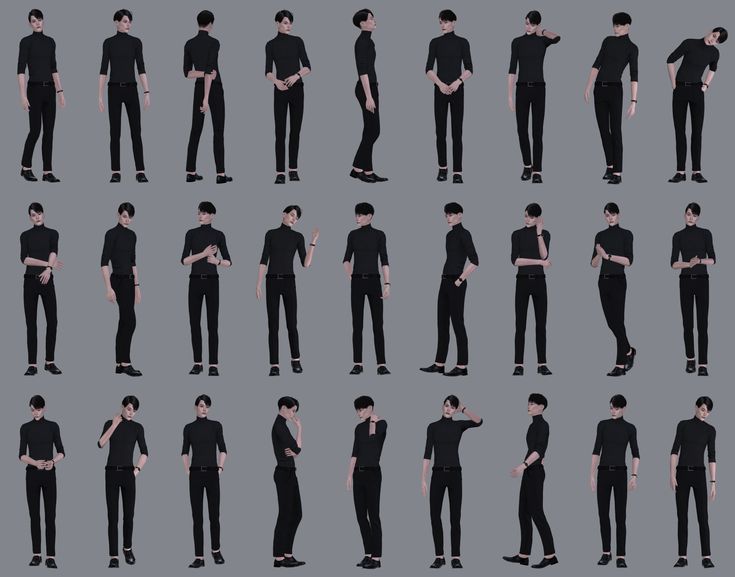 The kid will be interested in what his mother is doing, and he will be happy to learn from her experience. There is spontaneous drawing: crayons, a pen, a child draws a kalyaka - a little one. It comes from his body. The body is being formed - drawing is being formed, and this is clearly seen from the drawings. The spine has grown - it draws a lot of repeating shapes, circles, ladders, no matter what it represents - a car or a ship with many windows. There are towers, tall cranes and uncles with twenty buttons. Teeth are cut - draws sharp shapes: fences, waves ... even the clouds and trees in the picture become a little sharper. Or suddenly a boat appears with windows, where each of them is crossed out with a kind of snowflake - an asterisk.
It is not the plot that is important - it can be any or absent, as in an ornament - but the gesture - sharpness, rotation, support, and so on. This "Holy Drawing" is a kind of self-awareness, self-massage and "getting used" to your body from the inside. Gestures and drawings convey what is happening in the body. Draw what grows. What changes in the body - or what hurts. For example, an ear hurts, and a person with a big red ear suddenly appears in the picture. But it is not always so easy to understand what is reflected in the drawing, because it is not the forms of the body's organs that are drawn, but the activity that takes place in them and forms them during growth.
In this drawing for an adult (mother, educator, templates and coloring books), any examples of “correct drawing” are like putting splints and splints on a healthy body, you can’t interfere.
I pay special attention to all readers that we are talking about the SPONTANEOUS DRAWING of children with LINES, which grows out of the "scribble" and gradually flows into plot drawings! This activity comes FROM the child, as if splashing outward, revealing outside what is happening in him "by itself." Sculpture was so well developed in ancient cultures because people, like children, being much more connected with nature, first of all felt their body! Sculptures were originally made not from a posing nature, but according to the inner feeling of his own body - the artist, as it were, moved "inside" the volume of the sculpture, as if into a glove, and squeezed off the excess.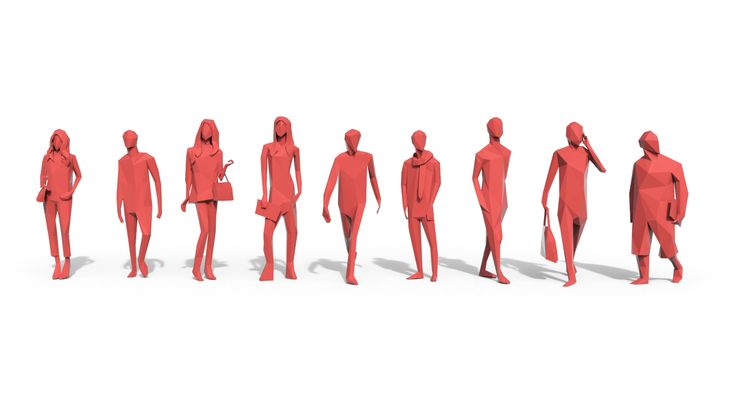 In exactly the same way, in spontaneous drawings, a child experiences himself “from the inside”, and conveys this with a certain character of lines - solid or rounded, vertical or horizontal ... Modernity has lost this feeling of fusion with the object - an adult looks at all objects from the outside, detachedly, life flows before him, like on the screen. And adults project this look of theirs onto the child - "Look, the dog's legs are not like that!" leg, her legs, how she stands on the ground - with her foot, heel ... and sees that the dog is also standing - that means she needs to draw the same thing that is in my leg ...
The feeling of unity, internal unity with the body, with nature in adults has become extremely dull. Therefore, the art of sculpture has become so sickly.
But we are not talking about paints yet!
The big trouble is that adults immediately want to get children to DRAW with paints - forms, objects. Here the greatest delusion reigns among the parents, destroying the child's ability to develop in the bud. Both the form and the object prevent the most precious experience that the child's soul needs - the experience of THE COLOR ITSELF - pure, juicy, playing with shades, iridescent, magical, nourishing the soul with a sense of the beauty of the higher world. Color, being immediately pinned to objectivity (blue water, green grass ... - that's a lie!) Driven into a contour prison, pressed into a flashy line of a felt-tip pen ... driven into opaque, opaque, such as gouache, paint, mixed into plasticine ... Color is the soul paint, as one artist said. And the child needs, first of all, the feeling of the soul in everything, and not in rough matter. (I will note in brackets that there is a lot in the state education system - and sadly successful, because now in the mass it is considered “children's creativity - attention is paid to drawing with children with dense materials, - gouache, now acrylic, accustoming to rigid forms - application , coloring, gluing, assembling toys from parts - acorns, leaves .
 .. But it is hard assembly, sticking parts according to a template, not plastic. With the help of materials, children are taught to think in a framework, rigidly and materialistically). Color, losing shades, transparency, luminosity, loses its original soul-feeding effect. Colors should be MANY AND WIDE, it should spread out, play before your eyes. A lot - it's just not a lot of different colors at once - but one - two harmonious colors, with their shades - is better than a dirty hodgepodge of 12 colors ... (see my articles "About drawing with children" and videos in them.)
On my advice, one mother took the risk of stopping “drawing” with her son, and they only started “painting” paper - a couple of times a week, with different color tints. And then they made lanterns out of it. And they began to play with color, as with a living being - and what is it like today? But the name doesn't say much... He says - character. Thoughtful... Or joyful? Dreamy? Or hot… I think that the boy will carry this experience through all his life.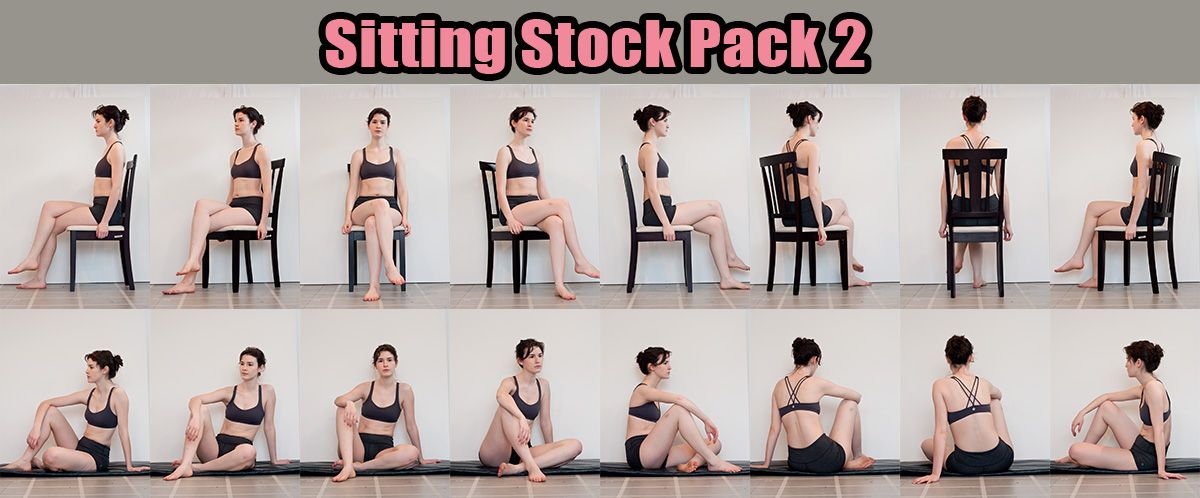 And even if he does not become an artist, then his eyes will still be wide open to the world.
Now let's talk about colors again. Colors are something that the child takes into himself, as opposed to spontaneous drawing that grows out of "doodles". Color is not generated, but ABSORBED, absorbed (This can be helped in a variety of ways, not only flashlights, there are many ways - see the article about dyeing fabrics with children, reprinted in my LiveJournal).
Color preference. Can it tell about the state of the environment and the influence of the environment on the child, how does he experience himself in life? Does he feel between sharp corners, in tension and alertness - sharply, in contrast - or does he feel comfortable, cozy, protected? If dark colors dominate - purple, black - they signal that the child is experiencing stress: physical or mental. At the same time, outwardly, parents may not notice anything: “Everything is fine with us! We moved to a new apartment! (The first factor! The usual environment is lost). - Well, yes, we are now having a divorce with dad, but this has been dragging on for quite a long time, everyone is already used to it, and we don’t fight, we don’t swear! (Factor 2. The child pays attention not to words, but to the mood of adults). Yes, my grandfather died six months ago ... (the person who provided informal communication disappeared). - And so we're all right! There is no stress! We do not deny him anything! We, from the age of four, have been going to karate, and to English ... ”- how often does a therapist hear such speeches at a reception ... And why would this son not want to take anything but black paint?
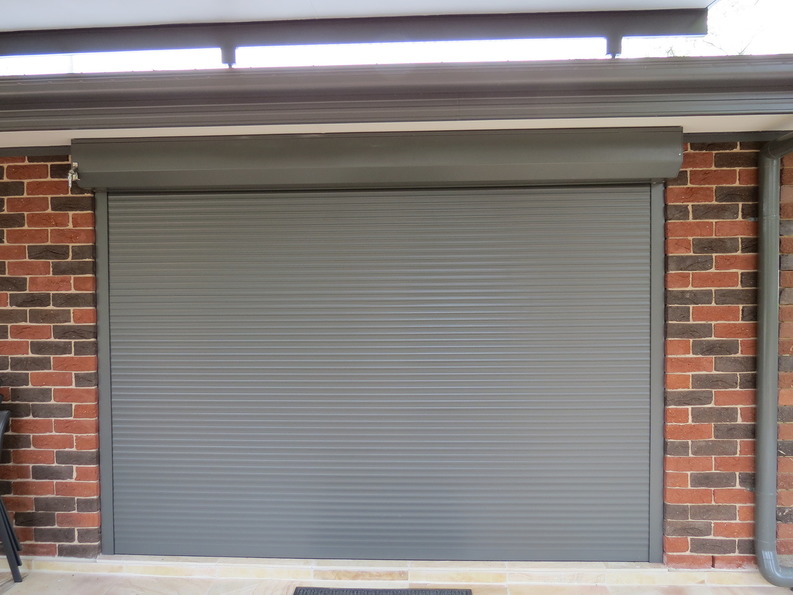
Or another example. There is a lot of equipment in the house - TVs, computers, kitchen appliances (even if the children didn’t use it), mom’s car, dad’s car, an automatic door in the garage (a terrible thing) and so on ... Phones, iPads ... And a lot of adults: mother, grandmother , a nanny (who also changes from time to time), and also an English teacher, a chauffeur, a gardener, a security guard .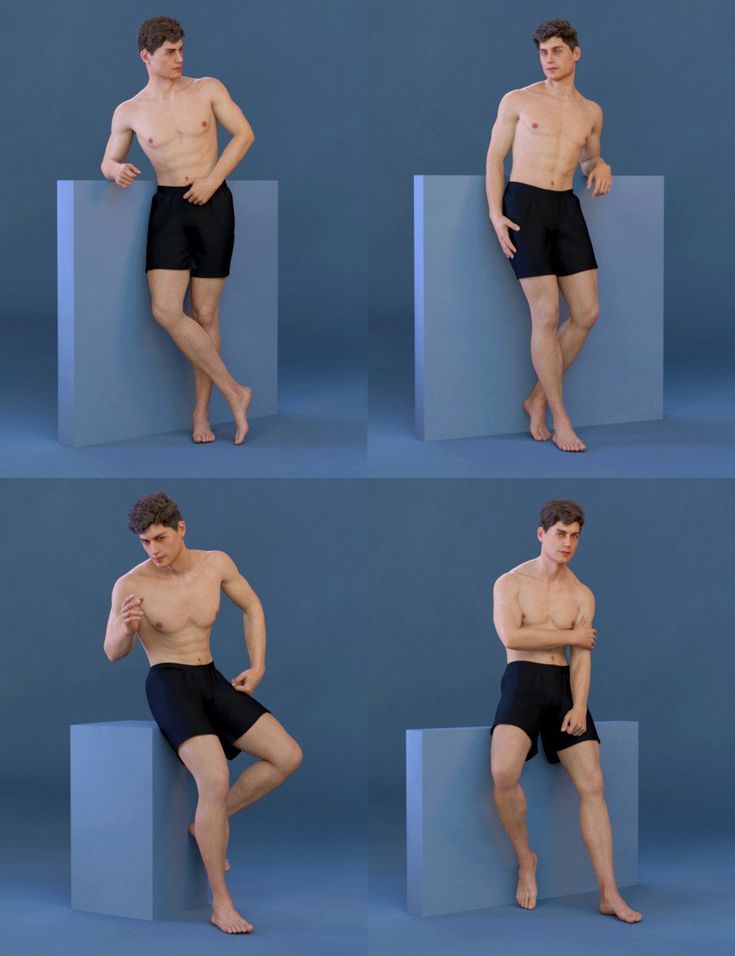 .. Continue? And all of them, as soon as they see a child, immediately consider it their duty to focus on him! There is no peace and silence in his life: devices, by their mere presence, force one to concentrate strongly and pointwise, while adults distract, constantly interfere, climb with their own ...
And one more example, the most painful: guess what a modern young mother does in the first place when she is going to go for a walk with a child, or feed him? Getting ready, getting dressed? Sits down at the table, puts down the plates? NO!
She's ASKING FOR A CHILD! "Well, let's go for a walk?" (Oh, sir, would you deign to bow to the decision to walk ... for I, a pathetic woman, am unworthy of imposing my will on you, but let me ask you about your plans? Ridiculous? And so it is! The adult demonstrates his inability to take up the matter of organizing it on your own!) “Do you want to eat?” "What juice will you be?" She asks - “well, let's go for a walk” - while she herself is still sitting, or starts talking on the phone, or is generally taken for something else. (Two in one, three in one, four in one ...) It turns out that the child should get up first, lead her, start gathering. Know what to cook today, and so on. RESPONSIBILITY FOR THE SHOWING OF THE WILL TO ACTION, responsibility for the choice is shifted to him. An adult constantly eludes himself, puts a disproportionate burden on making decisions and initiating execution! This is terrible stress. At the same time, mothers do not even want to notice that they are shifting responsibility. “Well, I can’t know if he wants to go for a walk or not!” - Get up and start packing! I tell them. With determination and without haste. Every day, preferably at the same time. War is war, and lunch is on schedule! And people will be attracted to you!
I have gone far from the topic of colors. But in fact - just in her heart. Go to a clothing store, a clothing market ... Look around - filled with gray, black, dull colors. “The child draws in black” ... And you, mother, who came to draw - what are you wearing? A black dress, a gray sweater.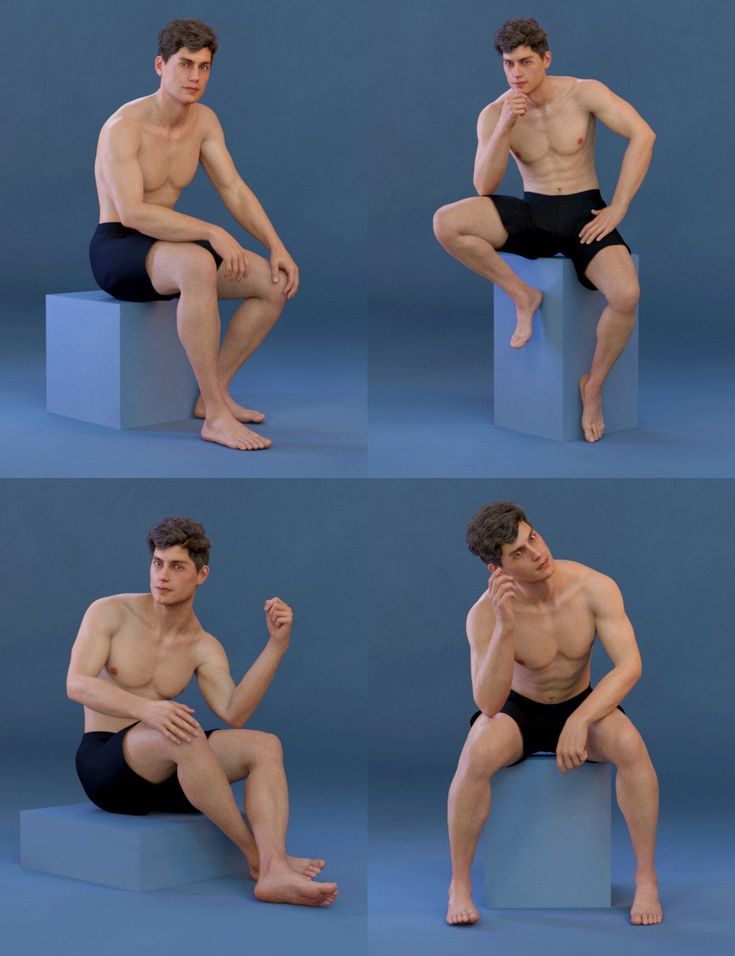 .. 90 percent of the public is dressed like this... - Anxiety, anxiety, fear - we must educate, we must develop. Faster, faster, others have already mastered English, they have been reading since the age of 3.. And we… - Black color.
What do you think about coloring books?
This is an "iron hoop" for children's drawing. Now in many kindergartens, coloring pages are printed on a printer, and then distributed to children. Who goes abroad is scolded. You draw badly. This can even make the child sick. That internal that seeks a way out and finds it in drawing, in the external, turns inward and begins to destroy. In Europe they love spontaneous drawing, we call it expressionism. The child does not look outward, he looks inward at the sense of self. Dog for him is not a noun, it's a verb. If he draws a dog, he makes a movement associated with it. This movement (dog barking) for him is hidden in the sound, at the level of the verb. More about the topic of coloring in my LiveJournal http://zwelik1. livejournal.com/24950.html
How to draw?
Need to draw with the body. Start with fun. How to learn it? I describe the method of how to "pull yourself out of the quagmire by the hair."
Close your eyes. Get up. And read the rhyme - only the simplest, rhythmic, "nurry - pestle", and not a poem or about "tear off the bear's paw." For example, something like this: “tushki-tyutyushki, birds are on the mountain” or calm - “Uli - cradles, gulenki flew in”, “Kotya is a cat” .... First, show them to yourself - (preferably with your eyes closed, so the movement is freer) with your arms and legs, with your whole body. Repeat. Then - with one hand, as if it were you yourself - a hand. Something will have to change! Then, with one finger, draw in the air! And then you can get "dance of lines on paper" - a translation from the dance of the finger in the air. These will be chaotic lines dancing to the sounds of your ditty - pestle. This is how you can understand what the child is drawing and start playing with him in such "dances on paper" with rhymes.
How to organize the workspace if the child does not want to draw at the table?
As he is comfortable, but not in bed. Let him be near her if he uses the bed as a table. Put a board on it so that it doesn’t slip, You can also on the floor. Usually the desire to draw on the bed is due to the fact that the table is not very comfortable, or that the room is too large, empty, there is no cozy corner in it. The child needs both space and comfort - for different activities. The bed is the most protected, “intimate” place. In addition, when drawing on the bed, you do not look into space, but see a wall in front of you - you are a little “like in a house”. As always, the oddities in the behavior of children, their persistent attachment to something and the categorical rejection of another, “good and normal” in our adult opinion, option, speaks of our misunderstanding of the TRUE need behind. A child is in many ways similar in his actions to a cat: she will not make her bed more comfortable, but will adapt herself to what is. The child does not have moral attitudes that "this is a table, they are sitting at it," unless they are communicated from the outside. Where it is more convenient, more comfortable - Thai and settled down. Now, if the table is in such a cozy corner ... That's another matter. But not everyone needs it equally - temperament plays a role.
About interiors - see interiors of Waldorf gardens and children's rooms….
How to choose colors and materials?
For paints, I recommend GAMM (can be found individually in tubes) and SPB in briquettes. They are diluted to a coloring solution (not too thin). Many colors should not be given at once, especially those that, if accidentally mixed, will give dirt.
First you need to try everything yourself, enjoy this process itself - without children nearby, cook everything - and first of all, YOURSELF! prepared in such a way that allows you to see it: a wet sheet moistened on both sides, like a bath, in which the colors float a little, but about and gradually concentrate when dried (see the LJ article “On drawing with young children”).
How to choose a color and organize the whole "kitchen" of the game in colors, you can read here: http://zwelik1.livejournal.com/13396.html
And finally, what color is best for a nursery?
Sun color is suitable for children. But do not abuse yellow - it awakens too much. Soft tones are suitable, their smooth overflows with enlightenment up to the ceiling. It is best to spray the paint with a spray gun. Here is an example of a photograph of a nursery that I painted.
What are your wishes for emerging artists?
Love the color and its movement. Color is the soul of paint. Form is a frozen, stopped movement. Goethe said: "Learning to draw is learning to see." And another time he added - Colors are deeds and trials of Light. Ancient wisdom says: “Matter is woven Light. The soul is dissolved love. This is not empty talk.
Einstein found that the energy E = mC2 With light and matter almost figured out.
It remains with the soul, which in psychology is an “unscientific concept” (YES! YES! Read the basic works on psychology!) Our task, as parents, in the field of painting, children's creativity is to find how the soul radiates love dissolved in it along with color towards the world - to children, and other people . ..
..
Material taken from here.
How to Pose for Portrait Photos
Portrait photography is the art of expressing the subject's personality in a still image, which can be surprisingly difficult to achieve. Think of all the pictures you've taken that showed the person stiff or awkward.
The first step to showing someone's personality is staging. A whole book could be written about this, but in this article we will look at one of the basic concepts of posing - the lines of the human body. How to position the model so that the lines of the body emphasize the dignity of a person.
photographer Oliya T. Yabuta, model Nozomi Inou
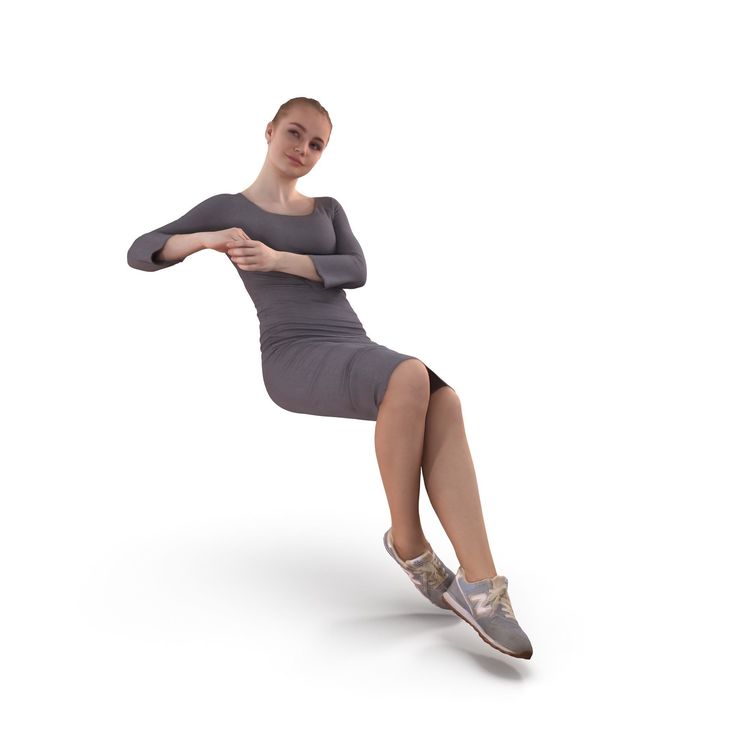
Sitting posture
EOS 77D/ EF-S18-135MM F/ FL: 24mm (38mm et) (f/4, 1/200 sec)/ ISO 400/ WB: Auto
Left - correct posing technique, Right - incorrect
clearly. The technique is applied incorrectly: the model's arm hides part of her body, so the body looks wider. The model looks away from the light source, which causes her face to hide in the shadows.
Demonstration of the natural form of the body
If you want to show the whole body of a person in the photo, it is important to remember how to position the model's forearms. For example, if you want to emphasize the model's waist in the frame, create an empty space between the forearm and the waist.
If the model's arms are in front of her (as in the "not perfect" example), viewers cannot see the natural contour of the body, which goes against your intentions and may even make the model look wider than he or she actually is .
At the same time, avoid vertical positioning of the arms (see "not ideal" example). This will make the pose stiff and unnatural. Instead, make sure the line the hand creates is at a non-vertical angle. This posing will make the image more dynamic and natural. To position the model in this way, you will need:
- form an angle between her body and the light source so that the model's face is well lit;
- put the model's elbows on the table and rest the arm slightly against the front of the face;
- position the forearm so that the waist is not covered;
- ask the model to spread her shoulders so that the shoulder blades on the back rush towards each other.
 This will improve posture in the frame;
 - slightly lower the model's face so that the light does not fall directly.
Things to note
Make sure the person's body is at an angle to the camera.
A slimmer waist looks good, whether you're a man or a woman. You can achieve this by having the model lean slightly away from the camera.
In the image in the "good" example, you can see that after the model sat down, her upper body was rotated clockwise away from the camera.
This helps to remove a clear vertical, the model's body forms a smoother line, which is especially important if you are trying to showcase feminine curves and physique features.
You can ask the model to tilt her upper body slightly at an angle to the camera, this will help to demonstrate softness and femininity.
Don't forget the details! Make sure that the hands and fingers also do not form a sharp vertical or horizontal line. This also applies to the legs: see the "not ideal" example in the second paragraph below.
S-Shaped Pose
Perfect (technique applied correctly). Legs look longer and waist looks slimmer
Not ideal (no technique used). Frontal shooting. Not very conducive to the beauty of the figure
EOS 77D/ EF-S18-135mm f/3.5-5.6 IS USM/ FL: 35mm (56mm equivalent)/ Manual exposure (f/8, 1/125 sec)/ ISO 800/ WB: Auto
Description of the pose
Left - correct, right - not quite perfect image
Slightly tilt the body. The figure will look more elongated, and from this more slender.
Try to avoid shooting front-facing portraits of a straight model unless you have a specific reason to do so. The body appears larger when viewed straight ahead, meaning that shooting from this angle can make objects visually appear larger. Instead, make sure that your model's body is slightly tilted away from the camera (about 45 degrees will be enough).
Make the legs look long
The pose will look quite rigid if both legs are just straight. Ask the model to raise her hip slightly and rotate it so that it is closer to the camera. This both creates the illusion of a longer leg and adds some momentum to the pose, breaking up the horizontal line that forms.
Make the body visually shorter (and the legs, respectively, longer in comparison) by turning the shoulder closer to the camera and asking the model to lean forward a little. It will also have a "weight loss effect".
Points to note
The main pose that looks most flattering in the frame forms an S shape. If you get this pose right, the model will look taller and leaner with longer legs and a thinner waist. However, unless you're working with a professional model, the right pose is harder to achieve than it looks. Here is a simple yet reliable method to put any person in the perfect pose.
How to orient your model in 3 easy steps for the perfect S-pose
- Position the model at a 45 degree angle to the camera
- All weight should be on the leg farthest from the camera.
 To verify this, ask the model to lift the other leg. If the weight is properly distributed, she should do it easily.
 The axis of the shoulder and hips will naturally shift to maintain the balance of the body, causing the whole body to form an S-shaped line.
- Ask the toe of the foot in front to be pulled tight. It should be lowered to the floor directly in front of the supporting leg. The model should be able to do this fairly easily without losing balance if step 2 was done correctly.
K-shape pose: for the illusion of dynamics
Perfect (technique applied correctly). There is a sense of movement. The pose creates visual tension with the background
Not ideal (no technique used). The vertical lines created by the pose match those created by the window frames in the background. The pose looks rigid and the whole image seems static
EOS 77D/ EF-S18-135mm f/3.
 5-5.6 IS USM/ FL: 42mm (67mm equivalent)/ Manual exposure (f/4.5, 1/320 sec) / ISO 400/WB: Auto
 Description of the pose
Left - perfect posing. Right: not perfect
Stretch as much as you can - elongation creates amazing dynamic lines. Unlike the S-shape pose and how it shows soft, feminine curves, the K-shape poses are more daring, open and dynamic. To achieve the desired shape, the model needs to extend the leg and open the arms.
In this posture, almost every part of the body is either stretched or curved. This may seem like overkill, but you don't have to worry about the image looking artificial: the tension from the "exaggeration" will create lines that add momentum.
Things to note: make sure the pose doesn't repeat lines in the background
background.
In the "non-ideal" example, the line of the window frame and the line formed by the upper body of the model form two vertical lines.
 This not only distracts attention from the model, but also disrupts the overall rhythm of the image.
 The dynamics and contrast of a bold pose (such as the K-shape pose) helps create visual tension in a background with many vertical lines. This not only draws attention to the lines of the body, but also makes the image more visually appealing.
To get the correct K-pose, ask the model:
- put all your weight on one leg and pull the other leg as far as possible;
- pull out the toe on a relaxed leg. In this case, you need to turn your leg so that the knee is facing the camera. So the legs will look longer;
- tilt the upper body from the waist up towards the outstretched leg. This will accentuate the pose;
- try to stretch the neck in the opposite direction from the upper body. So the neck will look longer;
- touch the shoulder and/or waist with one hand to bring about some change in the posture.
Finally, remember that communication is critical.
 Your model is also a person!
 Communication is very important when you are working with a model. Your portrait subject doesn't know what she (or he) looks like through the lens, so make sure you give detailed and clear instructions.
At the same time, it is important to establish good contact with the model. This will help you relax and open up, which in turn will improve your portrait photos.
What is important to know when communicating with a model.
Do not criticize. Express yourself positively.
Even if the poses don't look good, there's no need to discard them. Remain calm and guide the model, explain without irritation how she or he can stand up or sit down. Always do it with respect.
Praise the model as much as you can.
Everyone loves compliments addressed to them, even if it concerns the most trivial things. Complimenting as much as possible will help make the shooting atmosphere more pleasant and give the model more confidence.
Learn more
- Ask the toe of the foot in front to be pulled tight. It should be lowered to the floor directly in front of the supporting leg. The model should be able to do this fairly easily without losing balance if step 2 was done correctly.