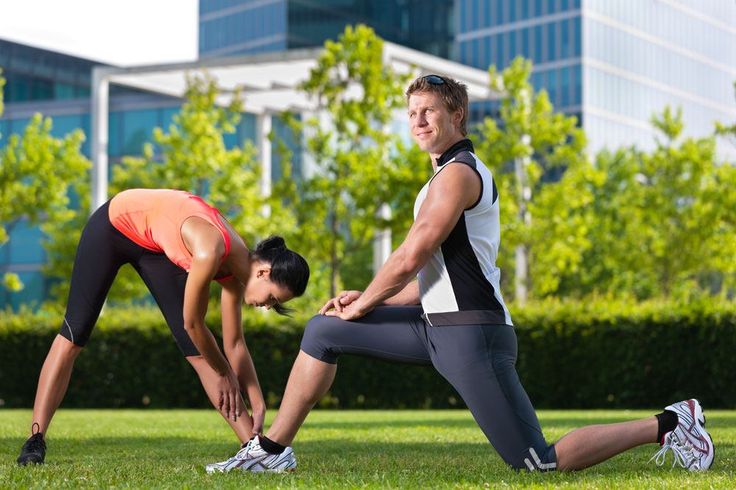
Tips for taking product photos
How To Take Perfect Product Photos With Your Smartphone (2022)
So you’ve decided to start an online store and you’ve got at least one product you’re excited to start selling. Your product might look great sitting in your bedroom or home office, but how can you make sure it really stands out in the era of Instagram filters?
Don’t sweat it. You don’t have to become a professional photographer to take attention-grabbing photos of your products. In this article, you’ll learn, step-by-step, how to take beautiful product photography using only your phone, some natural light, and a good product photo app.
Table of Contents
- How to take professional photos with your smartphone
- How to use natural lighting for product photography
- How to shoot photography on a mobile phone
- Best camera angles for product photography
- How to edit your product photos
- 5 best apps for product photography
- Getting the most from your product photography
- Product photography FAQ
How to take professional photos at home with your smartphone
Most ecommerce store owners know the basics of taking product photos with a smartphone: find a white background and some natural light, choose the highest quality setting and resolution possible on your phone—and click! You have a product photo. This is a great start.
But there are a few extra tools and accessories that can greatly enhance your photos and demonstrate the value of your product to let shoppers envision it in their lives.
If you want to become a professional photographer with your smartphone and take amazing product shots, here’s how to build your set up.
1. Use a room with good lighting
First, find a room in your home with a well-lit window. The bigger the window, the more natural light you’ll have for bringing your product to life.
Image source: PixcTaking product photos closer to the window creates a softer light with darker shadows. Being farther away from the light source will give you lighter, shaper shadows.
2. Choose your smartphone
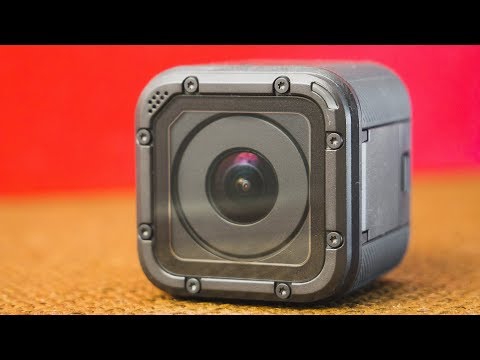
Most smartphone cameras these days make great DSLR alternatives for product photography. The higher the megapixel count, the better your product photos will come out.
You can use any smartphone with a good camera, but aim to get your hands on a newer model with a 12 megapixel camera or more, such as:
- Apple iPhone 8 or newer
- Samsung Galaxy S8 or newer
- Huawei P20 Pro or newer
- Google Pixel 2 or newer
3.
 Get a mini tripod
 Mini tripods can range from inexpensive to pricey, but the good news is, no matter your budget, they’re a good investment with high payoff. A mini tripod will reduce camera shake and help standardize photo angles and style for your product line.
If you want a simple mini tripod, consider the Manfrotto PIXI mini tripod kit.
The Manfrotto PIXI is great for beginners. You can manage smartphones up to 3.3 inches wide, securely held in place by the tripod’s gripping clamp. And it can be placed right on your sweep to easily grab nice, high-quality photos of your products. The Manfrotto PIXI mini tripod kit is available on Amazon for a little over $20.
4. Set up your backdrop
Place your white backdrop behind your product to give your photographs a clean and consistent look and to eliminate distractions. You could use a white paper sweep, or buy poster board from your local drug store or art shop for cheap. You’ll also need a table to place your backdrop on.
You can use Scotch tape to hold your backdrop down or stick your product to the backdrop. Sticky tack is also a great workaround if you don’t have Scotch tape.
Always keep your backdrop white. A white backdrop reflects natural light onto the product and gives you an evenly lit photo. It also makes the editing process easier if you need to remove the background. A cream or off-white color will make editing and lighting difficult. Also, try to position your backdrop not only behind your product but underneath it as well.
5. Use white bounce boards
Controlling the lighting is key when learning how to take product photos with an iPhone or Android. Bounce boards help minimize strong shadows and create a more balanced lighting environment to bring out the finest details of your product. You can buy a white bounce board made of foam on Amazon.
6. Set up a diffuser sheet if the sun is too bright
When the lighting is too harsh, these sheets will soften the light. You can find diffuser sheets on Amazon or DIY one at home with parchment paper, a frosted shower curtain, or printer paper.
Now that you’ve got your setup ready, let’s talk about how to use natural light when taking product photos with an iPhone or other smartphone.
Free Guide: DIY Product Photography
Learn how to take beautiful product photos on a budget with our free, comprehensive video guide.
Get our DIY Guide to Beautiful Product Photography delivered right to your inbox.
Almost there: please enter your email below to gain instant access.
We'll also send you updates on new educational guides and success stories from the Shopify newsletter. We hate SPAM and promise to keep your email address safe.
Thanks for subscribing. You’ll start receiving free tips and resources soon. In the meantime, start building your store with a free 3-day trial of Shopify.
How to use natural lighting for product photography
Photography lighting can be your best friend or worst enemy when learning how to take product photos with an iPhone or Android. Get it right and you’ll have some amazing product images on your hands. Get it wrong and no image retouching will help save your photo.
There are three key tips that are crucial for getting the best images from your photoshoot.
1. Shoot in a well-lit room. Natural light through a window is a great option versus a photo studio or artificial light. First, you probably have access to a window (and it’s free). Second, it comes from a single direction, which generates natural shows and adds texture to your products.
Consider the weather—is it sunny or cloudy? To get the look you’re going for, you may prefer a little overcast versus full sunlight. As you’ll see in the example below, it can make a big difference on the shadows and highlights on your photo.
2. Place your setup close to the window. Aim for 90 degrees to the right or left of your setup. Aim to start your photoshoot at the brightest time of day. If it turns out that the sun is too bright, you can always use a diffuser sheet to soften the light.
Whatever you do, avoid hard light at all costs, as it can make colors look saturated and will highlight the tiniest flaws in your product—things people normally can’t see with the naked eye.
3. Control natural light with foam boards and reflectors. Sometimes the sun will suddenly disappear behind the clouds mid-shoot. If that happens, don’t worry, use your foam boards to bounce and intensify the light to fill shadows.
If you’re using a reflector, you can manipulate the light reflecting onto your product by moving the reflector closer or further away. This will help reflect natural light from the sun back onto the product.
Remember to test different angles with the reflector to find the right balance between shadows and lighting.
Learn more: A Behind-the-Scenes Look at Jewelry Photography With Expert Sarah Pflug
Best camera angles for product photography
When it comes to taking product photos for your ecommerce website, there are some angles that work better than others. Offering different perspectives of your product to a shopper can also help answer any questions they have that your product descriptions don’t explain.
Considering 93% of shoppers use visual appearance as a key deciding factor when buying something online, you want to give as many different viewpoints as possible to highlight key features of your product. An all-around view is more engaging and can help shoppers envision themselves wearing or using your product, which can lead to more sales in your store.
It’s also important to include close-up shots of your products as well. Close-ups let you capture features that showcase the quality of your product, including print detail, fabric, texture, or product usage, and highlight specific elements of your product that shoppers would want to inspect in a retail store.
Whether you’re shooting clothing photography or footwear, there are the five camera angles you should test in your photo shoot:
- Eye level.
 This view shows the product as you’d see it looking straight on.
 - High angle.This view shows the product as if you’re looking down at it from an angle.
- Low angle. This view shows the product as if you’re looking up at it from the floor.
- Bird’s eye. This view shows the product as if you’re standing over it.
- Slanted. This view shows the product from one side.
If you’re new to product photography, it’s recommended you keep your smartphone and tripod in the same spot during the shoot and rotate your product to change the angle you want for your image. When you rotate the product versus the camera, your final shots will all be framed the same, plus, you’ll ensure consistency and reduce image editing after the shoot.
How to shoot photography with a mobile phone
Now that you have all your gear set up and understand the different camera angles and lighting, it’s time to shoot some photos.
Before you start, use the following checklist to make sure your Android or iPhone camera is ready to shoot.
- Prepare your phone. Make sure your phone is charged and you have backup storage for your images.
- Set up your white balance. To set the white balance according to the light temperature in your setup, touch the WB button, then touch the white background.
- Check your exposure. Tap the circular Exposure button, then touch your product so that the camera knows to expose it.
- Keep everything in focus. Touch the circular Focus button, then touch your product so that the camera knows to properly focus on the product.
- Make sure you lock your camera settings. After you’re done adjusting these settings, tap each one again to lock the settings in place. This will stop the camera from automatically adjusting the settings while you are taking shots.
Once you lock your settings, you’re ready to start shooting!
After your first shot, take a look at your image and see if you think it needs to be brightened or darkened in order to achieve a proper exposure. If you think the exposure needs tweaking, touch the +/- button below the circular Focus button and pull the slider up or down to change the exposure.
Remember to avoid the following three things in order to get the best product shots:
- Zoom feature, as this will reduce image quality
- Selfie camera, which isn’t as good as the back camera
- Flash, as this will overexpose the photo and mess up the colors
After you have your shots, it’s time to get to photo editing on your phone!
How to edit product photos on a white background on a smartphone
The idea of editing photos may sound intimidating, but it’s actually really easy with your smartphone.
- Choose a product photography app. Go to the App Store on your phone and download an editing app for product photos. Some smartphone photographers prefer mobile apps like Lightroom or Snapseed, others prefer photo editing software for their desktops.
- Open up your editing app.
 Choose the image you want to prepare for your online store. Most images need a little tweaking to truly make them shine.
 - Use the app to make a few basic edits. These include brightness, contrast, sharpness, highlights/shadows, and white balance. Don’t be tempted by filters, borders, tints, and oversaturation. Your goal is to make your product look amazing and make it stand out. Try to make it look as close to what the product looks like in real life.
- Save presets. After you edit your first photo, save the settings as a preset so you can apply the same adjustments to other photos from your shoot. While presets help you save time, make sure to check each image after applying the present to see if there are any additional tweaks for you to make.
- Apply a white layer background. Remove any blemishes or creases from your background by replacing your background with a white layer. Since you took photos on a white background, it’ll be easy to isolate the product and add a layer.

Once your product image is looking clean, crisp, and beautiful, add it to your Shopify store and put your hard work to use!
5 best apps for product photography
Choosing the right editing apps is an important part of mastering product photography with a smartphone. Many come with an in-app editor, but there are plenty of third-party apps that give you everything you need to make your product stand out.
Some of the top-rated product photo app options are:
1. Lightroom
Available for: iOS and Android
Price: Free
Some would say Adobe Lightroom is the best app for product photography on the market. It features easy-to-use tools like sliders and presets to create photos that look exactly how you want them. Lightroom is also a good option if you plan to edit photos on your computer. You can start on mobile, web, or desktop, and when you make edits, they will be automatically applied across devices.
If you want to get the most out of Lightroom, you can sign up for the Adobe Creative Cloud Photography plan, which includes the photo editing app for desktop, mobile, and web, plus the latest version of Photoshop for $9.99 per month.
2. Adobe Photoshop Express
Available for: iOS, Android, and Windows
Price: Free
You’ve probably heard of Adobe Photoshop and what it can do. With Photoshop Express, you get all of its great photo editing features right on your smartphone. You can take product photos from your phone or take them inside the app. Then easily adjust the hue, brightness, exposure, and contrast to create amazing photos for your store.
3. Snapseed
Available for: iOS and Android
Price: Free
Snapseed is a free photography editing software owned by Google. The app brings the power of a professional computer editor to your phone, with many features to edit images in ways you’ll usually only find in expensive software. Beginner photographers also have more utility with Snapseed using Stacks, which lets you revert your edits to an earlier version and makes it easy to save settings and apply them.
4. VSCO
Available for: iOS and Android
Price: Free
VSCO has all the basic editing tools such as exposure, contract, color balance, and more, letting you create incredible photos on the go. It’s a great product photo app to enhance images rather than overdo them and doubles as an effective Instagram tool with its huge library of filters and endless options to customize your photos.
If you want to share your product photos on social media, you can use VSCO Grid. VSCO Grid is a publishing platform integrated into the app that lets you share your images on social media and email.
5. Camera+
Available for: iOS
Price: $2.99
Camera+ is a great option for both experienced and beginner smartphone photographers. You can use Camera+ not only as an editor but also as a camera for your product shoots. The product photography app lets you set exposure and focus and includes a stabilizer, timer, and more so it feels like you’re shooting with a high-quality DSLR camera lens.
If you’re someone who prefers to edit photos on your computer, you can use Camera+ to capture product photos in RAW. This makes sure no information or data gets compressed and you can produce higher quality product images.
Shopify Compass Course: Product Photography
Photographer Jeff Delacruz shares how you can create your own photo studio and take beautiful product photos for less than $50.
Enroll for free
Getting the most from your product photography
Learning how to take photos on an iPhone or Android seems hard at first, but after a few times behind the camera, you’ll become a pro for sure. With all of the above info, you’re well on your way to mastering product photography and selling more photos in your store. At some point, you might even consider selling your photography online.
Have you come across any apps for product photos or product photography tips that you like to use in addition to these tactics? Share them in the comments below.
Product photography FAQ
How can I take professional pictures at home with my iPhone?
- Choose an iPhone 8 or newer.
- Test third-party camera apps.
- Use a white background for your setup.
- Place your setup near a window with natural light.
- Hold down the viewfinder to lock focus.
- Avoid zooming in on photos.
- Try different camera angles.
- Use a photo editing app.
How do I take quality product photos?
- Use a smartphone camera with 12 megapixels or more.
- Shoot from a tripod to reduce camera shake.
- Use natural light from a window.
- Bounce light using a foam board to soften shadows.
- Use a sweep or close-up shots to highlight product features.

- Shoot a variety of angles and image sizes.
DIY Guide To the Perfect Product Photography Setup (2022)
When it comes to selling products and services online, presentation matters. One of the easiest ways to improve your presentation and positioning is by taking high-quality photos.
That means having high-end beautiful product photography, which can go a long way in helping your online store stand out.
However, not every online store owner can afford to invest in a professional photography studio when they’re just starting out. DIY product photography provides a great alternative, and as long as you know the proper tools and techniques, taking compelling product photos is well within your grasp.
Start your photoshoot today 📸
- What you need for the perfect product photography setup
- How to take professional product photos on a white background
- Product photography tips
- Using your product photos
- Product photography FAQ
Shopify Academy Course: Product Photography
Photographer Jeff Delacruz shares how you can create your own photo studio and take beautiful product photos for less than $50.
Enroll for free
Items you need for product photography
- A camera
- A tripod
- A white background
- White bounce cards made of foam board
- A table
- Tape
- The right room with a window
Showcasing your products in your online store with high quality ecommerce photography can be the winning difference between a conversion and no sale at all.
This tutorial has been specifically crafted for business owners on a budget by someone who takes product photographs every day. It’s been designed to be simple, while producing excellent, professional product photography that gets results.
Let’s explore each of the items you’ll need for your product photography setup that will put you well on your way to shooting high quality photos.
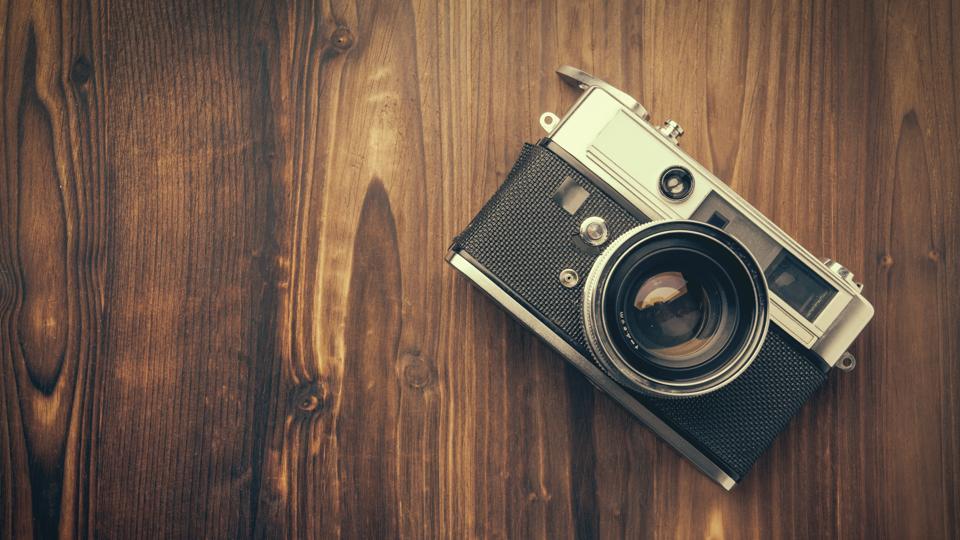
1. Camera
You don’t need a crazy full-frame DSLR camera system. While shooting images with a Nikon D810 (~$2,000) sporting a 105-mm f/1. 4 lens ($740) is awesome, it’s also totally unnecessary.
Still, if you’re feeling excited and have the budget to stretch for a new camera system for this project, I suggest reading a post I wrote on Quora, which offers tips to help you pick out a good camera for product photography. If all you have is your smartphone, that’s OK too: check out this helpful guide to smartphone product photography.
When I did the test images for this, I started with my older model (2008), beat-to-hell Canon G10 point-and-shoot. I love the Canon G series point-and-shoots because they can go full manual and they shoot a really nice raw file. I picked this camera because it’s definitely not top of the line anymore, allowing me to demonstrate that, with even modest equipment, good results are attainable.
So what’s the best camera for product photography? I would just start out with whatever you have handy and see what the results are. It’s a common myth that it’s the camera that takes the pictures. In reality, the camera is only one piece of the whole. A photograph is made up of a series of choices that incorporates lighting, exposure, styling, and post-processing decisions.
2. Tripod
Not to get too technical, but you’re going to set your camera to a very small aperture so you can have the most depth of field your camera is capable of.
The width of the depth of field defines the area of sharp focus, and to get to that you need the largest f-stop number your camera can obtain. Shutter speed and f-stop are related, and since a larger f-stop number like f/8 lets in less light, you’ll need to counter that by using a slower shutter speed to allow more light through.
When a camera has a slow shutter, you can’t hand-hold it or the subject will be blurry—so a tripod is your answer. If you’re interested in learning more about the fundamentals of photography, check out this video I did with Harrington College of Design. I realize that most point-and-shoots may not allow you to choose your f-stop. That’s OK, and there are ways to get around this, which we’ll discuss in the step by step.
Again, you shouldn’t need to spend a whole lot of money on a tripod at this point in your adventure, and there are many, many options out there that cost less than $30. I did a quick search on Amazon and found something that would work for $20.
3. White background
There are lots of options for a white background, and if you’re going to be shooting a lot, you may want to get a white sweep from Amazon. I prefer a paper sweep because sweeps get dirty and you can cut off the dirty part and roll a new piece down.
A really cheap option is to go to your local drug store or art store and buy some poster board. I’ve seen it as low as $7 for 10 sheets. Remember to look for pure white, as off-white or cream will be more difficult to make pure white.
4. White bounce cards made of foam board
When you’re lighting with window light, there will be a bright side where the light is striking the product, and a shadow side. This shadow side will typically be too dark, so we use something white to reflect the light back into the shadows and brighten it up. Foam board makes a great bounce card, because it’s rigid and white.
Alternatively, you can use black foam board to make the shadows deeper. This is particularly helpful if you’re shooting a white product on a white background. Adding black foam board to the sides, just outside of the photo, behind the product, will create a dark edge on the white product. Combine a white bounce card on the front and black bounce cards behind the product for a more sophisticated lighting setup.
You can buy foam boards on Amazon or at a local drugstore. Keep in mind, this is just a white card, so you might be able to simply balance a sheet of white printer paper or use a piece of poster board.
5. Table
A standard folding table works best, and a width between 24 and 27 inches is ideal.
6. Tape
Depending on the table you end up with, you can use tape or clamps to secure your board down so it sweeps properly.
7. The right room
A room with windows next to a wall is perfect, and the bigger the window, the more light you’ll have available. Being closer to the window will create a softer light with darker, softer shadows. Being further away will give a more even light but with sharper, lighter shadows.
Learn more: A Behind-the-Scenes Look at Jewelry Photography With Expert Sarah Pflug
How to take professional product photos on a white background
- Set up your table
- Set your sweep
- Adjust your camera
- Set up your product
- Set up your reflector card
- Take the picture and evaluate
- Retouch your pictures
- Optimize images for your website
The visual appearance of products is a key deciding factor for 93% of consumers. If customers can understand and envision the products you sell, they’ll feel more comfortable giving you their money. While photo editing is important, it all starts with the shoot. Let’s get into the step-by- step process for shooting your product photos.
Step 1: Set up your table
Once you have collected your gear together, it’s time to set up your shooting area. Place your table as close to the window as possible without intersecting the shadow from the windowsill. You’ll want to start with the window 90 degrees to the right or left of your setup. The closer you are to the window and the larger the window, the softer the light will be.
Also, remember to turn off all other lights inside the room you’re shooting in, as other light will contaminate the set. This is very important and the most common mistake.
You can try rotating the set so the window is at a 45-degree angle to the set, or try it with the window straight onto the set for a different style of natural lighting. Food photography is often shot with a window behind the setup and the camera shooting into the window for a more dramatic effect. Another variation is setting up in a garage with the door open—it will have the same qualities of light as a window, just without the glass.
You do not want direct sunlight hitting your set. Direct sunlight is harsh and looks bad on most people and products.
Step 2: Set your sweep
There are a lot of ways to do this, but the ultimate goal is to have your mat board sweep from being flat on your table to being vertical. You may need to roll up the board to help it reach that shape.
In my setup, we placed the table against the wall and taped the sweep to the wall and the table. If you don’t have a wall, you’re going to have to make something to secure the back of the sweep to. Some bricks or a wooden block would work well.
Place your product in the center on the flat part of the sweep and leave enough room to sneak your white reflector card in later. In this case, our product is a cool Skyrim and Doom toy available from Symbiote Studios. Thanks, guys!
Step 3: Adjust your camera
Every camera is a little different. Some cameras are fully auto and some have the ability to make adjustments. The beauty of this The Window Light setup is that you can set all camera settings to auto if you must and it will work.
1. Set Your white balance (WB) to Auto.
2. Turn your flash setting to Off.
3. Set your image settings to the highest quality. Most point-and-shoot cameras don’t have a raw setting, but if yours does, use it. Raw is the largest file a camera can shoot and utilizes the full bit depth of the camera. You will have to edit in software that reads raw imagery though, such as Photoshop, Bridge, Lightroom, or Aperture.
If you don’t have a raw setting, set it to the largest JPG setting you have. On my Canon there are two settings to look out for:
- Size. Sometimes L (Large), M (Medium), or S (Small).
 Pick Large. This setting determines the file size, and you almost always want to shoot it at the largest image size for optimal image quality. You can always shrink an image once it is taken, but you can’t make it larger.
 - Quality. S (Superfine), F (Fine), N (Normal). You should always set it to Superfine. This setting determines the number of pixels that are used on the camera sensor. Not using all the available pixels will render a lower quality image.
Set your ISO to 100. The ISO controls the sensitivity of the sensor. The higher the ISO the more noise there is. Typically, the lowest ISO you can set your camera to is ISO 100, so set it there if you can.
Exposure settings
Option A: Set your camera to Manual (M)
This is the best setting for this type of work because nothing will be moving or changing as you take your pictures. In manual, change your f-stop to the highest number, which will give you the greatest depth of field.
Preview the image on the back of the camera through liveview. Everything is probably pretty dark, which is OK. Now, switch to your shutter speed and rotate the dial to make it bright enough that the image is properly exposed. Your shutter number should be going up. For example, your number may go from 1/60th to ¼ . These are fractions of a second that your shutter will be open for, and as the number lowers it will let more light in. Adjust this number until the preview of the image is correct.
Option B: Use Aperture Priority (AV)
Your camera may not have this either, but if it does, change the f-stop to the highest number. This should automatically adjust the shutter to be what the camera thinks it should be. This may be wrong, and you may need to use the exposure compensation dial to add light.
Option C: Auto Exposure
If you’re stuck in the all-auto world, there may not be much you can do. Don’t fret, it’s not a big deal. If you have an exposure compensation dial, you will most likely need to add +1 or +1½ to get the correct exposure. If all you have is the running man images to choose from, try picking something like Sunset. With the iPhone, just tap the area you want exposed properly.
Use the histogram on the back of the camera. You’re looking for the slope to be closer to the right hand side, like in the image above.
💡Exposure Tip: Don’t trust the image on the back of the camera. Instead, pay attention to the histogram to know if your exposure is correct. The far right hand side is white, and the left is black. In the example image there is a little gap on the right-hand side, which means there is no pure white. Adjust the exposure until the part of the curve representing the white background is touching the right edge without going over. In this example, you would probably need to add ⅓ of a stop, or one click, for more light.
Zoom In
Don’t trust the image on the back of the camera. Instead, pay attention to the histogram to know if your exposure is correct. The far right hand side is white, and the left is black. In the example image there is a little gap on the right-hand side, which means there is no pure white. Adjust the exposure until the part of the curve representing the white background is touching the right edge without going over. In this example, you would probably need to add ⅓ of a stop, or one click, for more light.
Step 4: Set up your product
Setting up your product is one of those things that seems simple but can take time to position correctly. If it’s a bottle, pay attention to keeping the label type centered. Many times there are lots of tiny movements needed to get everything lining up perfectly.
Step 5: Set up the reflector card
This simple white card is the single most important light modifier we have in our photo studio, and we use it with everything. The light will bounce off the card and fill in all the shadows. How you position this card is a matter of taste, so try it at different angles to the product.
Step 6: Take the picture and evaluate
Once you take the picture, take some time and really look at what you’ve created. This is where experience and education come into play—what’s working, what isn’t working, and what can you do to make it better. Experiment with different ways of making your image better, and over time your skills will improve naturally.
Upload your images onto your computer to get a better idea of how they look. The back of your camera is never very accurate. I suggest using Adobe Lightroom to organize all your images. It can be used to do almost all of your editing except very advanced processes. You’ll no doubt need to make some adjustments to the images to get them to look right.
Post-production software like Adobe Lightroom is very in-depth, and we don’t have time to go into the details of using it.
Step 7: Retouch your pictures
Once you’ve got a final image you’re happy with, it’s time to get it retouched. If you photographed your product correctly, the product should be exposed properly and your background a light gray. It should look something like the un-retouched image above, and comparing it to the retouched version shows you how important this step of the process actually is.
The retouching tasks associated with on-white photography can be tricky for someone without a lot of training, and tend to be the weak link for most people trying to photograph products themselves. So, instead of trying to teach you advanced Photoshop, I’m going to show you how to outsource it.
You’d be surprised how affordable this can be. From around $3 to $5 an image, you can have a professional retouching company improve your images for you.
Finding a good company can be tough, but one company that works well for consumers, in my opinion, is Pixelz. Its software allows you to upload and manage your retouching from start to finish. Pricing starts at $1.45 per image, with a $25 minimum, but you get three free test photos.
Step 8: Optimize images for your website
Search engine optimization (SEO) is crucial for all online sellers. One thing that is important is the load speed of your ecommerce website, and large images can really be a burden on this. There is a delicate balance between image quality and optimization, because if you over optimize, it destroys the image. As a rule of thumb, I try to make my images no larger than 200 kilobytes but shoot for the smallest image I can.
Resize your image for the container
The first way to optimize your image is to resize the height and width of the image. When you look at an image on a webpage you are actually looking at an HTML container with an image dynamically scaled to fit inside it. If the container on my website is a 648 pixel square and the actual image is 1500 pixels square, it will be displayed at 648 pixels, but the image it’s referencing will still load at 1500 pixels. That’s a lot of extra load time, especially if you have many images.
1. Figure out the HTML container size
You want to resize the actual image to fit the container before you upload it to your website. I usually resize my images 1.5 times larger than the container so it looks good on a retina screen, which in this example would be 972 pixels square.
To discover the image container size, you’ll need to access your web browser’s Developer tools. Right click on the image and choose Inspect Element. On the sidebar it will show the pixel dimension of the container.
2. Resize the image
There are many free tools to help you resize your image. I recommend using Mac Preview or Microsoft Picture, because they’re built in and easy to use.
After you’ve re-sized the image, export it and save it to the desktop as a jpeg at 100%.
3. Compress the image
Once you’ve saved the image at 100% quality in preview, you’ll notice that the file size is actually fairly large. This is because we don’t want Preview to compress the image, because we can’t see the results of moving the JPEG Compression slider. When we compress an image it actually removes data that’s not being used—compress it too much and the image starts to fall apart and it looks blotchy.
So instead, we want to compress the image smartly. In the past I used to recommend Adobe Photoshop’s Save For Web function, because as you lower the slider you get a preview. Recently, I discovered a software called JPEGmini that uses an algorithm to determine the best compression for your image. After running a couple thousand images through it, I’m impressed with how quick and easy it is.
Summary Recommendations
- Image size: ~1 to 1.5x the HTML container the image is in
- Format: jpeg
- Colorspace: srgb
- Compression: compressed using JPEGmini after export.
Free Guide: DIY Product Photography
Learn how to take beautiful product photos on a budget with our free, comprehensive video guide.
Get our DIY Guide to Beautiful Product Photography delivered right to your inbox.

Almost there: please enter your email below to gain instant access.
We'll also send you updates on new educational guides and success stories from the Shopify newsletter. We hate SPAM and promise to keep your email address safe.
Thanks for subscribing. You’ll start receiving free tips and resources soon. In the meantime, start building your store with a free 3-day trial of Shopify.
Product photography tips
Did you know that 22% of returns happen because a product looks different in person than in photos? It’s clear that high-quality images can not only increase revenue but also save you money on returns. Let’s look at a few tips to keep in mind when taking product photos.
Use window light vs. lightbox
The number one question I get is, Should I get a lightbox? Window light (natural light) is easy because it’s a one-light setup, plus it is cheap and easy to do. When shooting with a light tent, you enter into a multi-light setup, which adds a level of complexity, usually requiring education beyond a simple article.
Multi-light setups introduce the following issues:
- You have to buy lots of extra gear, which can get expensive. The cost of the lightbox and lighting can add up, possibly costing more than hiring a professional.
- You’ll need to understand how to balance the exposure of the different lights and how to position them properly. Learning how f-stops and shutter speeds work in relation to lights can be challenging.
- Color balancing lights become a concern, as each light source has a different color, which is called color temperature. Extreme color can greatly affect your image.
- If you decide to use flash instead of continuous light, be prepared for a challenge beyond basic exposure. Flash exposure is determined by f-stop only, has limits on sync speed, and requires special equipment to trigger.
- The quality of light from a light tent is very even and often shadowless. Shadows are important because they create the shape of a product and provide a sense of place.
It is my personal opinion that the image resulting from window light is more dynamic and interesting than a light tent.
If you still find yourself wanting to purchase or build a light tent, be prepared to learn how f-stops, shutter speeds, ISO, and color balance are set on the camera and with individual lights.
Limitations with this setup
DIY window light setup vs. professional studio.
One issue people have with this setup is that their photos don’t look perfect. For example, some people have struggled with reflective products using this method because it reflects the background behind the camera, like in the examples below.
Only a professional on an advanced set can achieve perfect results.
Like anything, there are limitations to DIY without getting serious with education and investing in professional equipment. Most people can shoot great photos in a single-light shooting environment, like with the natural window light strategies discussed above. However, to photograph difficult products like clear and reflective products perfectly requires a multi-light studio setup and a deep technical knowledge of photography.
Learn basic photo editing techniques
Once you’ve got the hang of taking amazing product photography, it makes sense to learn photo editing to polish up your images. It’ll save you money because you won’t have to pay for a service or professional editor. And it gives you complete control over the look and style of your final image.
A good place to start would be Adobe Photoshop Tutorials. It has an emphasis on using Adobe products, but the lessons are easy to understand and you can apply them beyond using Adobe Photoshop.
After you learn the basics, choose a photo editing software for retouching your photos. This will help you prepare them for publishing on your website. You can also use a tool like Taler to make ads and social media content with your product photos. It offers tons of filters, overlays, and other editing features to create branded images for your marketing campaigns.
Shoot multiple angles
The point of shooting multiple angles is that it’s a change for shoppers to see products from different perspectives. Some shoppers may prefer close-up shots. Others may want to see items straight on. Everyone can envision themselves using your product in different ways, which can lead to more sales.
Some camera angles to try are:
- Eye level, which shows your product as you’d see it straight on
- High angle, which shows your product as if you’re looking down as it
- Low angle, which shows your product as if you’re looking up at it
- Bird’s eye, which shows your product as if you’re standing above it
Make sure to keep your camera and tripod in the same position during your shoot. Rotate the product if you want to change angles. If you rotate the product only, your final shots will have the same frame effect. This ensures consistency and reduces image editing after your photoshoot.
Try other types of product photography
You may want to try different types of product shots besides on the white background. There are many options available to you once you’re comfortable behind the camera. Let’s look at a few.
Lifestyle. Lifestyle shots help tell the story behind your product. They work for website content, but you can also use them for social media, blog posts, emails, and other channels to attract new customers.
Notice how Allbirds uses both white background and lifestyle photos on its product pages.
This gives shoppers context for where and how people actually use its products. If you sell hiking boots, you can show a scene of them on someone's feet out on a beautiful hike. If you’re selling clothing, you might show your apparel on someone walking around town or at a classy event, depending on what you sell.
Learn more: Clothing Photography 101: How to Take Beautiful Apparel Product Photos
Detailed. Detailed images give shoppers a closer look at specific product features. Leather retailer hardgraft uses detailed shots to show zippers, handles, and other unique features of its goods on its product pages.
Group. These shots show products grouped together. You’ll want to use this style when offering kits. It’s a common tactic brands like Beardbrand use to showcase the variety of products offered in their bundles.
Hire help
If you’ve reached your limitations, you may want to consider hiring a professional photographer instead. The average cost of getting a professional white background photo is around $30 to $40 per photo, and there are many options online. This could be a worthwhile investment, as better photos do sell more products online. Start by running a Google search for local product photography services.
Write great product descriptions
Lastly, make sure to write great product descriptions. Product photos and descriptions work together to help customers understand your products. They also help influence purchasing decisions to increase sales for your ecommerce store.
Your goal is to give as much information as possible so people are compelled to buy. New entrepreneurs often overlook product descriptions. But they are the backbone of a high-converting products page—along with beautiful photos, of course.
Learn more about product descriptions by reading 9 Ways to Write Product Descriptions that Inform and Persuade Your Customers.
Free Reading List: Copywriting Tactics for Entrepreneurs
Is your website content costing you sales? Learn how to improve your website copy with our free, curated list of high-impact articles.
Get our Copywriting Tactics reading list delivered right to your inbox.
Almost there: please enter your email below to gain instant access.
We'll also send you updates on new educational guides and success stories from the Shopify newsletter. We hate SPAM and promise to keep your email address safe.
Thanks for subscribing. You’ll start receiving free tips and resources soon. In the meantime, start building your store with a free 3-day trial of Shopify.
Using your product photos
The best ecommerce sites have one thing in common: beautiful product photos. When you’re just starting out, getting your product images shot can be an intimidating prospect, because good ecommerce photography can be expensive. But there are hundreds of product photography tools to help you get the job done yourself. By following this DIY product photography tutorial, you too can produce amazing images for your website. As you get more comfortable behind the camera, you can branch out into different types of photography. You can get as creative as you want!
The best part? You’ll have full control over how you build your brand and showcase your products online. Done well, you’ll increase sales and conversions on your website and grow a successful online business. Maybe one day you’ll even sell your own photos online as a new side gig!
Illustration by Gracia Lam
Ready to create your business? Start your free trial of Shopify—no credit card required.
Product photography FAQ
What is product photography?
Product photography refers to using specific photography techniques to take accurate and attractive photos of your products. Your product photos influence shoppers’ purchasing decisions, which can increase conversion rates and sales for your business.
What do you need for a product photography setup?
- A camera
- A tripod
- A white background
- White bounce cards
- A table
- Tape
- The right room with window lighting
How can I shoot product photography at home?
- Invest in gear and equipment
- Set up your product photography studio
- Take your product shots
- White bounce cards
- Edit your photos online
- Add them to your website
How do you shoot product photos?
- Set up your table
- Build your sweep
- Adjust your camera
- Set up your product
- Set up the reflector card
- Take the picture and evaluate
- Retouch your pictures
- Optimize images for your website
Product Photography Fundamentals: Best Practices | Articles | Photo, video, optics
I don't care what Thu you wrote about : a person always clings to the picture first. A beautiful and original picture of the product will immediately interest a potential buyer, and so he will be on your website or social network account. It sounds simple, but in order to make this very frame, you will have to get acquainted with the basics of product photography. We have collected several basic techniques that professionals use in advertising photography and not only.
Photo: pixnio.com
Preparation
Location
You don't have to go to the studio to shoot the perfect subject shot. You can arrange a place for photography at home - right on the table. Use fabric or paper to create the background you want. Make sure there are no visible borders or horizon lines anywhere. It is also convenient to use glass, with it you will get a transparent surface and a spectacular reflection in the frame.
The object can also be removed in the "habitat". This technique is especially common in advertising photos of household appliances, but it is suitable for any items. To make it easier for the viewer to imagine how they might use what you are promoting, place the item where it fits best. Film a person making espresso with a stylish coffee maker, or a vacuum cleaner gliding comfortably across carpet next to pets. Add life to subject frames.
Tripod
Product photography is always done with a tripod, even if you shoot with a smartphone. In addition, sometimes you have to work with one light source or deliberately shoot in a dark room, and a tripod will help keep the camera in one place. So you can try different shutter speeds and effects. The photo will not be blurry and will look more professional as a result.
Raylab Pro 70 is an inexpensive tripod that is suitable for studio and home product photography on a SLR or mirrorless camera, and for a smartphone, you can take the Raylab MTF-SC with a special holder.
The frame is “attached” to its original format, so, for example, cropped on Instagram, it will not look as organic. Photo: pixnio.com
Post-processing planning
For product photography, processing in graphic editors is a completely common thing. Again, it doesn't matter what you're shooting with. Before and during the shooting process, you should always think about how exactly you can edit the resulting frame. If you're shooting for Instagram or a marketplace, keep in mind what photo format is used there to properly compose all items.
Shot
Accessories and props
You must have noticed that a shot of a pack of coffee is more catchy if there is a cup of steaming drink in the frame next to it. And books look great with a bookmark or flowers. It's a great idea for a product photographer to use what is at hand to shoot, create backgrounds and environments, making the picture more organic. But do not forget that you should not litter the frame with an excessive amount of things either.
The flower and the book create a backdrop, but do not detract from the watch. Photo: pixnio.com
Changing angles
Regardless of what you are photographing, an important technique for still photography is changing angles. One shot from above is simple and boring. After all, you can post entire albums on social networks, and the more attractive the subject, the more we know about it, we see it. Shoot from the side, from above, from below, be sure to focus on one or more details. Viewers, and especially buyers, want to see everything and have a complete picture of the product you show them.
Color
Working with color is an urgent task for a photographer. And for commercial shooting, it is completely fundamental. Colors affect the human psyche: their combination always creates a certain mood.
We can't tell the whole theory of color in a nutshell, but we will note the most important thing you need to know for product photography.
- Complementary colors are opposite shades on the color wheel. They create momentum.

- Triad - a combination of three colors equidistant from each other in a circle. The result is the same as for complementary colors.
- An analog triad is 2 to 5 colors that are next to each other on a circle. It gives a more delicate image with the primary color highlighted.
- The contrasting triad, just like the usual one, is built in a triangle with equal sides. This is a variant of a complementary combination of colors, but instead of one of them, the colors adjacent to it (left and right) are used. A bright color sets the foundation, and a pair of opposites support it. It turns out a softened (compared to a complementary combination or triad) dynamics.
The color wheel is a working tool for the artist, photographer and designer. Photo: sutterstock.com
Technical Tips
Subject Lighting
The most important thing to consider when photographing subjects is lighting. Without it, neither the thing nor the background will look the way you would like in the photo. You have probably noticed that the white in the pictures becomes gray or yellowish. That is why light is important. You can use both natural and artificial. You don't have to splurge on a professional studio, especially if you're just starting out shooting or doing photography as an amateur.
Natural light is suitable for photographs of food or clothing. If you're shooting indoors, it's best to position your subject closer to a window and shoot early in the day to maximize light.
Lamps are best for capturing graphics or subjects with a lot of fine detail. There are several basic recommendations for the correct setting of the light.
- Take two lamps and point them at the background, on both sides of the subject. Make sure they highlight the background.
- Aim one lamp at the object and one above it. So you highlight it, and the top lamp will save you from the shadows.
If you don't have a dedicated softbox for your subject, use diffusers to soften the light on your subject. Photo: flickr.com
Ideal aperture value
For subject photography, it is better to choose one of three aperture values, depending on the situation:
- diaphragm. This will ensure bokeh and the subject will be the center of attention. However, you will have to move away from the object for the trick to work. Everything superfluous will remain blurry, and the details of the subject will be sharp.
- If you are shooting a subject with a model or surrounded by other things, use an aperture value of around 2.8. So the background will remain blurry, and the main subjects will be sharp. But in this case, try to bring the viewer's eye to the main object.
- In the studio, you can limit yourself to a medium or closed aperture (denoted by a larger number), since the object against the background will be highlighted by light.
Standard lens
If you are photographing a product, it is important to make sure that its dimensions are not distorted in the frame. Wide-angle lenses will stretch or magnify different parts, which is something to avoid.
But the standard lens (in fact, as close as possible to what the human eye sees) is just perfect for product photography. It doesn't distort proportions. Standard lenses usually have a focal length of 40-58mm, the most common is 50mm.
Captured motion adds a unique touch to the shot. Photo: gbphotography19.wordpress.com
Product photography ideas
- Shoot outdoors. From the woods to the beaches, just about anything looks perfect with a natural backdrop.
- Shoot at home: coziness and comfort will set you in the right mood, and the environment will help the viewer imagine how the subject will fit into his interior.
- Don't be afraid to frame children or pets. They will not divert attention from the main subject, but the picture will become more interesting.
- Let the subject dictate the environment. Look at its colors or purpose - what does it remind you of?
- Use your imagination and don't be afraid to break the rules.

Now you know how to make your pictures memorable and show ordinary objects from an unusual side. In the era of online trading, we cannot see the product live and rely on the picture with its image when choosing. Make it attractive and no one will resist buying it.
Product photography. Tips from the masters of photography
In order to sell something to someone, you need to make sure that the buyer believes the seller that his product is of high quality, and that he needs it. And how to achieve this? The solution is simple: you need to show the product to the consumer in such a way that it looks attractive. This is the main task of an advertising photographer. An advertising photographer needs to take into account all aspects that affect the subconscious of the consumer, competently, but at the same time delicately and unobtrusively emphasize all the winning features of the subject. Plus, when working on advertising a product of a company, you need to take into account the style of this company.
In the article that we recommend to you today, you will read about how to create attractive and memorable photos of products and other goods, get a lot of tips on this. I would like to think that the information presented in it will give you a reason to rethink some of the ideas of marketing and advertising. The advice that the reader will receive in this article will be useful for photographers who have different financial possibilities. The author also gives good advice on how to install effective and correct lighting, talks about how to increase the amount of light with limited funding for the project. Also in the article you will find a description of unusual and interesting tricks with subsequent computer processing, with which you can achieve the maximum attractiveness of the subject.
Product photos from Rockwell Kon
Ken Rockwell was one of the first to create "sellable" photographs. He knows how and what to shoot in this regard. Ken takes great pictures, knows how to organize good and effective lighting, what kind of background to choose for a particular product. His works are bright and long remembered by the viewer.
How to photograph jewelry. photography lessons
Advertising photographers are very fond of shooting jewelry and other expensive and beautiful items and goods. In the lesson that the author offers you, various important tips are very well selected, clear and understandable recommendations for photographing all kinds of jewelry are given. Naturally, in a job like shooting jewelry, there are a lot of interesting features. Everything is essential and important here, from choosing the right camera for work to correct and accurate focusing. When shooting all kinds of jewelry at work, you may need a photo box. In this article, you can read about how to make such a photo box on your own in order to shoot small jewelry with it.
Product Photography Tips by Design Sponge
After reading this article, you will get excellent additional information on how to properly set the light when photographing food, how to place the subject in the frame, how to correctly determine the boundaries of such a frame. By the way, photographers often forget about framing. But in vain. Framing is very, very important when shooting subjects like this.
7 Tips for Shooting Subjects by Smash and Peas
A very interesting blog is Smash and Peas. By looking into it, you can learn about the numerous concepts of product photography. In this blog, you will read about the correct framing of a frame that depicts certain objects, you will find stories in it about the correct and interesting lighting of such subjects, about the delicate, but very effective post-processing of images of this order. This will be invaluable help in your work on photographing food and food in general.
Tips for creating studio photos at home
It goes without saying that not every photographer, especially a beginner, has the opportunity to work in a well-equipped photo studio and good photographic equipment. But ingenuity, ingenuity and some perseverance in achieving your goal will help you do without all this, and in the conditions of an ordinary apartment, on your own create good conditions that could be quite close to the studio ones.
What Every Newbie Should Know About
Product Photography
Where does an inexperienced photographer start when they receive an order to shoot products? This can sometimes confuse a beginner, from which it will be very problematic for him to get out. Very good recommendations on this subject can be obtained by reading this article.
5 Common Lighting Mistakes Many Photographers Make
Check out the articles on this blog to learn the most common lighting mistakes food photographers make. You'll read about what kind of light can completely ruin your shot, get great tips on how to avoid these mistakes and how to get rid of them in the post-processing process.
Step by Step Guide to Product Photography
This article offers you a wonderful step-by-step guide on how to create photographs of various objects step by step, where to start, what to pay special attention to in the process, and much, much more.
Photographing a bottle of wine. Tips from Monicoz
You will learn how to shoot various drinks in beautiful bottles of various shapes, such as wine, in this short lesson. In it, you will receive very valuable and necessary tips for a photographer who is engaged in such shooting, on how to control the reflection on the glass of a bottle, on how to properly build lighting for such a difficult object to shoot as a glass object, and much, much more.
Best photos of small items
In this lesson, you will learn about the importance of accuracy in camera settings when photographing small objects. It will help in the work of those who photograph very small objects.
Product Lighting: A Step-by-Step Guide to Digital Photography
An excellent reference for lighting when shooting food and culinary dishes. It describes the whole process of such shooting very well, in detail and in detail, draws attention to all stages and moments of work, describes the solution of problems, the occurrence of which in this work is very likely. The list of products is described in detail. This book compares favorably with other similar ones also in that the whole process of work is described there from beginning to end, so to speak, from the very basics, from the basics. At first, the authors of the book will teach you how to take seemingly primitive pictures, but then the requirements for work will become stricter and stricter with each new step, and your work will improve from one stage to another. In this helpful book, you will also learn how to set the right lighting for food photography, what colors will look best in your photos, and how to choose the right combination of these colors. You will also learn about the tools that can and should be used in the work of a food photographer.
Convenient Platinum Photo Studio for Photographing Items
The softbox, which is made of specialized fabric resistant to high temperatures, is very simple and easy to use. Plus, it looks quite stylish. The material of this miniature desktop photo studio is 100% velor. This material gives excellent uniform and well-diffused lighting that does not create harsh shadows from the subject and avoids bright glare on it. The softbox is easy to fold, and in such a compact form it is easy and convenient to both store and transport.
The Handbook of Photography: Using the Built-in Flash and Other Tricks to Take Professional Pictures
Imagine that you are looking at beautiful, high-quality photographs of some objects. These photographs sometimes evoke unique sensations, the viewer even takes his breath away. Sometimes it just seems unrealistic. But, nevertheless, all these pictures were not created in a professional photo studio! Reading this book, you will easily see that this is not the case at all. This wonderful publication will give you comprehensive information on how to create wonderful pictures of various objects without a professional photo studio and expensive photographic equipment.
Commercial Photography Handbook: Business Techniques for Professional Digital Photographers
A book that we think is simply wonderful. It was written with a focus on the work of experienced masters involved in commercial photography. The advice in this book is truly invaluable. It deals with almost all aspects and problems of the work of a commercial photographer. Each section of this publication begins with the fact that the author talks about what a photograph should be like, what the one who ordered it to you expects from it. In addition, each section of the book contains comprehensive information on what tools should be used in a particular type of commercial photography in order to achieve the best result, what principles work when creating a particular type of commercial photography. The author will tell readers in detail, in all details, delving into every little thing, about marketing as such, teach them how to negotiate with a potential customer of work, tell you how to determine the cost of an order, how to set a price for your work, how to maximize profits and minimize costs. . A very practical book! Be sure to read it!
From snapshots to professional photos.