Home made studio lights
13 Easy (But Impressive) DIY Photography Lighting Ideas
The best way to start with DIY photography lighting is to get down to the basics. This means using a simple flashlight as your primary light source.
Trying to control its output with modifiers is a great learning process. This article will take you through some easy and inexpensive DIY photography lighting projects. Some of them are helpful for off-camera flashes, and some improve the light of your camera flash.
You can try these DIY photography lighting projects at home, with a flashlight and a light modifier made out of repurposed items. You’ll have most of these at home, but some will require a trip to the hardware store.
[Note: ExpertPhotography is supported by readers. Product links on ExpertPhotography are referral links. If you use one of these and buy something, we make a little bit of money. Need more info? See how it all works here.]
13. DIY Diffuser
If you are using a big light source and want softer light, you can create your own diffuser. It really isn’t complicated or difficult.
Take a large picture frame and remove the canvas or the cardboard from the back so that only the frame remains. You can also create a rectangular frame using plastic pipes. Then stretch a white curtain/fabric across the frame, and nail or staple it.
This creates a sort of softbox, but one where you can control the light. If you take the flash or lamp closer to the diffuser, the light will be harsher. If you go further, then it will be smoother.
12. Use Poster Boards as Reflectors and Flags
One of the most basic pieces of lighting equipment are reflectors and flags. Reflectors bounce off light from the light source back onto the subject. This helps smoothen out harsh shadows.
Flags, on the other hand, do the exact opposite. They block out light to darken specific areas of your subject. This helps give moody shadows to your photos.
The simplest and cheapest reflectors and flags are white and black poster boards, respectively.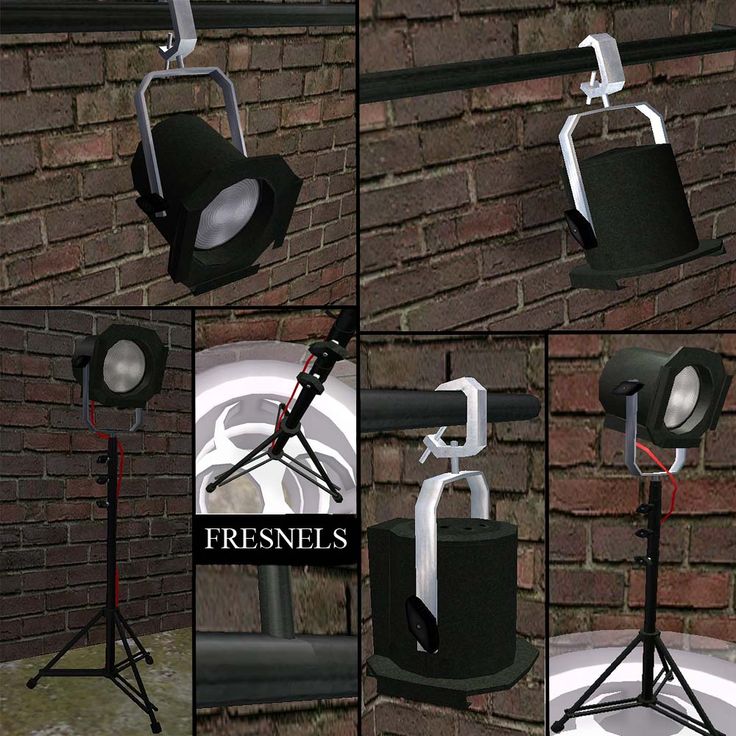
Since a black poster board is non-reflective, it won’t bounce back any light, making it a perfect flag.
Fairy lights make a great DIY photography lighting source that is really easy and versatile. Incorporating fairy lights into your photographs lets you light up your subject in a very creative way. Because fairy lights come in different colors and temperatures, you can choose what effect you want.
The model can hold the fairy lights, or you can string them behind her. Placing fairy lights in front of the lens can create a dreamy foreground.
By blurring the image, you can create a beautiful bokeh effect.
Fairy lights are great for photography because unlike other light sources, they can be visible in the image without looking odd.
Wondering how to get soft light with the flash on your camera? The answer is a flash diffuser. This makes the light from your flash much smoother and balanced. The best part is, you can make one on your own for very easily and for almost no cost! All you need is some white paper, white adhesive tape, a hollow tube (like an empty chips can), and scissors.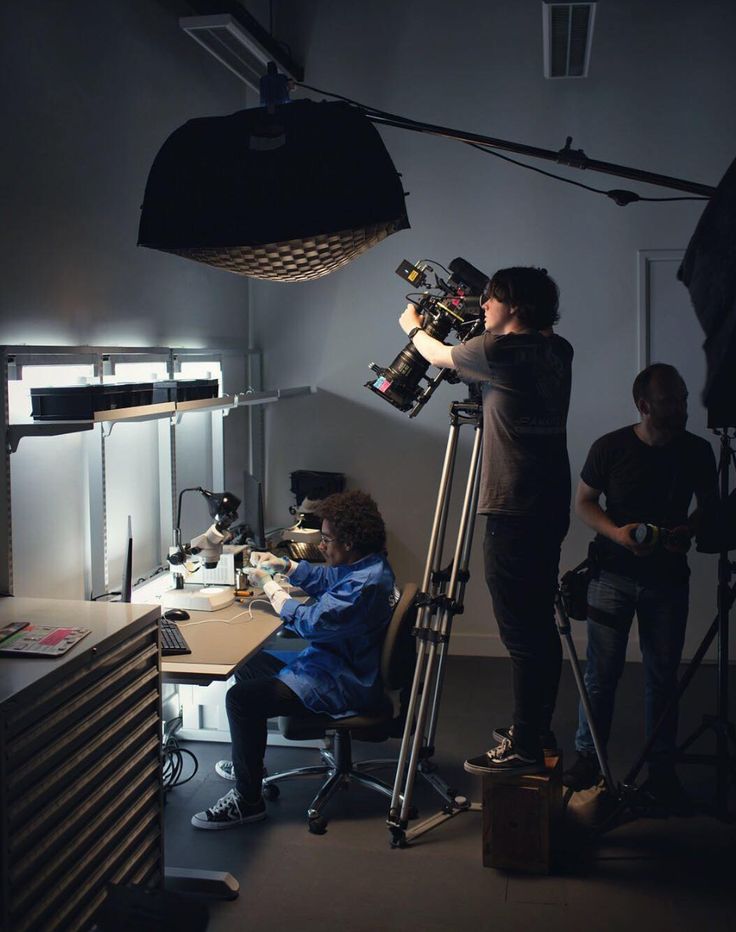
Just follow this super quick and easy DIY flash diffuser tutorial to create this amazing piece of equipment which will help you take beautiful photographs.
Right flashes produce some really good lighting, but boy can they be expensive. Not if you do it the DIY way though. You just need some materials from your home and a little bit of time.
This is a really detailed tutorial, although it does require you to use your flash off camera. That’s not hard, though.
Find it here the tutorial here – DIY Ring Flash
I’ve seen a number of DIY softboxes. Most are made from cardboard, wire, and fabric or other random items. None of these look very good or are very strong.
Andrew (the writer of this guide) wanted something that would hold up to some abuse, and that didn’t look like it was assembled from old boxes.
If you want to create one of these, you should check out our DIY Softbox guide.
The beauty dish is probably my favorite lighting modifier because I love how the light falls off the subject, in a really soft way.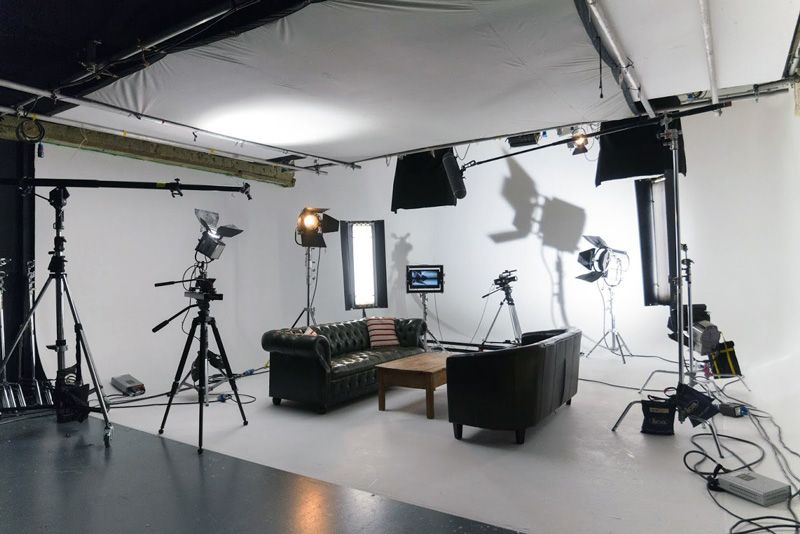
I recommend them to everyone, but they’re not always the cheapest thing to buy. That’s where Todd Owyoung comes in from IShootShows. He’s written a hugely detailed guide to building your own.
Check it out here – DIY Beauty Dish
Piping bags are great tiny light sources. When placed in front of a flashlight, they give you greater control of light direction.
Their tips have different shapes, which will offer you different lighting effects.
You’ll be able to point your light with great accuracy, as you can see in the following product photography lighting shots.
I used a flashlight with a narrow oval piping bag tip for the light ray. This photo was taken in a simple studio setup. I didn’t use the typical white background of product photography. The textured background adds interest to the image.
I used a white fill card with a hole for the lens to cast the light on the ring.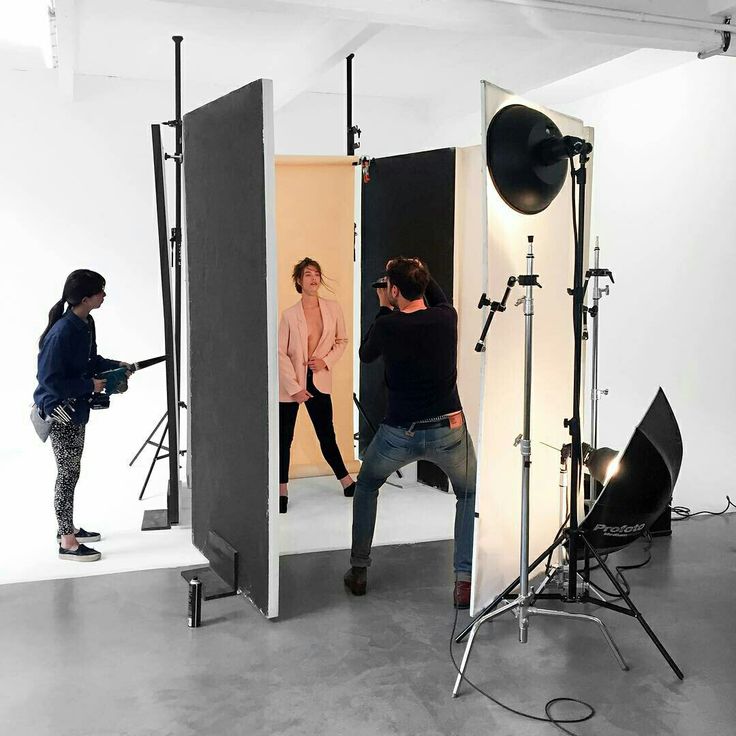
It makes for a fantastic DIY flash diffuser. And it’s great for close-ups.
5. Table Tennis Balls
Table tennis balls are one of the cheapest DIY photography lighting solutions for better shots.
They’ll soften the harsh light that comes out of your flash and help you avoid harsh shadows.
Cut an X shape with a knife on the ball and slide the flash through the opening.
The white plastic is semi-translucent. This allows light to pass through but scatters it in the process.
It creates uniform DIY photography lighting with soft shadows, like in this image below.
I created the overall light with a flashlight and a table tennis ball diffuser in my photo studio.
Moving the DIY diffuser from the back to the front of the image created a backlight effect. And it cast soft shadows on the front of the picture.
4. Balloons
Balloons are an excellent option for creating a DIY lightbox effect.
You can control the size of the light effect by controlling the size of your balloon.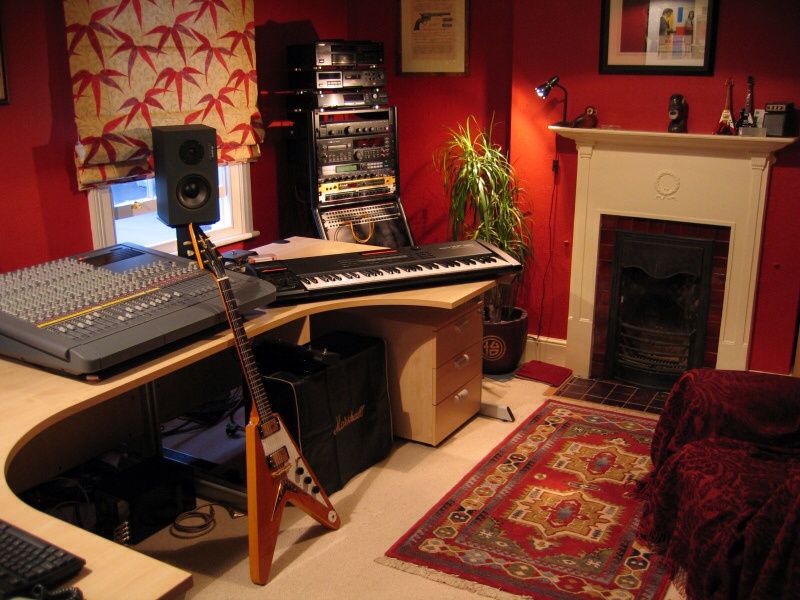
This transforms the small light beam produced by your DIY photo lighting. It becomes a big and soft lighting source.
You’ll need a long exposure due to the low light output of a flashlight.
It can cover a bigger area and even a portrait image. If the model is able to stand still like in this following image.
I created the lighting effect using a flash and a big inflated white balloon during this photo shoot.
Placing the balloon on the top left side of the model created soft shadows on the side of the nose and under the chin. This was a simple and easy lighting setup.
It’s great for portrait photography, and upon closer look you can see the catchlights in the model’s eyes.
3. Fiber Optics
In DIY photo lighting, you can use this type of materials to create a “light brush”. You can use this as a light painting tool.
To create a simple light brush, take the top part of a cheap fiber optic table lamp. Attach it to a flashlight with some black tape.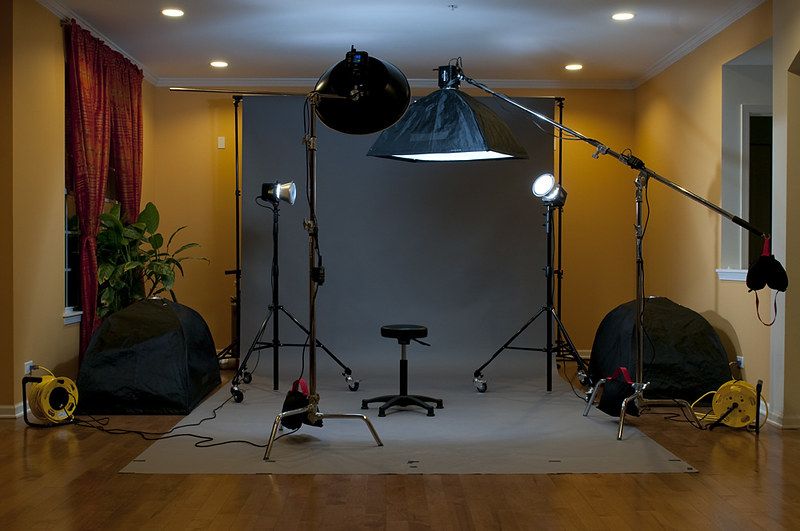
You now have a light brush, and you can achieve many different light effects with it. My personal favourite effects are the ones done with long exposures in a dark room.
This creates light paintings like the ones Man Ray did in the 1930s. I tried to recreate this style in the following image.
I created the DIY photo lighting effect by slowly moving the flash with the fiber optics. This was a 10-second exposure. The white balance on the camera was set to tungsten, hence the blue light effect.
2. Star Wars Toy LightsaberThis kids’ toy is actually the base for a great DIY photography lighting tool.
It only had a small red light, and some bad Darth Vader sounds. After dismantling it, I glued the plastic rod to a flashlight. This created a lightsaber worthy of a true Jedi.
And a fantastic DIY studio light.
The plastic rod contains the DIY photography lighting. This allows it to sweep through a wide area during long exposures.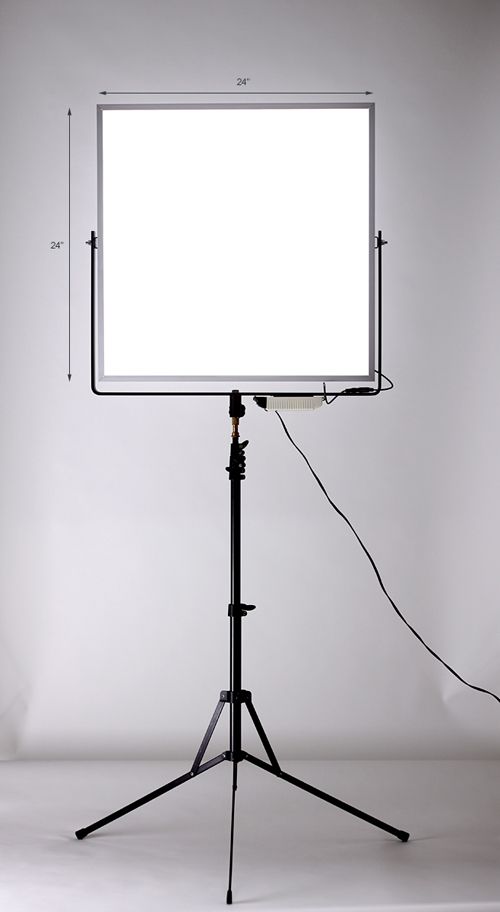
It works great on reflective subjects like the metal chain in this next image.
To create the light effect, I swept the DIY lightsaber from the front to the back of the image. This created soft reflections on the metal without shiny hot spots.
I also placed a vertical white card on the left side of the image.
This helped create a uniform reflection on the image. It also emphasized the background stone and water droplets‘ texture.
1. Coloured Cellophane and Plastic Bottles
For DIY photography lighting, you can use color gels. Place them in front of the light source to get colored effects.
You can’t compare cellophane to genuine color gels when it comes to color rendition. But it is a great cheap option to use with flashlights.
Place these colorful pieces of cellophane inside a plastic bottle. This creates a color mix lighting source. It will create ambience and depth, as you can see in this next image.
To create the colored light effect, I placed a plastic bottle with two cellophane sheets inside over the scene.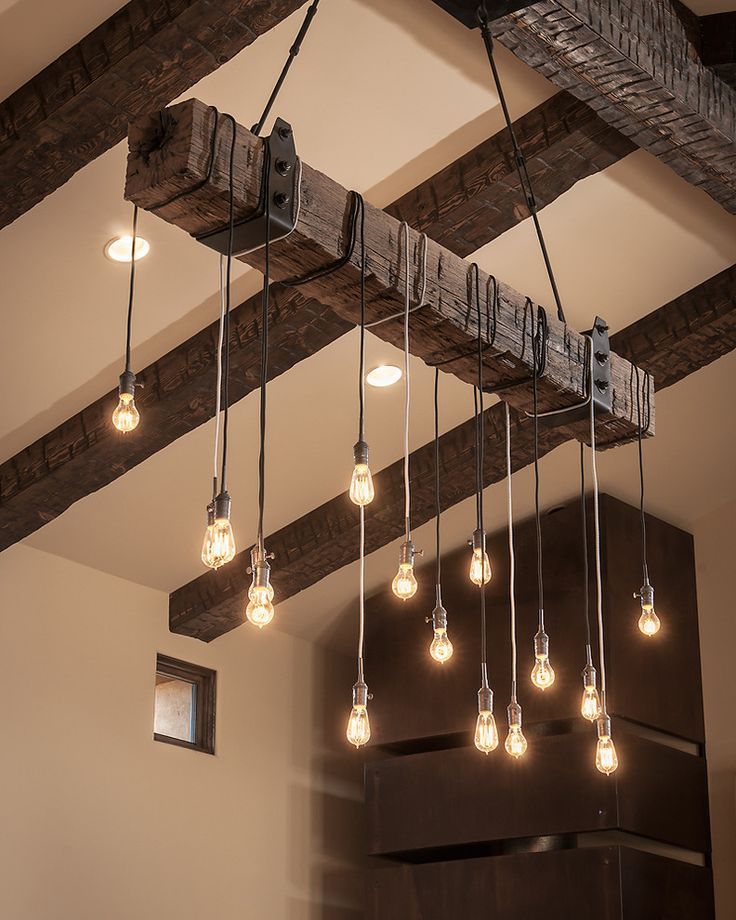
Then I moved it slightly to the back to create a shadow effect.
It is fun to experiment with lighting while shooting, but you aren’t limited to just that. If you want some really cool lighting effects, like sun rays, light trails, lightpaths, and more, you can always explore in Photoshop.
There are some things you can do on Photoshop that you might not be able to do in real life.
For example, if you don’t have a tripod to take a very long exposure but want bold light trails, you can stack various images together and merge them into one image.
Or, you can add in light paths as if you were light painting.
If the lighting in your photos wasn’t good enough, you can always add a luminosity mask or a gradient tool to even out the lighting or brighten the image.
Conclusion
That’s it! Good photos need good lighting. If you want to experiment with lighting in your photos but don’t want to splurge, this is your opportunity. There are plenty of DIY photography lighting accessories that you can create in a low budget.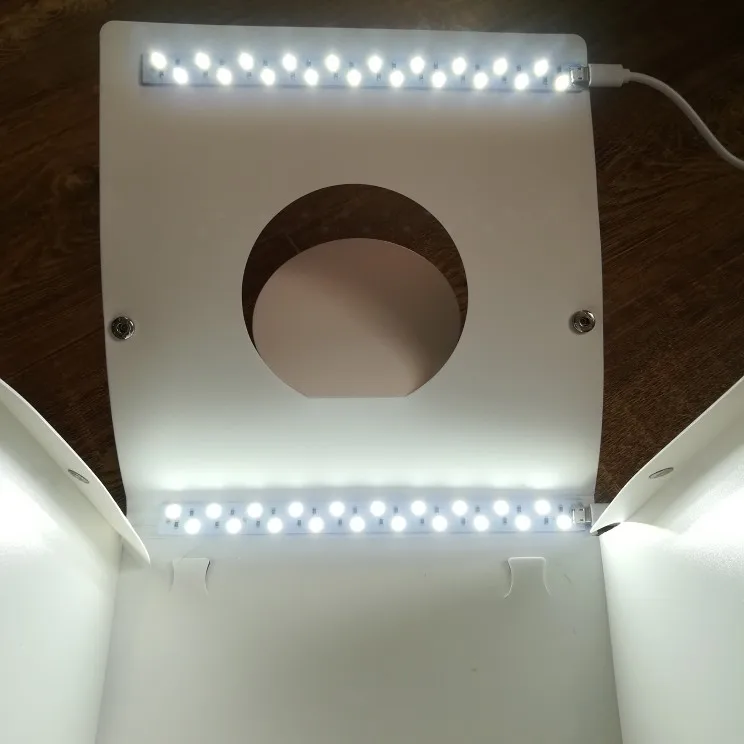 Try them out, and you can drastically improve your images.
I’m sure you will get great results and learn a lot along the way.
To get the most out of your photos, take a look at our Wow Factor Photography course!
If you want even more DIY photography ideas, check out our Fun With Photoelasticity post or our DIY Cake Smash Photography article.
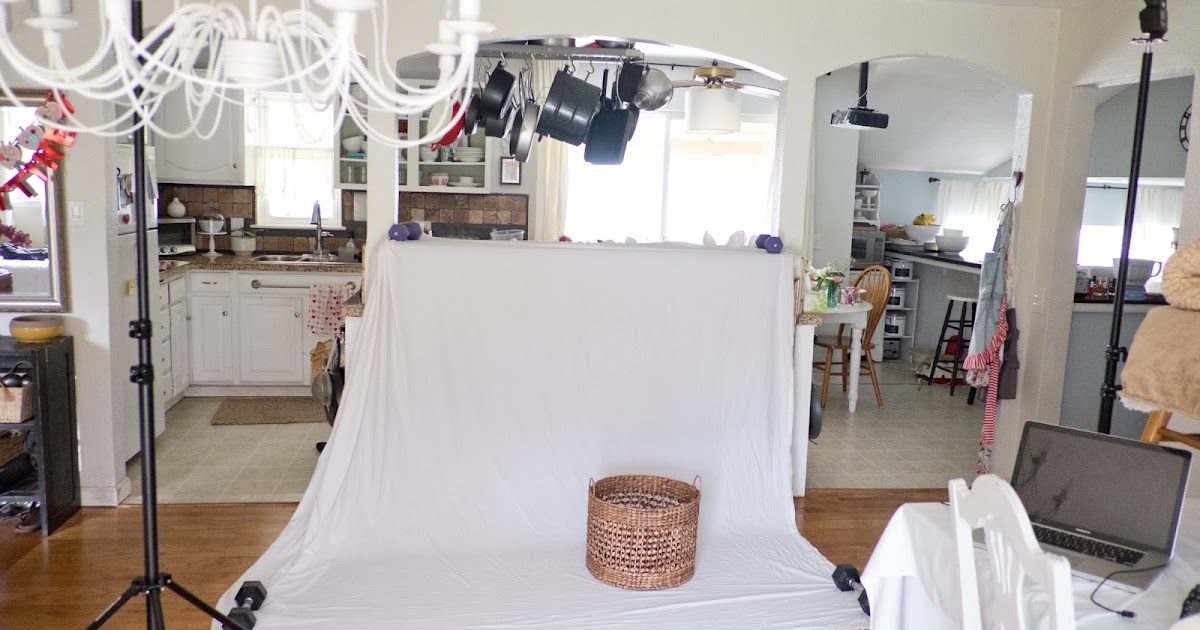
Understanding basic studio lighting for your DIY home studio.
Understanding basic studio lighting for your DIY home studio.
In our previous post we showed you how to create your own home studio on a budget. The next step to creating a functional home studio is to understand a basic lighting setup.
Your lighting is the most important part of your studio setup, and one could argue that you are worst off having the best camera with a poor lighting setup than having an average camera with an excellent lighting setup.
In this post, we will be running through some lighting jargon to give you a better understanding of studio lighting and help you understand a basic lighting setup.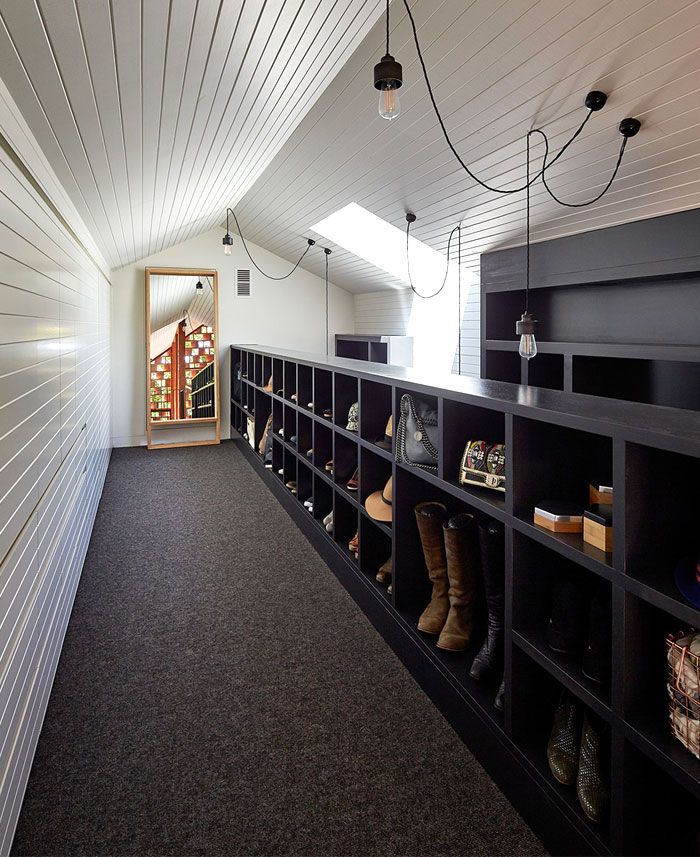
1. Studio Lights
Studio lights are relatively broad terms and cover all lights that are being used in the studio. There are many branches of studio lights and below we will be covering studio lighting basics. Studio lights, unlike traditional home lights, allow you to adjust the brightness and give you more control over your lighting situation.
There are three main types of studio lights. Fluorescent, LED and Tungsten.
Fluorescent: These lights are energy efficient but give off a relatively low output of light, usually around 60-100 watts. The bulbs are readily available, cheap and easy to replace.
LED: LED lights are very energy efficient and produce very little heat. They are composed of lots of small “light emitting diodes” (LEDs) and generally last a long time.
Tungsten: Tungsten (or “tungsten halogen”) lights offer the highest output levels but also generate a lot of heat. The bulbs are relatively inexpensive to replace but can change colour temperature if brightness levels are adjusted.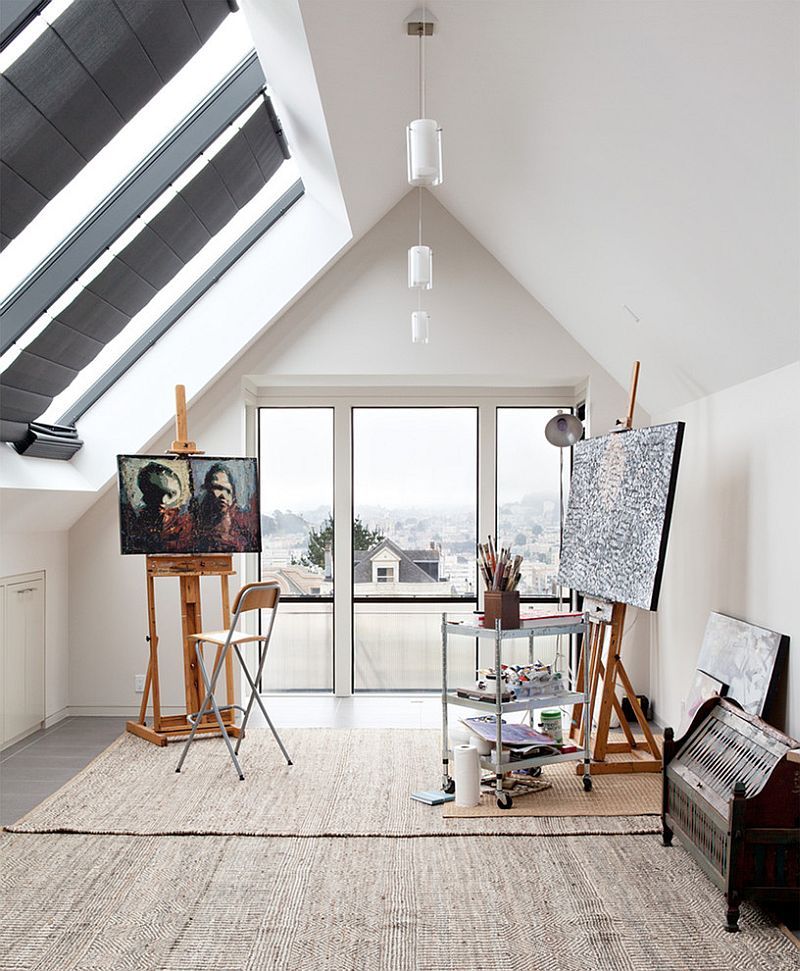
As the name suggests, continuous or constant lighting stays on once they’re switched on. The way you adjust the light would be how you capture the frame. This all depends if you expose everything correctly on your camera
1.2 What is Strobe lighting?Strobe lighting is a burst of light (a flash) that’s triggered with each shot. This makes it a little harder to determine the initial outcome which needs a little trial and error to try and get the desired effect. Strobe lights tend to be much harsher and brighter and also need time to reload power for the next shot.
The choice between continuous lighting and strobe lighting is purely a personal choice. Continuous lighting gives you more control and consistency, but a strobe lighting gives you a bit more punch.
A professional lighting setup. Source Pexels
2. Key Lights
The key light is the main light that usually has the highest intensity.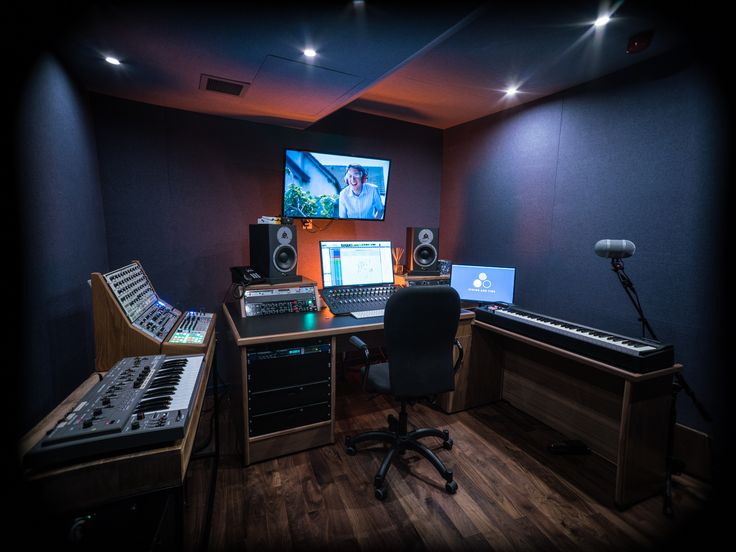 A window can act as a key light, but depending on the time of the day and the weather, a window might give you mixed results.
So we recommend getting an artificial light with a diffuser to help you light up your subject if the natural light is not sufficient or unavailable. A key light helps shape your subject and can be placed where ever you want all depending on the effect you are looking to achieve.
3. Fill Lights
Fill light is mostly placed on the opposite side of the key light to fill in the shadows created by the key light. The fill light should be defused (soft) and not create any of its own shadows; this helps create an even soft tone on the images. A fill light doesn’t have to be an actual light. It can be anything capable of filling the dark spaces like a reflector or a white wall.
Softbox lights are affordable and act as great fill lights: Source Amazon
You can make a DIY reflector inexpensively, or you could use a white shoe box. Anything capable of reflecting soft light would work. A reflector also doesn’t take up much space but keep in mind the reflector should always be bigger than the object.
Softbox lights are also popular fill lights because they are relatively inexpensive and does a great job at filling in the shadows. (more on those below)
4. Strobe Lights
Strobe lights (like a flash) is also an option but would have to be defused and will also cost you a little more. Studio lights gives you the ability to control the light output. You can dim and brighten the light and also use a variety of modifiers to help create a perfect lighting situation.
5. Diffusion
Diffusion is the process in where the light from the source is softened through a filter to give your images a soft more even look. By applying a diffuser on your light source will help eliminate harsh shadows and help highlight specific areas instead of casting shadows.
There are numerous ways of defusing your light sources, and one of them is by making use of defusion panels that can be bought in different sizes at your local camera store.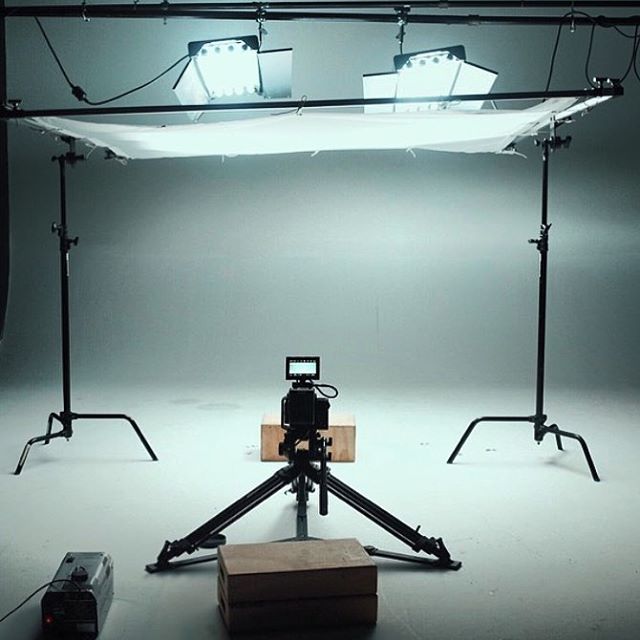 These work great, but you would need special clamps and stands so it could end up costing a lot of money.
Another DIY trick is to use the plain old wax paper you use for cooking. This acts as a great diffuser and could be made by cutting the top of a shoebox lid and covering it with wax paper. It all depends on your budget.
Softbox lights are also popular diffusion lights and are relatively inexpensive. You get loads of different variations, but for a basic home setup, they should be more than sufficient.
Basic lighting setup.
6. Making use of home lights
If you are not able to make use of the window and don’t have the budget to invest in studio lighting, then you might consider making use of a traditional home light. When deciding to make use of conventional home lights, it’s essential to understand what kind of bulbs to use.
It’s necessary when you make use of light at home that you get a fluorescent bulb with a cooler colour temperature.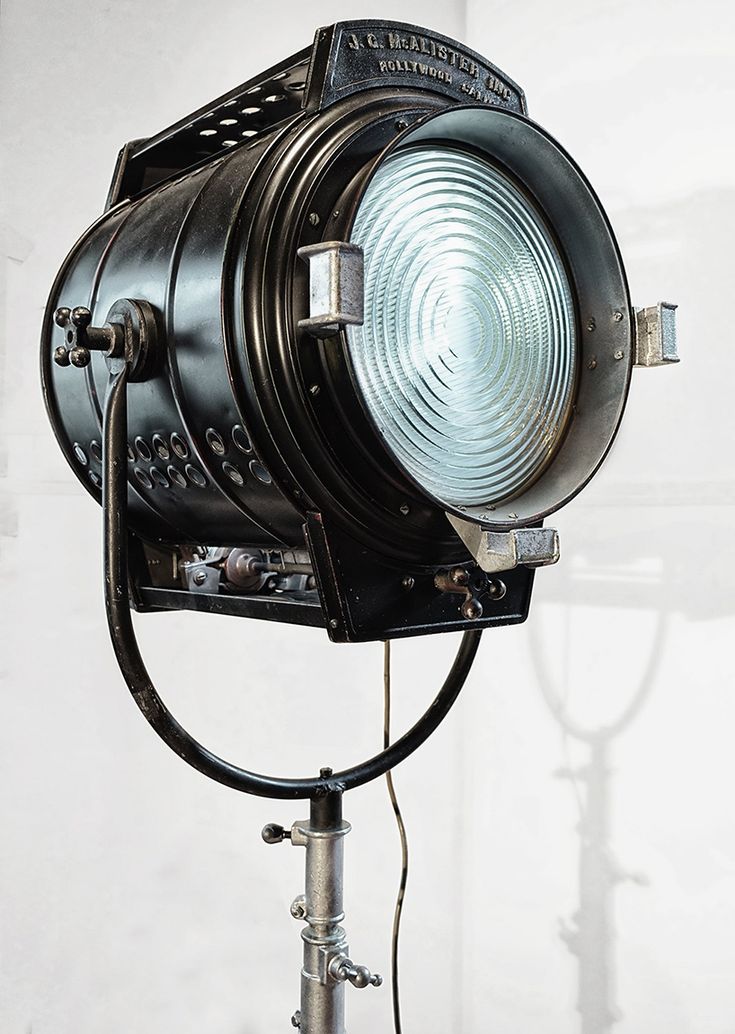 It’s important not to have a bulb with a warm colour temperature because this will alter the subjects colour tone. Also when you decide to make use of a few lights, make sure that all the bulbs are the same colour temperature.
There you go, this was a run-through for a basic lighting setup, and we trust that this cleared up some possible confusion regarding this rather complex subject.
If you have images that need retouching please get in contact with us here or register here to upload your images for retouching today.
How to guide: Colour Optimisation
In this guide we are going to analyse all the aspects of colour optimisation, accompanied by examples and as well as a step by step photoshop guide. So lets start.
How does good product photography increase revenue in E- commerce websites
Product photography is a type of commercial photography which is used to promote a product in a realistic way while making it look very attractive to customers.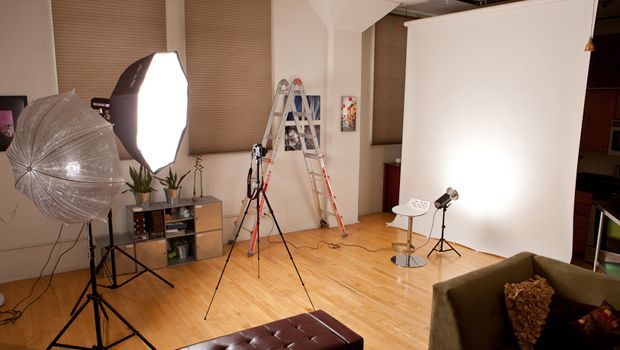
Common pre and post-production mistakes to avoid
Photography is mostly associated with the process of capturing the image, but in reality, it consists of pre-production as well as post-production.
Use your smartphone to take great product photos
With the advancement of smartphone cameras, it’s easier than ever to take professional-looking product images without needing an expensive studio.
MASTER NIKON. Christmas shooting: nikonofficial — LiveJournal
Very soon we will plunge into the fabulous atmosphere of the New Year! There is less than a month left before the winter holidays, so it is worth considering a Christmas photo.Let's learn how to capture a magical time of magic in the frame with experts and professional photographers in the new Nikon Master's course. Elena Linkova, Alexei Nikonov, Elina Kurmysheva, Ruslan Olinchuk, Anna Novozhilova and Elena Mironova will share their secrets.
And the traditional contest: we are waiting for your work in the comments here until January 10! We remind you that the photos must be taken with Nikon! According to the jury, the author of the best picture will receive branded souvenirs from Nikon! Good luck and Happy New Year everyone!
Author: Elina Kurmysheva
Elena Linkova:
“My most valuable skill is photography, my main focus is family and children.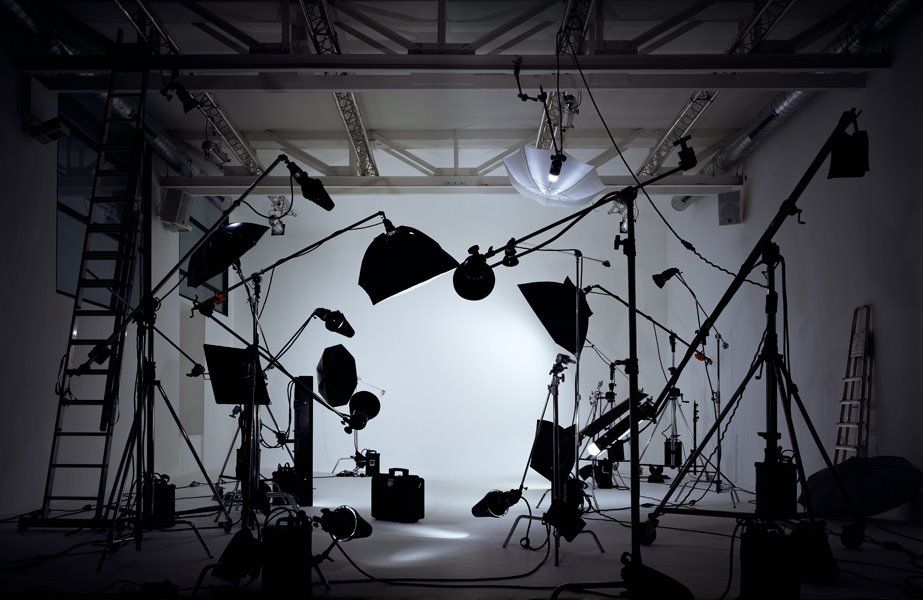 Is it easy to be a children's photographer? Unlike adults who are used to including one or another tactic of behavior, children do not tolerate falsehood and always remain themselves - direct, open and sincere. That is why taking children's photography is a real and sincere surge of emotions. Today I want to share my experience with you and give you some tips for photographing children and families. And on the eve of the most magical holiday, we will talk about Christmas photography!
Get the attention of children
At different ages, the child reacts differently to the process of taking pictures. During New Year's shooting, all the attention of the baby is usually attracted by the main decoration of the holiday - everyone's favorite Christmas tree.
Based on the experience that I got from the children's Christmas shooting, I can say that when you are photographing a very young or slightly older child, you need to bring his favorite toy, but if such a toy is not already available, then you should grab various rattles and toys of bright colors.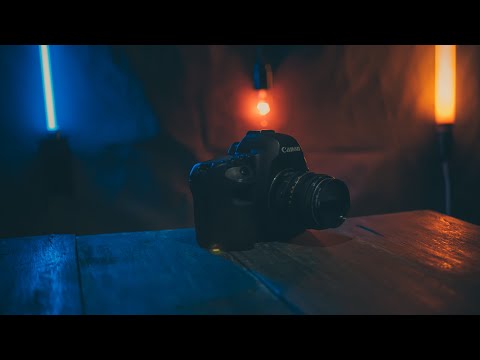 colors, as well as music and light. All this will attract the attention of the child, and you will get great pictures where the baby is looking into the frame.
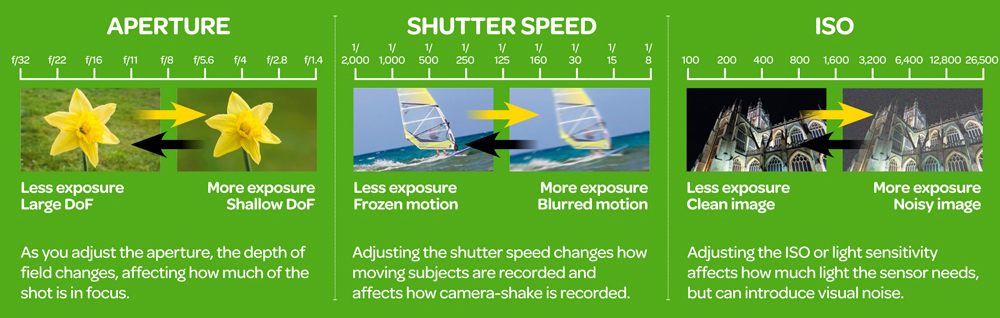
Camera: Nikon D5300
Aperture: f/2
Shutter speed: 1/80
ISO: 320
Focal length: 50mm
Capture the moment
There is a kind of reportage in children and family photography. All children love to dress up a beautiful Christmas tree, wrap themselves in New Year's tinsel or very emotionally open gifts from Santa Claus. Don't miss this moment!
Camera: Nikon D810
Aperture: f/1.8
Shutter speed: 1/200
ISO: 100
Focal length: 50 mm
Encourage your child to help you decorate your home for the holidays or unpack presents together after Christmas. For the fastest possible image acquisition, it is better to foresee everything in advance. Prepare your camera, focus and set the exposure. Take a position for shooting - and the picture is ready! And if you're lucky, then a few pictures.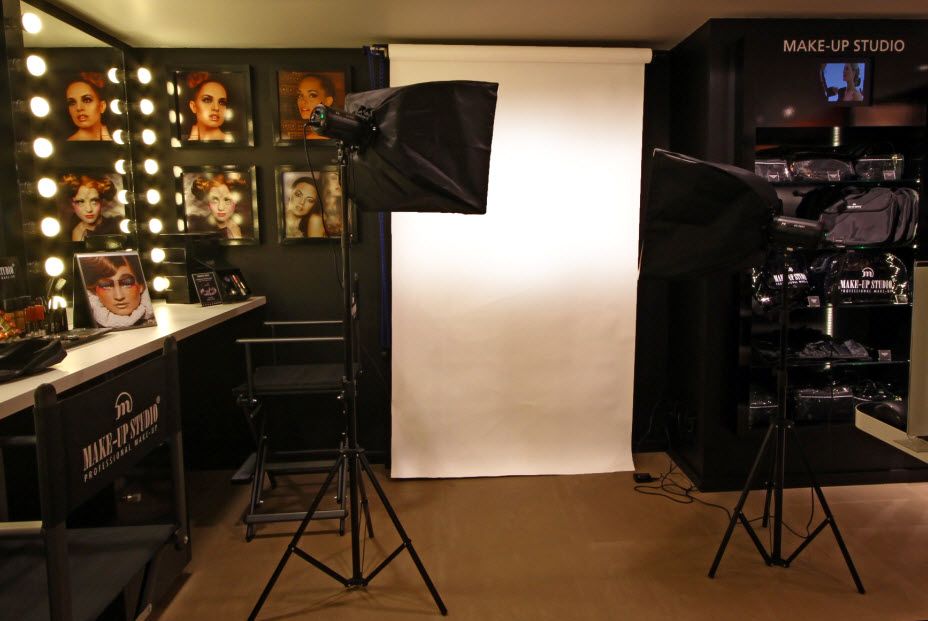 The child cannot sit still for a long time, my advice is to shoot in burst mode. You may be able to capture a more interesting facial expression or emotion while changing your posture.
Camera: Nikon D810
Aperture: f/1.8
Shutter speed: 1/160
ISO: 100
Focal length: 50mm
Need preparation?
For any photography, including New Year's, it is better to prepare in advance. A properly prepared image is always the key to a beautiful picture. Most of the home interior decoration, as a rule, is in the classic colors of the New Year holiday: gold and silver, diluted with white. I really love this combination, because it gives you absolute scope for your imagination, and almost any color fits harmoniously into this decor. When making New Year's shooting, I recommend reflecting it as a celebration or as a cozy family holiday.
Camera: Nikon D810
Aperture: f/5
Shutter speed: 1/160
ISO: 100
Focal length: 50mm
My favorite Christmas classic red is my advice when choosing a color scheme for an image.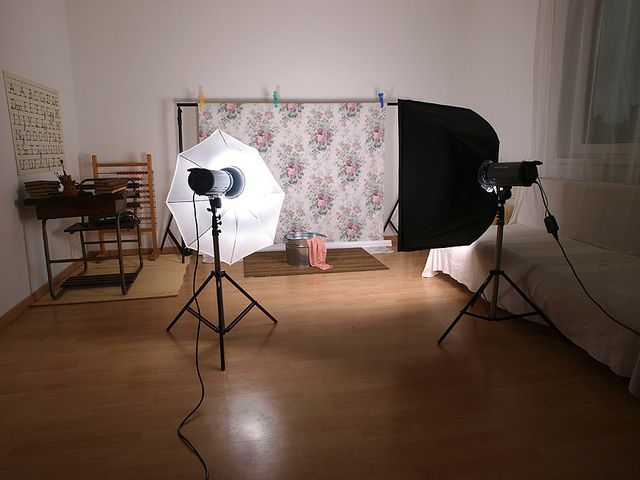 It's perfect for New Year's Eve. This color can be used both in evening dresses (chic dresses for moms and grandmas, butterflies in tuxedos for dads and grandpas), and in more cozy outfits - sweaters with deer, hats with pom-poms, mittens, etc.
Lately family shooting in pajamas is gaining more and more momentum in the comfort section. Pajamas can be completely different, but when choosing sets, do not forget that pajamas should look harmonious for all family members, choose similar sets! Or mix and match them in color and texture.
Camera: Nikon D810
Aperture: f/1.8
Shutter speed: 1/200
ISO: 100
Focal length: 50mm , I want to tell you how to shoot these beautiful and mysterious Christmas lights. Any Christmas photo shoot includes lights that add magic to your shot.
If you're shooting outdoors, it's best to shoot at dusk before the sky is completely black. In this case, it is better to mount the camera on a tripod or use any stable surface to place the camera on it.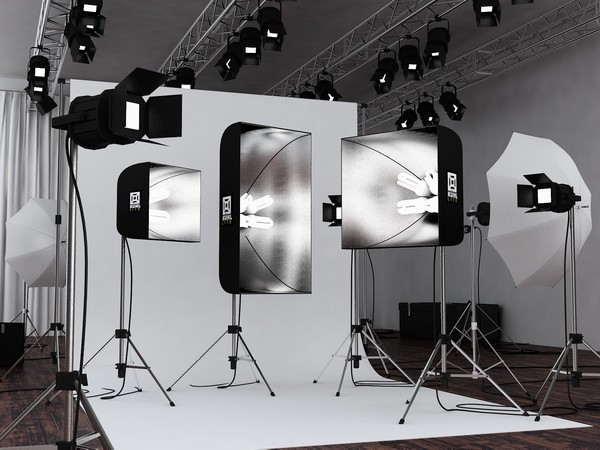 If your camera allows you to raise ISO without much loss of quality, then use this tool. When photographing lights indoors, I do not recommend using a flash pointed frontally at the model or subject, as it will interrupt the light from the lights, and the picture will no longer convey a magical mood. Use constant light aimed at the models. For example, this light can be a regular flashlight on your phone, which is always at hand.
Manual mode is most suitable for this shooting, but shooting can also be done in aperture-priority mode. The choice is yours.
Camera: Nikon D810
Aperture: f/2.5
Shutter speed: 1/160
ISO: 320
Focal length: 50mm
To get beautiful bokeh in the background, you need to find a very bright point object. The next step is to set the maximum focal length of the lens, thereby zooming in on the image.
Technically, to get these "out of focus" lights, you need a lens with an aperture of less than 2.8 (it's even better to have a 50 mm 1. 8 or 1.4 lens). And after following these steps, you will see beautiful bokeh in your photo.
Animals in the frame
Shooting with animals is never an easy task (even for an experienced photographer)!
One of the key qualities that a photographer and a model must have is patience. An animal cannot be forced to sit still or assume a particular posture. But if you have a real friend and family member on four legs living in your house, then he should definitely be involved in the photography process! Now for pets, there are many costumes that will look very funny. And if you haven’t got a pet yet, then many photo studios offer different animals for a photo shoot. It all depends on your creative imagination, maybe you want a photo in the winter forest with a bear or with the cutest rabbits by the Christmas tree - the choice is yours!
Camera: Nikon D810
Aperture: f/2.5
Shutter speed: 1/125
ISO: 100
Focal length: 50mm shooting with his participation, the child will be endlessly happy about it.
Alexey Nikonov:
“The New Year is a magical holiday that both children and adults look forward to. At this time, I want to immerse myself in a fairy tale, to face real magic. Let's see how to achieve this in your photos.
Holiday atmosphere
You can also create a warm, cozy atmosphere at home using various props - it can be your favorite toys, candle lanterns, garlands, homemade crafts and other things.
Camera: Nikon D3s
Lens: AF-S NIKKOR 24-70mm f/2.8G ED
Aperture: f/5.6
Shutter speed: 1/4
ISO: 200
Focal length: 30mm
garlands, the lights must be exposed with a slow shutter speed of about 1.4 seconds, for this you need to use pulsed light, which will freeze micro-movements, you also need to make sure that there are no other light sources that can negatively affect the picture. Use better directional light from a stripbox with a mesh.
Camera: Nikon D3s
Lens: AF-S NIKKOR 24-70mm f/2.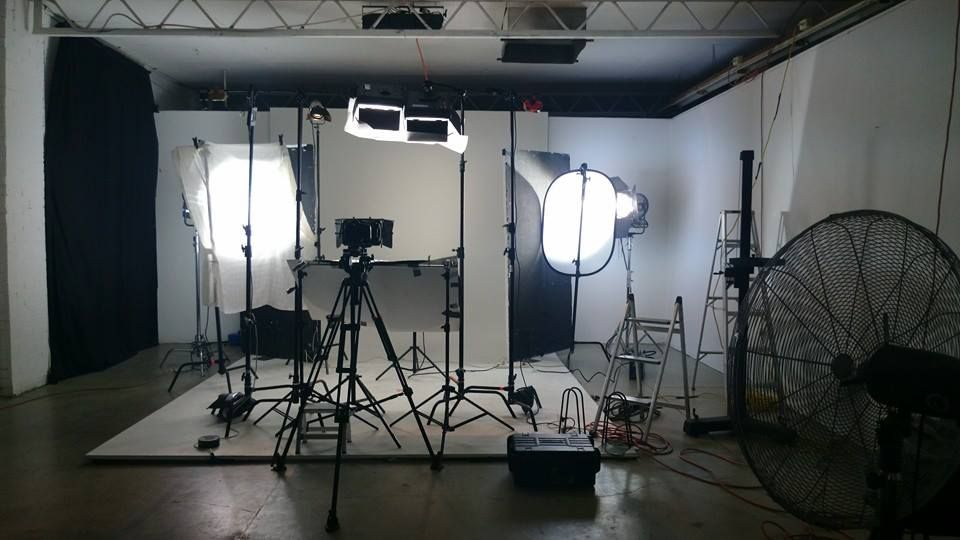 8G ED
8G ED
Aperture: f/5.6
Shutter speed: 1/20
ISO: 400
Focal length: 24mm
2 Do not forget that nature gives us no less fabulous locations. For example, with a sharp cold snap, frost forms, it looks very beautiful in the forest, enveloping the grass and trees with an ice cover.
Camera: Nikon D700
Lens: AF-S NIKKOR 85mm f/1.8G
Aperture: f/1.8
Shutter speed: 1/1000
ISO: 200
Focal length: 85 mm
Photos with pets such as huskies look very cute, these lovely creatures look harmoniously with a person and give unforgettable emotions.
Camera: Nikon D700
Lens: AF NIKKOR 180mm f/2.8D ED-IF
Aperture: f/2.8
Shutter speed: 1/400
ISO: 200
Focal length: 180mm
Comp. light, to give greater expressiveness and harmony, you should pay attention to the color gamut, color compatibility, and the overall white balance of the picture. Since warm family shots will look strange in cold, gloomy colors.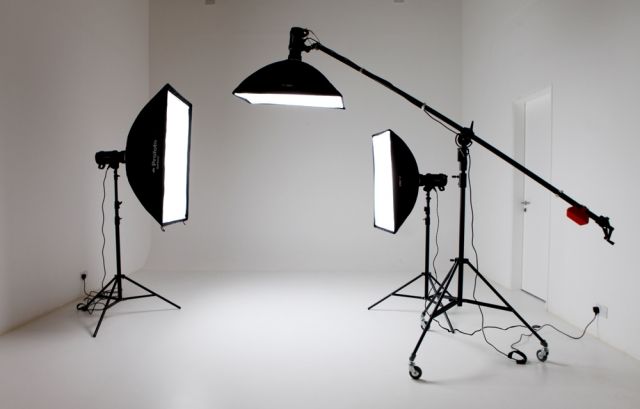 Clothing should be comfortable and appropriate for the theme of photography. Postures are natural, relaxed. Ask the participants to position themselves as they like, and then correct and advise how best.
Camera: Nikon D3s
Lens: AF-S NIKKOR 24-70mm f/2.8G ED
Aperture: f/2.8
Shutter speed: 1/6
ISO: 200
Focal length: 35mm
Technique I use constant light (RetLight) for most of my photos. This gives me the ability to see how the light falls and shoot in complete darkness, focusing on the glowing silhouette.
Shooting is, of course, only in manual mode M. To have full control over the shooting parameters, at slow shutter speeds it is better to use a monopod for speed or a lens with a stabilizer, for example, AF-S NIKKOR 24-70mm f / 2.8E ED VR ”.
Camera: Nikon D3s
Lens: AF-S NIKKOR 24-70mm f/2.8G ED
Aperture: f/2.8
Shutter speed: 1/3
ISO: 200
Focal length: 24mm
Elina Kurmysheva
“New Year and Christmas are the holidays of childhood, kindness, and also the time of miracles! We are waiting for a good mood, pleasant changes in life, warm company, smiles from relatives and friends.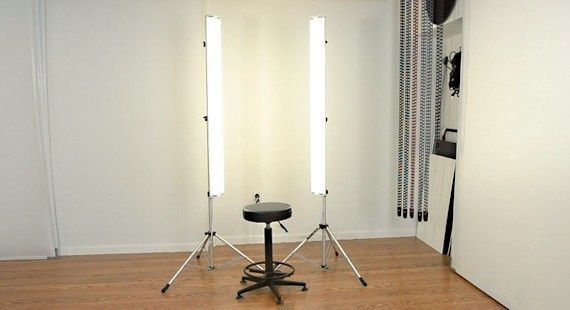
New Year's Eve photo session is a great idea, and it gives you the opportunity to remember photos with your loved ones.
Camera: Nikon D700
Lens: AF-S NIKKOR 85mm f/1.4G
Aperture: f/2
Shutter speed: 1/200
ISO: 600
Focal length: 85mm outside the window there is no snow, but only slush. Collect your favorite Christmas songs in a playlist. Beautiful New Year's music will help you immerse yourself in the magical world of the holiday. In addition, a wonderful way to create a New Year's mood is to decorate the house with light garlands, you can also create your own Christmas decorations.
Camera: Nikon D700
Lens: AF-S NIKKOR 85mm f/1.4G
Aperture: f/2
Shutter speed: 1/200
ISO: 200
Focal length: 85mm
What smells do you associate with New? year? I have with the smell of tangerines, gingerbread cookies and pastries with cinnamon! A great way to capture the whole family preparing, for example, homemade cookies.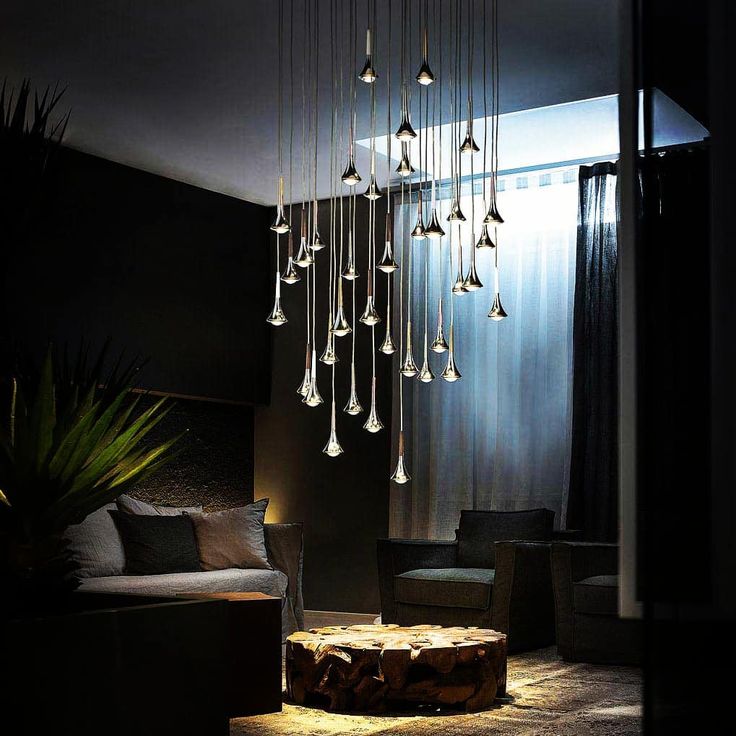
Not only children write letters to Santa Claus Invite your loved ones to write such letters and be sure to save them. Such letters become very dear to the heart over the years, and photographs will remind you of these moments.
Camera: Nikon D700
Lens: AF-S NIKKOR 85mm f/1.4G
Aperture: f/1.4
Shutter speed: 1/200
ISO: 600
Focal length: 85mm
Turn on constant light on the garland. To get beautiful bokeh in the background, I recommend placing the model at a distance of 2 meters from the tree (or, for example, a light curtain).
If you have any additional sources of lighting in your room (floor lamps, table lamps), I recommend using them and turning off the overhead light.
Camera: Nikon D700
Lens: AF-S NIKKOR 85mm f/1.4G
Aperture: f/1.8
Shutter speed: 1/200
ISO: 400
Focal length: 85mm
Set white balance manually. Especially if you are shooting at dusk. Shoot wide open with your lens.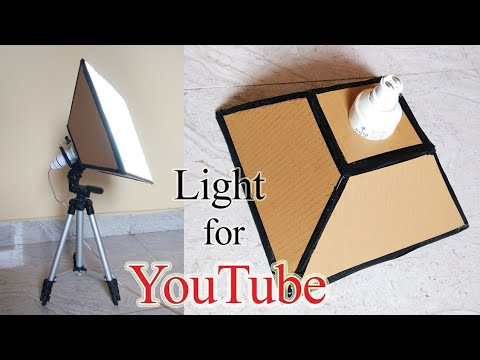 Please note that you will need to raise the ISO.
Camera: Nikon D700
Lens: AF-S NIKKOR 85mm f/1.4G
Aperture: f/2.8
Shutter speed: 1/160
ISO: 200
Focal length: 85mm
On New Year's Eve, spend more time with your family — your loved ones will appreciate your care. Turn off your phone for at least an hour. During this time, you can read your favorite book aloud (tell the children a beautiful New Year's fairy tale) or view a family photo album.
Camera: Nikon D700
Lens: AF-S NIKKOR 85mm f/1.4G
Aperture: f/2
Shutter speed: 1/250
ISO: 600
Focal length: 85mm lights, the aroma of tangerines and cinnamon, the hugs of relatives and friends - all these are priceless moments of our lives!”
Camera: Nikon D700
Lens: AF-S NIKKOR 85mm f/1.4G
Aperture: f/2
Shutter speed: 1/250
ISO: 600
Focal length: 85mm
Ruslan Olinchuk:
photographer of a regional glossy magazine, in addition, I cooperate with world photo agencies.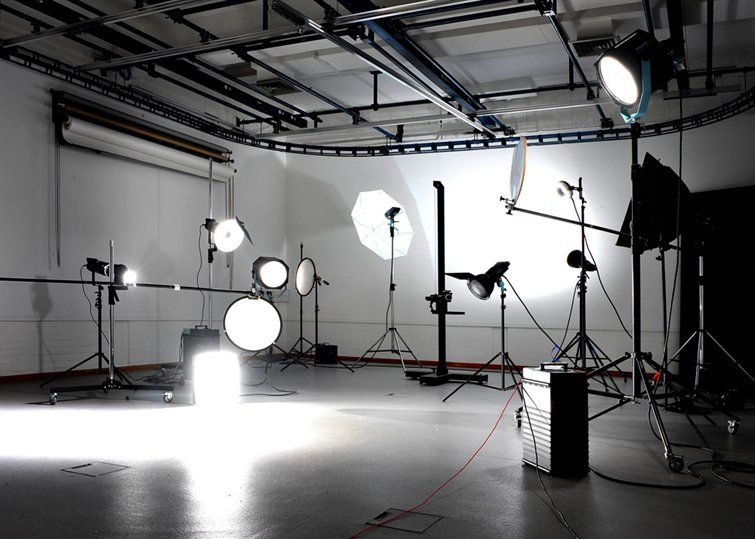 In our digital time, we stopped using live mail and sending each other postcards, but it's very nice to receive them for the New Year. So I got the idea to create them.
Prepare carefully for shooting. Take the time to create the object of your shooting, prepare the props. The better the subject, the more interesting details, the more stunning the result.
Camera: Nikon D810
Lens: AF-S NIKKOR 24-70mm f/2.8G ED
Aperture: f/10
Shutter speed: 1/160
ISO: 100
Focal length: 62mm
Don't forget colors and composition are one of the most influential parameters, after light,
on photography.
Camera: Nikon D810
Lens: AF-S NIKKOR 24-70mm f/2.8G ED
Aperture: f/11
Shutter speed: 1/160
ISO: 100
Focal length: 45mm
, for this you can include in the composition the one with whose hands the atmosphere was created - this adds a sense of presence, reality and gives liveliness to the picture.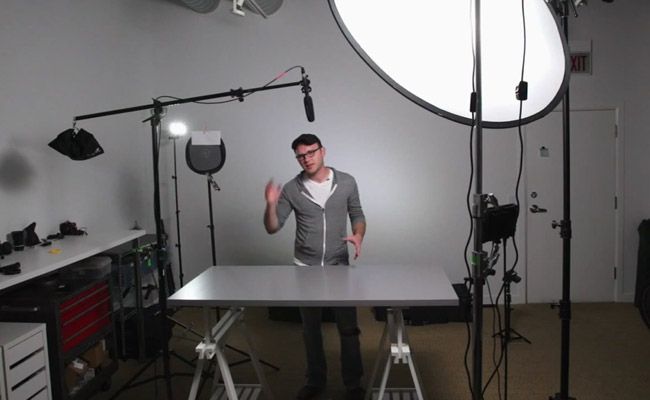
Camera: Nikon D810
Lens: AF-S NIKKOR 24-70mm f/2.8G ED
Aperture: f/11
Shutter speed: 1/160
ISO: 100
Focal length: 42mm
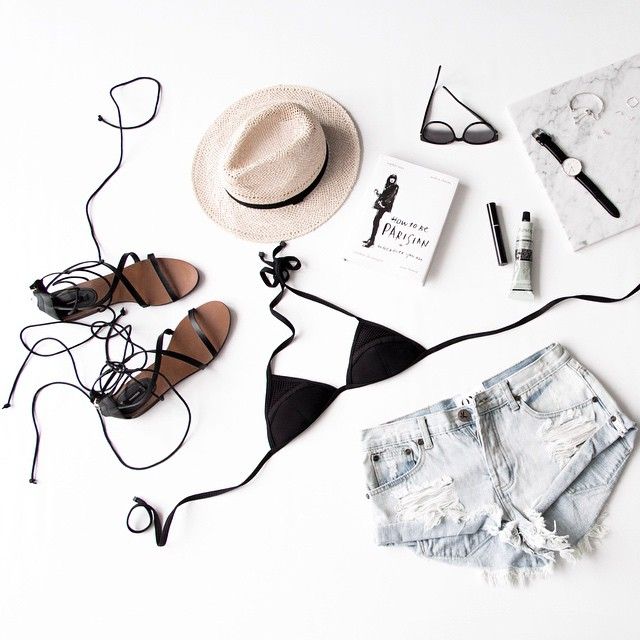
Experiment with shooting points . With the development of various social networks, especially Instagram, the so-called flat lay is in vogue. This is the arrangement of objects on a plane with a view of them from above. Based on it, you can create beautiful patterns, postcards.
Camera: Nikon D810
Lens: AF-S NIKKOR 24-70mm f/2.8G ED
Aperture: f/11
Shutter speed: 1/160
ISO: 100
Focal length: 40mm
Light is the main thing in photography, experiment with it to create interesting effects and capture the Christmas atmosphere. To do this, you can use garlands, candles, lanterns and, of course, sparklers! Mount your camera on a tripod, set your shutter speed to a few seconds, and you can create interesting lighting effects.
Camera: Nikon D810
Lens: AF-S NIKKOR 24-70mm f/2. 8G ED
8G ED
Aperture: f/14
Shutter speed: 3
ISO:100
Focal length: 50mm
You don't need special tools to create interesting effects. For example, salt and flour are great for the role of snow. Be sure to put your camera on a tripod and set a slower shutter speed. Then, from many frames, you can glue the one you need, using masks in the editor, showing what is needed.
Camera: Nikon D810
Lens: AF-S NIKKOR 24-70mm f/2.8G ED
Aperture: f/11
Shutter speed: 8
ISO:100
Focal length: 42mm
Print and share your photos. In real life they are more beautiful than in electronic form!”
Camera: Nikon D700
Lens: NIKKOR 50mm f/1.4
Aperture: f/1.4
Shutter speed: 1/160
ISO: 200
Focal length: 50 mm
but deepened into this process after the birth of her second son in 2014. I started my journey from scratch, all I had was a Nikon D600 camera and a dream. The dream of having a photo studio made me go through the hard way, creating everything with my own hands. Gradually I came to a full-fledged studio with many decorations made by myself. I really want to give hope to the same dreamers as I do, to tell that everything is possible, but not at the snap of a finger, but thanks to perseverance and love for your work.
Camera: Nikon D800
Aperture: f/3.2
Shutter speed: 1/125
ISO: 1250
Focal length: 50mm
camera, we can create something that in real life would not attract the attention of an ordinary person. We can change space, make small things big and big things small. With the help of framing the frame, you can achieve expansion of space due to the work of the brain and imagination. And this is where I would like to start.
Even if you have very little space, and you have made a New Year's corner at two meters (I'll tell you how to make it later), you can create the feeling that you were filming in a large studio. This is especially easy to achieve when photographing children. Plant your subject near a tree, take a photo, and then crop the photo so that only part of the tree remains, so that the viewer can guess how big it is.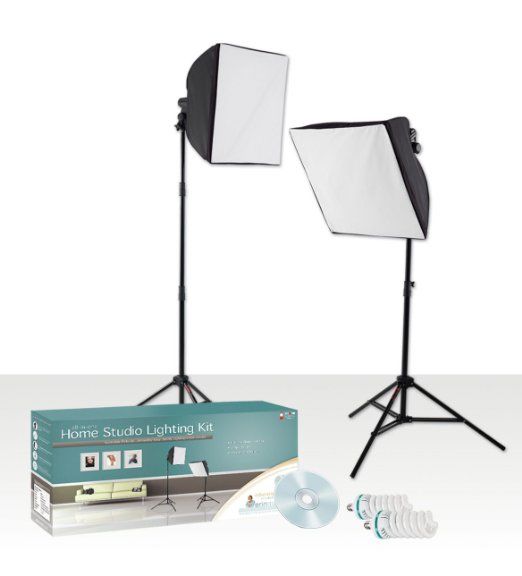 Do not shoot from the level of your height, sit down at the level of the eyes of the person being filmed, or you can stand on a chair and shoot from the top point. This will also create a nice illusion.
Camera: Nikon D800
Aperture: f/2
Shutter speed: 1/160
ISO: 1000
Focal length: 50mm
ISO 100 it's ISO, and it should be 100. But that's not algebra, and ISO 100 is not a formula. This is especially true for New Year's Eve shoots. The pulsed light will drown out the glow of the New Year's garlands, and the photo will lose some of the New Year's magic. ISO and a constant light source come to the rescue. Don't be afraid to gradually increase the ISO value until you get the desired result. At home, you can also highlight the subject with a lamp or even just a flashlight.
Camera: Nikon D800
Aperture: f/1.4
Shutter speed: 1/125
ISO: 640
Focal length: 50mm
, the aperture should be as wide open as possible. But remember: when shooting multiple subjects at a wide aperture, someone may not be in focus, especially if you shoot from a short distance.
Camera: Nikon D800
Aperture: f/3.2
Shutter speed: 1/125
ISO: 2000
Focal length: 50 mm
Fantasy. I made my first decorations with my own hands. At home, a box from a new TV was just lying, I decided to make a fireplace out of it. I cut out a box of the desired shape, painted it white and cut out an imitation of a brick from napkins and glued it onto the box. The fireplace served me faithfully for two years, until I earned a new one. Now, of course, I have a big Christmas tree, and a fireplace, and a lot of interesting things in the studio, but it all started just with a dream.
Camera: Nikon D800
Aperture: f/3.2
Shutter speed: 1/160
ISO: 1600
Focal length: 50mm
sprinkle it with artificial snow, and it will add mystery to your photos and take the viewer into the world of magic.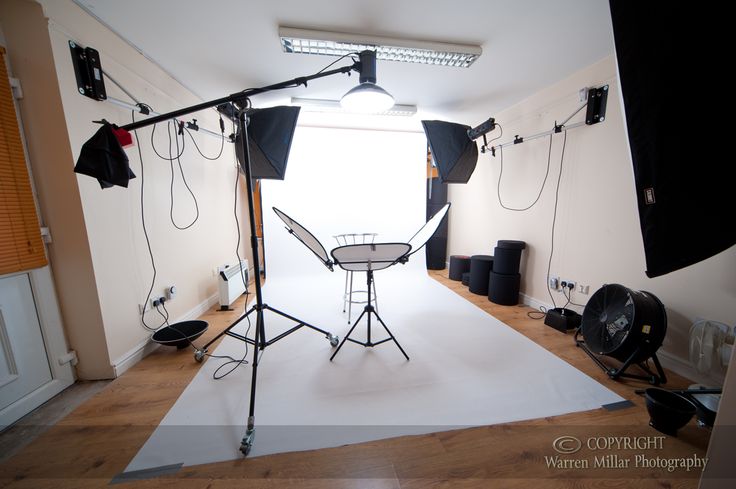
Camera: Nikon D800
Aperture: f/2
Shutter speed: 1/160
ISO: 100
Focal length: 50mm
And what is the New Year without gifts? This is the simplest thing you can do: collect empty boxes at home or ask at the nearest store, wrap them in wrapping paper and fill the void under the tree with them. Or even more so: if you have a small tree, you can put it on a stool and cover the bottom with gifts, as I did, until I have a decent tree.
Elena Mironova:
“Childhood is an endless source of inspiration for me. Probably because a child still lives inside me who believes in miracles, and also because I am the mother of a little girl for whom I really want to create a fairy tale.
Camera: Nikon D800
Lens: AF-S NIKKOR 85mm f/1.8G
Aperture: f/1.8
Shutter speed: 1/200
ISO: 100
Focal length: 85mm
There's always magic in baby photography , and the most magical time is, of course, the New Year and Christmas holidays! Time for warm family gatherings and gatherings by the fireplace, bright lights and fabulous miracles.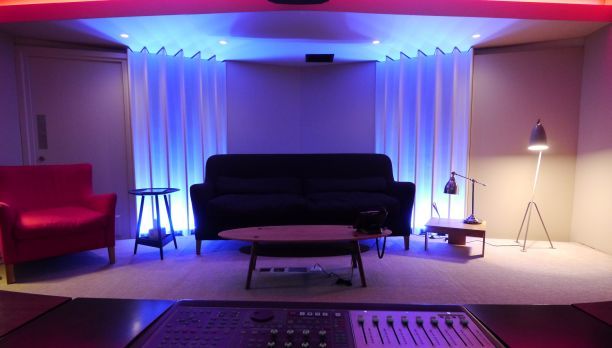 Family New Year's photo sessions have become a tradition in almost every family, and the main task of the photographer is to capture warm emotional moments, as well as recreate the atmosphere of the holiday in New Year's pictures. But how to do it? This is exactly what I want to tell you!
Camera: Nikon D800
Lens: AF-S NIKKOR 85mm f/1.8G
Aperture: f/1.8
Shutter speed: 1/160
ISO: 250
Focal length: 85mm
lights: garlands, lamps, flashlights. And I think that everyone already knows that in order for the lights not to lose their "glow", you need to shoot them with constant light. For an even greater atmosphere of mystery and magic, you can even experiment in shooting without the use of studio lighting, using candles, lanterns and lamps as the only light source.
Camera: Nikon D800
Lens: AF-S NIKKOR 85mm f/1.8G
Aperture: f/2.2
Shutter speed: 1/125
ISO: 600
Focal length: 85mm
Use for fireplace backlighting .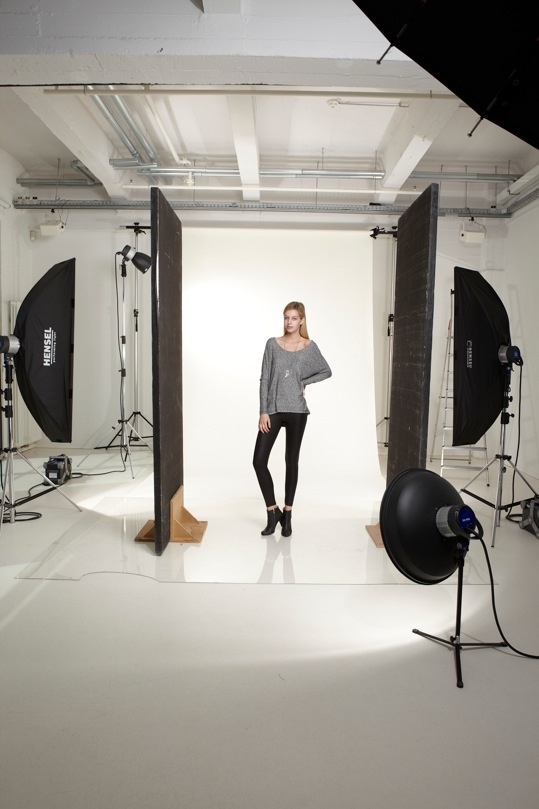 The light source can be either studio equipment or a simple flashlight (a camping flashlight or any mains-operated household lamp).
Camera: Nikon D800
Lens: AF-S NIKKOR 85mm f/1.8G
Aperture: f/2
Shutter speed: 1/160
ISO: 400
Focal length: 85 mm
But the most fabulous stories can be filmed en plein air at night, when the breath of a model, flying snowflakes and smoke from a kerosene lamp, illuminated by backlight, freeze in the air.
Camera: Nikon D800
Lens: AF-S NIKKOR 85mm f/1.8G
Aperture: f/1.8
Shutter speed: 1/160
ISO: 200
Focal length: 85mm
Can be used indoors and outdoors artificial snow. It flies beautifully and consists of a foam that melts after a few minutes without leaving any residue.
Camera: Nikon D800
Lens: AF-S NIKKOR 85mm f/1.8G
Aperture: f/1.8
Shutter speed: 1/160
ISO: 200
Focal length: 85mm
Just like that magic happens ! Fabulous pictures for you!”
Night
What is constant light, what is good and bad about it?
In order, constant light in photography refers to light sources that are constantly on, not only at the moment the shutter is released, as a flash does.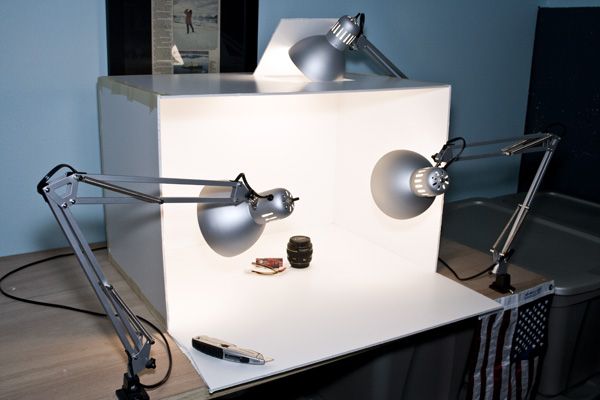
This type of lighting has quite a few advantages.
Firstly, this is the ability to immediately see the amount of light and quickly adjust to its intensity, because the lamps shine all the time, you can immediately see what to correct.
Secondly, this is its versatility, it is suitable for shooting video, not only for photos.
Thirdly, he creates an atmosphere on set. When a constant light is set, not only the photographer, but also the model feels more confident, it is easier to adapt to the subject of the shooting.
And fourthly, it is easier to combine constant light sources, no special synchronizers are needed, and the color temperature can also be changed along the way, which is extremely necessary to achieve the desired result.
However, it is less powerful than flashed light and often more expensive.
Beginning to show you Madina's night scene
Katrina's makeup and hair
Taken with multiple steady lights
Posted
I will dilute my summer-autumn tape with winter photographs. And it's already 1 month of winter. New Year, Christmas tree, tangerines, snow and lights around the city. Do you also imagine such images? Maybe I forgot? Share it in the comments)
I love this time so much: the time of magic and fairy tales. It gets dark early, the lights are on, which means you can take even more atmospheric evening photos. And if it’s also snowing, then the photos become cozy and even a little magical in winter. After all, when, if not on New Year's Eve, do we again believe in miracles and a good fairy tale.
Today I'll show you a series of photos from a recent shoot with Lesya
Now I'm heading to conquer night and evening shooting, since December gives such a chance, because it's almost always dark)
Published
Published by
Winter is getting closer! Every day it gets colder and colder, in the morning everything is frosty on the street .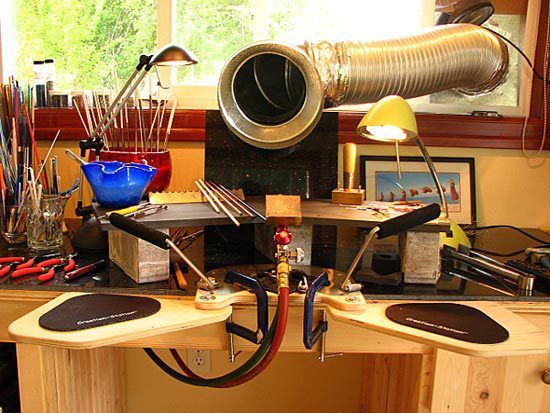 .. The days are getting shorter and the nights are longer. Soon the New Year's bustle will come: queues in stores for tangerines and Christmas tree decorations, everyone's favorite New Year's films will go on TV! Winter is a great time!❄❄❄ When you can get together with the whole family and prepare for the most important holiday of the year.
The year 2019 is already coming to an end, which, it would seem, was New for us quite recently. It was bright and rich, but it is too early to sum up the first results of this wonderful year. After all, there are still 34 days until the New Year 2020!
There is still a lot to be done, to have time and accomplish. In the meantime, I'll show you another photo from my last shoot💥💥💥
_________________________________
Md: incredible Marie
Posted by
Well, here comes All Saints Day or Halloween. It's about half an hour until midnight)
The most mystical night of the year is coming. I like this holiday, its traditions and customs. 🎃🎃🎃
Before, I just enjoyed the carnival, the opportunity to try on homemade costumes of evil spirits...🎃🕸🐾
Now it's an opportunity to create interesting thematic pictures.
Ask what prevents you from filming the subject at another time? - Nothing really... This is just another reason)
P.s another photo from my last thematic project with incredible Rita 🎃
Published
📍I want to tell you about my little dream. Since the beginning of spring, I wanted to go to the field at night. And just to be alone with nature at night, looking at the starry sky and drinking tea from a thermos. I don't know why, this picture immediately appeared.
📍At first I decided to put it off for the summer, deciding not to interfere with my studies. Although I don’t know how it could interfere with my studies so much, but I decided like this.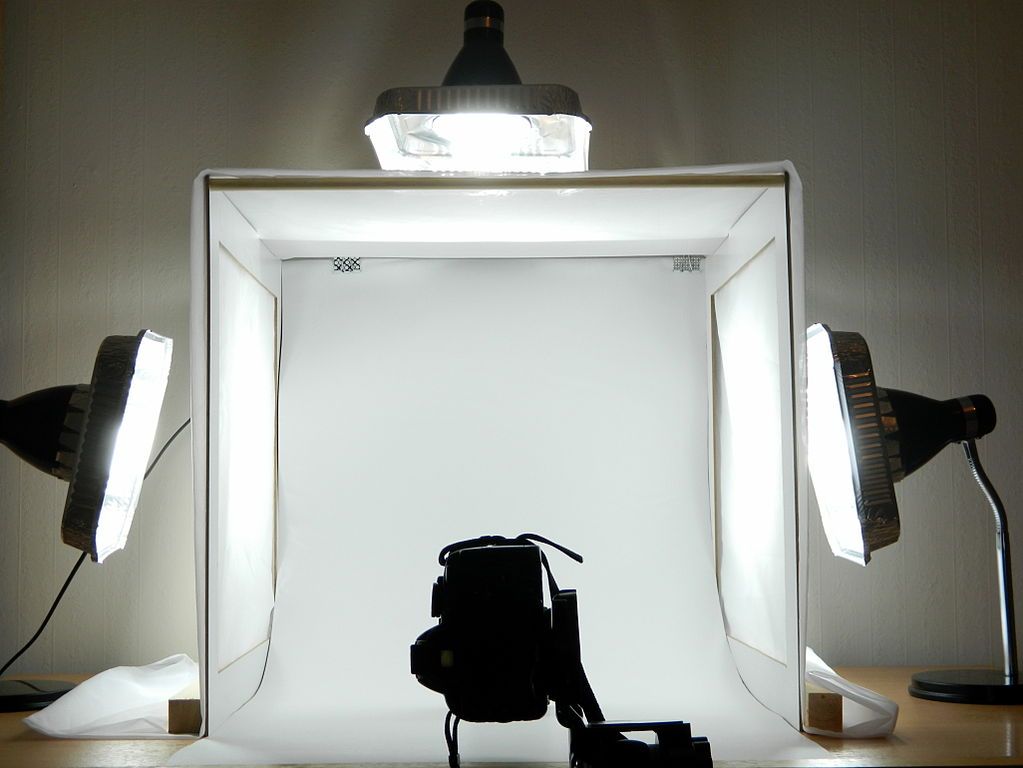
📍 When summer came, I again postponed the trip to July, as June was very busy: I did several shootings a week, while actively continuing to study, not only in the school curriculum, but also in photography ...
📍 And in July, the weather didn’t suit me ... Therefore, I know for myself that such events can be postponed endlessly)))
📍 And towards the end of July, I decided to combine my desire to take a walk at night on the field and my photo project “In the headlights”
📍As a result, only on the last day of July I managed to realize my dream! But now I know for sure that it was not in vain! And the choice of an idea, and careful preparation, the choice of location and image, and preparation from the technical side, I rarely shoot with mixed light, and there were not so many photosets in the dark either.
📍But it seems to me everything went well 💯💯💯 Despite the cold weather, the air was just wonderful, and in general the evening was wonderful! And how else can he be away from the city, in nature and in great company!
———————————————————-
The next batch of photos from my thematic photo project “In the headlights”
Md: incredible Polina
—————————— —————————-
More photos of
Published
Friends, I think everyone, well, or almost everyone has had such a thing when there is only enough time for a routine.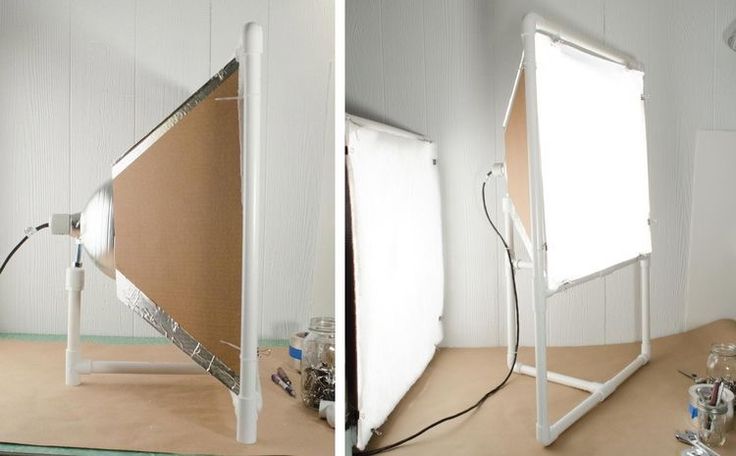
📍We get up in the morning and go to work/study, then we return and plunge into routine things: we need to cook food, clean the apartment, buy groceries and household trifles, without which we can’t do anything, and then, looking at the clock, showing that already deep after midnight, we go to bed, postponing our plans and ideas for tomorrow.
📍 And so it goes day after day, week after week, month after month, and even year after year... Every year the number of routine things increases, and if you don't know how to properly allocate time, then this situation will repeat all your life.
📍To prevent this from happening, you need to change yourself, making small deviations from your "insanely important" daily routine, gradually introducing into the habit of things unusual for yourself: a walk, at least around the house, before going to bed, devote time to your family (and not computer and phone that we go to to relax… In fact, an evening with people close to you will help you relax and get distracted much more than an evening on social networks, looking through tons of photos and unusable information…)
📍And after a few weeks, you will notice that you began to have time to do not only “insanely important” things that cannot be postponed, but your ideas, desires and dreams began to come true.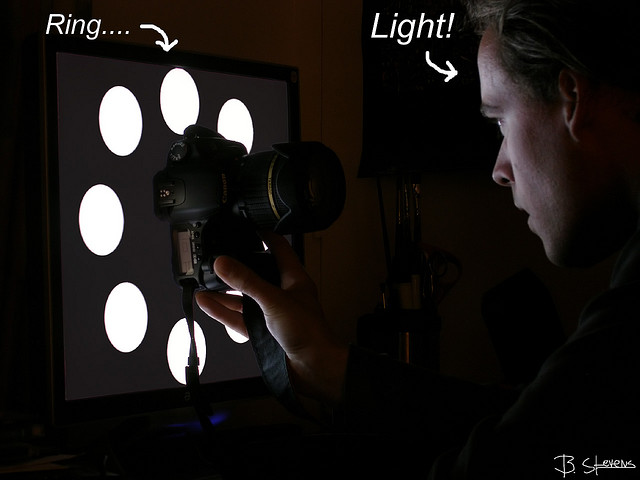
We often think that summer/vacation will come and then I will definitely visit my relatives, go to nature, agree to a picnic with friends whom I have not seen for a long time, buy this thing that I liked when we last dropped into grocery store... 📍And there are thousands of such examples. When summer or vacation time arrives, a new to-do list is formed that will overshadow your less important plans...
📍Therefore, we must act now! Don't wait for holidays or weekends. If you want to meet - meet, if you want to call a person - call, dream of a weekend in nature - get together and go to nature, at least for a couple of hours ...
📍This is the only way to do what you have planned and bring joy and pleasure to yourself and your family!
Published
📌 Heading portrait. Friends, has it ever happened to you that all your plans were postponed or completely canceled? I have, and unfortunately many times.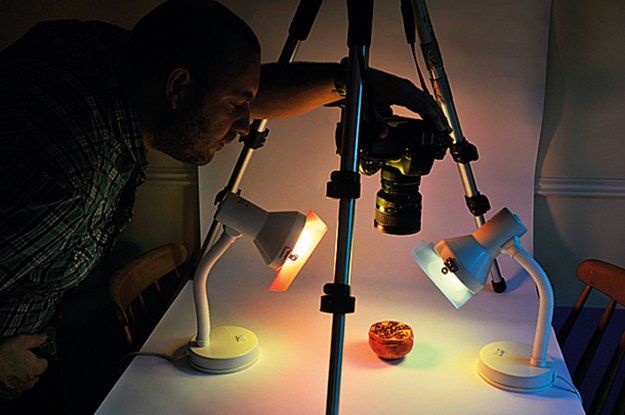 Last week, due to cold and rainy weather, I had to cancel several photo shoots.
📍My photo project also fell on the coldest day. I wanted to shoot at night in nature, but the weather was clearly against this idea ... According to all forecasts, they promised rain and a drop in air temperature to + 9 ° by the evening. 🌡🌧
📍 shooting.
📍I am immensely glad that then we made such a decision. By evening, the temperature really dropped a lot, but there was no rain! Despite the weather, we were not cold at all, but rather warm and fun! No wonder they say that nature has no bad weather)
📍What photos turned out! I can say with confidence that it was one of my brightest and most memorable shoots in recent times!
More photos of
Published
📍I almost never took night photo stories. Why? I always thought that there was not enough experience.